To deploy the two additional NSX Manager VMs and create a three-node NSX Manager cluster as recommended by VMware, perform the following steps:
- In the NSX Manager UI, select System > Appliances.
- In the right pane, select ADD NSX APPLIANCE.
- Complete the Appliance Informationpage. In this deployment, the following values are used:
- Hostname – NSX-Manager02.dell.local
- Management IP/Netmask – 172.16.11.152/24
- Management Gateway – 172.16.11.254
- DNS and NTP servers – default (the same servers used by NSX-Manager01 are prefilled)
- Node Size – Medium (use the same size for all three NSX Managers)
- Click NEXT.
- Complete the Configurationpage. In this deployment, the following values are used:
- Compute Manager – vCenter.dell.local
- Compute Cluster – Compute (the existing cluster)
- Resource Pool – not specified
- Host – R640_MGMT
- Datastore – Datastore-0 (the existing datastore)
- Network – Management Network
- Click NEXT.
- Complete the Access and Credentialspage. In this deployment, the following values are used:
- Enable SSH – Yes (optional)
- Enable root access – No (optional)
- Configure the Root, Admin, and Audit passwords.
- Click INSTALL APPLIANCE. The second NSX Manager appliance installation starts.
- Repeat the same steps for the third NSX Manager.Note: Ensure to change the hostname and IP address. All other values can remain same.
At the end of this process, NSX Appliance cluster is deployed.
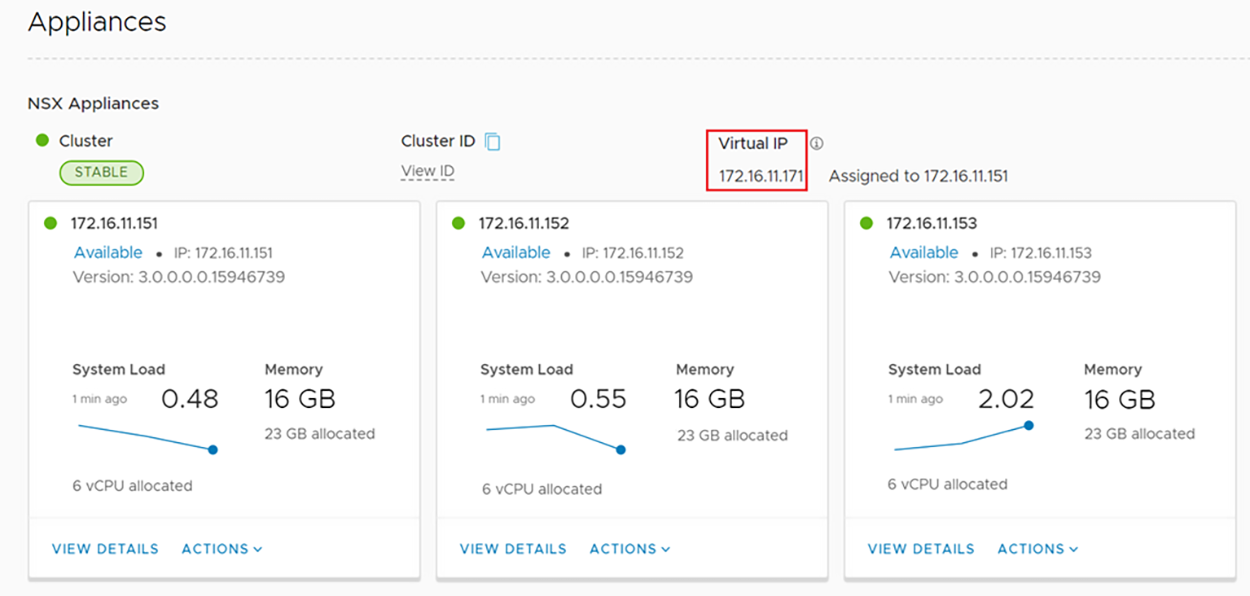
In this deployment, the third NSX Manager hostname is NSX-Manager03.dell.local and the IP address is 172.18.11.153/24. It may take approximately 10 to 15 minutes for deployment, cluster formation, and synchronization to finish. When complete, the NSX Appliances screen displays as shown in the figure below. Ensure the cluster status is STABLE as shown in the upper left corner of the screen.

Configure Virtual IP address for NSX Manager cluster
A Virtual IP address (VIP) is used to provide fault tolerance and high availability to NSX Manager nodes. The leader node of the cluster takes ownership of the VIP to service any API and UI requests. If the leader node becomes unavailable, NSX-T elects a new leader that assumes ownership of the VIP.
To configure a Virtual IP address (VIP), follow the steps mentioned below:
- In the NSX Manager UI, select System > Appliances.
- On the NSX Appliances page, click Set Virtual IP.
- Enter the VIP for the cluster.Note: Ensure that the VIP is part of the same subnet as the other NSX Managers. In this deployment, the 172.16.11.171 is used.
- Click SAVE.
The NSX Manager VIP is now configured.