
To add vCenter as compute manager into VMware NSX-T Data Center, perform the following steps:
- Connect to the NSX Manager UI at https://<nsxmanagername>.<fqdn>. For this deployment, use a web browser to connect to the NSX manager UI at https://nsx-manager01.dell.local and log in as admin.
- Review the information in the EULA and if you accept the terms, check the box, and click CONTINUE.
- Select whether to Join the VMware Customer Experience Improvement Program and click SAVE.
- Go to System > Fabric > Compute Managers > ADD.
- Complete the compute manager details. For this deployment, the following values are used:
- Name – vCenter
- Type - vCenter
- FQDN or IP Address – vCenter.dell.local
- HTTPS Port - 443
- Username – administrator@vcsa.local
- Password – password
- SHA-256 Thumbprint– blankNote: You can enter the vCenter SHA-256 thumbprint here to allow it to be automatically filled out in the next step.
- Enable Trust – No
- Click ADD.Note: If you left the thumbprint value blank, you are prompted to accept the server provided thumbprint.
- For this deployment, click ADD to use the thumbprint. The vCenter server displays in the Compute Managerslist.Note: If the vCenter server does not display in the Compute Managers list, click REFRESH at the bottom of the page. After a few seconds, the Registration Status changes to Registered, and the Connection Status becomes Up.

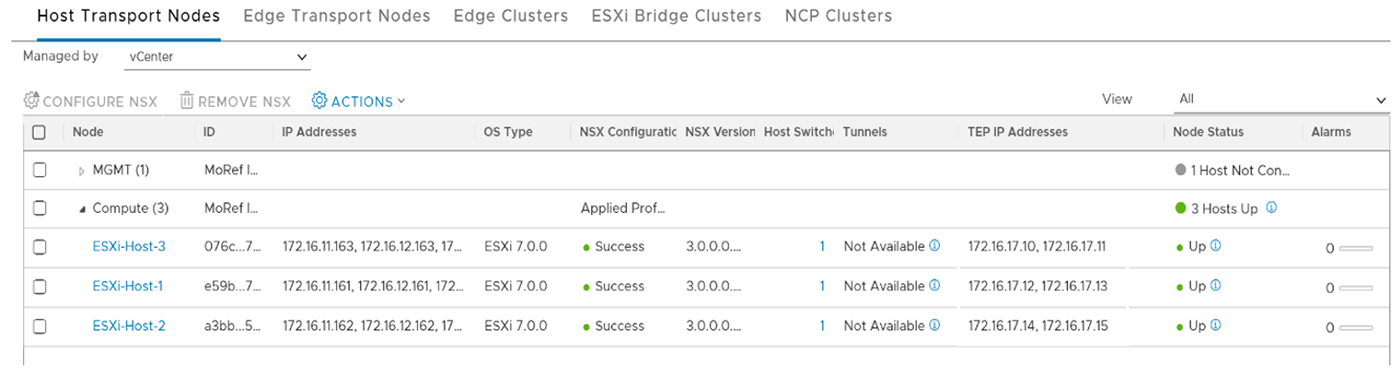
Verify vCenter added as compute manager
Once vCenter is added as a computer manager, the ESXi compute host nodes are automatically configured as host transport nodes. To verify that vCenter is designated as the compute manager, perform the following steps:
- In the NSX Manager UI, select System > Fabric > Nodes > Host Transport Nodes.
- Next to Managed by, select the vCenter from the drop-down list.
- Expand the cluster.
- Click Hosts to verify the information.
Note: Be sure to install VMware NSX-T Data Center license by accessing System > Licenses > ADD in the NSX Manager UI. For an explanation of the various NSX-T 3.0 license tiers, see the Product offerings for VMware NSX-T Data Center page.