The following steps prepare the ESXi hosts for NVMe/TCP connectivity.

SmartFabric Storage Software Deployment Guide
Introduction
Network Planning
Overview of Example Deployment
Configure the IP network
Configure ESXi NVMe/TCP hosts
Configure SUSE Linux Enterprise Server NVMe/TCP hosts
Configure PowerStore subsystems
Configure PowerMax subsystems
Deploy SFSS on ESXi
Deploy SFSS on Linux KVM
Configure SFSS
Establish NVMe/TCP between Endpoints
Configure guest virtual machines
Hardware and Software Used in this Guide
Manual discovery, registration, and verification
Additional Configuration and Settings Information
Additional Information on ESXi NVMe/TCP Hosts
Additional information on Linux NVMe/TCP hosts
Troubleshooting
Technical resources
Configure ESXi NVMe/TCP host virtual networking
Configure ESXi NVMe/TCP host virtual networking
-
Create and configure vDS for host NVMe/TCP storage I/O traffic
In this example, the C02-vDS-NVMeTCP distributed switch is created for NVMe/TCP host traffic. Alternatively, you can use an existing vDS or standard switches. A virtual switch per SAN port can be used, but this example uses a single vDS for both SAN ports with each SAN port group mapped to different uplinks.
You will configure two port groups on this vDS: one for SAN-A and one for SAN-B traffic.
To create a vDS:
- From the vSphere client, locate the Networking listing, and then right-click the DC-NVMeTCP virtual data center.
- Click Distributed Switch > New Distributed Switch.
Figure 38. Select New Distributed Switch 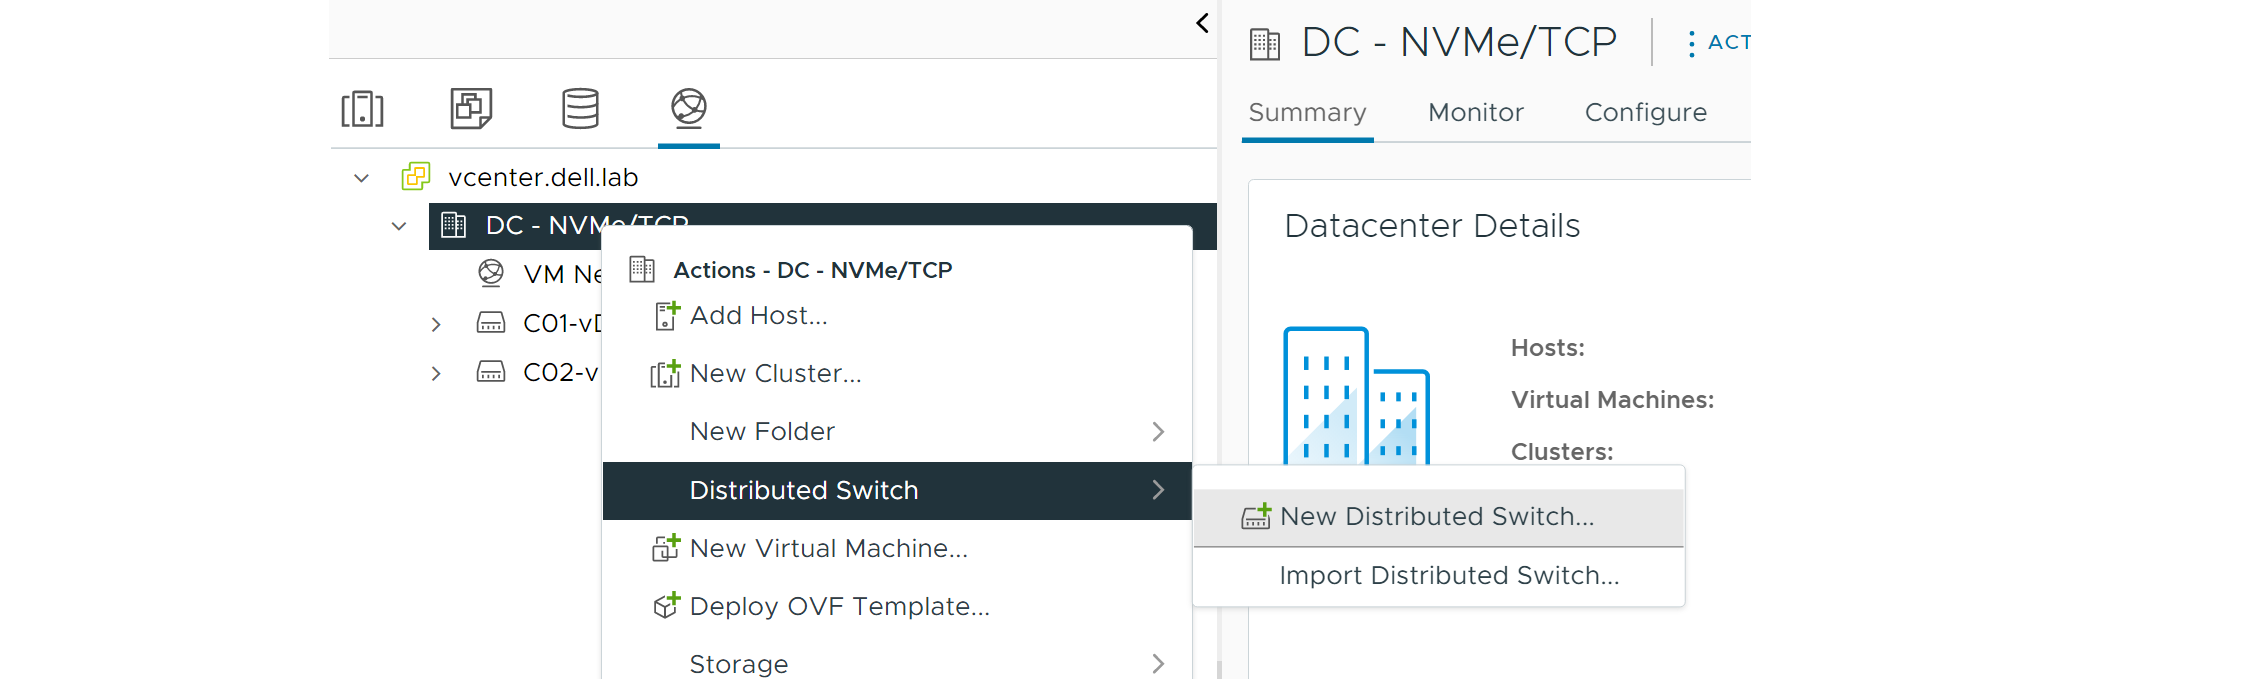
- In the Name field, enter a name for the vDS. Note: In this example, C02-vDS-NVMeTCP is used.
Figure 39. Provide Name for vDS 
Figure 40. Select ESXi version (7.0) 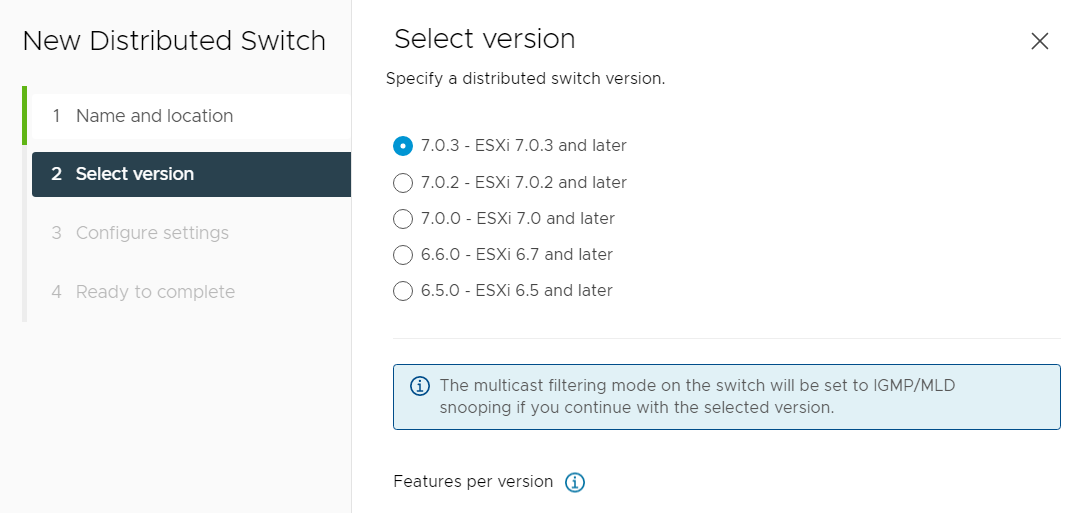
Figure 41. Select ESXi version (8.0) 
- Click Next.
- Specify the number of uplinks. This example uses 2 of the four uplinks for this vDS.
- Click to clear the check from Create a default port group.
Figure 42. Number of uplinks (7.0) 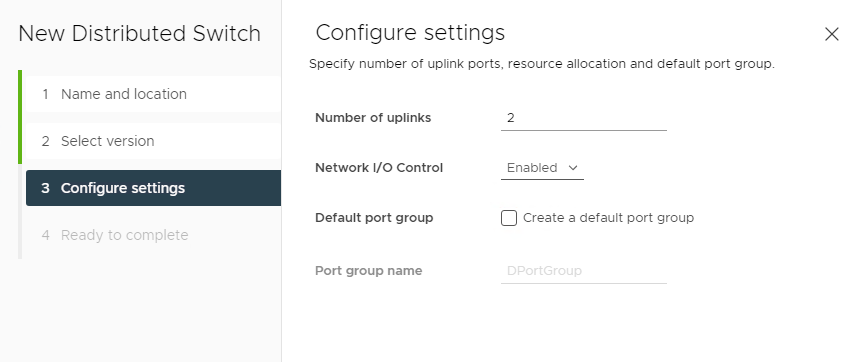
Figure 43. Number of uplinks (8.0) 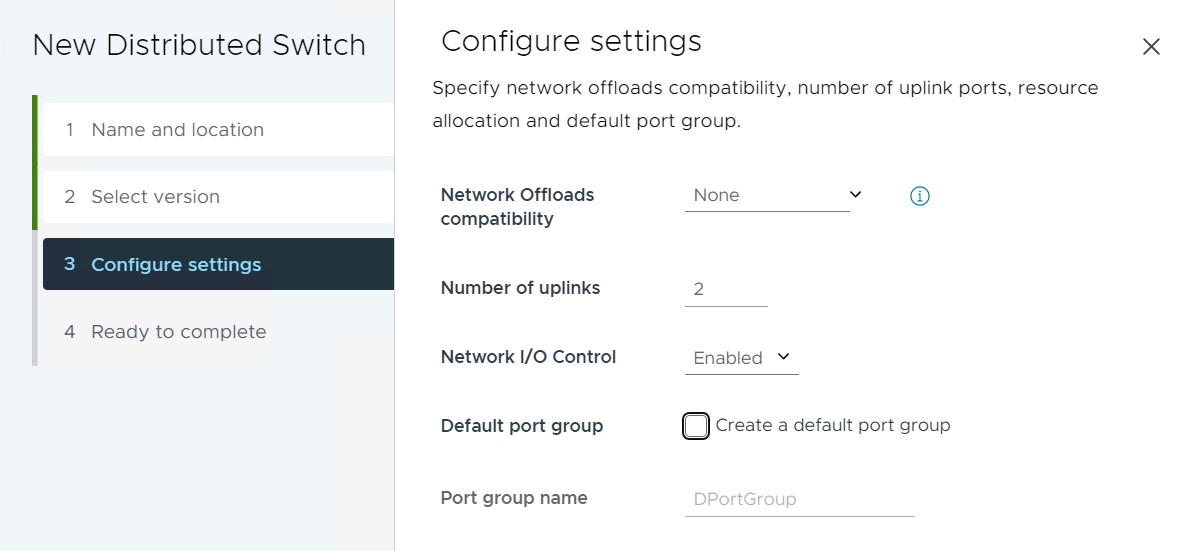
- Click Next.
- Review the Ready to complete screen and then click FINISH.
Figure 44. Ready to complete confirmation screen (7.0) 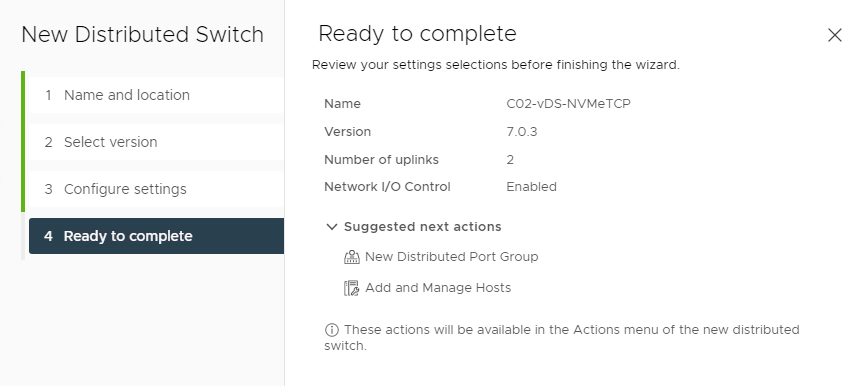
Figure 45. Ready to complete confirmation screen (8.0) 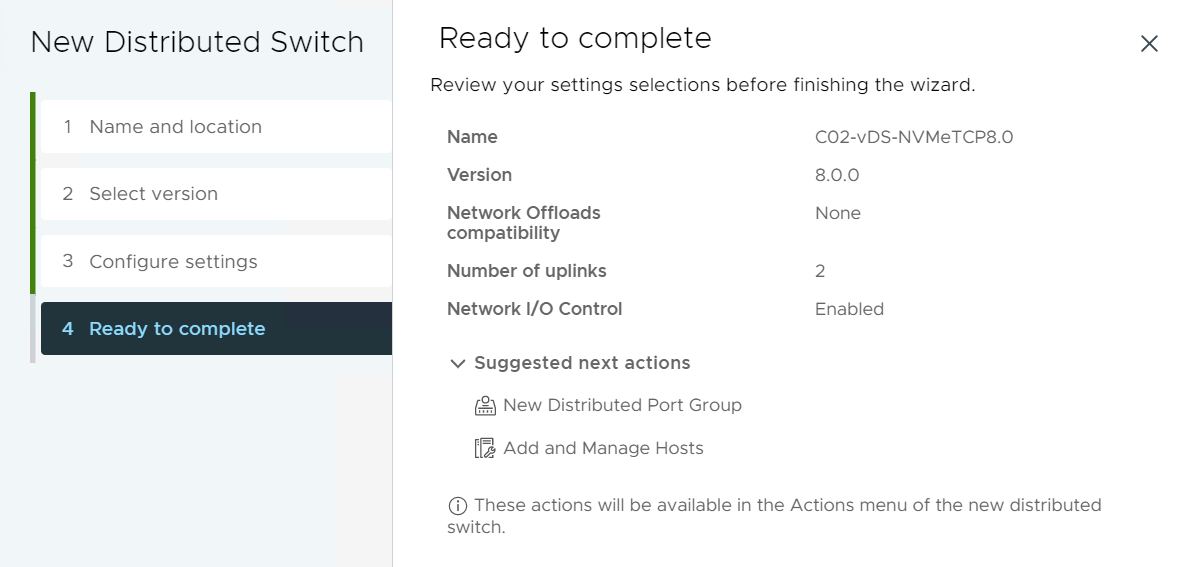
- Right-click the new C02-vDS-NVMeTCP vDS and then click Settings > Edit Settings.
Figure 46. Edit Settings of new vDS 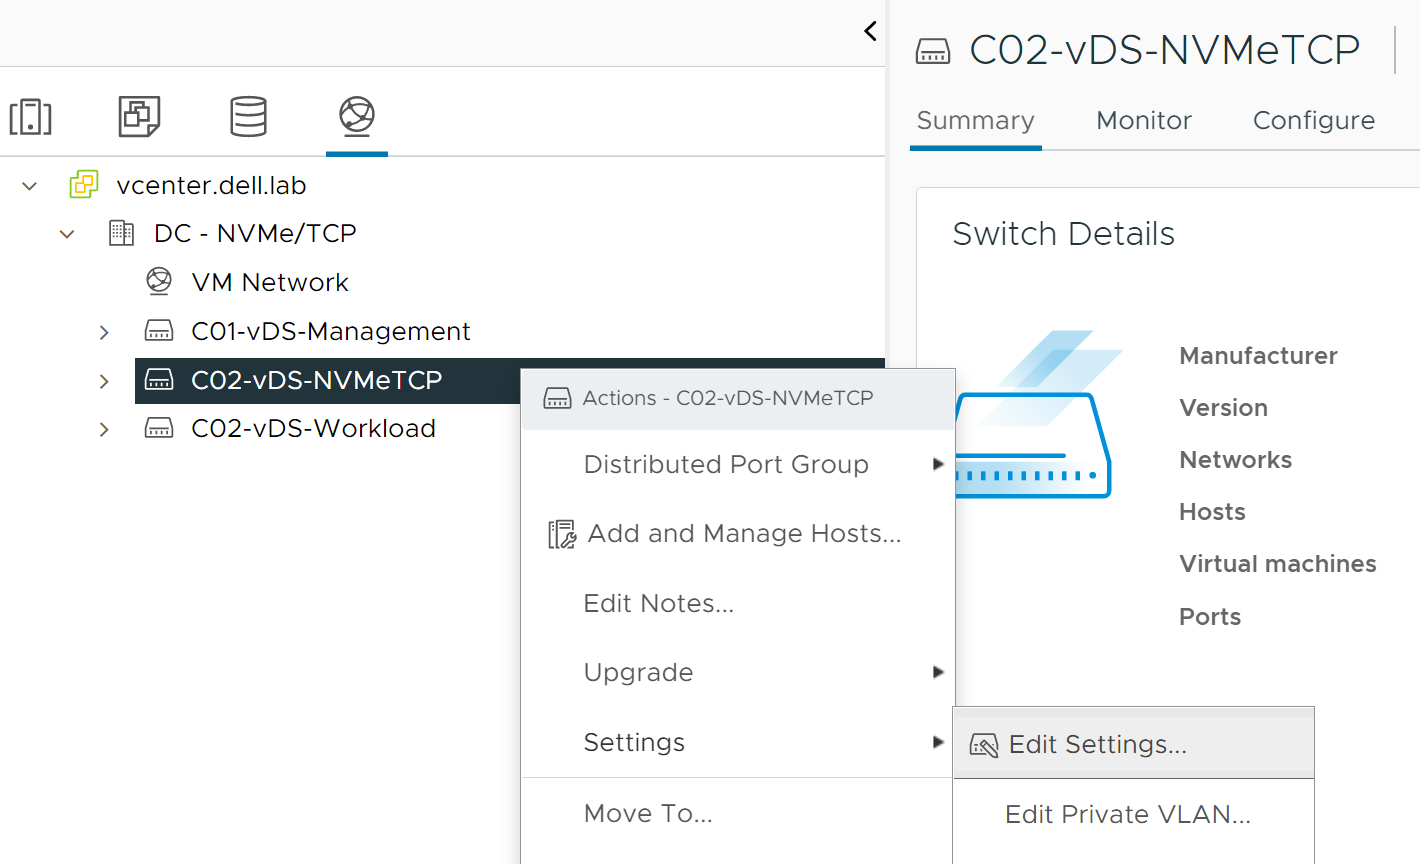
- Click the Advanced tab and modify the following parameters:
- MTU (Bytes) – Change the MTU to match the end-to-end network. In this example, 9000 is used.
- Under Discovery protocol, change the Type and Operation to match the network switches.
Figure 47. Distributed Switch - Edit settings 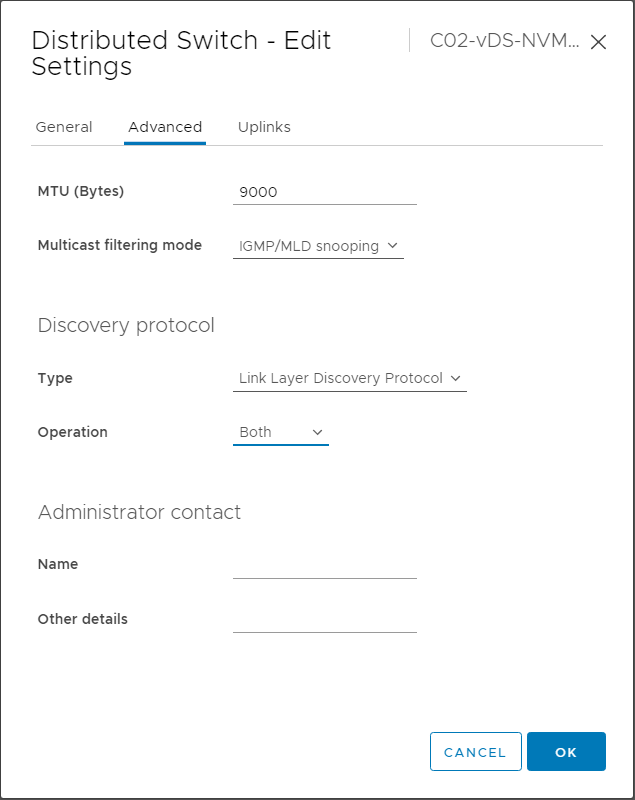
- Click OK.
- From the Configure tab, verify that the Properties page displays the updated configuration.
Figure 48. vDS Properties 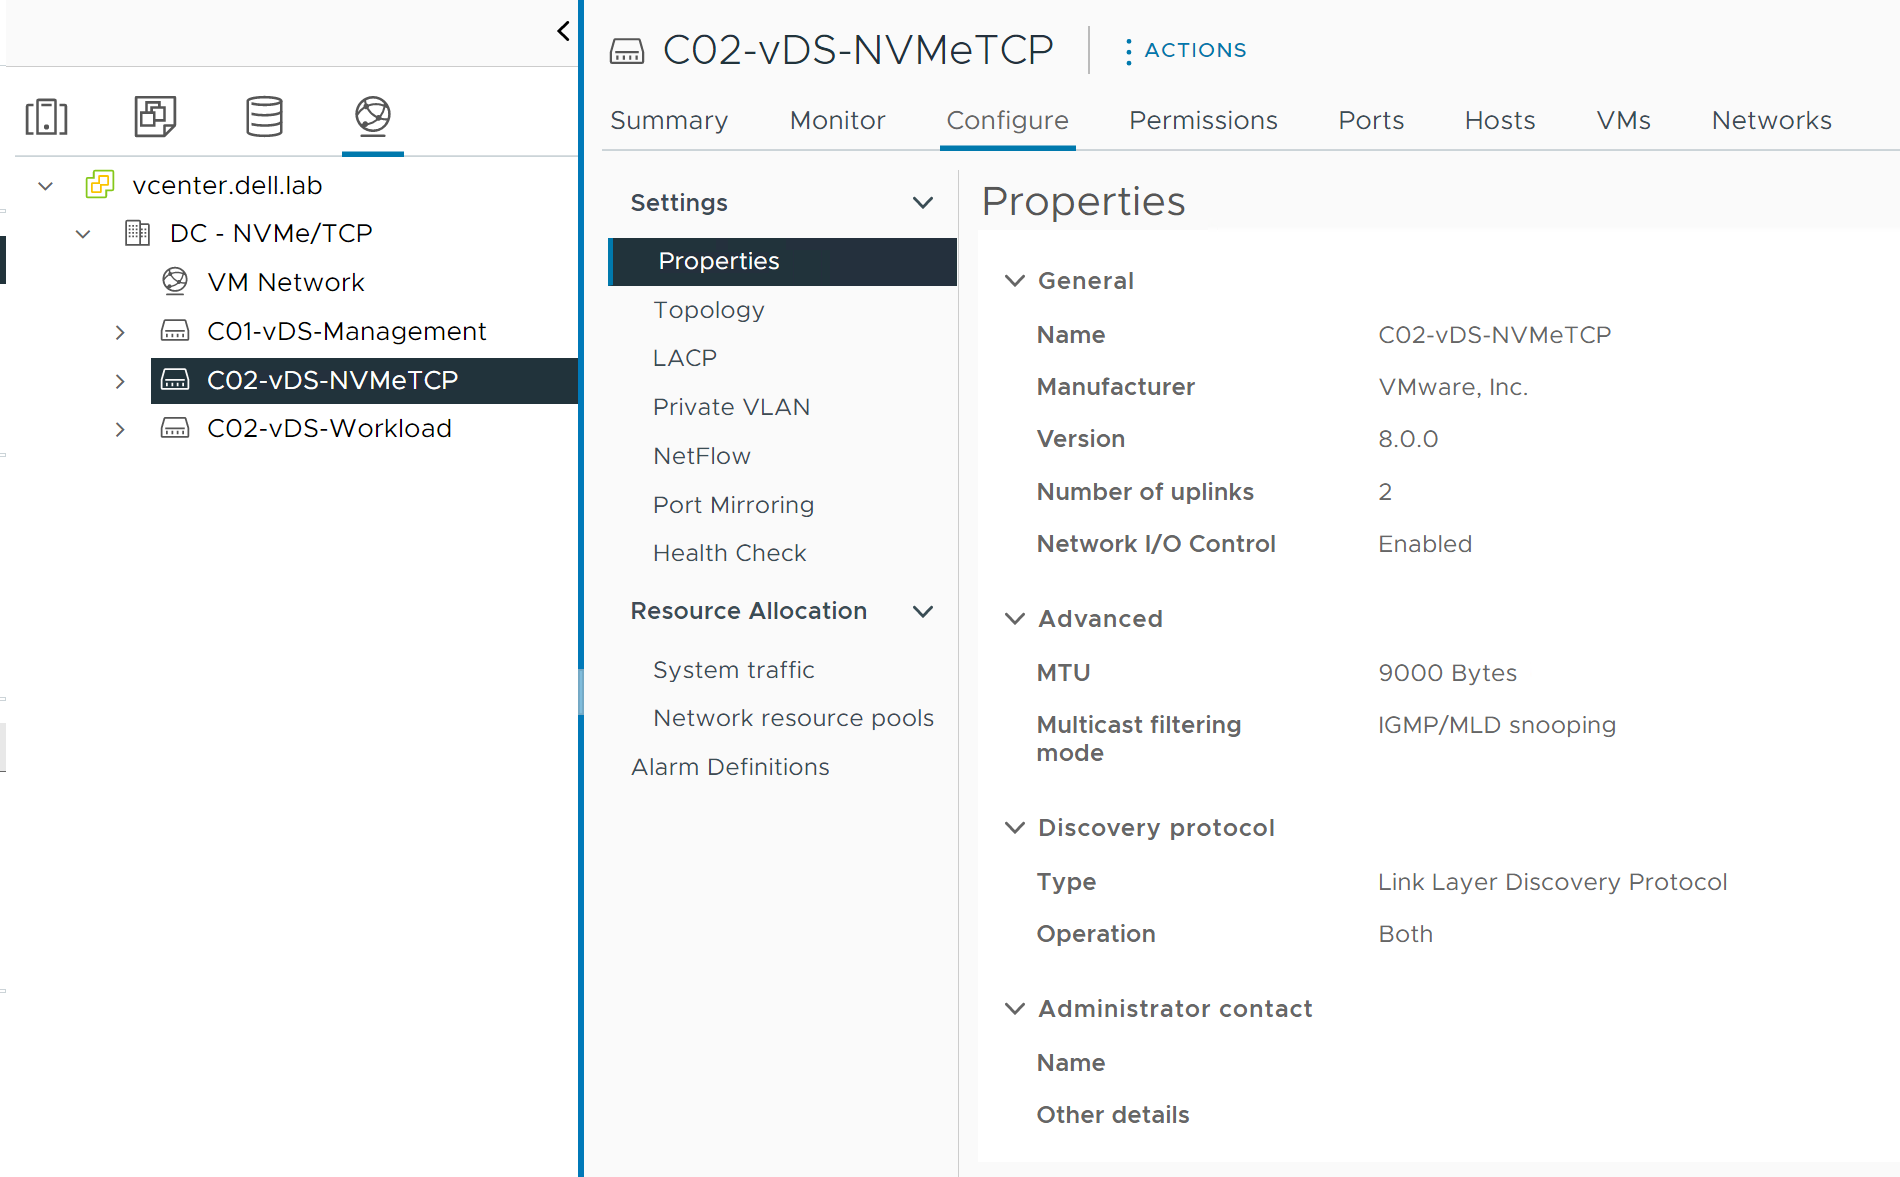
Add hosts to vDS
To add the hosts to the vDS, perform the following steps:
- Right-click the new vDS and select Add and Manage Hosts.
Figure 49. Add and Manage hosts 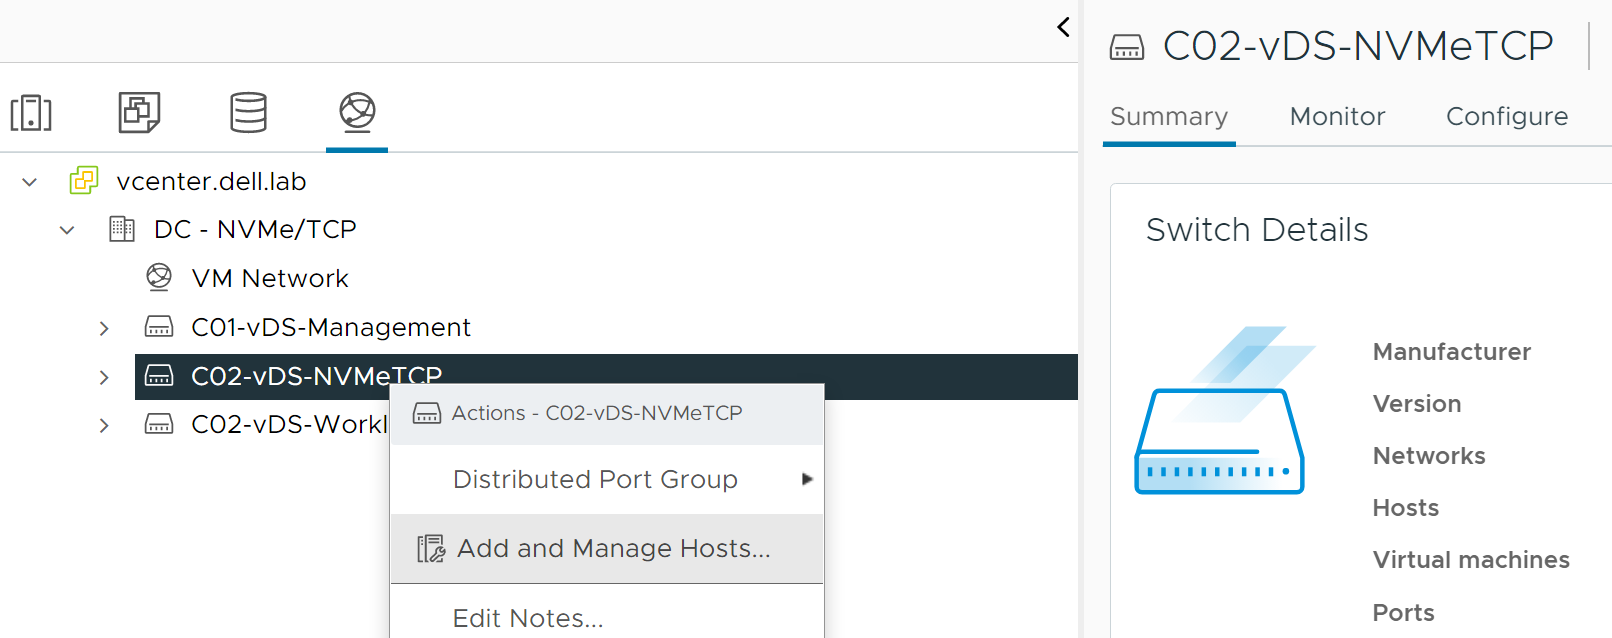
- Select Add hosts and click NEXT.
Figure 50. Add Hosts 
- From the listing, click to select the hosts that will participate in NVMe/TCP.
Figure 51. Select Hosts 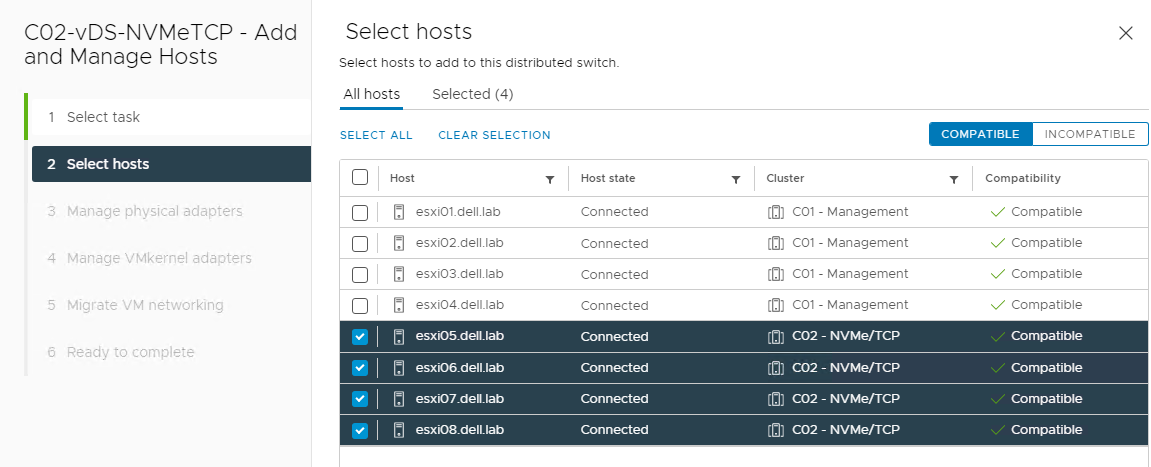
- In Manage physical adapters, click to select and assign which of the host vmnics will map to the vDS uplinks. In this example, Uplink 1 and Uplink 2 are assigned to vmnic 2 and vmnic3.
Figure 52. Manage physical adapters 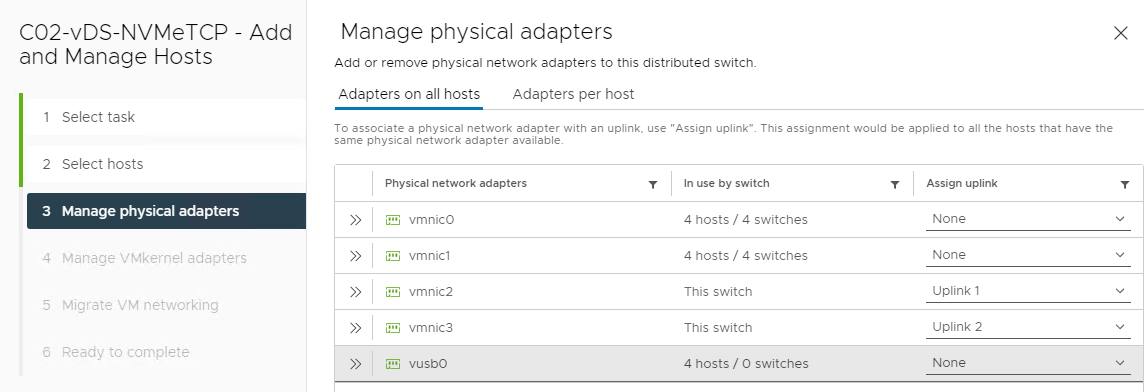
- On the Migrate VM networking screen, click NEXT, and then click FINISH.
Figure 53. Ready to Complete host addition 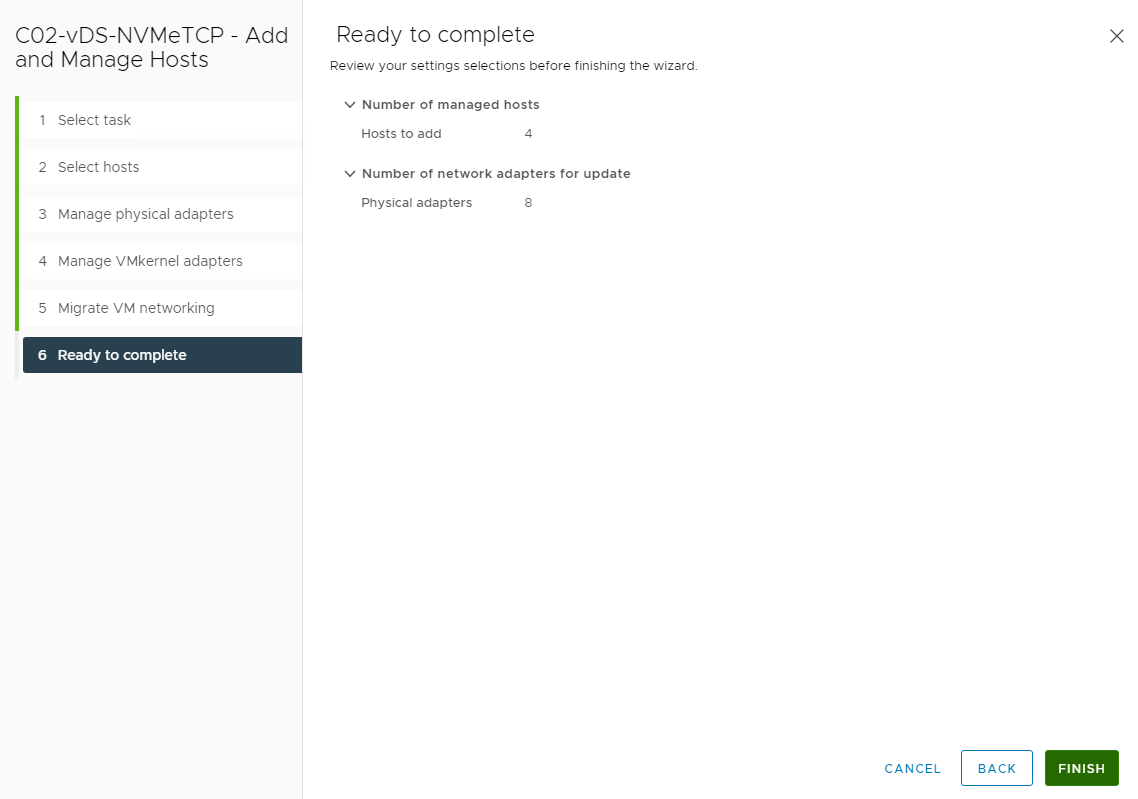
Figure 54. New vDS Topology View 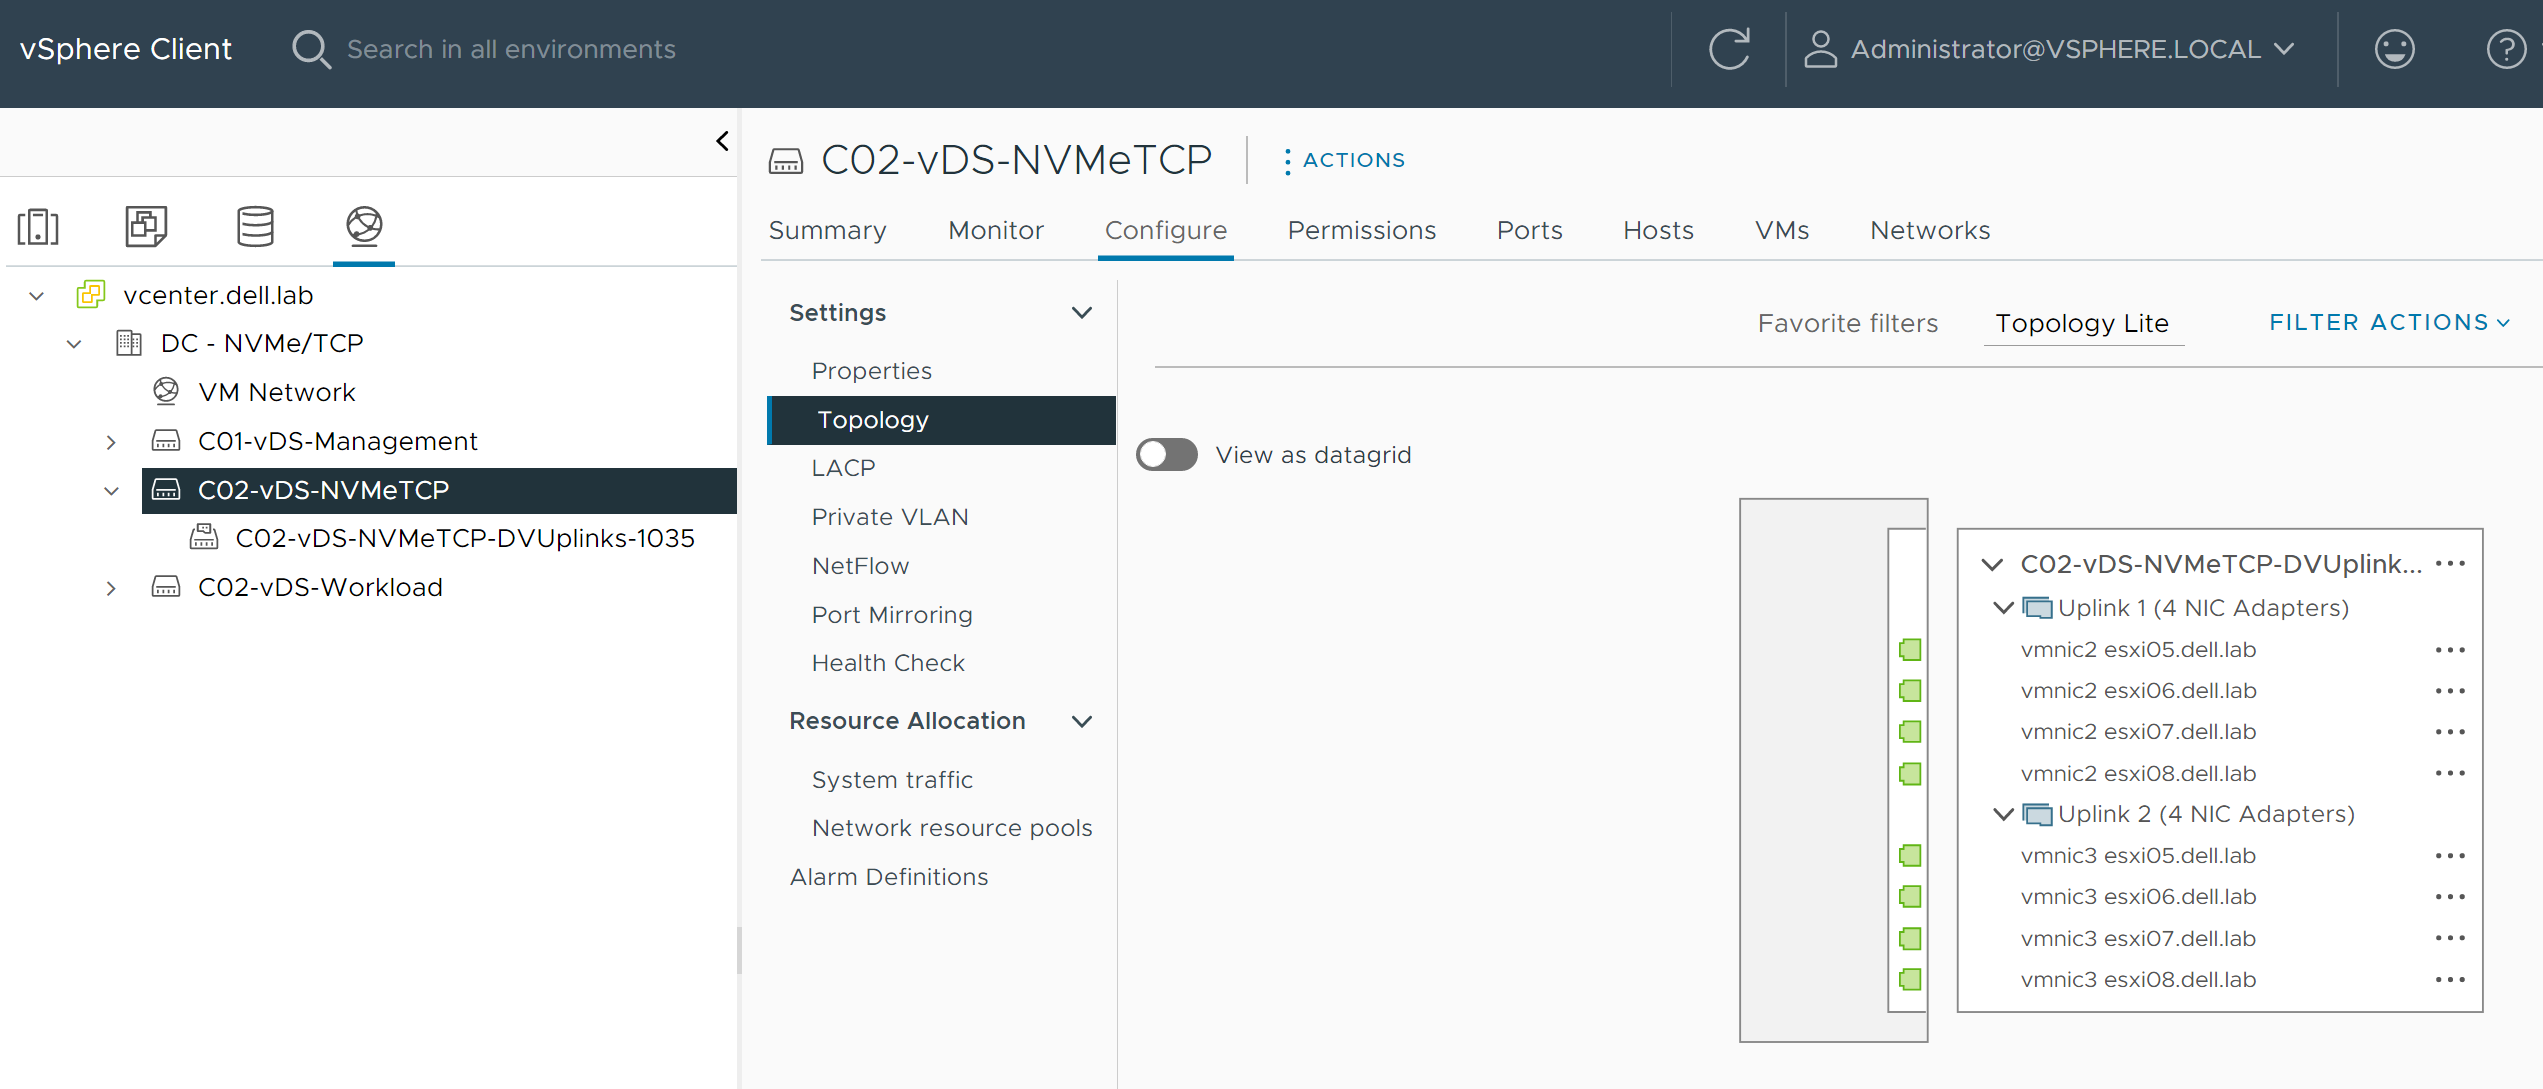
Create host NVMe/TCP storage I/O traffic port groups
In this section, two port groups for NVMe/TCP storage traffic are created on the virtual distributed switch. In this example, C02-NVMeTCP-SAN-A and C02-NVMeTCP-SAN-B are created on the C02-vDS-NVMeTCP distributed switch.
Configure SAN A Port Group for NVMe/TCP VMkernels
To configure the SAN A port group for the NVMe/TCP VMkernels, perform the following steps:
- Select Distributed Port Group, and then click New Distributed Port Group.
Figure 55. Create Port Group 
- From the Name and location screen, enter a Name for the port group in the field provided. Note: In this example, C02-NVMeTCP-SAN-A is used.
Figure 56. Specify name for port group 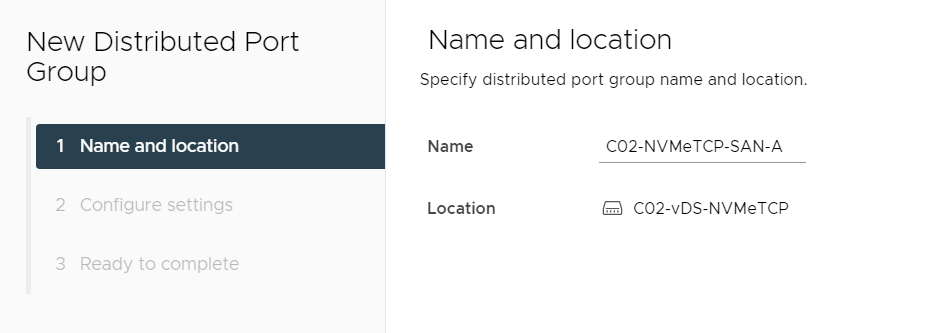
- Click NEXT.
Figure 57. Configure settings for port group 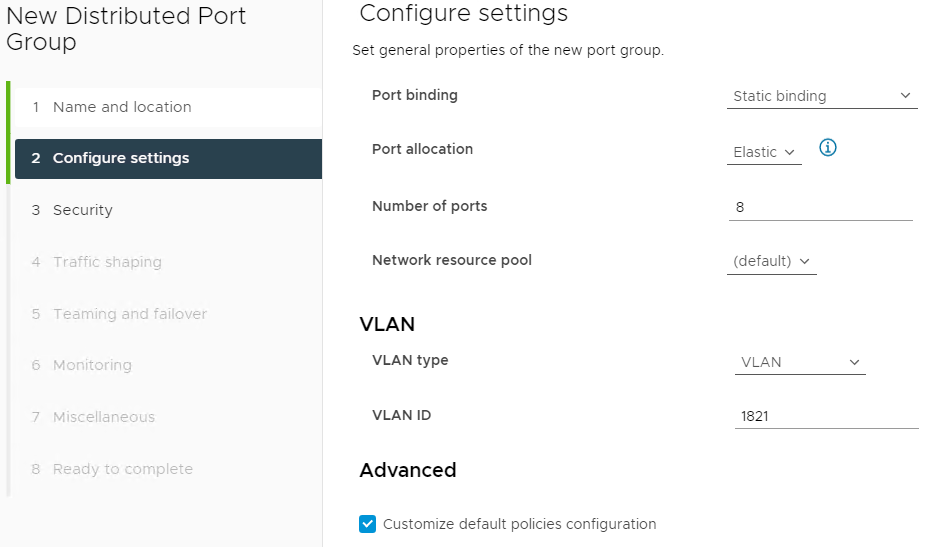
- From the Teaming and Failover screen, set Notify switches to No, and the Failback option to No. Note: Set only one Active uplink. Other Active or Standby links are not possible because the storage adapter cannot failover. In this example, Uplink 1 is the Active uplink for C02-NVMeTCP-SAN-A, Uplink 2 is moved to Unused uplinks and is active for SAN B.
Figure 58. Port group Teaming and failover screen 
- On the Ready to complete screen, review the information, and then click Finish.
Figure 59. Ready to complete confirmation screen 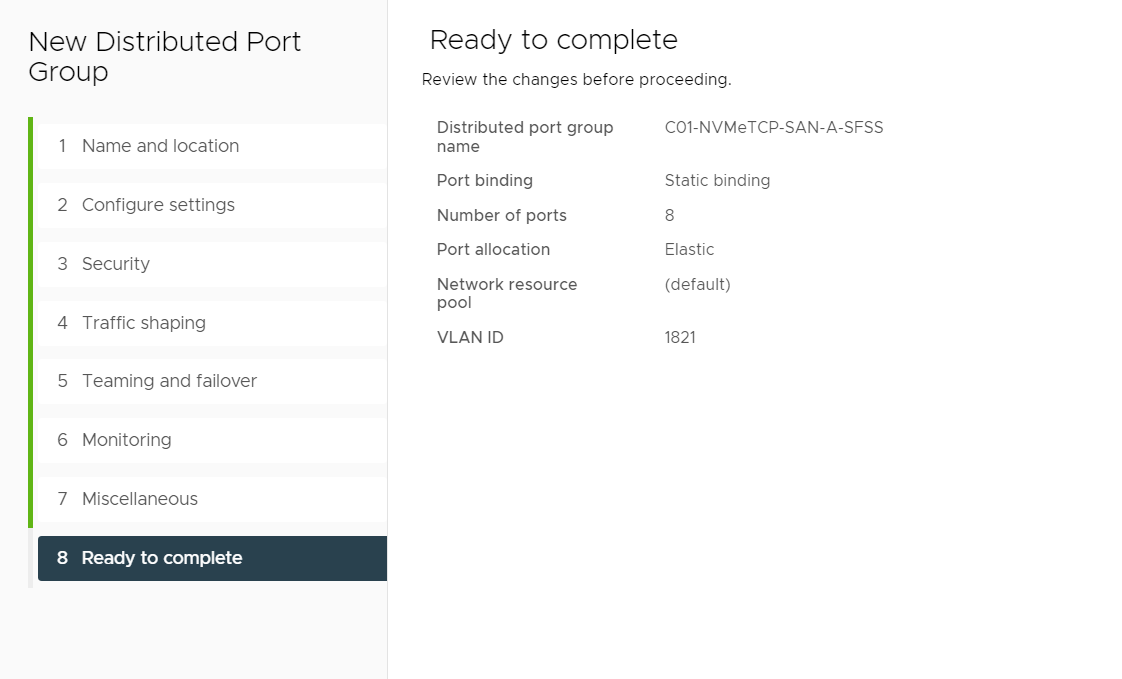
Configure SAN B Port Group for NVMe/TCP VMkernels
To configure the SAN A port group for the NVMe/TCP VMkernels, perform the following steps:
- On the Teaming and Failover screen, set Notify switches to No, and Failback to No. Note: Set only one Active uplink. Other Active or Standby links are not possible because the storage adapter cannot failover. In this example, for C02-NVMeTCP-SAN-B, Uplink 2 is the Active uplink. In this example, move Uplink 1 to Unused uplinks.
Figure 60. Teaming and Failover settings on SAN B Port Group 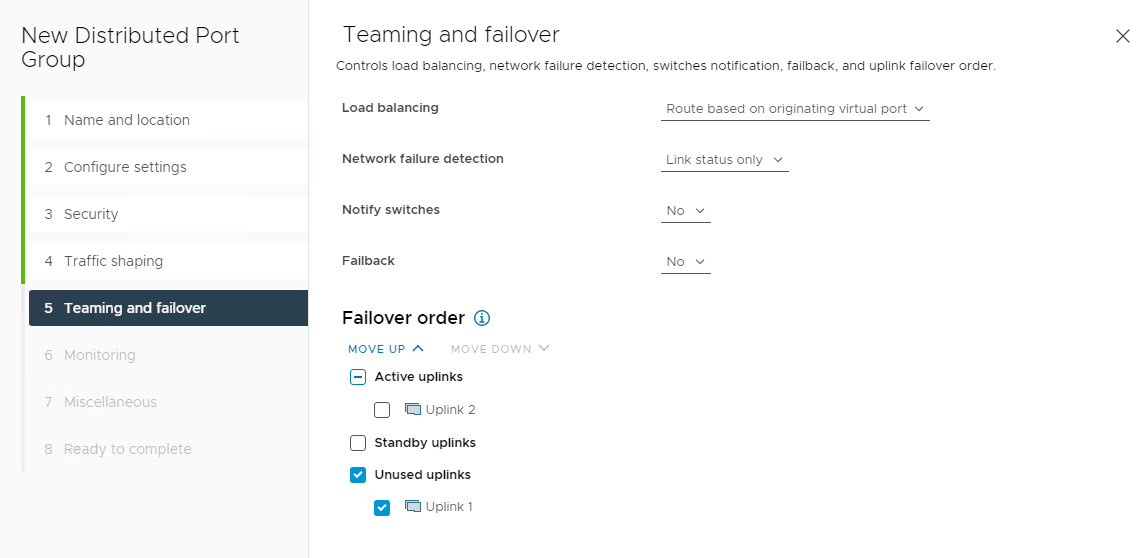
- To view the topology of the vDS, right-click the distributed switch, go to the configure tab, and click Topology.
Figure 61. New vDS with two new Port Groups for NVMe/TCP traffic 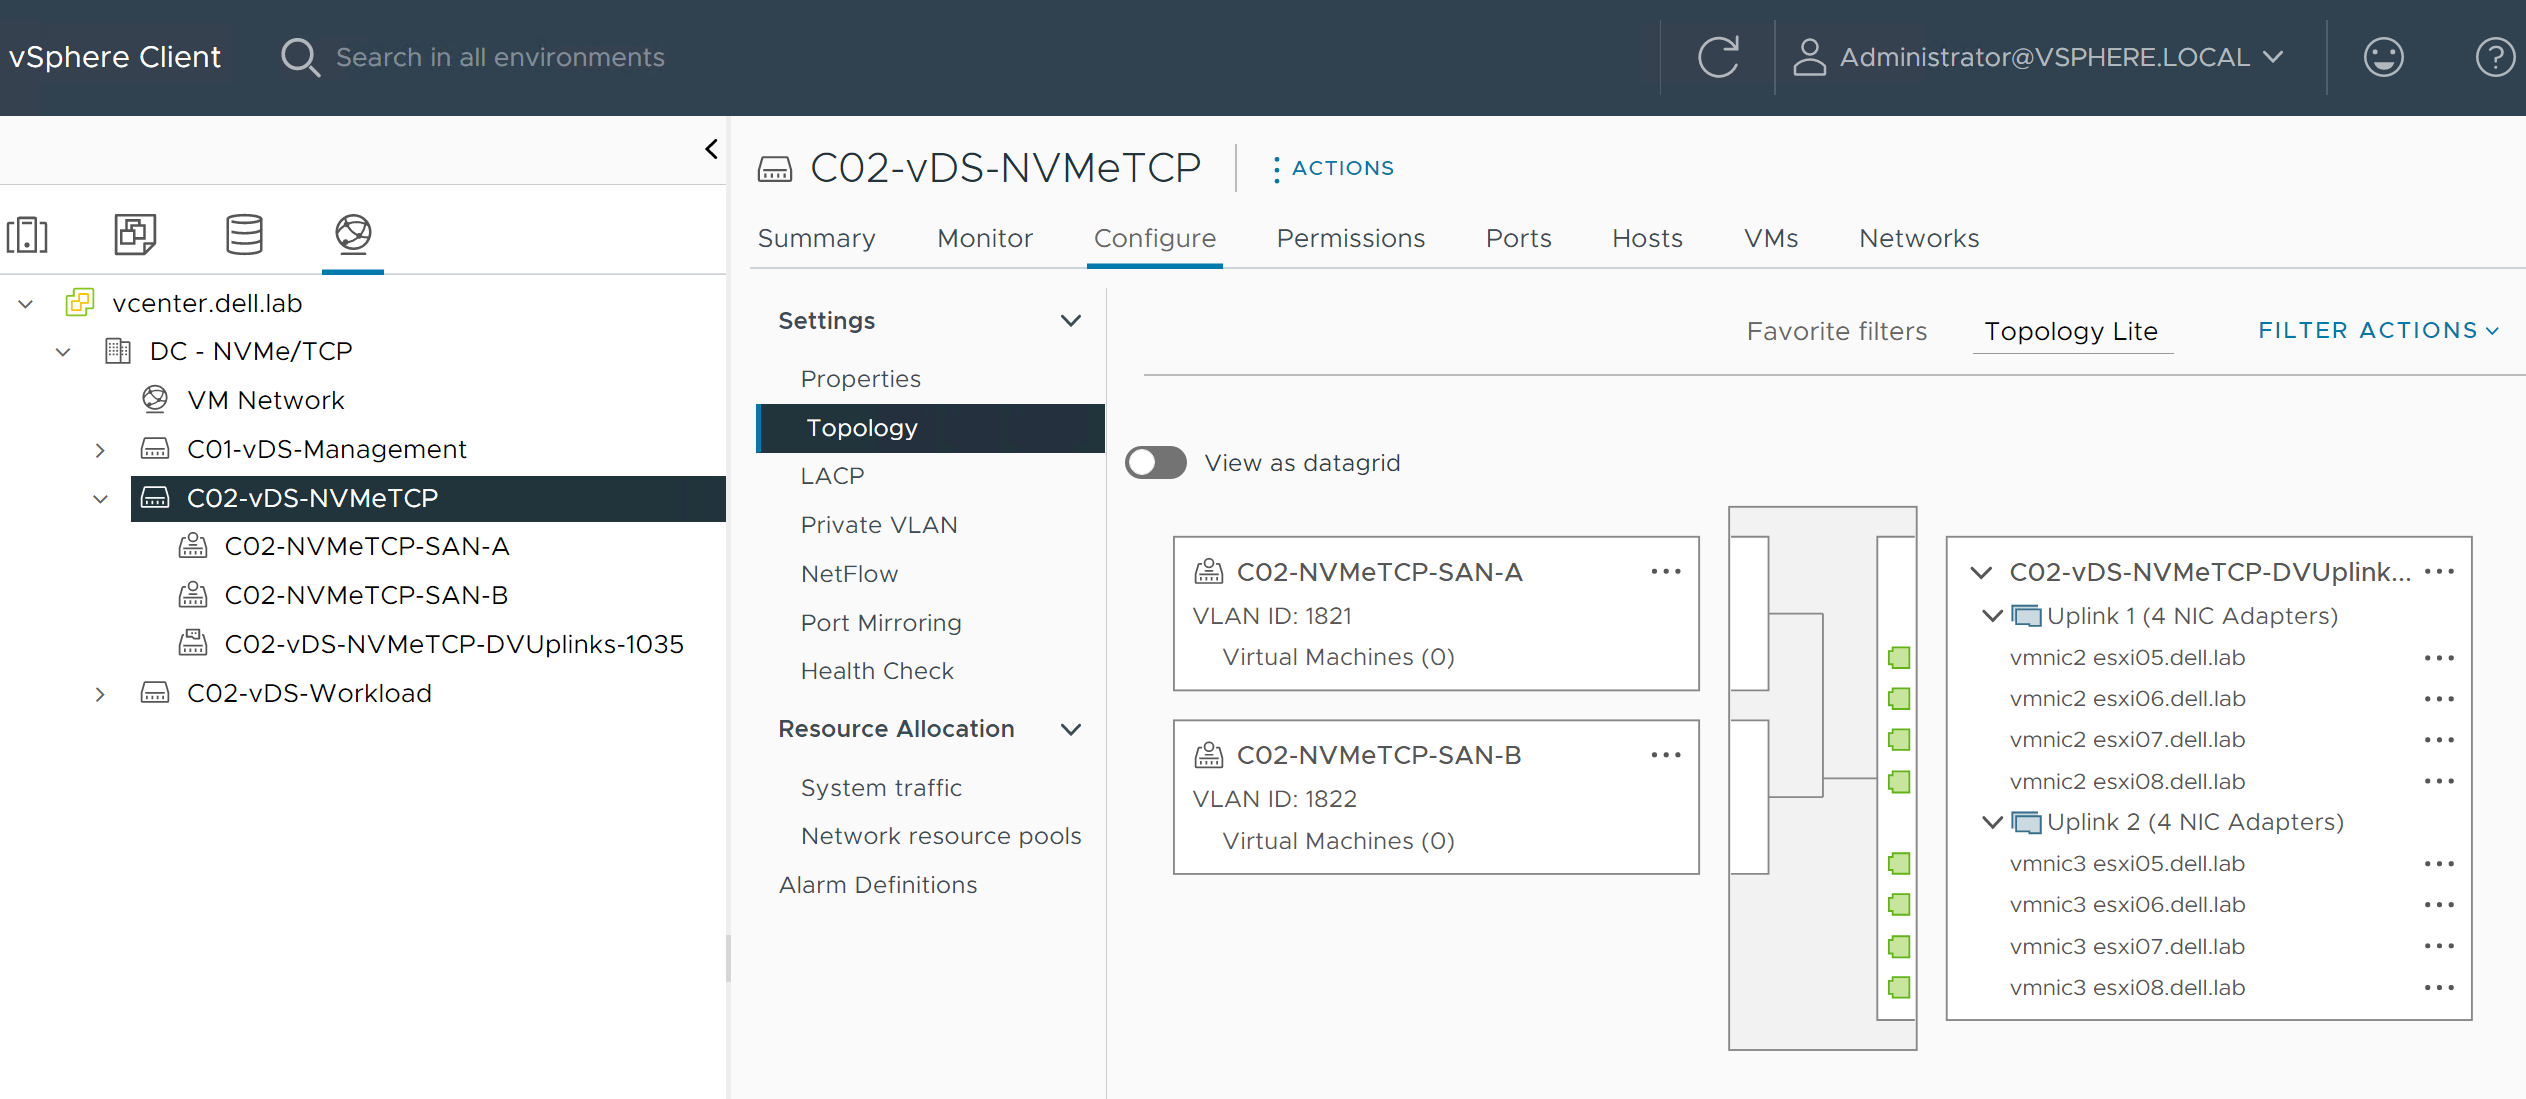
Create VMkernel ports for NVMe/TCP Storage I/O Traffic
Follow the steps to create VMkernel ports for NVMe/TCP on all hosts connected to the vDS.
The first set of steps provides instructions for port group C02-NVMeTCP-SAN-A. The steps are repeated using different IP settings for port group C02-NVMeTCP-SAN-B.
- Select Add VMkernel Adapters.
Figure 62. Add VMkernel to Port Group 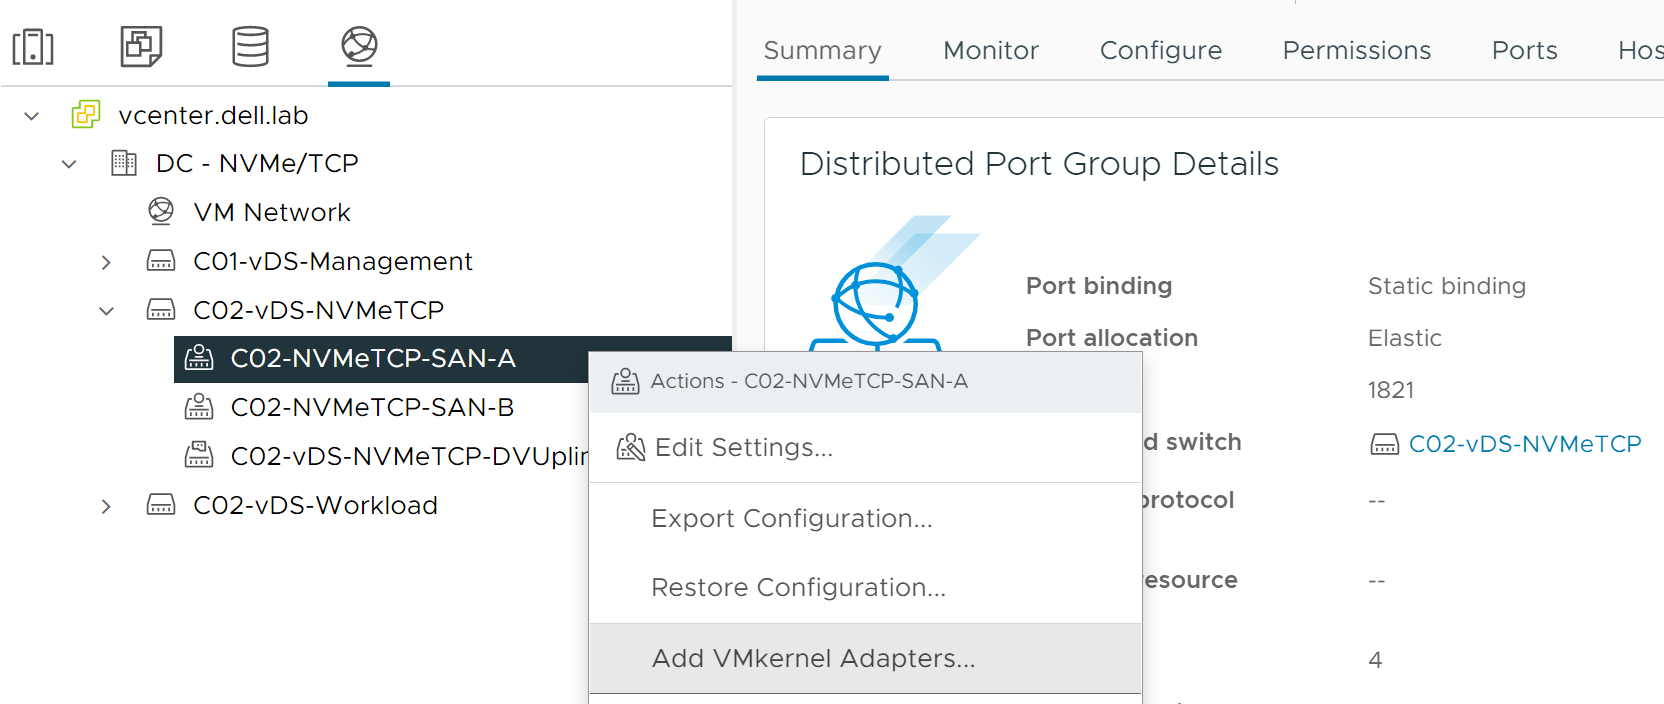
- In the Add VMkernel Adapters dialog box, select the following options:
- In the Select Member Hosts dialog box, select all the hosts listed and click Next. Note: In this example, hosts esxi05 through esxi08 are selected.
Figure 63. Select host members 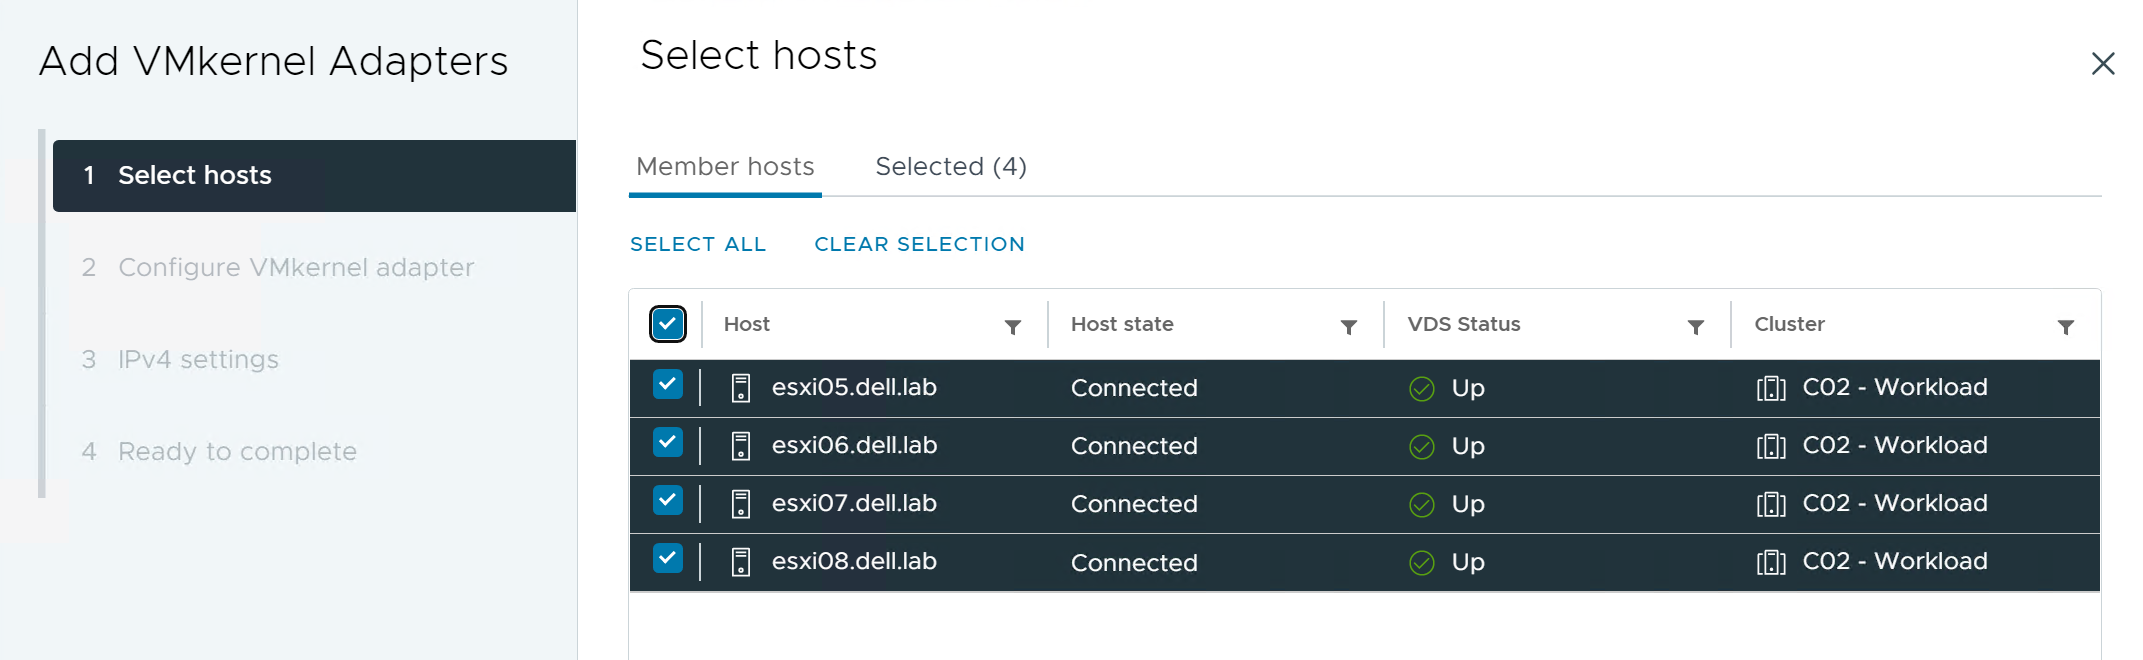
- From the Available services listing, select NVMe over TCP.
Figure 64. Configure VMkernel adapter (7.0) 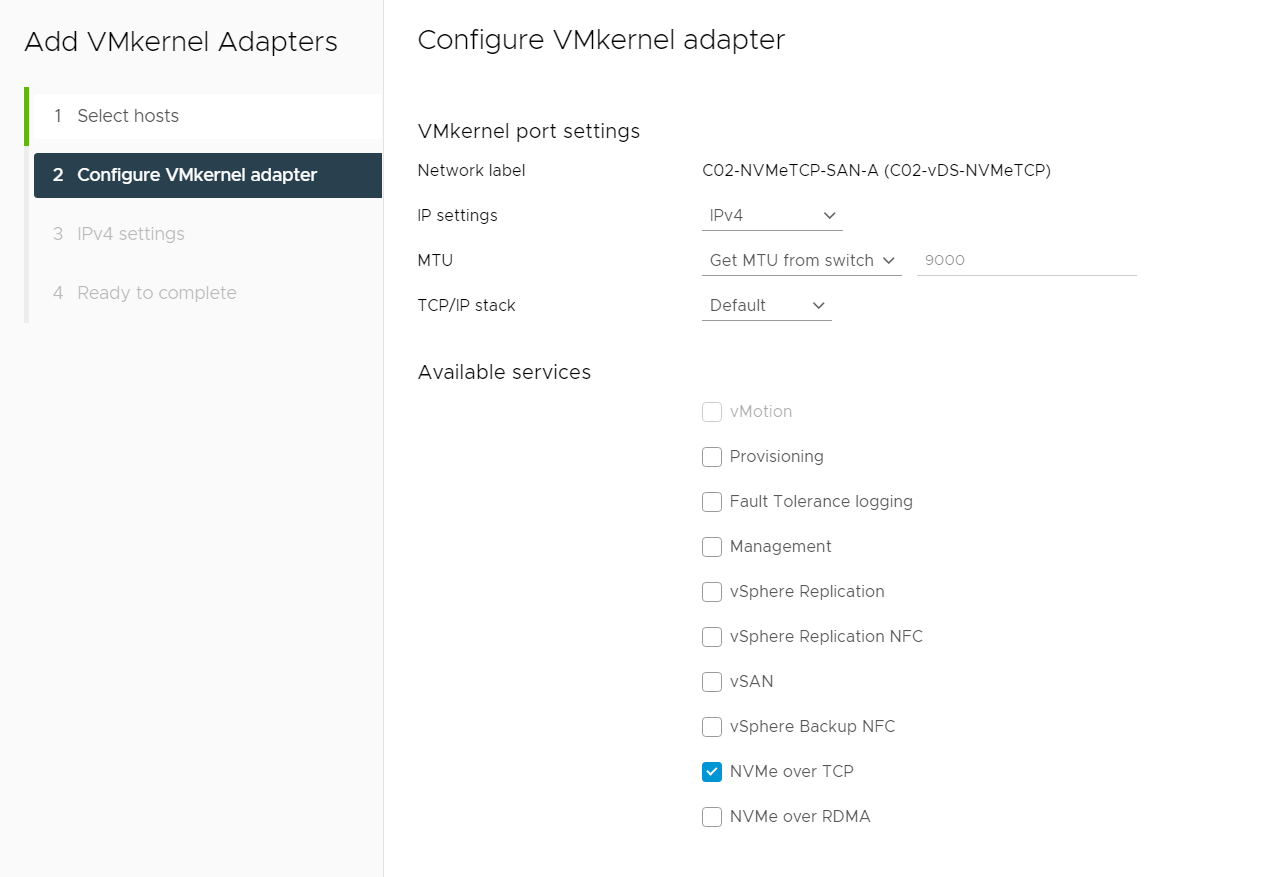
Figure 65. Configure VMkernel adapter (8.0) 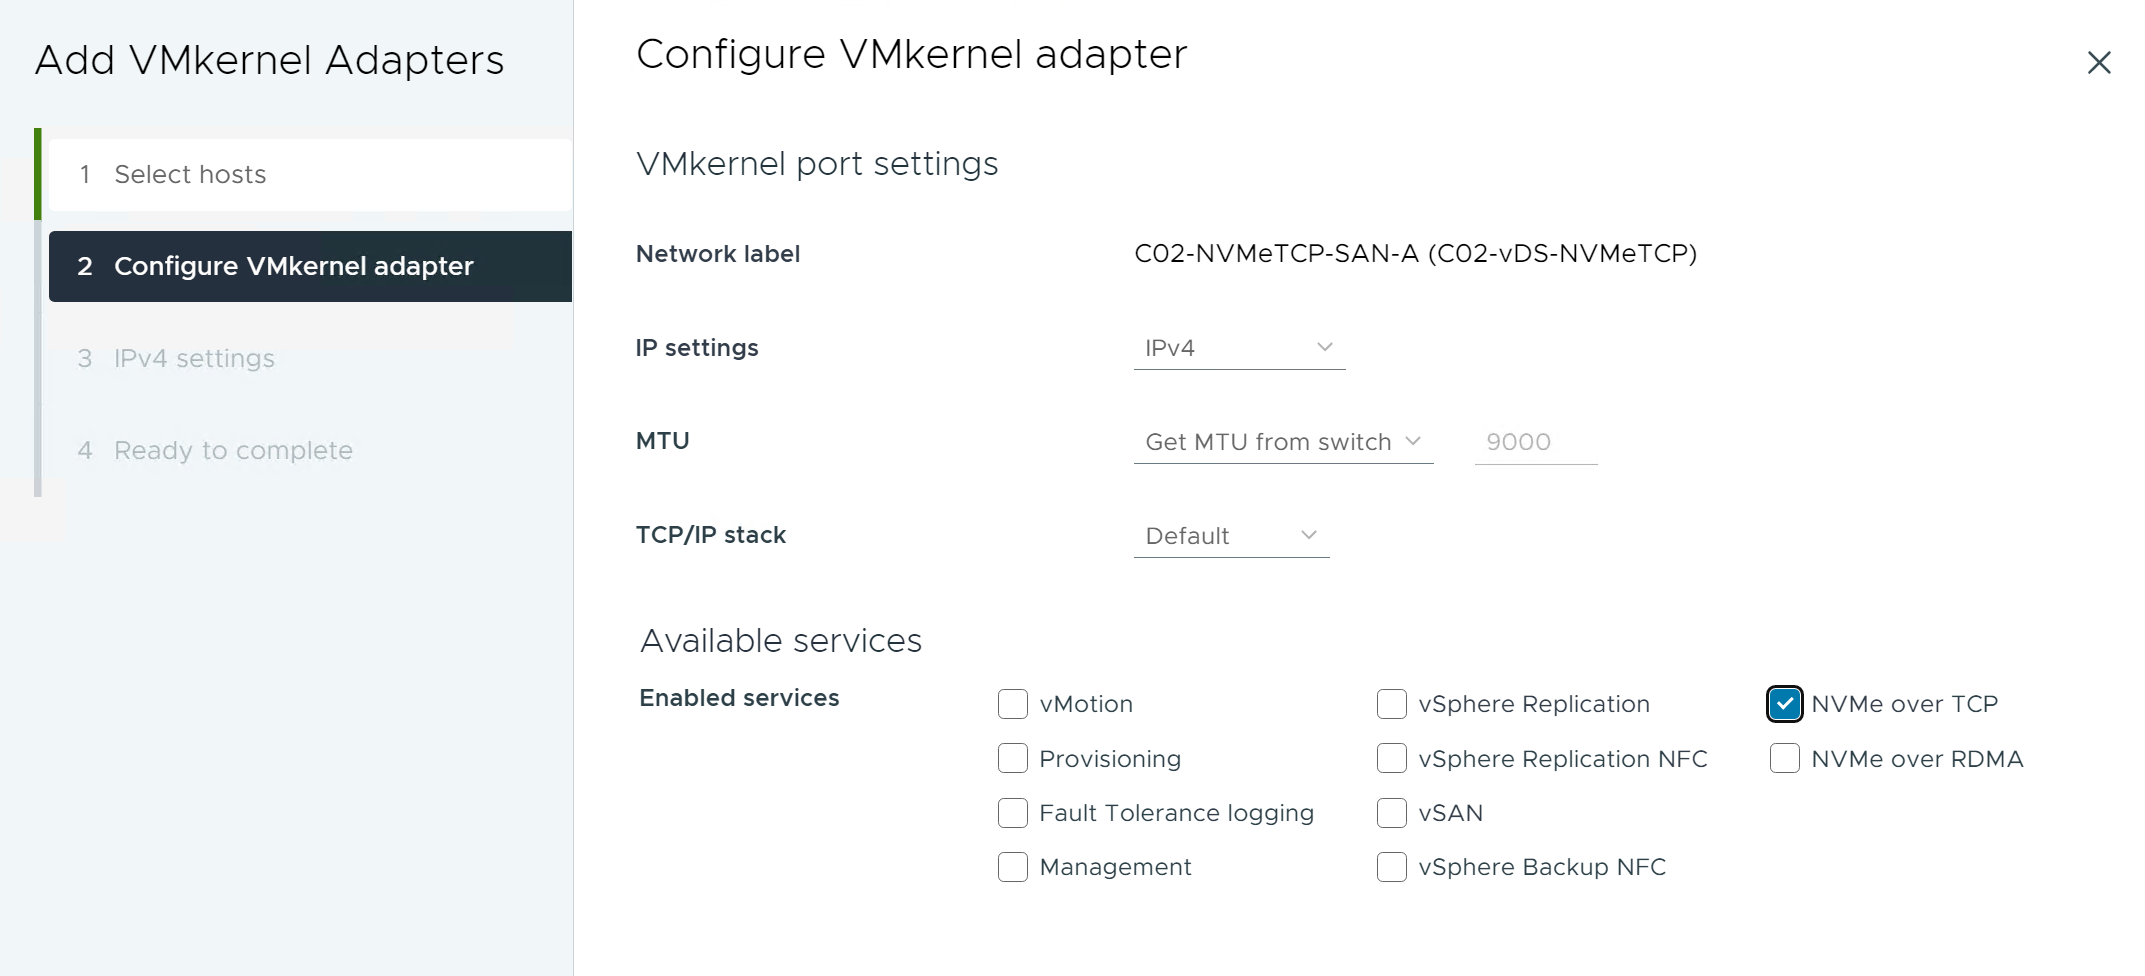
- Enter the IP and Subnet Mask for each host.
- Use IP addresses from the SAN A NVMe/TCP Storage network. In this example, 172.18.21.105 through 172.18.21.108 are used.
- In the Gateway section, select Do not configure from the drop-down. Note: If Layer 3 connectivity is required to reach the hosts from SFSS or storage, add a default gateway as follows:
- In the Gateway section, select the Configuration type as Configure on VMkernel adapters.
- Enter the Gateway IP address. Note: In this example, gateway 172.18.21.254 would be used.
Figure 66. IPv4 settings 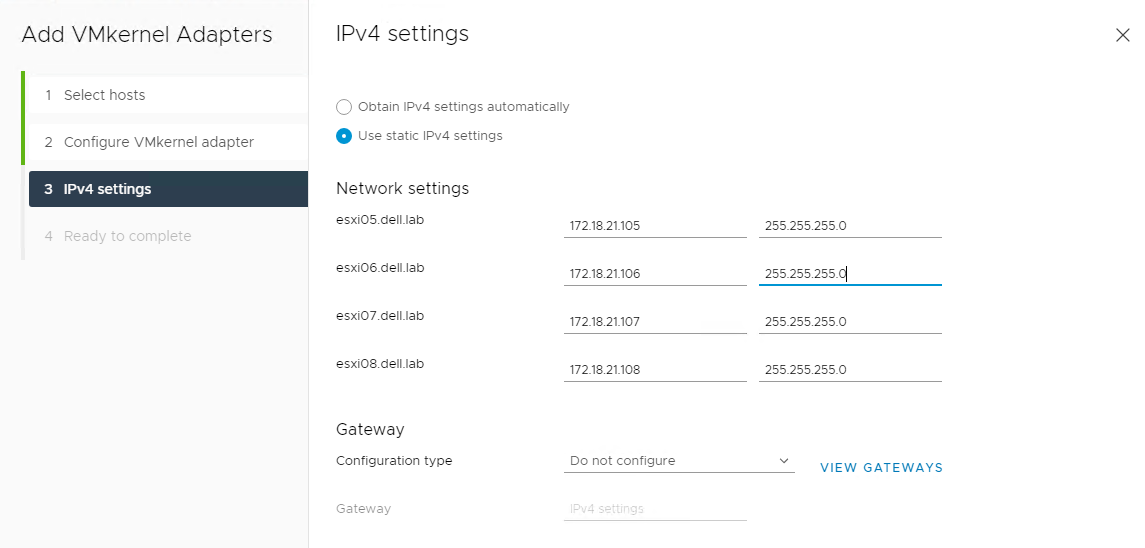
- On the Ready to complete page, review the information and click FINISH .
Figure 67. Ready to complete confirmation screen 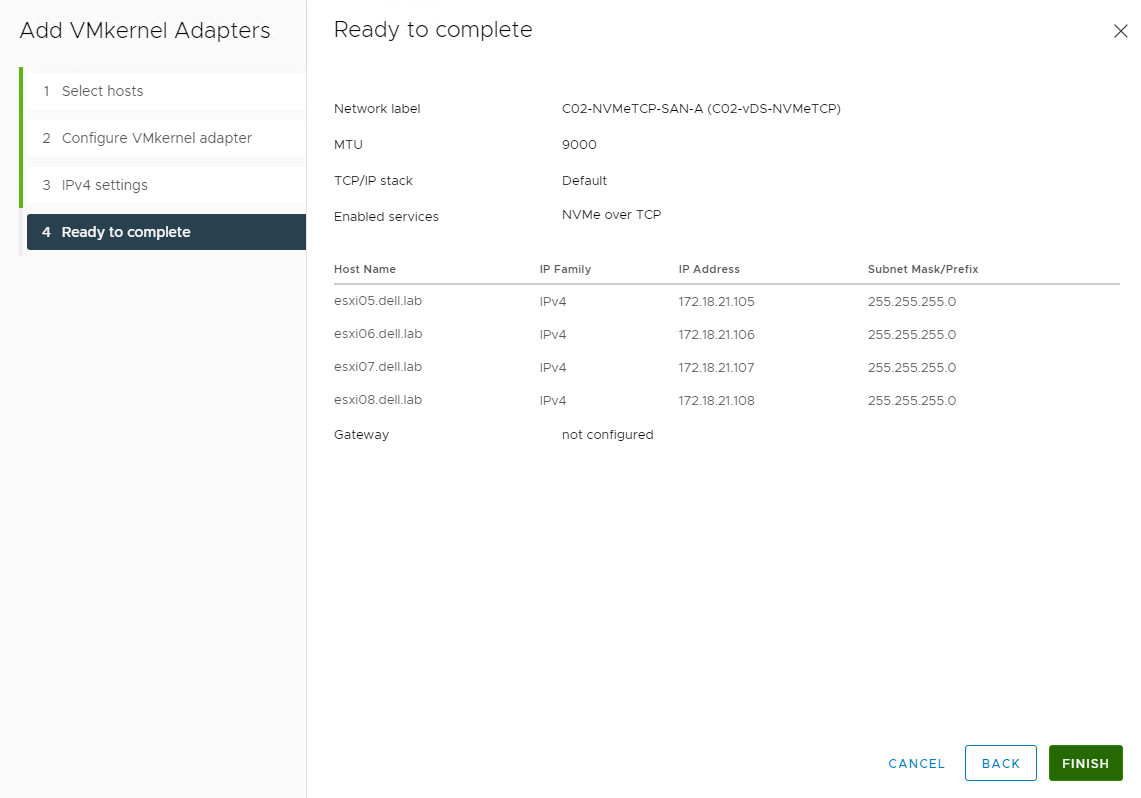
- In the Select Member Hosts dialog box, select all the hosts listed and click Next.
- Click to expand the VMkernel ports section in the C02-NVMeTCP-SAN-B port group, and view the VMkernel details.
Figure 68. Verifying VMkernel ports for SAN A and SAN B 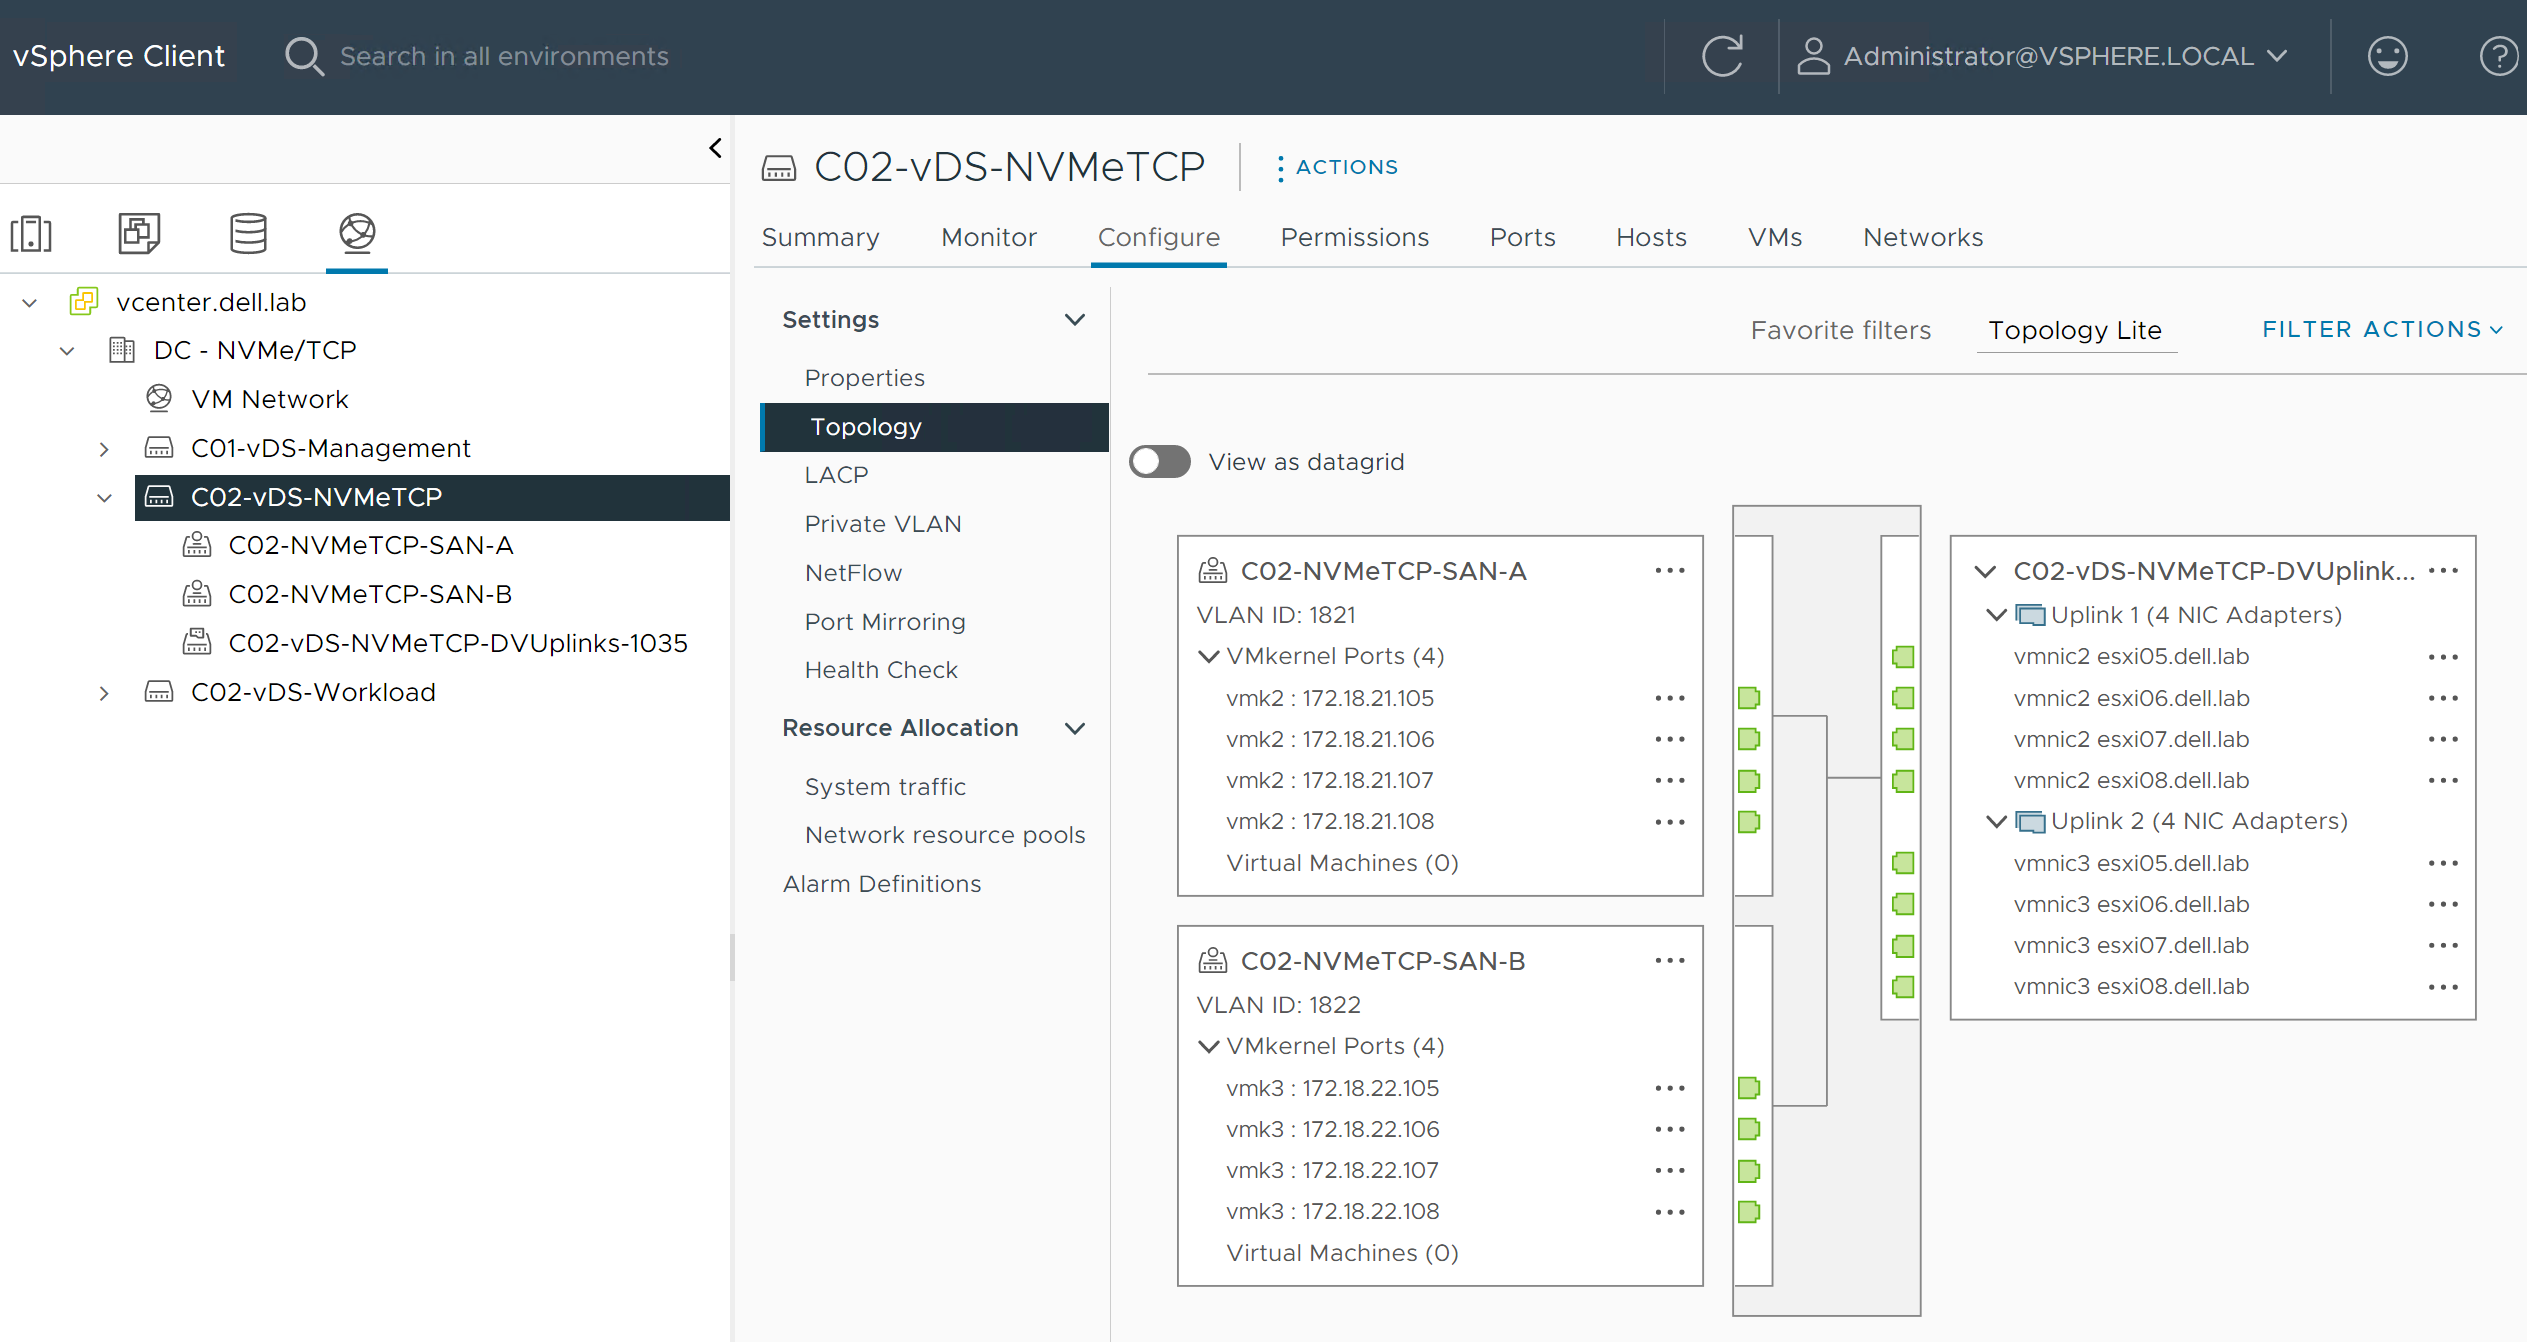
Create NVMe over TCP storage adapters on each host
CAUTION: If running ESXi 8.0, Dell Technologies recommends that the vmhbas are created after the CDC is online. ESXi 8.0 only attempts auto-discovery once, at the time of vmhba creation. If CDC is created after the vmhbas, trigger discovery with mDNS using the esxcli nvme fabrics discover -D -a [vmhbaXY] command on each vmhba.You can create VM HBAs in the CLI or in the vCenter GUI.
To create the storage adapters using the CLI, use the following esxcli command: esxcli nvme fabrics enable -p TCP -d [vmnic].
To create storage adapters using the vCenter GUI:
- Select Add NVMe over TCP adapter.
Figure 69. Select Add NVMe/TCP Adapter 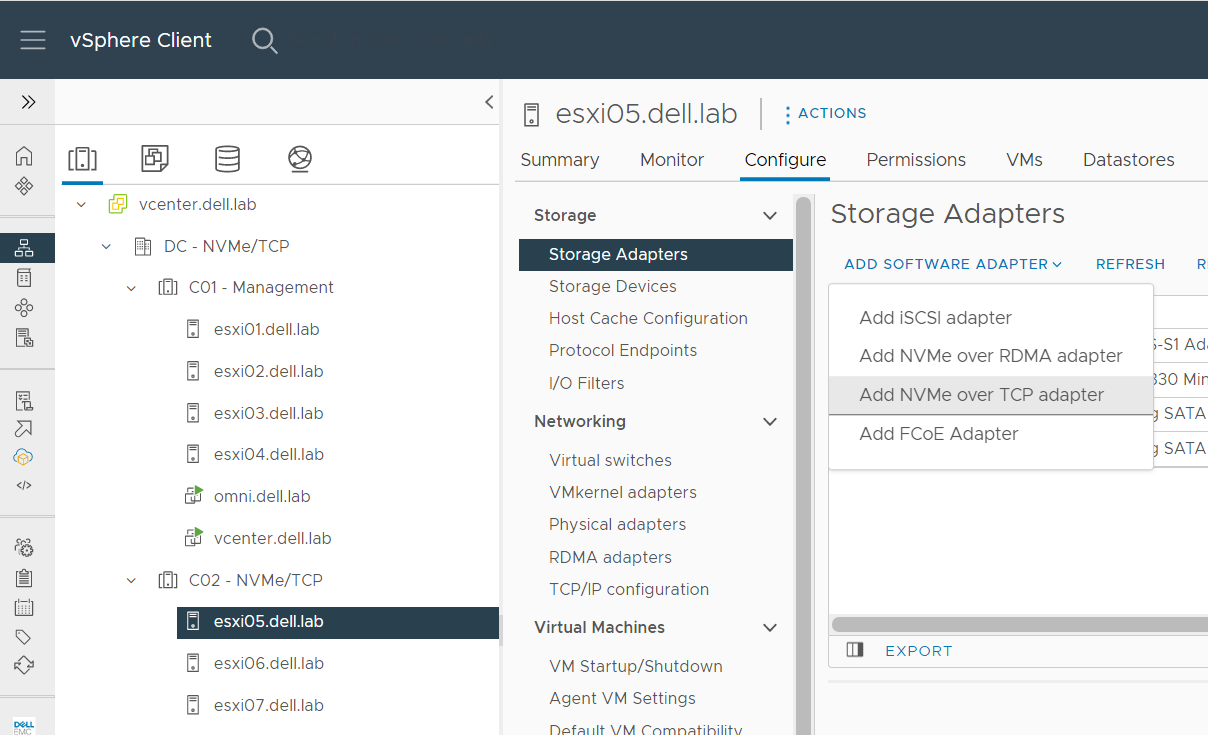
- Select the Physical Network Adapter for SAN A. Note: In this example, vmnic2 is selected.
Figure 70. Add software adapter - SAN A 
- After a few seconds, verify that the newly created NVMe over TCP software storage adapter, vmhba64, was added.
Figure 71. NVMe/TCP storage adapter (vmhba64) 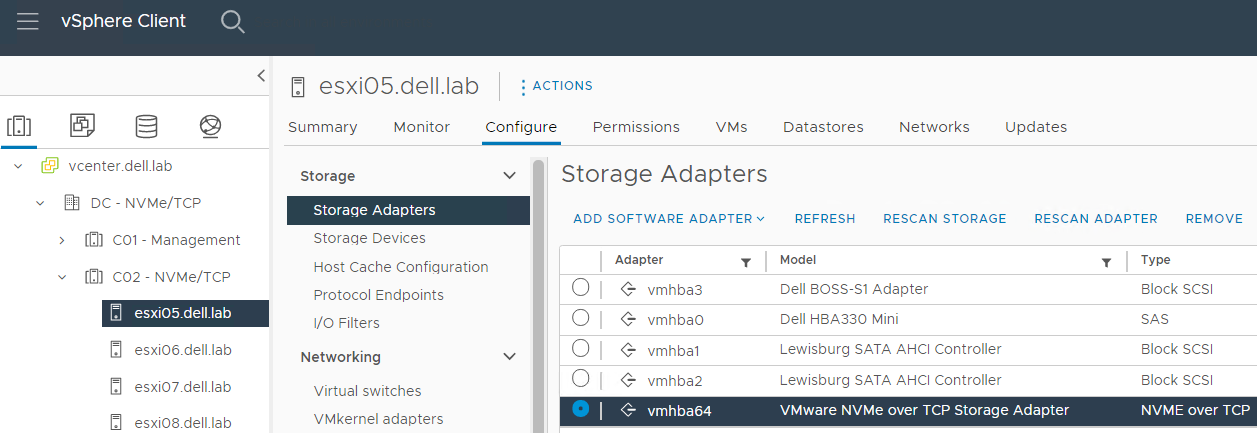
- Select the Physical Network Adapter for SAN B. Note: In this example, vmnic3 is selected.
Figure 72. Add software adapter - SAN B 
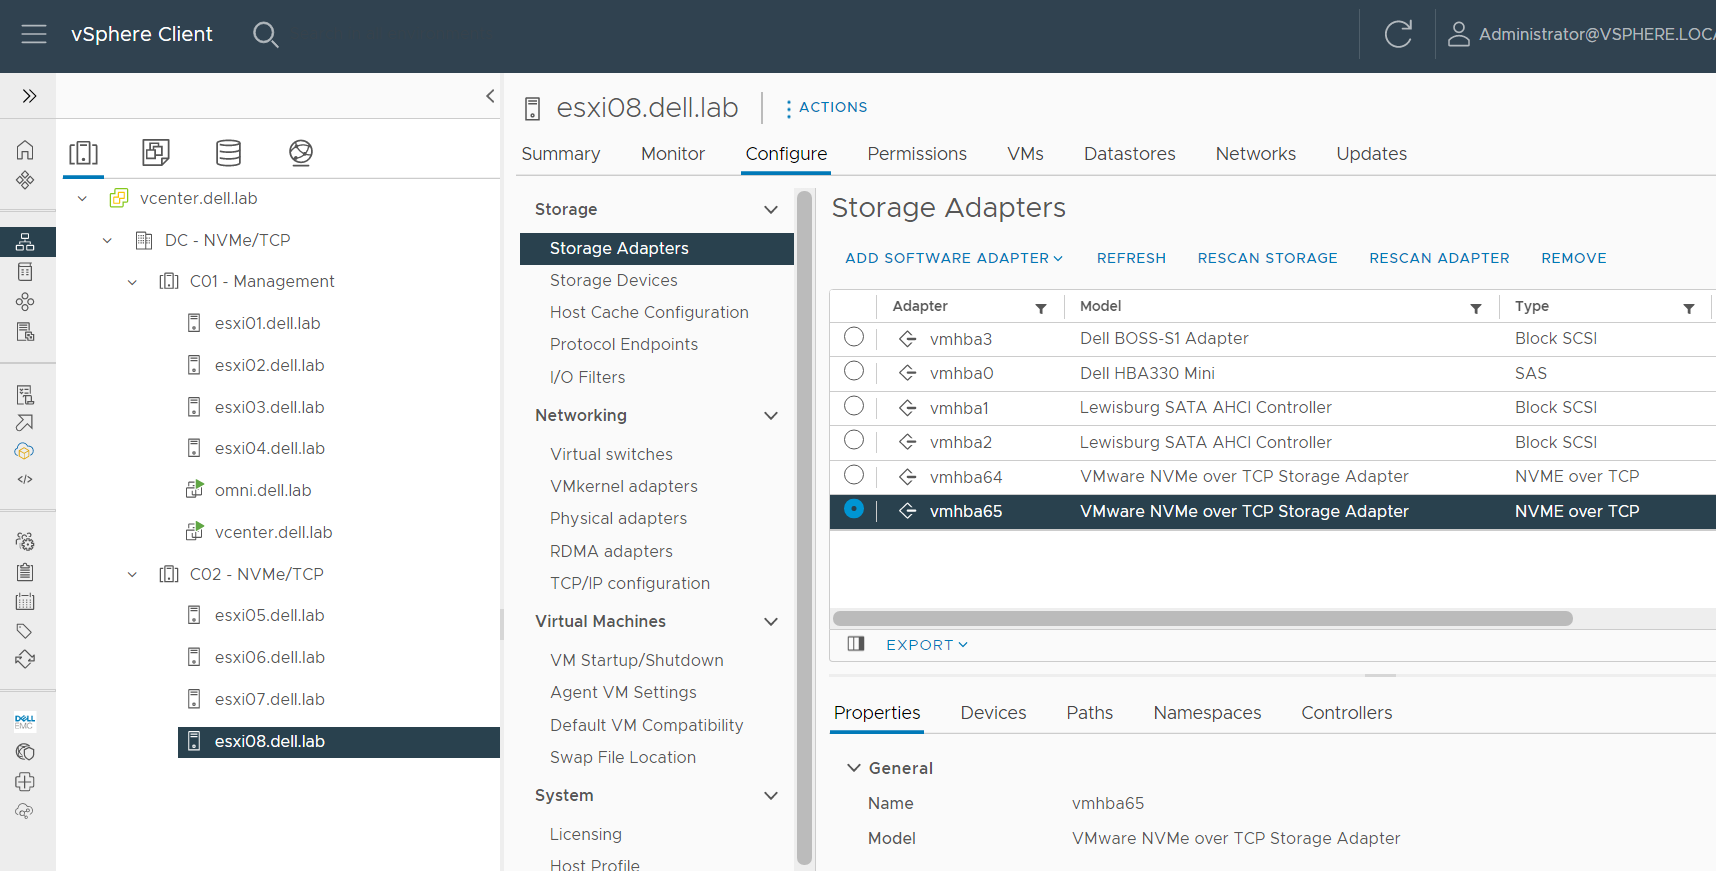
- After a few seconds, verify that the second NVMe over TCP software storage adapter, vmhba65, was added.
Figure 73. NVMe/TCP storage adapters (vmhba64 and vmhba65) 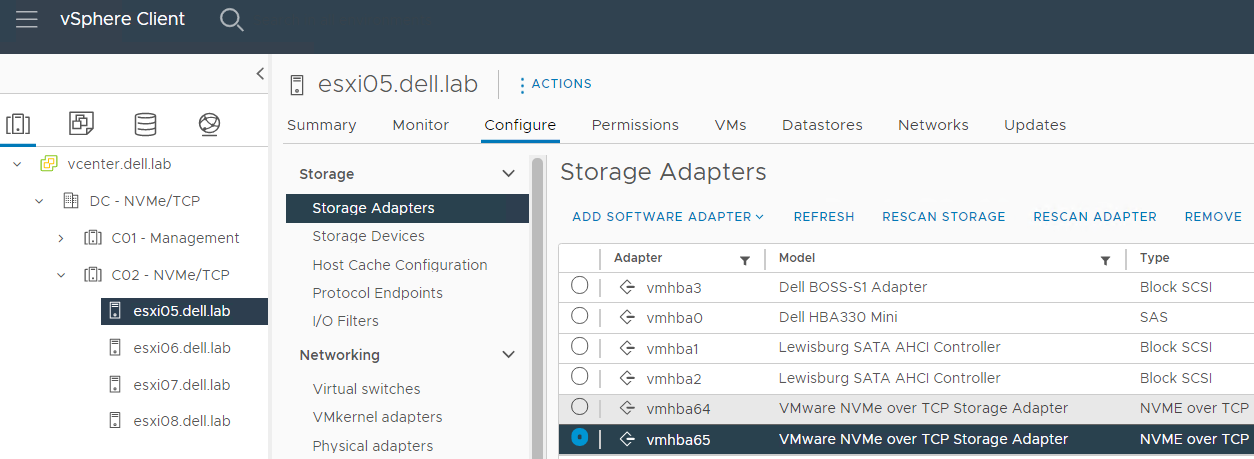 Note: There is a limit of two NVMe/TCP vmhba per host.
- Repeat the steps above to add two storage adapters on the remaining hosts in the cluster. Note: For the topology in this example, hosts esxi05, esxi06, esxi07, and exsi08 will each have two NVMe/TCP storage adapters ( vmhba64 on physical adapter vmnic2, and vmhba65 on physical adapter vmnic3) added.
Figure 74. Two storage software adapters for each host