
Note: The Dell PowerEdge MX platform gives you the ability to replace an I/O module in a SmartFabric if required. The process used depends on the version of OS10 installed and should be run with Dell Technical Support engaged before starting and throughout the process of IOM replacement. For technical support, go to https://www.dell.com/support or call (USA) 1-800-945-3355.
Note: A new replacement IOM will have a factory default configuration. All port interfaces in the default configuration are in the no shutdown state.
Note: The switch replacement process for the Z9432F-ON is the same as the Full Switch IOM replacement process.
With OME-M 1.30.00 and later, Dell PowerEdge MX platform gives you the option to replace the I/O modules in SmartFabric mode in the case of persistent errors or failures and if required through OME-M console. This process can only be done on OME-M after SmartFabric is created.
Prerequisites:
- The MX9116n FSE and MX5108n can only be replaced with another I/O Module of the same type. Ensure that you have the same Dell SmartFabric OS10 version on the switch that is to be replaced, and on the new switch.
- The replacement IOM must be a new device within the chassis deployment. Do not use an IOM that was previously deployed within the MCM group.
- The other IOM in SmartFabric mode must be up, running, and healthy; otherwise a complete traffic outage may occur.
Note: OS10 is factory-installed in the MX9116n FSE or MX5108n Ethernet Switch. If the faulty IOM has an upgraded version of OS10, you must upgrade the new IOM to the same version.
To replace the IOM through OME-M, follow the steps provided in this section.
CAUTION: Carefully follow the steps indicated in the OME-M prompts. Performing the steps out of order or missing a step could cause a failure and may require a replacement of the switch.
- Open OME-M console.
- From Navigation pane, choose Devices > Fabric.
- Select the already created Fabric and select the Replace Switch option.
Figure 176. Replace Fabric Switch Introduction screen 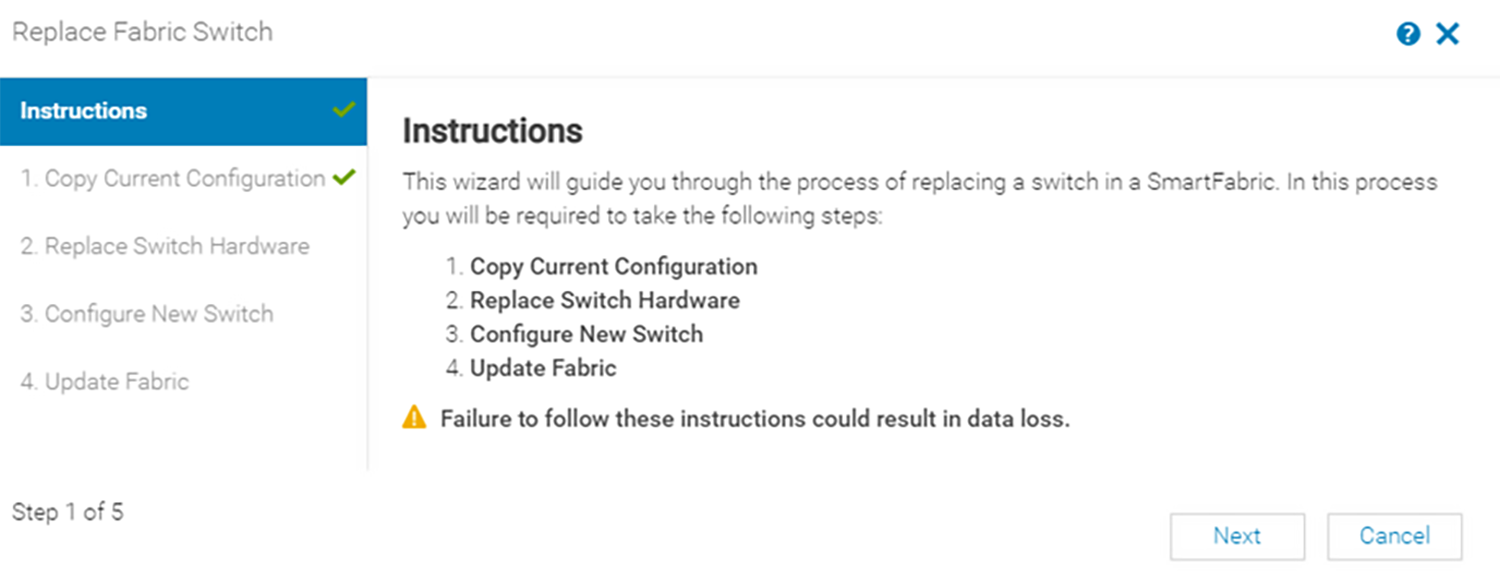
- Click Next.
- Copy the Current Running Configurations from the switch that is to be replaced. Note: See the Dell SmartFabric OS10 User Guide for more information. Find the relevant version of the User Guide in the OME-M and OS10 compatibility and documentation table.
- Click Next.
Figure 177. Copy Current Configuration screen 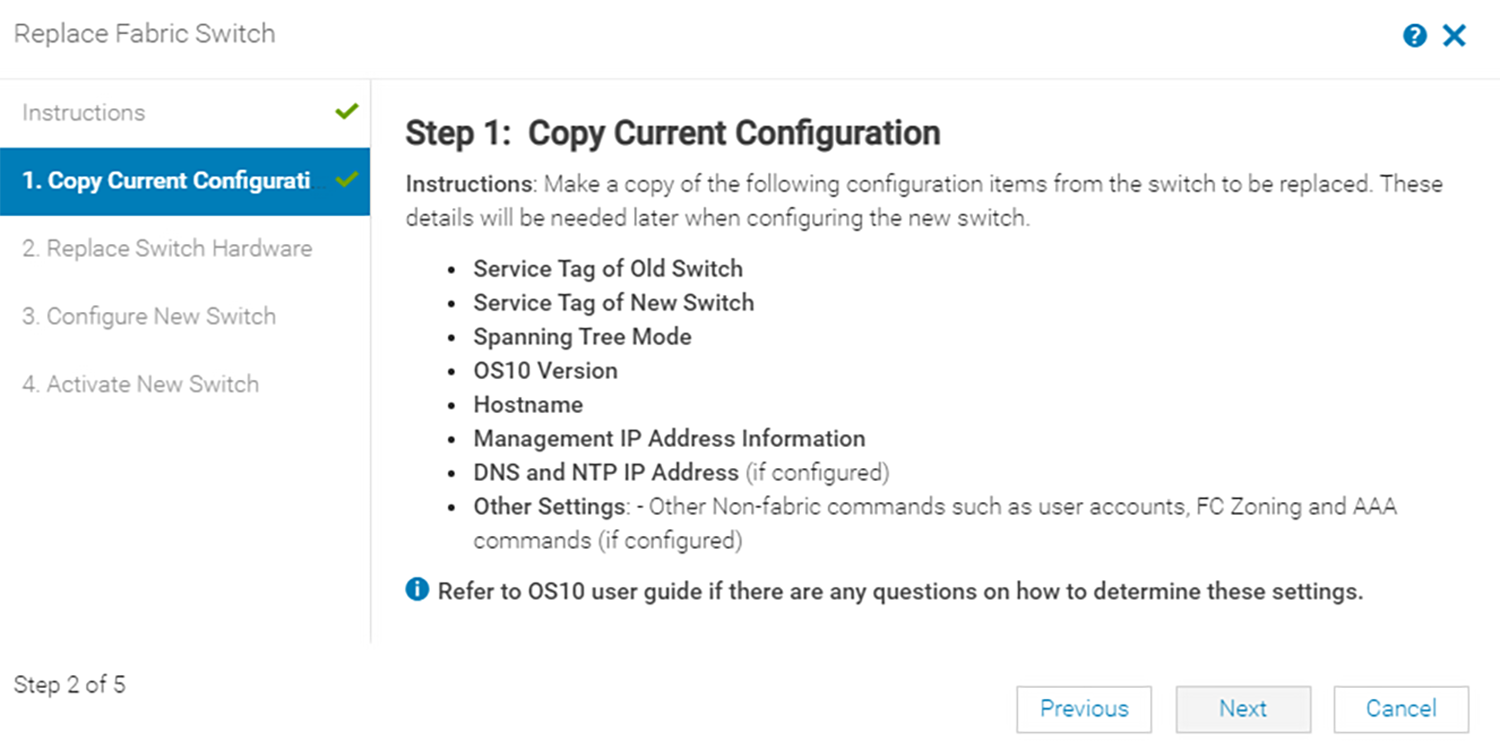
- Carefully remove the cables from the switch that is to be replaced.
- Remove the switch that is to be replaced from the chassis and insert the new switch in the same slot. CAUTION: Do not connect the cables yet. Wait for the switch to boot and ensure that the OS10 version on new switch is same as the switch that is being replaced.
- Confirm the OS10 version on OME-M then click Next.
Figure 178. Replace Switch Hardware screen 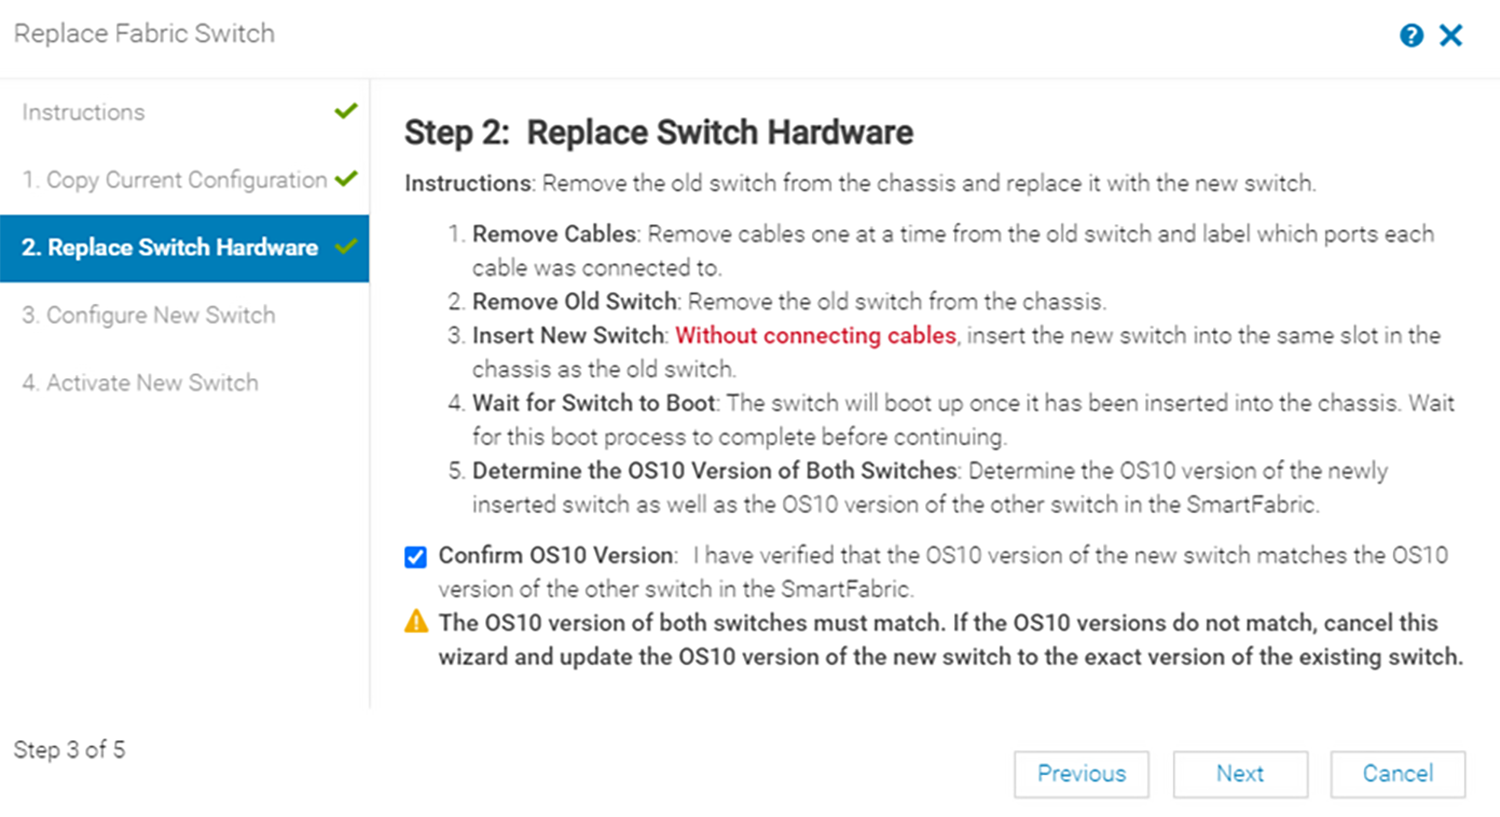
- Configure new switch and apply the settings that were copied from the switch that is being replaced, to the new switch. Note: For more information about the application of the settings from the switch that is being replaced to the new switch, see the Dell SmartFabric OS10 User Guide. Find the relevant version of the User Guide in the OME-M and OS10 compatibility and documentation table.
CAUTION: Do not connect the cables at this time. - After you have configured the software settings and have verified the configuration of the new switch, click to place a check in the Confirm New Switch Settings box, then click Next.
Figure 179. Configure New Switch screen 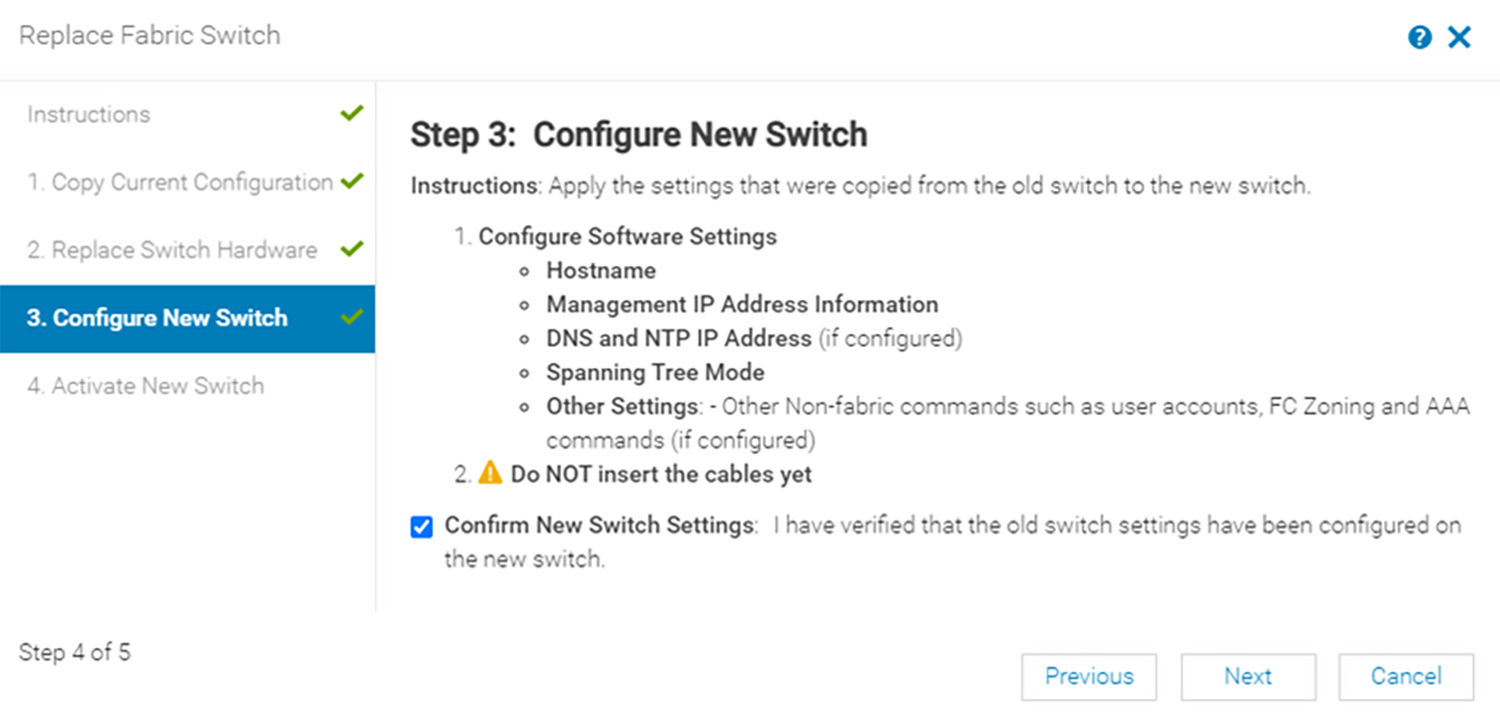
- From the Activate New Switch screen, click the drop-down to select the Old Switch and New Switch in the fields provided.
Figure 180. Activate New Switch screen 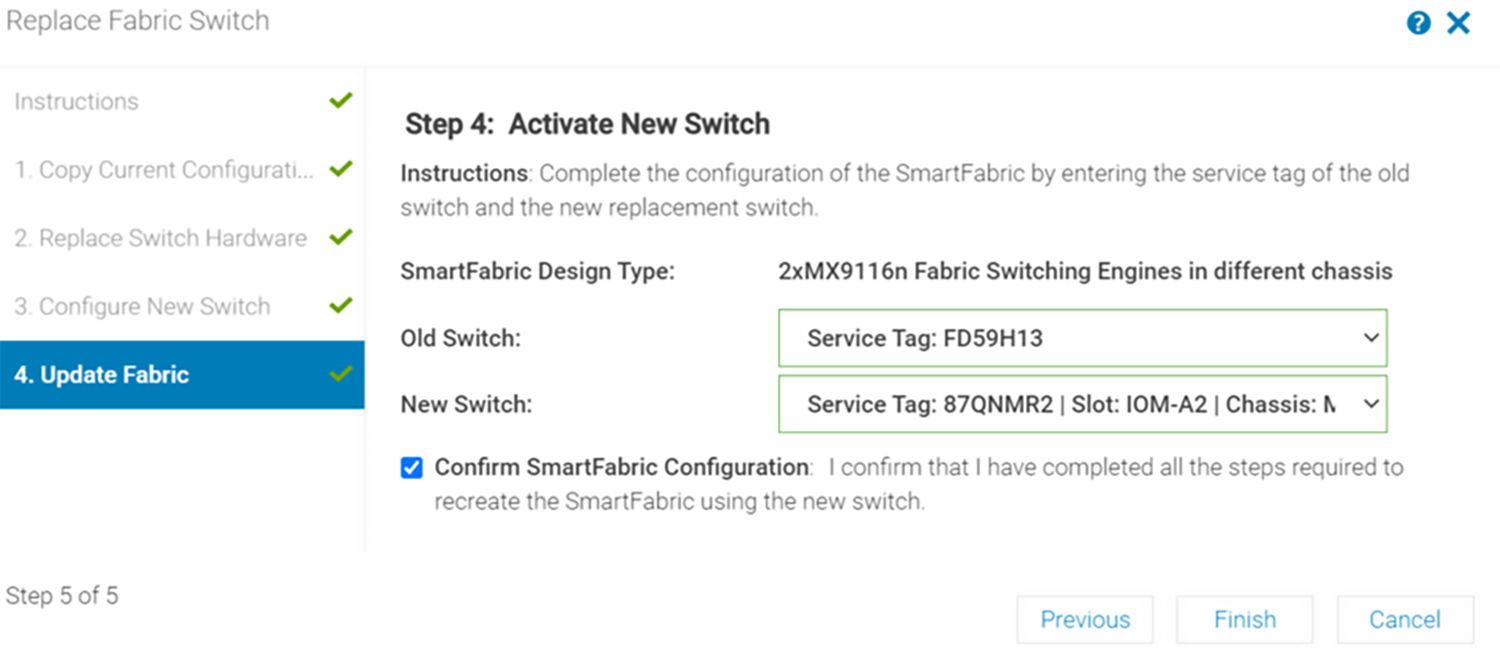
- After you have confirmed that each of the steps required to recreate the SmartFabric using the new switch is complete, click to place a check in the Confirm SmartFabric Configuration box.
- Click Finish, then click Yes to complete the process.