
Starting with OME-Modular 1.20.00 and OS10.5.0.7, a single MX7000 chassis with a pair of MX9116n switches can be expanded to two MX7000 chassis with MX9116n FSEs and M7116n FEMs while running in SmartFabric mode. As shown in the following steps, this process will not require any reconfiguration, is not destructive, and can be performed with the system online as long as network redundancy is configured correctly.
Step 1: Cable Management module
Connect network cables to the MX7000 Management Modules on both chassis. For more information on Management Module cabling, see the PowerEdge MX Chassis Management Networking Cabling White Paper.
Step 2: Create Multichassis Management Group
Create a Multichassis Management (MCM) Group on the single MX chassis configuration. For a scalable fabric that uses more than one MX chassis, the chassis must be in an MCM Group.
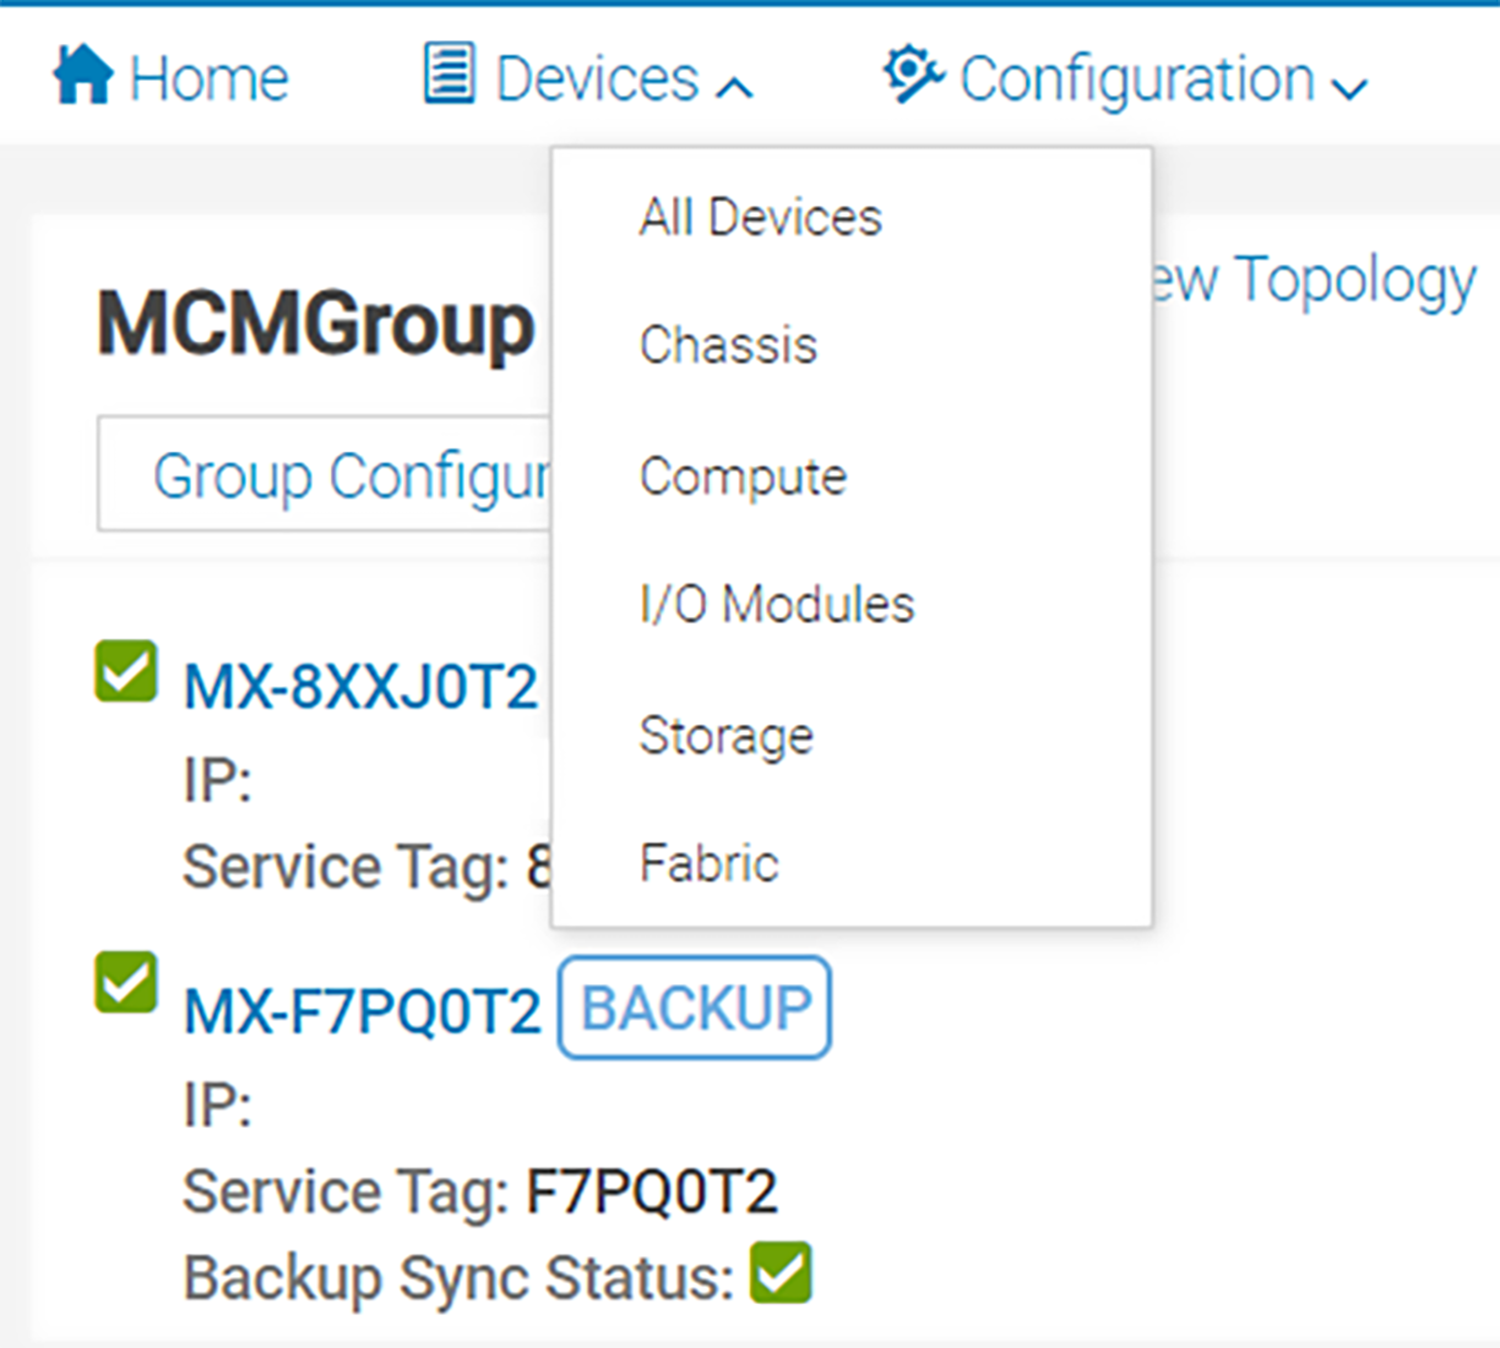
Step 3: Add second MX Chassis to the MCM Group
Perform the following steps:
- Access the OME-M UI.
- Select Chassis. Choose Configure > Add member.
- Select the second MX7000 Chassis from the available chassis to be added as a member to the existing MCM group.
- Click Finish.
Step 4: Move MX9116n FSE from first chassis to second chassis
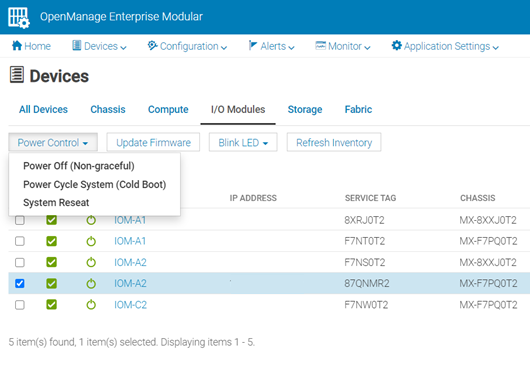
Access OME-M UI from the lead MX Chassis. Choose I/O Modules under Devices.
Select I/O Module in slot A2 from the first chassis. Power off the IOM from the Power Control drop-down menu.
- Once the MX9116n FSE in Chassis 1-Slot A2 in the first chassis is powered off, physically move the switch to Slot A2 of the second MX7000 chassis, but do NOT insert it completely at this time.
- Insert a MX7116n FEM in Chassis 1-Slot A2 and another FEM in Chassis 2-Slot A1.
- Connect QSFP28-DD cables between FSE and FEM, as shown in the following figure. Note: The following diagram shows the connections for a scalable fabric on multiple chassis between the FSE and FEM components. The diagram does not show the VLTi connections required for operating in SmartFabric mode or as recommended when in Full Switch mode.
Figure 175. Connection between FSE and FEM 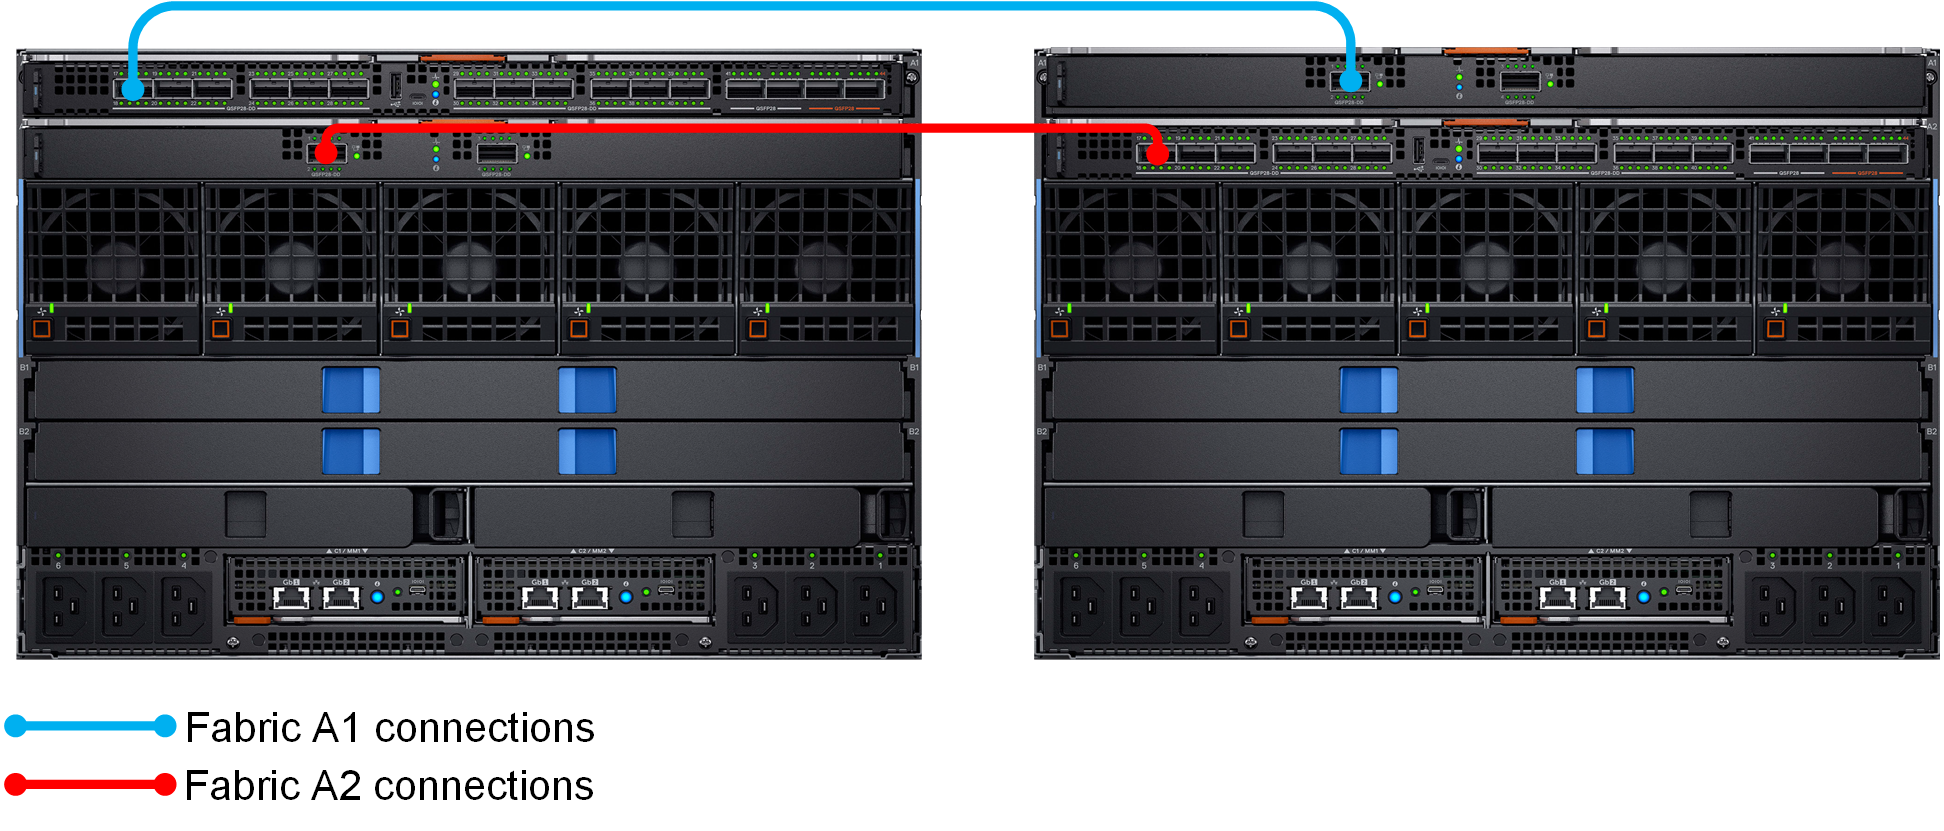
- Once cabled, fully insert the MX9116n FSE in Chassis 2-Slot A2 and it will power on automatically.
- These steps can be repeated for IOMs in slots B1/B2 as well.
Step 5: Validation
Perform the following steps to validate the environment.
- Make sure that all MX9116n FSEs and MX7116n FEMs on both chassis appear in the OME-M UI. Restart the second MX9116n FSE if you do not see it in the correct chassis.
- Check the SmartFabric configuration to ensure that nothing has changed.
- Make sure all internal switch ports on the MX9116n FSE and MX7116n FEMs are enabled and up. Check link lights for the external ports to make sure that they are illuminated.