The additional switch and rack names are configured as follows:
- In the SFS UI, click the Global Settings tab.
- Under Global Settings, click the Set Fabric & Switch Name tab and click SET FABRIC & SWITCH NAME.
- On the Network Fabric page, click NEXT.
- On the Racks page, the second rack appears in the list. Update the Name (recommended) and Description (optional) of the second rack, as shown in the following figure.
Figure 74. Rack renamed to Rack 2 
- Click NEXT.
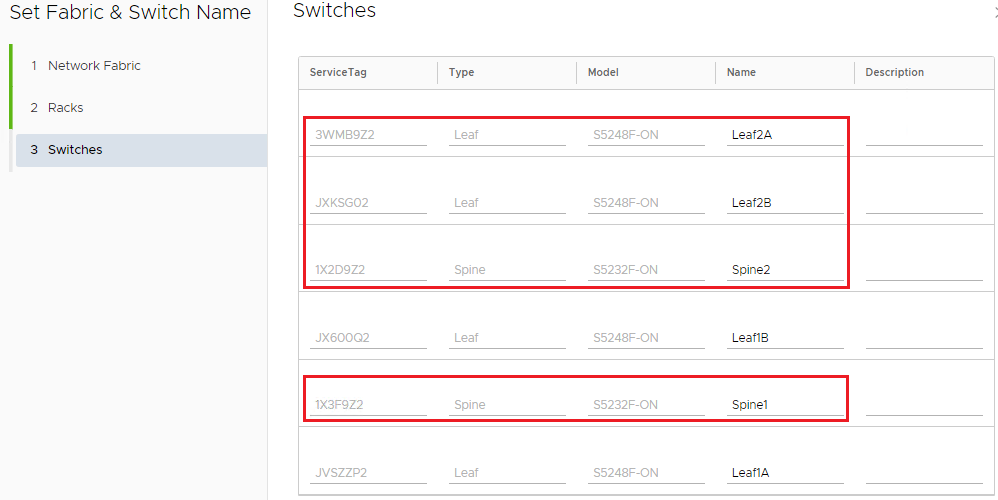
- On the Switches page, the additional switches appear along with their service tags, types, and models. Update the Names (recommended, if not previously configured from the CLI) and Descriptions (optional) of the newly added switches. The four additional switches with updated names are outlined in red in the following figure.
Figure 75. Switch name configuration page 
- Click FINISH and then OK to apply the settings.
