
Cisco ISE
Cisco ISE
-
Cisco ISE is a next-generation identity and access control policy platform that enables enterprises to enforce compliance, enhance infrastructure security, and streamline their service operations.
The unique architecture of Cisco ISE allows enterprises to gather real-time contextual information from networks, users, and devices. The administrator can use that information to make proactive governance decisions by tying identity to various network elements including access switches, wireless LAN controllers (WLCs), virtual private network (VPN) gateways, and data center switches. Cisco ISE is a combined policy-based access control system that incorporates a superset of features available in existing Cisco policy platforms.
Cisco ISE performs the following functions:
- Combines authentication, authorization, accounting (AAA), posture, and profiler into one appliance
- Supports comprehensive guest access management for the Cisco ISE administrator, sanctioned sponsor administrators, or both
- Enforces endpoint compliance by providing comprehensive client provisioning measures and assessing device posture for all endpoints that access the network, including 802.1X environments
- Provides support for discovery, profiling, policy-based placement, and monitoring of endpoint devices on the network • Enables consistent policy in centralized and distributed deployments that allows services to be delivered where they are needed
- Employs advanced enforcement capabilities including security group access (SGA) through the use of security group tags (SGTs) and security group access control lists (SGACLs)
- Supports scalability to support several deployment scenarios from small office to large enterprise environments The following key functions of Cisco ISE enable you to manage your entire access network. Provide Identity-Based Network Access
The Cisco ISE solution provides context-aware identity management in the following areas:
- Cisco ISE determines whether users are accessing the network on a authorized, policy-compliant device.
- Cisco ISE establishes user identity, location, and access history, which can be used for compliance and reporting.
- Cisco ISE assigns services based on the assigned user role, group, and associated policy (job role, location, device type, and so on).
- Cisco ISE grants authenticated users with access to specific segments of the network, or specific applications and services, or both, based on authentication results.
In the next several chapters, we will briefly describe how to create a network device (NAS or Dell SONiC Edge switch), network device profile, network device group, user identify/name, authentication and authorization polices, policy profiles, RADIUS dictionaries used in AAA, and how to use ISE library condition/studios to compose/create various policies. Please refer to Cisco ISE user documents for more detail information
Cisco ISE management access
Cisco ISE log in
Use the following steps to log into Cisco ISE:
- Point browser to Cisco ISE IP address (100.67.151.58 for example)
- Enter the username and case-sensitive password, that was specified and configured during the first Cisco ISE setup.
- Click Login or hit Enter.
Figure 3. Cisco ISE Login Page

Figure 4. Cisco ISE Home Page
Cisco ISE version
- To check or display Cisco ISE version, click the gear icon on the top right corner of ISE web UI and select About Identity Services Engine from the drop down menu.
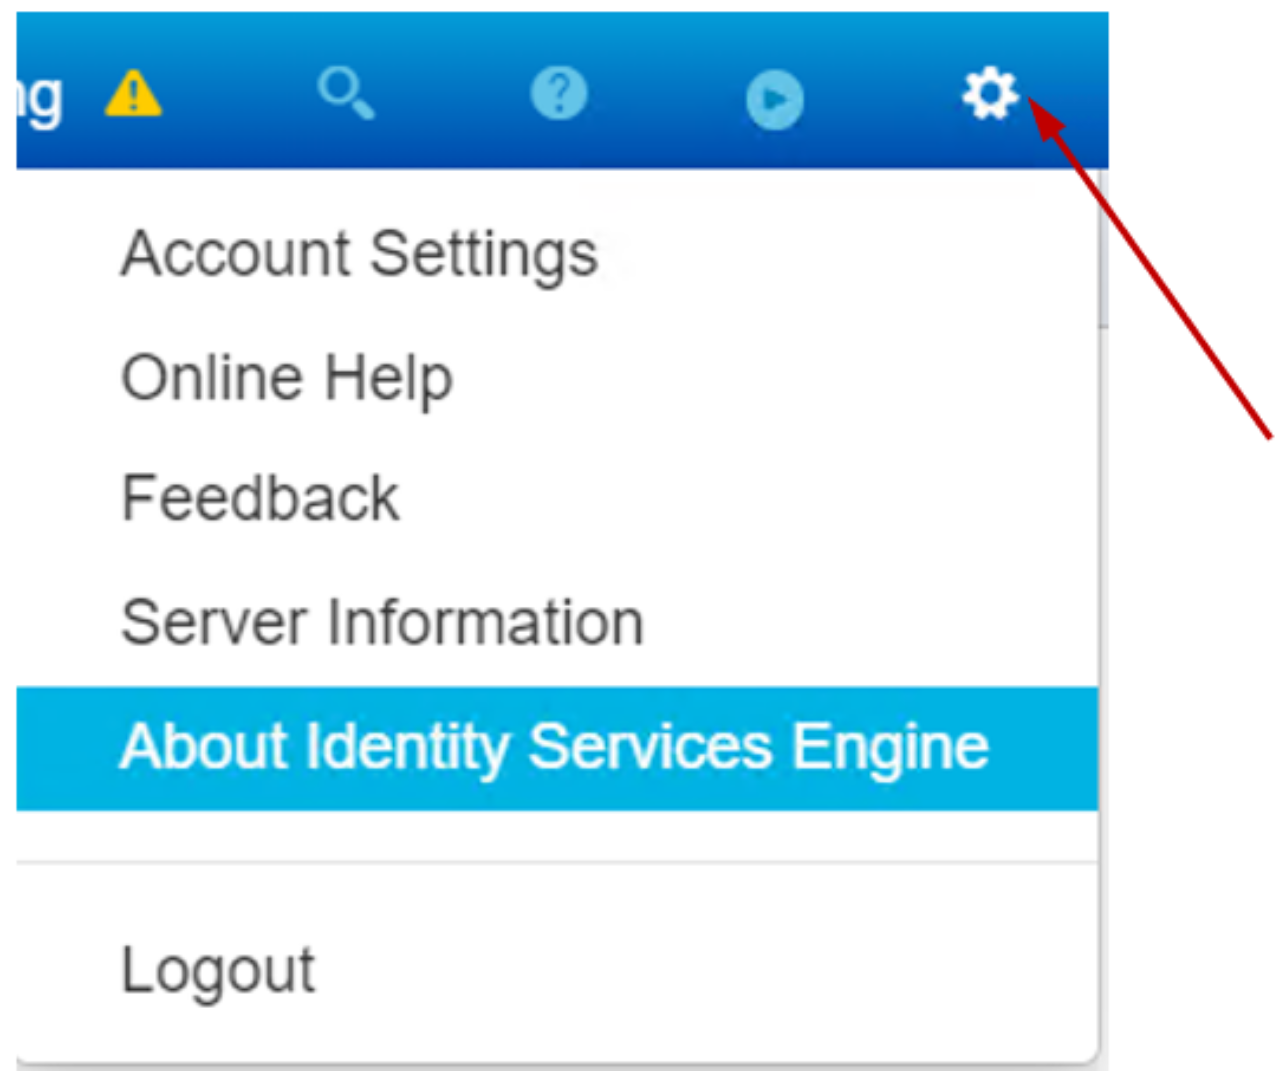
Figure 5. Cisco ISE About page
- The Cisco ISE version page appears.
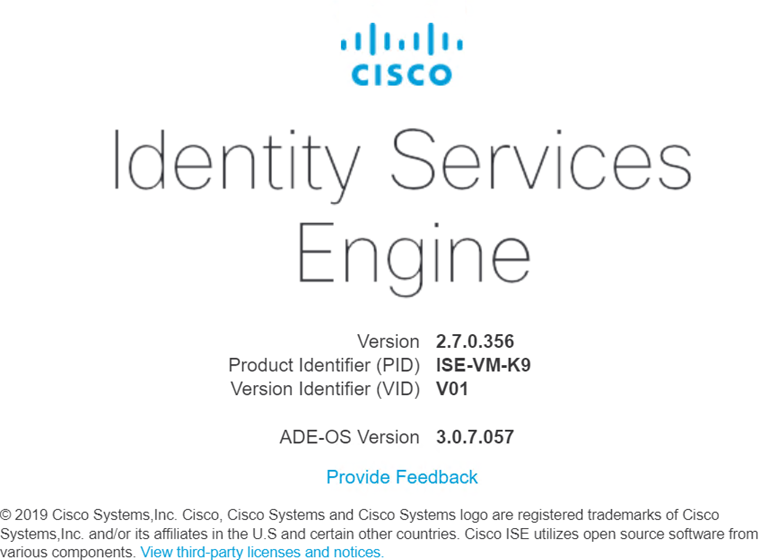 Figure 6. Cisco ISE Version page
Access Cisco ISE online help materials
Hover over to the ? icon on the top right corner, it displays the following online resources as shown in Figure 7.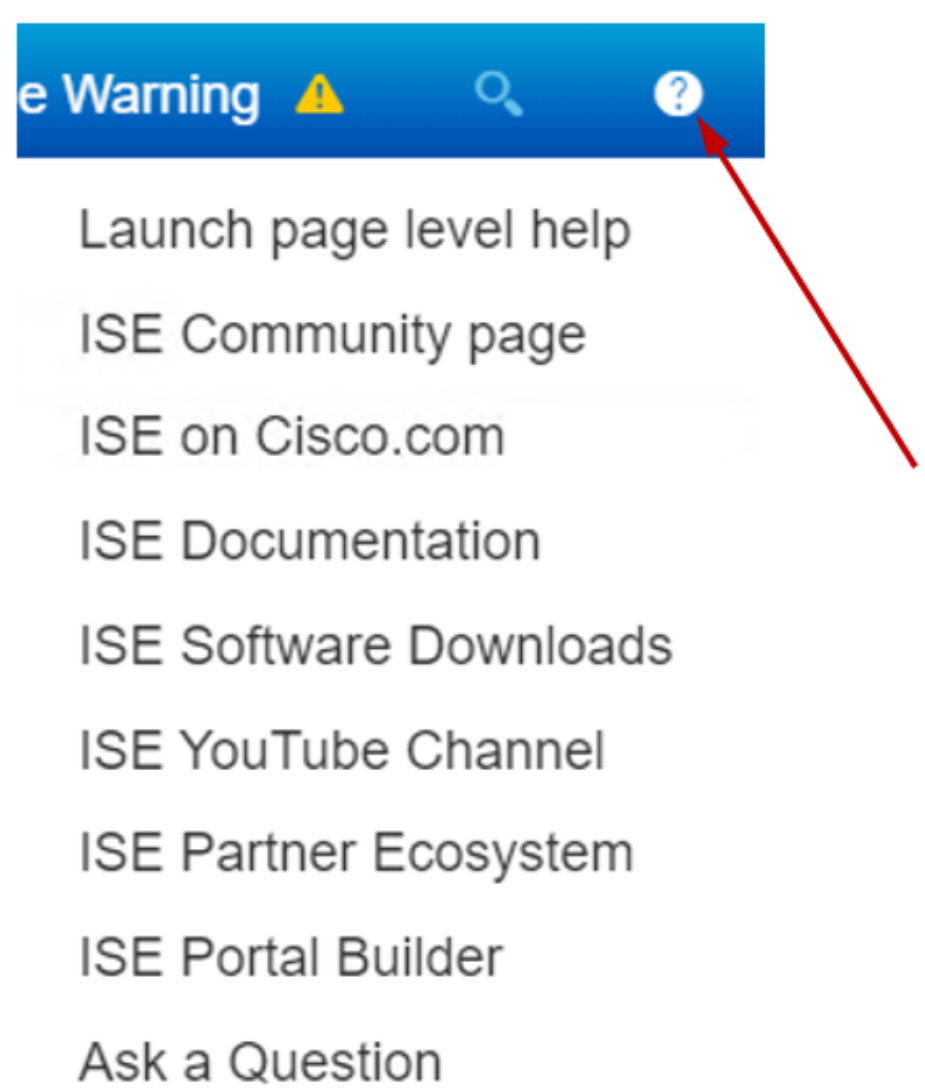
Figure 7. Cisco ISE Online Help
Create a new network device
- To create a network device, go to the Administration tab and click Network Resources > Network Devices.
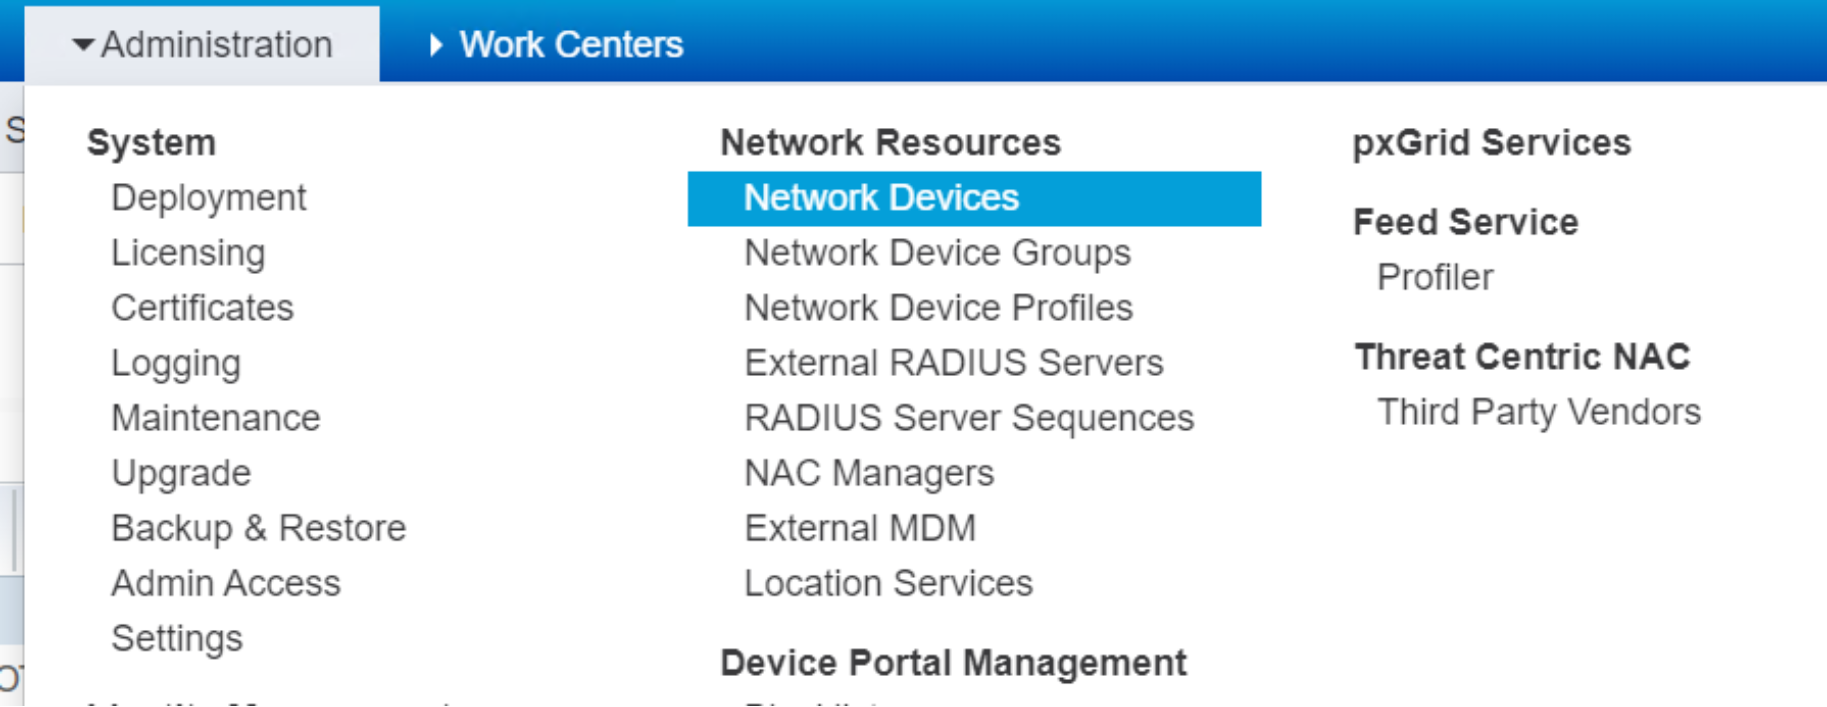 Figure 8. Pulldown menu for Network Devices
- A new network device tab appears, as shown in Figure 9.
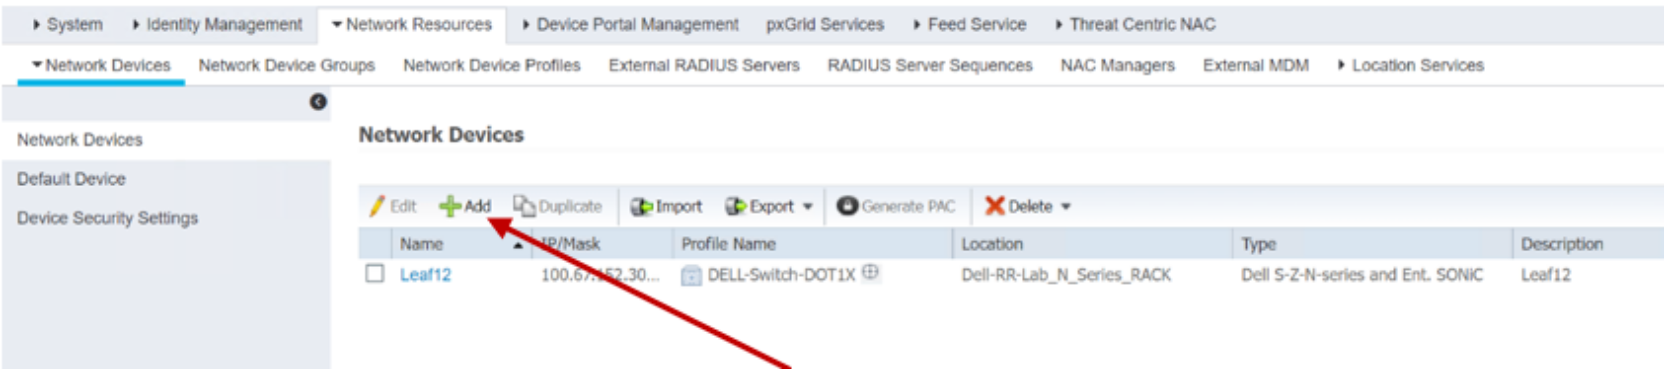
Figure 9. Network devices list
- Click +Add as shown in Figure 9 to open the network device creation tab.
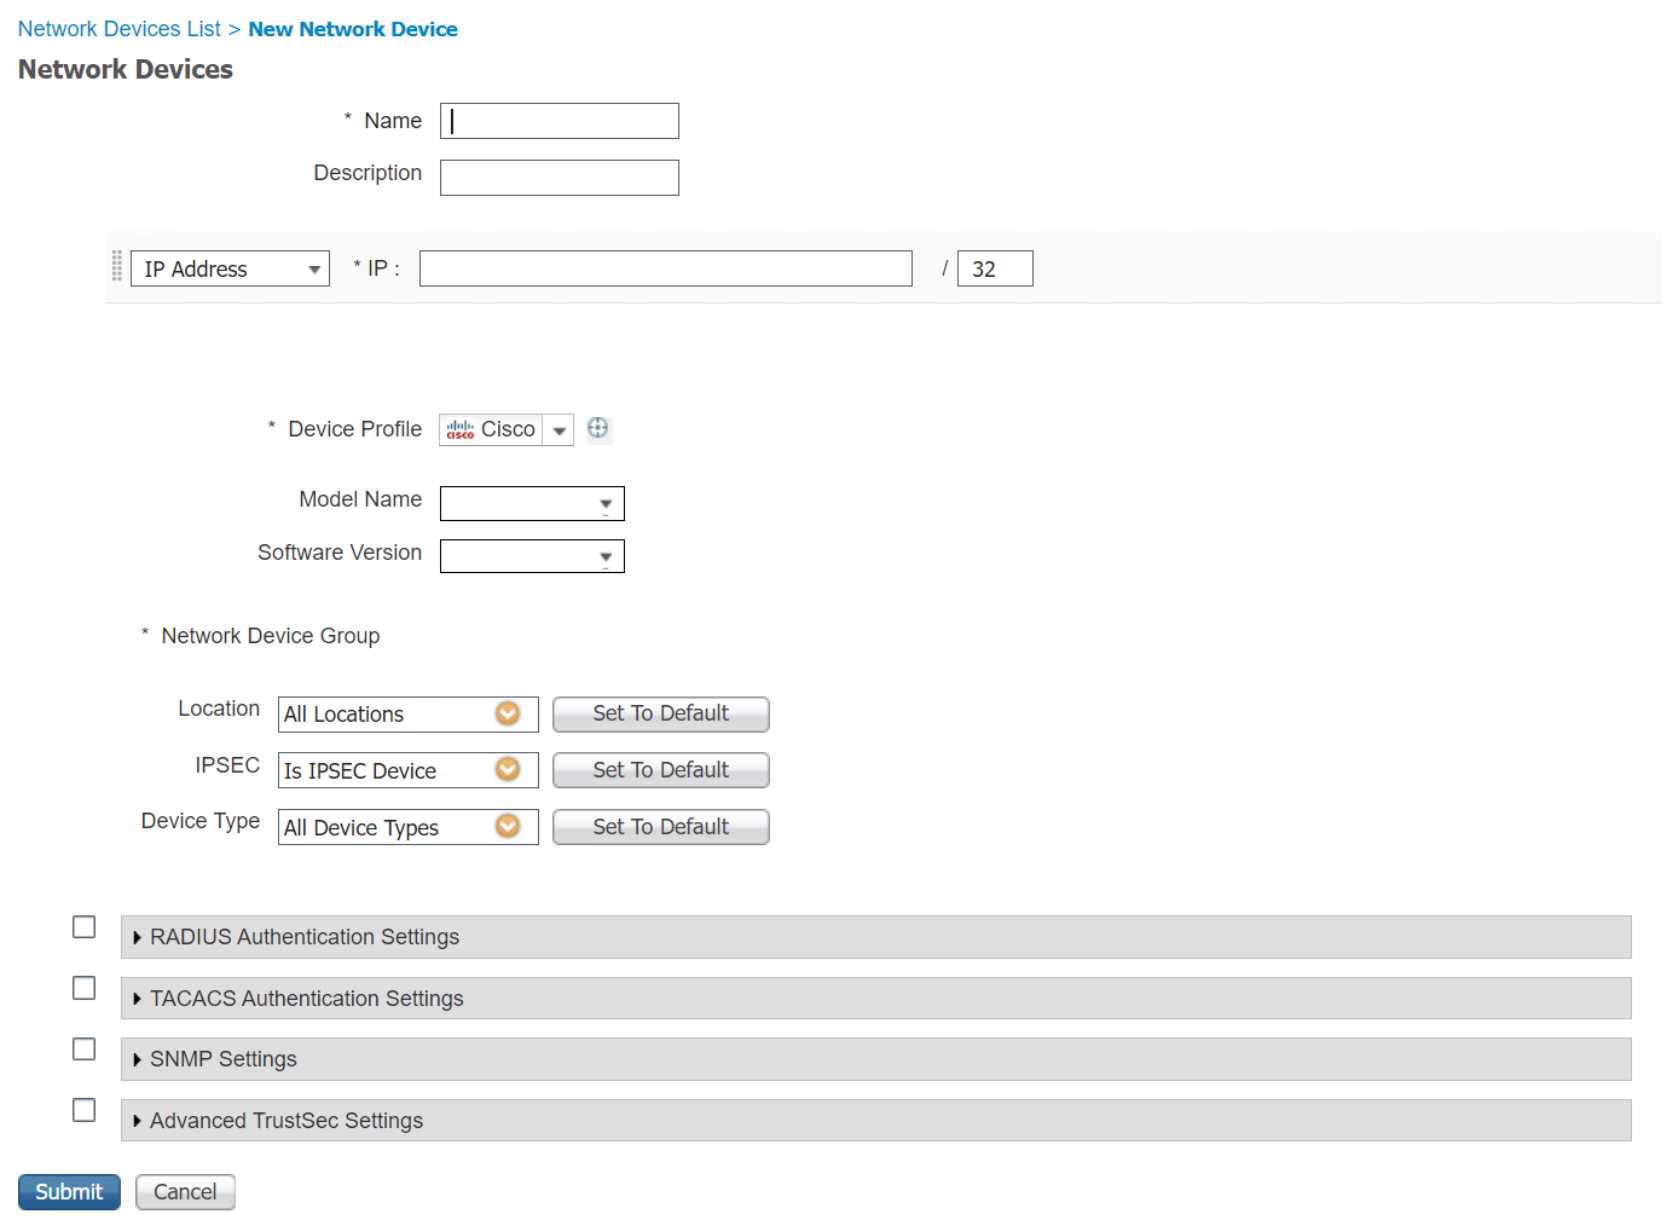 Figure 10. New Network Device Page
 - Fill in fields with the appropriate information and click Submit to create a device.
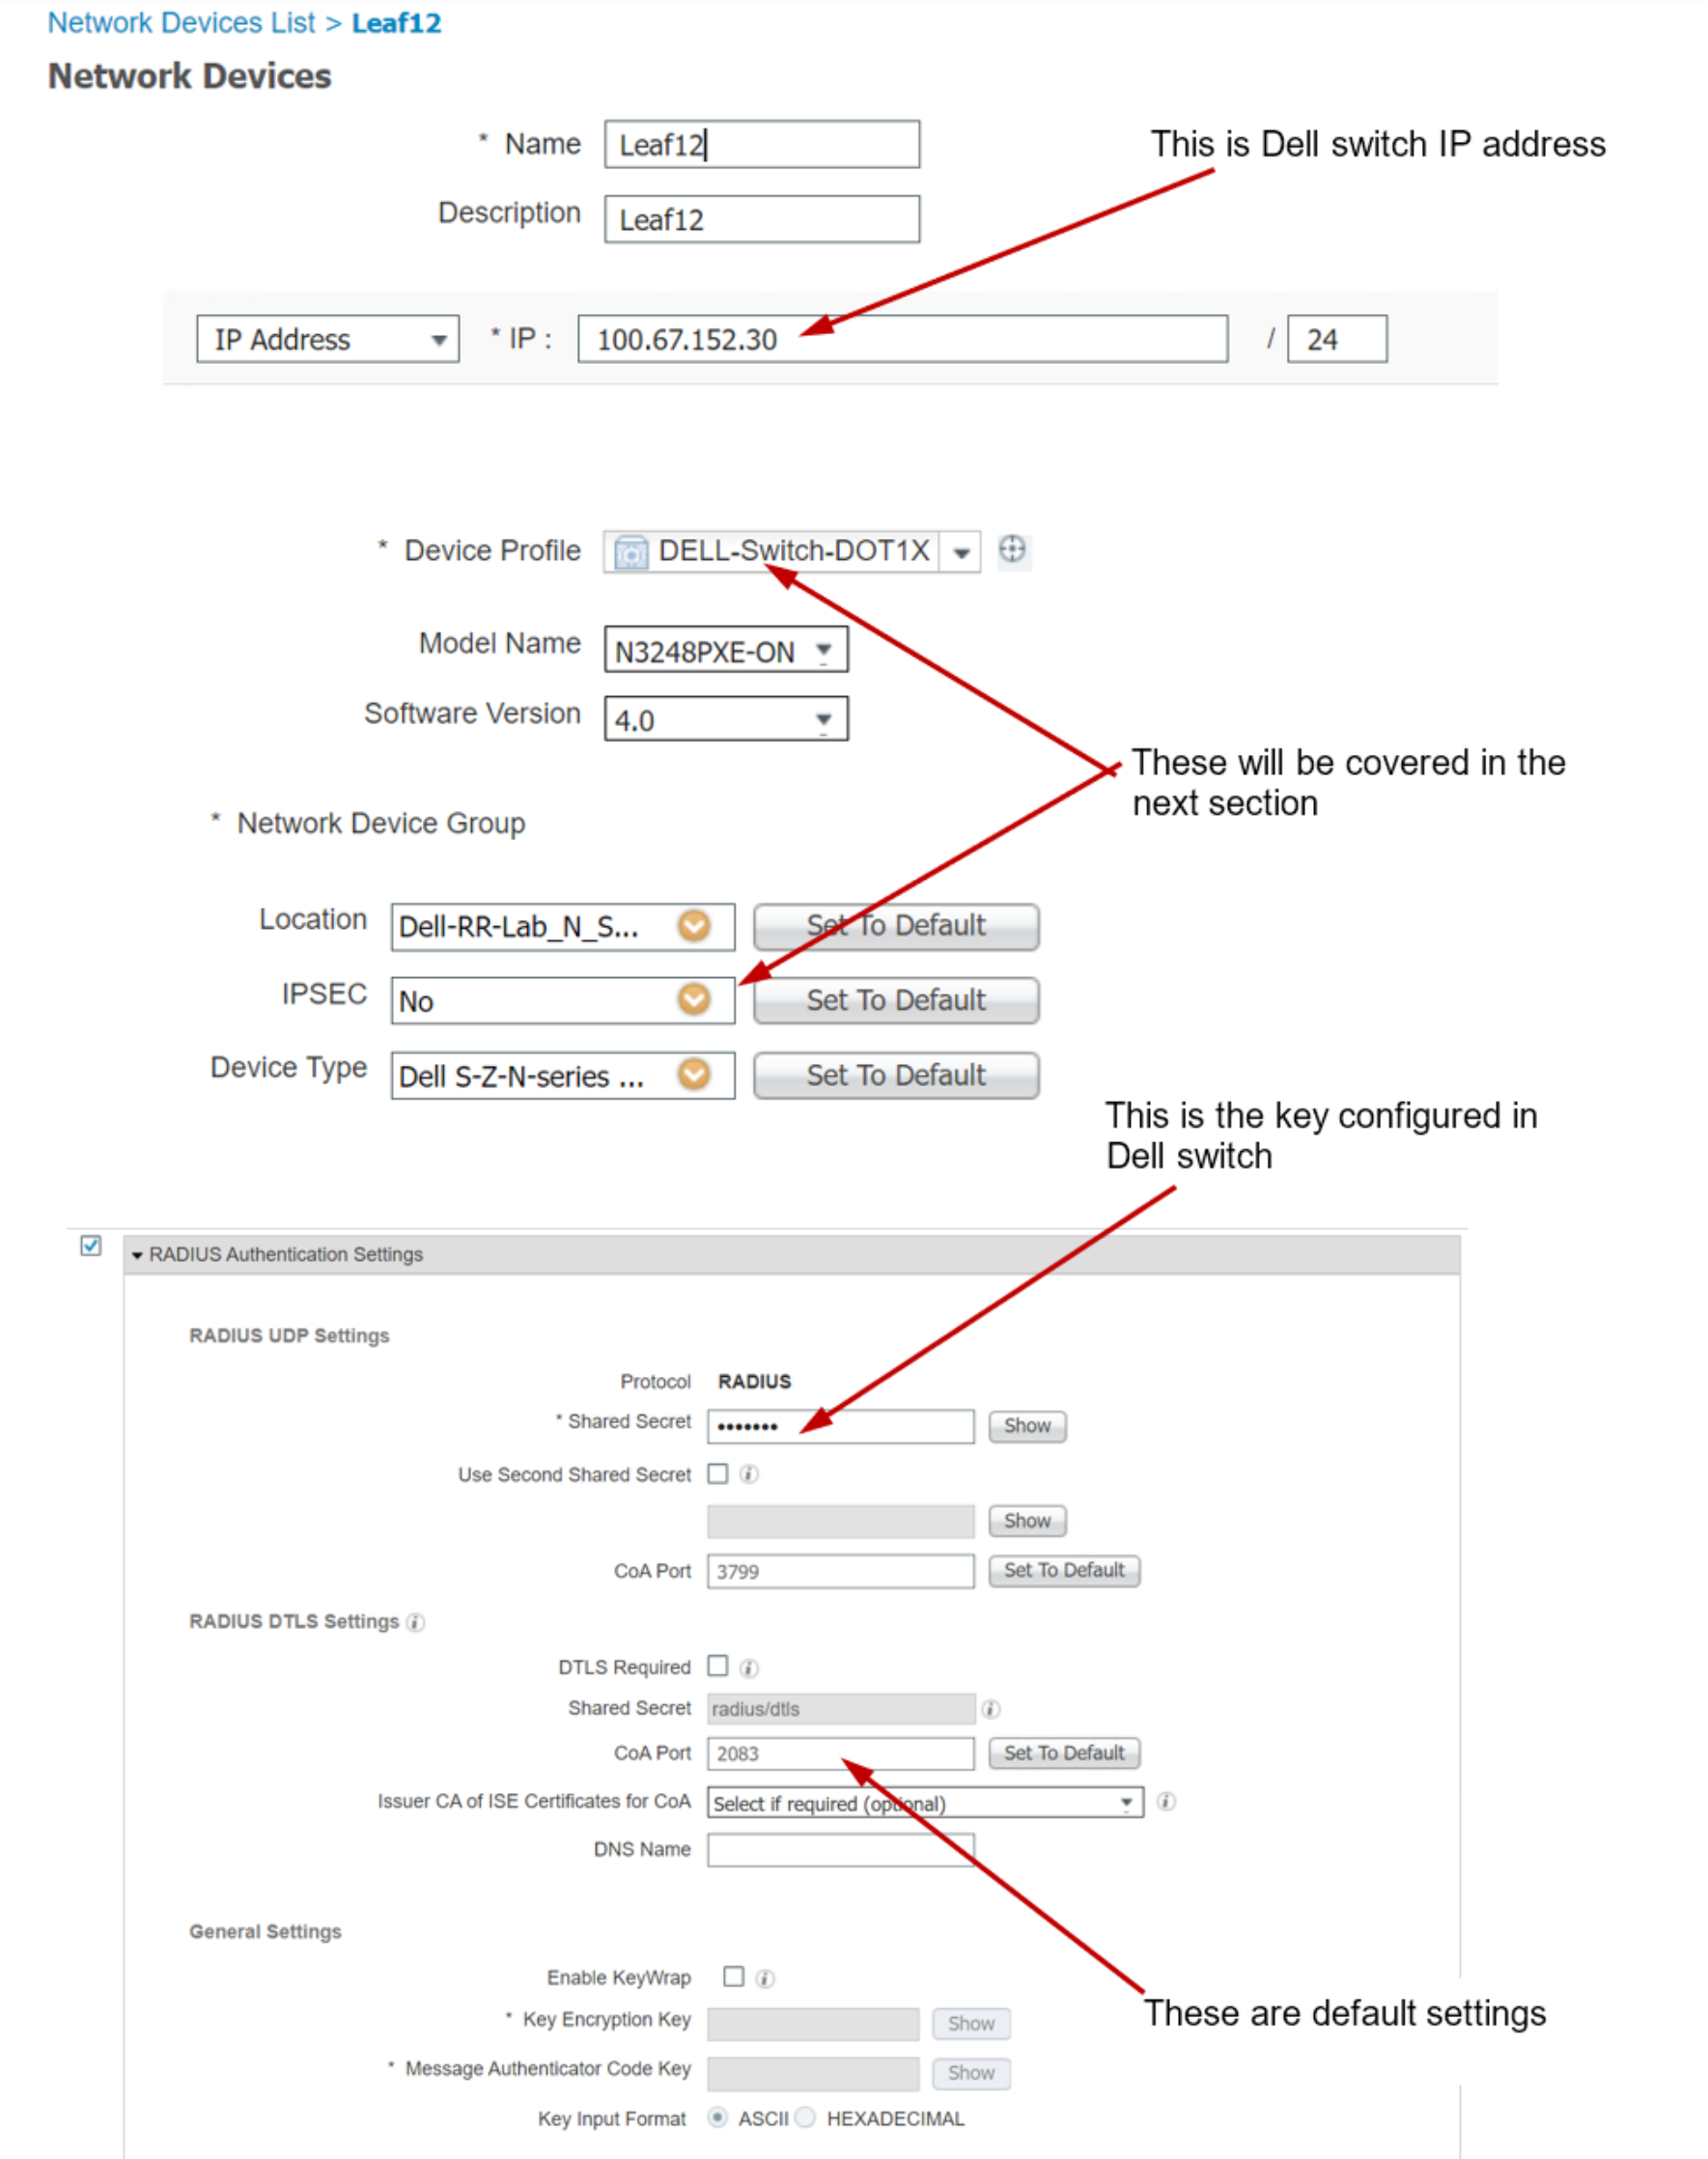
Figure 11. Create a new Network Device (detail)
Create a new network device profile
The DELL-Switch-DTO1X device profile used to create network devices is defined in the device profiles page. Here are the steps to create or edit a network device profile.
To create a network device profile, click Administration > Network Resources > Network Device Profiles to open the network device profiles page.
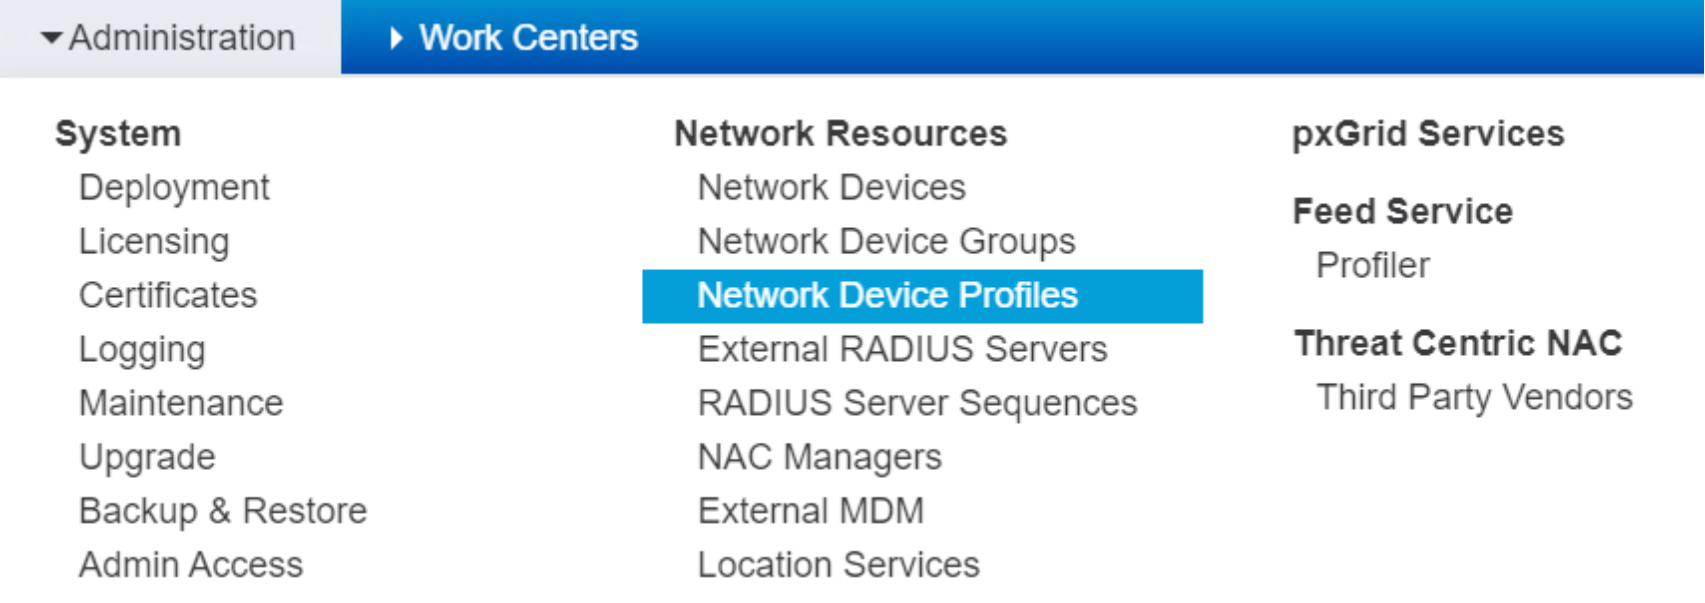 Figure 12. Drop down menu for Network Device Profiles
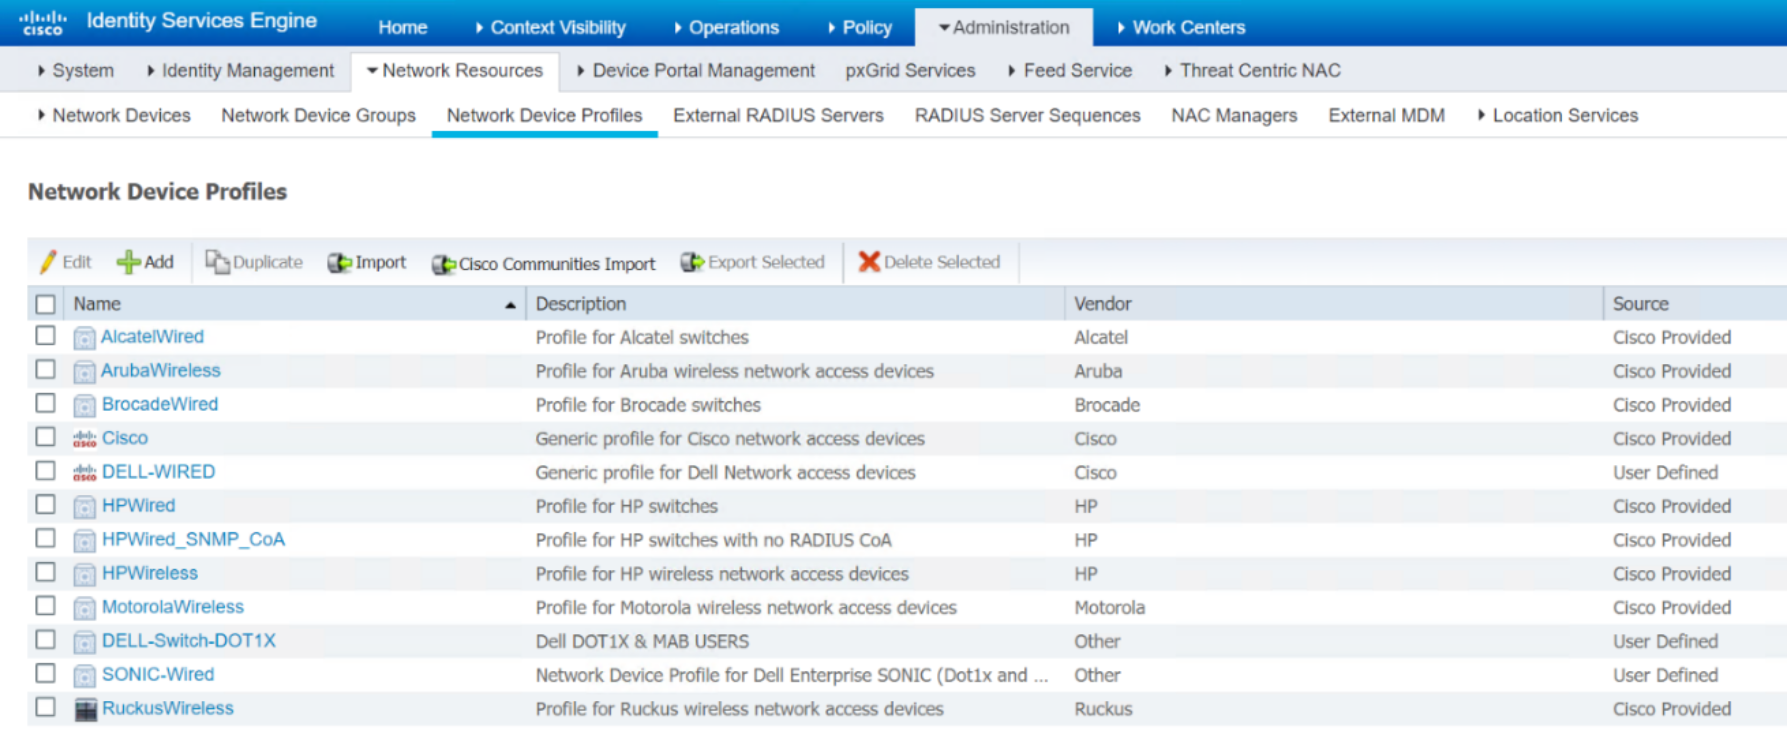 Figure 13. List of Network Device Profiles
- The Source column shows the predefined device profiles that are included in the Cisco ISE package and which profiles are created by user (User Defined).
- Click +Add to create a new device profile.
- Check the box next to the device profile and click Edit to bring up the device profile edit page.
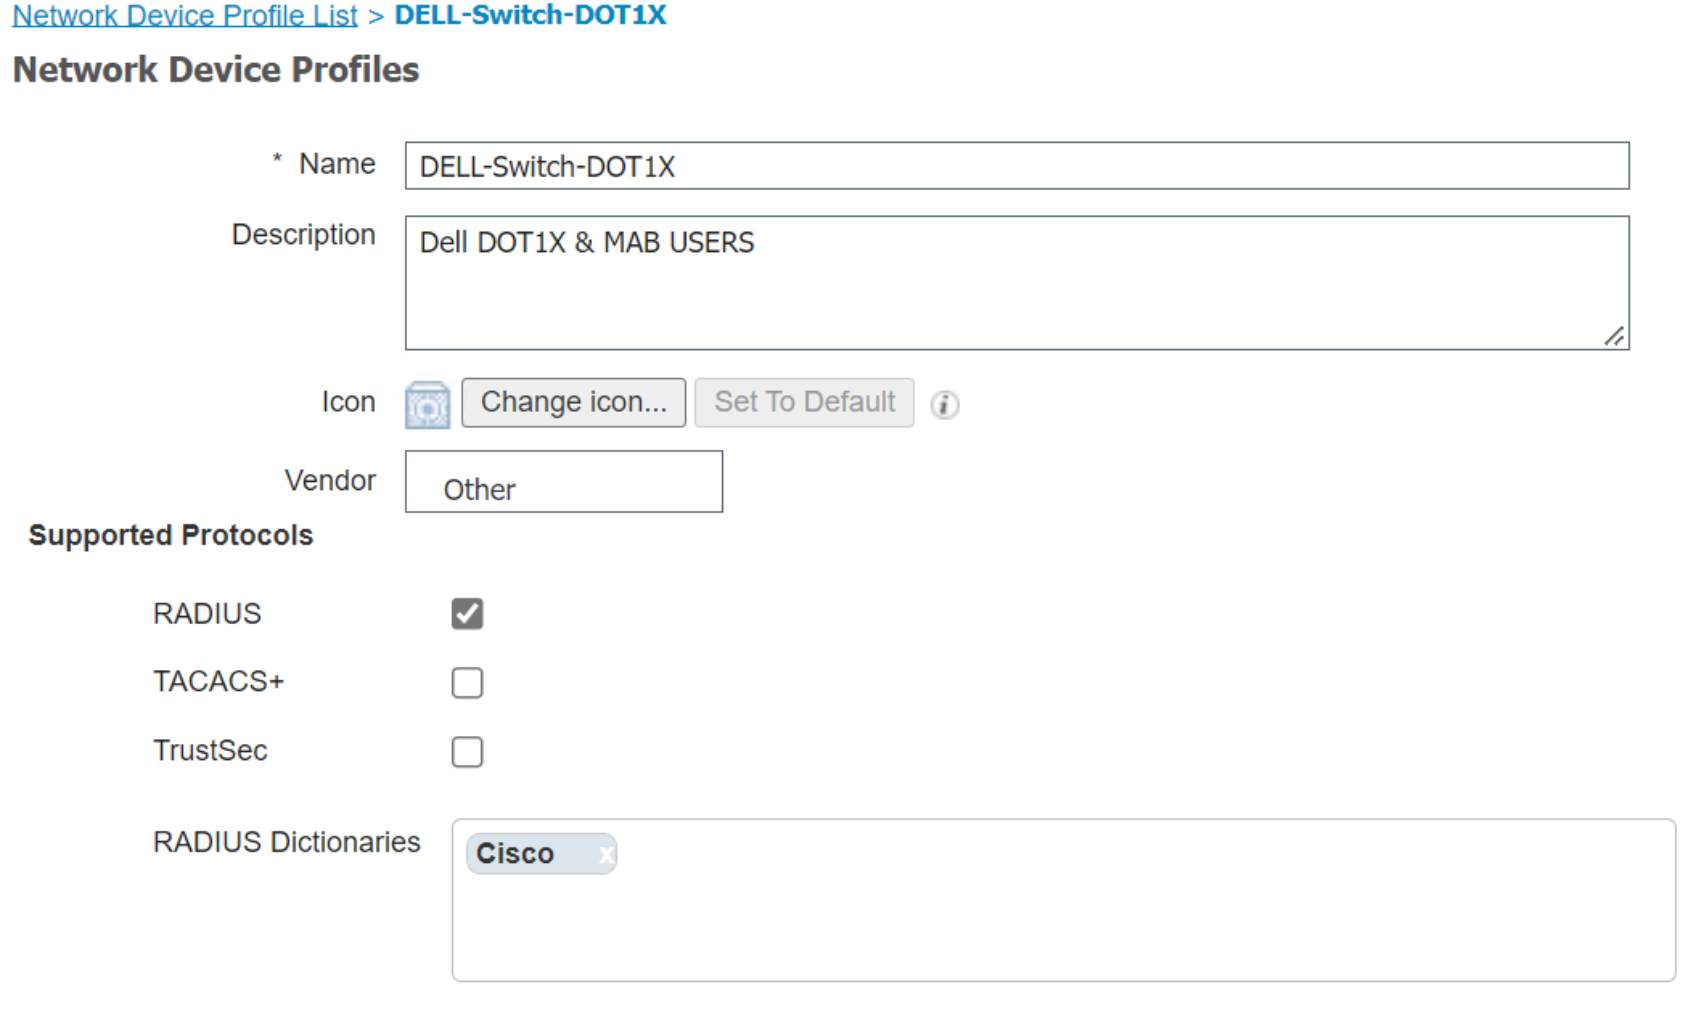
Figure 14. Detail of Network Device Profile
- Cisco RADIUS dictionary is used in this device profile, click the box to bring up the rest of RADIUS dictionary flavors.
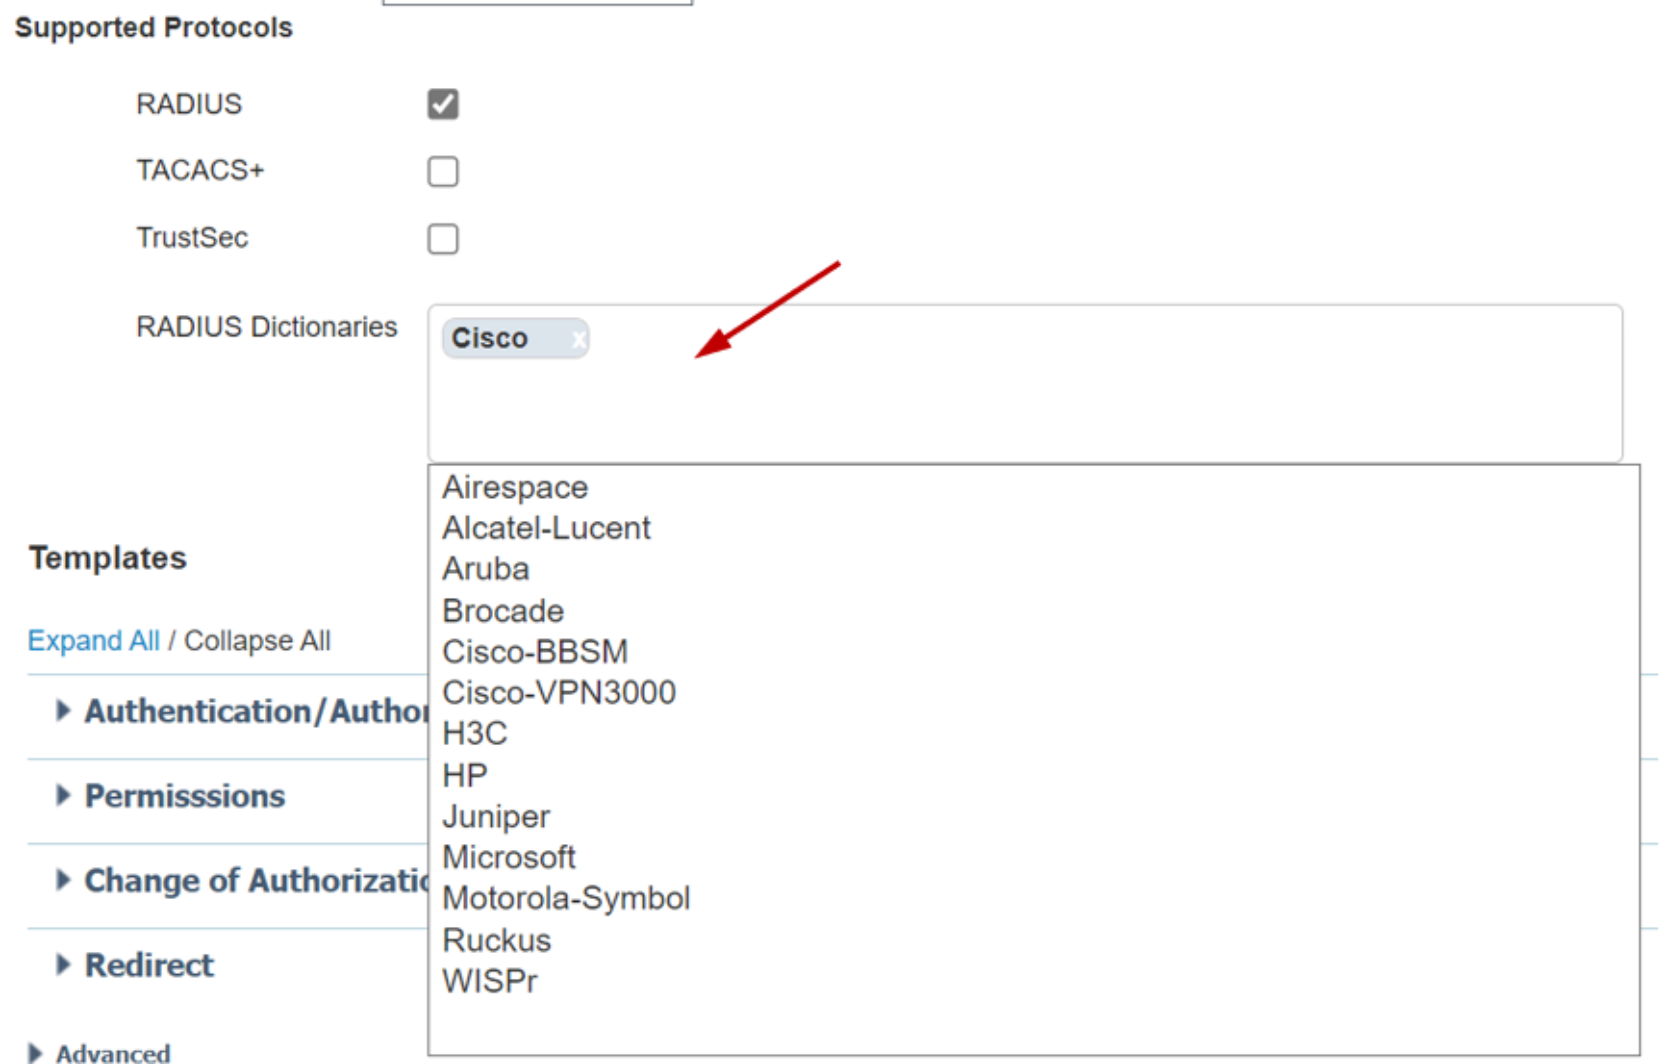 Figure 15. RADIUS Dictionaries drop down menu
- After filling in all the fields properly, click Save to save the newly created device profile.
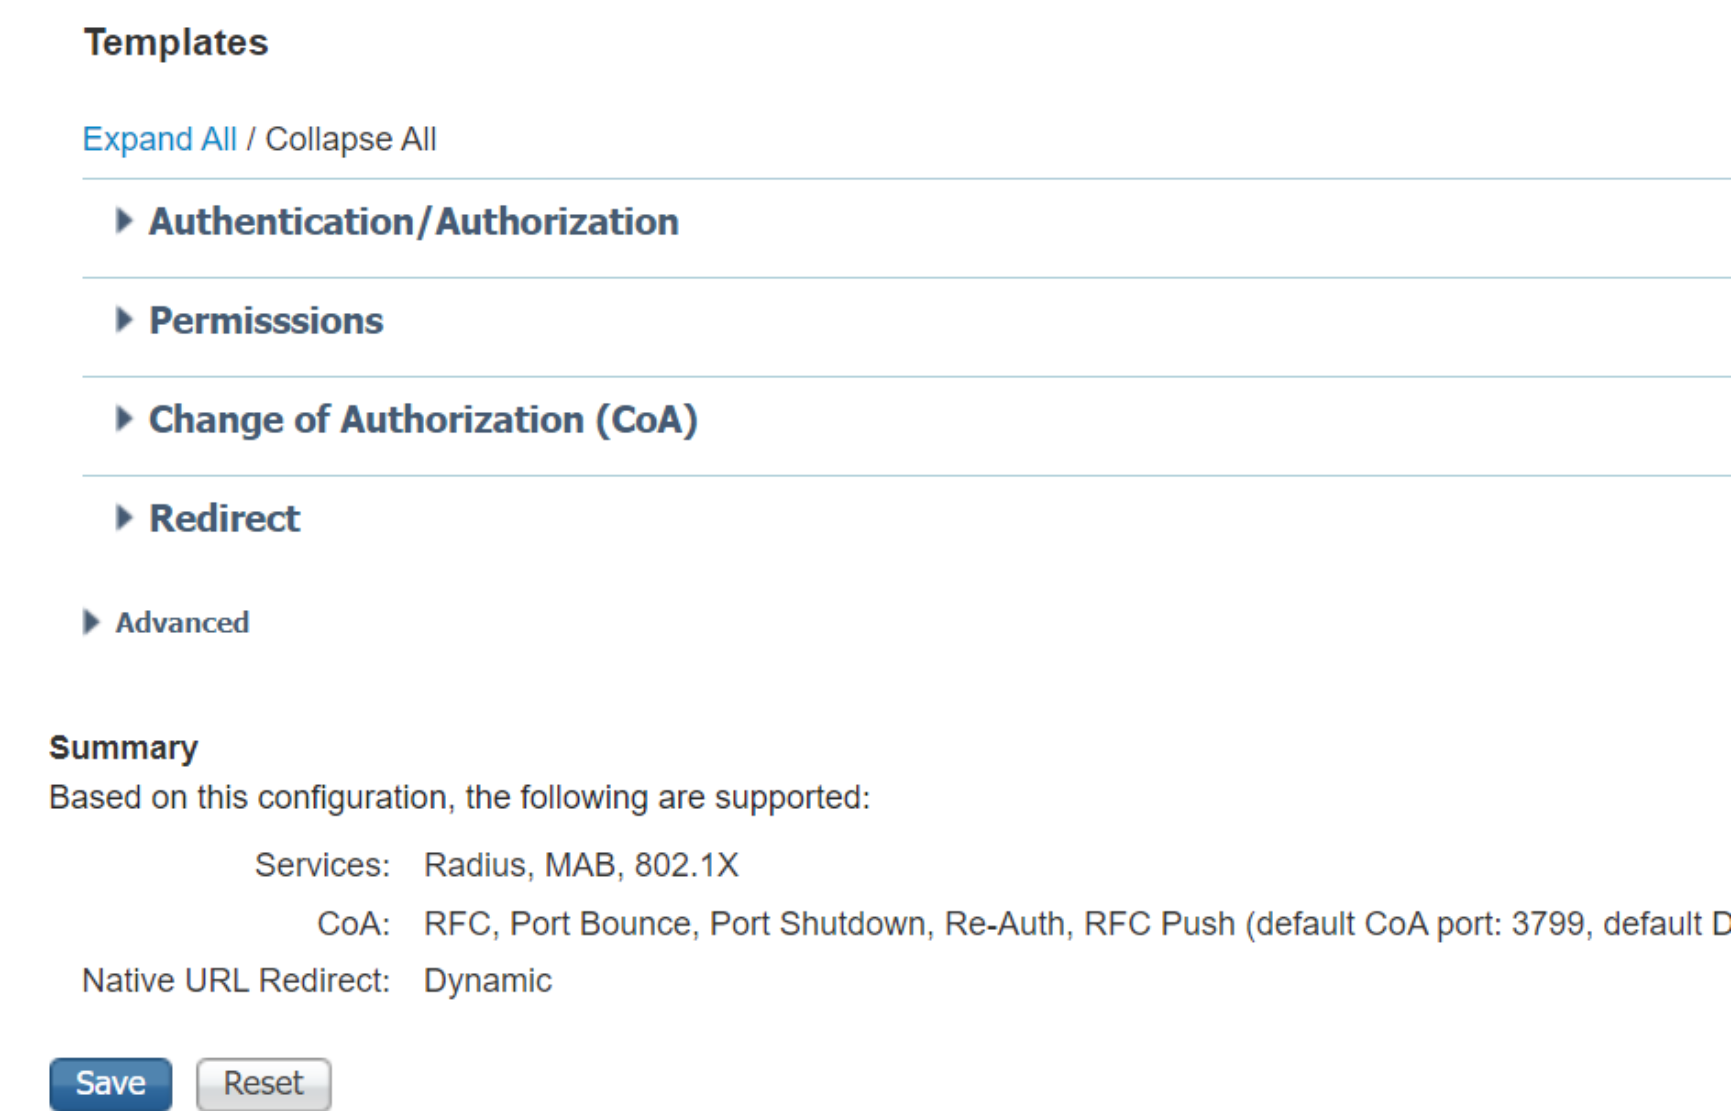 Figure 16. Save Network Device Profile
Create a new Network Device Group
- To create a network device group, click the Administration > Network Resources > Network Device Groups drop down menu to view the Network Device Groups page. The follow steps describe how to display the existing device groups.
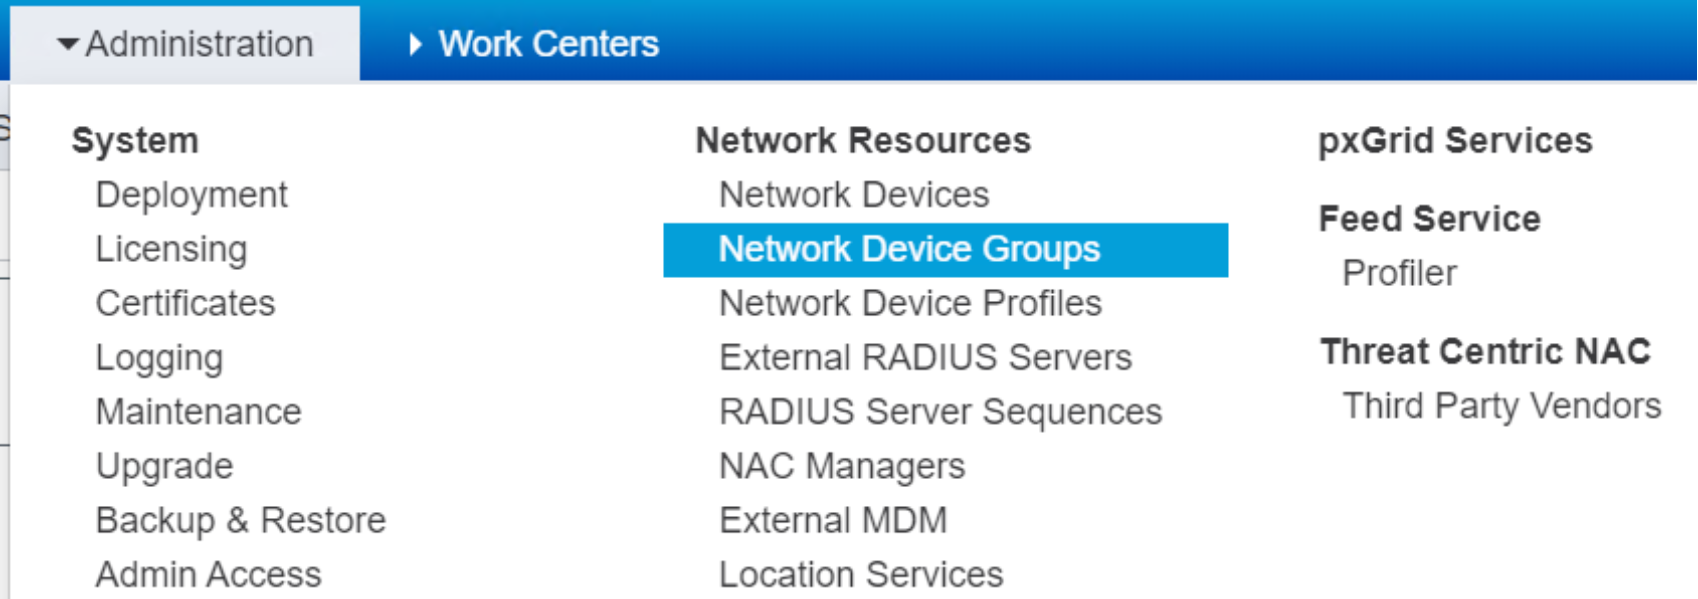
. Figure 17. Drop down Menu for Network Device Groups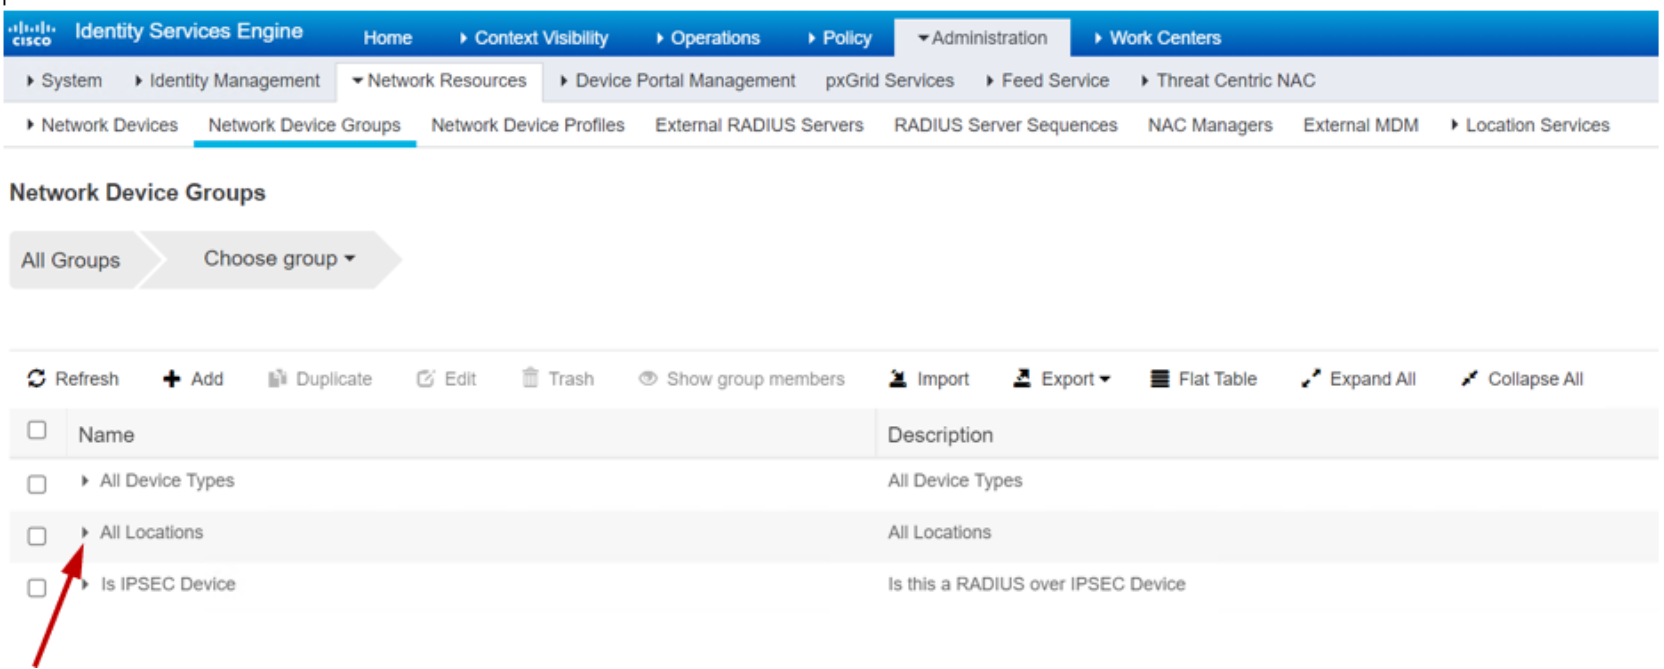
Figure 18. List of Network Device Groups
- Click the caret next to each group to expand the subgroups.
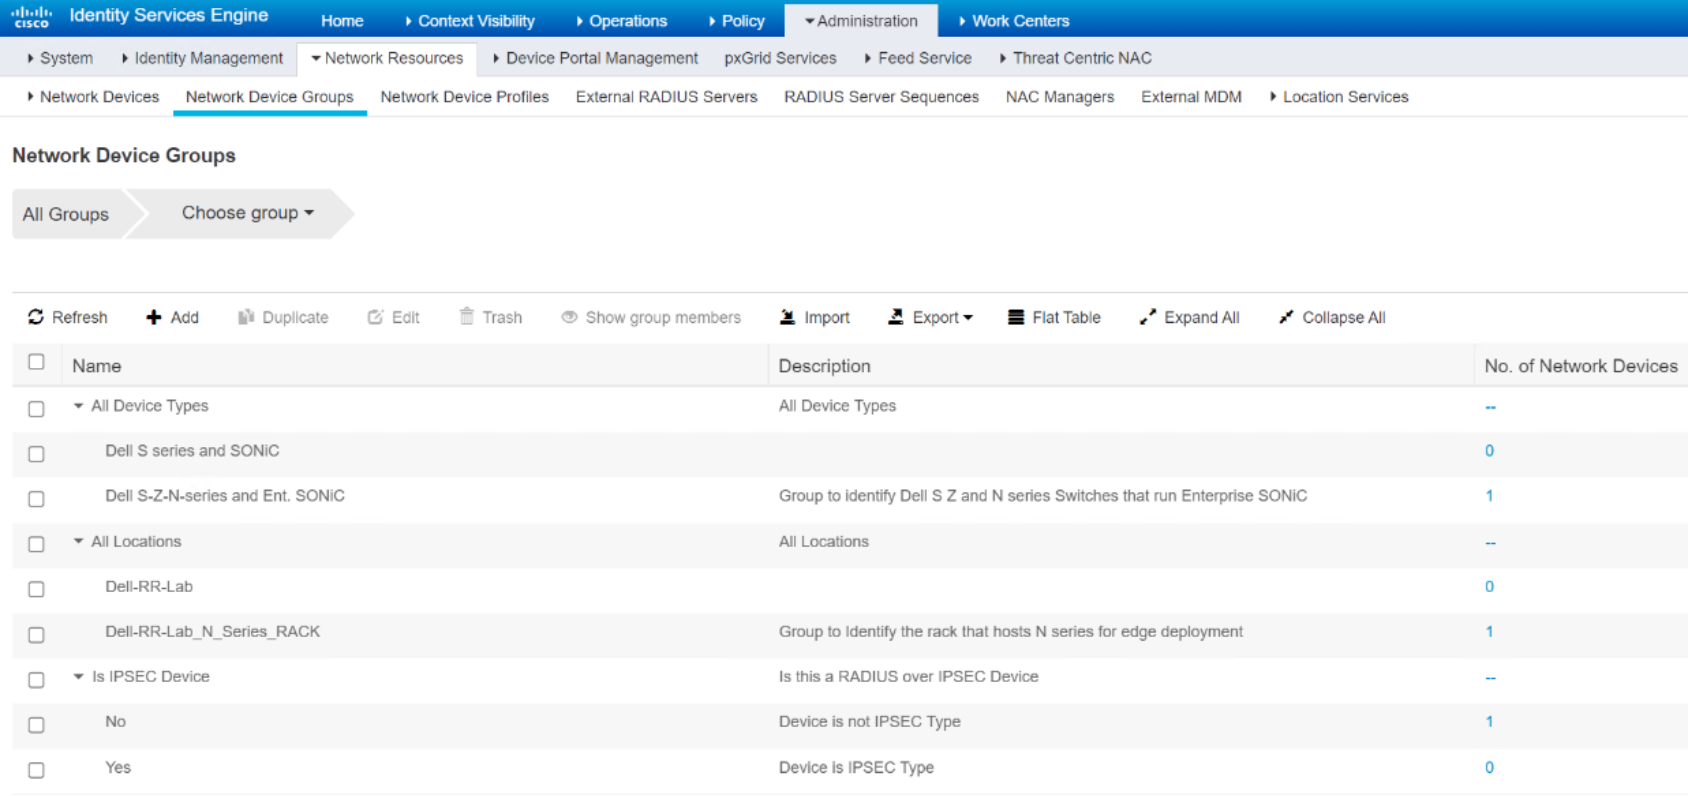 Figure 19. Expanded List of Network Device Groups
- Check the check box next to each group and click Edit to display the group edit page and view the details of a device group.
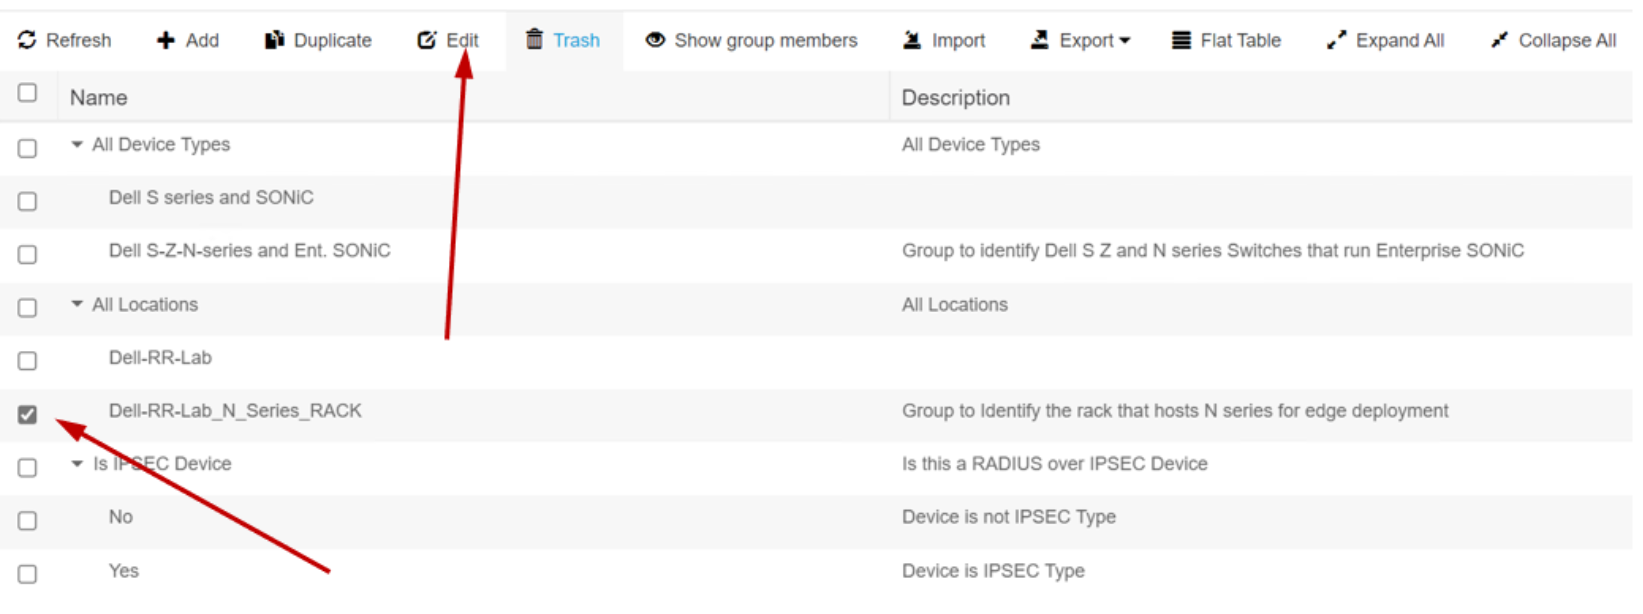
Figure 20. Select a Network Device Group
- Click +Add can create a new device group. The sample Dell device groups were created by this method.
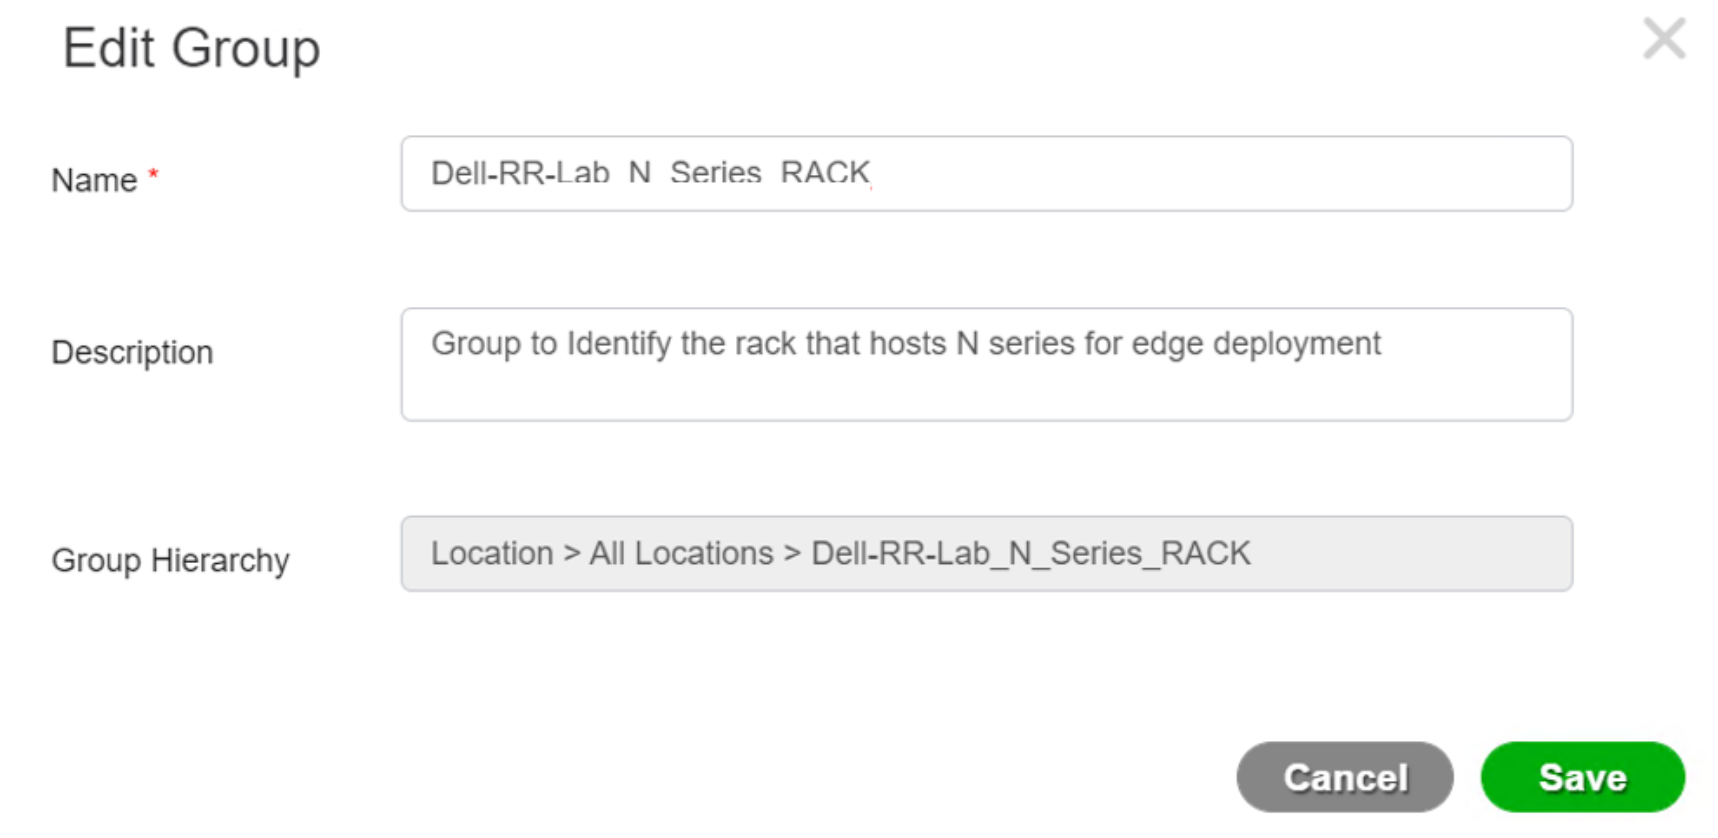 Figure 21. Network Device Group Detail Page
Create a username
- To create a username, click Administration > Identity Management > Identities to open the Identity page.
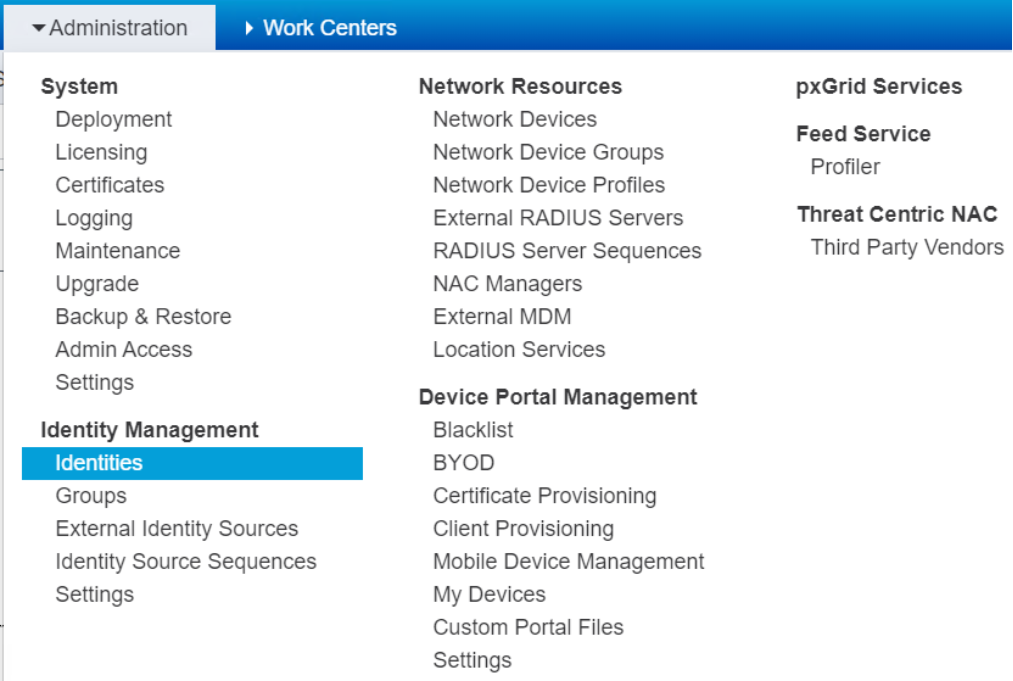 Figure 22. Drop down menu for Identities
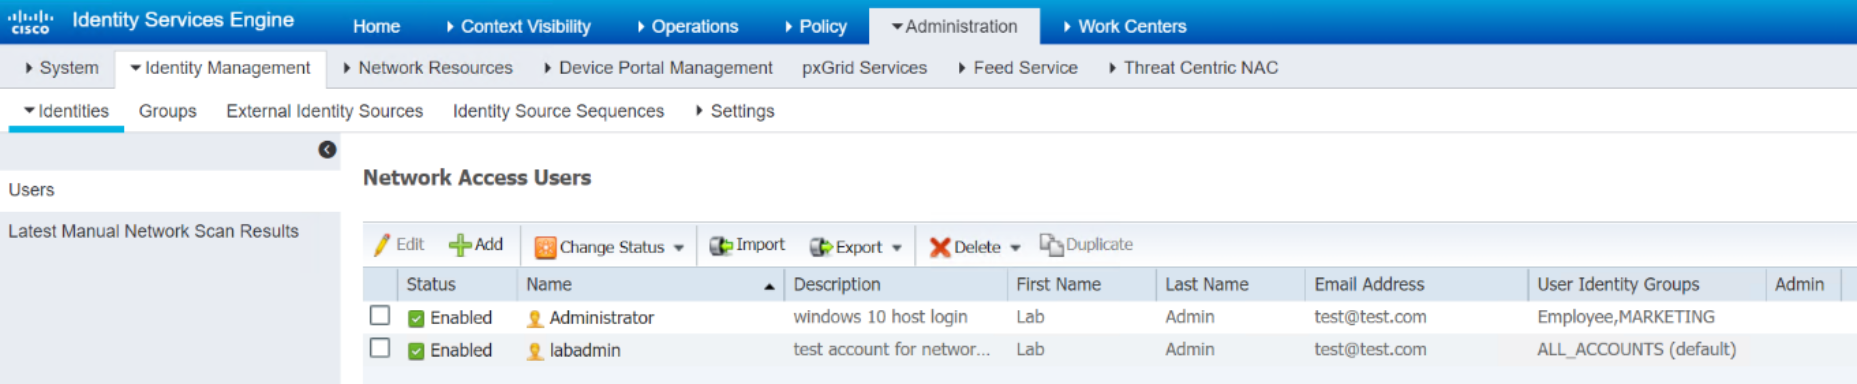
Figure 23. List of Identities
- Click +Add to open a new identity creation page.
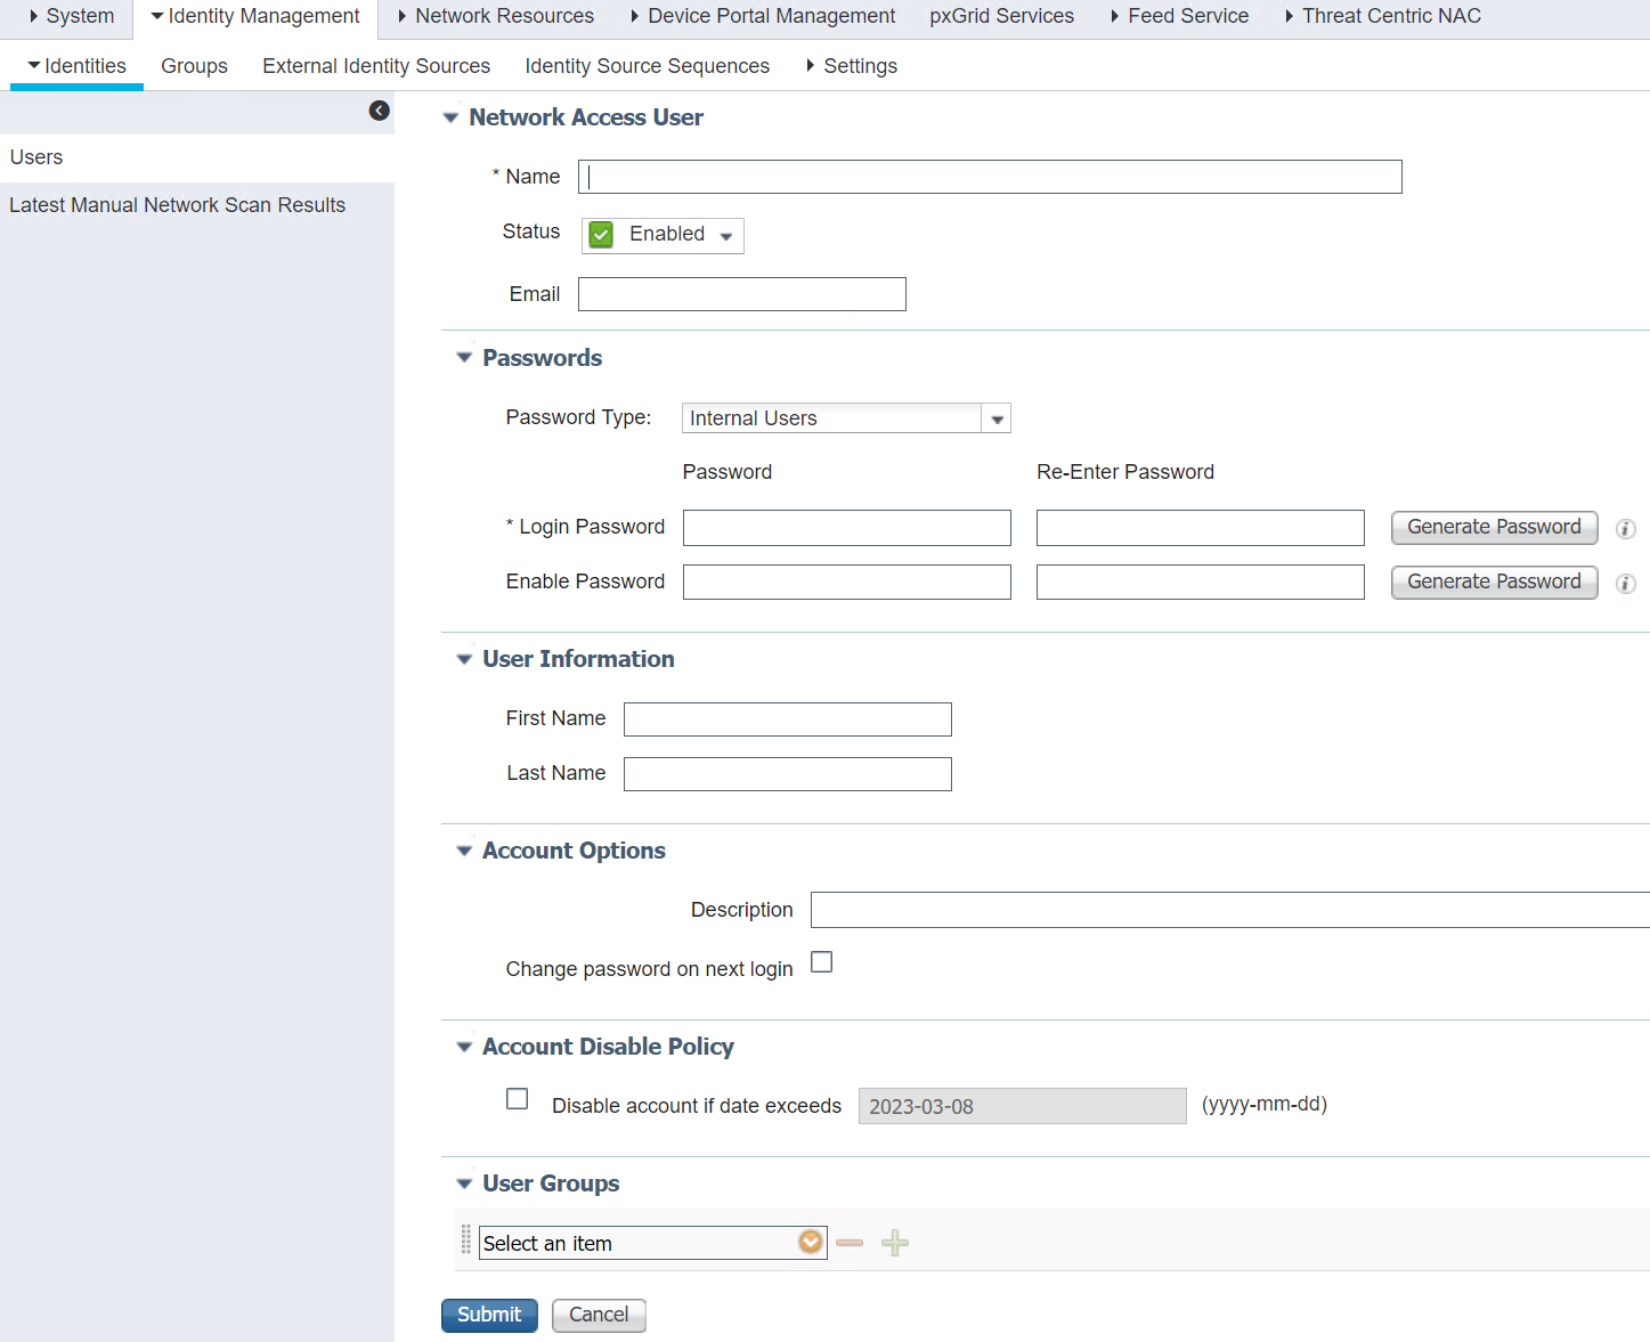 Figure 24. New Identity Page
- Fill out all the required fields and click Submit to save and create a new identity.
RADIUS dictionaries configuration
- To configure RADIUS Dictionaries, co to Policy> Policy Elements> Dictionaries. to open the complete dictionaries list.
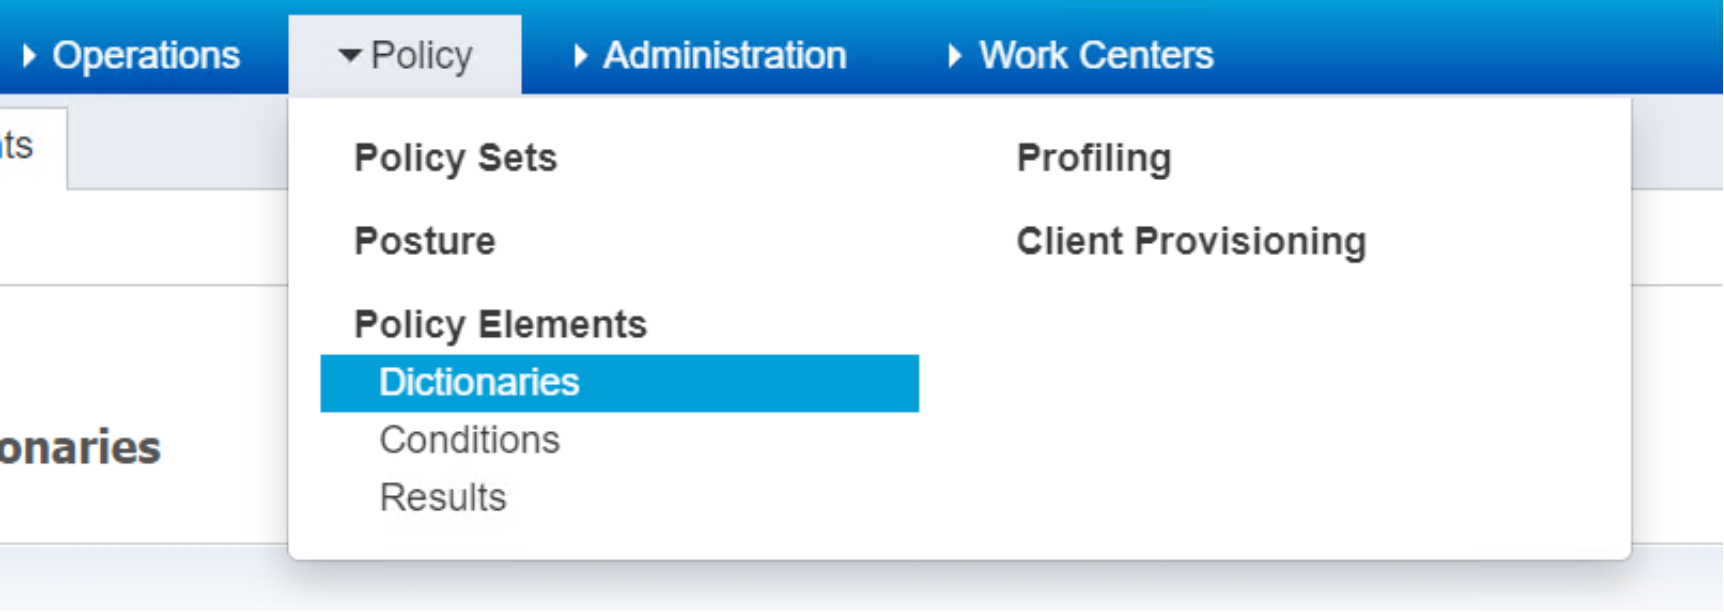 Figure 25. Drop down menu for Dictionaries
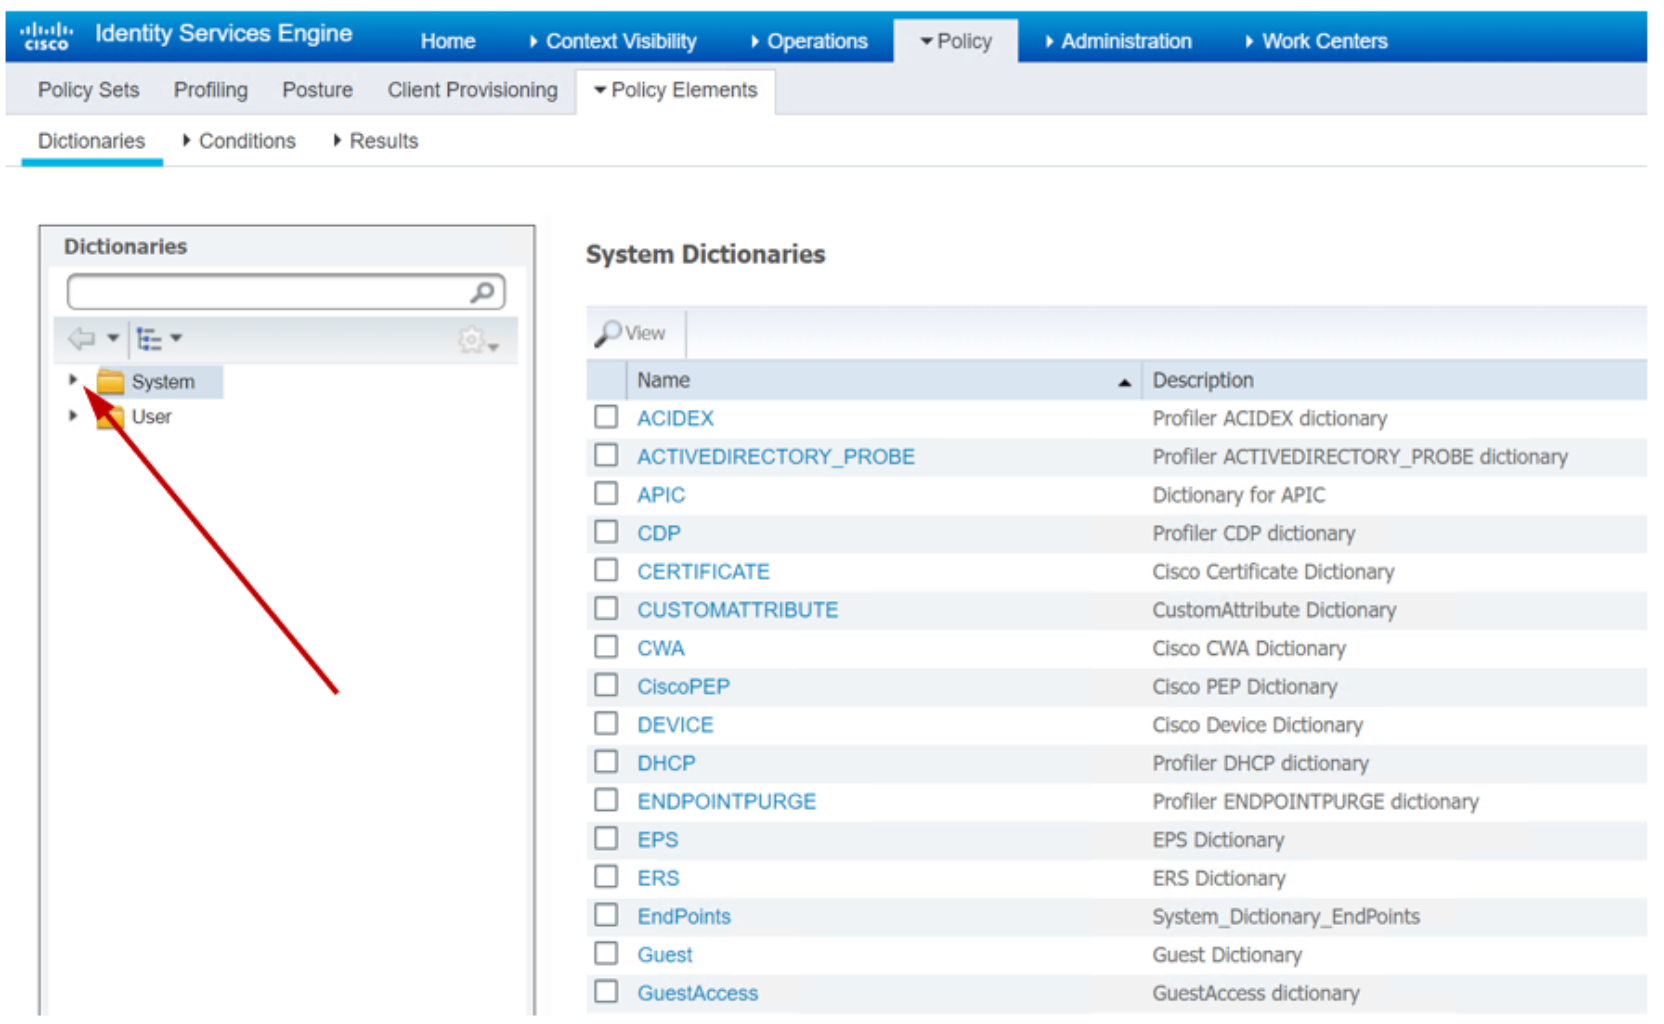 Figure 26. List of Dictionaries
- Click the caret key next to the System label on the left panel to expand the system dictionaries list.
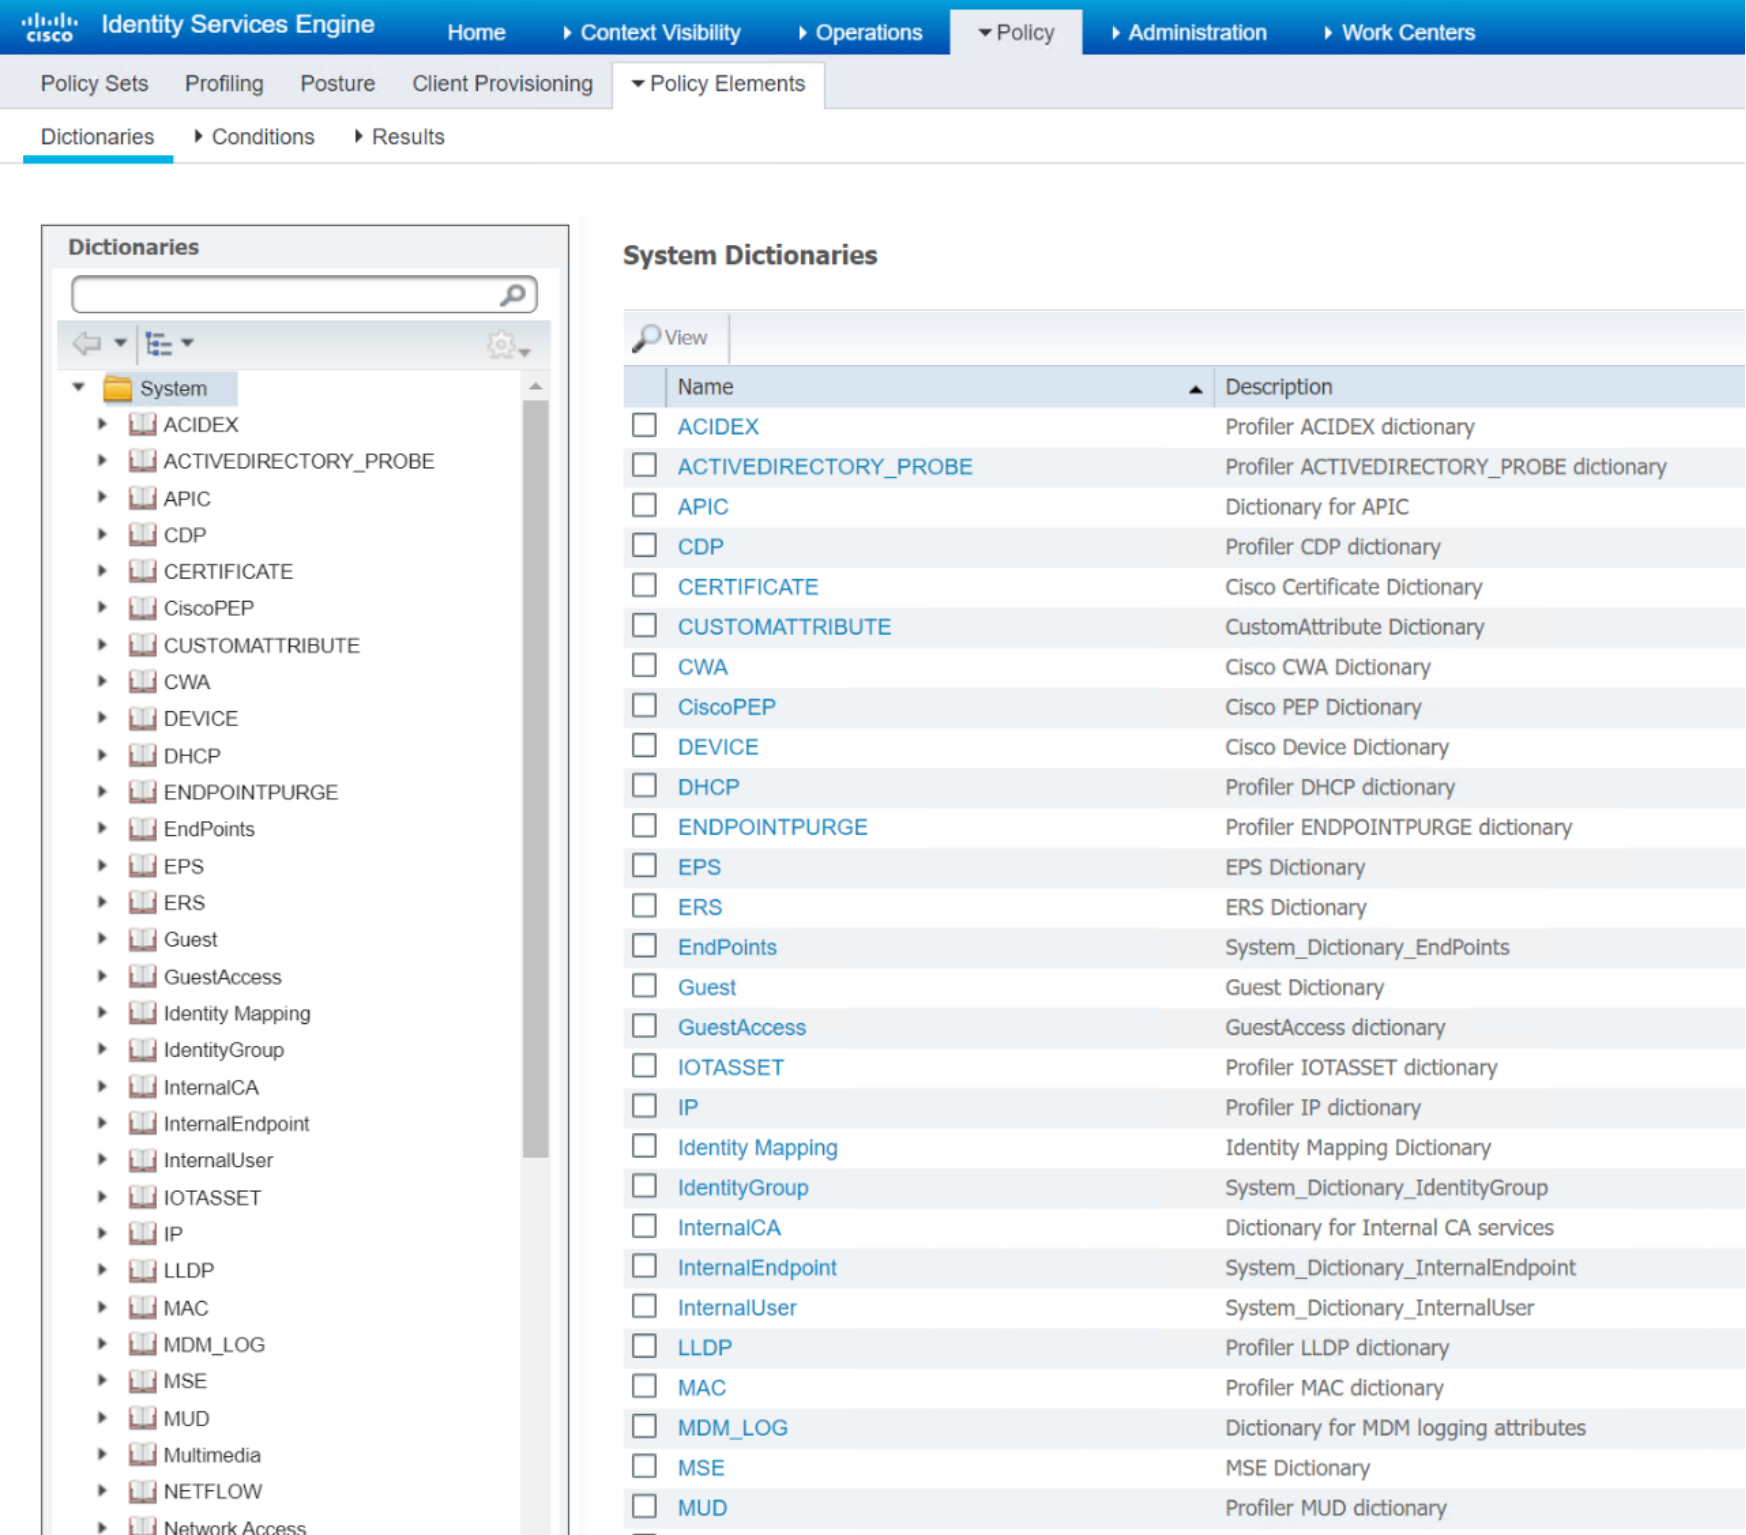 Figure 27. Expanded System Level Dictionaries
- Scroll down the left side panel to display RADIUS dictionaries.
- Click the caret to expand RADIUS menu items, as shown in Figure 28.
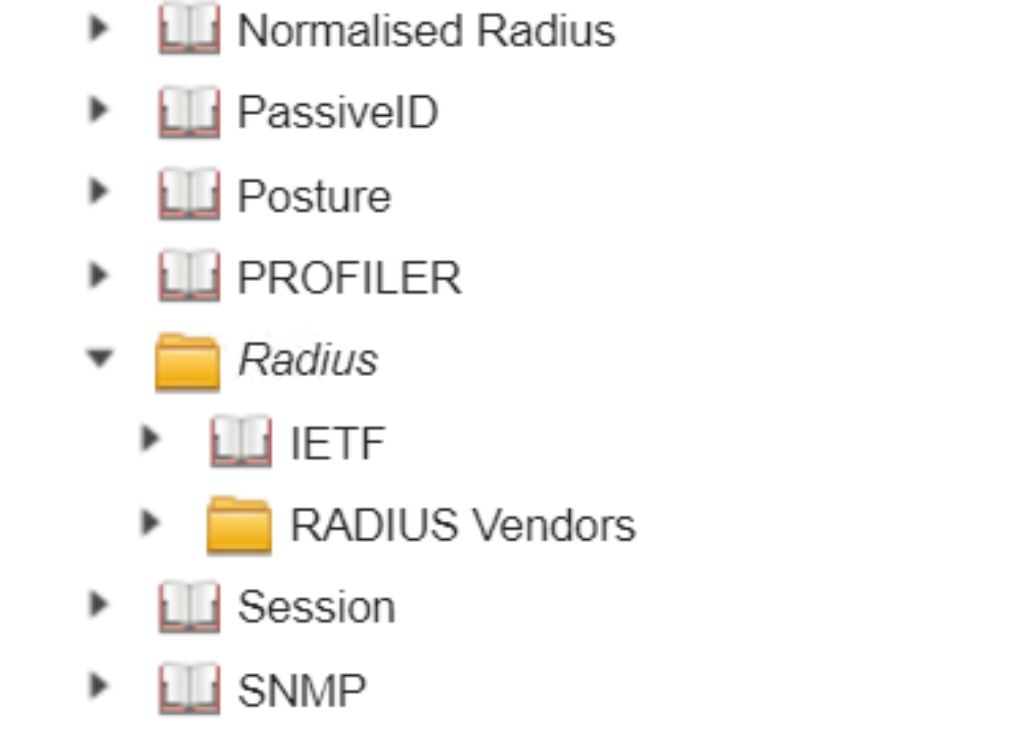 Figure 28. RADIUS Dictionaries
- Mouse over to the hourglass circle to view the details of RADIUS dictionaries.
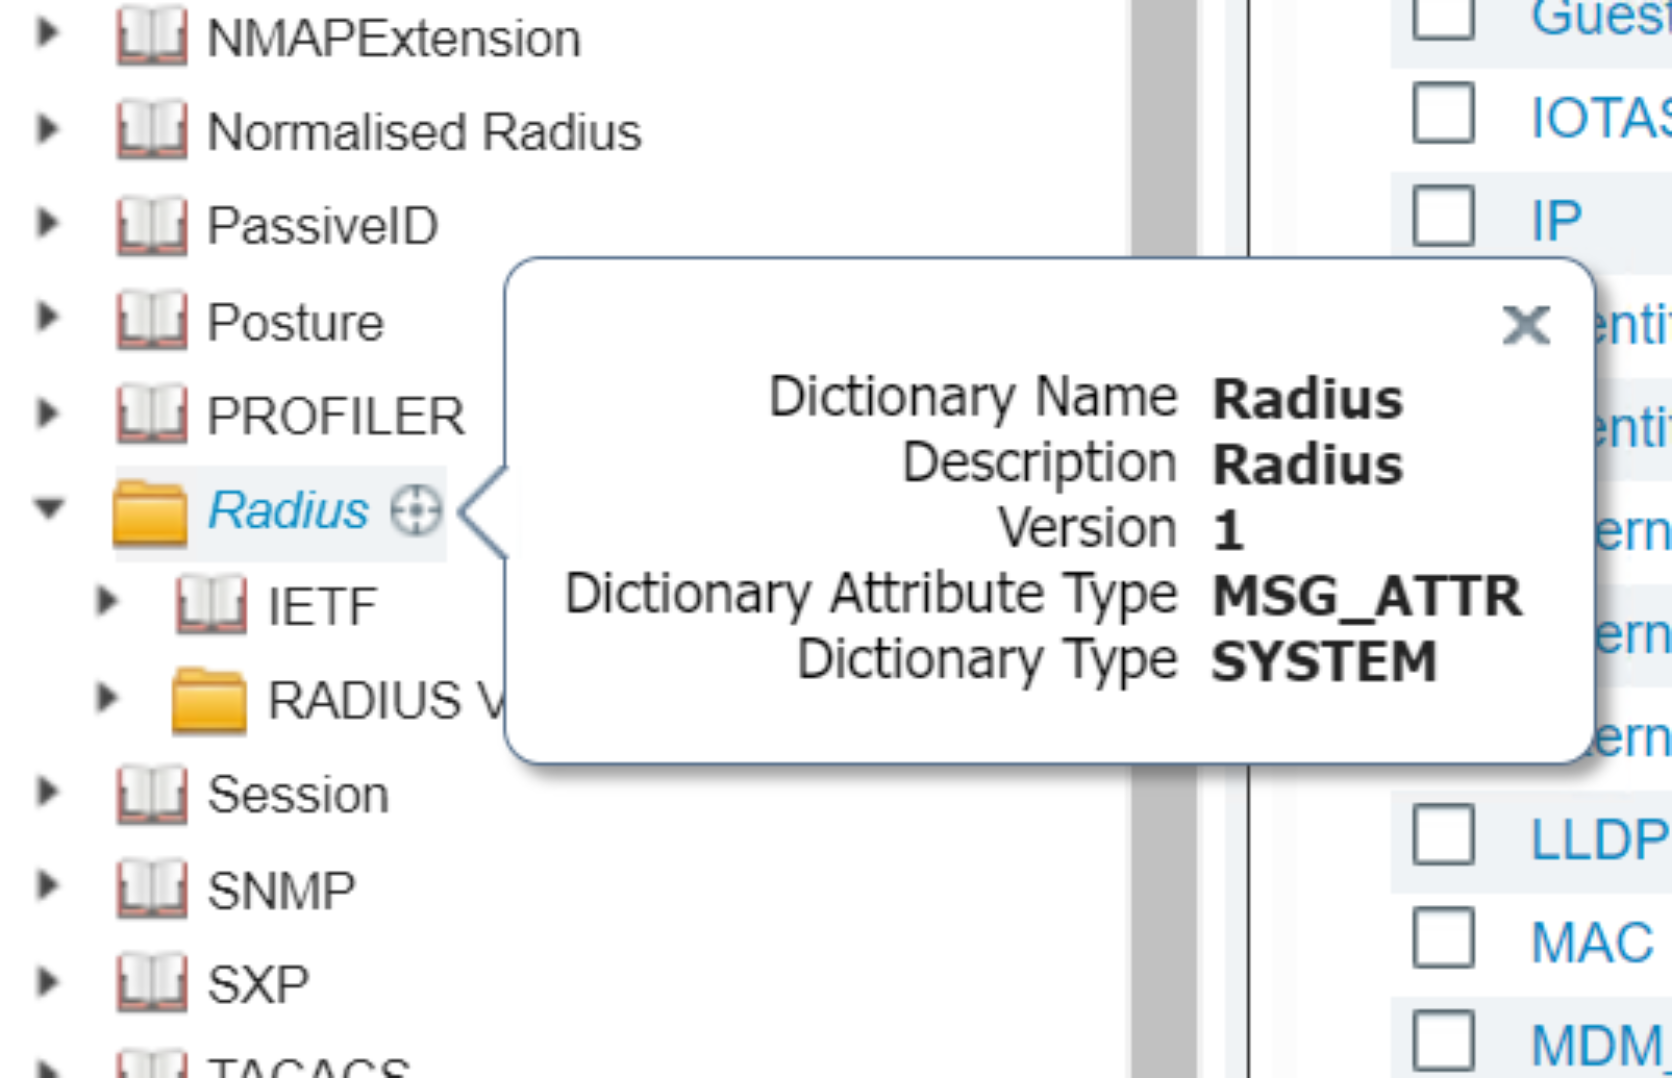 Figure 29. Detail of RADIUS Dictionary description
- Click RADIUS Vendors list item to display all the RADIUS vendors on the right-side panel.
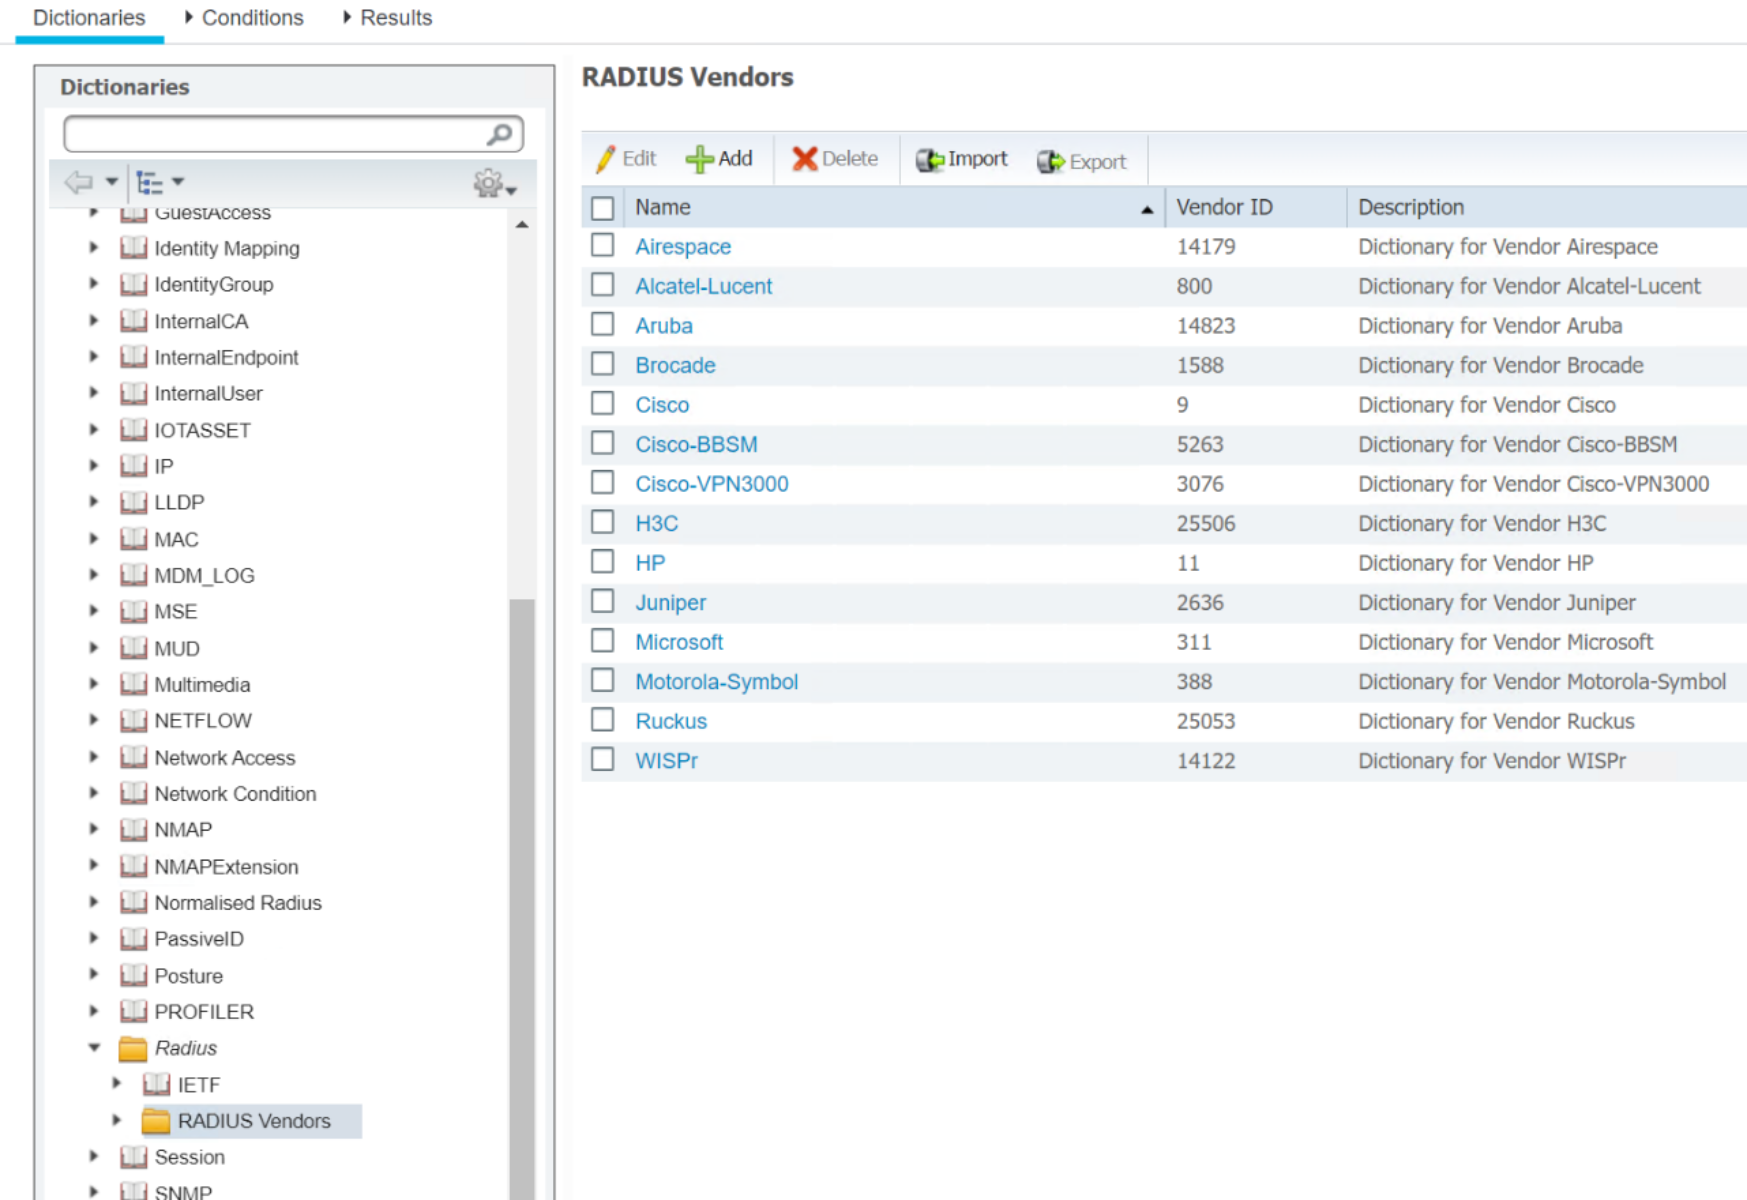 Figure 30. List of RADIUS Dictionaries
- Check the box next to Cisco.
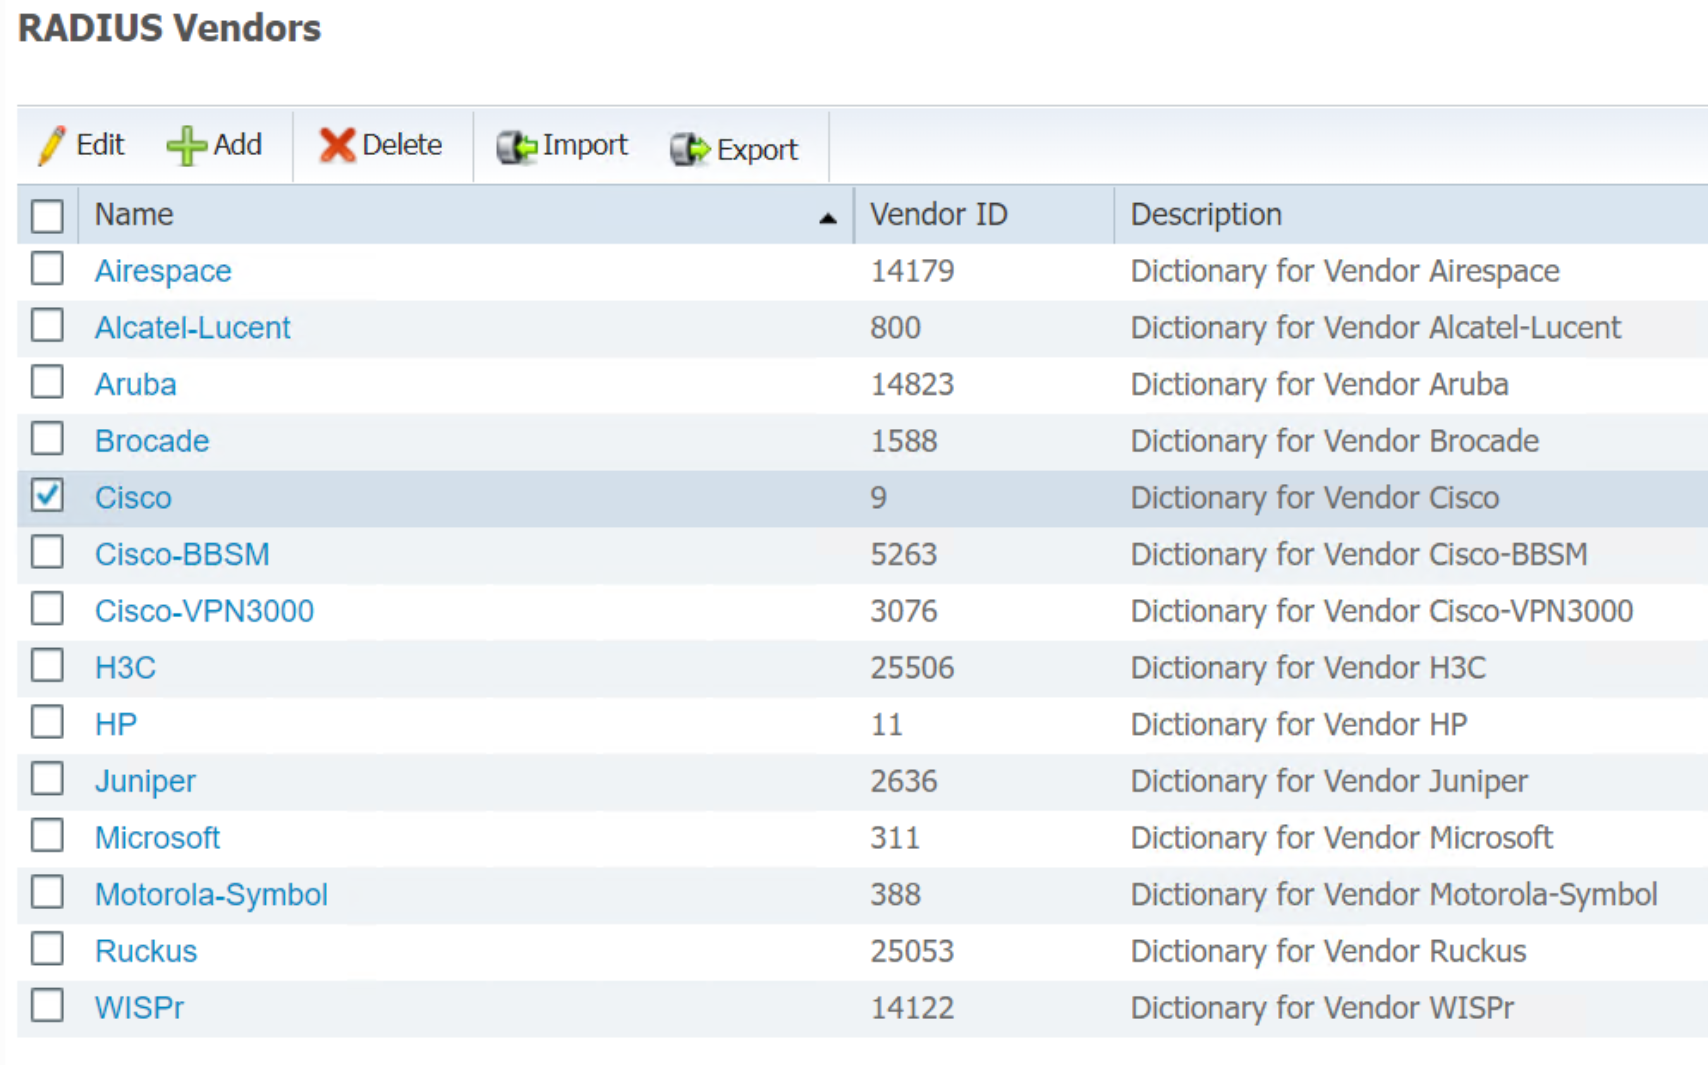 Figure 31. List of RADIUS Dictionary Vendors
- Click Edit to display the Cisco RADIUS dictionary description page.
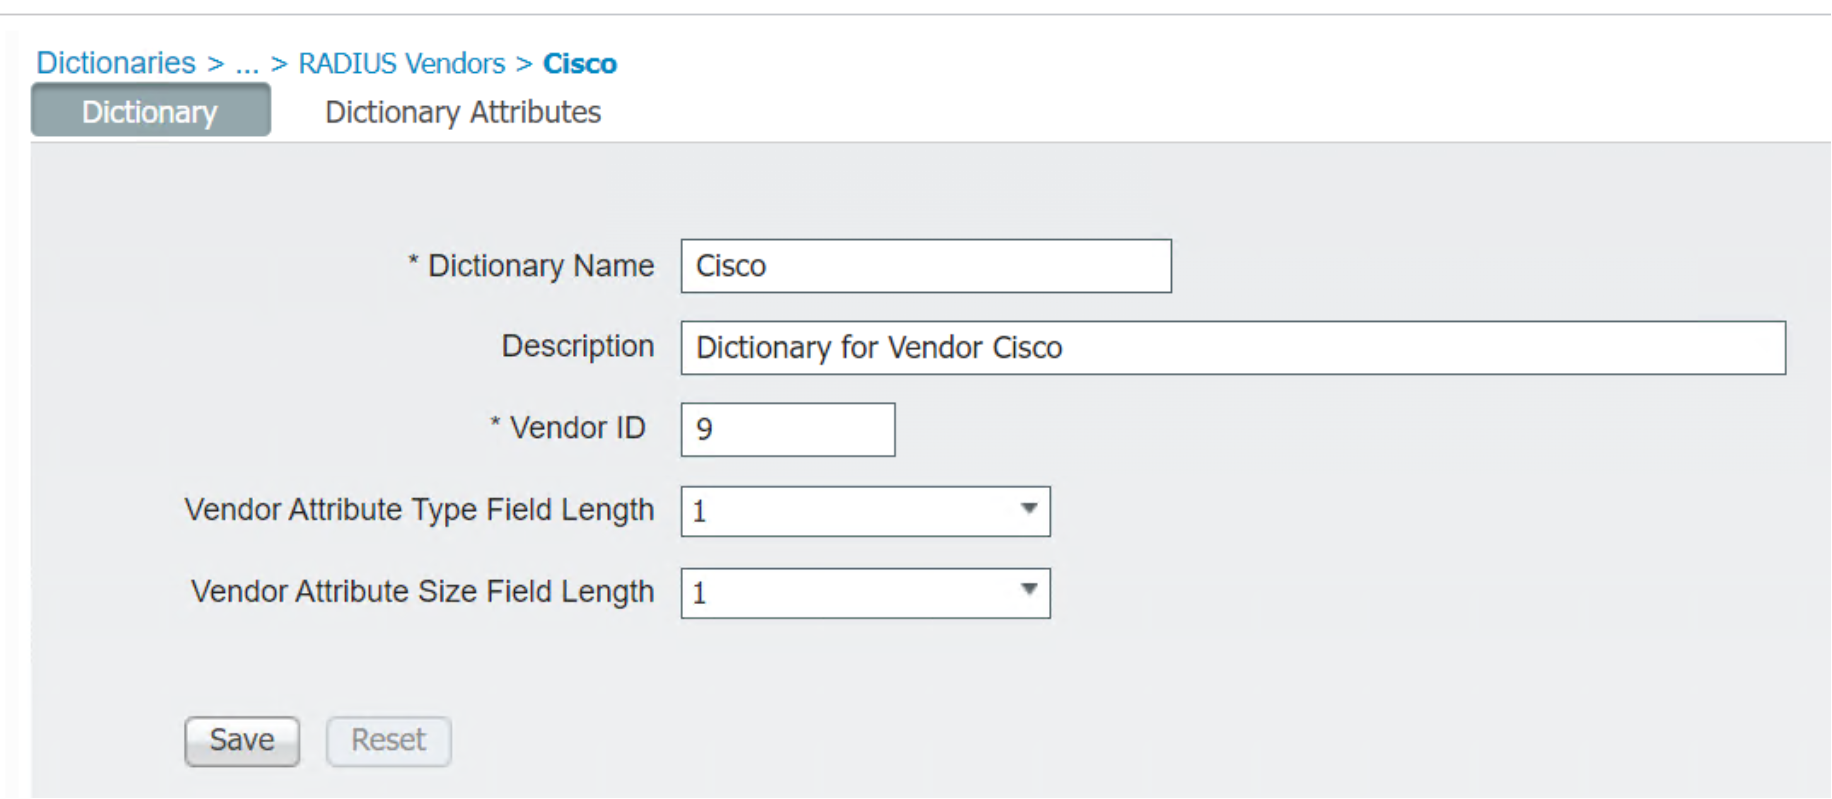 Figure 32. Cisco RADIUS Dictionary
- Click Dictionary Attributes to display the complete list of Cisco RADIUS dictionary.
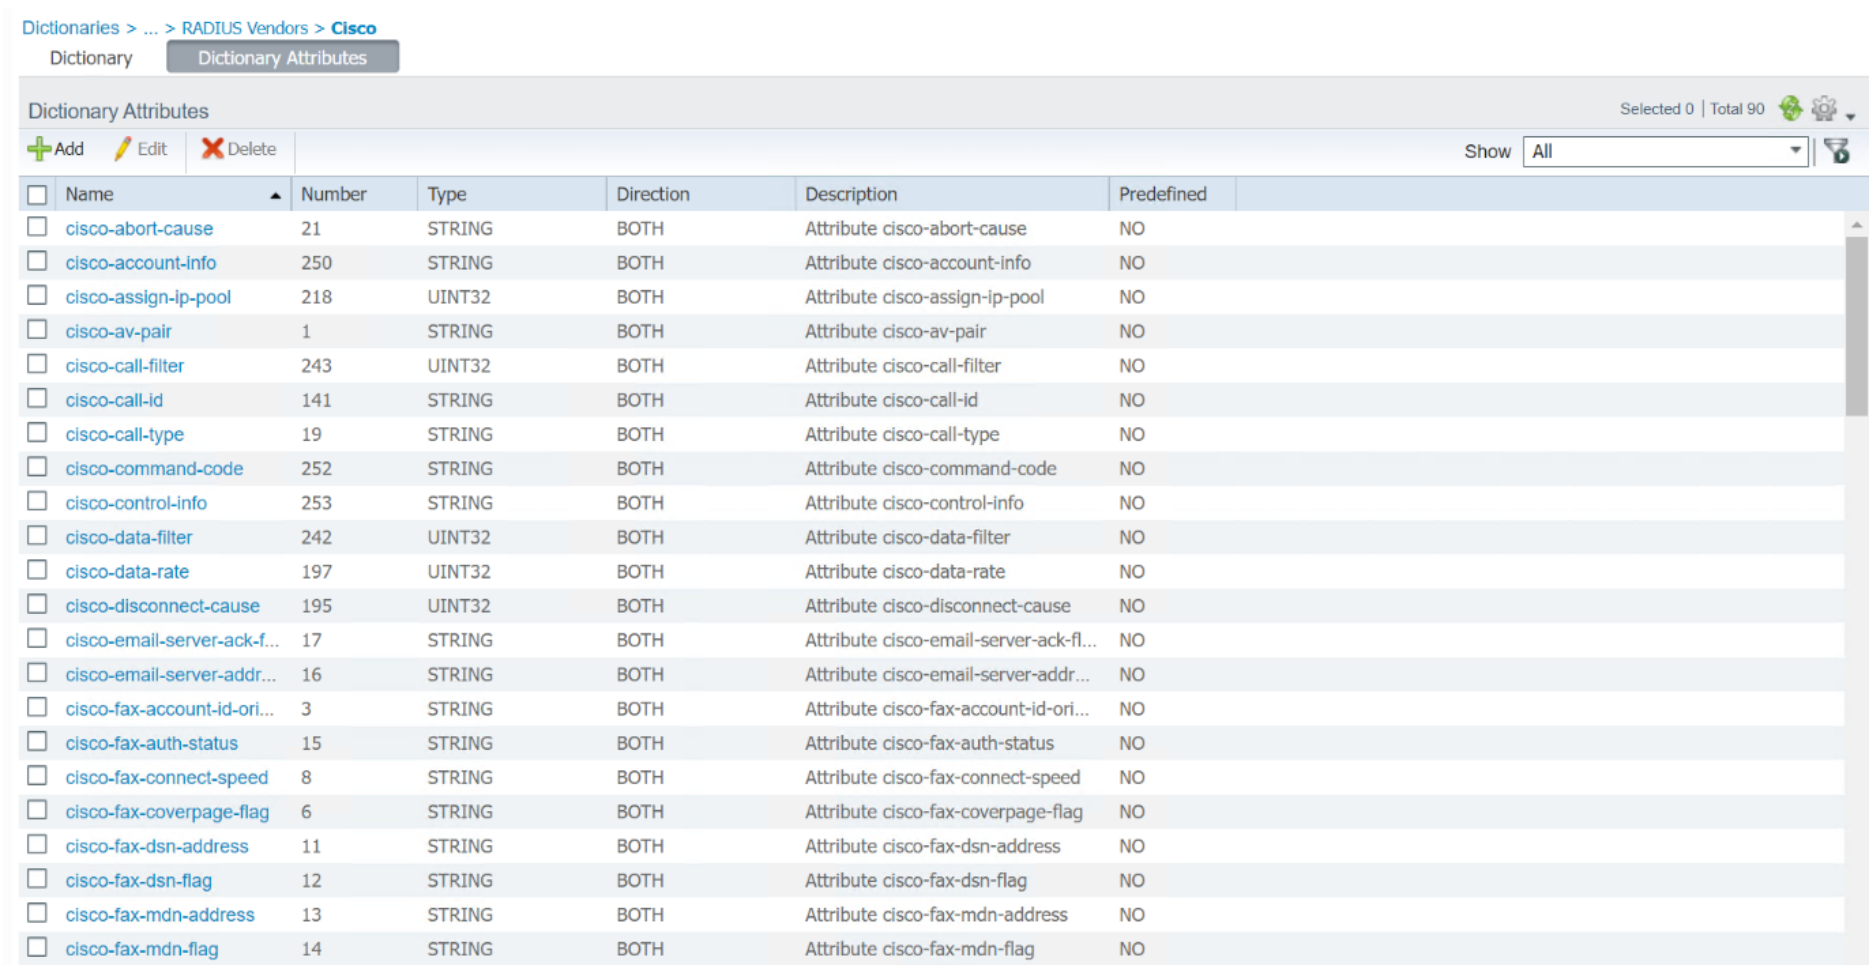 Figure 33. Partial List of Cisco RADIUS Dictionary Attributes
- Use the +ADD, Edit, and Delete buttons to change the attributes. Click any attributes on the left side to display the details of the attribute.
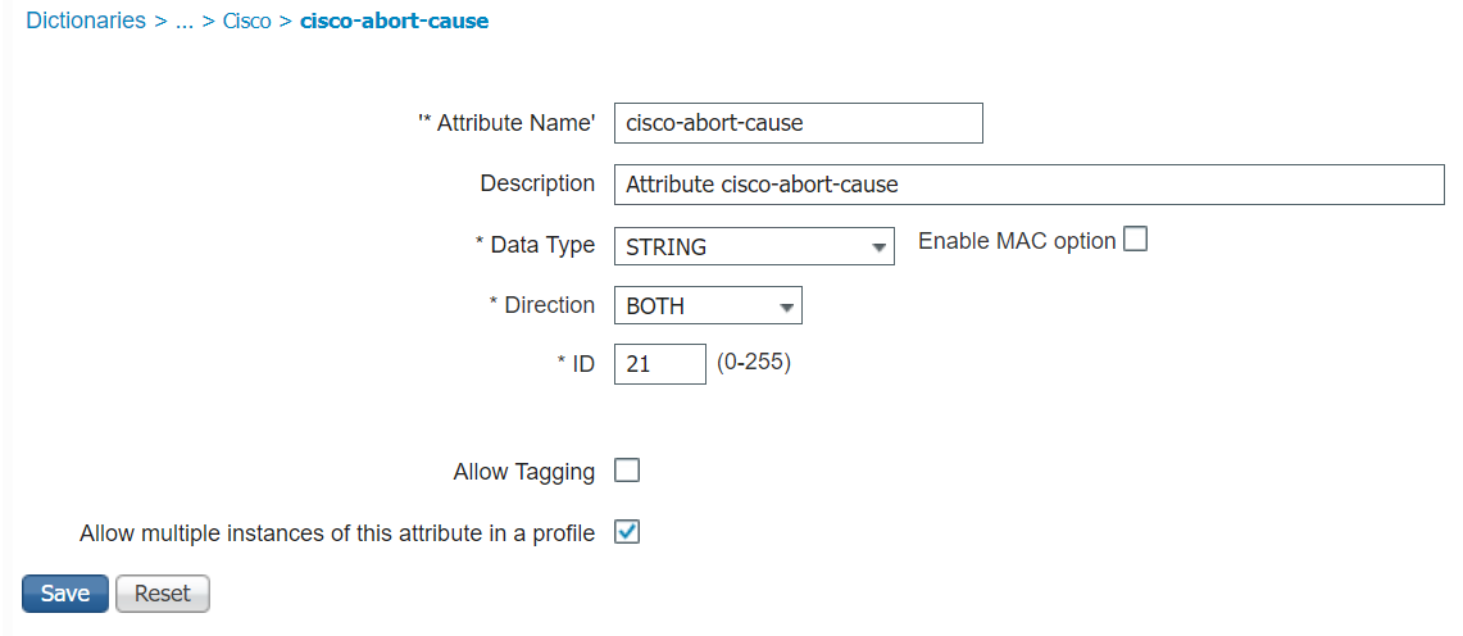 Figure 34. Detail of one Cisco RADIUS Dictionary Attribute
See Figure 15 on how to use RADIUS dictionaries to create Network Device Profiles before continuing with these steps.
Conditions Studio
- To configure Conditions Studios, click Policy > Policy Elements > Conditions to bring up ISE Condition Studio page.
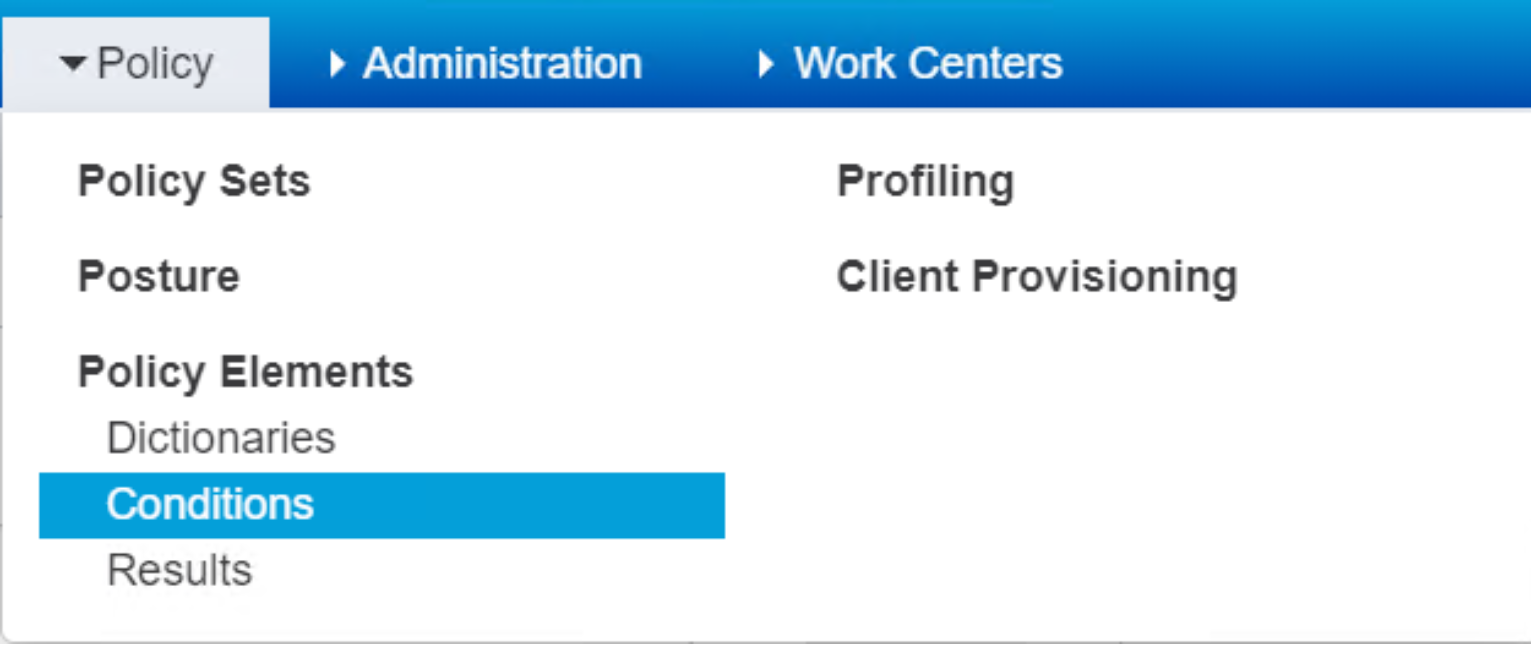 Figure 35. Drop down Menu for Policy Elements Conditions
Figure 36. Condition Studio Page
Create a new library condition
To create new library condition, the first condition in the studio is Library Condition, as shown in Figure 37. The left side of the studio provides a list of existing Library Conditions and the the right side of the studio contains the conditions editing functions.
- Click the attribute text field to open the attribute edit panel.
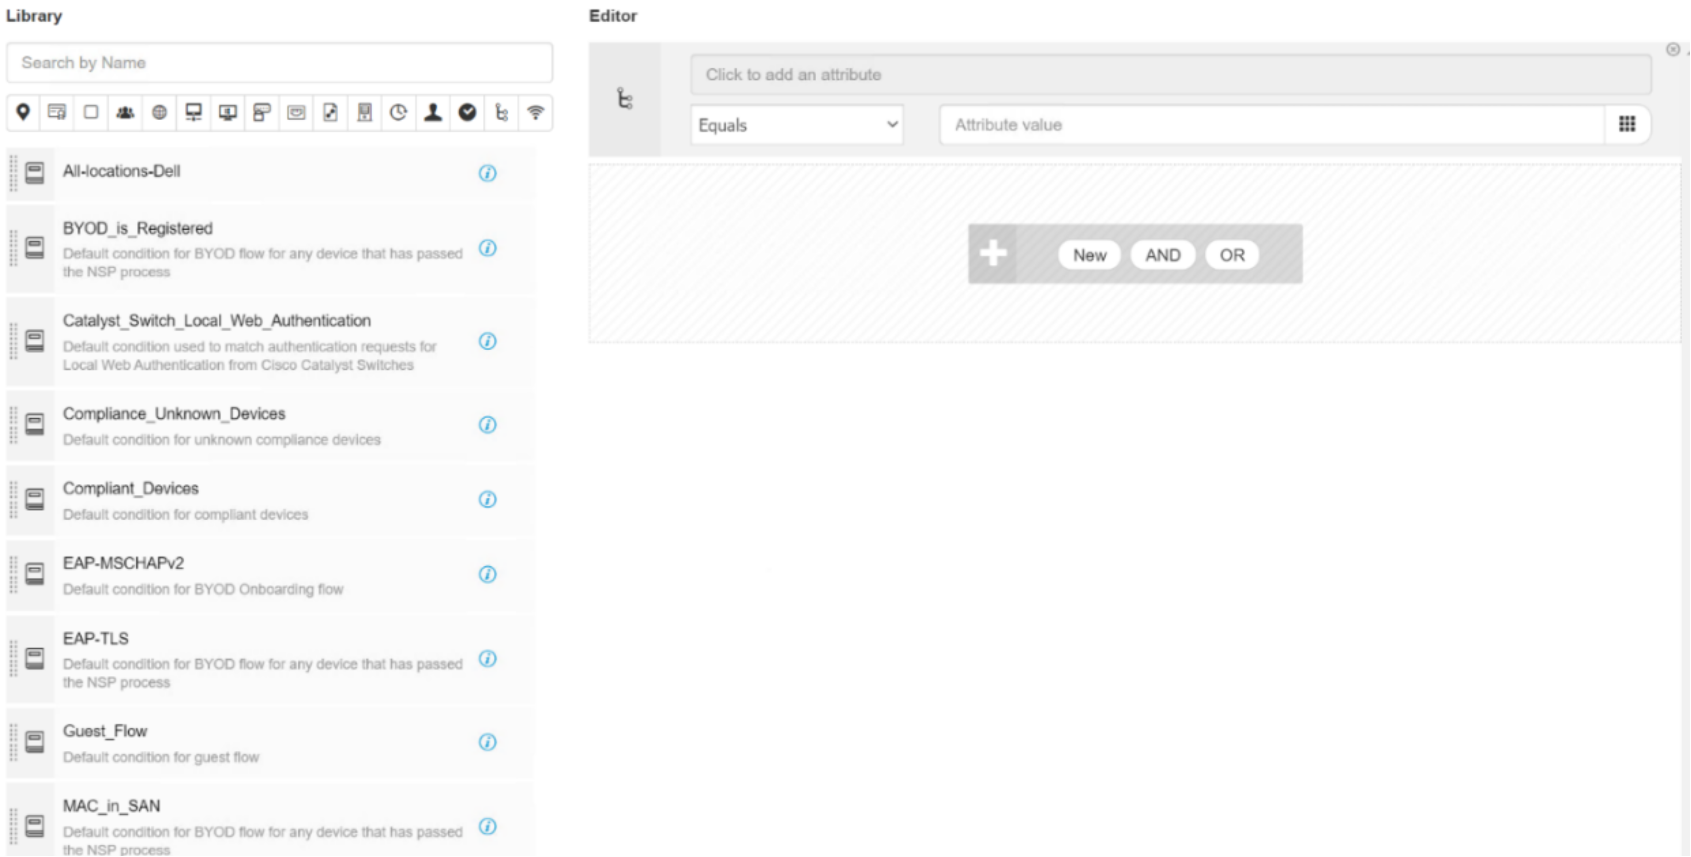 Figure 37. Editor for Library Conditions
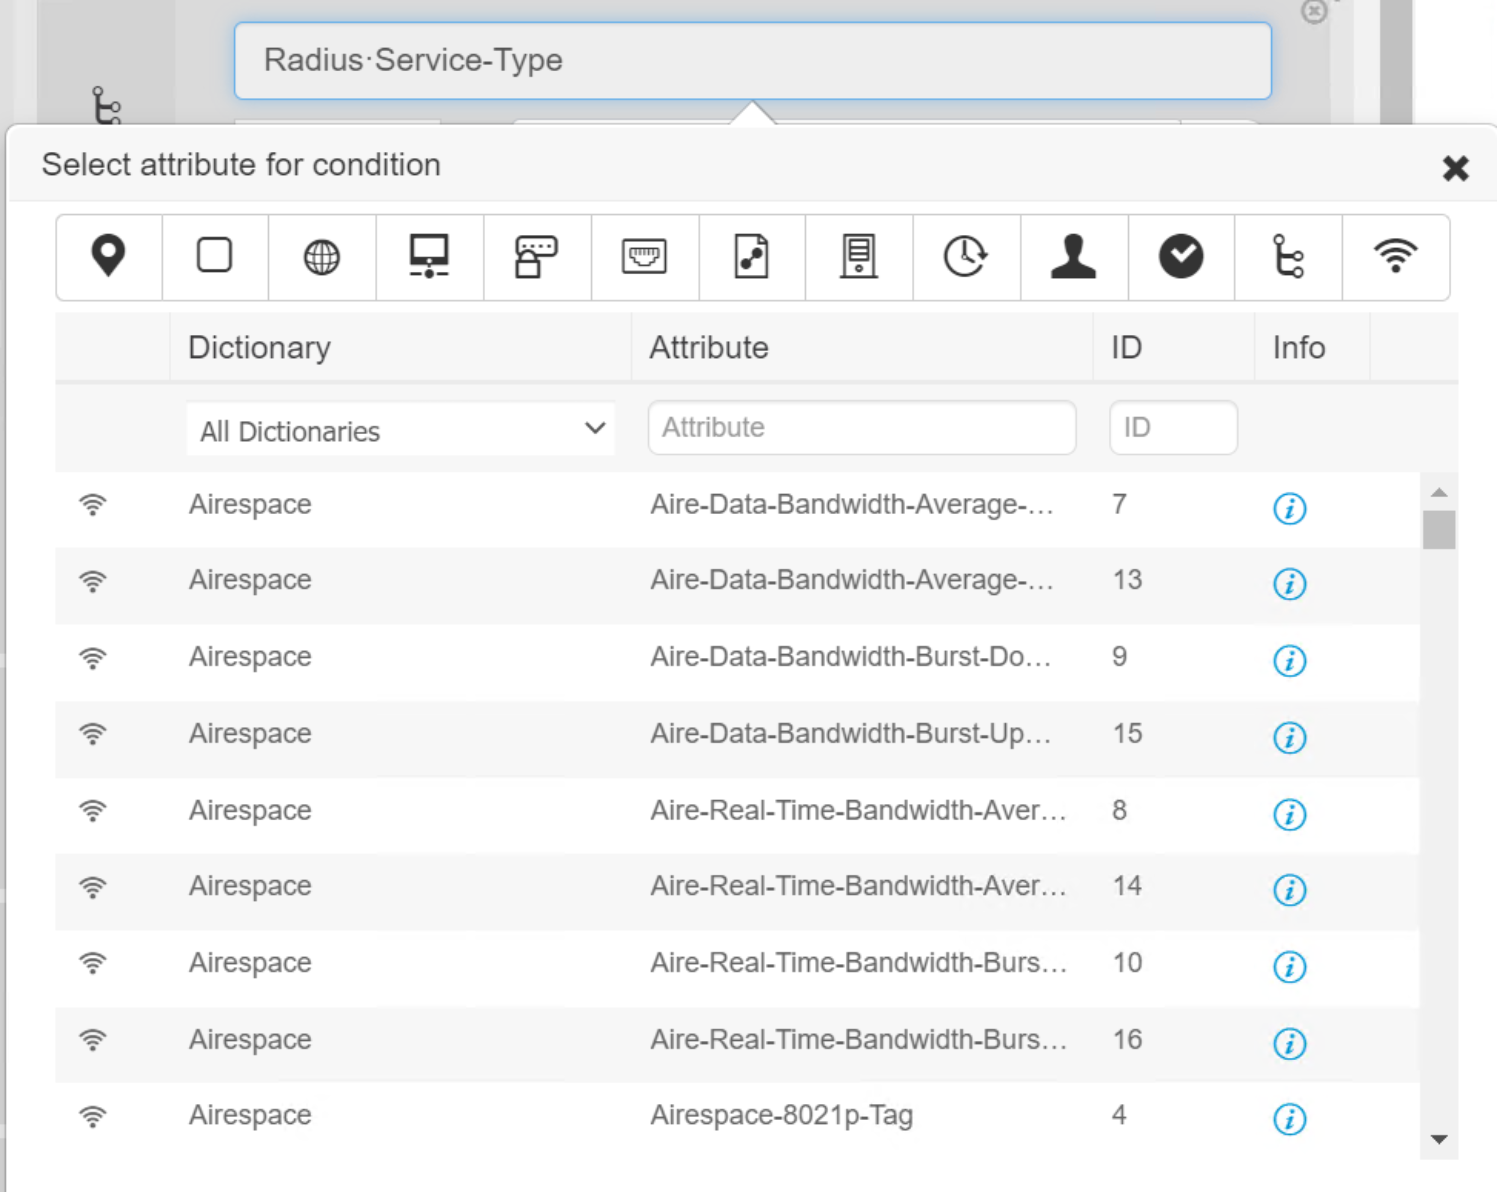 Figure 38. Partial list of RADIUS Attributes
- Mouse over any attribute icons on the top to display the attribute name.
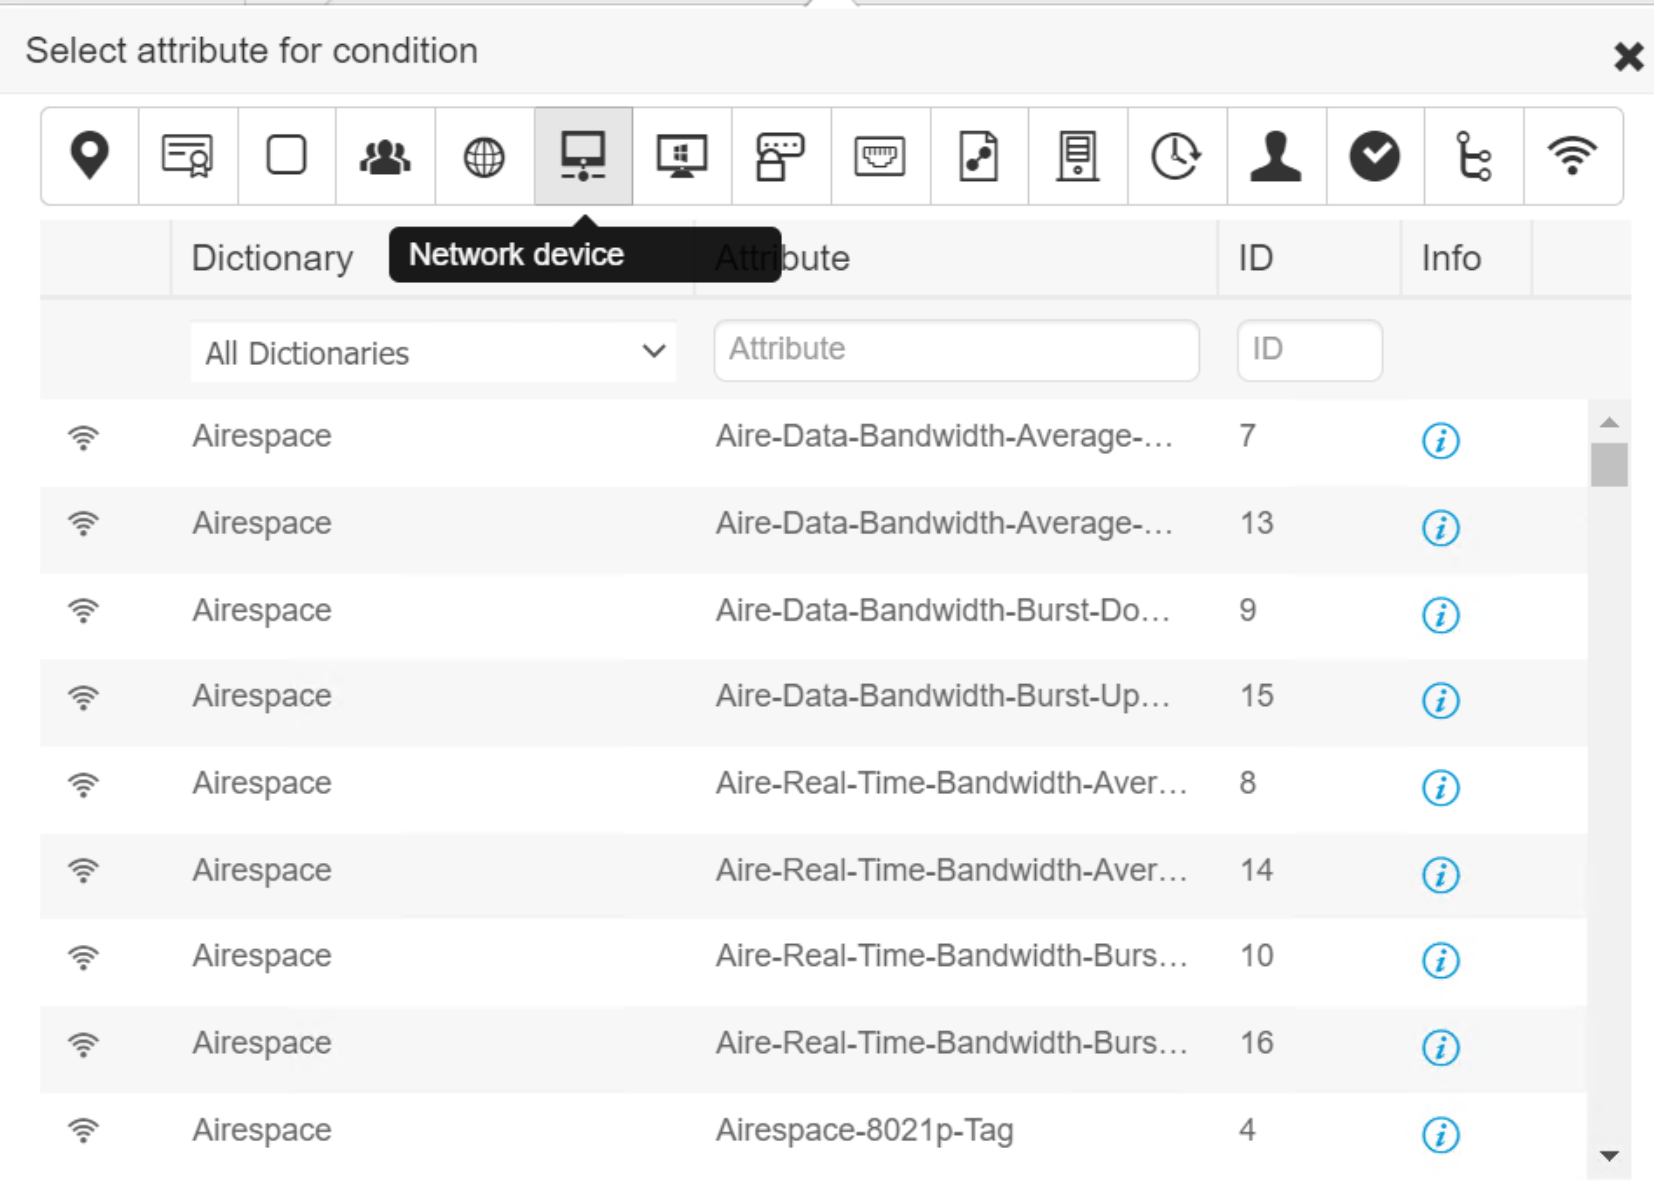 Figure 39. Auto Title for Attribute Icons
- Selecting an attribute automatically closes the edit page and fill out the attribute text field with the selected attribute.
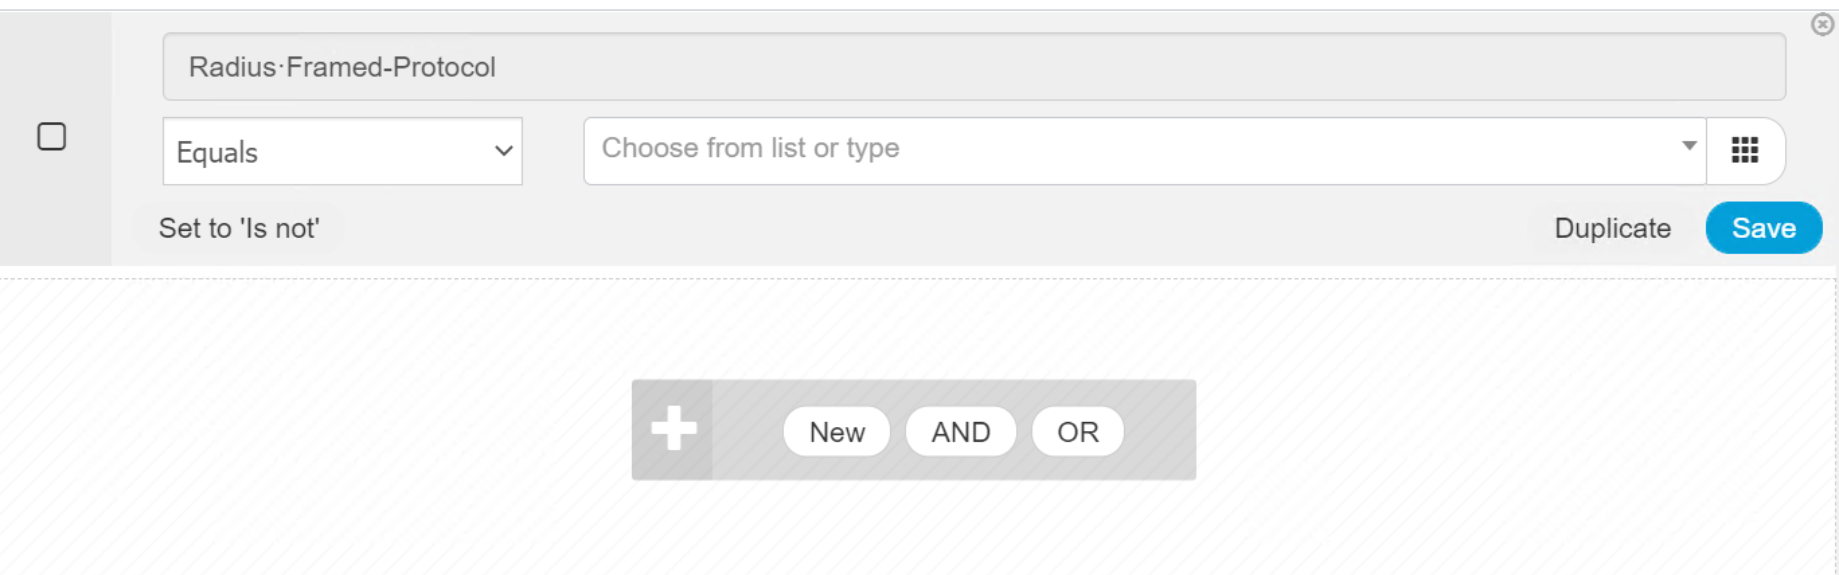
Figure 40. Instant Editor for RADIUS Attribute
- Click the Attribute value text field and click it to open all the eligible values in a pull down menu.
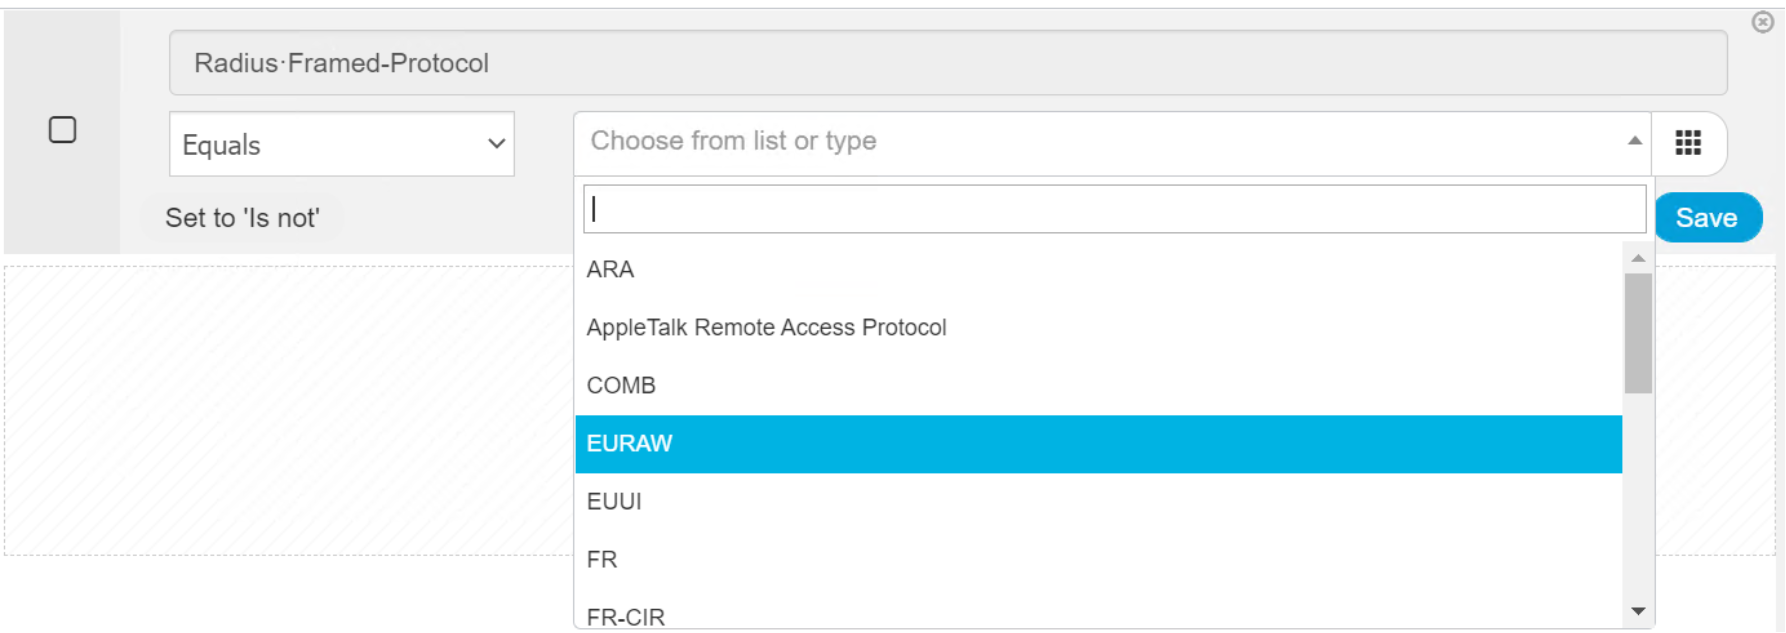 Figure 41. Drop down menu for Attribute Values
Select a value to close the menu and populate the attribute value text field with that value.
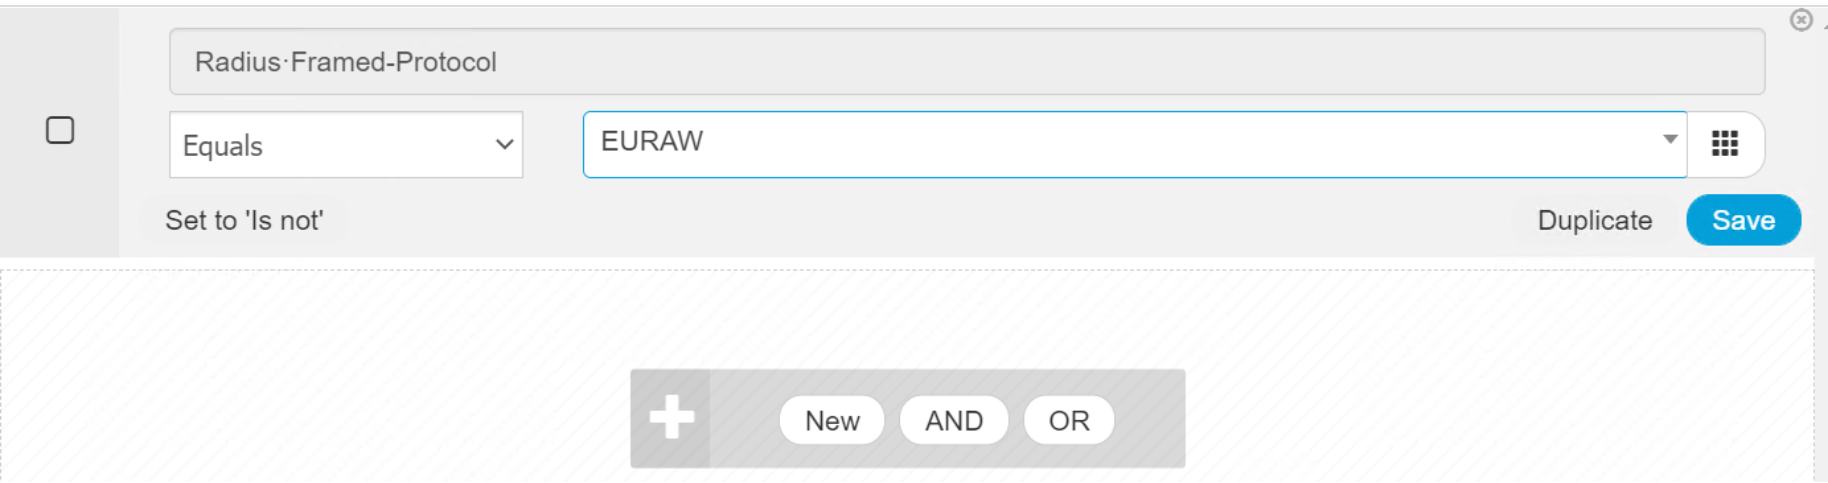 Figure 42. Populate Attribute Value from drop down list
 - Click Save to save this new library condition.
 Figure 43. Save Condition in Studio
Modify an existing Library Condition
Use the following steps to modify an existing Library Condition.
- Click Edit on the right side to expand the condition.
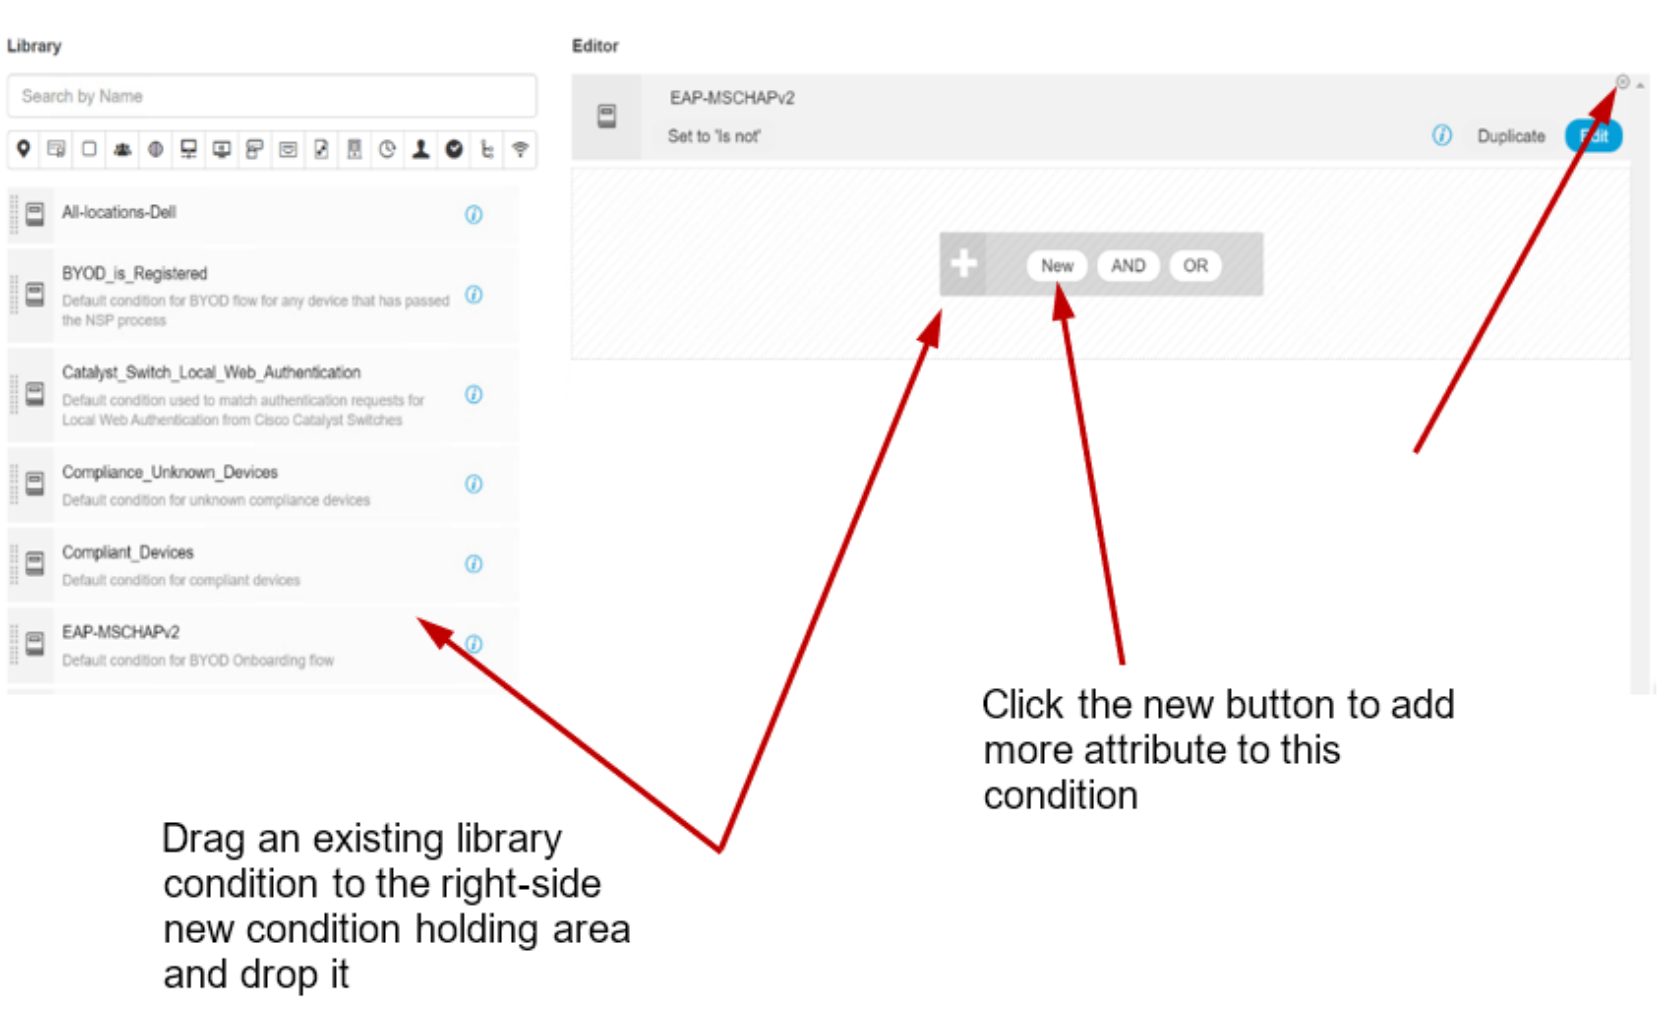 Figure 44. Add Library condition to the editor
- Click New button to add more attributes to the condition.
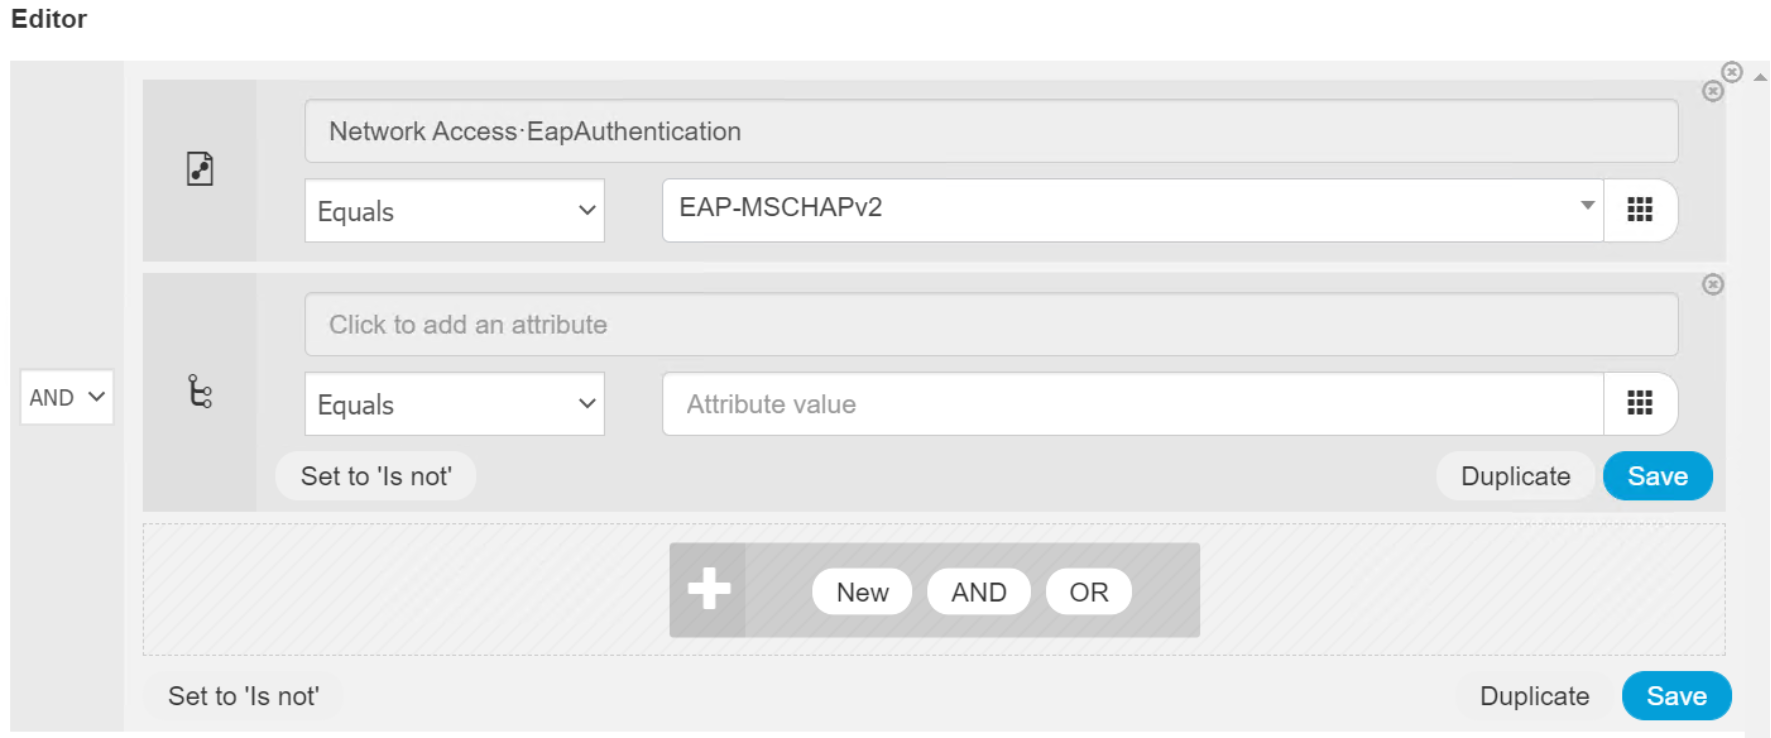 Figure 45. Instant Editor for attribute
 Figure 46. Add New attribute in Editor
- Use the same procedure to create a new condition or change the condition.
Smart Conditions
Use the following steps to view Smart Condition details.
- Click Smart Conditions on the left panel to bring up Smart Conditions list.
Figure 47. List of Smart Conditions
- Click the name of a Smart Condition to view detailed information of the condition.
- Click Close to return to the Smart Conditions list.
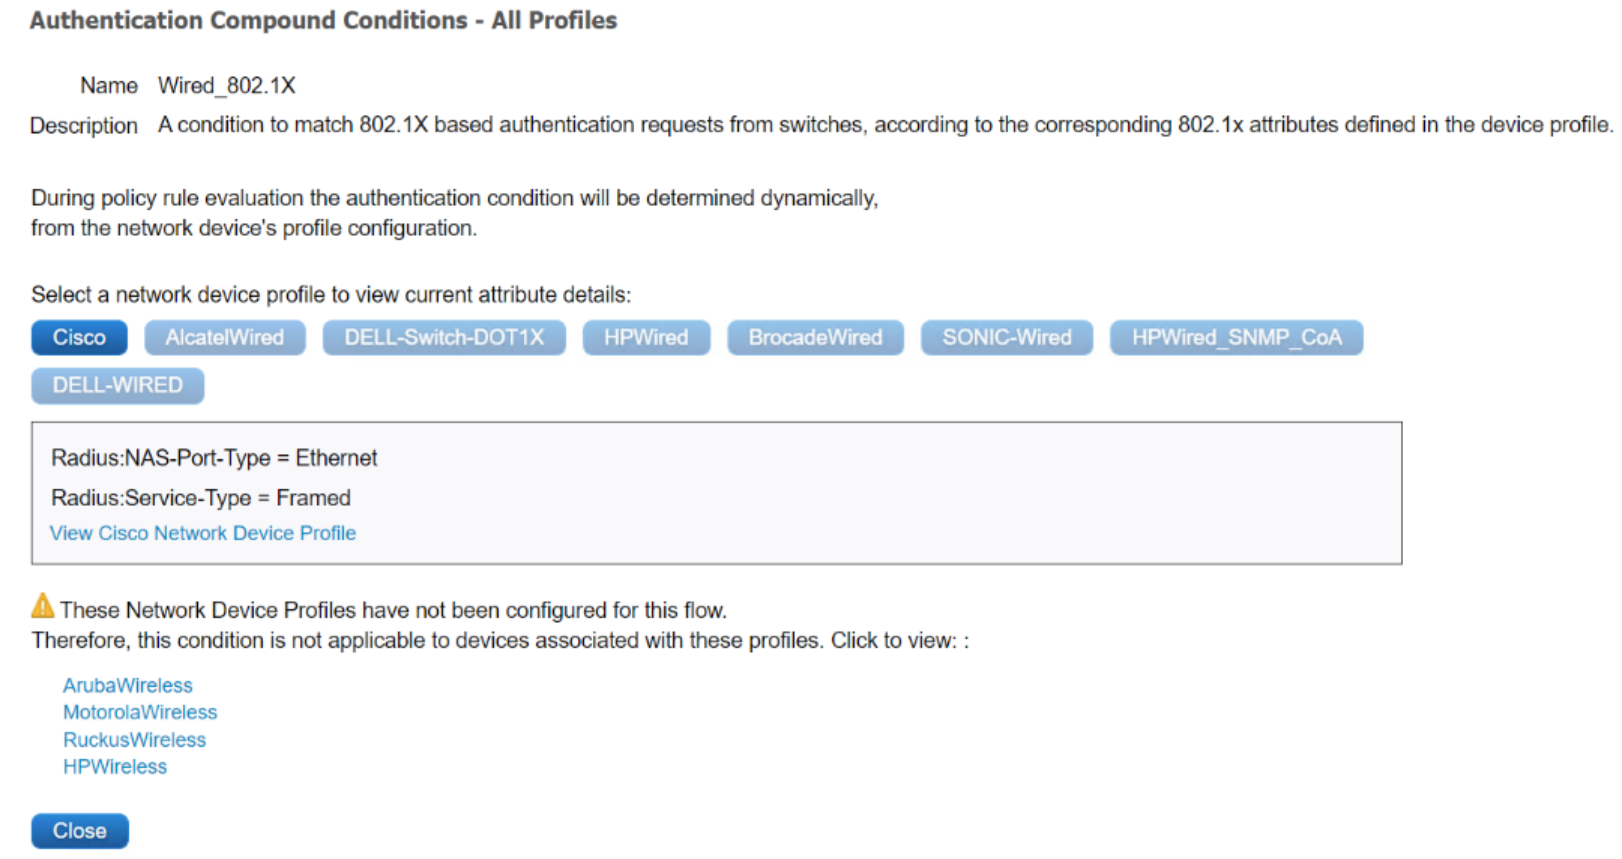
Figure 48. Smart Condition detail
Use the following steps to configure the policy results.
Policy results configuration
- Click Policy > Policy Elements > Results to view the results.
 Figure 49. Drop down menu for Policy Elements Results
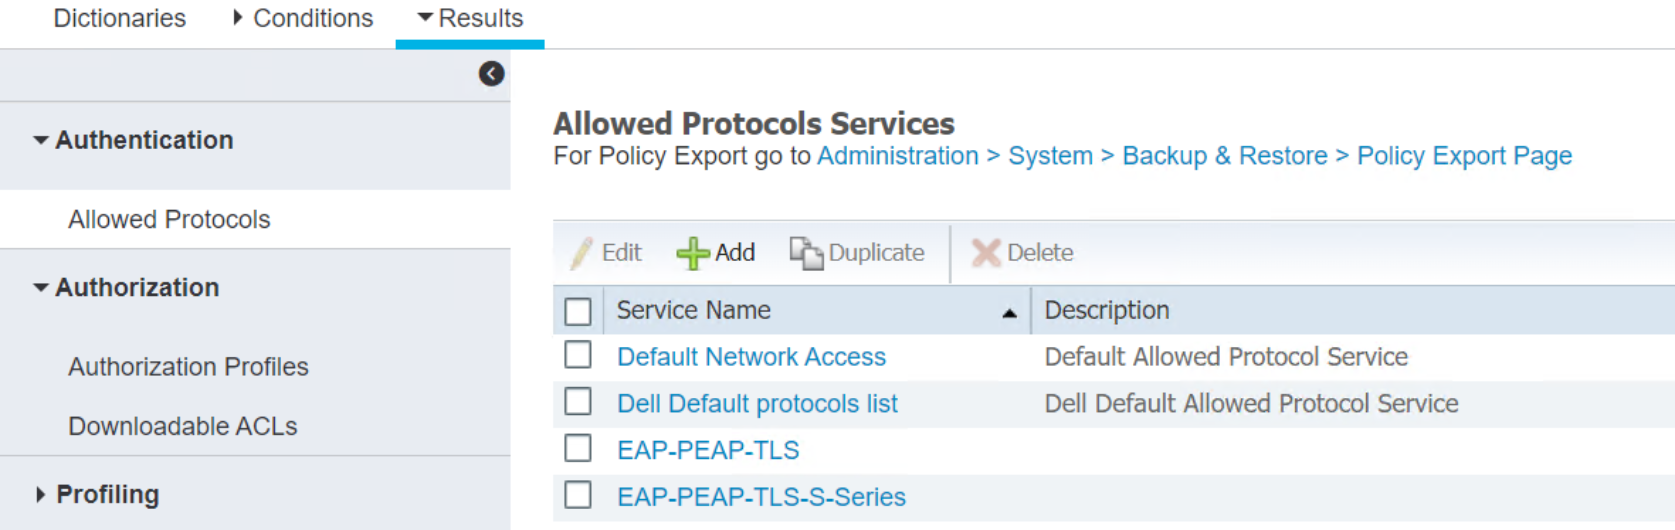 Figure 50. List of Allowed Protocols in Results
Authentication Results
Click Authentication > Allowed Protocols to view services and detailed service information.
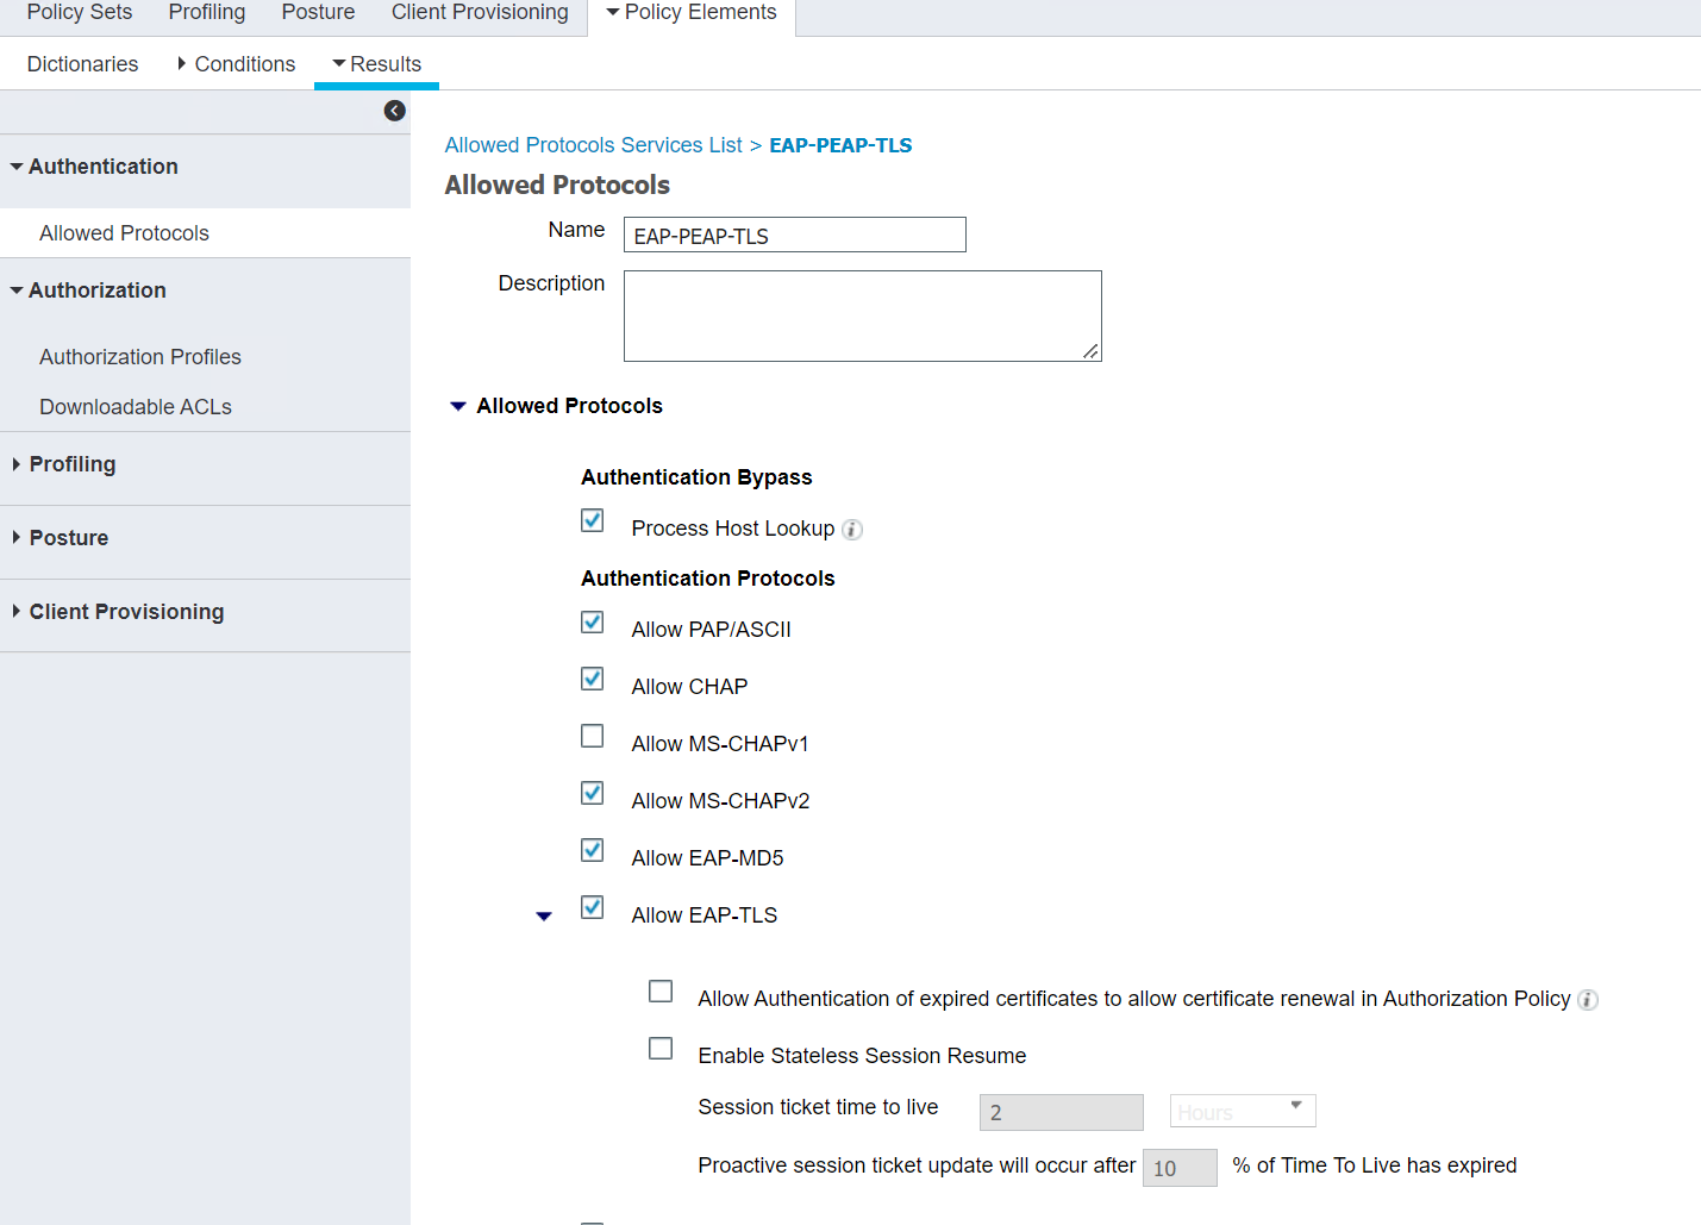 Figure 51. Detail of Allowed Protocols
Authorization Profiles configuration
- Check the box next to the Authorization Profiles name and click Edit to view the Authorization Profile.
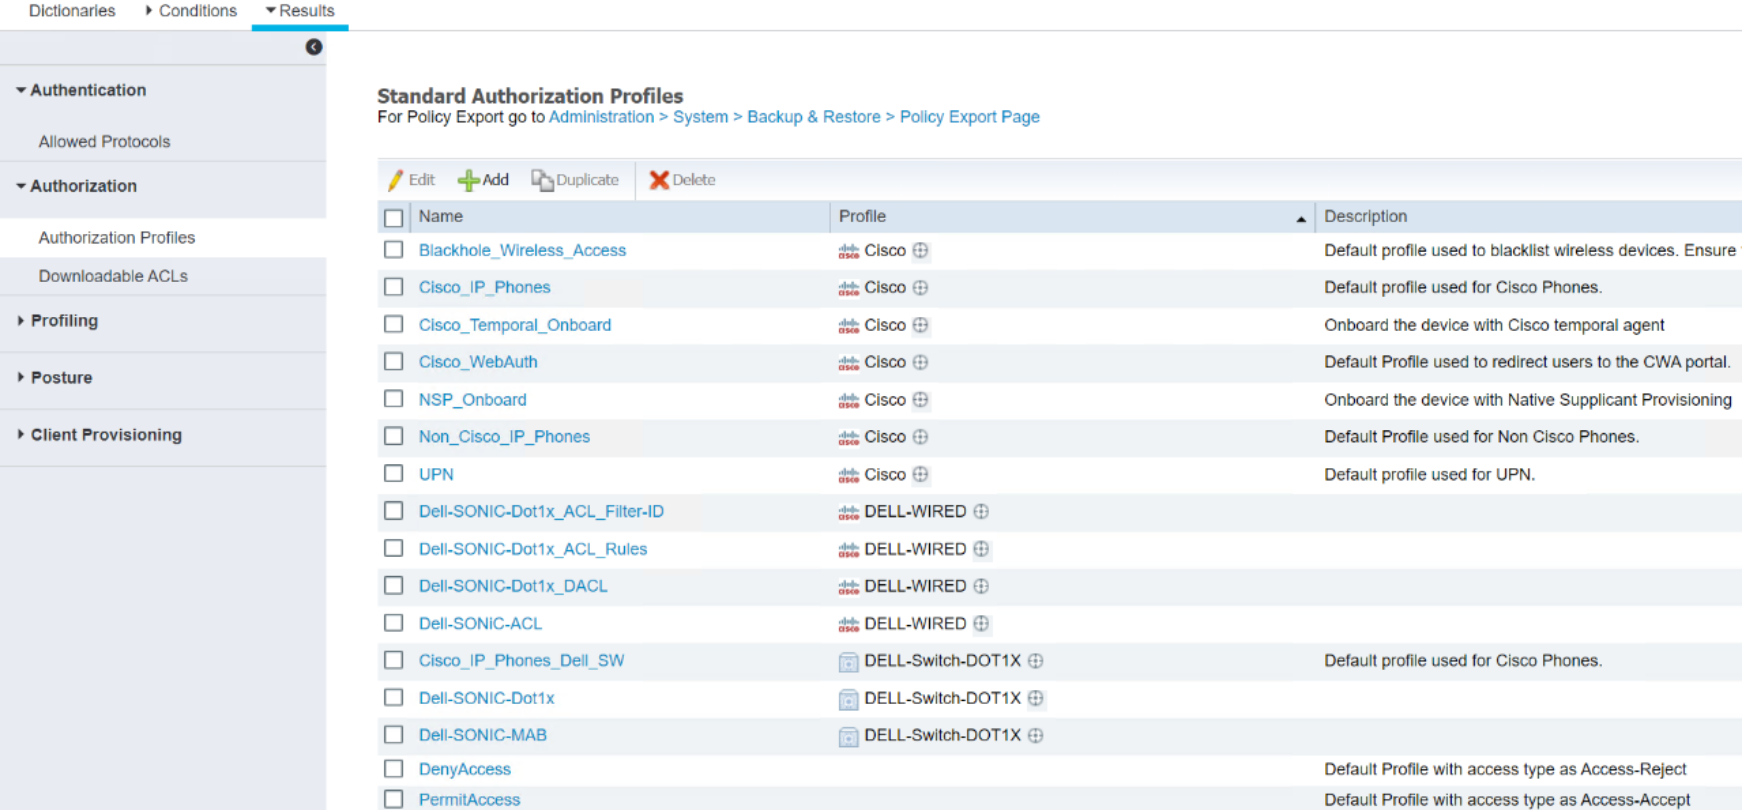 Figure 52. Select an Authorization Profile to edit
- Check the box next to the Authorization Profiles name and click Edit to view the Authorization Profile.
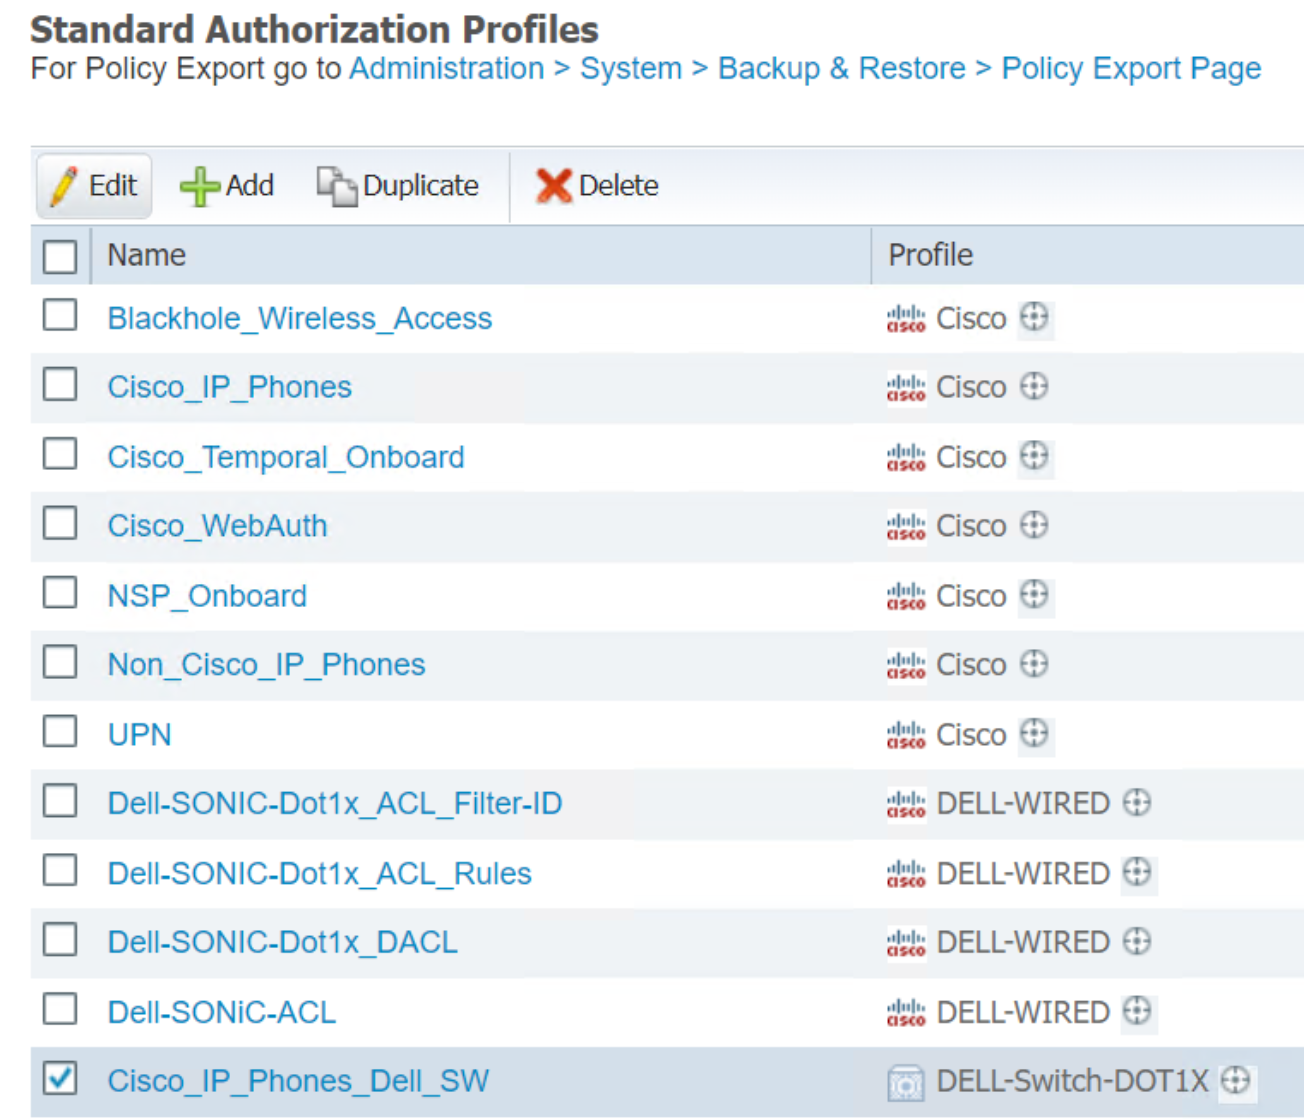 Figure 53. Select an Authorization Profile to edit
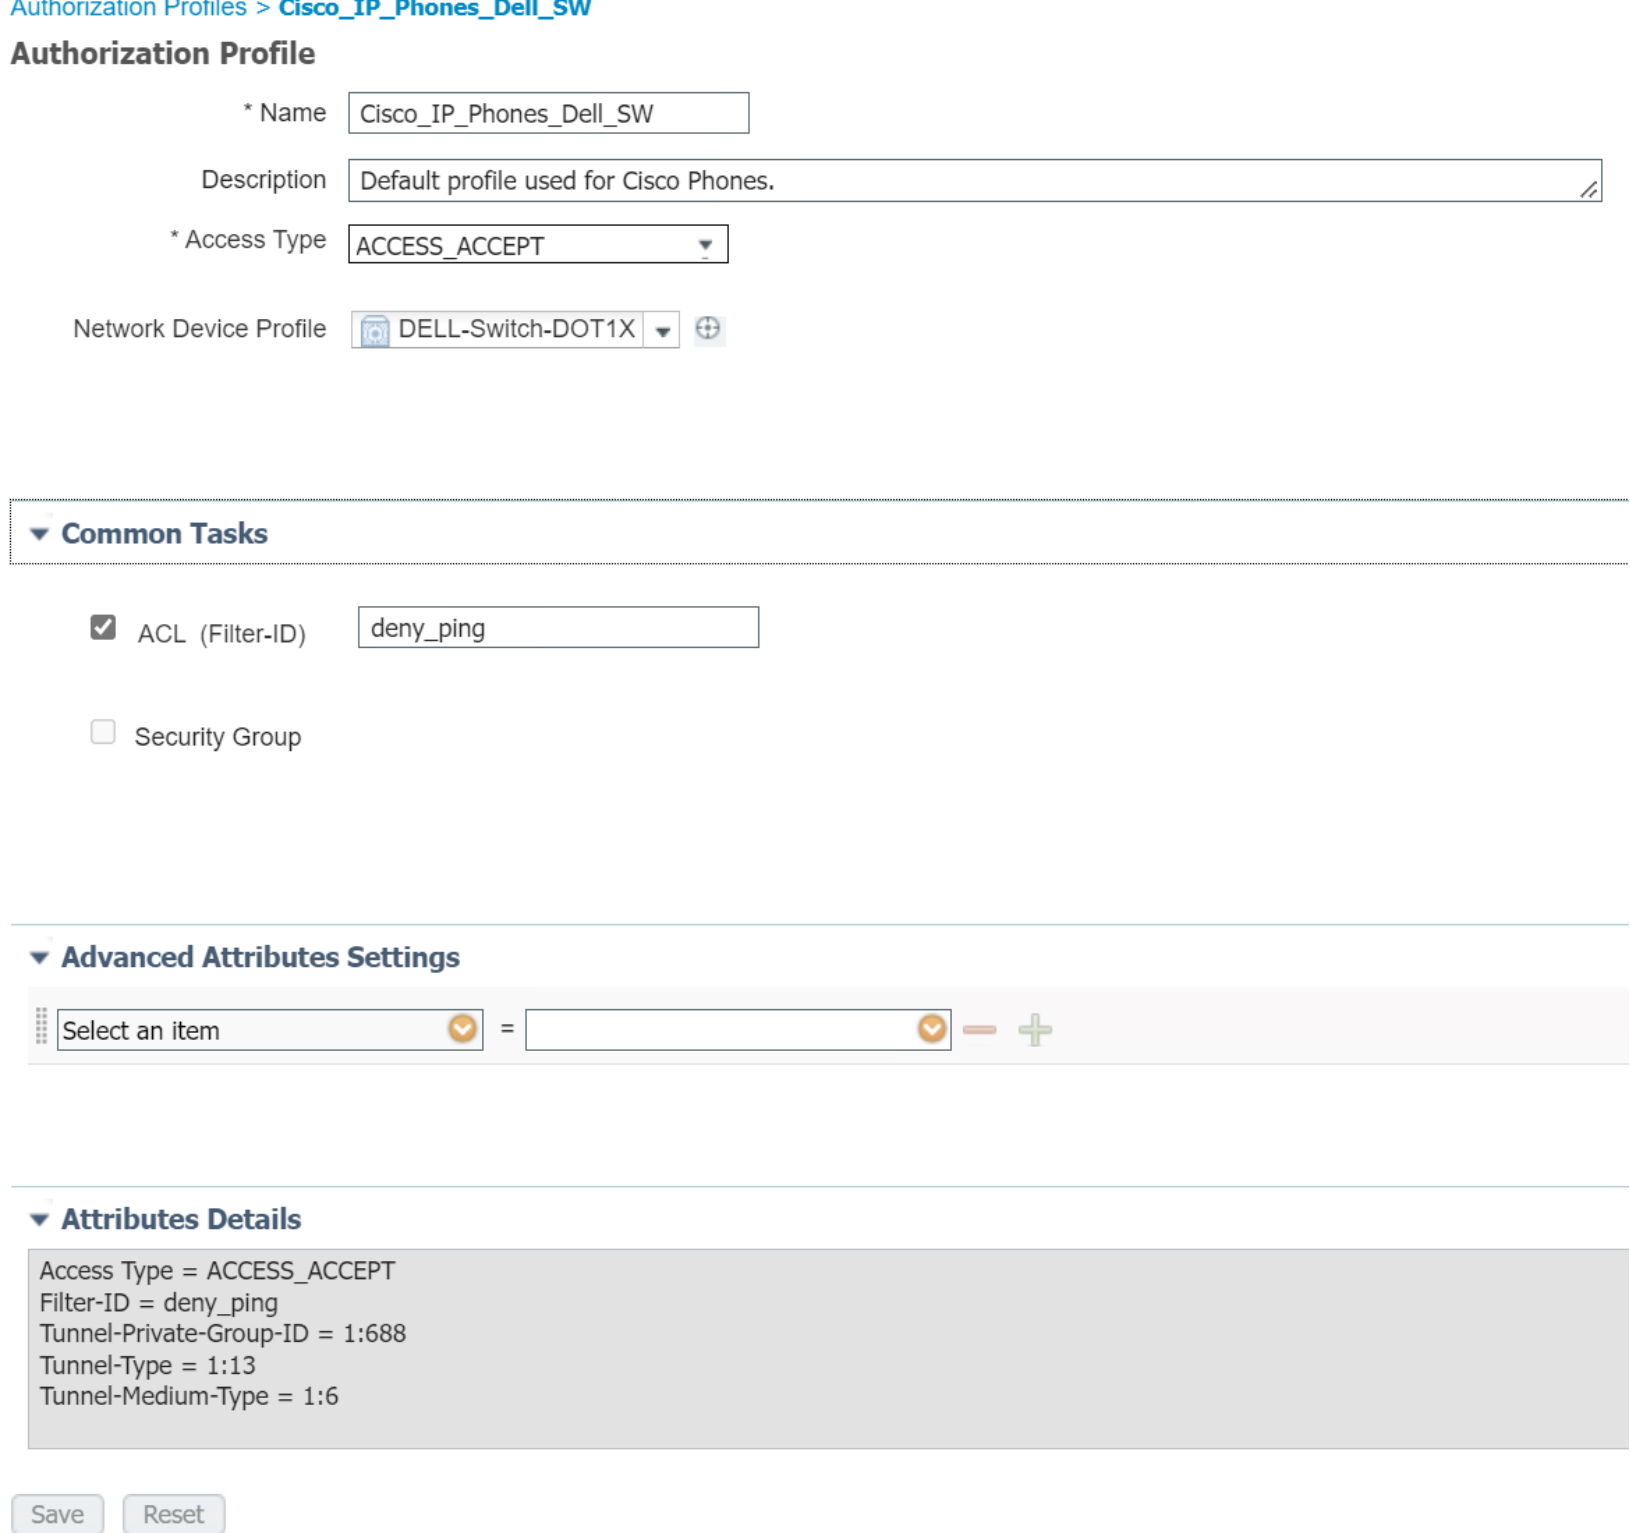 Figure 54. Detail of an Authorization Profile
- Use the vertical scroll bar on the right side to view more contents under Common Tasks.
- When the modification is complete, click the Save.
- Click +Add to create a new Authorization Profile.
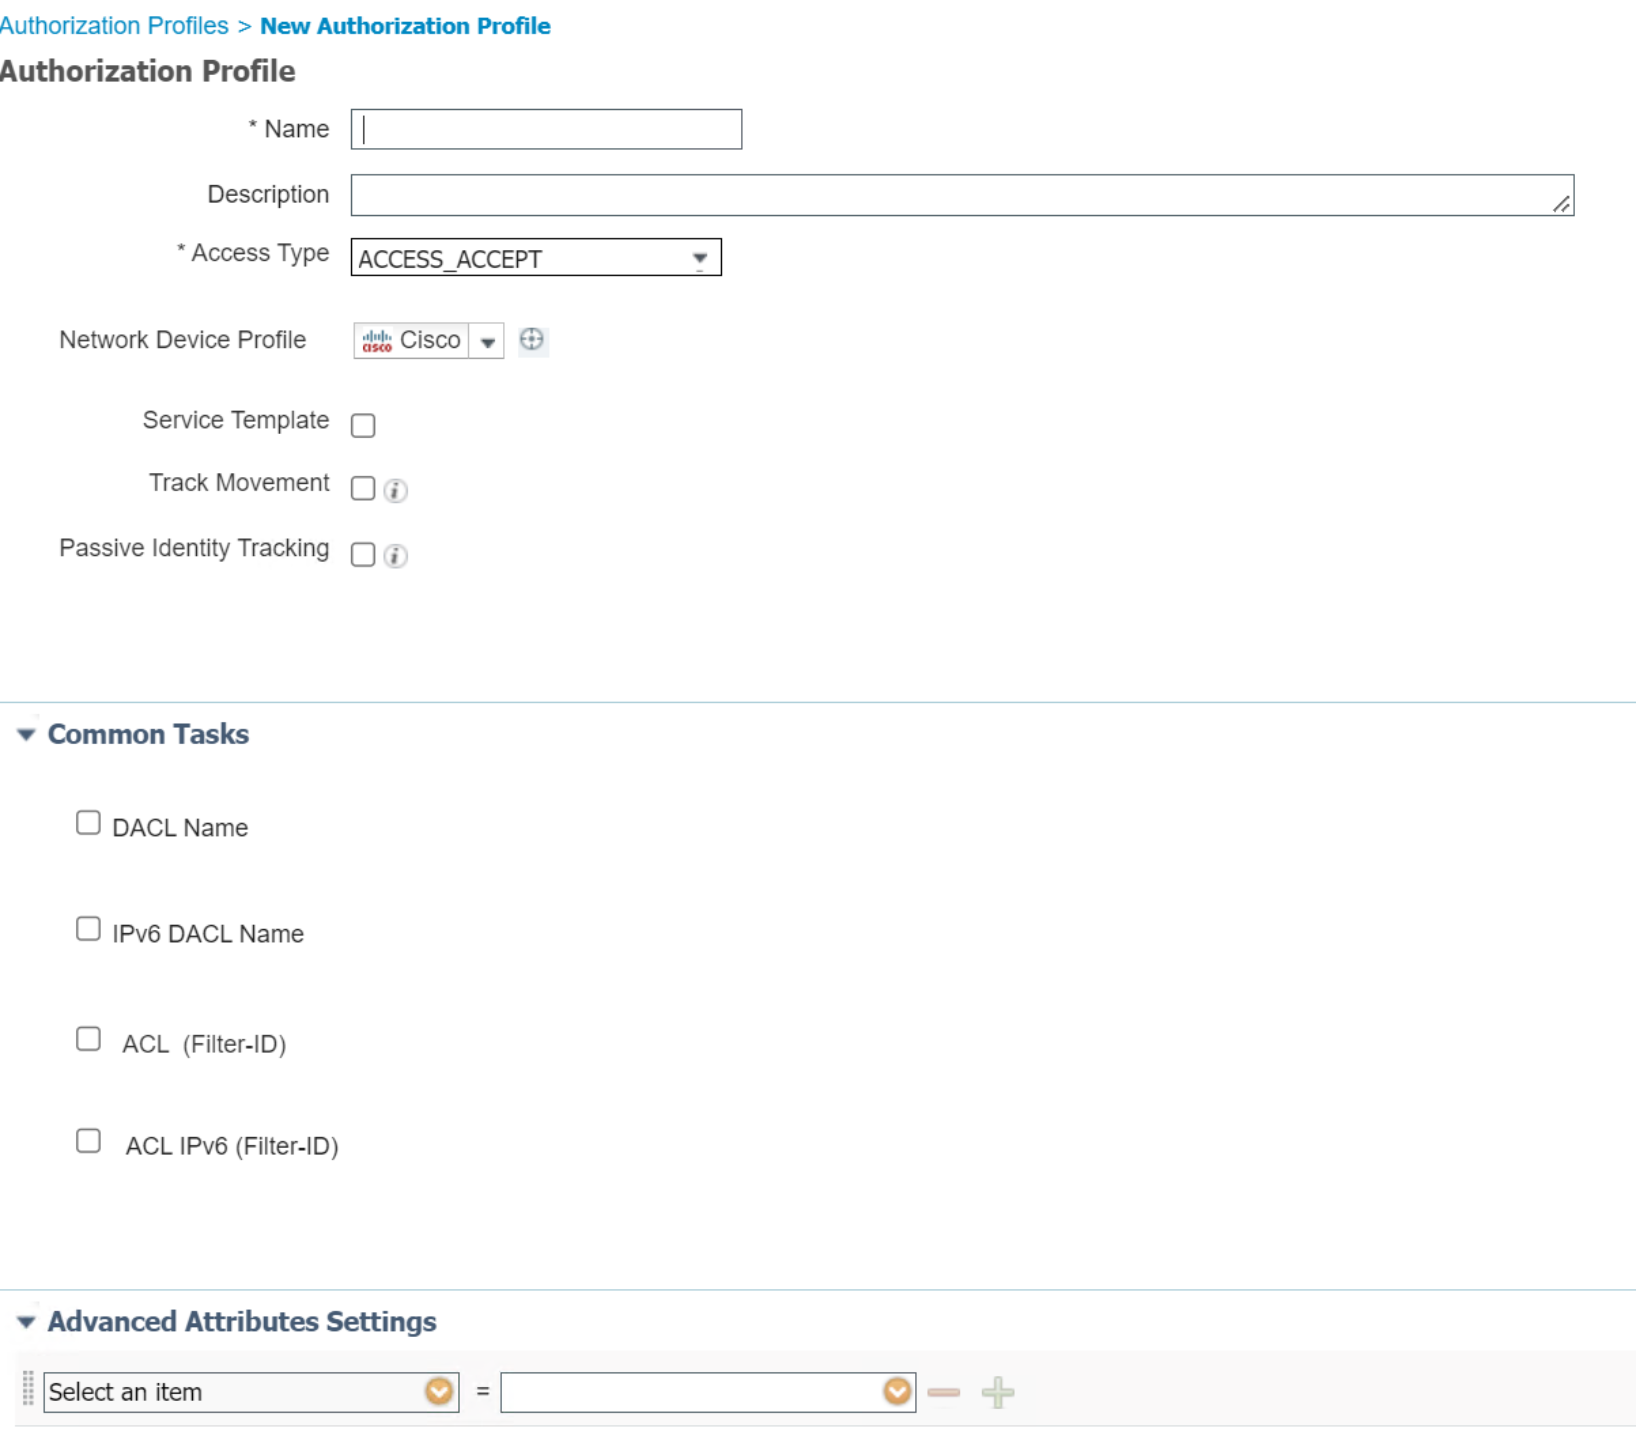
Figure 55. New Authorization Profile Page
- Select ACCESS_ACCEPT in the Access Type drop down menu.

Figure 56. Drop down menu for Access Type in Authorization Profile
- Select Cisco or another device profile type in the Network Device Profile drop down menu.
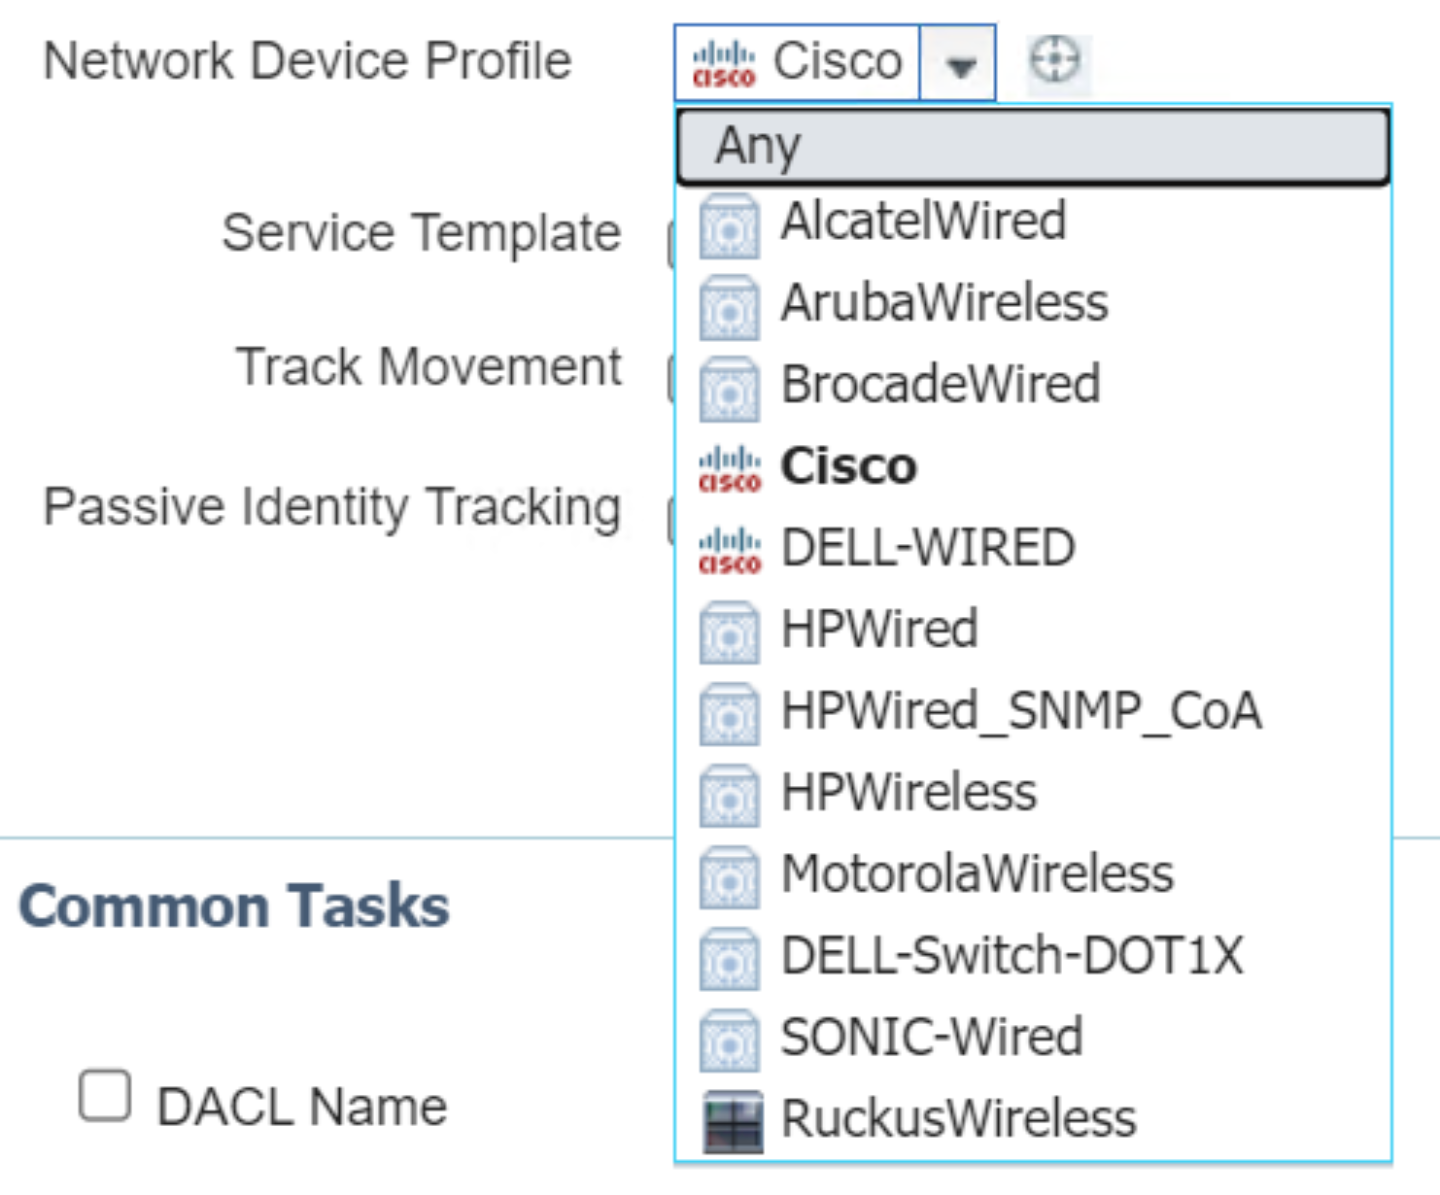
Figure 57. Drop down menu for Network Device Profile in Authorization Profile
- Go to the hourglass circle next to the device profile name to view a detailed description of the profile.
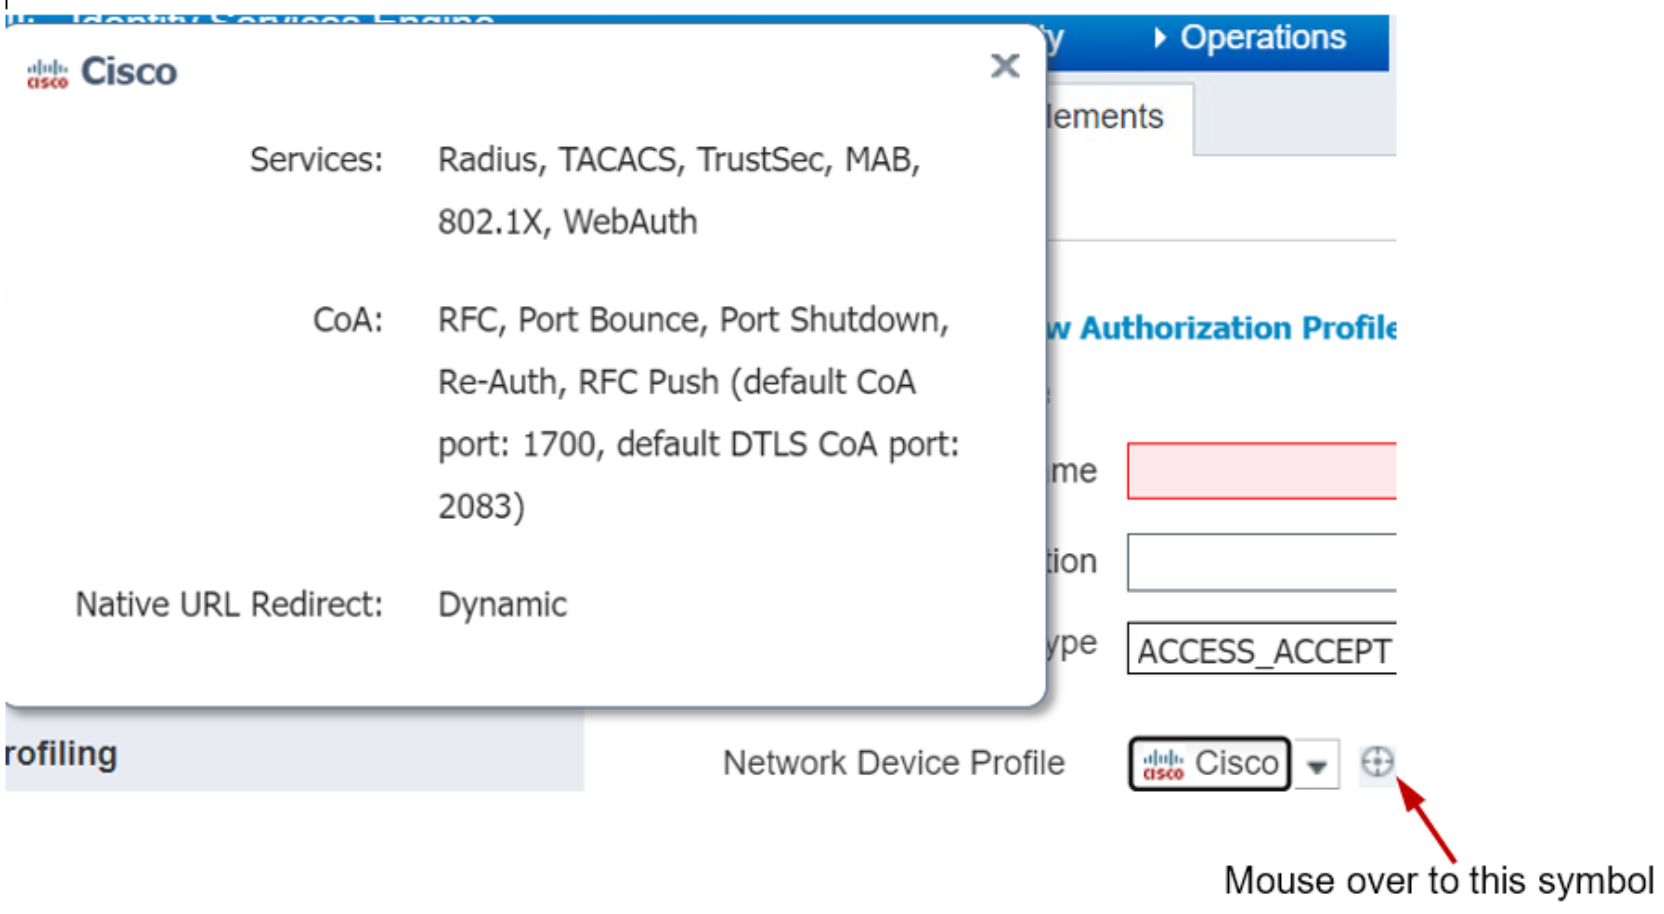
Figure 58. Instant Display of Network Device Profile Description

Figure 59. Edit Authorization Profile Advanced Attributes
- Expand a category in the Dictionaries tab using the caret to view the complete attribute dictionaries.
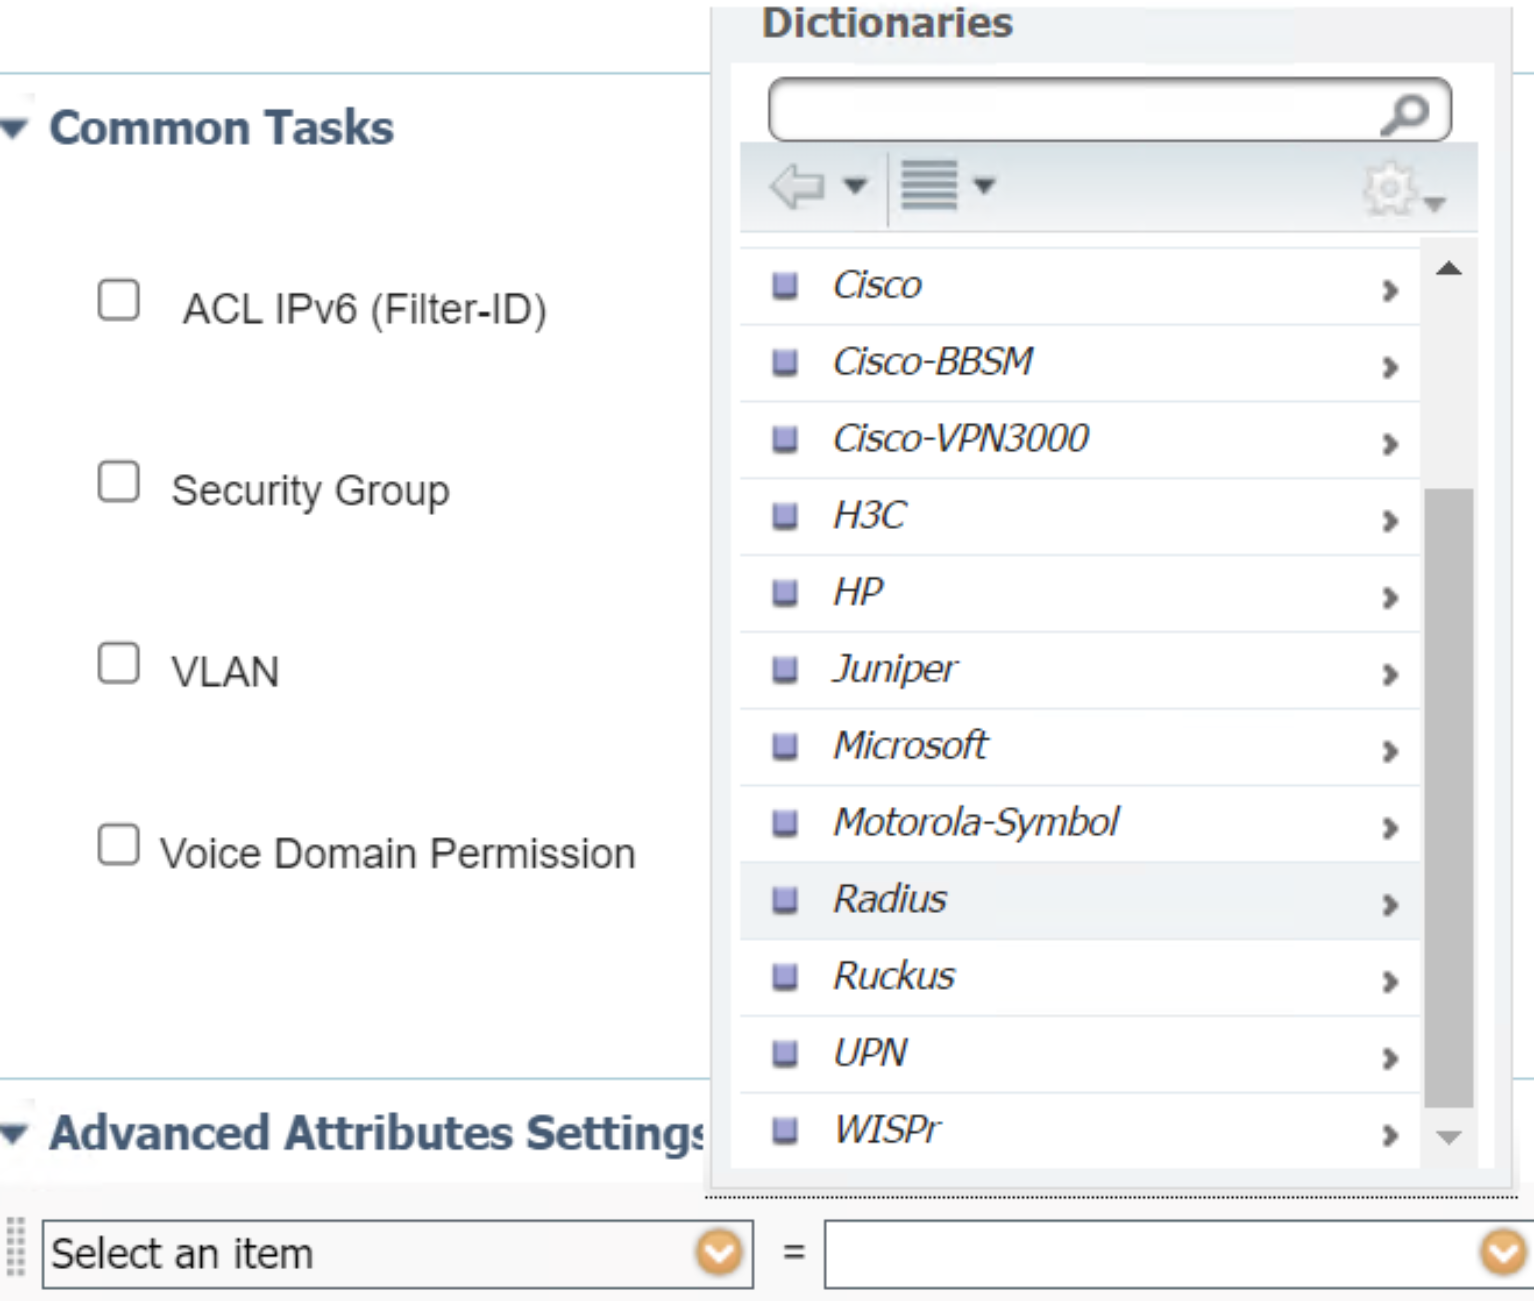
Figure 60. List of Dictionaries
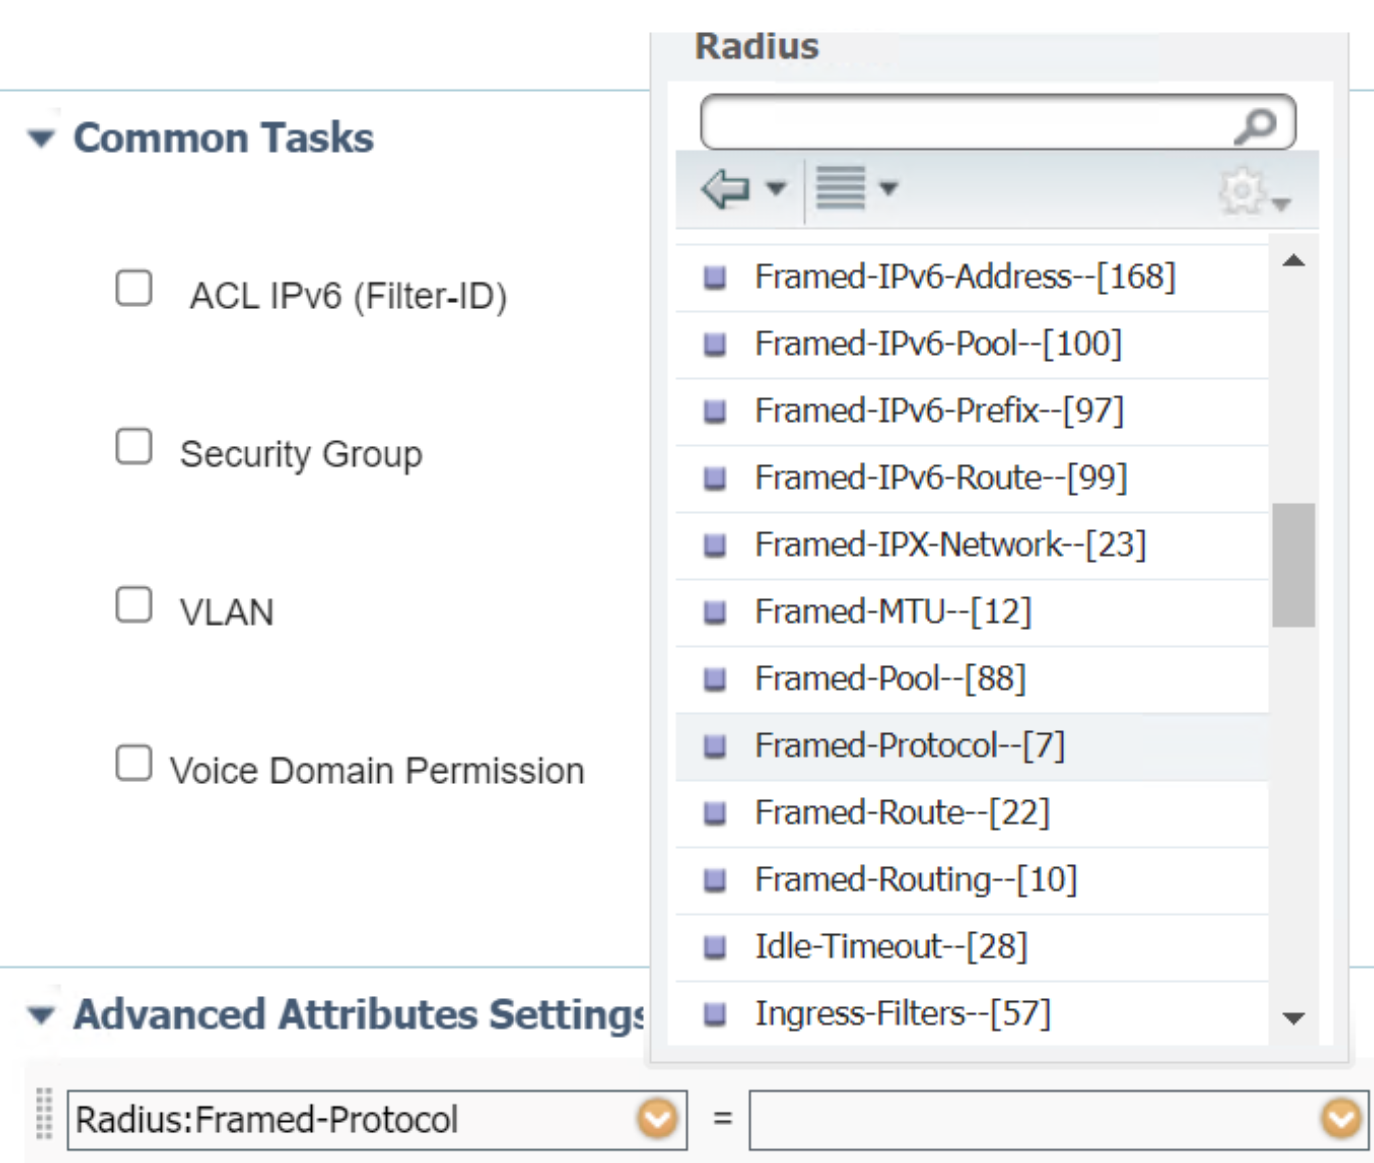
Figure 61. List of Attributes in RADIUS Dictionary
Select an attribute to close the list use the caret to expand the attribute text field on the right side to view eligible values for this attribute.
Figure 62. List of Attributes in RADIUS Dictionary
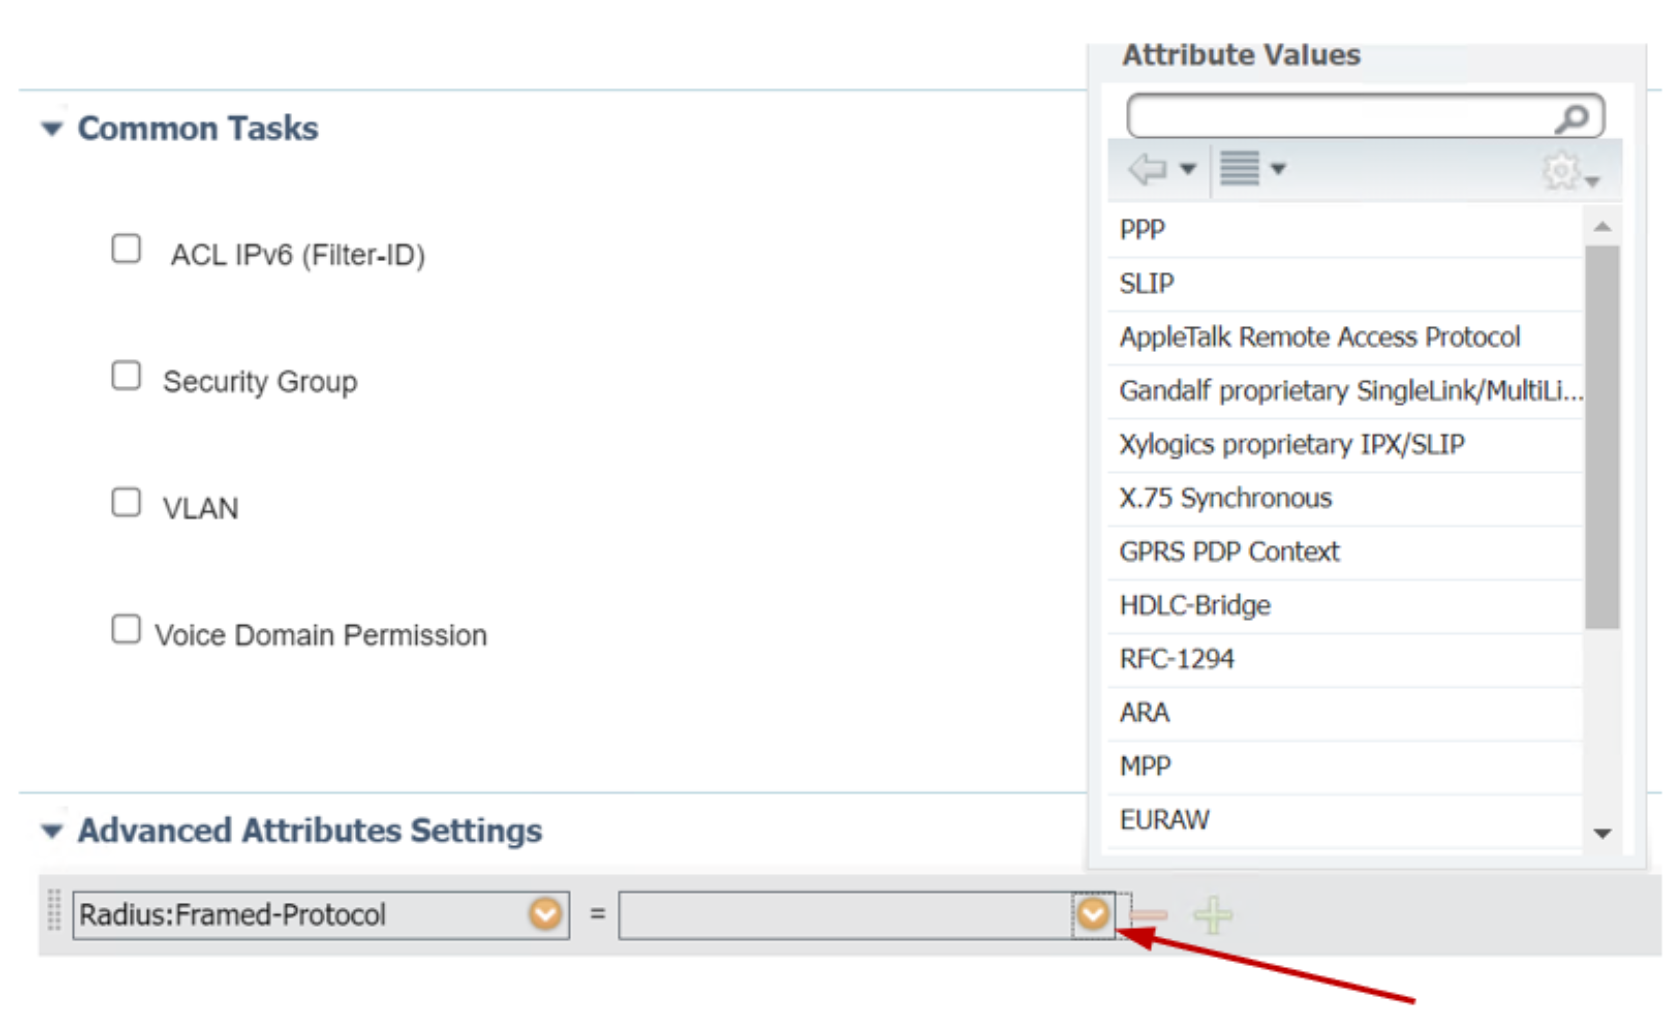
- Select and click one value to close the list and click + to add more attributes. Click - to delete the attribute.

Figure 63. Add or delete an attribute
- Once the fields are complete, click Submit to save the profile.
Downloadable ACLs
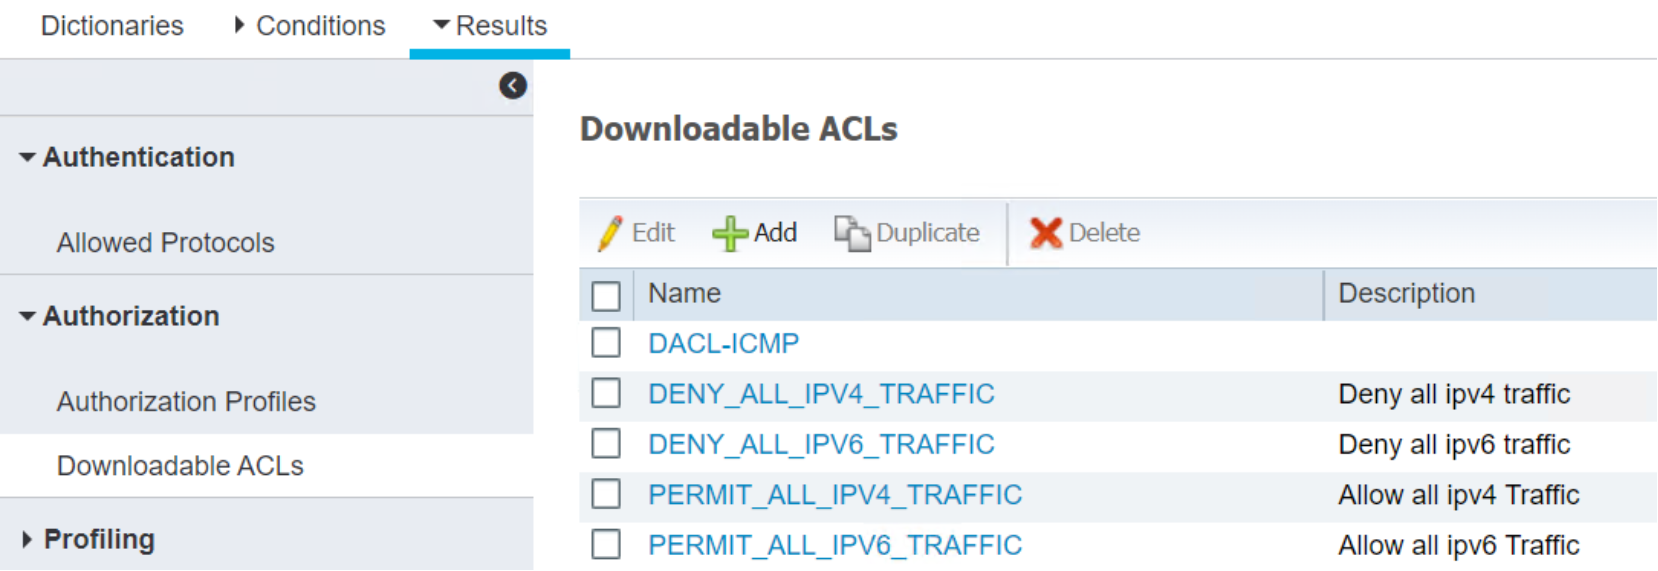 Use the same procedures for Authorization Profiles to edit or create new downloadable ACLS.
Figure 64.
 List of downloadable ACLs in Policy Results
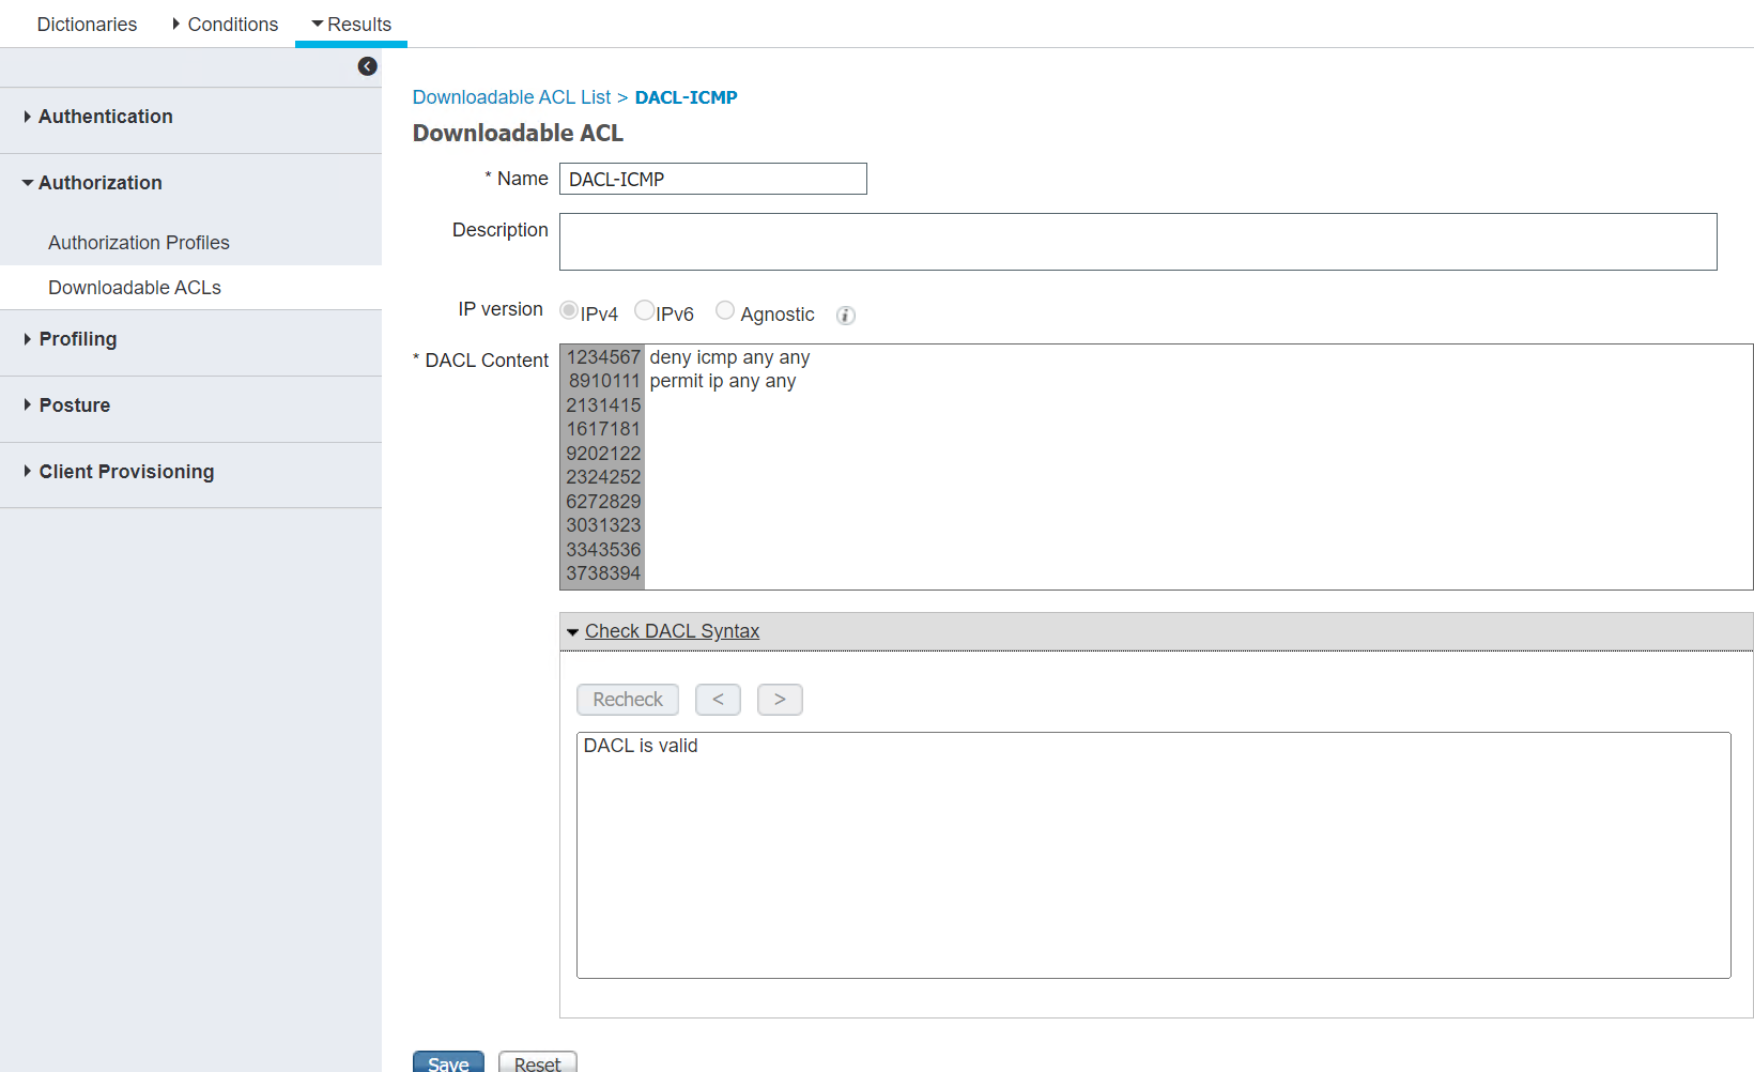
Figure 65. Detail of a downloadable ACL
Endpoint profiling policies
Cisco ISE includes predefined default profiling policies, and their hierarchical construction allows you to categorize identified endpoints on your network and assign them to a matching endpoint identity group.
The Profiling Policies page displays endpoint profiling policies with their names, type, description, and status. The endpoint profiling policy types are classified as:
Cisco Provided: —Endpoint profiling policies that are predefined in Cisco ISE are identified as the Cisco Provided type.
User Created: —Endpoint profiling policies that users create or duplicate Cisco-provided endpoint profiling policies are identified as the Administrator Created type.
Users should create a generic policy (a parent) for a set of endpoints from which its children can inherit the rules and conditions. If an endpoint must be classified, then the endpoint profile must first match the parent, and then its descendant (child) policies when you are profiling an endpoint. For example, Dell-Device is a generic endpoint profiling policy for all Dell devices.
Navigate existing profiling policies
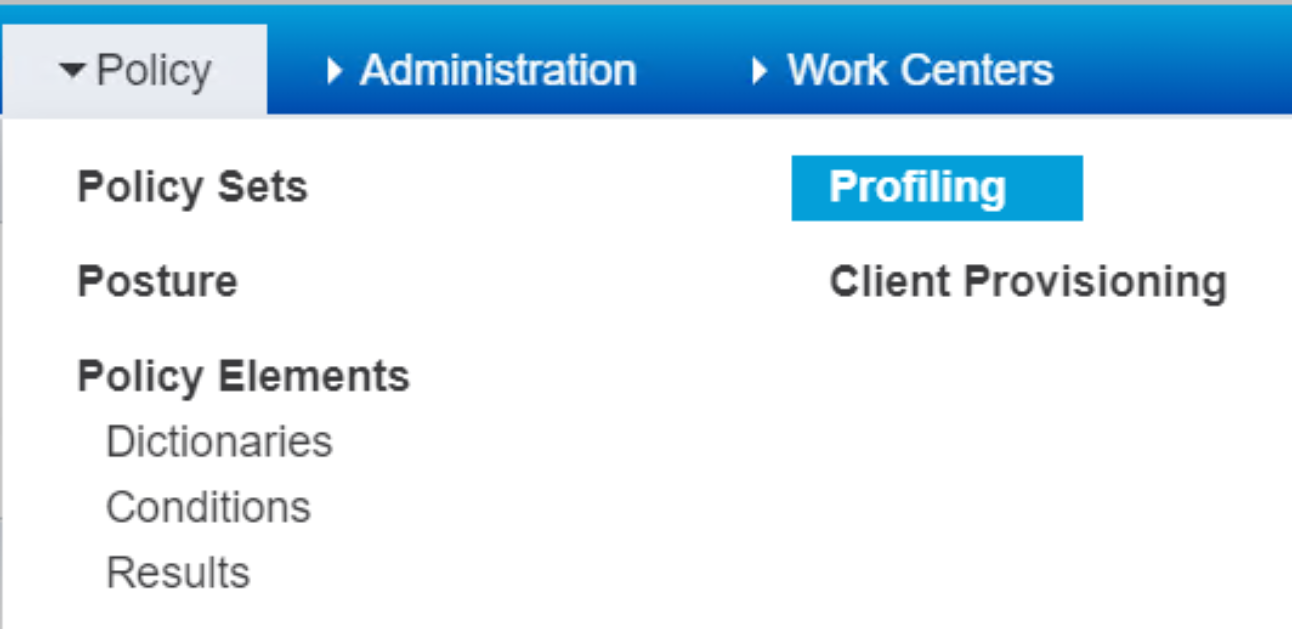
Go to Policy > Profiling to view a complete list of endpoint profiling policies.
Figure 66. Drop down menu for Profiling Policies
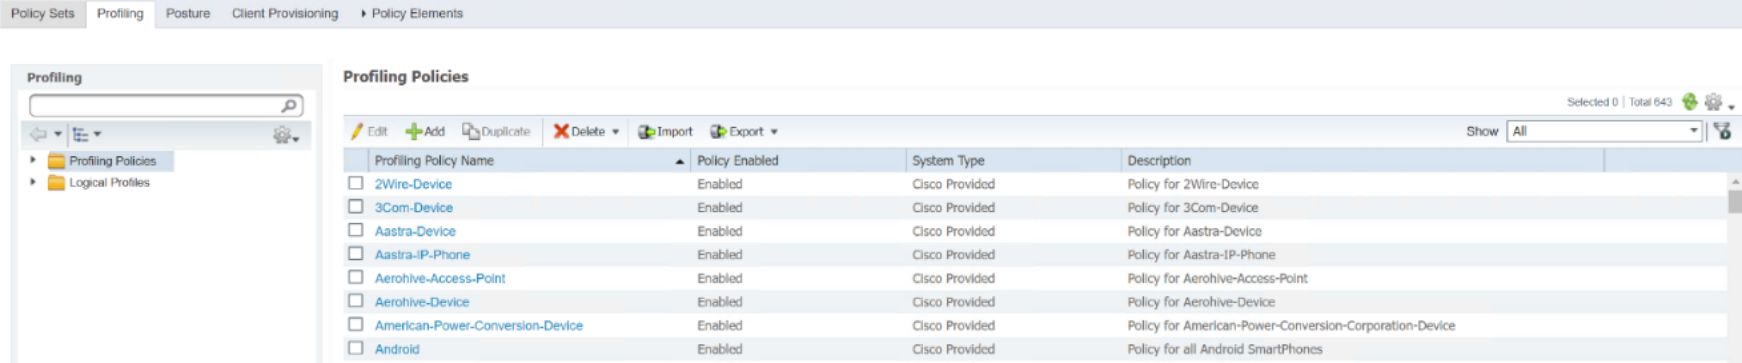
Figure 67. List of Profiling Policies
- Type Dell in the left side search bar and hit Enter.
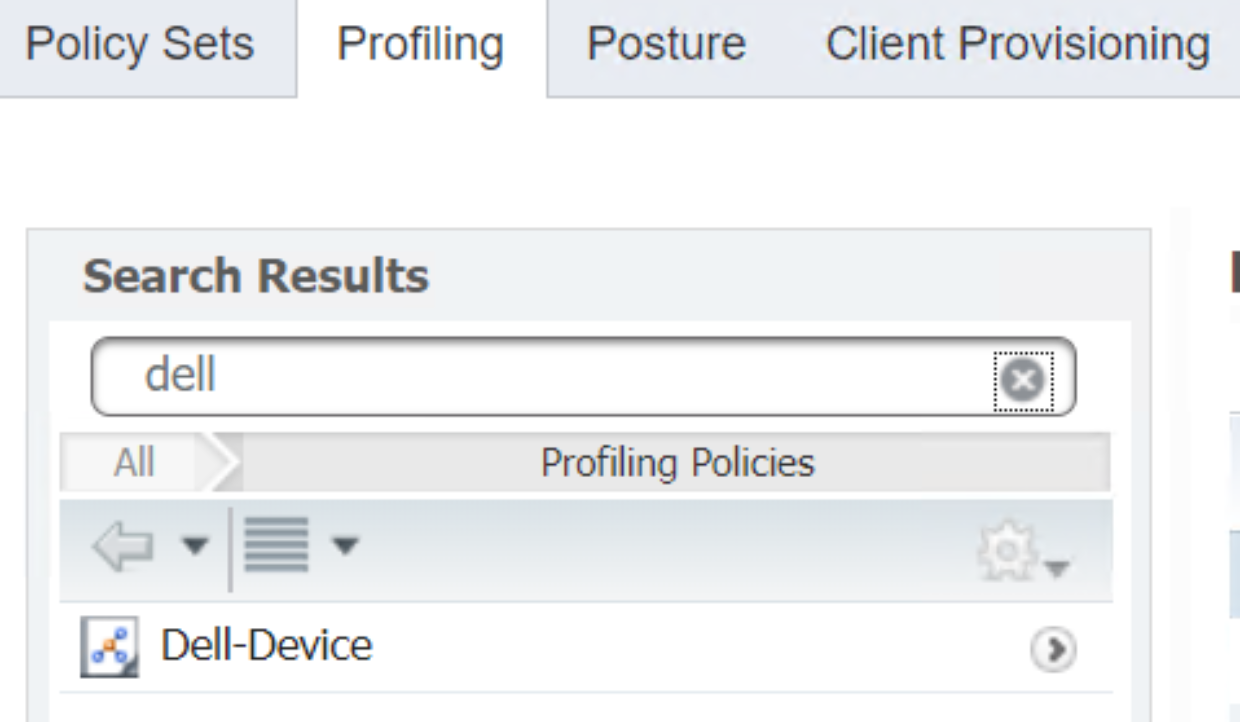
Figure 68. Search a policy by name
- Dell-Device profiling policy appears.Click the policy name text to view the policy.
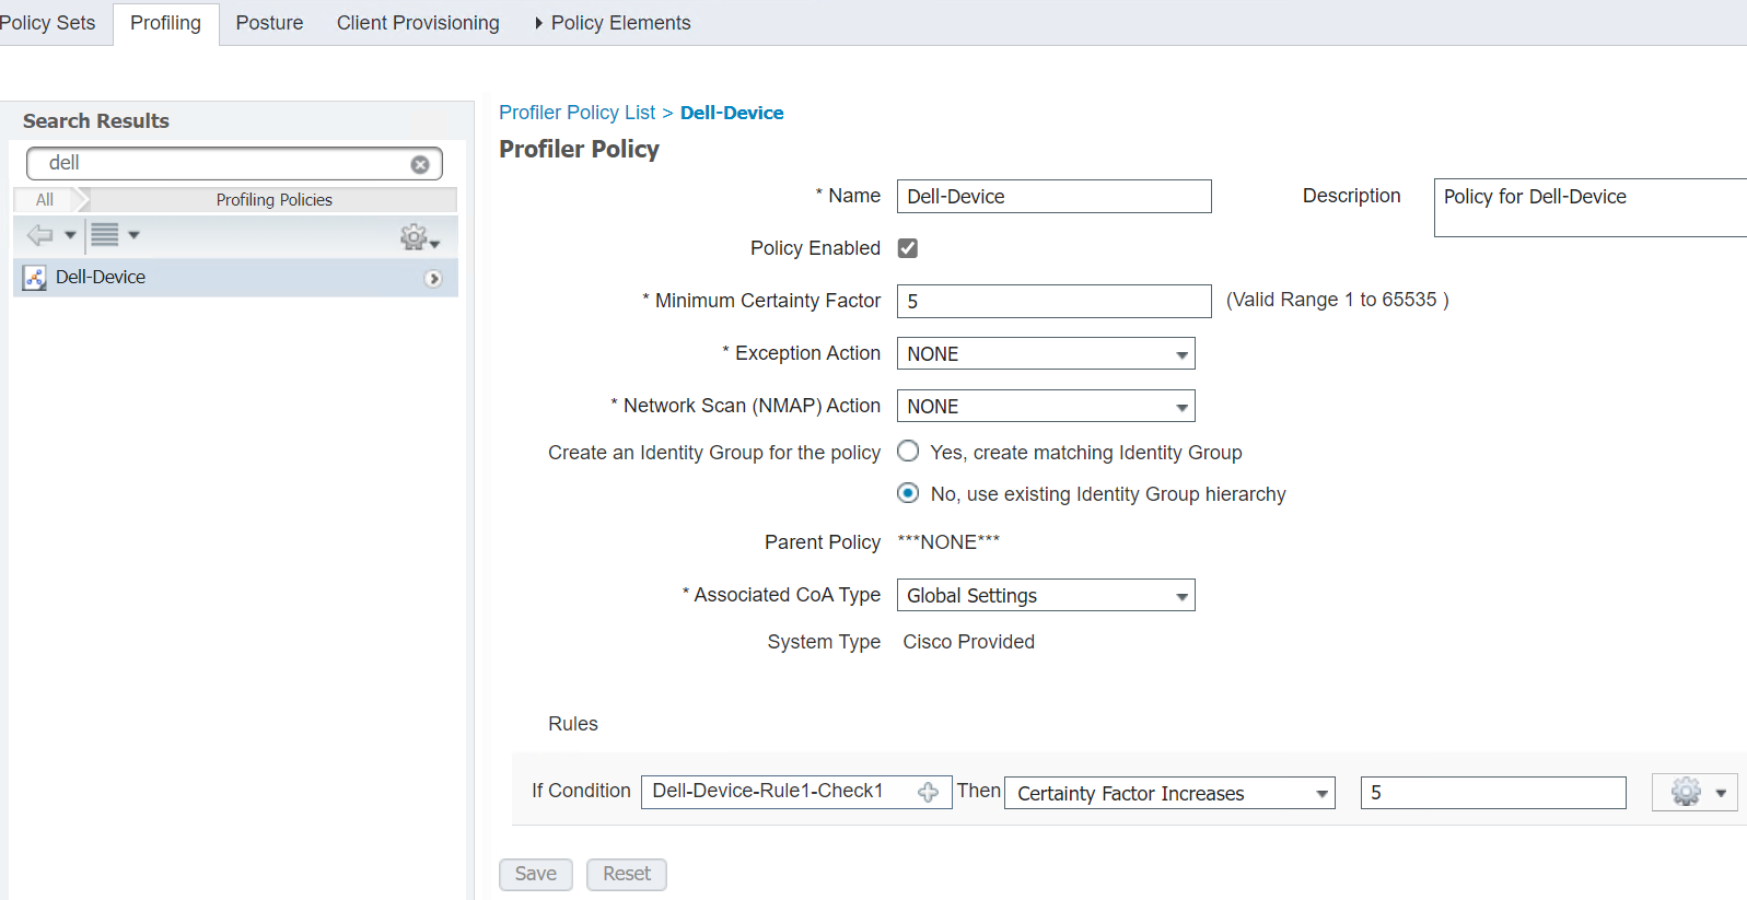
Figure 69. Detail of a Profiling Policy
- Click + in the Rules text field to view the detail description of the rule.

Figure 70. Instant display of a rule description in profiling policy
This rule defines using endpoint MAC address OUI (Organizational Unique Identifier) code to classify them as Dell devices. When an EAPOL/RADIUS access request reaches the RADIUS server (Cisco ISE), ISE automatically classifies the endpoints through profiling policies and categorizes it as a Dell device if the MAC address OUI field has Dell name.
Modify an existing profiling policy
 Click the gear icon opens a drop down menu with to add more rules or delete a rule.
Figure 71. Pulldown Menu to add/delete Rule in Profiling Policy
- Once the modification is complete, click Save.
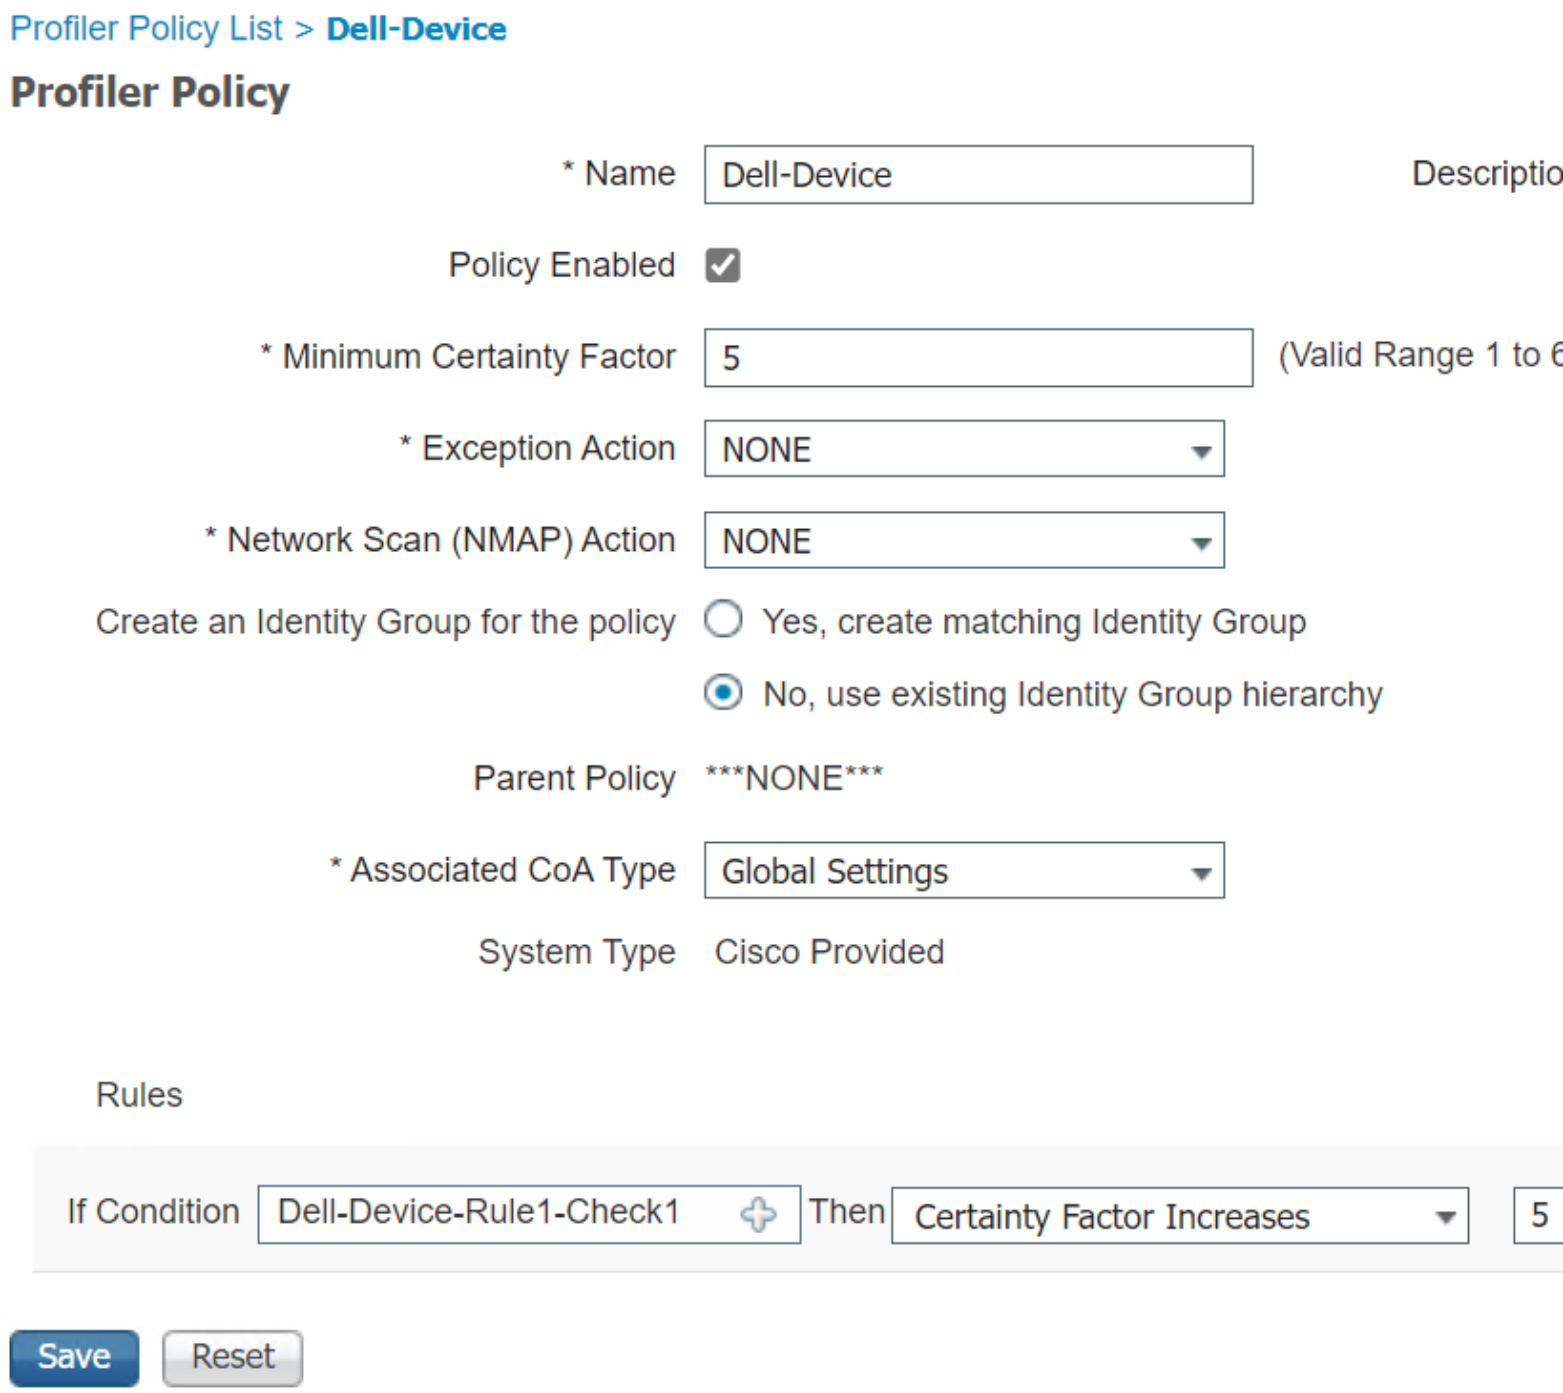
Figure 72. Save a modified profiling policy
Create a new Profiling Policy
- Click +Add to view a new profiling policy page.
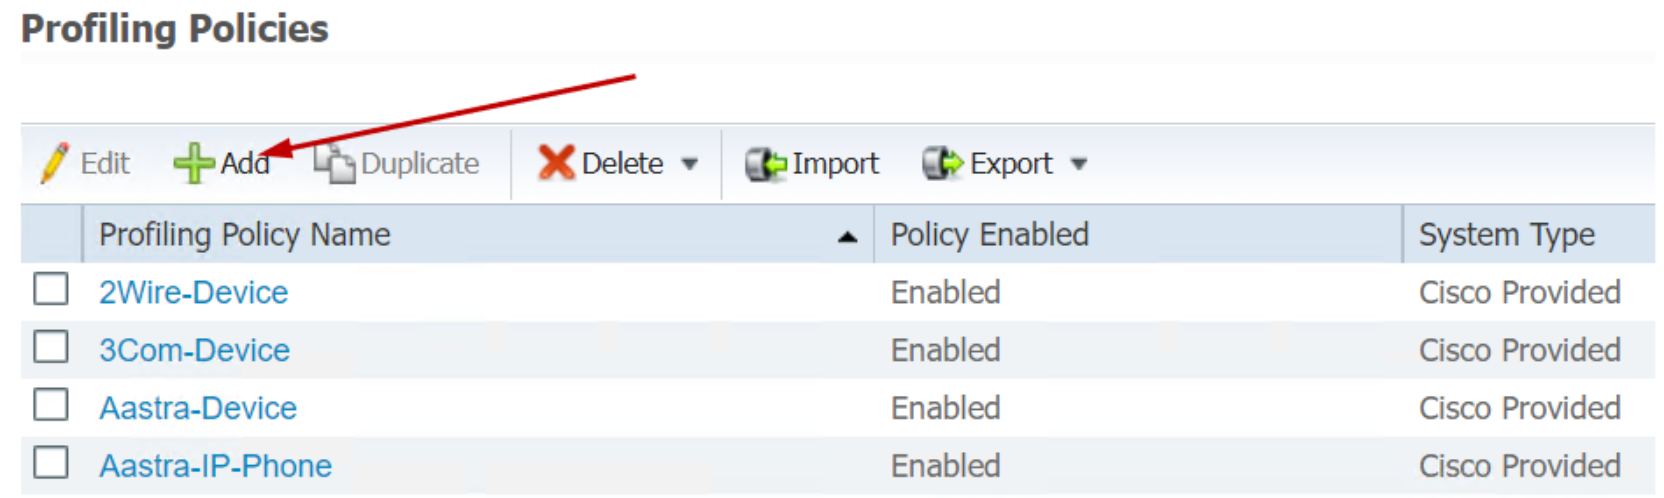
Figure 73. Add a new Profiling Policy
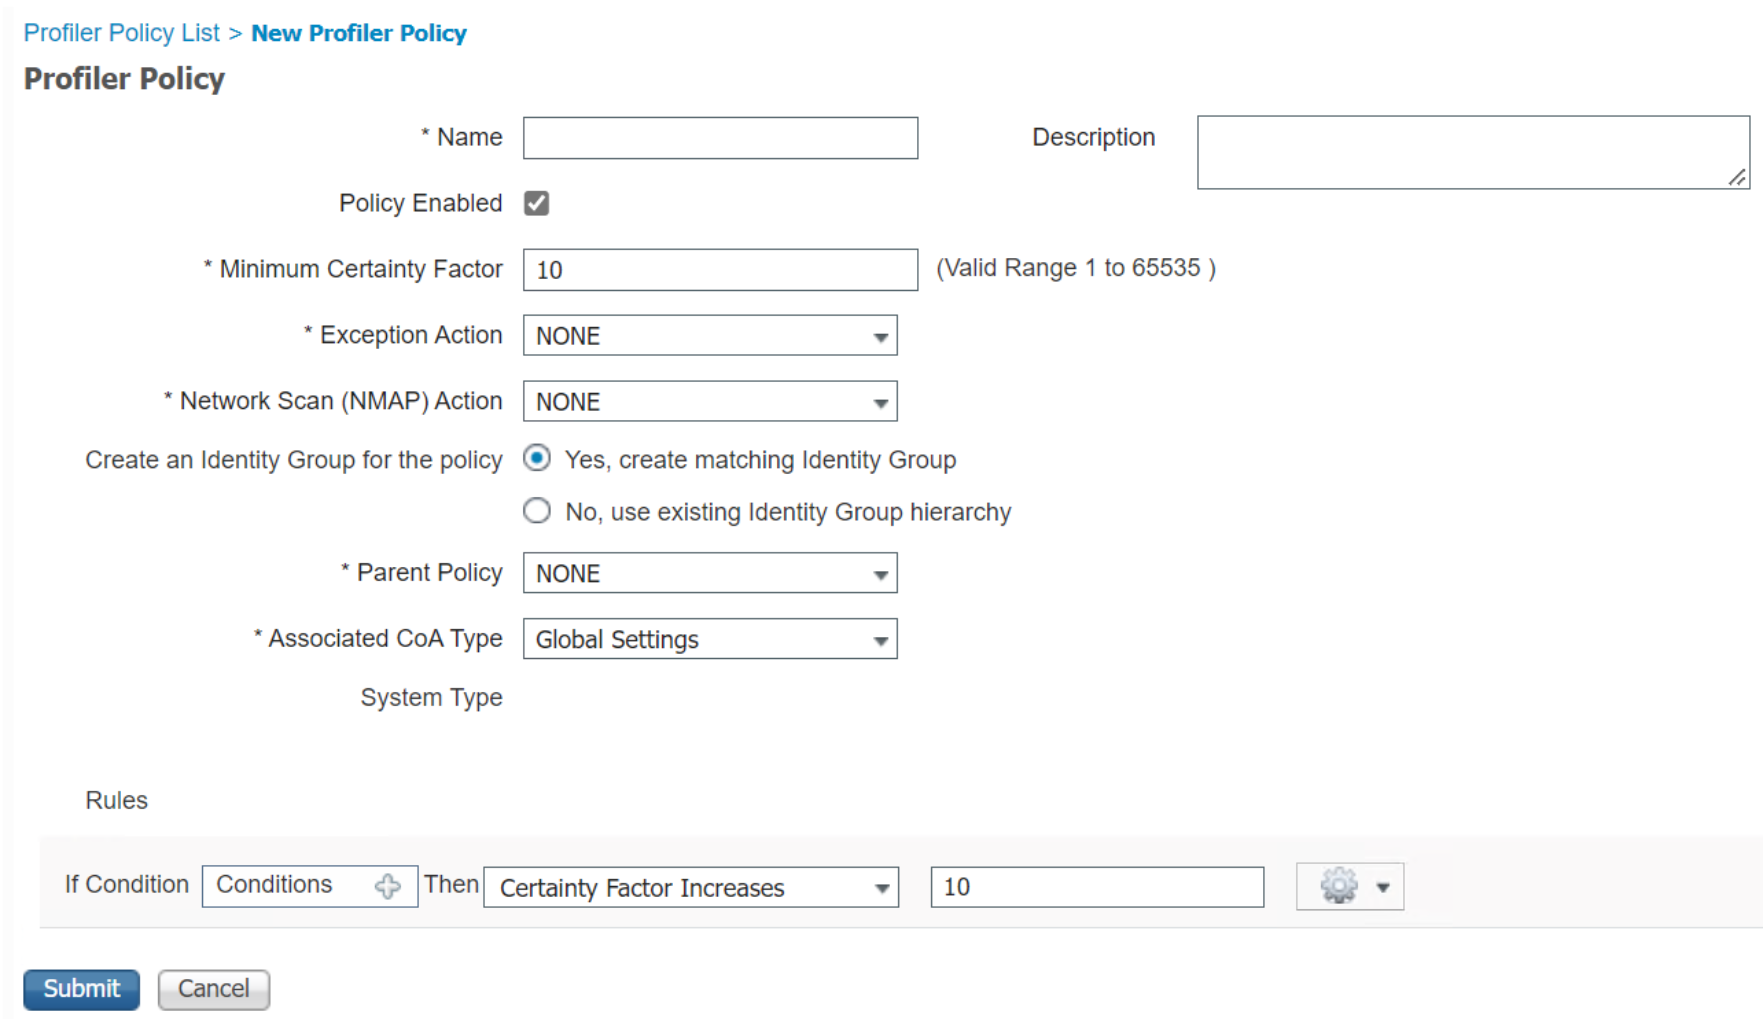
Figure 74. New Profiling Policy Page