
Policy Sets
Policy Sets
-
Overview
Policy sets in Cisco ISE can be configured with conditions and results to choose the network access services on the policy set level, the identity sources on the authentication policy level, and network permissions on the authorization policy levels. Users can define one or more conditions using any of the attributes from the Cisco ISE-supported dictionaries for a variety of different vendors. Cisco ISE allows users create conditions as individual policy elements that can be reused. The network access service can be used per policy set to communicate with the network devices that are defined at the top level of that policy set. Network access services include Allowed Protocols and Server Sequences.
Policy sets are configured hierarchically, where the rule on the top level of the policy set, which can be viewed from the Policy Set table, applies to the entire set and is matched before the rules for the rest of the policies and exceptions. The rules in this set are applied in the following order:
- Authentication policy rules
- Local policy exceptions
- Global policy exceptions
- Authorization policy rules
Main policy sets UI
The main policy UI in Cisco ISE is the place where the list of all the Policy Sets is displayed.
- Click Policy Sets to open the main policy sets UI panel which displays all of the policies defined for endpoints authentication and authorization.
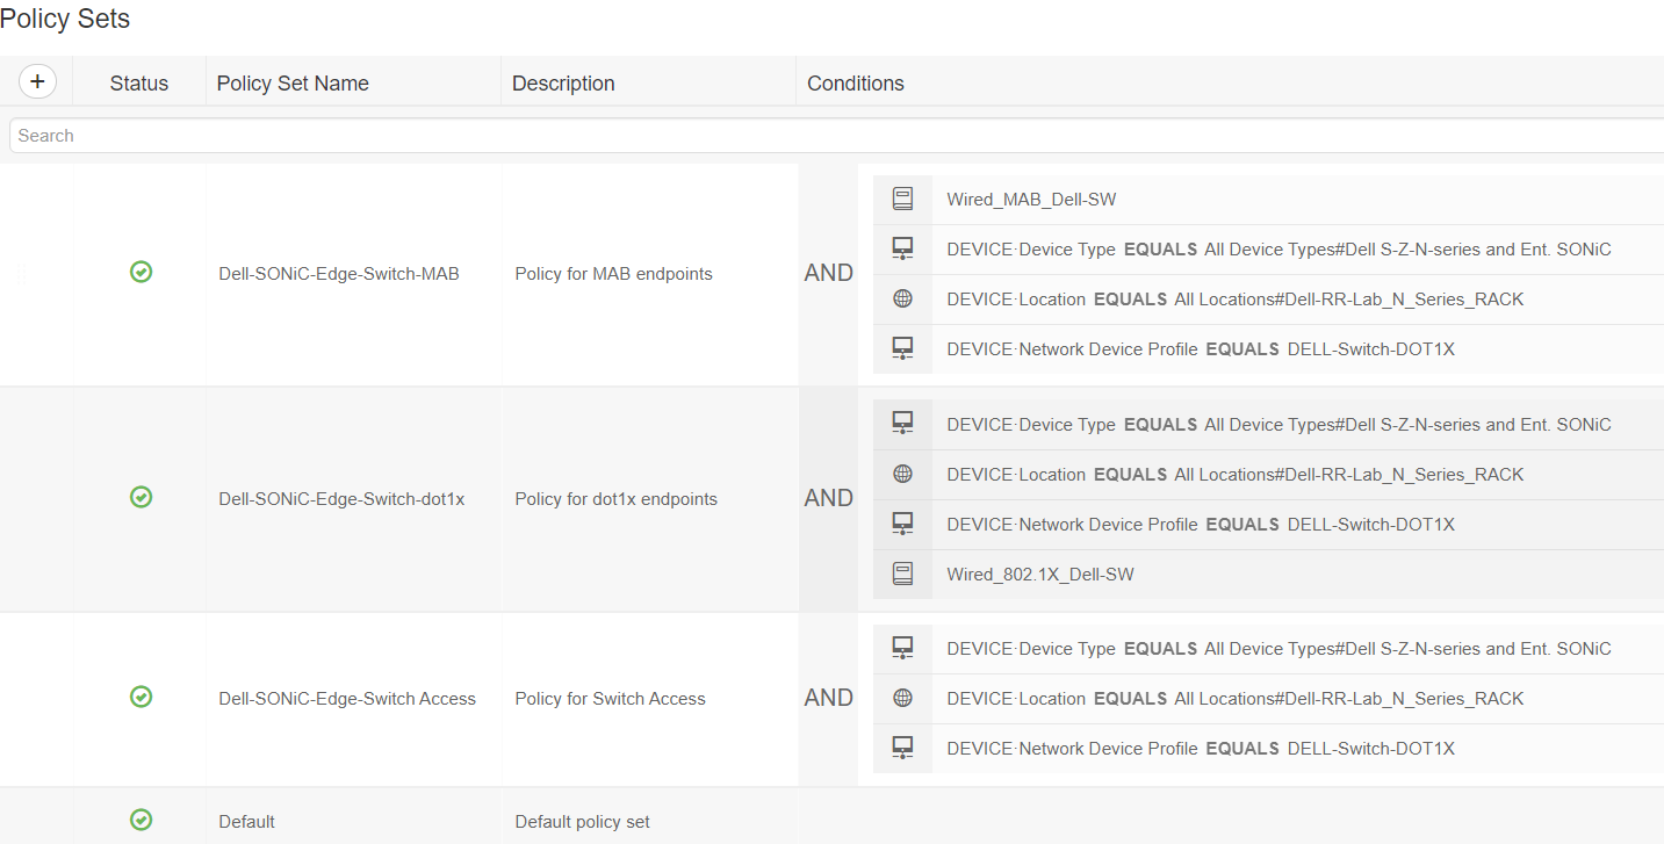 Figure 75. List of Policy Sets in the main policy sets UI panel
ISE applies these policies one by one in the top-down order(policy 1 first, policy 3 last) when a RADIUS access request is received. If the access request matches one of them, it will then get into that policy set for authentication/authorization. If none of them match, it will go to the last one in the bottom, the default policy set which has no rules/conditions defined.
Note: The default policy set listed in the bottom cannot be removed. It is created by Cisco ISE software. If the incoming access request cannot match any of the policy sets listed above the default policy, it will be processed by the Default policy set.
- Click the + to new Policy Set.

Figure 76. Create a new Policy Set
- Click the gear icon on the right side to add or delete conditions in the middle.
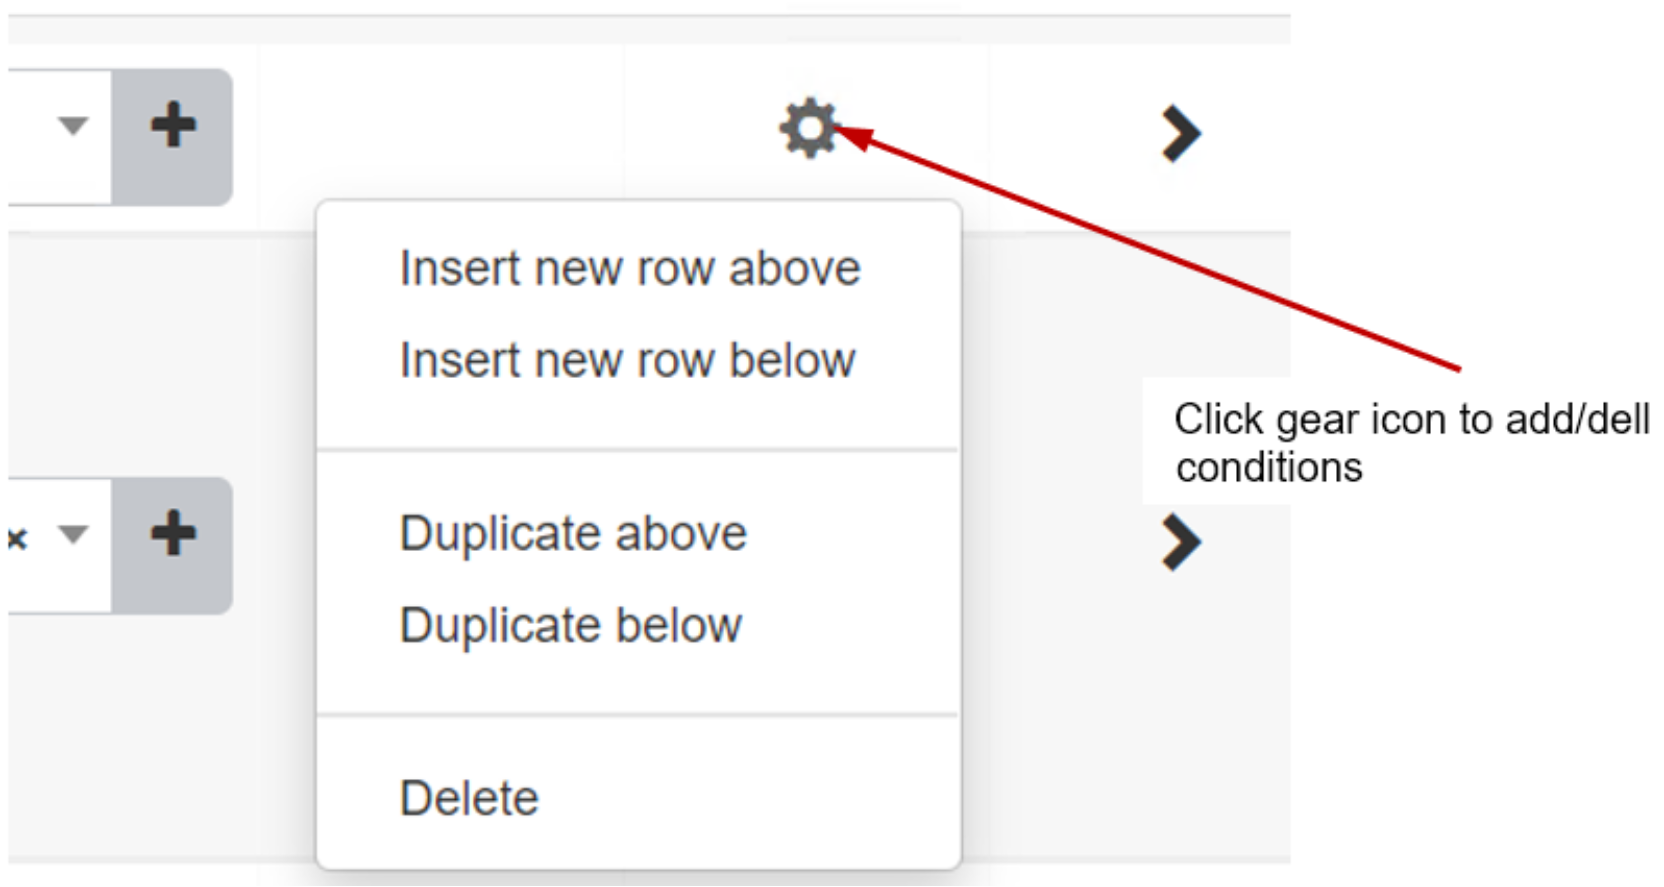
Figure 77. Add or delete a policy condition
- Select the policy set name and description fields to type the new name and description.
 Figure 78. Policy Set Name and description text field
- Click + to add new conditions and view the Conditions Studio.
 Figure 79. Add a new Condition for a Policy Set
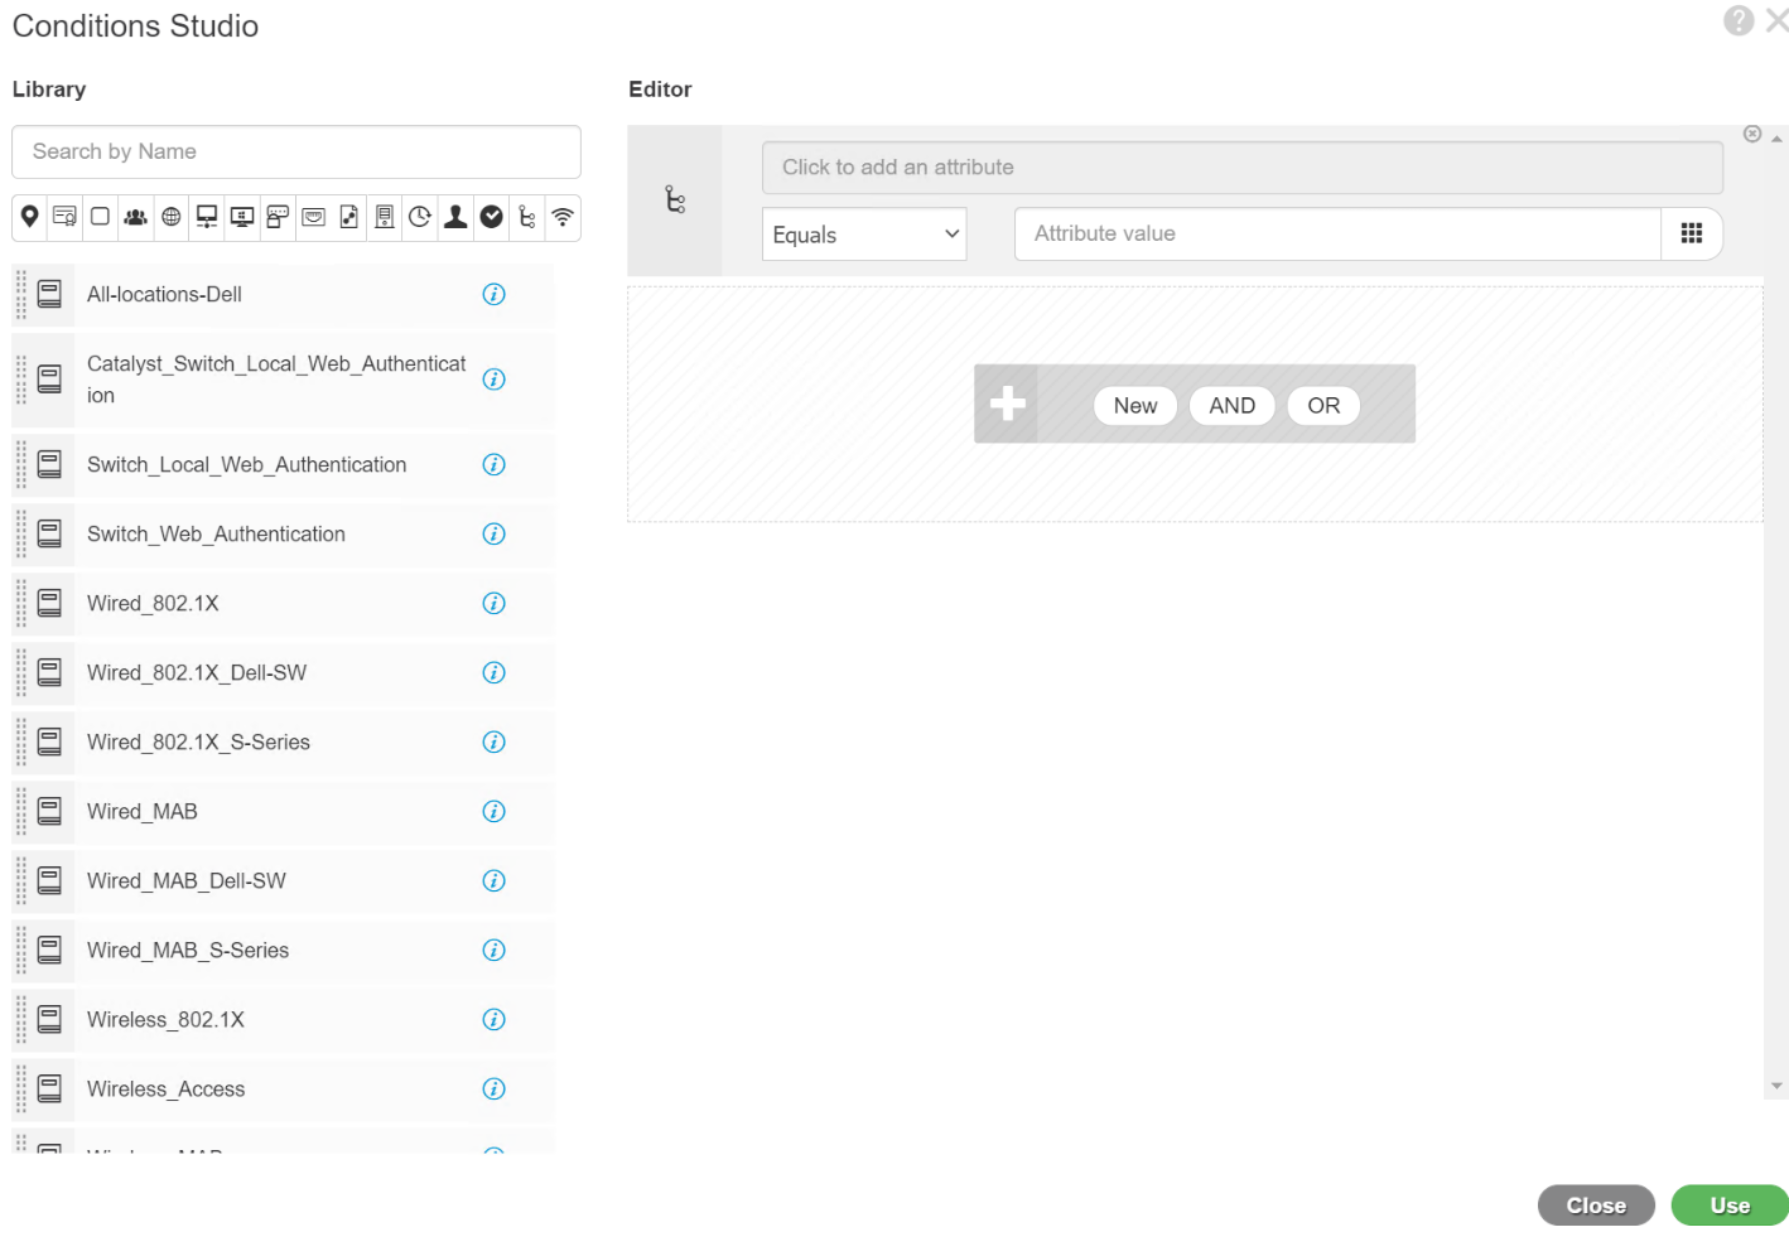
Figure 80. Condition Studio
Edit existing Policy Sets
- Click the middle of the policy rules to view the Conditions Studio editing page.
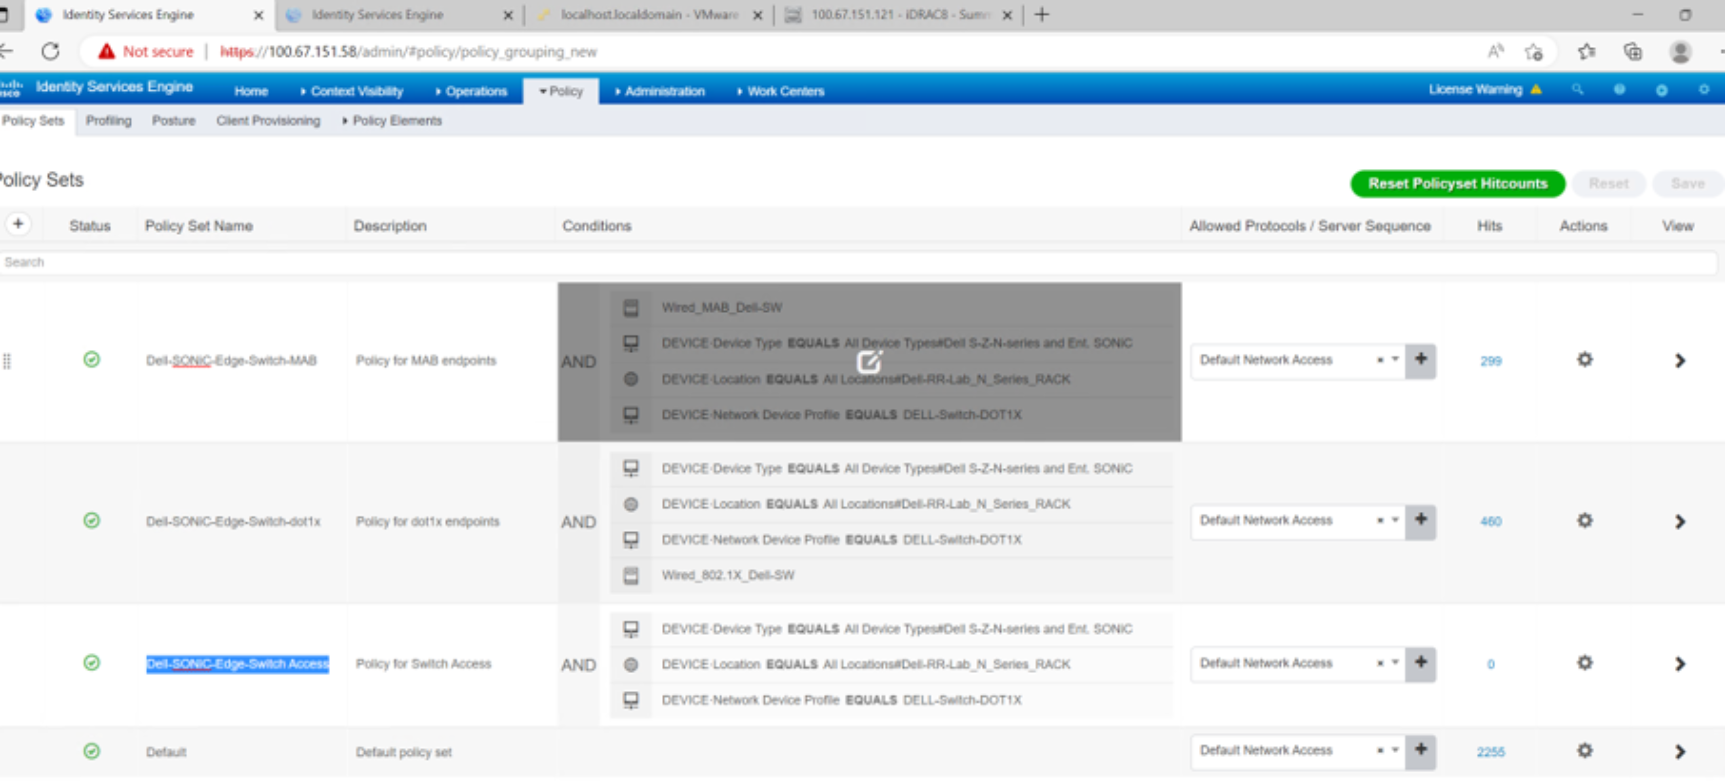 Figure 81. List of Policy Sets
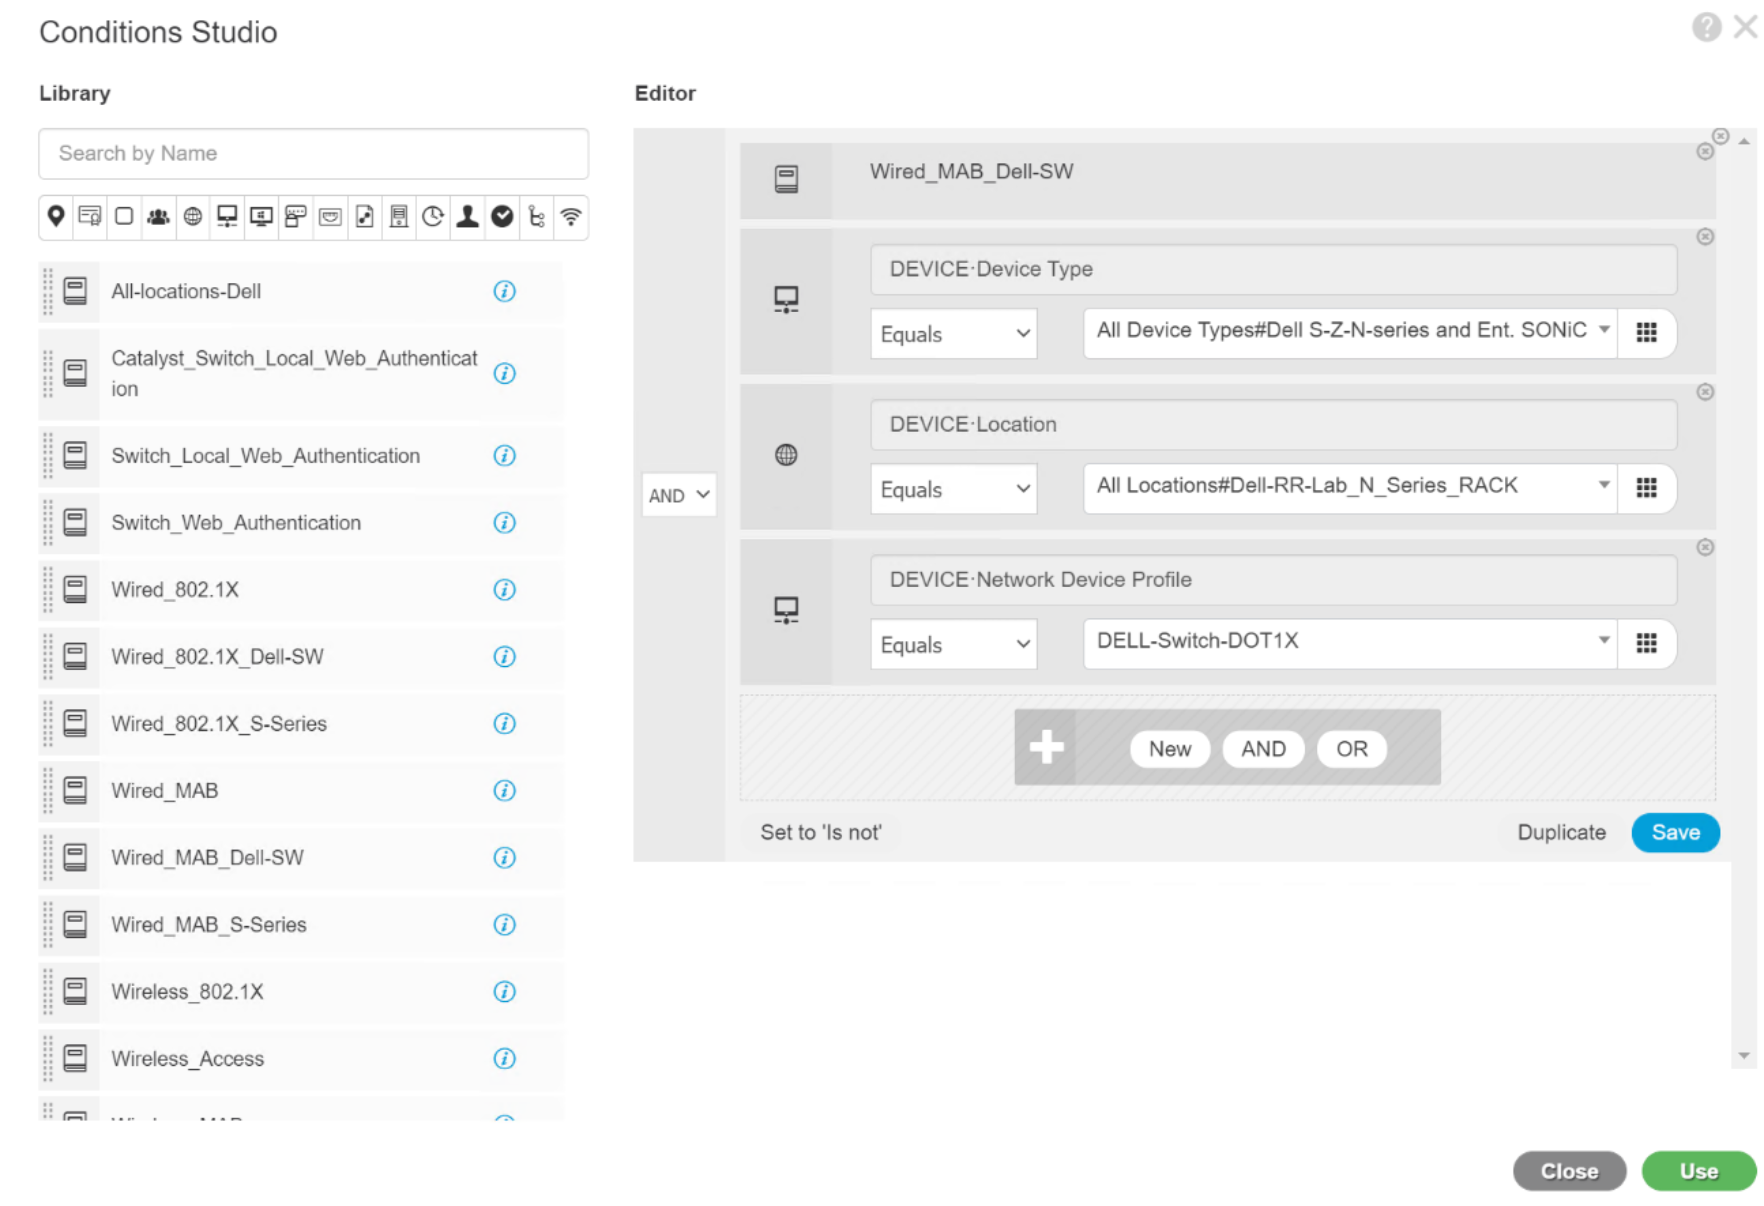
Figure 82. Policy Condition Studio and Editor
On the right side, it lists all four components used in this Dell-SONiC-Edge-Switch-MAB policy and these are,
- One library condition, Wired_MAB_Dell-SW.
- Two network device attributes, network device type and profile.
- One location attribute, Device location.
Note:
- Device location and type are available in Administration> Network Resources > Network Device Groups.
- Device profiles are listed under Administration > Network Resources > Network Device Profiles.
- Library conditions are listed on the left side panel. The complete library conditions are under Policy > Policy Elements > Conditions > Library Conditions.
- The editing page on the right side can be used to change any existing conditions or create a new condition. Use any policy components to open the Duplicate and Edit buttons.

Figure 83. Edit button for a Library Condition
- Click Edit to view the sdaxccondition edit page. Wired_MAB_Dell-SW library condition for the AND logical expression of these two RADIUS attributes, service-type and NAS-Port-Type.
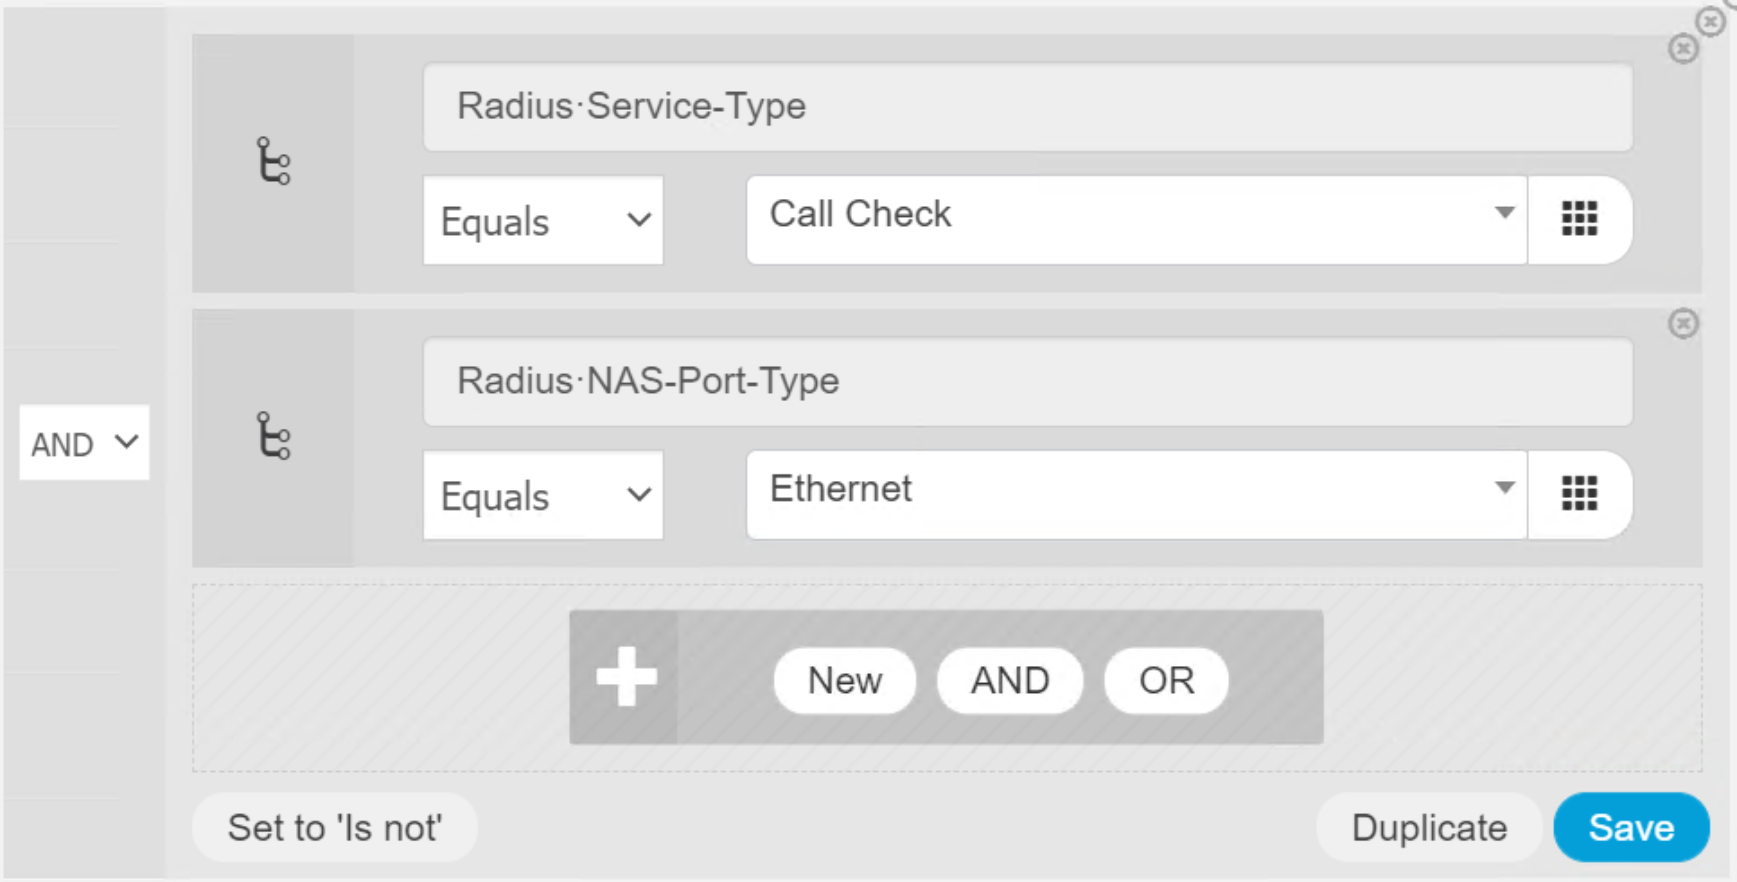 Figure 84. Detail of a Library Condition
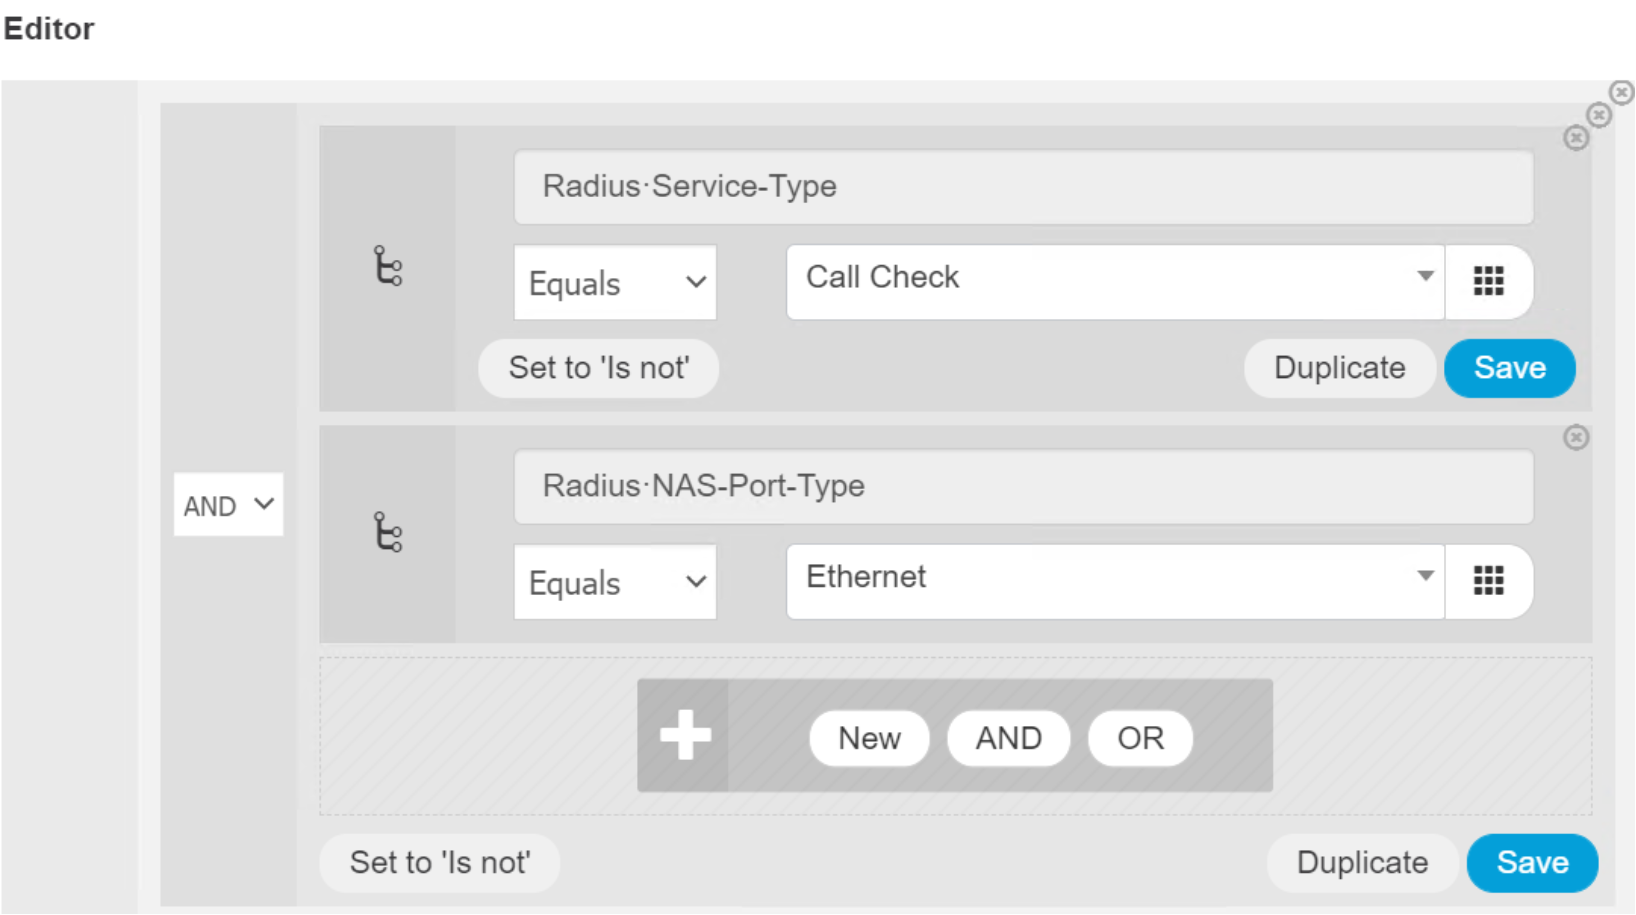
Figure 85. Save button for an attribute panel
- Click the RADIUS attribute text field to open the attribute edit panel.
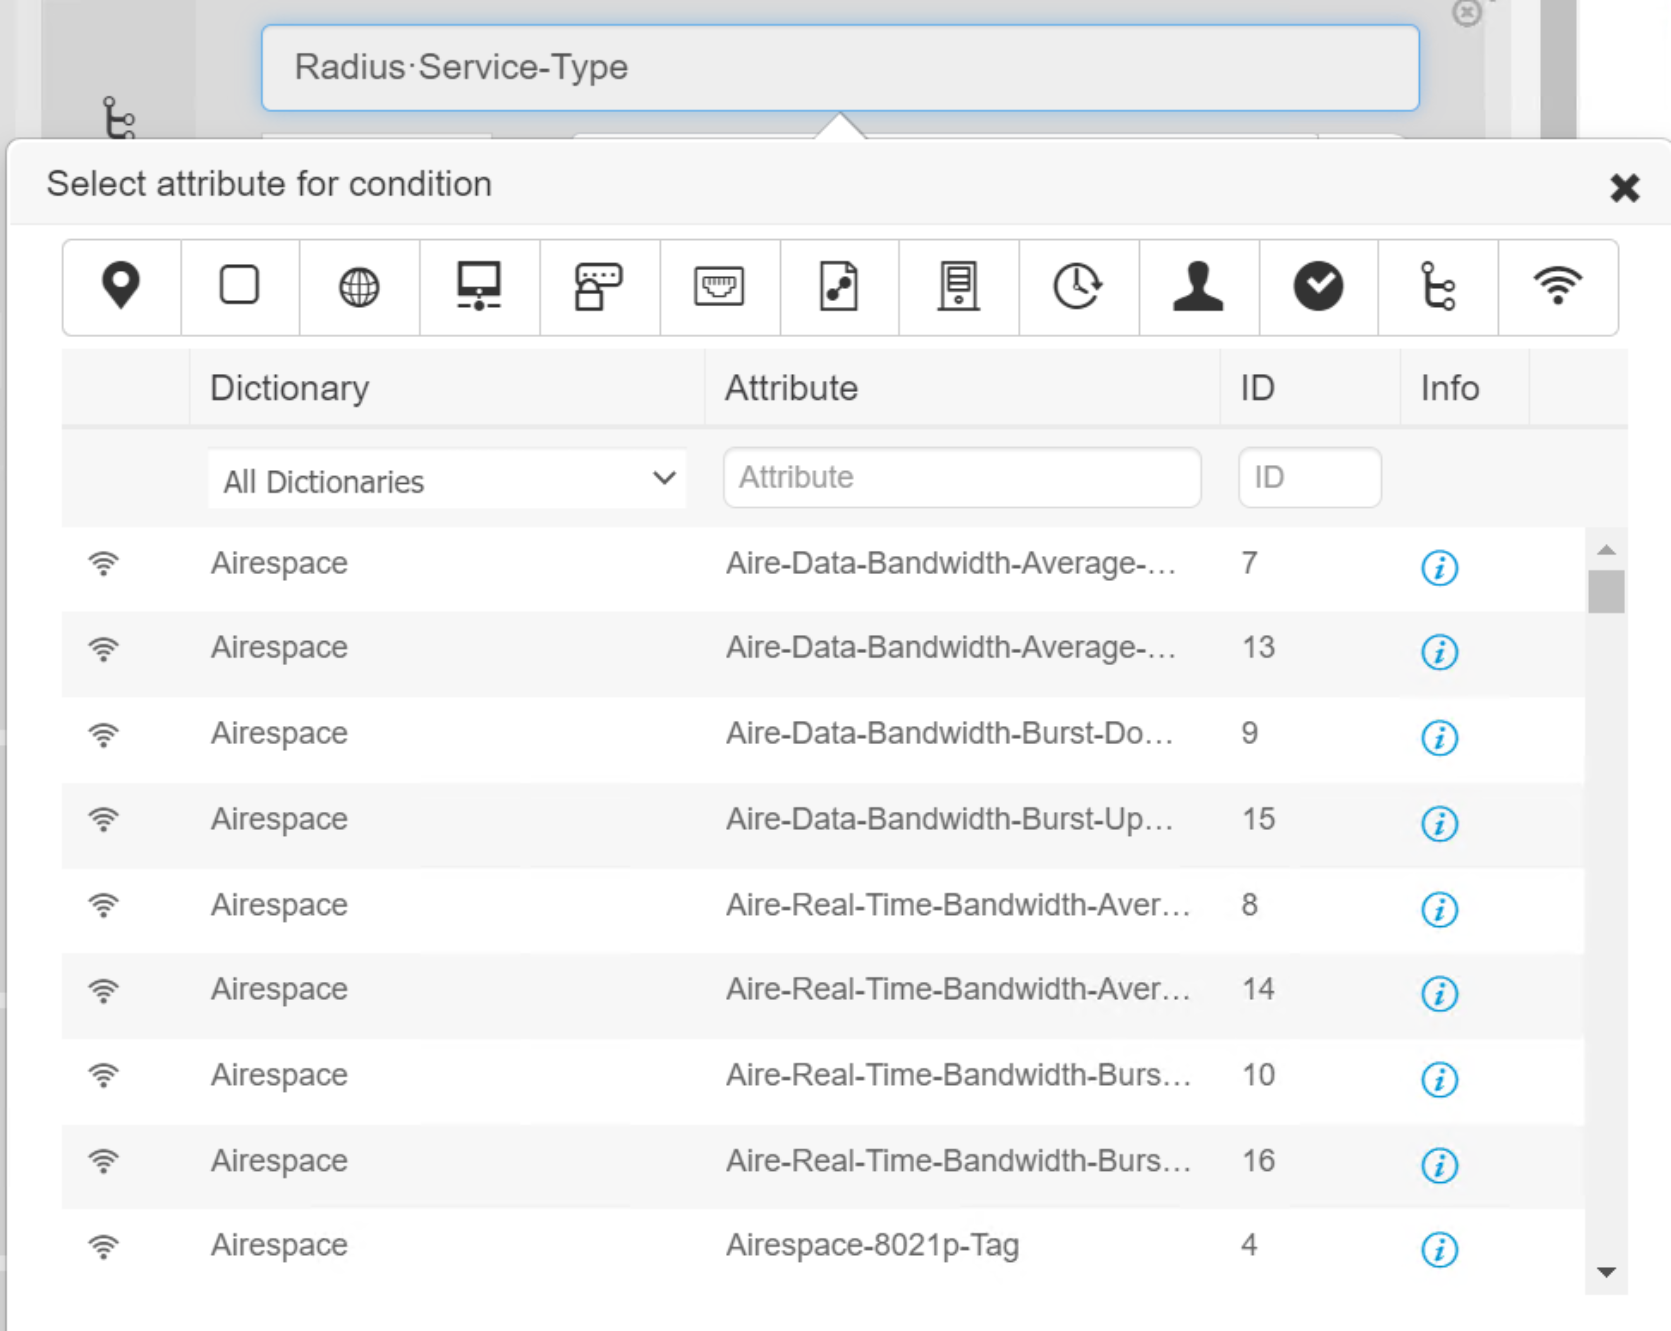
Figure 86. Attribute Dictionary List
- Click an attribute icon to view the attribute name.
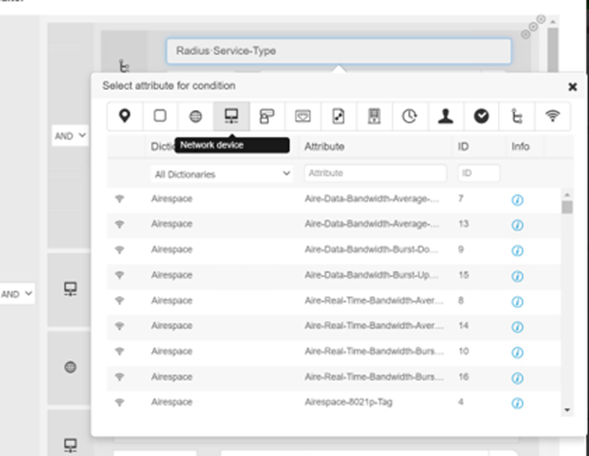
Figure 87. Auto hint for dictionary attribute categories
- Selecting an attribute automatically closes the edit page, fill out the attribute text field with the selected attribute.
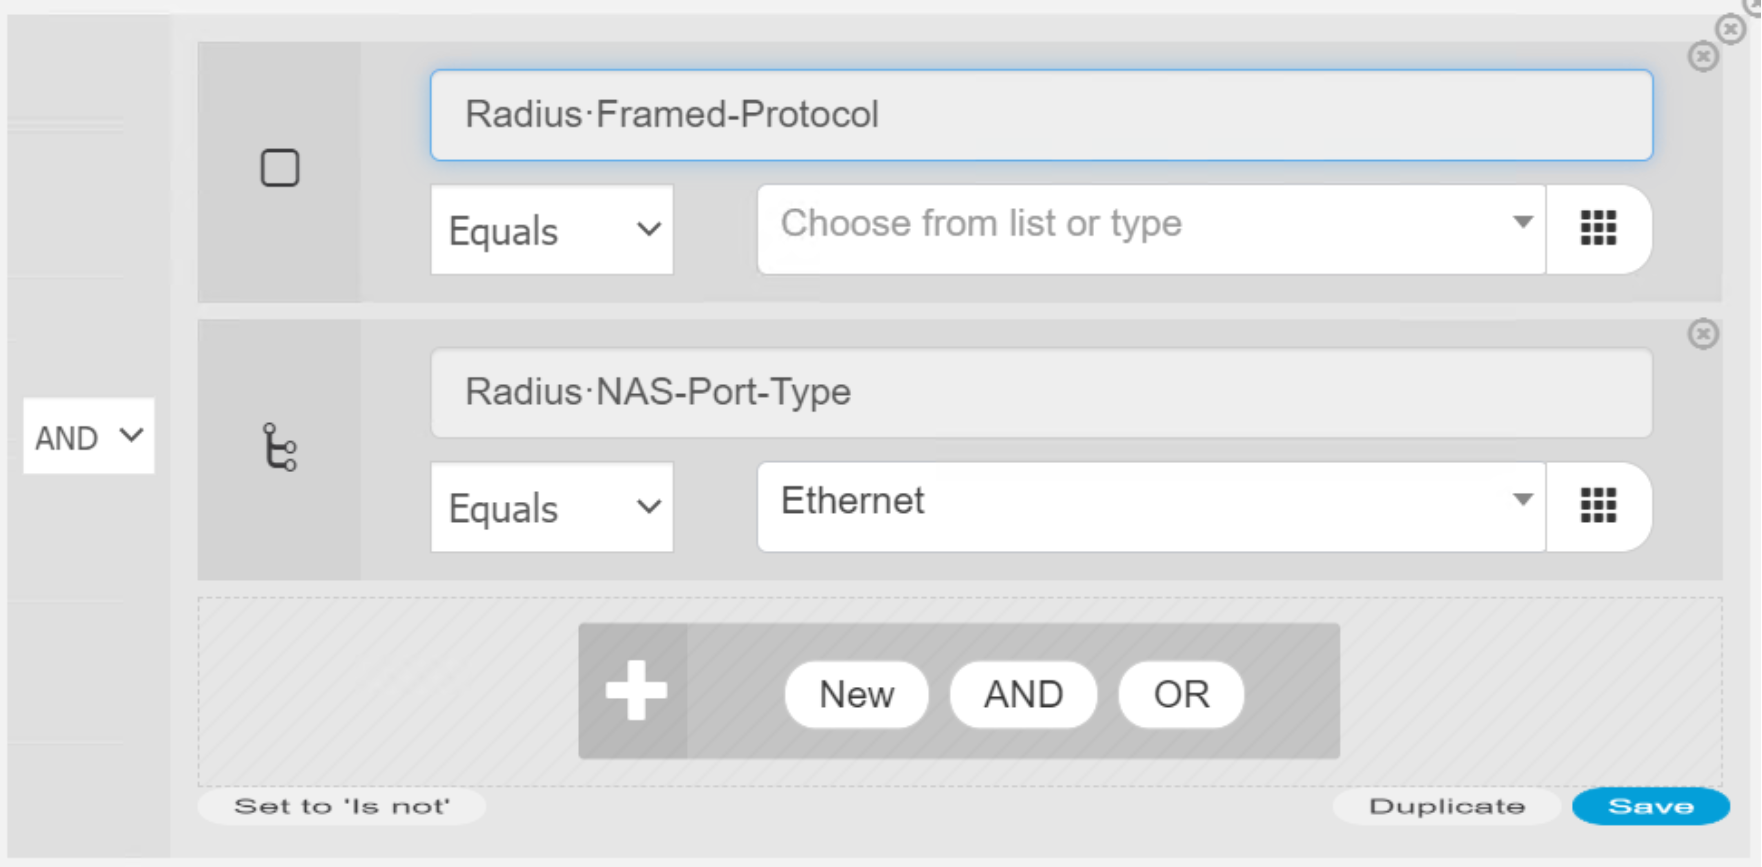 Figure 88. Select an attribute and close the list
- Click Attribute to view all the eligible values in a drop down menu.
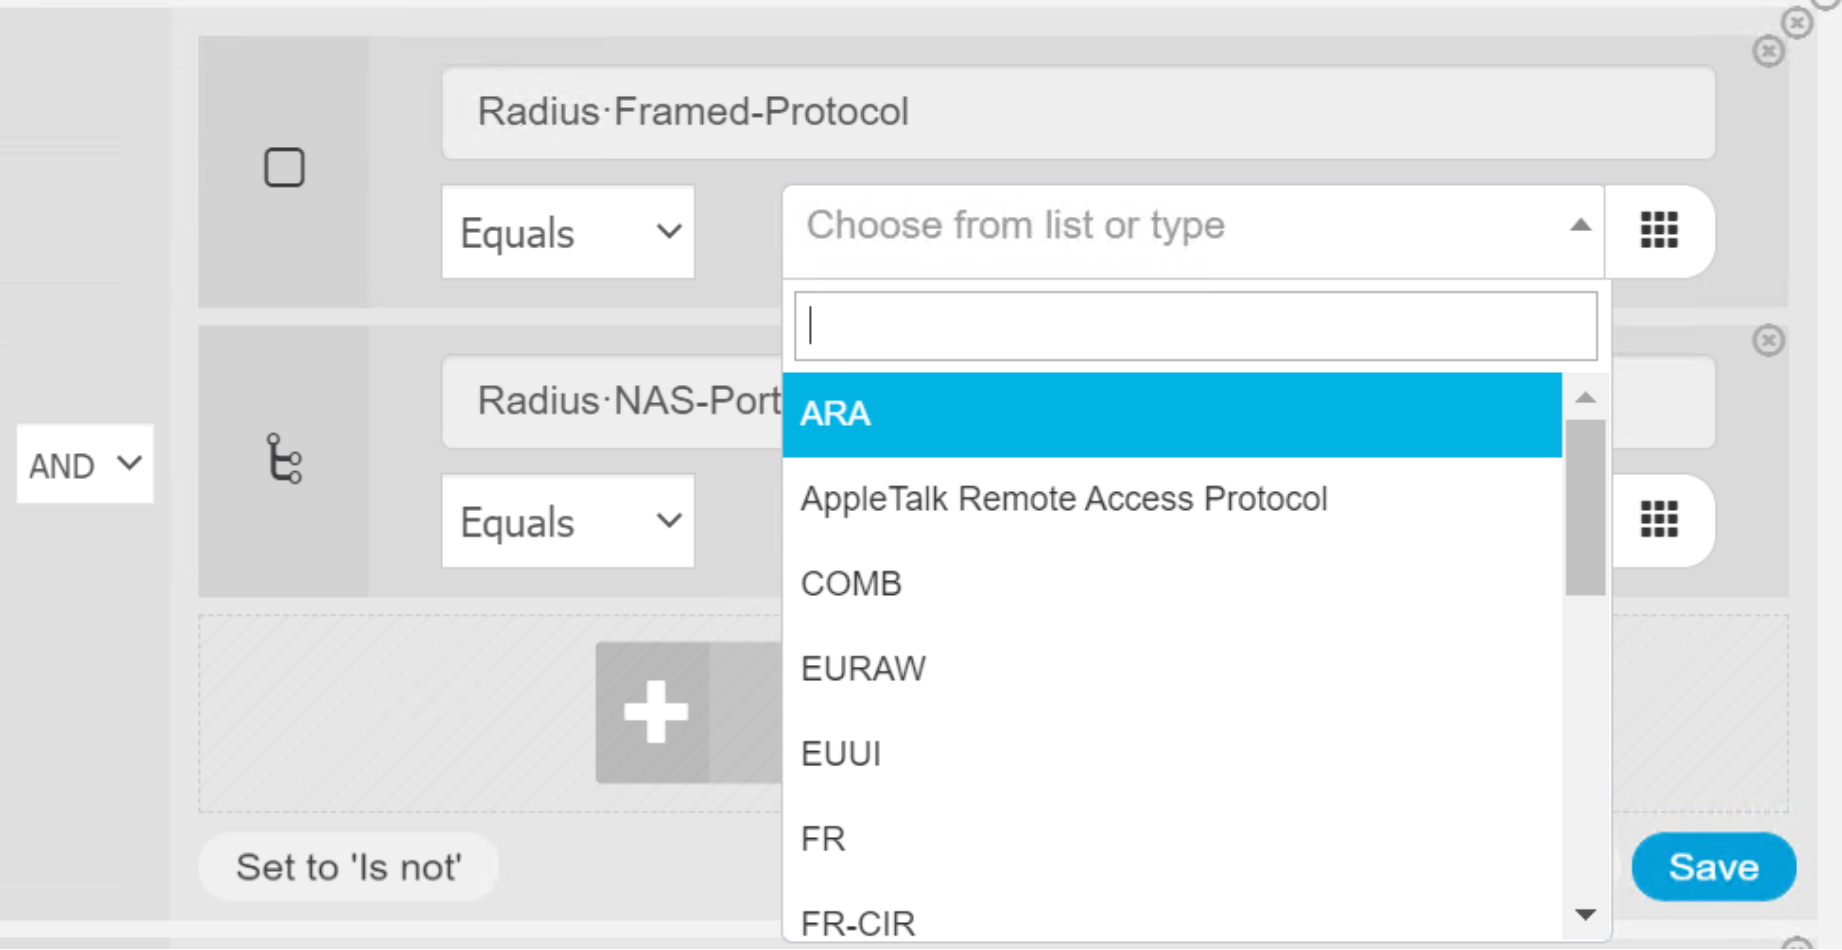
Figure 89. Drop down list for attribute values
- Select a value to close the drop down menu.
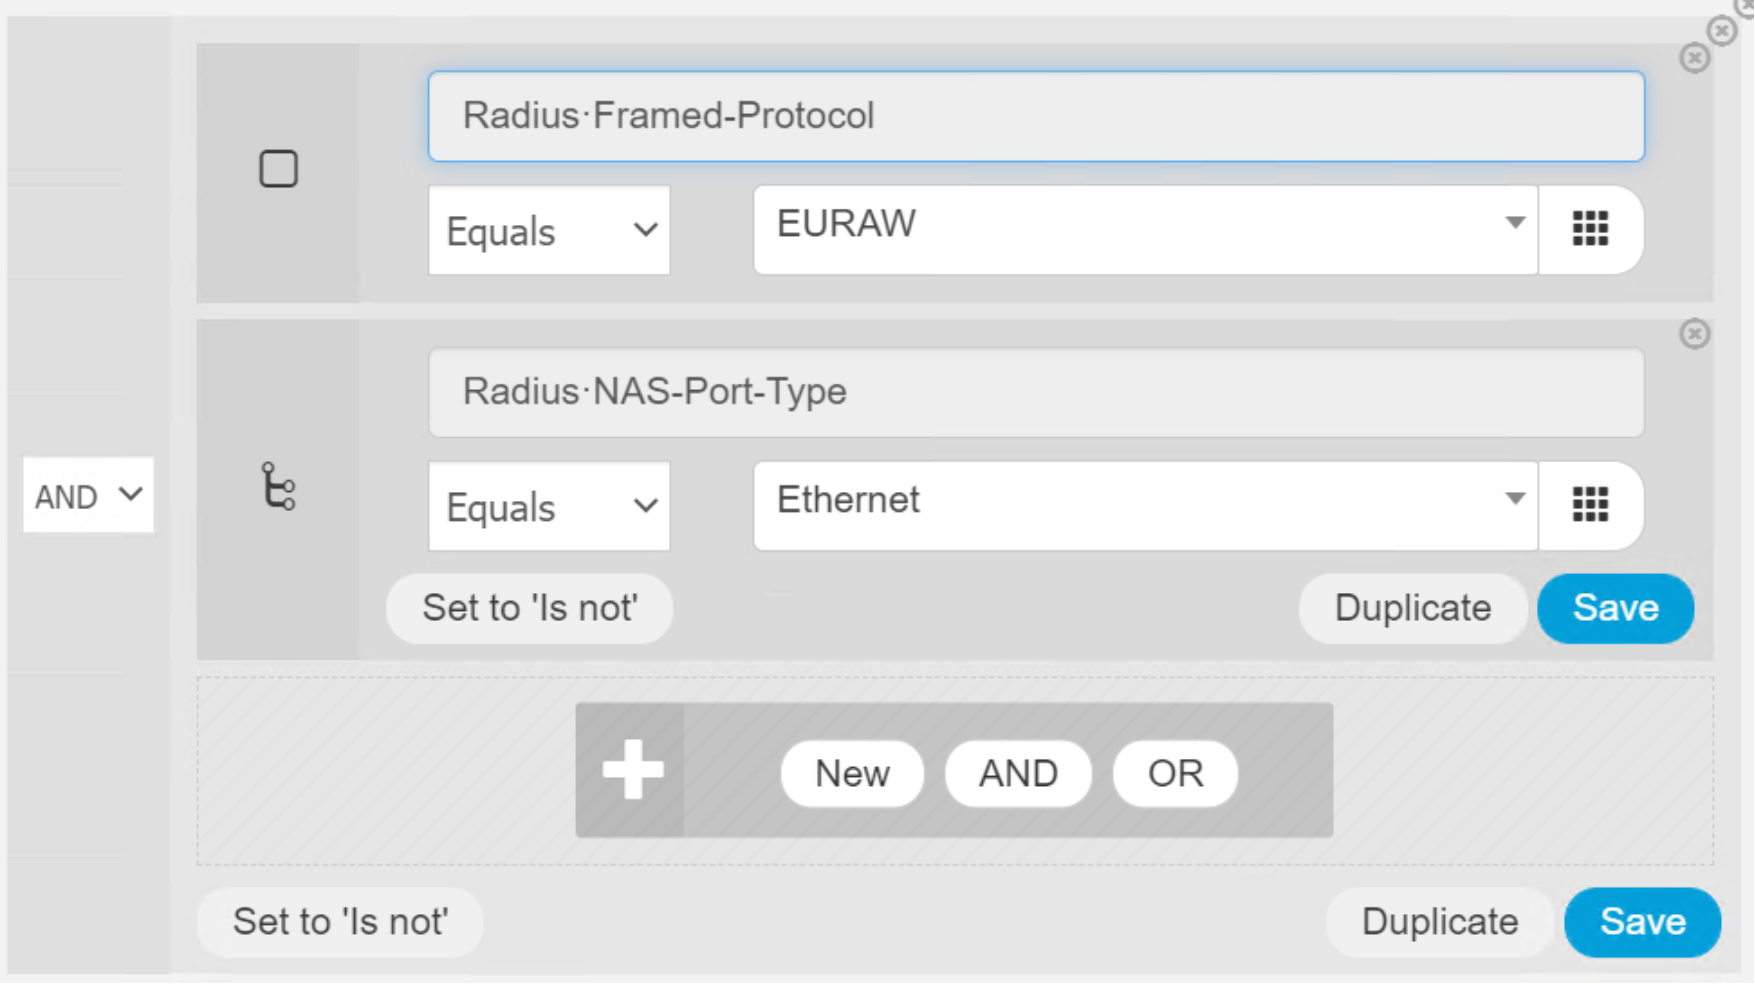 Figure 90. Fill out attribute value from the list
- Click Save to change and save this library condition.
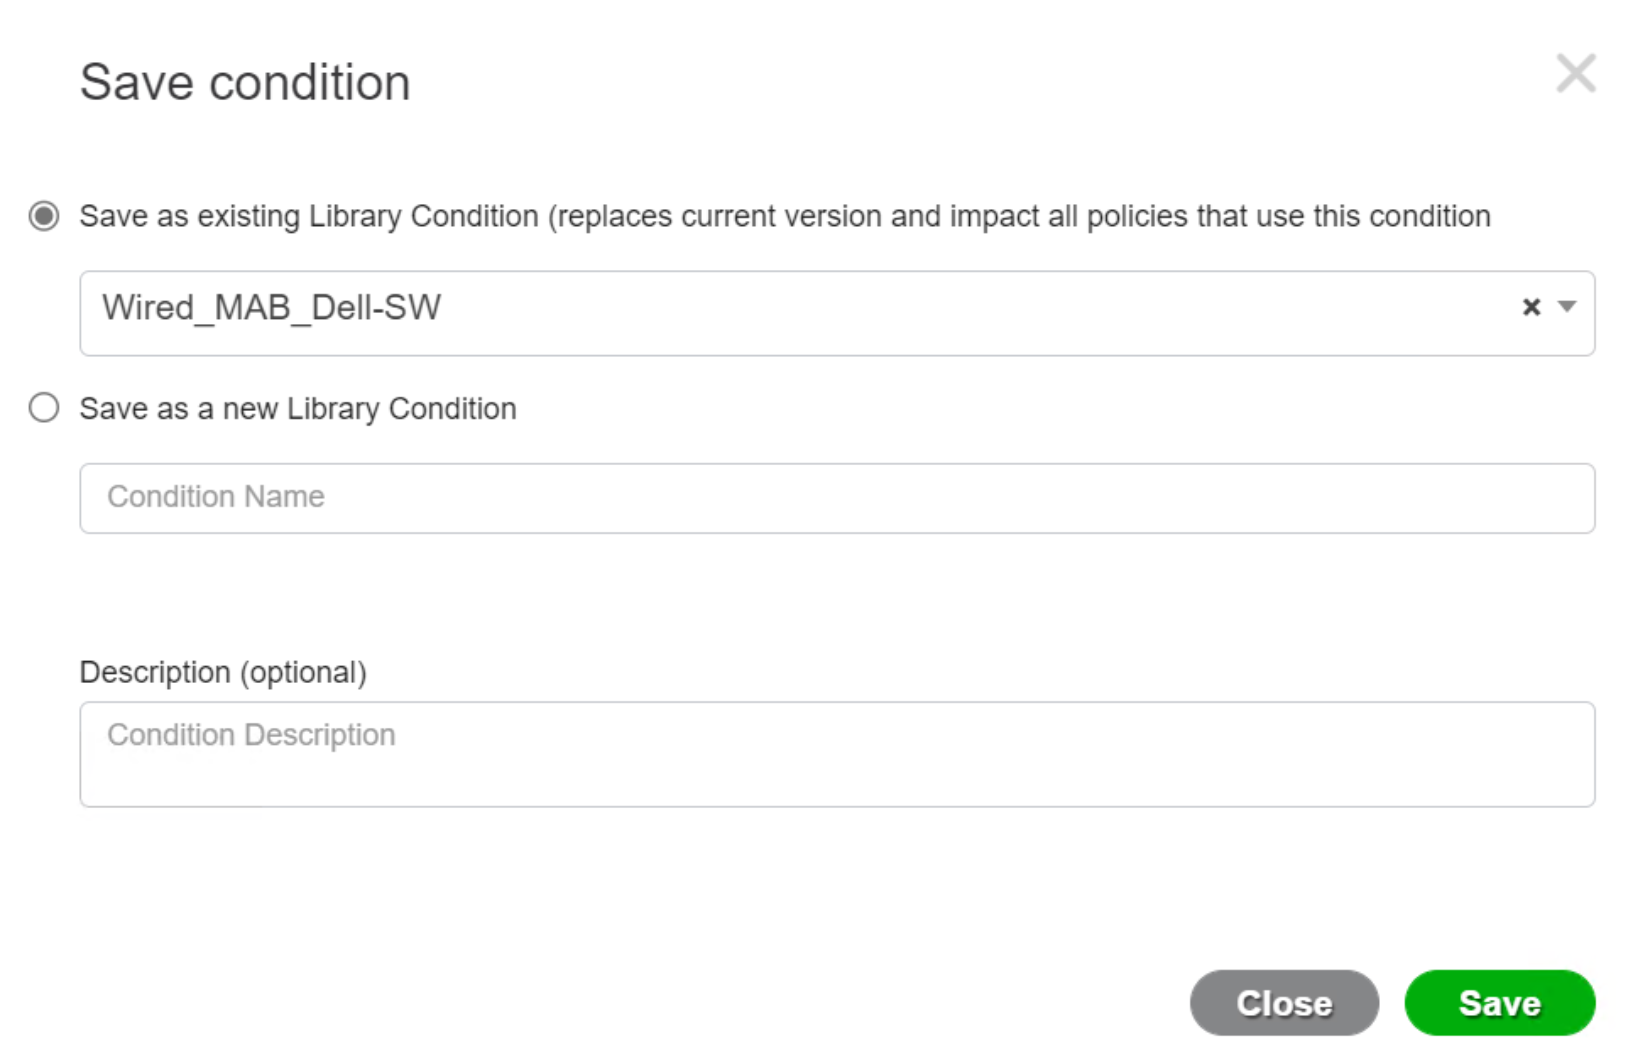 Figure 91. Library Condition Save Panel
- Click Use to modify the condition in the policy, but not save the condition in the library.
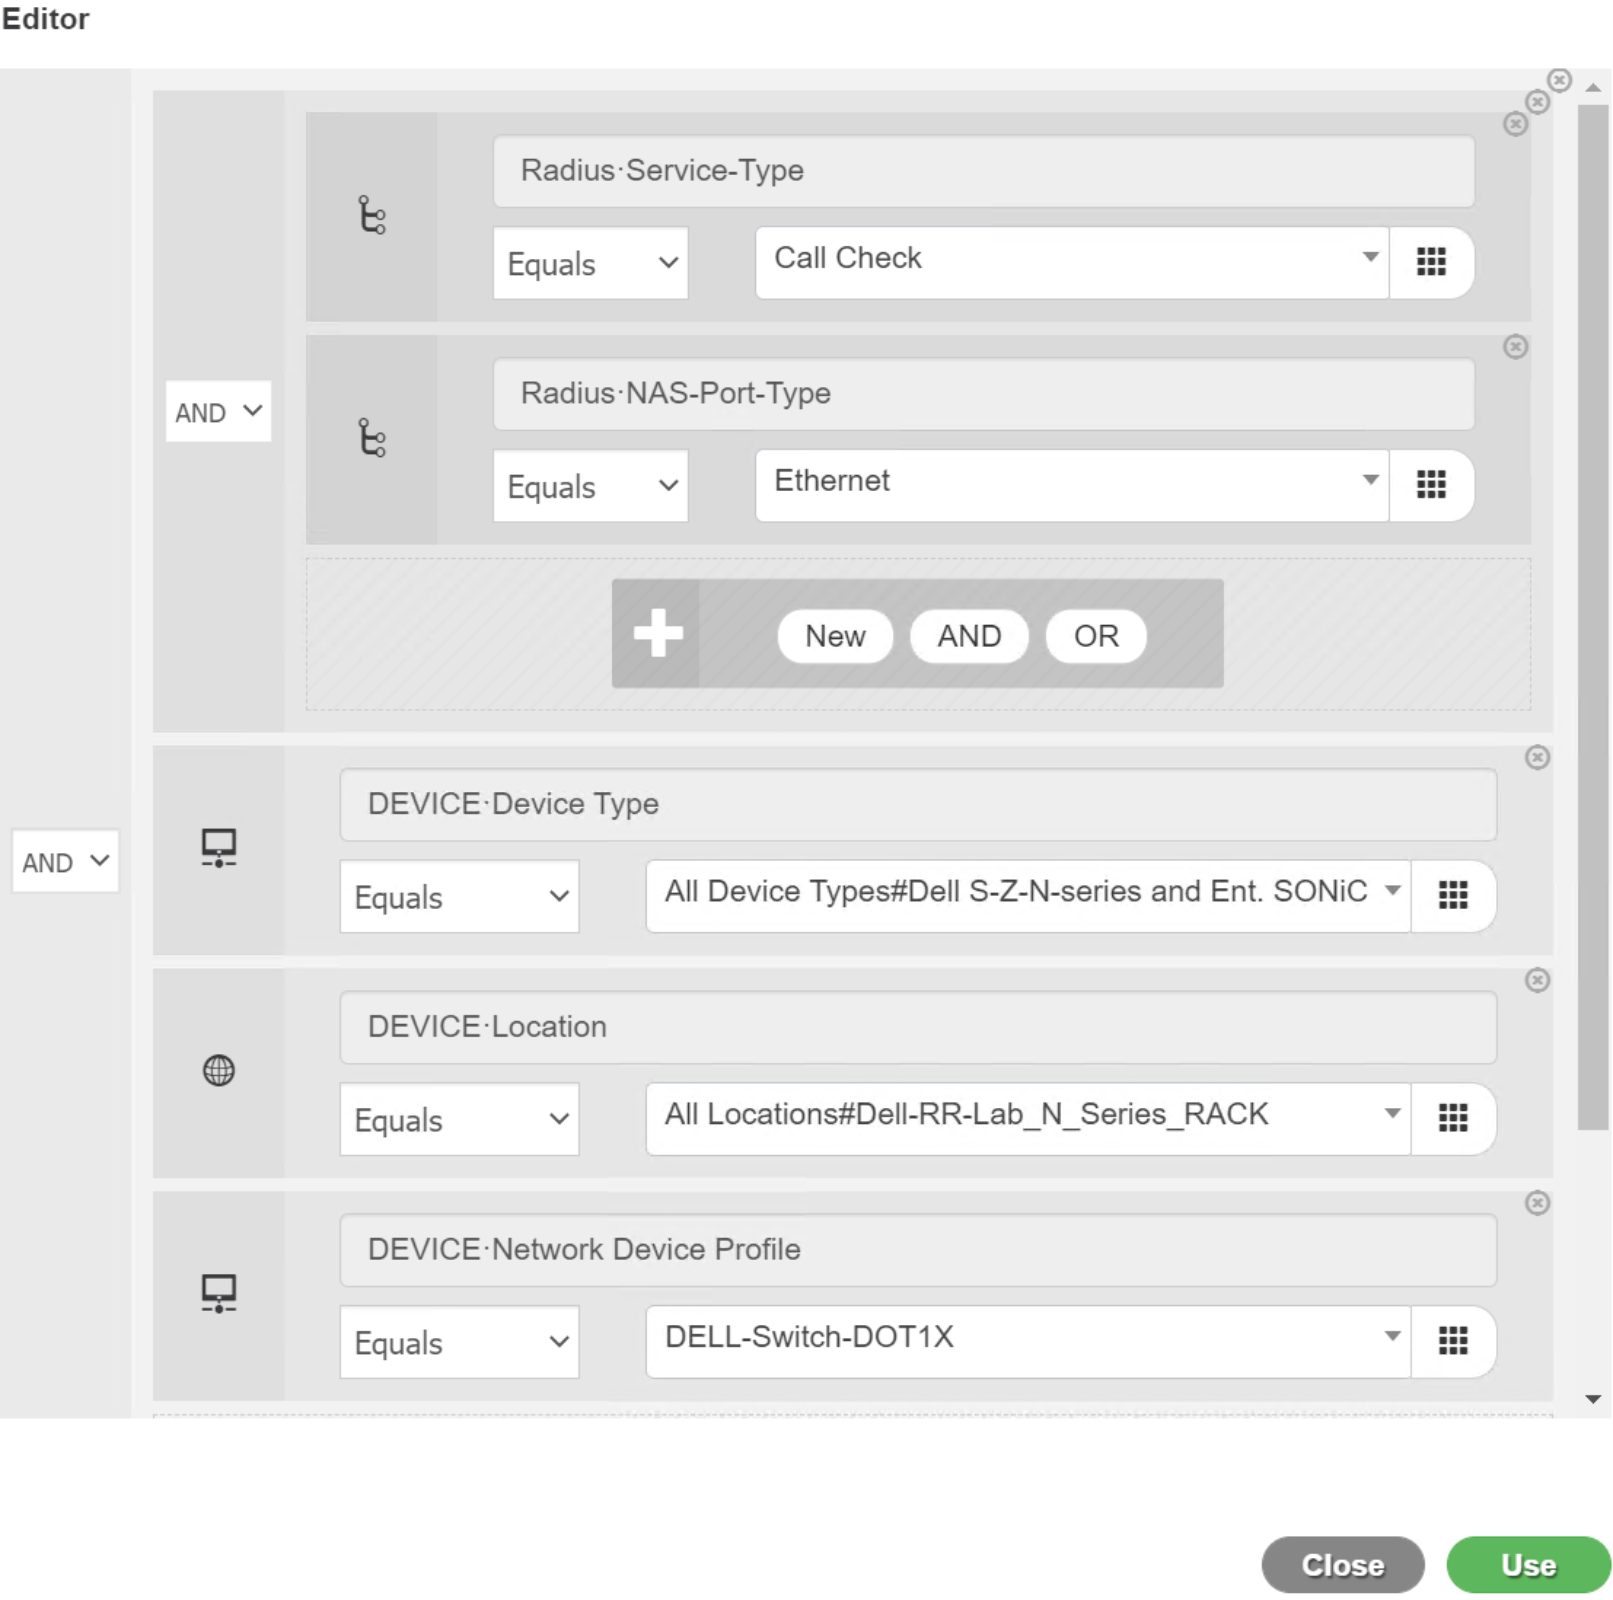
Figure 92. Use a library condition from a Policy Set
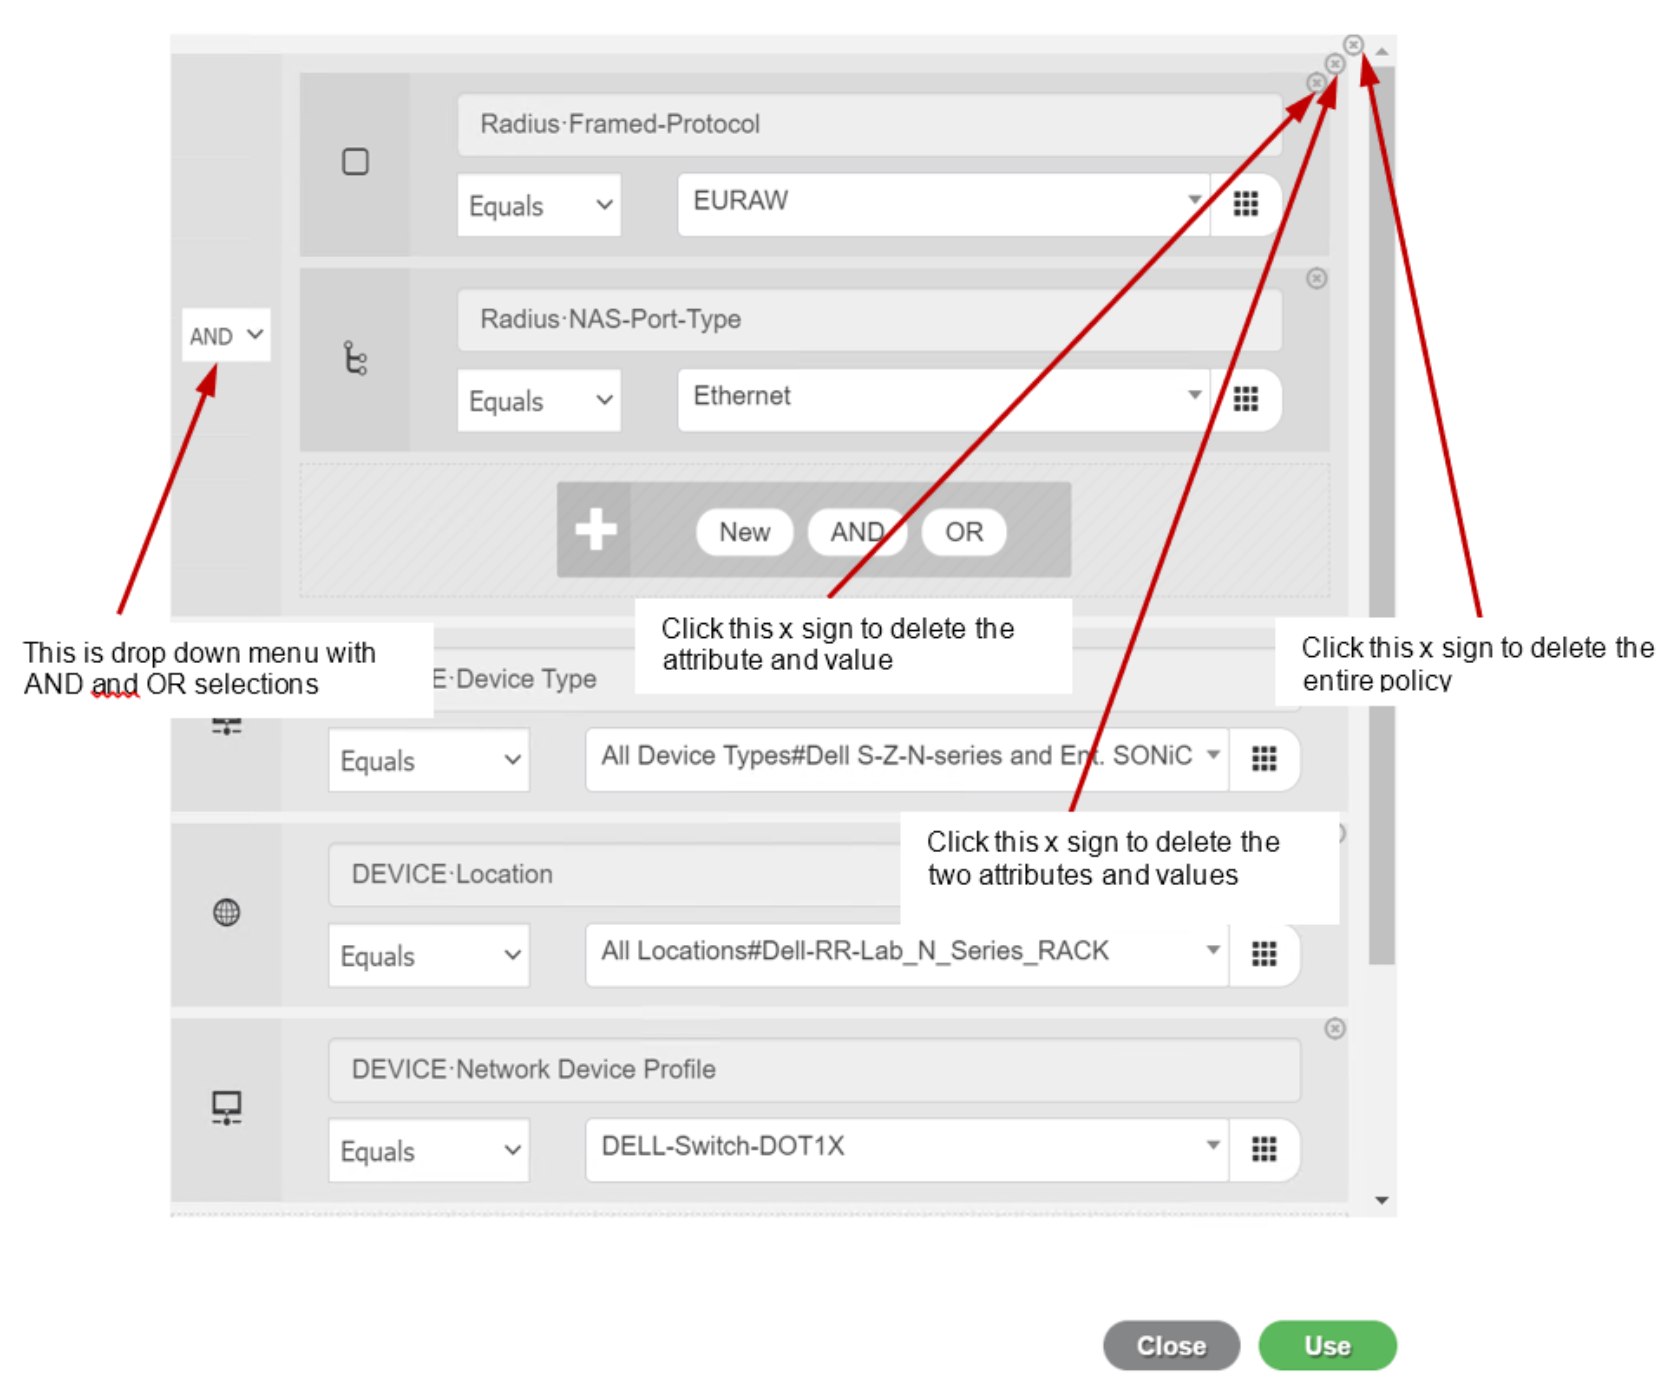
Figure 93. Other buttons in Policy Studio
- Existing conditions can be moved to the right-side holding area to change it and save it as brand-new condition or override the existing condition.
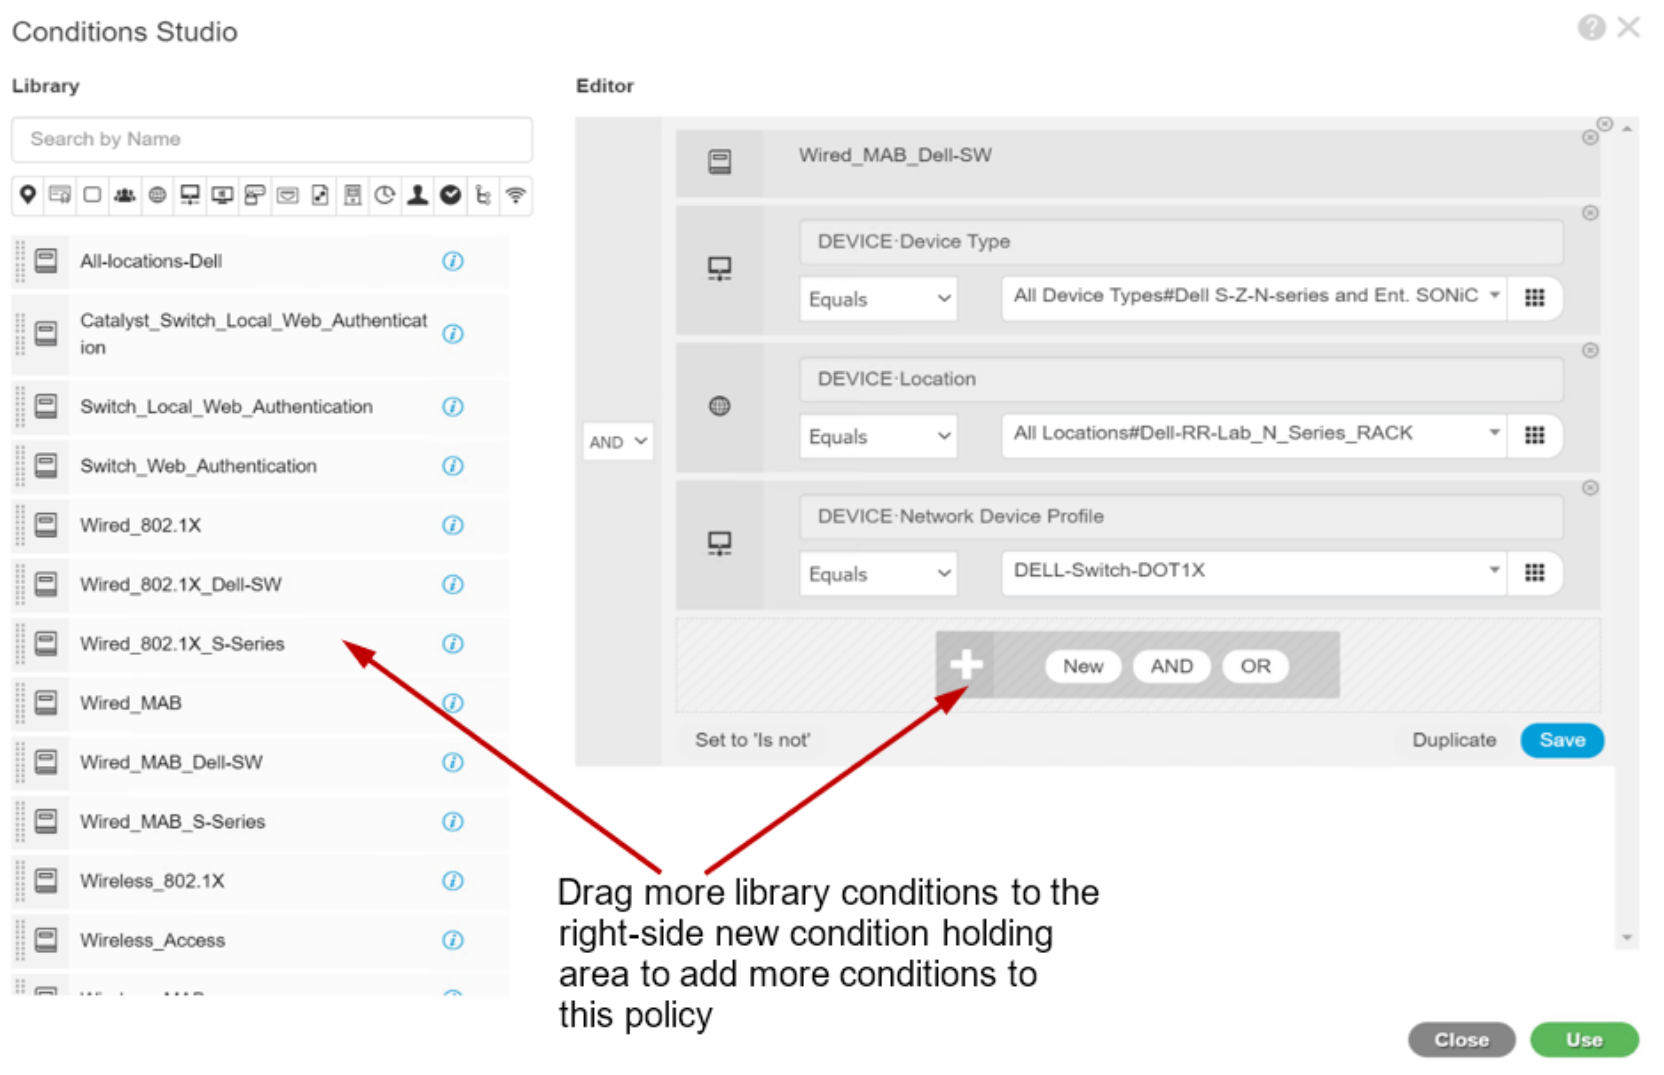
Figure 94. Drag and drop function in Policy Studio
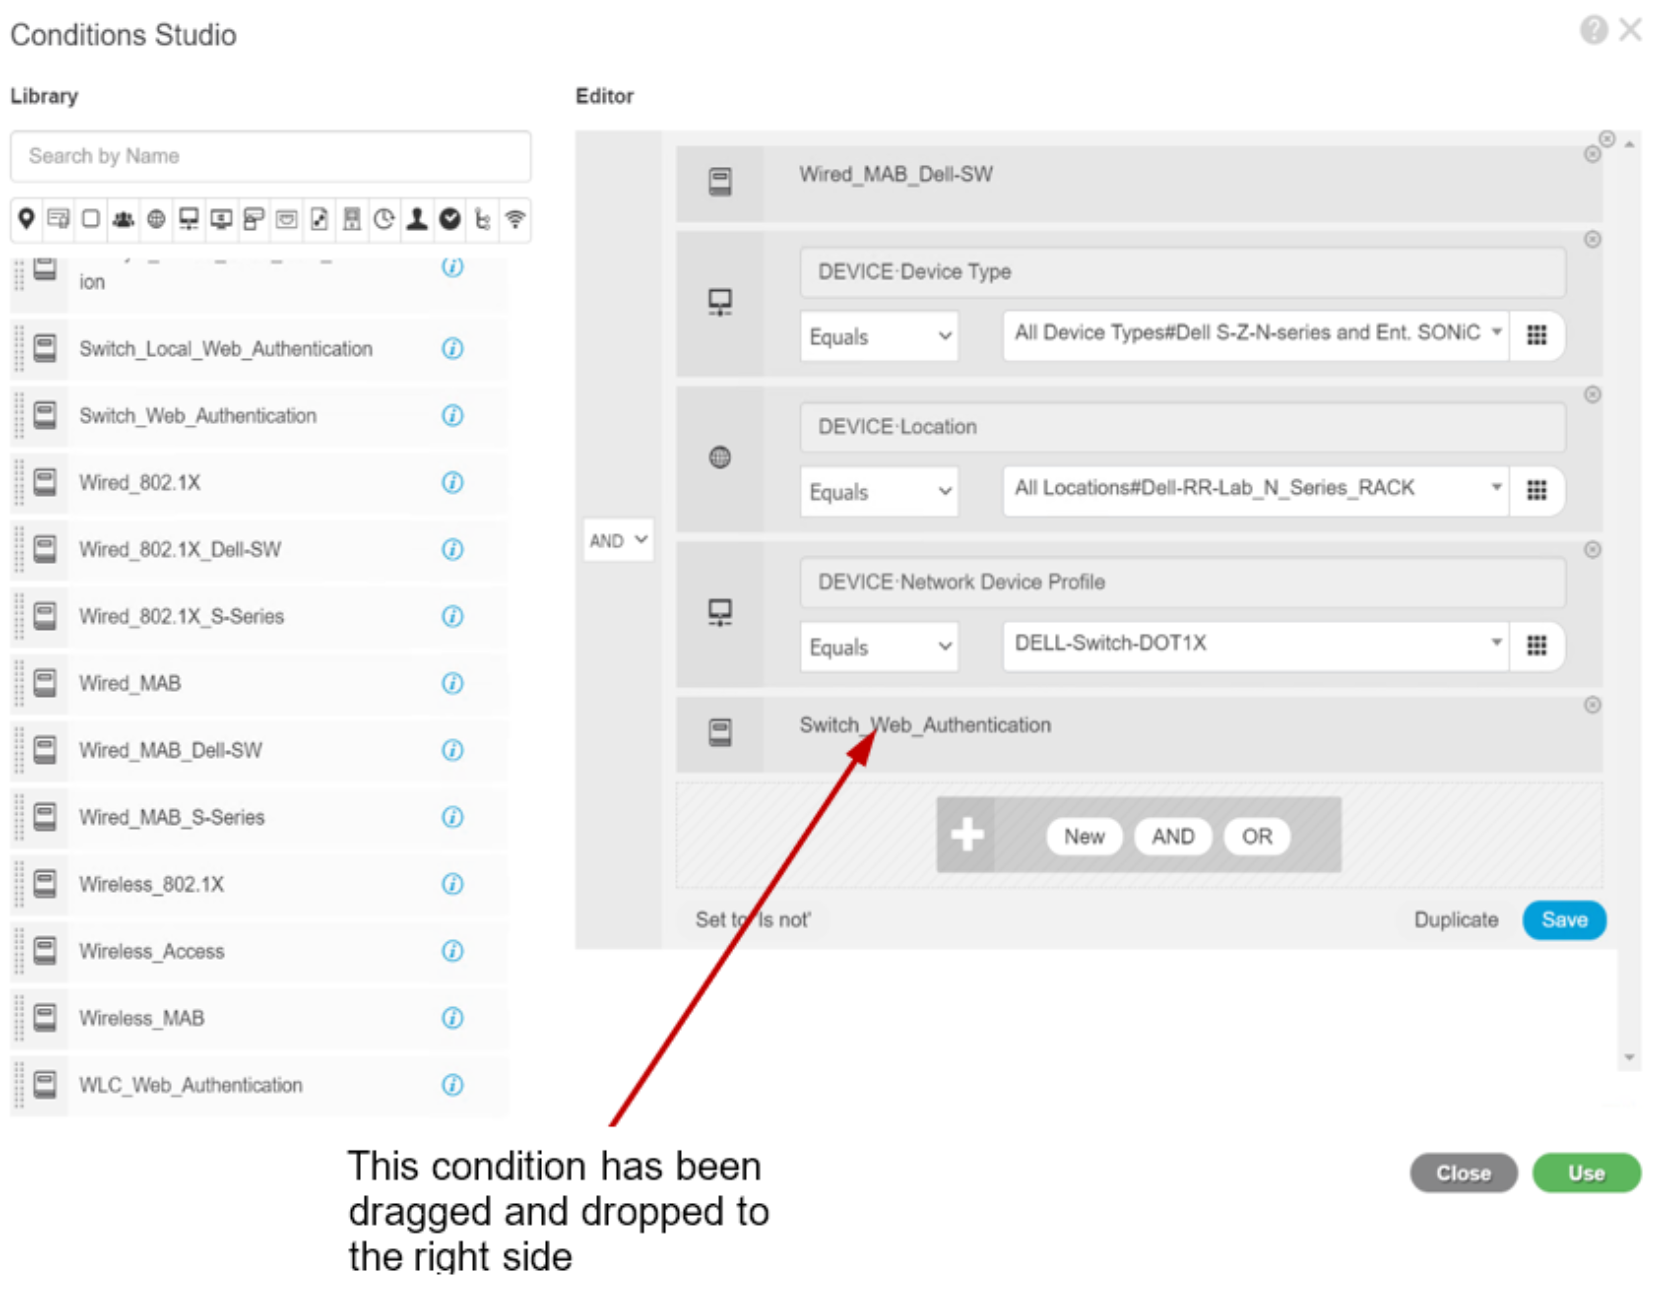
Figure 95. Drag and drop function in Policy Studio (2)