
Deployment Guide—Red Hat OpenShift Container Platform 4.2
Creating master (etcd-*) nodes
Creating master (etcd-*) nodes
-
To create master nodes, perform the following steps:
- Connect to the iDRAC of the master node and open the virtual console.
- Power on the master node.
- To ensure that the ens2f0 interface is set for PXE boot:
- Press F2 to enter System Setup.
- Select Device Settings > NIC in Slot 2 Port 1 > NIC Configuration.
- From the Legacy Boot Protocol menu, select PXE.
- Click Finish to go back to System Setup.
- Select System BIOS > Network Settings.
- Under UEFI PXE Settings, select PXE Device1 Settings.
- From the Interface menu, select NIC in Slot2 Port1 Partition 1.
- Save the changes and reboot the node.
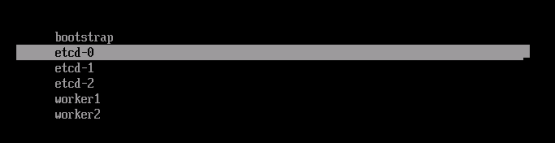 The system automatically boots into PXE network and the PXE menu is displayed, as shown in the following figure:
 Figure 4. iDRAC console: PXE menu
- Select etcd-0 (because this is the first node). Let the system reboot after installation.
- Before the node boots again into the PXE, ensure that the hard disk is placed above the PXE interface in the boot order:
- Press F2 to enter System Setup.
- Select Boot Settings > UEFI Boot Settings > UEFI Boot Sequence.
- Select PXE Device 1 and click the – icon.
- Repeat the preceding step until PXE Device 1 is at the bottom of the boot menu.
- Click OK, and then click Back.
- Click Finish and save the changes.
- Let the node boot into the hard drive where the operating system is installed.
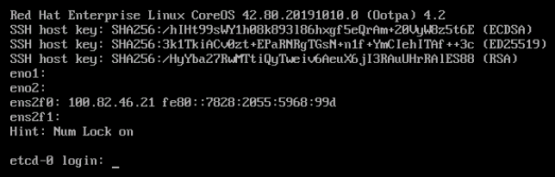 After the node restarts, ensure that the hostname and IP address are aligned, as shown in the following figure:
Figure 5. Master (etcd-0) iDRAC Console
After the installation is complete, the node reboots to fetch the master configuration file.
- Repeat steps 1-7 for the remaining two master nodes. For the second master, select etcd-1 and for the third master select etcd-2.