To create a SmartFabric using the OME-M console, perform the following steps:
Open the OME-M console.
From the navigation menu, click Devices > Fabric.
In the Fabric pane, click Add Fabric.
In the Create Fabric window, complete the following:
Enter a name for the fabric in the Name box. In this example, "SmartFabric" was entered.
Optionally, enter a description in the Description box. In this example, the description was entered as “SmartFabric using MX9116n/MX7116n in Fabric A.”
Click Next.
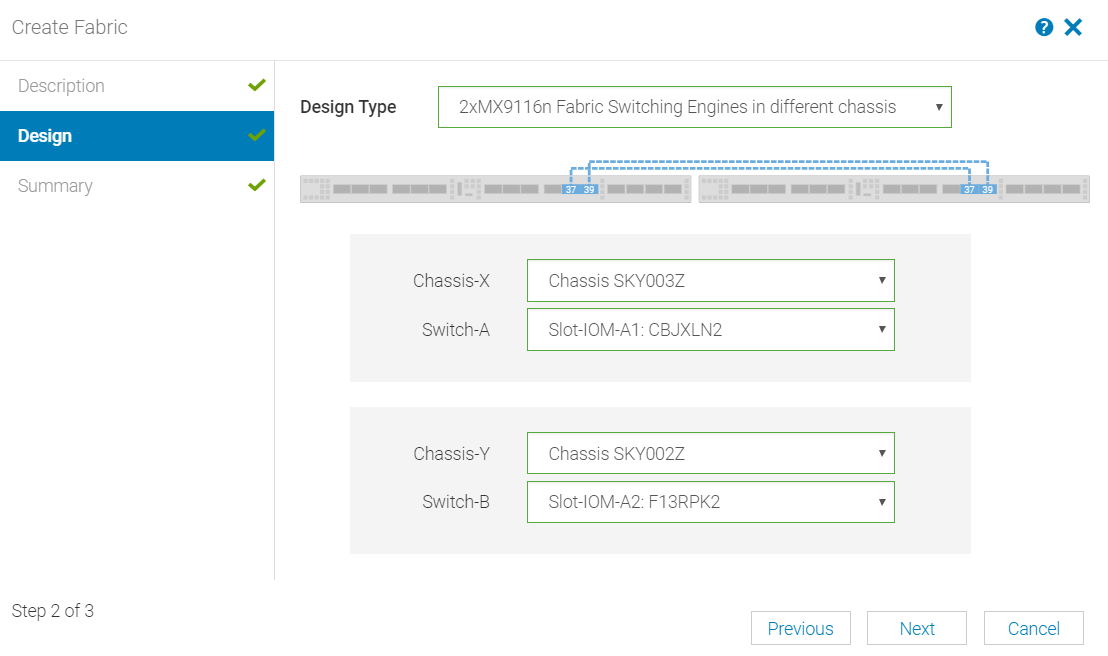
From the Design Type list, select the appropriate type. In this example, “2x MX9116n Fabric Switching Engine in different chassis” was selected.
From the Chassis-X list, select the first MX7000 chassis.
From the Switch-A list, select Slot-IOM-A1.
From the Chassis-Y list, select the second MX7000 chassis to join the fabric.
From the Switch-B list, select Slot-IOM-A2.
Click Next.
On the Summary page, verify the proposed configuration and click Finish.
Note: From the Summary window, a list of the physical cabling requirements can be printed.
Figure 97. SmartFabric deployment design window
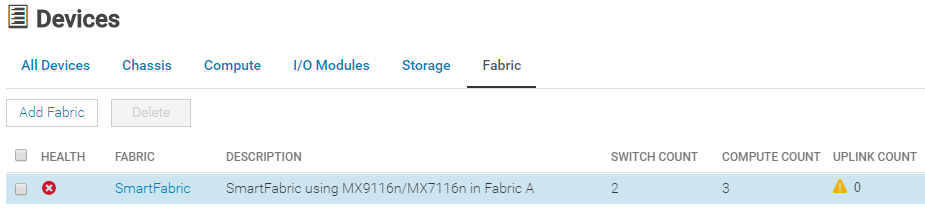
The SmartFabric deploys. The process of Fabric creation can take up to 20 minutes to complete. During this time, all related switches are rebooted, and the operating mode changes from Full Switch to SmartFabric mode.
Note: After the fabric is created, the fabric health is critical until at least one uplink is created.
The following figure shows the new SmartFabric object and some basic information about the fabric.
Figure 98. SmartFabric post-deployment without defined uplinks