To add the VxRail node-connected ports for the second cluster to the VxRail networks created in the previous section, perform the following steps.
- In the SFS UI, select the Server Interface tab.
- Under Server Interface Profile, click +IMPORT FROM FABRIC.The Discovered Server Interface page displays.
- For the new VxRail node interfaces, the Server Type column indicates VxRail, as shown.
Figure 103. Second cluster VxRail interfaces discovered 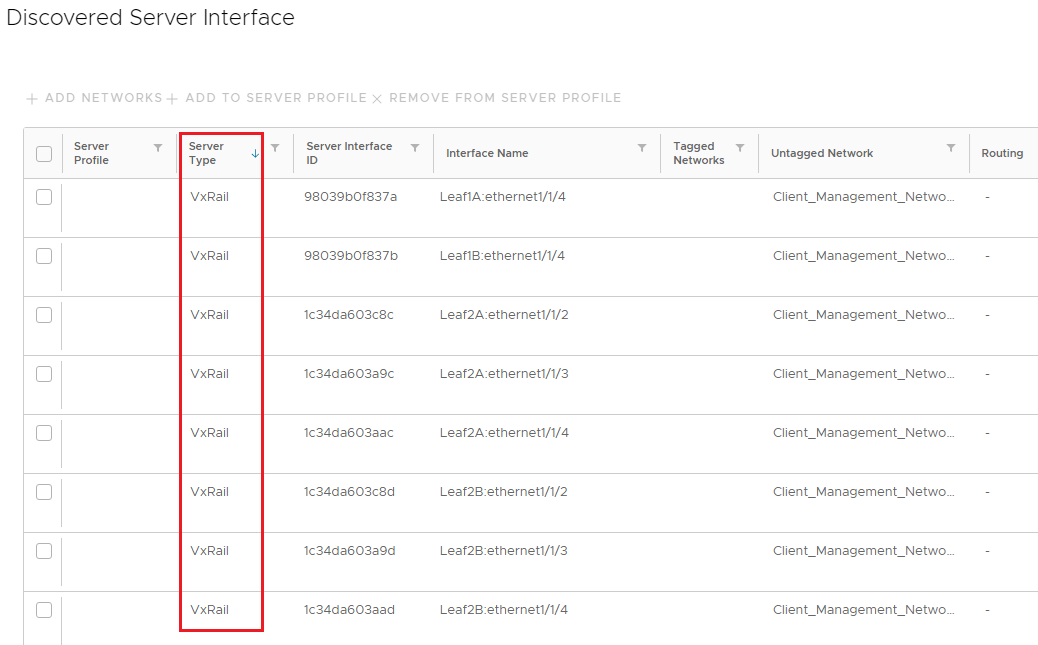 Note: In this example, there are four new VxRail nodes connected to the leaf switches, resulting in eight discovered VxRail interfaces. Other connected devices that support LLDP and have not yet been onboarded to the SmartFabric will also appear in the list. If other devices are connected, it may help to sort the list by clicking the Server Type column heading.
- Check the boxes next to all VxRail interfaces and click +ADD TO SERVER PROFILE.
- In the Server Profile dialog box:
- Select Existing Server Profile.
- Next to Server Profile ID, select the existing VxRail profile, named vxrail-profile in this guide. The page appears as shown:
Figure 104. Sever Profile configuration window3 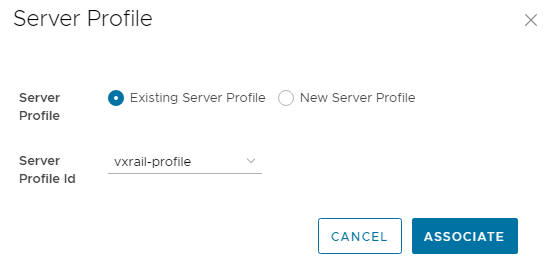
- Click ASSOCIATE. The profile, named vxrail-profile in this example, is associated with the VxRail interfaces, as shown.
Figure 105. New profile associated with VxRail interfaces 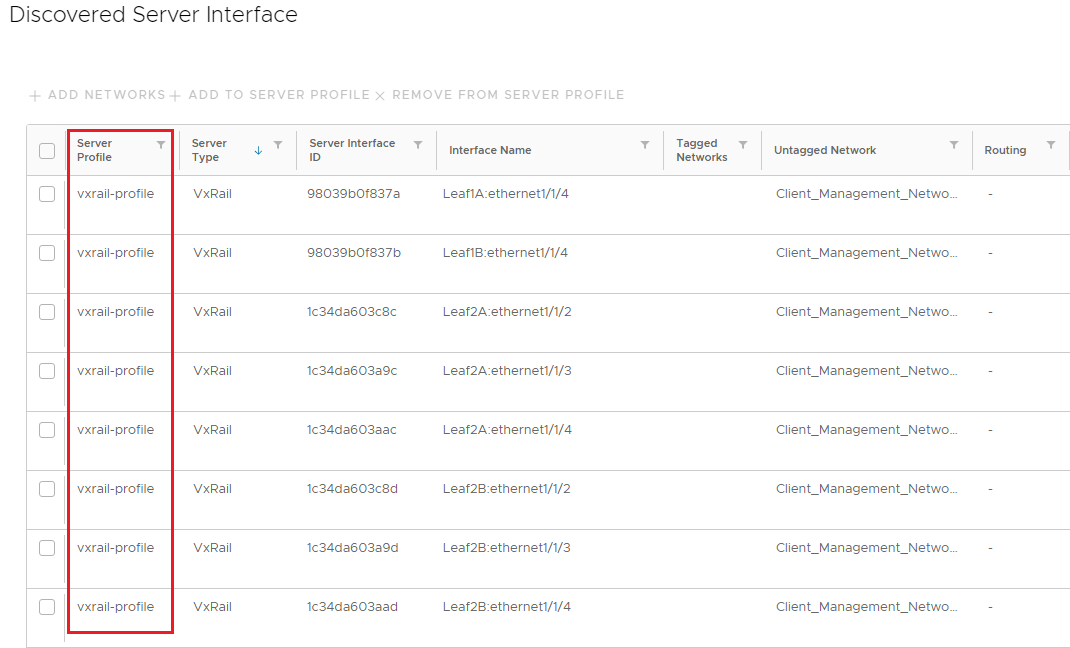
- Check the boxes next to all interfaces associated with the vxrail-profile and click +ADD NETWORKS.
- In the Add Server Interface Networks window, do the following:
- Next to Tagged Networks, the following networks for the second VxRail cluster are selected in this example:
- extmgmt (VLAN-1811)
- vmotion (VLAN-1822)
- vsan (VLAN-1823)
- vmnet_A (VLAN-1824) – optional guest network
- vmnet_B (VLAN-1825) – optional guest network
- Client_Control_Network (VLAN-3939) – automatically created VxRail node discovery network
- Next to Untagged Network, select Client_Management_Network (VLAN-4091). This network is used to connect to the VxRail Deployment Wizard.
- Click ADD. The Discovered Server Interface page appears as shown:
Figure 106. Interfaces placed in VxRail networks 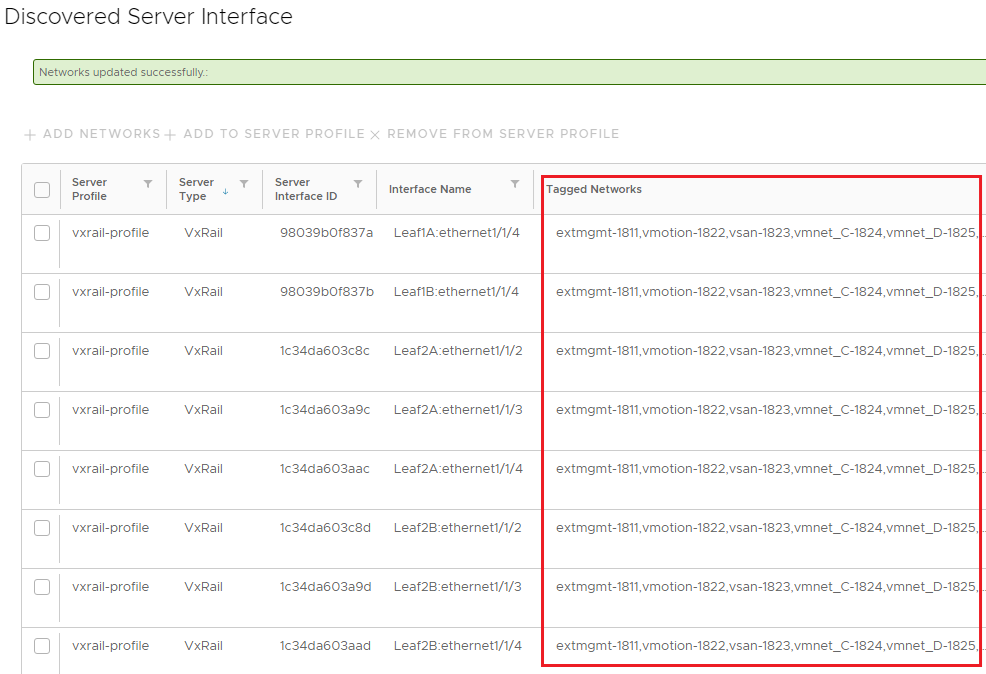
- Next to Tagged Networks, the following networks for the second VxRail cluster are selected in this example:
- Click the box next to all interfaces associated with the vxrail-profile and click CREATE to apply the configuration.
- In the Importing Server Interface Profiles window, a success message is displayed for each interface as shown:
Figure 107. Success messages displayed 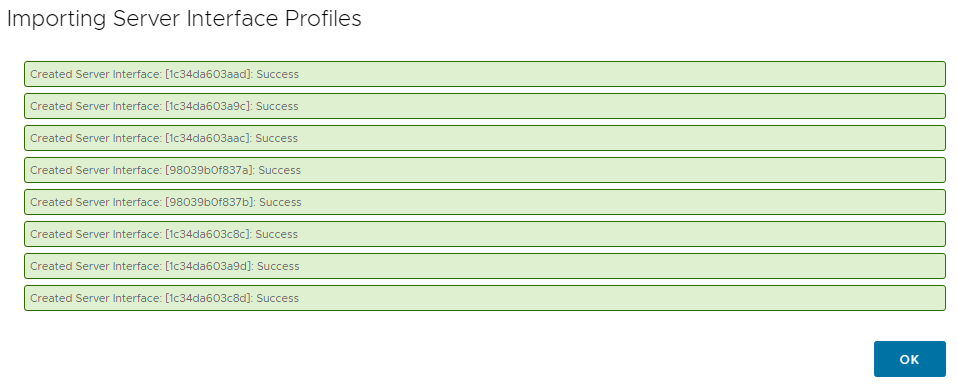
- Click OK.
The interfaces for both VxRail clusters appear in the Server Interface Profile list. When an interface is selected, the associated leaf switch, port, and networks are displayed to the right of the interface profile list. The networks for a selected VxRail interface in the second cluster are outlined in red in the lower right corner of the following figure.
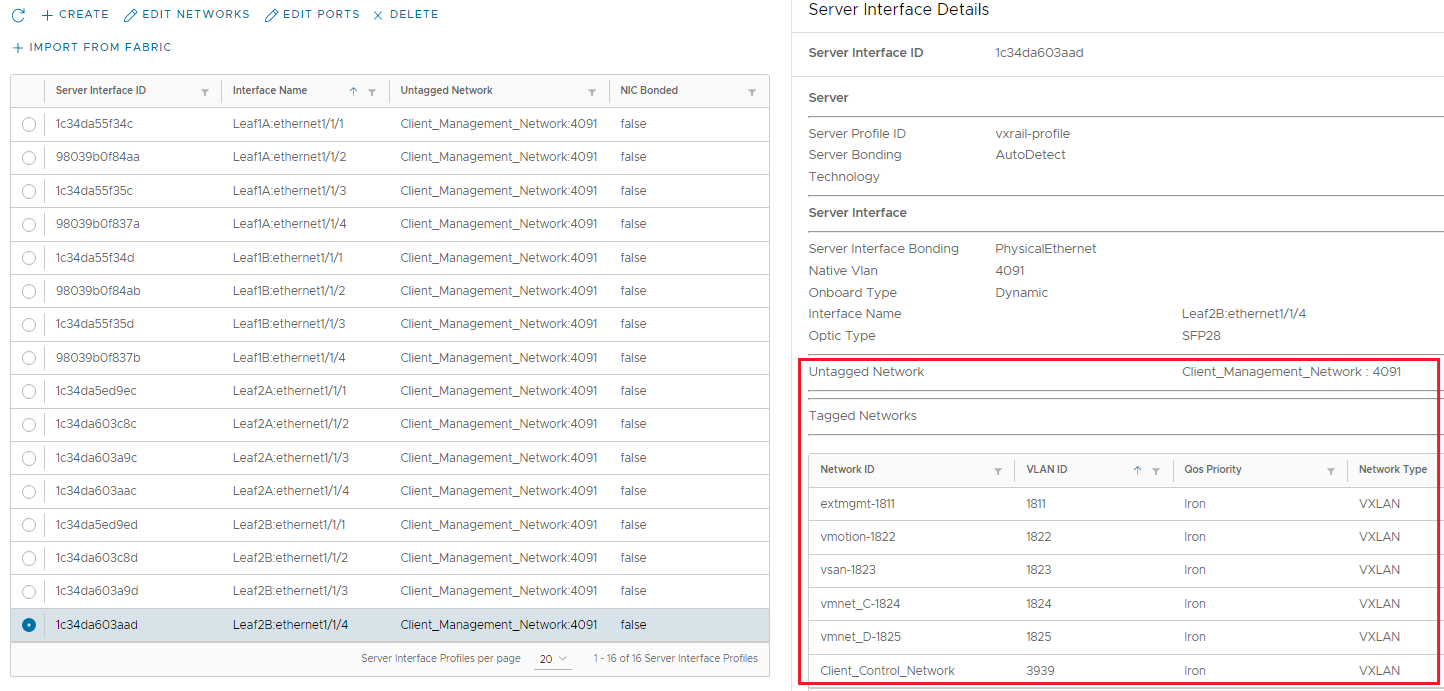
Ensure that the VxRail interfaces in the second cluster are in the correct networks.
Optionally, verify the network to interface configuration at the CLI of the leaf switches by running the show virtual-network command.
