This section shows the settings used for this deployment. In the vSphere Client, after the OMNI deployment is complete, power on the OMNI VM.
Note: The vCenter summary page for the VM might indicate that a newer version of VMware Tools is available. Do not install this newer version.
Determine an IP address and hostname for the OMNI VM and configure DNS (in this example, we use omni.dell.local and 172.18.11.56).
Power on the OMNI VM.
Figure 89. Power on the virtual appliance
Launch the OMNI VM web console.
Authenticate with the default username admin and password admin .
Change the default admin password to a new password.
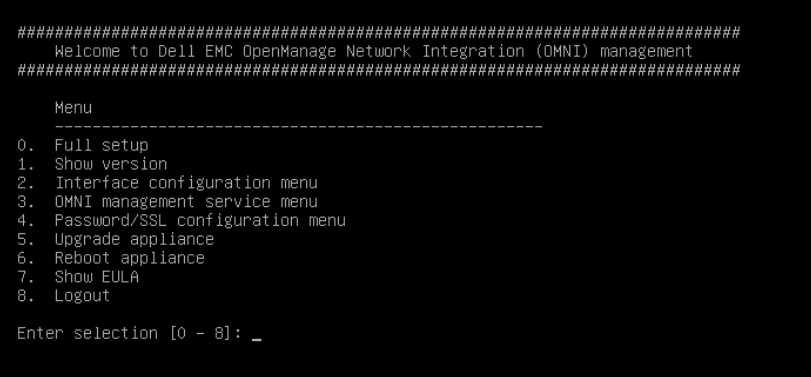
From the OMNI plug-in main menu, select 0. Full setup.
Figure 90. Full setup from OMNI main menu
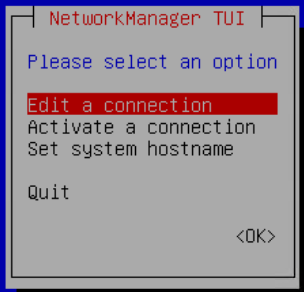
Select Edit a connection.
Figure 91. OMNI connections
Note: Use the Tab and Arrow keys to navigate and the Enter key to select.
Select Wired connection 1.
Note: The
Device field lists the MAC address followed by
(ens160).
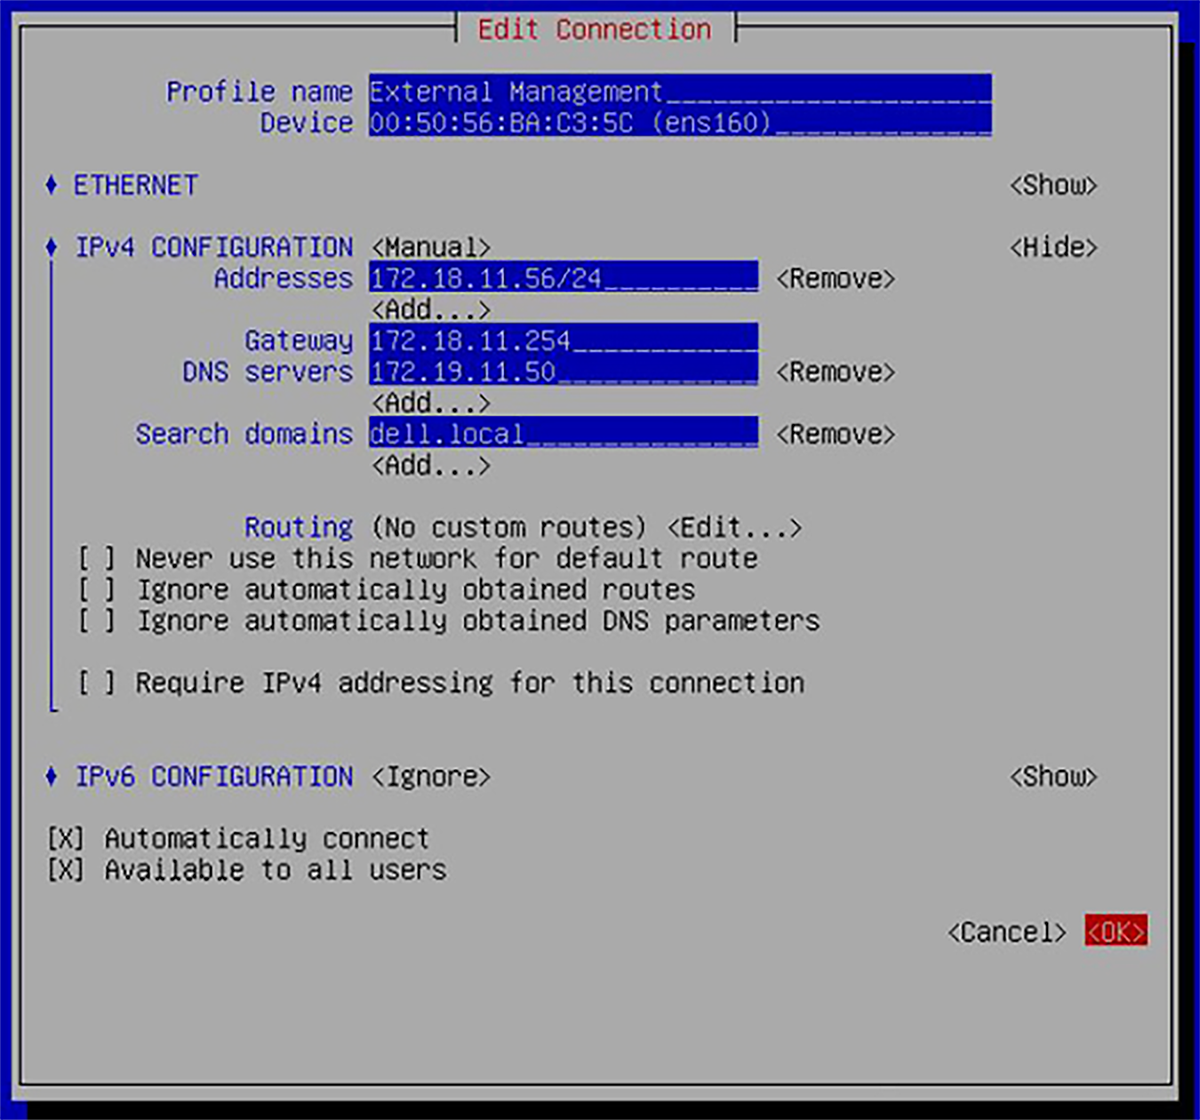
Apply the external management network settings to the first network connection:
Note: The external management network is the vCenter network.
Enter a name for the Profile name. In this example, we use external management .
Set IPv4 Configuration to <Manual> .
Select <Show> for IPv4 CONFIGURATION.
For Addresses, select <Add…> and enter the IP address using the Cassless Inter-Domain Routing (CIDR) format (in this example, we use 172.18.11.56/24 ).
In CIDR format, the entry is constructed with an IP address, a slash (/) character, and a decimal number for the subnet mask.
Add the Gateway, DNS servers, and Search domains.
In this example, we use
172.18.11.254 for the gateway,
172.19.11.50 for the DNS server, and
dell.local for the search domains.
Note: The Primary DNS for L2 uplinks is 172.18.11.50. The Primary DNS for L3 uplinks is 172.19.11.50. Enter the DNS IP address as appropriate for your setup.
In the Edit Connection window, select the following settings:
Change the profile name to Wired connection 2 - OOB mgmt.
Note: The
Device field is automatically populated with a MAC address and
(ens192).
Set IPv4 Configuration to Manual.
Next to IPv4 Configuration, select Show to expand the additional fields.
Note: Select
Add next to each field as needed to enter the values.
Enter the OMNI IP Address/prefix on the OOB Management network.
Note: A gateway is not used here because a gateway is configured on the external management connection. If routing is used on your OOB management network, next to
Routing, select
Edit, and configure static routes as needed for your network. OMNI will need to reach the SmartFabric IP address on the OOB management network.
Set the IPv6 Configuration to Ignore. Default values are used for the remaining settings. When complete, the Edit Connection window displays as shown in the following figure.
Figure 93. OMNI OOB management network interface configuration
Select OK > Back to return to the Network Manager TUI menu.
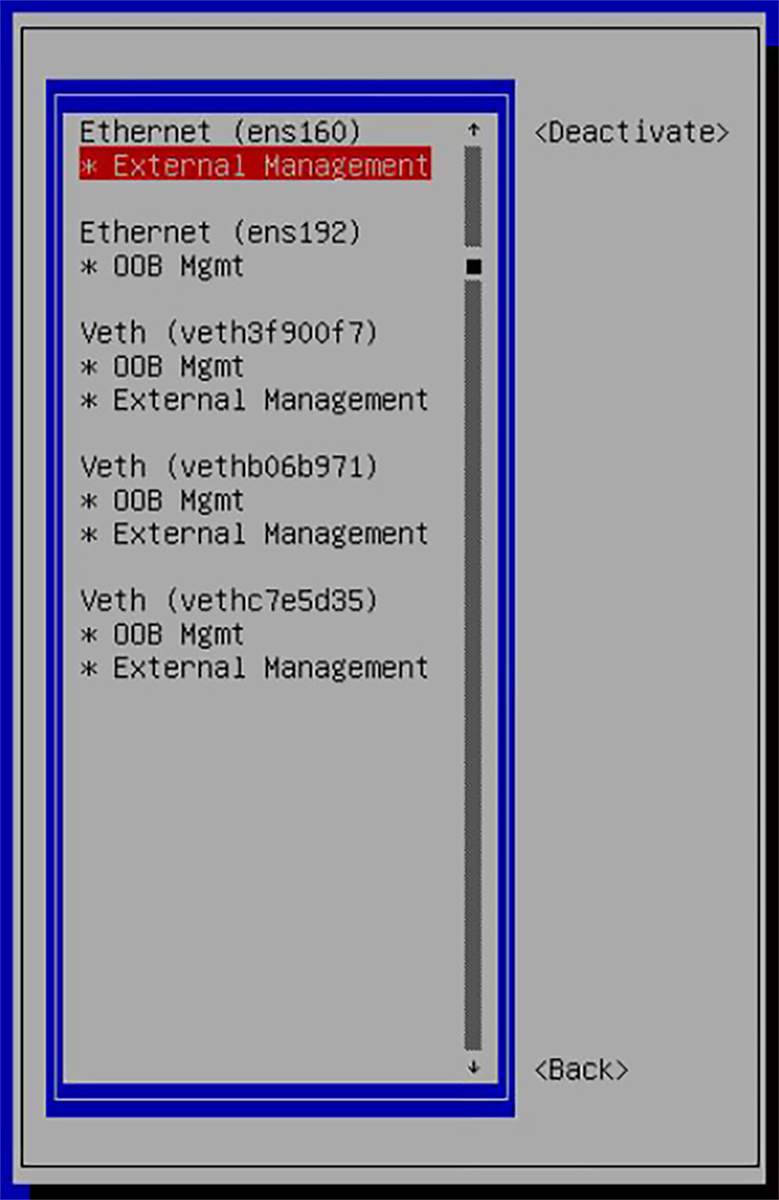
Select Activate a connection and select <OK>.
Figure 94. OMNI connection activation
Deactivate and Activate both network Ethernet connections, External Management and OOB Mgmt .
Figure 95. Activate networks on OMNI plug-in
Select <Back> to return to the Network Manager TUI menu.
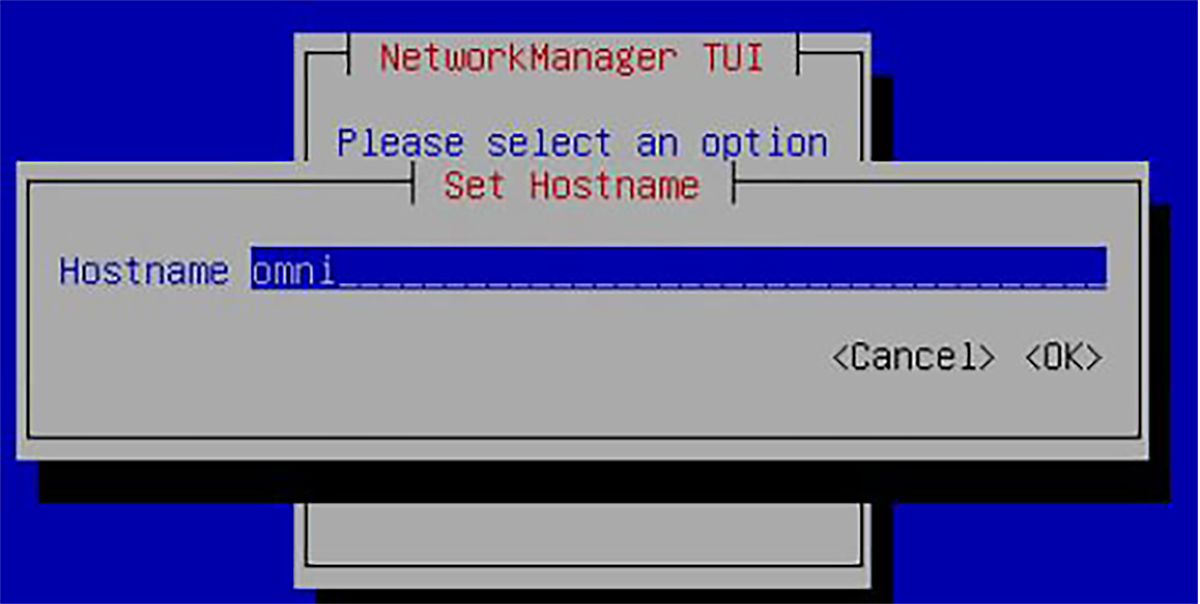
Select Set system hostname and click <OK>.
Enter the Hostname ( omni ) and click <OK>.
Figure 96. OMNI hostname
Select OK.
Enter the NTP Server IP/Hostname.
Figure 97. OMNI plug-in NTP entry
At the Install SSL certificates from remote Server [y]?, enter n.
Note: Certificate imports are outside the scope of this guide. To import certificates later, select
4. Password/SSL configuration menu from the OMNI menu. Follow the instructions provided in the
SmartFabric Services for OpenManage Network Integration User Guide, which is available on the
Dell EMC OpenManage Network Integration for VMware vCenter website.

 Note: Use the Tab and Arrow keys to navigate and the Enter key to select.