


Using HashiCorp Packer in Dell APEX Private Cloud
Throughout the lifespan of a project, infrastructure engineers can spend hours redeploying virtual machines with the proper configurations, such as for a VDI project in which each team needs a specific configuration. The infrastructure team might have a base image template and customize it for each group. That means booting the base virtual machine, configuring it, and saving it as a newly configured template. Rinse and repeat for each team’s requirements, and it can mean a lot of manual work.
HashiCorp Packer can help create all these virtual machine templates with less manual work. Virtual machine templates help infrastructure administrators standardize their offerings and speed delivery. There are multiple ways to create a template, from manually to a full CI/CD pipeline. In this blog, we will create a SLES 15 SP4 golden image for a Dell APEX Private Cloud environment using HashiCorp Packer. Packer is an open-source tool for creating templates for virtual machines, servers, or hard disk drives (golden images). We’ll design this template to work with Dell APEX Data Storage Services, SUSE RKE2, and Rancher. Within Rancher, we can use this template to deploy downstream clusters using vSphere as the provider.
There are a few prerequisites. We’ll need:
- To install Packer on our workstation
- A SLES 15 SP4 image
- A SLES15 license
- A DHCP network configured in the Dell APEX Private Cloud environment
Plenty of GitHub repositories have Packer templates to get users started. I forked the David-VTUK repo and used it as my starting point. This SLES 15 template works great for an RKE deployment. However, this same template wouldn’t work for an RKE2 deployment, maybe because some packages included (or excluded) in this image conflict with RKE2.
I started by manually creating a virtual machine with SLES 15 SP4 installed, then verified that RKE2 could be installed. (This document has many steps I followed to configure this image.) The only added extension in the configuration was the public cloud module.
After installing SLES 15 SP4, I booted up the virtual machine and installed the cloud-init and open-iscsi services as root.
sudo -i
zypper addrepo https://download.opensuse.org/repositories/Cloud:Tools/SLE_15_SP4/Cloud:Tools.repo
zypper refresh
zypper install cloud-init
zypper install open-iscsi
Cloud-init is required to automate Rancher downstream RKE2 clusters. Open-iscsi allows the image to use Dell APEX Data Storage Services (ADSS) for external storage. In a SUSE Rancher cluster, it is useful for persistent volumes. Make sure to disable the AppArmor and Firewalld services.
Note: The open-iscsi package can be installed as part of the cloud-config setup later on, so we can skip this part.
With the manual image appropriately configured, I used AutoYast to create a new autoinst.xml file. I compared this new file with the autoinst.xml file from the original repo and added the new packages and services that were found on the new autoinst.xml file to the original file.
Now. with an autoinst.xml file compatible with an RKE2 cluster, I ran the Packer script from the GitHub repo to create the new virtual machine template. Don’t forget to modify the variables.json file with the Dell APEX Private Cloud credentials and add the SLES 15 SP4 image to the working directory. The entire creation process takes about 10 minutes to complete.
There you have it, short and sweet. Packer with Dell APEX Private Cloud services is simple, and you can use existing vSphere Packer scripts within APEX Private Cloud.
Note: SUSE recently made available a SLES 15 image with cloud-init enabled. With this new image, creating a template is easier because it only requires spinning up a VM and creating a template inside vCenter. However, Packer makes life easier with specific VM configurations and software installation.
Resources
- Packer Download
- David-VTUK Github Repo
- SLES 15 Configuration Documentation
- AutoYast Documentation
Author: Juan Carlos Reyes, Senior Engineer
Related Blog Posts

Serverless Workload and APEX Private Cloud
Mon, 29 Apr 2024 13:18:52 -0000
|Read Time: 0 minutes
What is a serverless service?
To begin answering this question, let’s build upon my previous blog in which I walked through how a developer can deploy a machine-learning workload on APEX Private Cloud Services. Now, I’ll expand on this workload example and demonstrate how to deploy it as a serverless service.
A serverless service is constructed in a serverless architecture, a development model that allows developers to build and run applications without managing the infrastructure. Combining serverless architecture and APEX Cloud Services can provide developers with a robust environment for their application development.
Knative Serving and Eventing
Knative is a popular open-source Kubernetes-based platform to deploy and manage modern serverless workloads. It consists of two main components: Serving and Eventing.
Knative Serving builds on Kubernetes and a network layer to support deploying and serving serverless applications/functions. Serving is easy to get started with, and it scales to support complex scenarios.
The Knative Serving project provides middleware components that enable:
- Rapid deployment of serverless containers
- Autoscaling, including scaling pods down to zero
- Support for multiple networking layers such as Ambassador, Contour, Kourier, Gloo, and Istio for integration into existing environments
- Point-in-time snapshots of deployed code and configurations
Knative Eventing enables developers to use an event-driven architecture with serverless applications. An event-driven architecture is based on the concept of decoupled relationships between event producers that create events and event consumers, or sinks, that receive events.
Examples of event sources for applications include Slack, Zendesk, and VMware.
Deployment demo
Following the Knative installation instructions, I configured Knative in my cluster. Next, I configured real DNS in my environment.
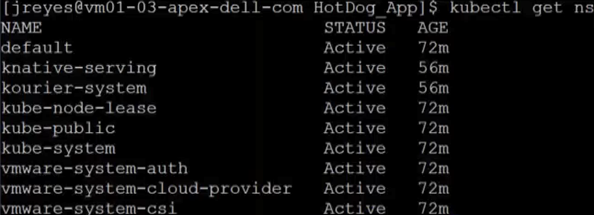
I also installed the Knative CLI through homebrew to make deploying of Knative services easier. Using the kn CLI, I wrapped my flask server in the serving framework. After a successful deployment, I used the following command to view the current Knative services:
kubectl get ksvc
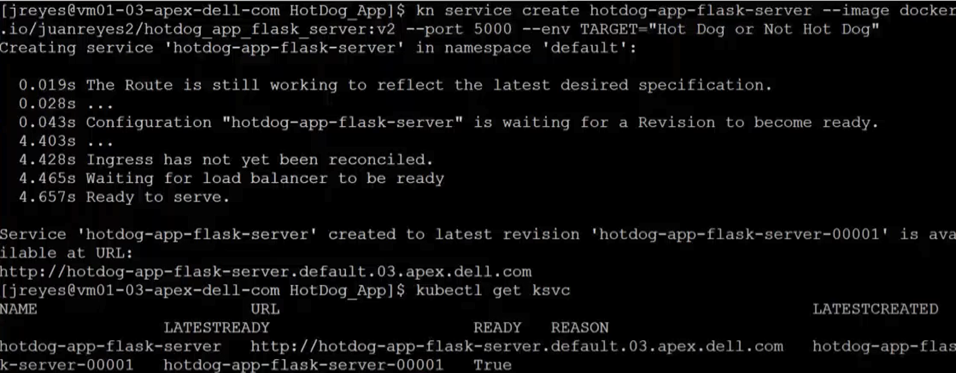
You can see from the screenshots how the pods get created and destroyed as the service receives traffic.

Now, the serverless user interphase can request predictions from my model.
Kserve
My first attempt to wrap the TensorFlow service with Knative wasn't effective. The service dropped the opening requests, and the response times were slower. The spinning up and down of the pods was creating the delay and the execution drops. I fixed these issues by having a constant heartbeat so that the pods would stay active. Unfortunately, this workaround defeats some of the benefits of Knative. This was not the way for me to move forward.
In my quest to have the model in a serverless framework, I came across Kubeflow.
Kubeflow is a free and open-source machine-learning platform designed to use machine-learning pipelines to orchestrate complicated workflows running on Kubernetes.
Kubeflow integrates with Knative to deploy and train ML models. Kserve is the part of Kubeflow used for serving machine-learning models on arbitrary frameworks. Kserve recently graduated from the Kubeflow project, and you can configure it by itself without installing the whole suite of Kubeflow.
Following the Kserve installation guide, I configured it in my cluster.
Creating the YAML file for this service is straightforward enough. However, the tricky part was entering the correct storageUri for my APEX Private Cloud environment. This parameter is the path to the model’s location, and depending on the storage used, it can look a little different. For example, for APC, we need to save the model in a persistent volume claim (pvc).
Here is the YAML file code snippet I used to create the pvc:
apiVersion: v1
kind: PersistentVolumeClaim
metadata:
  name: task-pv-claim-1
spec:
  storageClassName: vsan-default-storage-policy
  accessModes:
    - ReadWriteOnce
  resources:
    requests:
      storage: 1Gi
Once the pvc is formed, we need to copy the model to the pv. I achieved this by creating a pod and attaching the volume. After the pod is created, we can copy the model to the pvc directory.
#pv-model-store.yaml
apiVersion: v1
kind: Pod
metadata:
  name: model-store-pod
spec:
  volumes:
    - name: model-store
      persistentVolumeClaim:
        claimName: task-pv-claim-1
  containers:
    - name: model-store
      image: ubuntu
      command: [ "sleep" ]
      args: [ "infinity" ]
      volumeMounts:
        - mountPath: "/pv"
          name: model-store
      resources:
        limits:
          memory: "1Gi"
          cpu: "1"
  imagePullSecrets:
    - name: regcred
By running the following command, we can copy the model to the PVC:
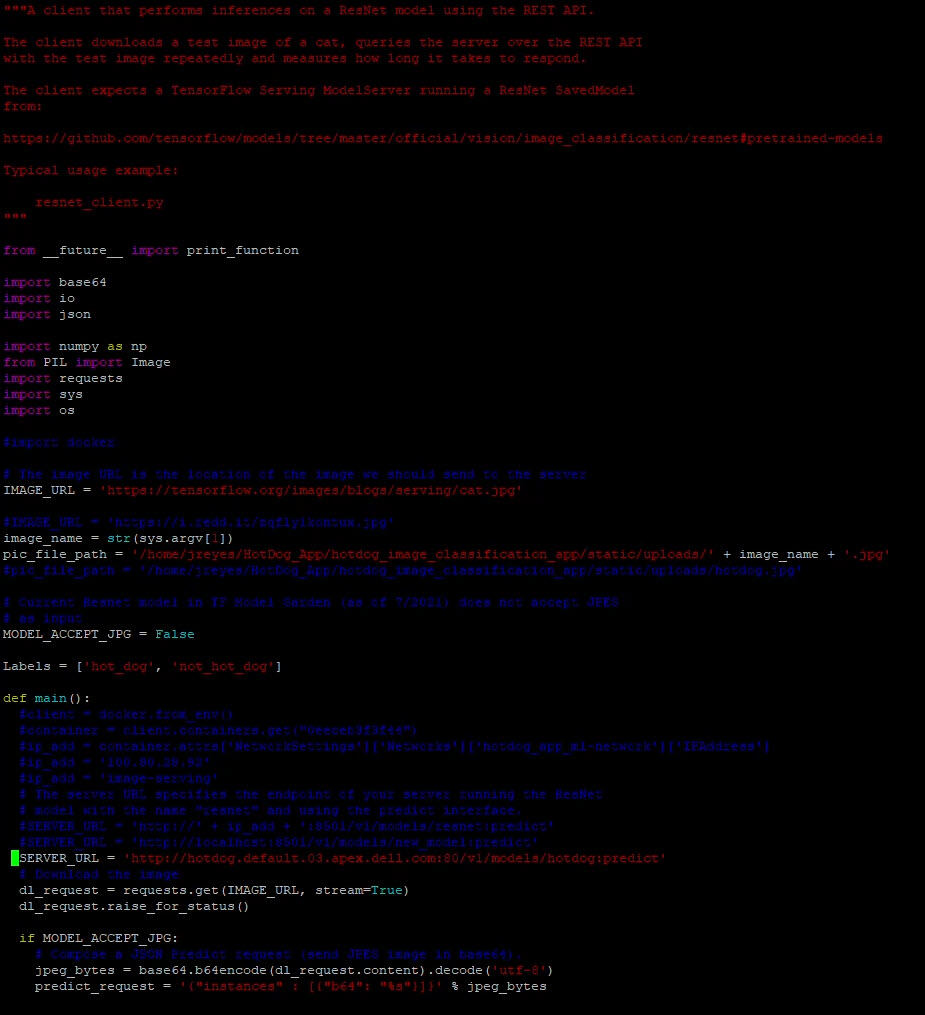
kubectl cp [model folder location] [name of pod with PVC]:[new location within PVC] -c model-store
kubectl cp /home/jreyes/HotDog_App/hotdog_image_classification_model/new_model model-store-pod:/pv/hotdog/1 -c model-store
The critical part is not forgetting to add a version number to the model. In this case, I added version number 1 to the end of the path.
Once the model is stored, we can log in to the pod to verify the contents using the following command:
kubectl exec -it model-store-pod – bash
After verification, we need to delete the pod to free up the pvc.
We can now run the Kserve Inference service YAML file that will use the pvc.
apiVersion: "serving.kserve.io/v1beta1"
kind: "InferenceService"
metadata:
  name: "hotdog"
spec:
  predictor:
    tensorflow:
      storageUri: "pvc://task-pv-claim-1/hotdog"
The TensorFlow serving container automatically looks for the version inside the folder, so there is no need to add the version number in the storageUri path.

After executing the YAML file, we can find the address of our Kserve service with the following command:
kubectl get isvc

With this address, we can update the resnet client to test the model.
Here are the predictions when we run the client with two different images:

We have successfully made our user interface and model use a serverless framework. The final step is to update the flask server to point to the new address.
Note: I could not get an inference service to listen to two ports at a time (REST and gRPC). My solution was to create two inference services and adjust the flask code as necessary.
Conclusion
Now, we have a complete image-recognition application on a serverless architecture. The serverless architecture grants us greater resource flexibility with autoscaling and facilitates a canary deployment for the machine-learning model. Furthermore, combining this architecture with APEX Private Cloud services provides an environment that is powerful and flexible for many edge application deployments. In my next blog, I will cover migrating the application to the public cloud to compare the differences and provide a cost analysis.
Until next time!
Author: Juan Carlos Reyes

Day 1 – Deploying an APEX Private Cloud Subscription
Fri, 04 Nov 2022 19:03:21 -0000
|Read Time: 0 minutes
Ordering and deploying new physical infrastructure for a business-critical application is often challenging.
This series of blogs reveals the Dell differences that simplify the complex task of infrastructure deployment[1], specifically the processes of fulfillment, configuration, and workload creation. These steps are typically referred to as Day 0, Day 1, and Day 2, respectively. Each blog in this series will show how an APEX subscription can remove complexity and achieve quicker time to value and operational efficiency. (In this blog series, we assume that the application being built requires the compute resources of a 4-node general purpose APEX Private Cloud Dell-integrated rack, ordered through the APEX console with typical network and power requirements.)
Before we dive in, let’s review briefly what has happened so far during the fulfillment stage after an order for a subscription is submitted. To get to this point, the APEX backend business coordination team has been orchestrating the entire fulfillment process, including people, parts, and procedures. The Dell Project Manager and Planning & Optimization Manager have been in frequent contact with the customer, assisting them with configuration and site review. Dell team members support the customer through the Enterprise Project Services portal: a planning and approval tool that allows customer visibility throughout the deployment process, from setting up the host network, to verifying and validating the new hardware. During planning, the Dell Customer Success Manager meets the customer and becomes the customer’s main point of contact for Day 2 operations and afterward.

Delivery day begins when Dell’s preferred shipping partner carefully escorts the rack from the customer loading area to the tile where it needs to be installed inside the customer’s data center. While the rack is being shipped and installed, the Dell Project Manager assigns and coordinates with an on-site professional services technician.
Day 1
Day 1 starts when the professional services technician arrives at the customer site, ready to configure the rack with the agreed upon options. The technician first inspects the rack inside and out, making sure that the wiring is secure and that there are no electrical or physical hazards. The technician then guides the customer or the customer’s electrician to plug the PDUs into datacenter power, and to power up the rack. The technician also plugs the customer provided network uplink cables into the APEX switches. When power and networking are connected, the technician verifies that all systems are in compliance and validated for the next steps.

The technician then configures the APEX switches and works with the customer to get the switches communicating on the customer’s core network, according to the specifications previously agreed upon during the planning meetings. Each APEX Private Cloud rack is pre-wired for 24 compute nodes, regardless of the number of nodes in a subscription. This forward-thinking feature is yet another Dell difference that simplifies rapid expansion. (When the need for an expansion arises, the customer can contact their CSM directly to expedite the order process. Both Dell-integrated and customer provided rack options come with on-site configuration by a professional services technician.)
After the technician performs network health checks, the technician initiates the cluster build. Upon verification and validation of the APEX compute nodes, the technician installs the latest VxRail Manager and vCenter on each, to tie all nodes together into a robust, highly available cluster.
With APEX VxRail compute nodes, customers get a broad range of benefits from the only hardware platform that is co-engineered with VMware. VxRail is a highly-trusted platform with thousands of tested and validated firmware and hypervisor installations around the globe. Each node hosts an instance of the integrated Dell Remote Access Controller (iDRAC) with the latest security and update features. Built-in automations include hot node addition and removal, capacity expansions, and graceful cluster shutdown.
An APEX subscription also includes Dell’s Secure Connect Gateway appliance, which proactively monitors compute nodes and switches. If an anomaly is detected, the appliance gathers logs and issues a support ticket, reducing the time it takes to resolve problems if they arise.
VMware vCenter on VxRail, included with each APEX Private Cloud subscription, comes equipped with Dell integrations such as firmware, driver, and power alerts, and an intuitive physical view to help resolve any hardware issues simply and quickly. Dell is the customer’s single point of contact for help with our streamlined Pro Deploy Plus service and Pro Support Plus with Mission Critical Support - all included in the customer’s APEX Private Cloud subscription.
After the latest versions of VxRail Manager and vCenter are installed, the technician brings up the vCenter interface at an IP address, in accordance with the customer’s network requests. Even after the technician is gone and additional help is needed, customers can ask support to review and help guide updates twice a year at no additional cost.
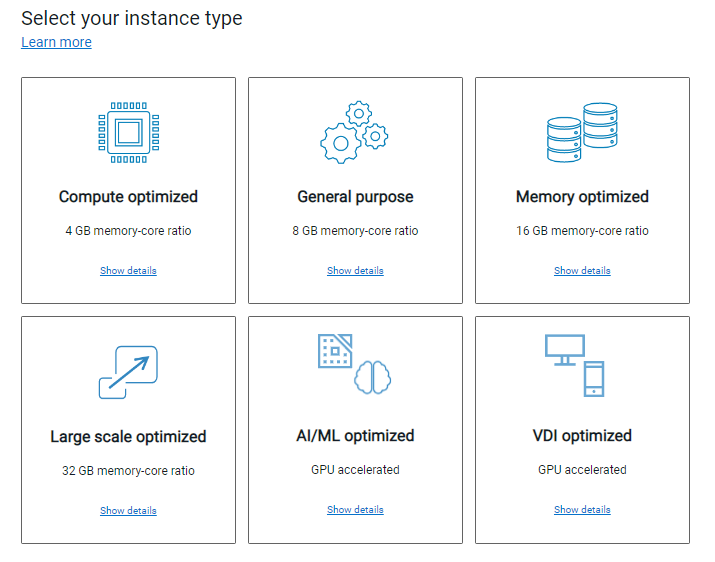
While the underlying hardware is essential and a major differentiator when comparing Dell to the rest of the market, the spirit behind APEX is to provide the best possible outcome for the customer by removing the complexity when deploying a rack-scale solution. To achieve this goal, the APEX Console simplifies the planning process with a wide variety of subscription choices with preconfigured compute, memory, and GPU accelerators. This means that the customer can easily select the number and type of instances they need, or use the Cloud Sizer for assistance to match their workload needs to the available subscription options. The customer can use the APEX Console to contact support directly, manage console users, and assign roles and permissions to those with console access to facilitate the entire lifecycle of their subscription.
Licensing
After vCenter is up and running, the technician installs enterprise licenses for both vCenter and vSAN. APEX is flexible enough that the customer can also bring their own licenses for a potential discount on their subscription. If this is the case, during the planning phase and prior to the subscription order, VMware will review the licenses to eliminate any lapses during the APEX subscription term.
All APEX Private Cloud subscriptions include 60-day full-feature trial licenses for VMware Tanzu and NSX Advanced Load Balancer. After licenses are installed and all software stacks are running successfully, the Dell technician securely hands the usernames and passwords to the customer and requests that they change the passwords.
Additional Services
The technician is also available to configure additional services such as a stretched cluster within the rack, deduplication compression, and in-flight or at-rest encryption. The technician can also help stretch a cluster across racks and to configure fault domains. Although these additional services and costs need to be declared and agreed to during the planning phase, this is well within the capabilities of Dell professional services.
When all the customer requested services are up and running, the technician updates the EPS portal to conclude their tasks and to offer any notes and feedback on the process.
At this point the customer’s subscription is activated! Customers can now move into Day 2 operations and start using new resources for various business workloads.
Resources
Author: David O’Dell, Senior Principal Tech Marketing Engineer - APEX
[1] Deployment time is measured between order acceptance and activation. The 28-day deployment applies to single rack deployments of select APEX Cloud services pre-configured solutions and does not include customizations to the standard configuration.