


PowerStore: Lifecycle Management with Virtual Storage Integrator
Thu, 05 Oct 2023 14:39:06 -0000
|Read Time: 0 minutes
The integrated lifecycle management is available starting with virtual storage integrator (VSI) version 10.3. The plugin will upload the code, perform a health check, and update the PowerStore system. PowerStore code version 3.0 or later will be needed to take advantage of this capability.
This blog provides a quick overview of how to deploy Dell VSI and how to perform non-disruptive upgrades of PowerStore systems with the VSI plug-in in vCenter.
Components of VSI
VSI consists of two components—a virtual machine (VM) and a plug-in for vCenter that is deployed when VSI is registered for the vCenter. The VSI 10.3 open virtual appliance (OVA) template is available on the Dell Technologies support website and is supported with vSphere 6.7 U2 (and later) through 8.0.x for deployments with an embedded platform services controller (PSC).
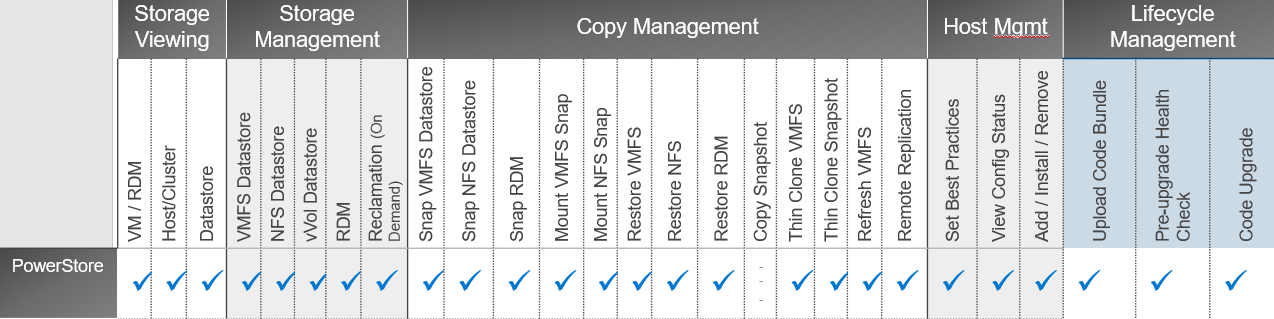
This chart shows VSI supported areas of operation for PowerStore:
Deployment
A deployed VSI VM needs 3.7 GB (thin) or 16 GB (thick) space on a datastore and is deployed with two vCPUs and 16 GB RAM. The VSI VM must be deployed on a network with access to the vCenter server and PowerStore. 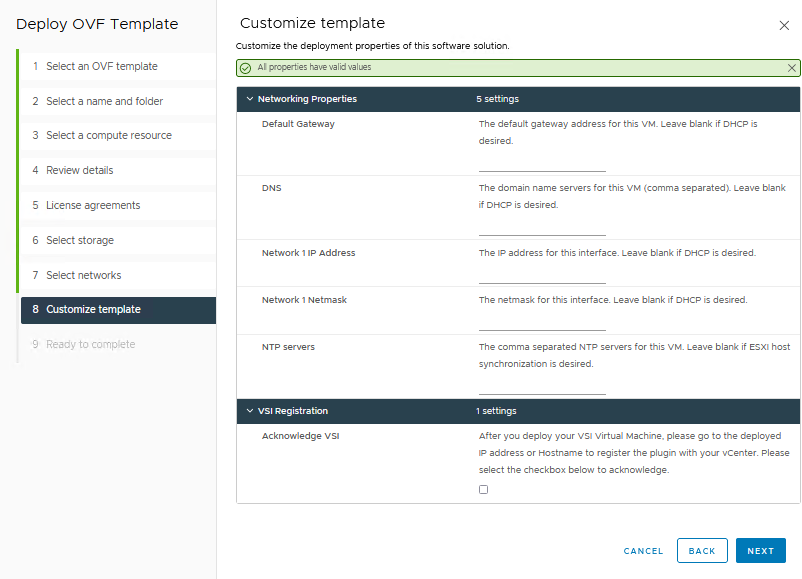
When the VM is deployed and started, you can access the plug-in management with https://<VSI-IP>.
Register VSI plug-in in vCenter
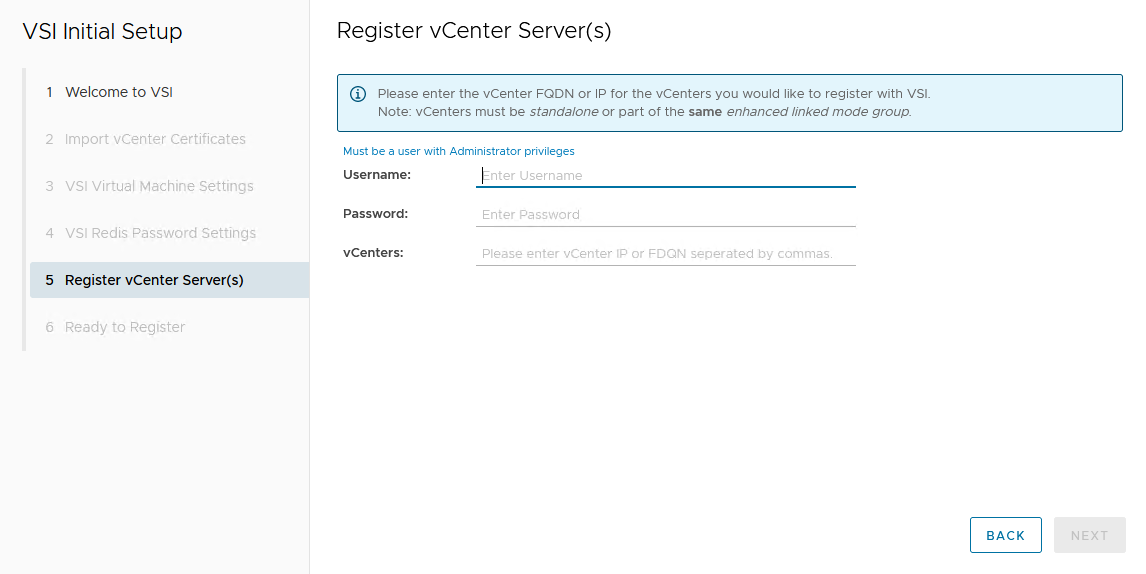
A wizard helps you register the plug-in in a vCenter. Initial setup only requires that you set the VSI password for the internal database and supply the vCenter address with username/password. Multiple vCenters can be registered if they are in a linked mode group.
After the VSI VM is configured, it takes a few minutes for the VM to come online.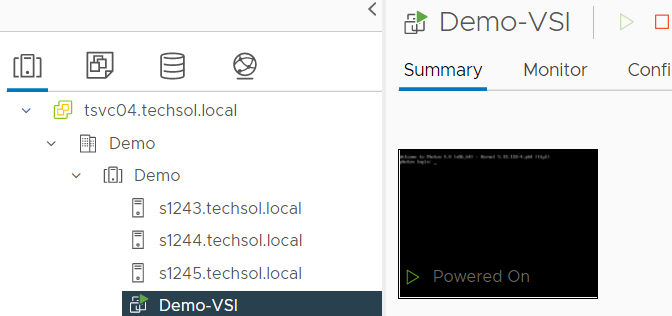
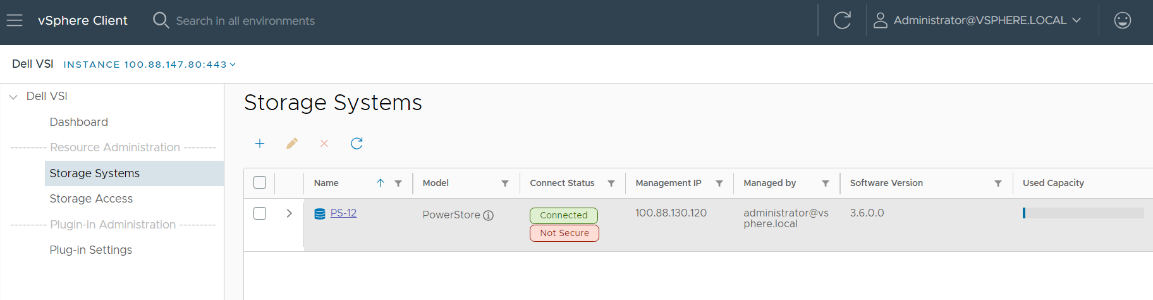
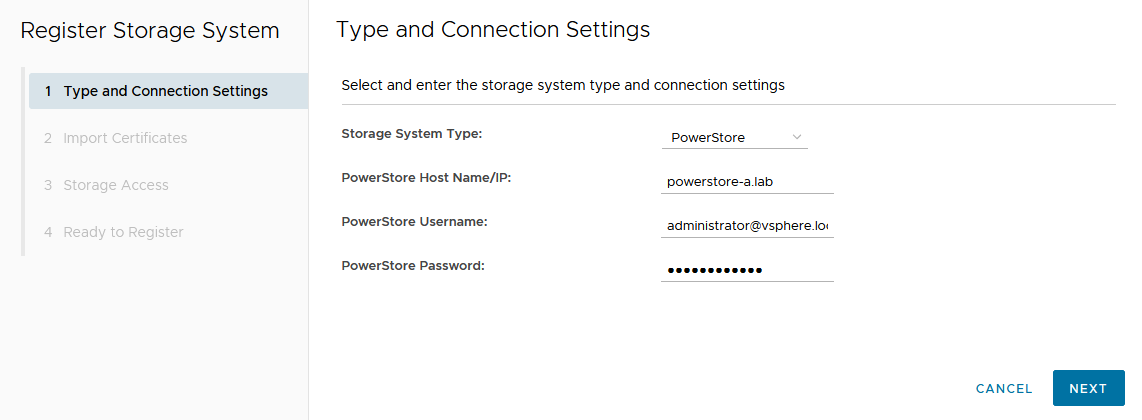
From the Dell VSI dashboard, select Storage Systems and the + sign to add the PowerStore system.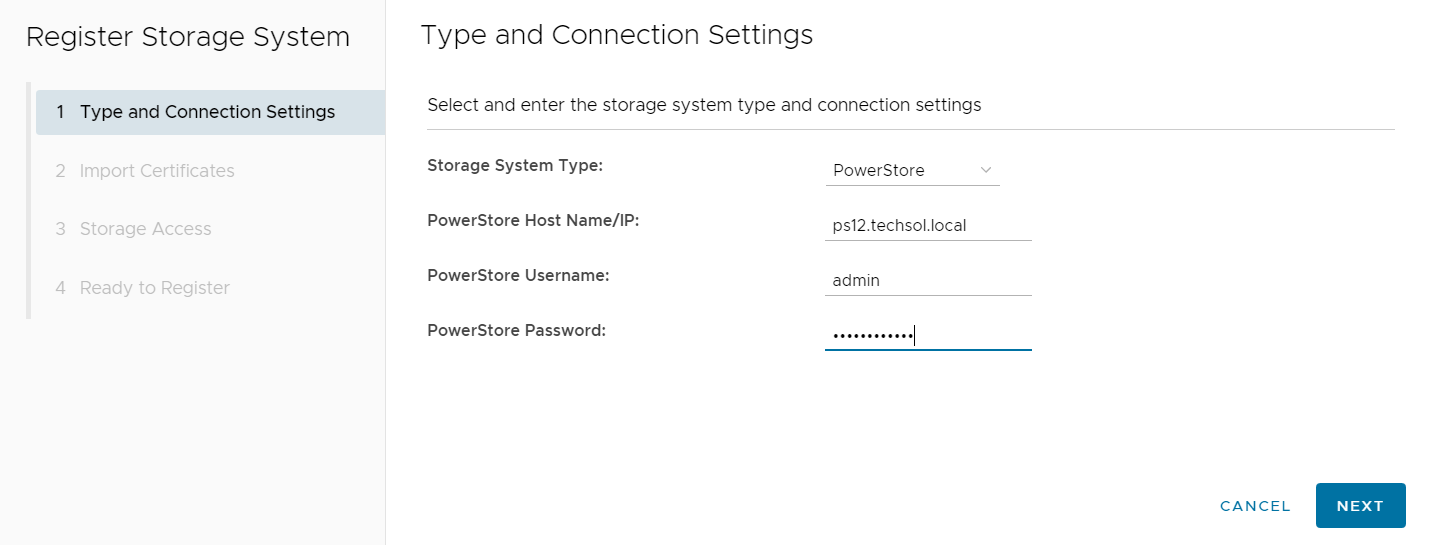
Perform a non-disruptive upgrade
VSI lifecycle management of PowerStore provides the following benefits:
- Upload the code bundle from the local device to PowerStore from the VSI plug-in to vCenter.
- Run a precheck after the bundle has been uploaded from the VSI plug-in to vCenter.
- Run the upgrade with the uploaded bundle from the VSI plug-in to vCenter.
The non-disruptive upgrade process with the VSI plug-in requires three steps:
- Upload the code bundle.
- Complete a pre-upgrade health check.
- Perform a code upgrade.
To perform the non-disruptive upgrade, do the following:
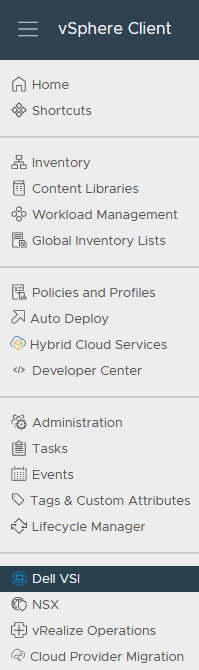
- From the Dell VSI dashboard, select the PowerStore system.
 After selecting the PowerStore system, select the Upgrades tab.
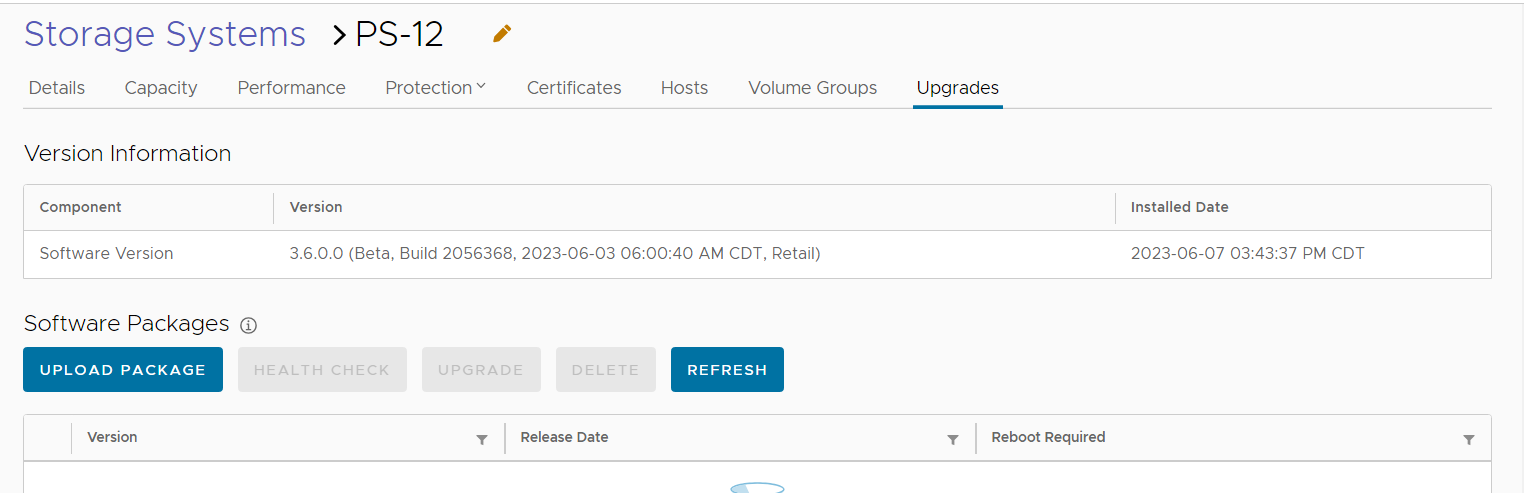
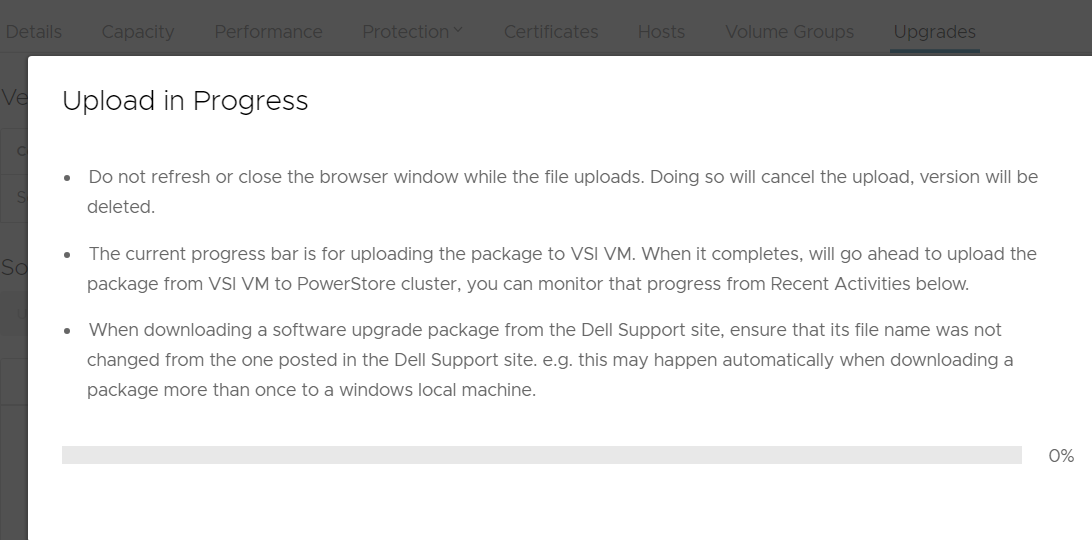
3. Under the Upgrades tab, select Upload package.
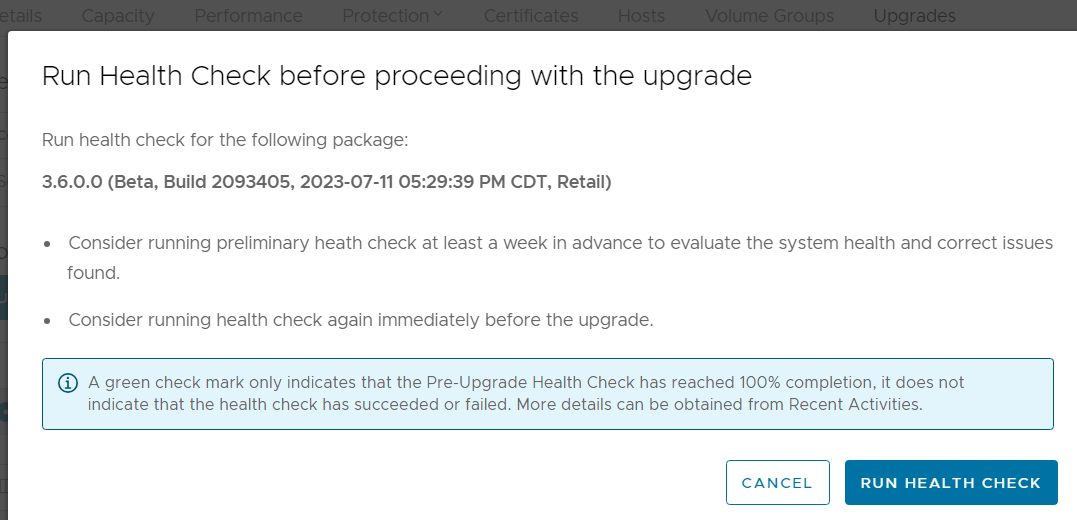
4. After uploading the code, select Run Health Check.
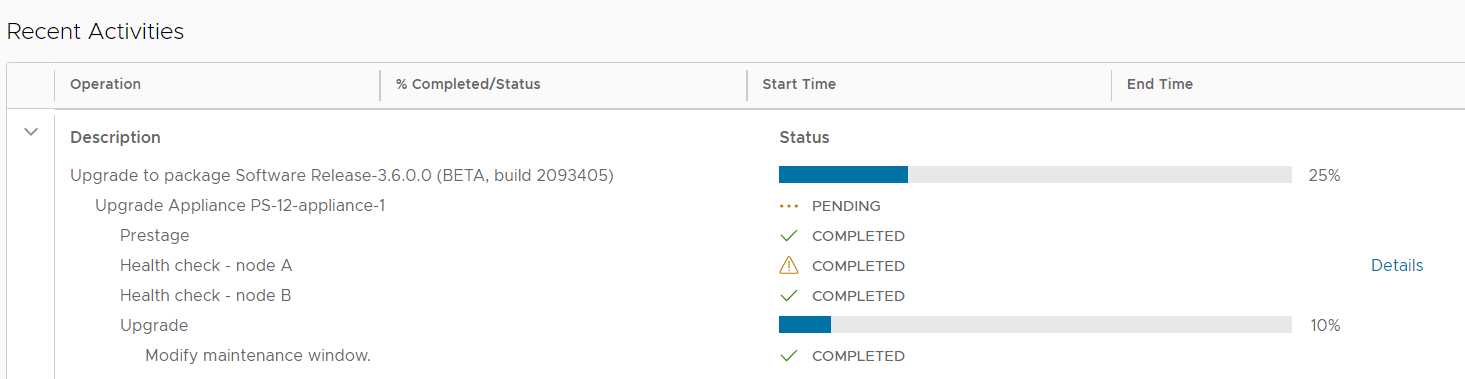
5. When the health check completes, kick off the upgrade process and monitor the status until complete.
Conclusion
Dell PowerStore extends the boundaries of mid-range storage with unmatched capabilities for enterprise storage. PowerStore integrates seamlessly with the VSI plugin. This system integration enables the orchestration necessary to deliver non-disruptive, streamlined PowerStore updates from within VMware vCenter.
Author: Jason Gates
Related Blog Posts

Provision PowerStore Metro Volumes with Dell Virtual Storage Integrator (VSI)

Tue, 30 Aug 2022 19:55:24 -0000
|Read Time: 0 minutes
Since PowerStoreOS 3.0, native metro volumes have been supported for PowerStore in vSphere Metro Storage Cluster configurations. With the new Virtual Storage Integrator (VSI) 10.0 plug-in for vSphere, you can configure PowerStore metro volumes from vCenter without a single click in PowerStore Manager.
This blog provides a quick overview of how to deploy Dell VSI and how to configure a metro volume with the VSI plug-in in vCenter.
Components of VSI
VSI consists of two components—a VM and a plug-in for vCenter that is deployed when VSI is registered for the vCenter. The VSI 10.0 OVA template is available on Dell Support and is supported with vSphere 6.7 U2 (and later) through 7.0.x for deployments with an embedded PSC.
Deployment
A deployed VSI VM requires 3.7 GB (thin) or 16 GB (thick) space on a datastore and is deployed with 4 vCPUs and 16 GB RAM. The VSI VM must be deployed on a network with access to the vCenter server and PowerStore clusters. During OVA deployment, the import wizard requests information about the network and an IP address for the VM.

When the VM is deployed and started, you can access the plug-in management with https://<VSI-IP>.
Register VSI plug-in in vCenter
A wizard helps you register the plug-in in a vCenter. Registration only requires that you set the VSI Redis Password for the internal database and username/password.

After the VSI VM is configured, it takes some time for the plug-in to appear in vCenter. You might be required to perform a fresh login to the vSphere Client before the Dell VSI entry appears in the navigation pane.
From the Dell VSI dashboard, use the + sign to add both PowerStore clusters used for metro volumes.
Configure a metro volume with the VSI plug-in
As with PowerStore Manager, creating a metro volume with the VSI plug-in requires three steps:
- Create and map a standard volume.
- Configure metro for the newly created volume.
- Map the second metro volume to the hosts.
The following example adds a new metro volume to cluster Non-Uniform, which already has existing metro volumes provisioned in a Non-Uniform host configuration. Esx-a.lab is local to PowerStore-A, and esx-b.lab is local to PowerStore-B.
- Create and map a standard volume in vSphere.
Use the Actions menu either for a single host, a cluster, or even the whole data center in vSphere. In this example, we chose Dell VSI > Create Datastore for the existing cluster Non-Uniform. - Configure metro for the newly created volume.
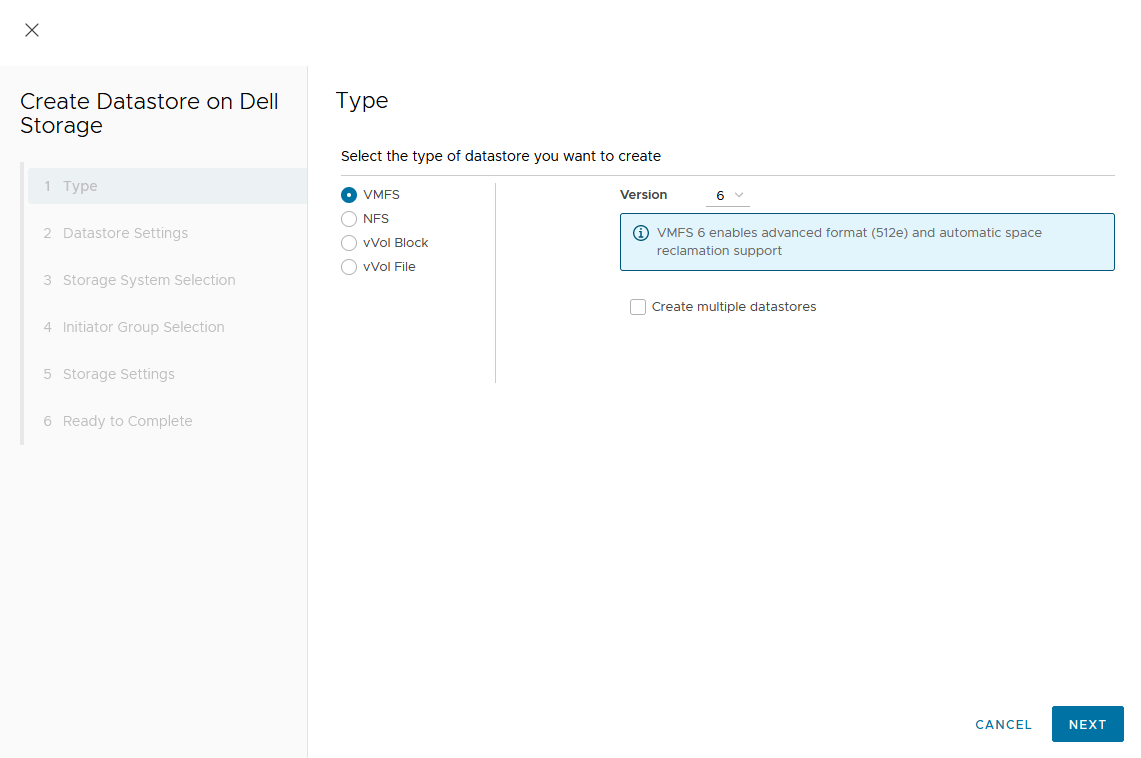
The VSI Create Datastore wizard leads us through the configuration.- For a metro volume, select the volume type VMFS.
- Provide a name for the new volume.
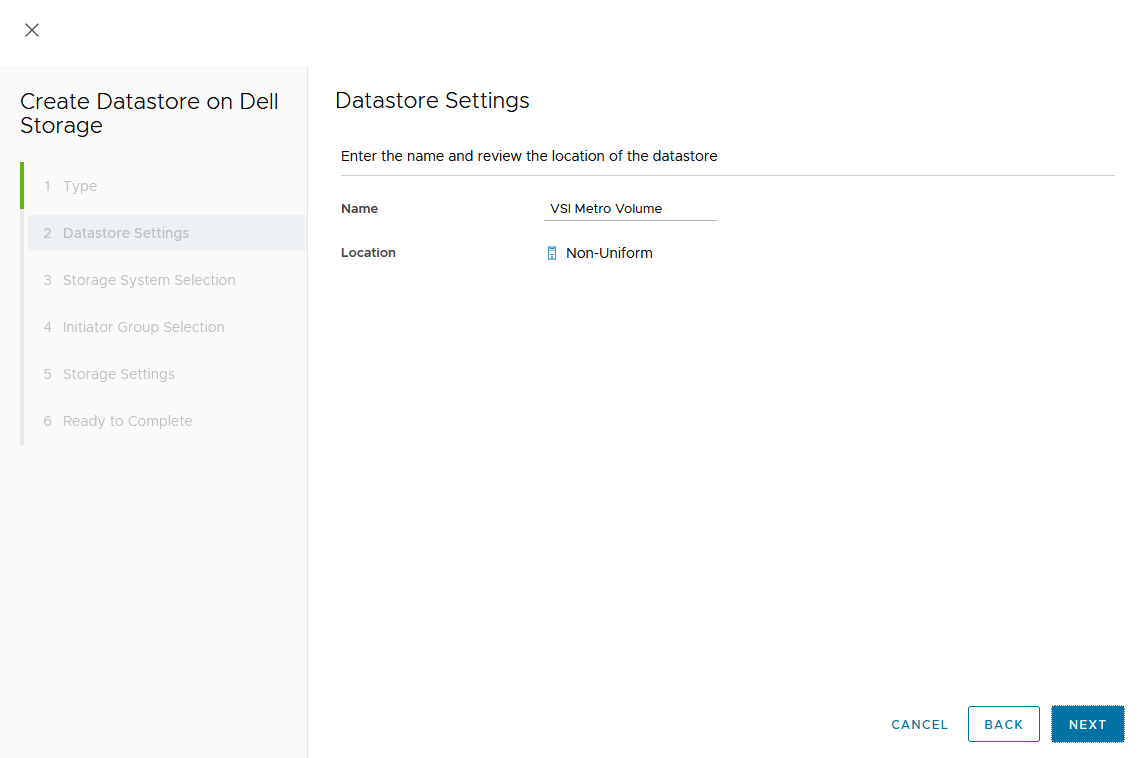
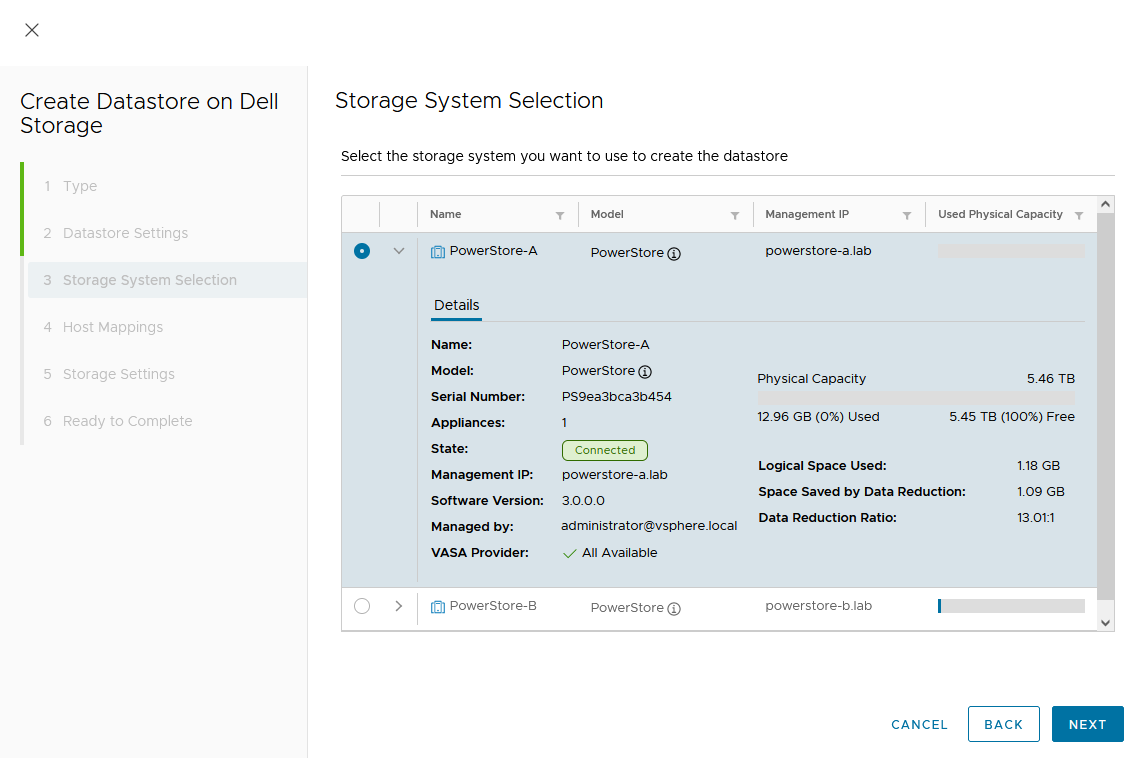
- Select the storage system.
- For a metro volume, select the volume type VMFS.
In the dialog box, you can expand the individual storage system for more information. We start with PowerStore-A for esx-a.lab.
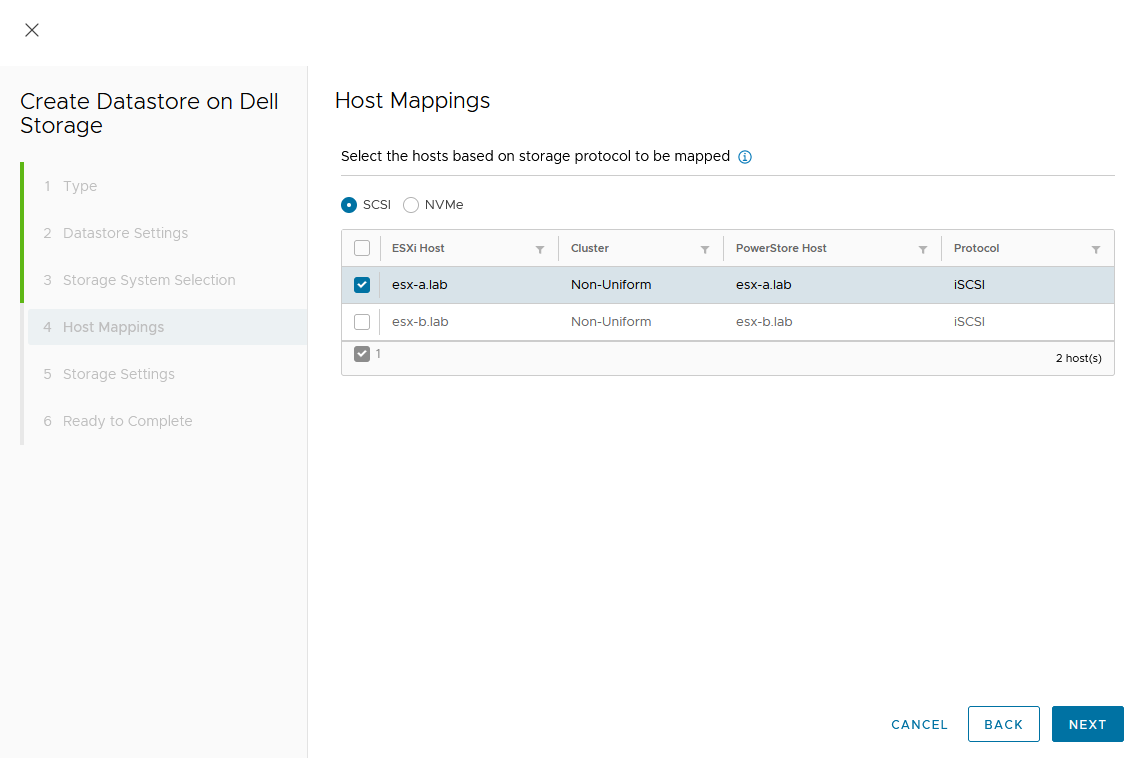
d. Map the host.
As this is a Non-Uniform cluster configuration, only esx-a.lab is local to PowerStore-A and should be mapped to the new volume on PowerStore-A.
e. Set a Capacity and select other volume settings such as Performance Policy or Protection Policy.
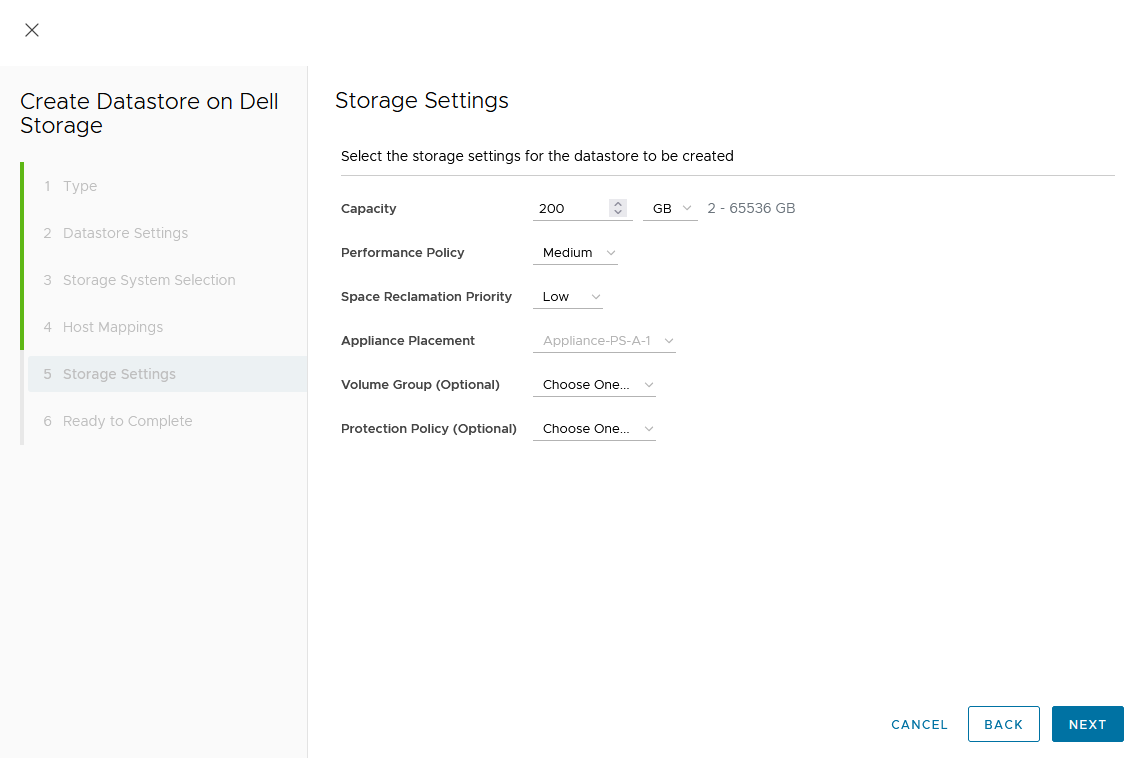
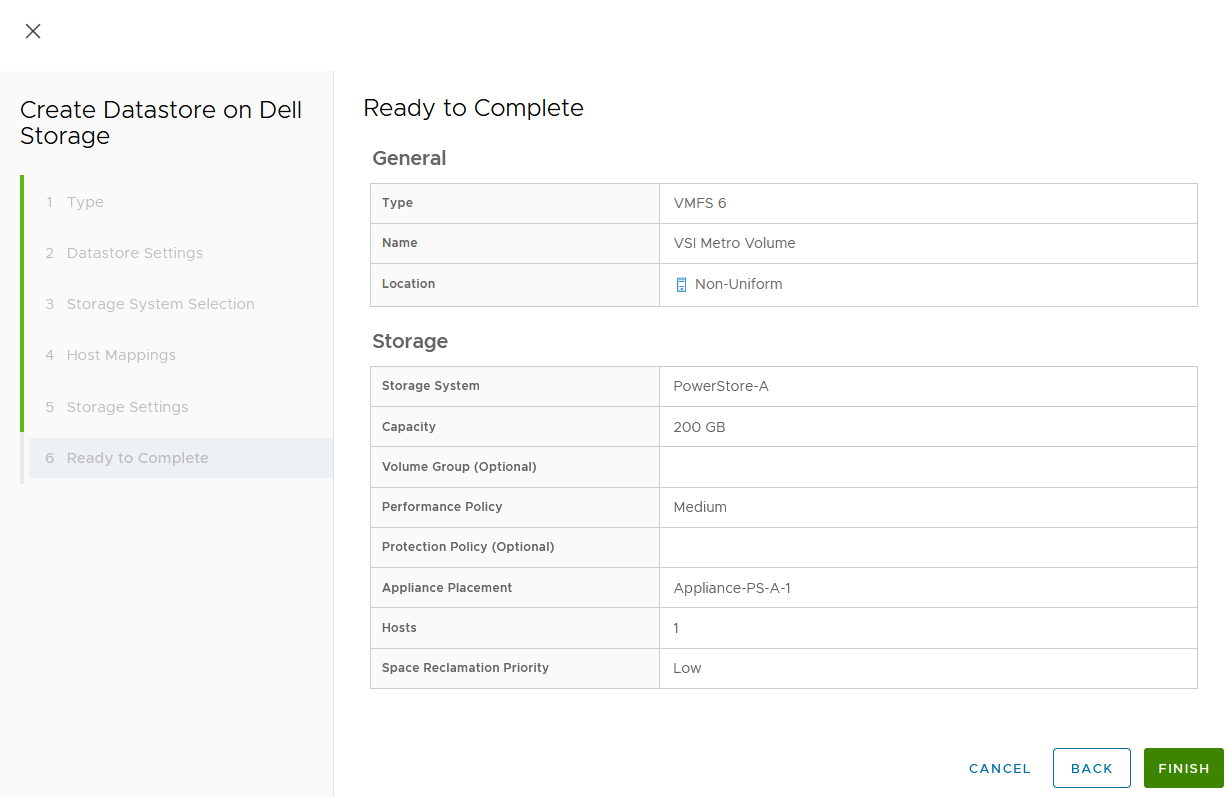
Wizard summary page:
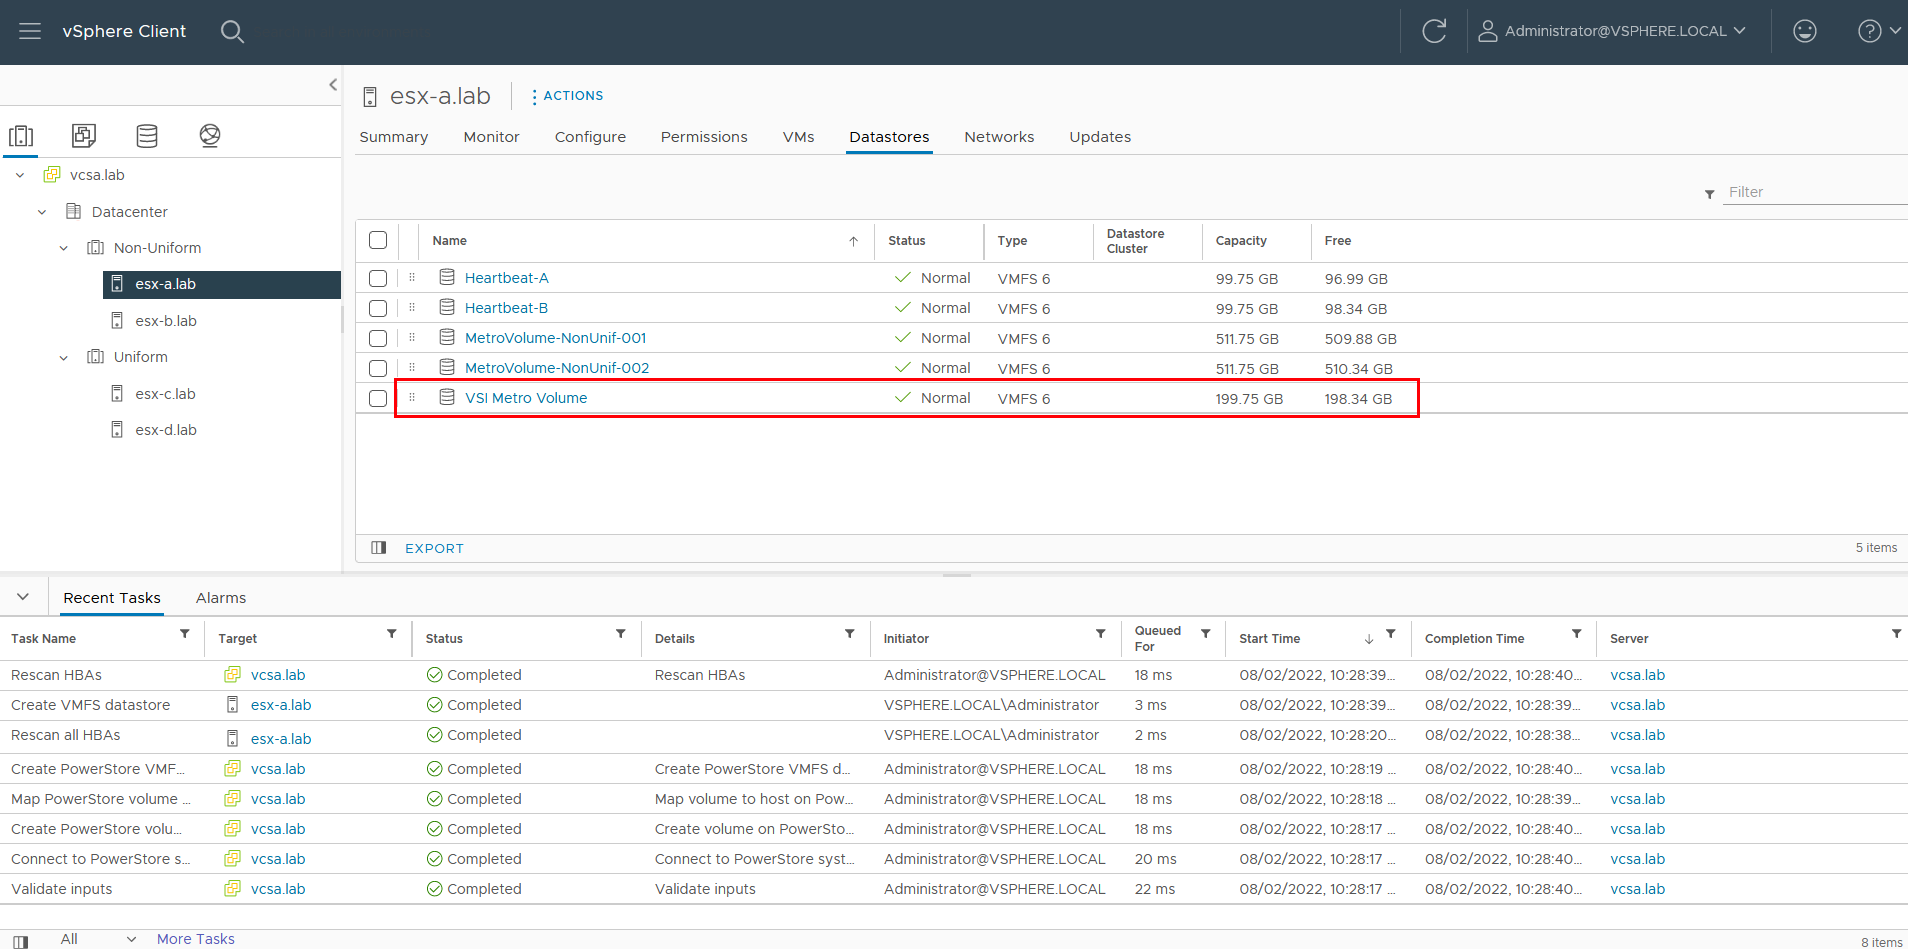
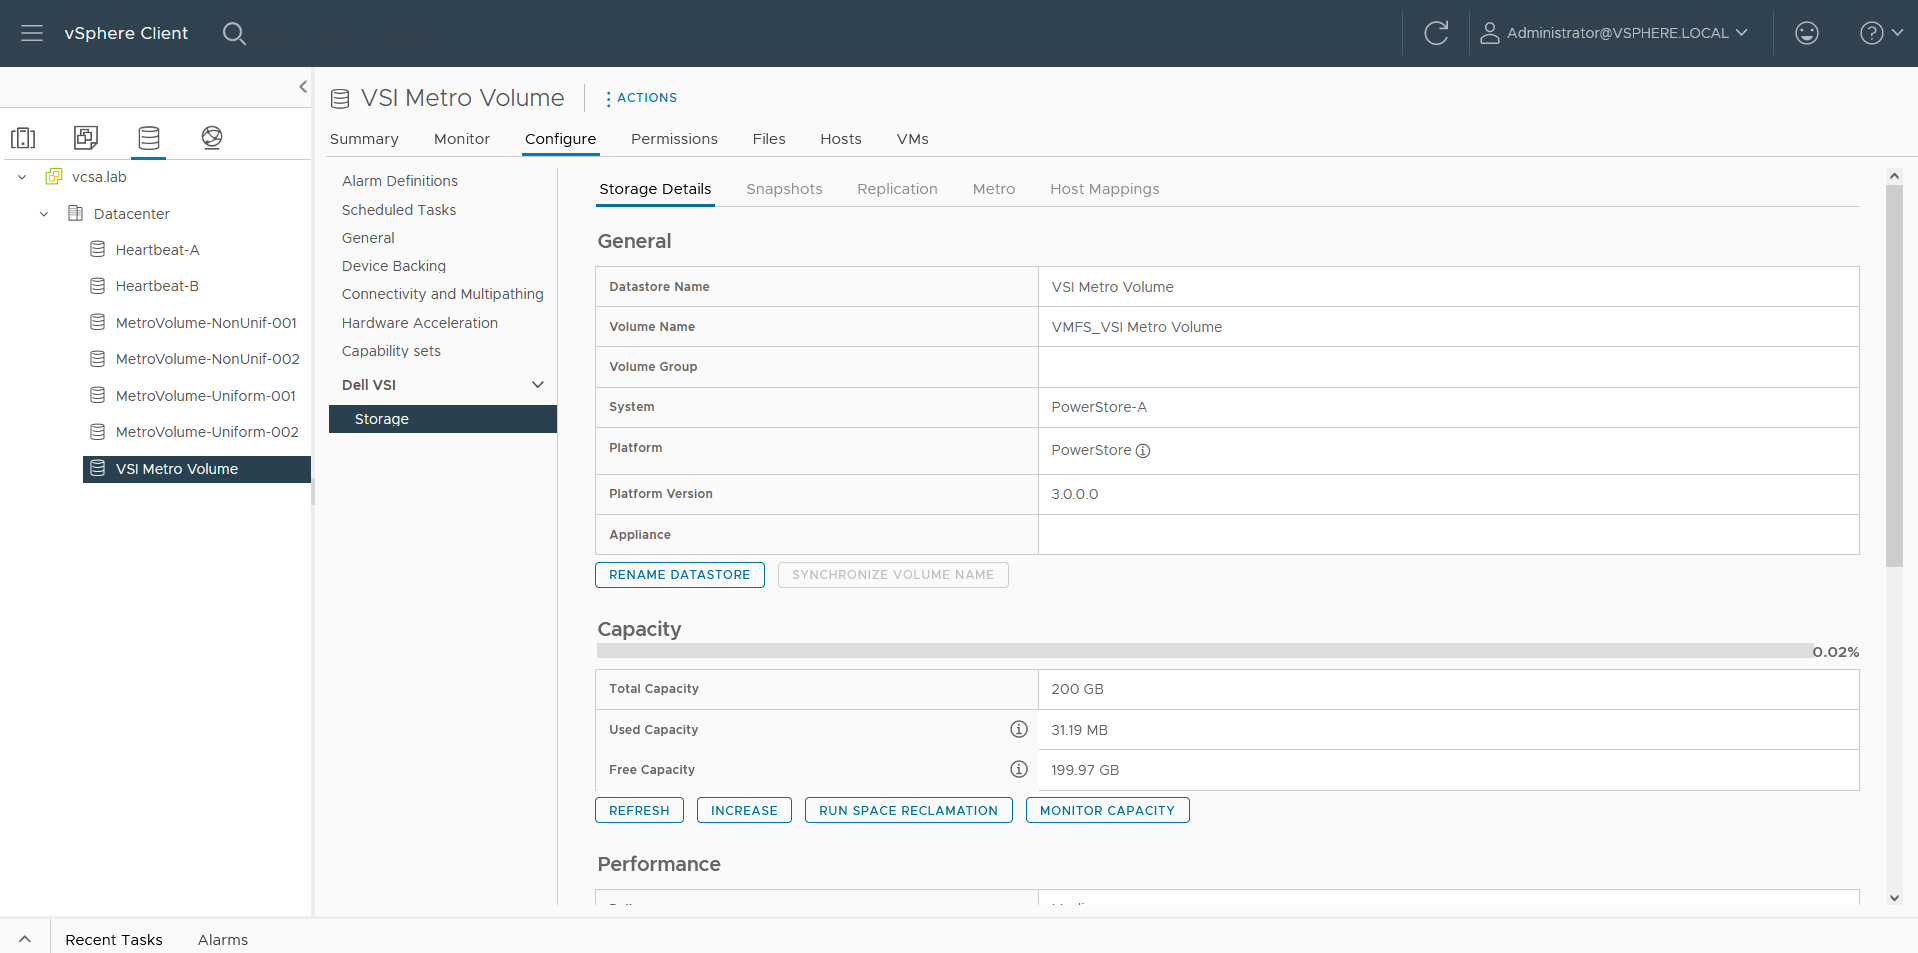
Upon completion, the volume is configured and mapped to the host. The following screenshot shows the new volume, VSI Metro Volume, and the tasks that ran to create and map the volume in vSphere.
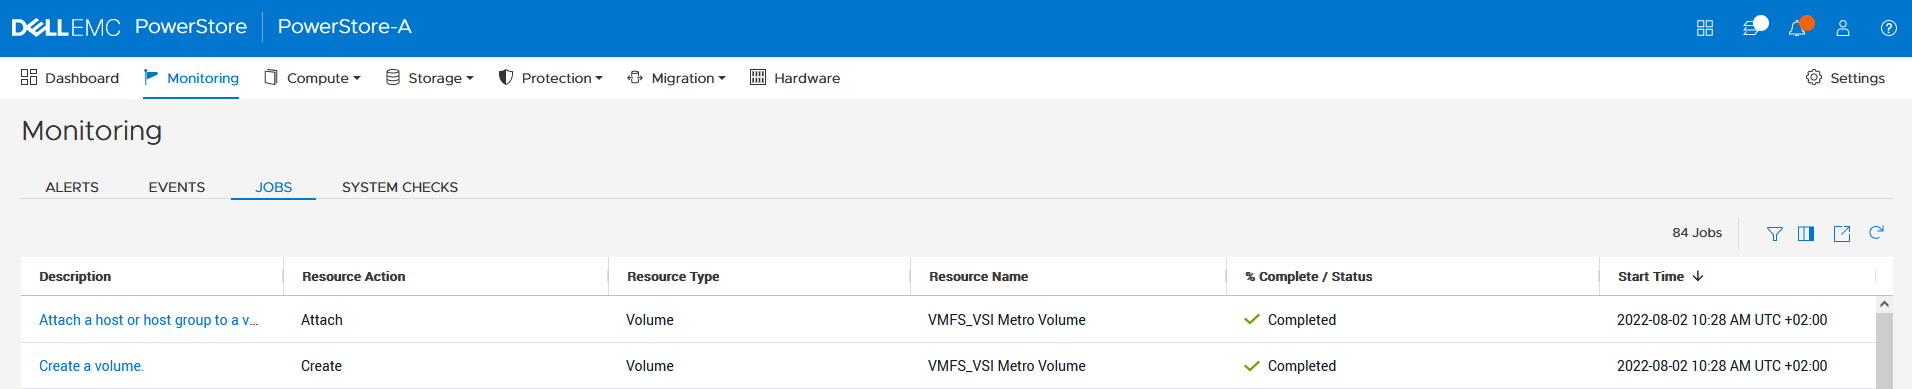
For reference, the related jobs in PowerStore Manager for PowerStore-A are also available at Monitoring > Jobs:
f. Select the VSI Metro Volume datastore, and then select Configure > Dell VSI > Storage to see the details for the backing device.
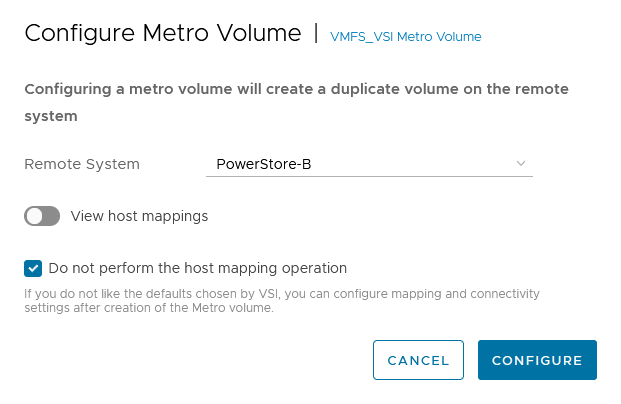
g. On the Storage Details tab under Protection, click Configure Metro.

h. In the Configure Metro Volume dialog box, specify the Remote System and whether host mapping should be performed.
Depending on host registrations on PowerStore, automatic mapping may be unwanted and can be skipped. In this example, PowerStore-B has also the esx-a.lab host registered to provide access to one of the heartbeat volumes required for vSphere HA. The host mapping operation in the Create Datastore wizard creates an unwanted mapping of the volume from PowerStore-B to esx-a.lab. To configure manual mapping after the metro volume is created, select Do not perform the host mapping operation.
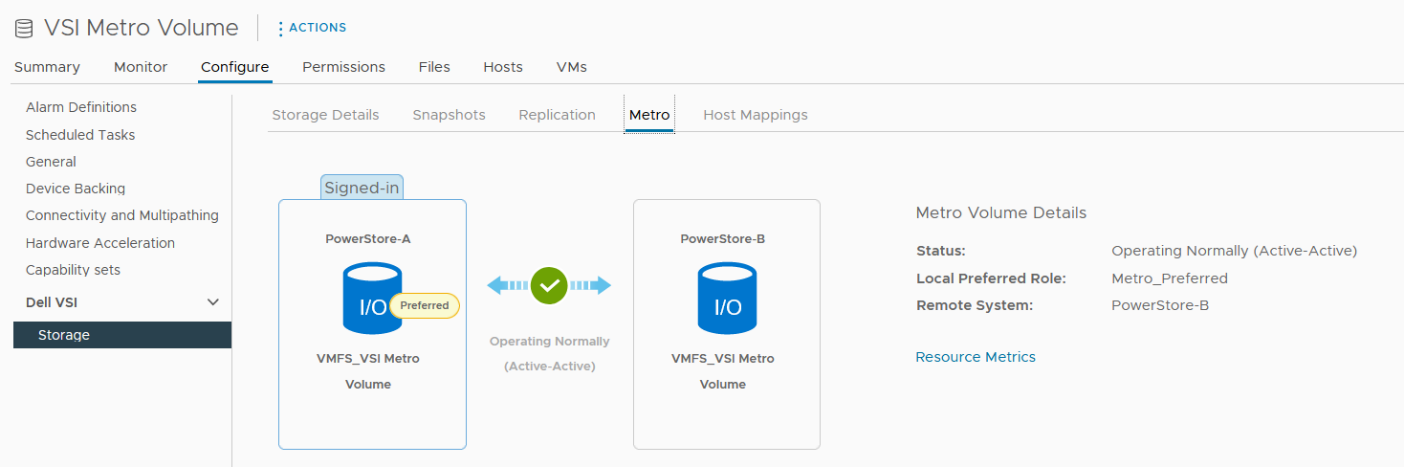
The metro volume is immediately configured on PowerStore and the Metro tab in Dell VSI > Storage view shows the status for the metro configuration.
3. Map the second metro volume to the host.
Because we skipped host mapping when we created the metro volume, we must map the esx-b.lab host to the metro volume on PowerStore-B on the Host Mappings tab. Currently, the volume is only mapped from PowerStore-A to esx-a.lab.
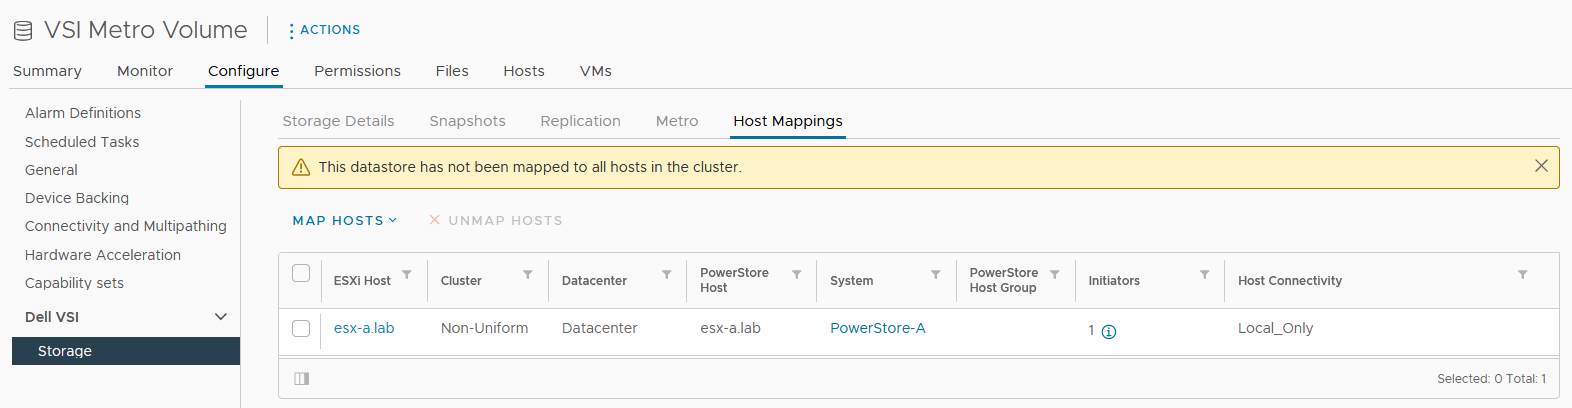
a. Select Map Hosts > PowerStore-B to open the Map Hosts dialog box.
b. Map the volume on PowerStore-B for esx-b.lab.
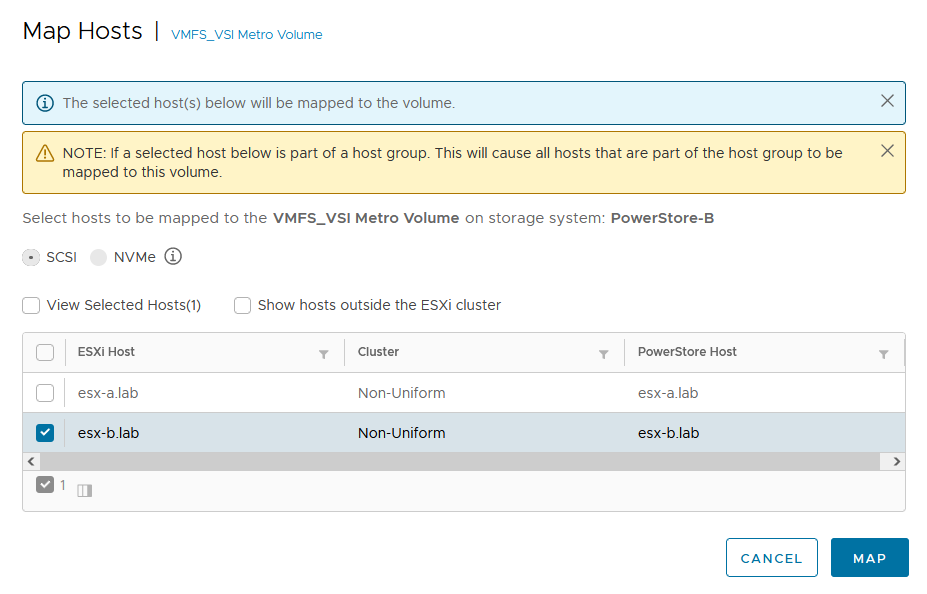
The host mapping overview shows the result and concludes the metro volume configuration with Virtual Storage Integrator (VSI) plugin.

Resources
- Dell Virtual Storage Integrator (VSI) for VMware vSphere Client Version 10.0 Product Guide
- Dell PowerStore Protecting Your Data—Metro Protection
- Dell PowerStore: Metro Volume
Author: Robert Weilhammer, Principal Engineering Technologist
https://www.xing.com/profile/Robert_Weilhammer

Protecting VMware Workloads with PowerStore Metro Volumes
Mon, 09 Oct 2023 18:14:42 -0000
|Read Time: 0 minutes
PowerStore’s metro volume replication allows storage administrators to create a high availability shared SAN environment across PowerStore clusters. Metro Volume provides symmetric active/active data access to VMware environments for use cases such as: planned migrations, disaster avoidance, and proactive resource rebalancing.
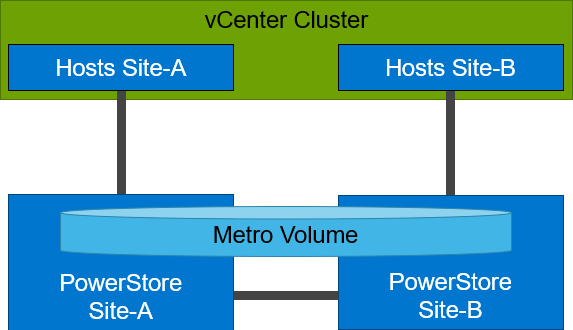
PowerStore supports two different configurations with Metro volume access: non-uniform and uniform. In this blog, our configuration is non-uniform.
Here is our sample non-uniform configuration, where hosts only have access to its local PowerStore system:
Creating the Metro Volume
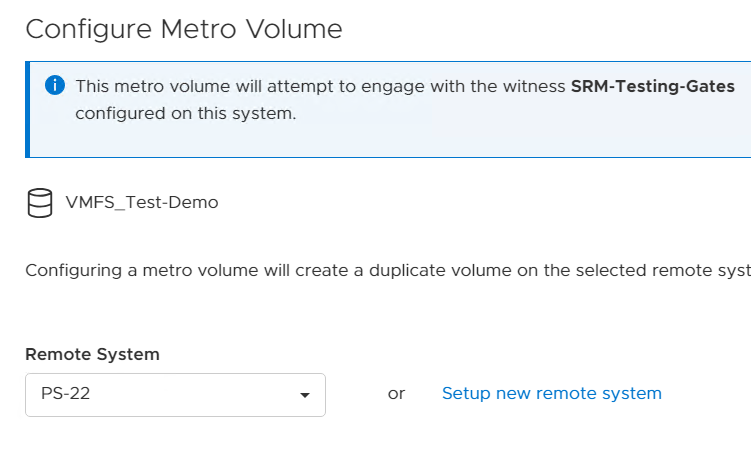
- Creating the metro volume session is a relatively simple process and involves a few clicks. Log into PowerStore Manager, select Storage, then select the volume (here, VMFS_Test-Demo), then select Configure Metro Volume.

2. On the Configure Metro Volume page, select the remote PowerStore to create the duplicate volume.
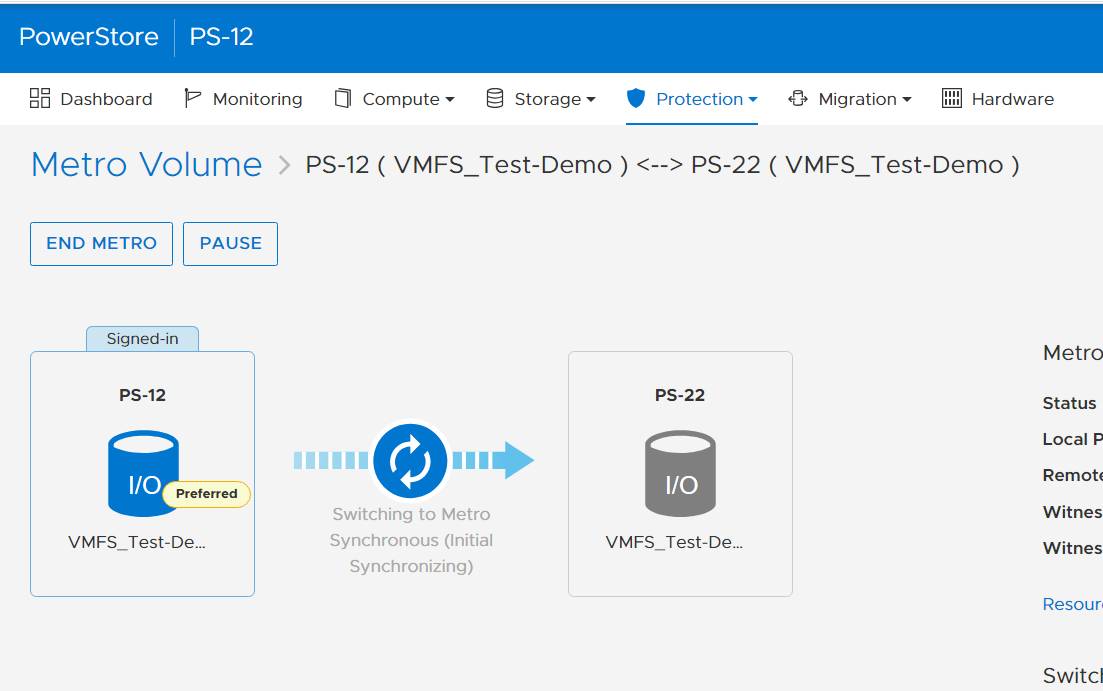
3. Now we see the volume switching to metro synchronous.
Creating the Metro Witness
Starting with PowerStore version 3.6, Metro Volume supports a witness server. The witness server is a third party that is installed on a stand-alone host. The witness observes the status of the local and remote PowerStore systems. When a failure occurs, the witness server determines which system remains accessible to hosts and continues to service I/Os. When configuring Metro Witness on a PowerStore appliance, you must generate a unique token.
Note: You must configure the witness on each PowerStore cluster.
1. The following is an example of using the generate_token.sh script to create the token JeBTPIFf:

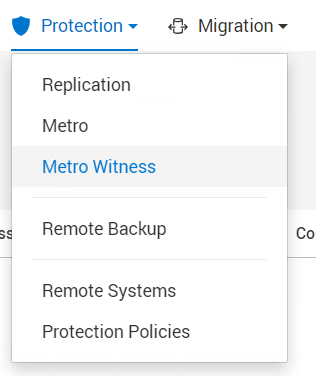
2. After gathering the token, select Protection > Metro Witness to enter the Metro witness configuration details.
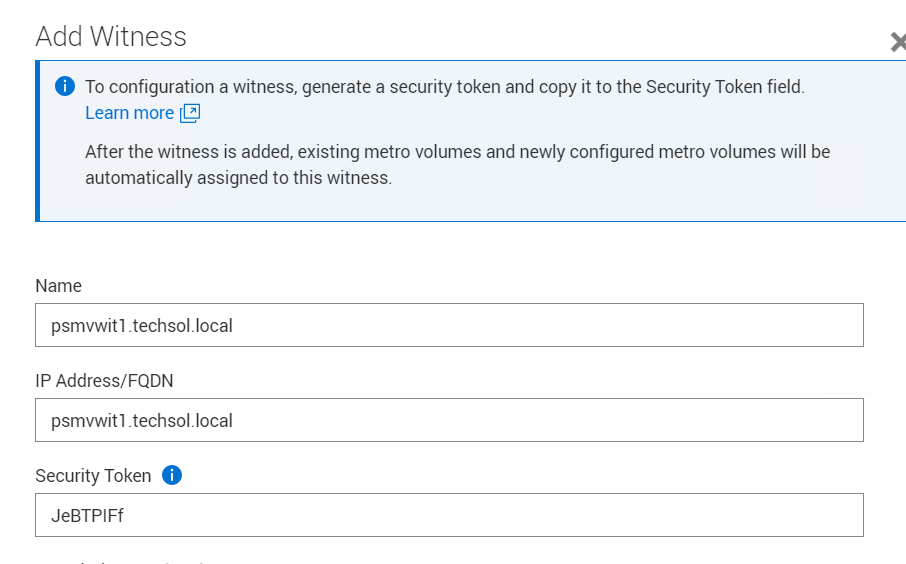
3. Enter the witness details, including the DNS or IP address and security token.
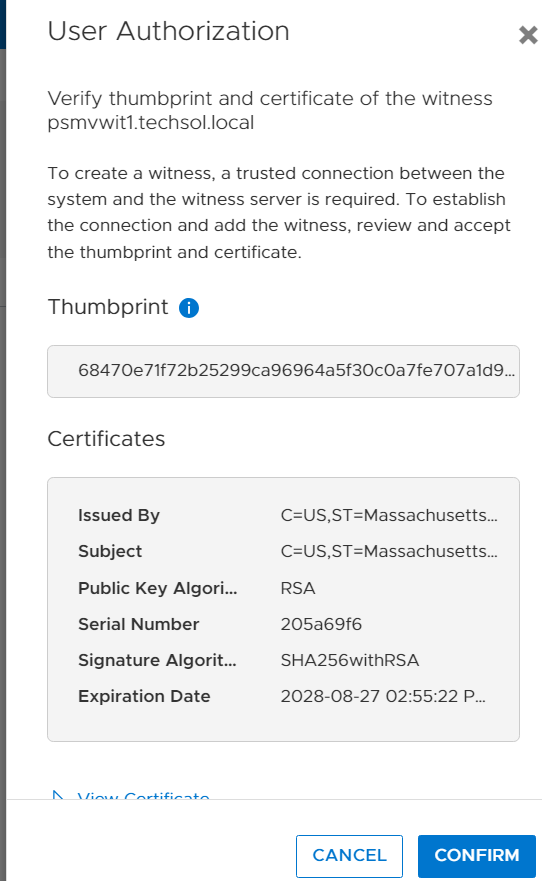
4. Confirm the witness settings.
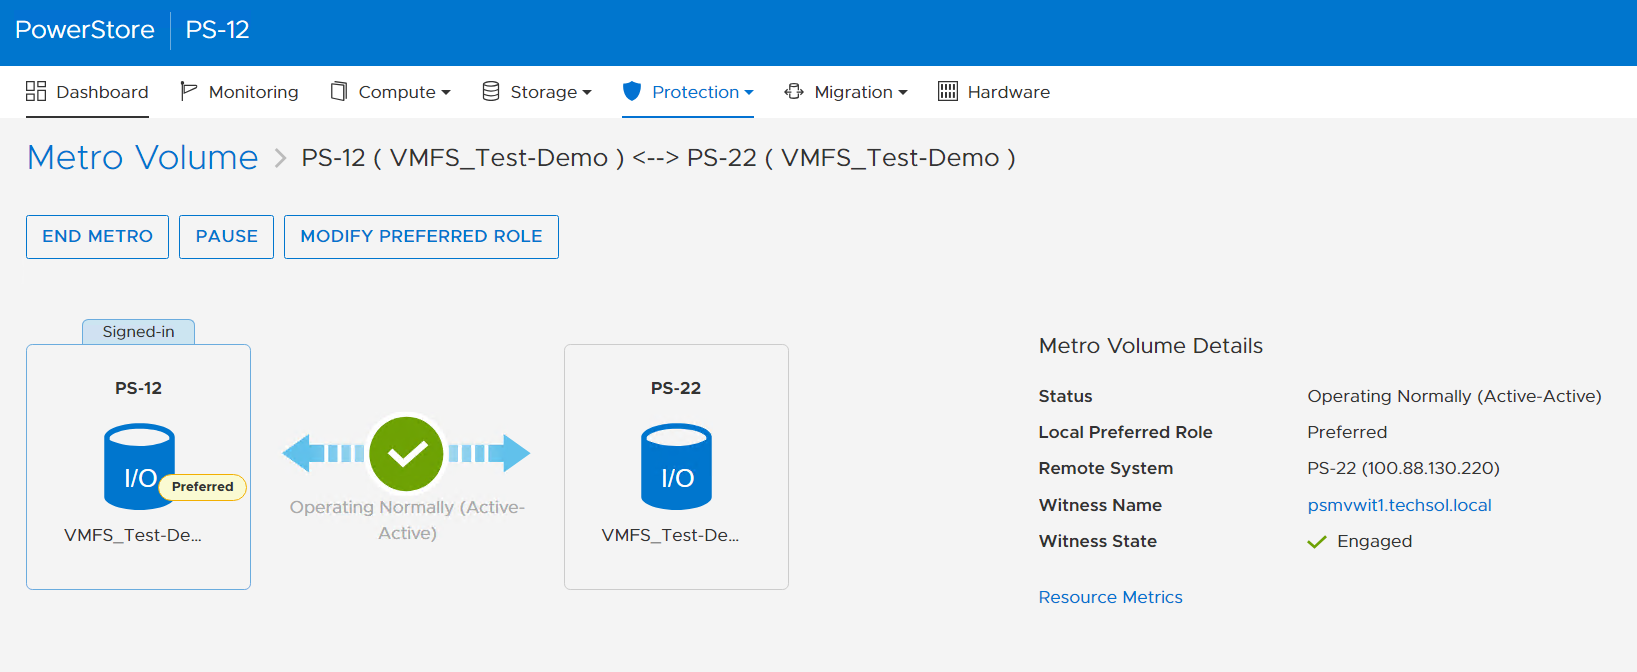
5. Witness is connected to the metro sessions.
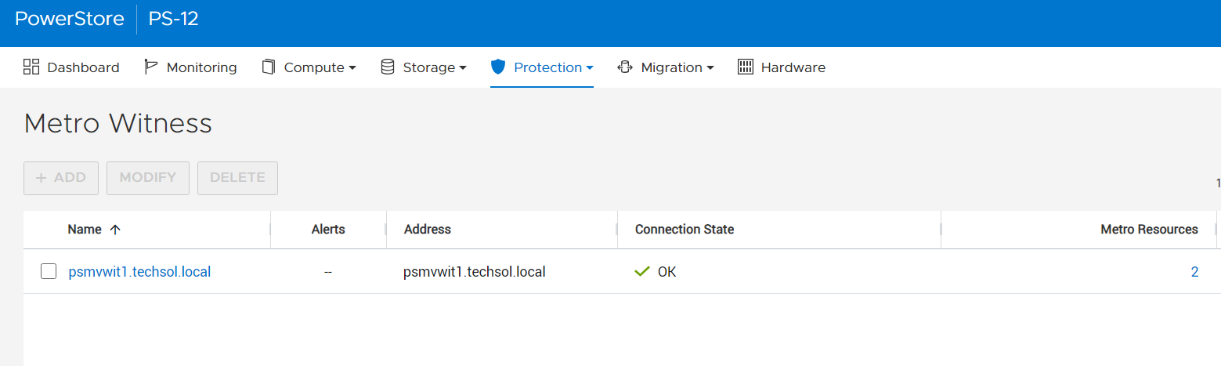
6. The metro session is synced, and the witness is now engaged.
Metro Volume is designed to give VMware environments the ability to operate synchronously without disruption. Metro Volume integrates seamlessly with vSphere Metro Storage Cluster, for our PowerStore customers who must avoid disaster/data unavailability.
For more information, see the following resources.
Resources
- White paper: Dell PowerStore: Metro Volume
- White paper: Dell PowerStore: Replication Technologies
Author: Jason Gates