
Integrate and configure Data Protection Advisor with Splunk
Integrate and configure Data Protection Advisor with Splunk
-
High-level procedure to integrate Data Protection Advisor with Splunk
- Create and configure Analysis Engine policy with rules on Data Protection Advisor
- Configure a receiving port from the Splunk Web UI
- Install the Splunk universal forwarder on Data Protection Advisor
- Query the Splunk main index for events forwarded from Data Protection Advisor
Configure analysis policy on Data Protection Advisor with rules and actions
From the Data Protection Advisor UI, navigate to “Policies” and select “CREATE POLICY” to create an analysis policy with analysis rules and policy-based actions as shown in Figure 45.
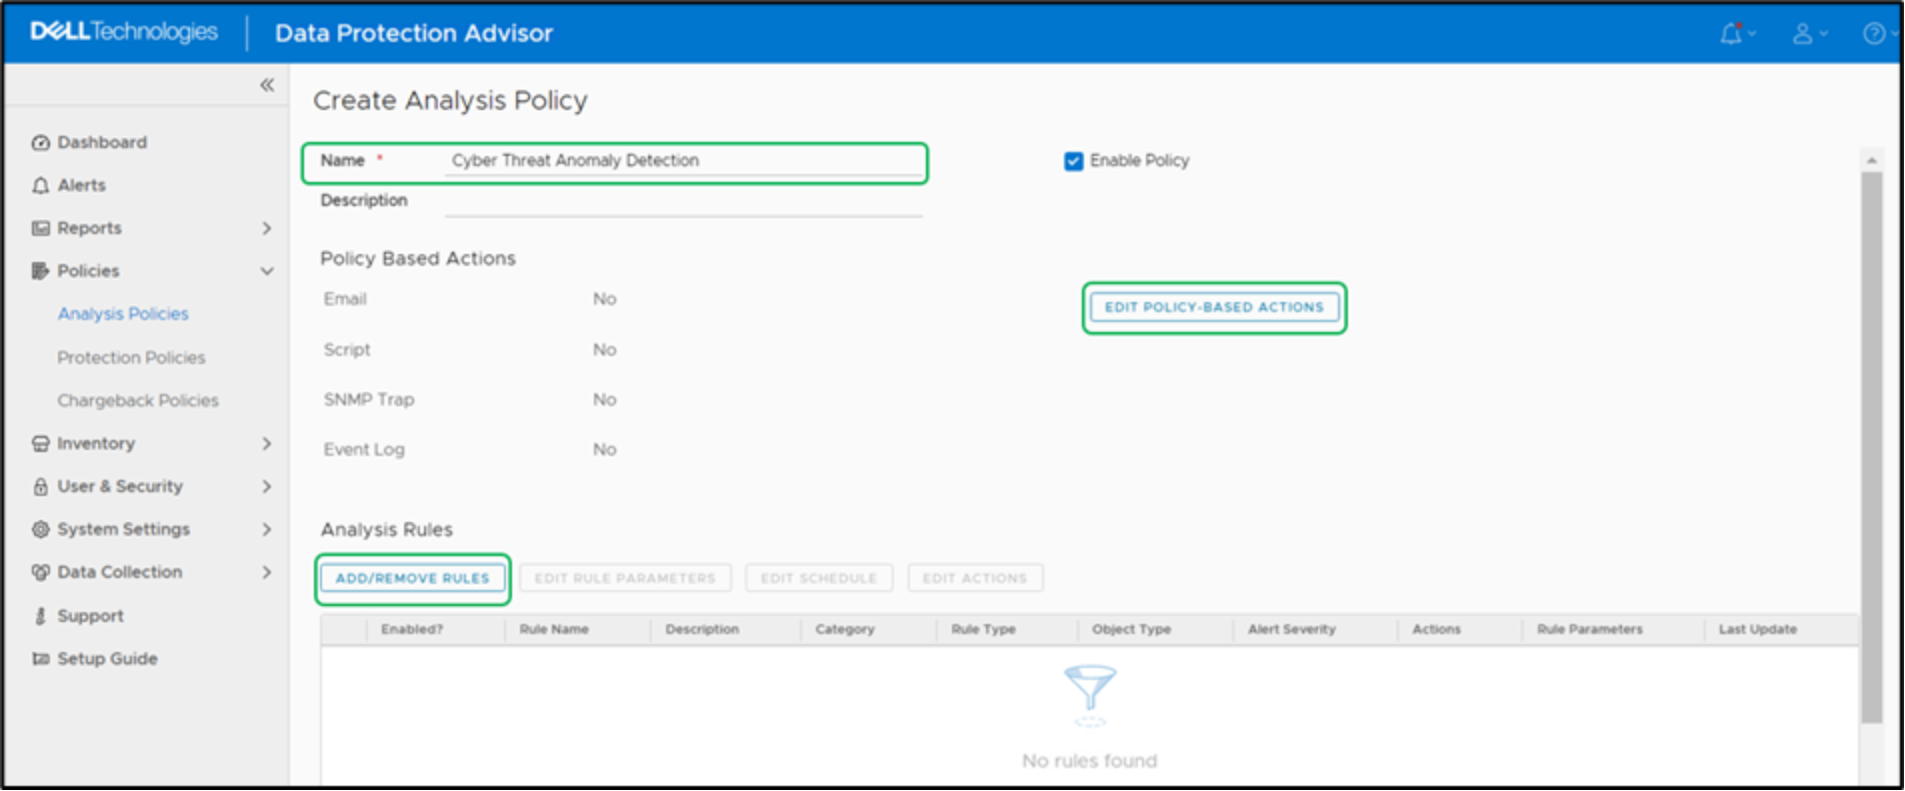
Figure 45. Creating analysis policy in Data Protection Advisor UI
In the policy-based actions, select “EDIT POLICY-BASED ACTIONS” and enable the event log action “Write an event to the Windows Event Log” as shown in Figure 46.
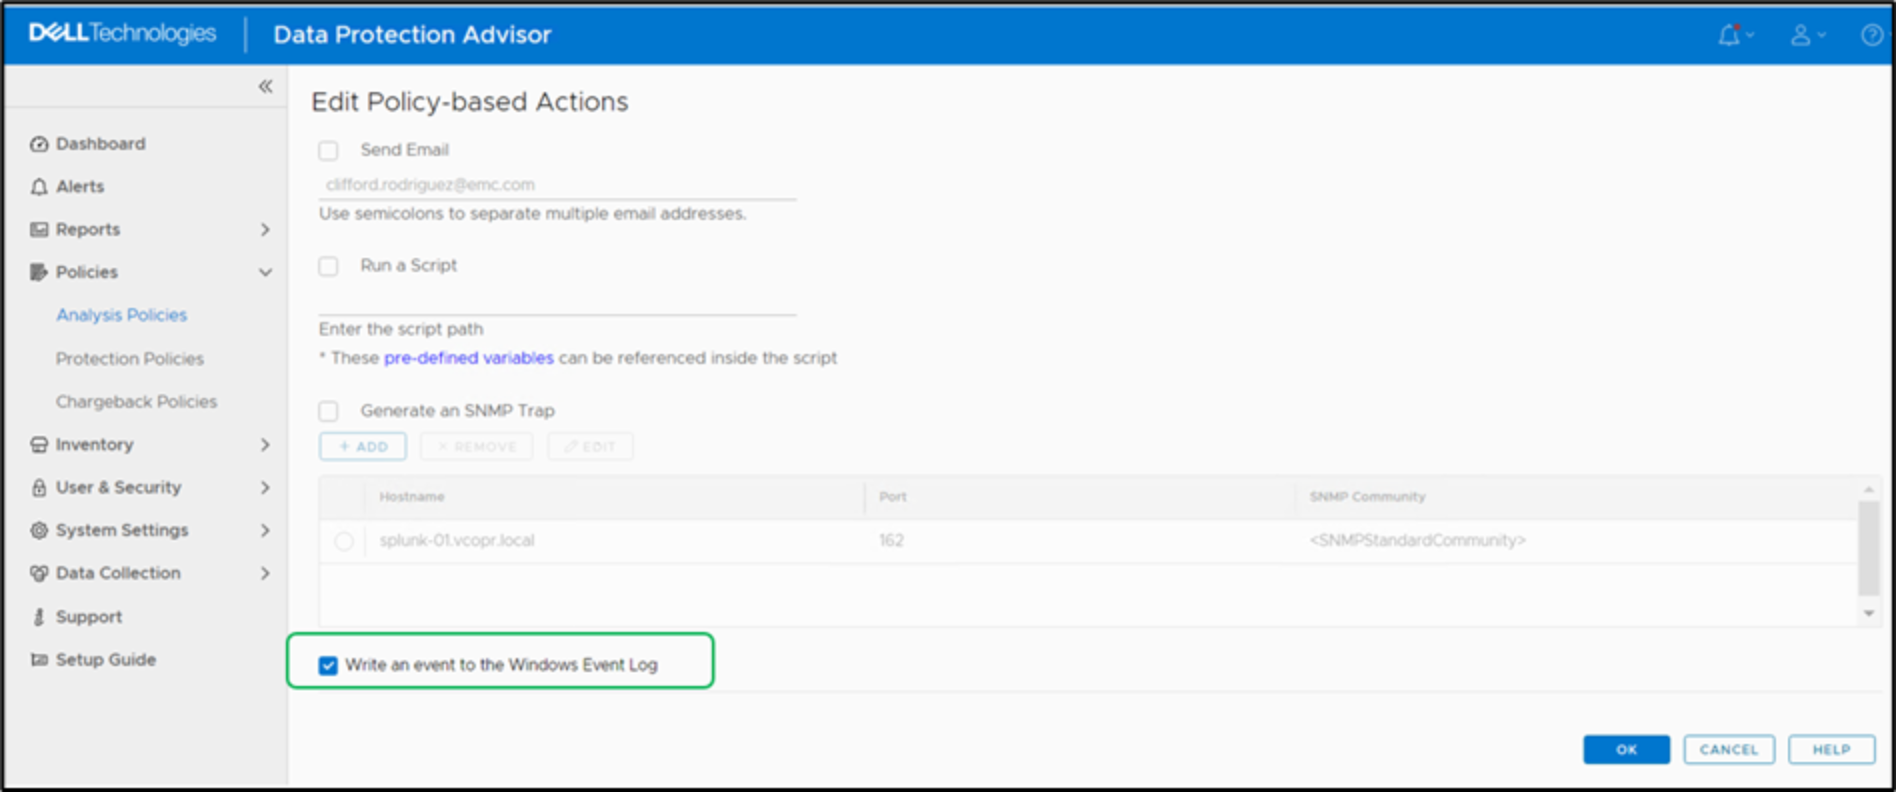
Figure 46. Policy-based action configuration
In the Analysis Rules, select “ADD/REMOVE RULES” to add the analysis rules as shown in Figure 47.
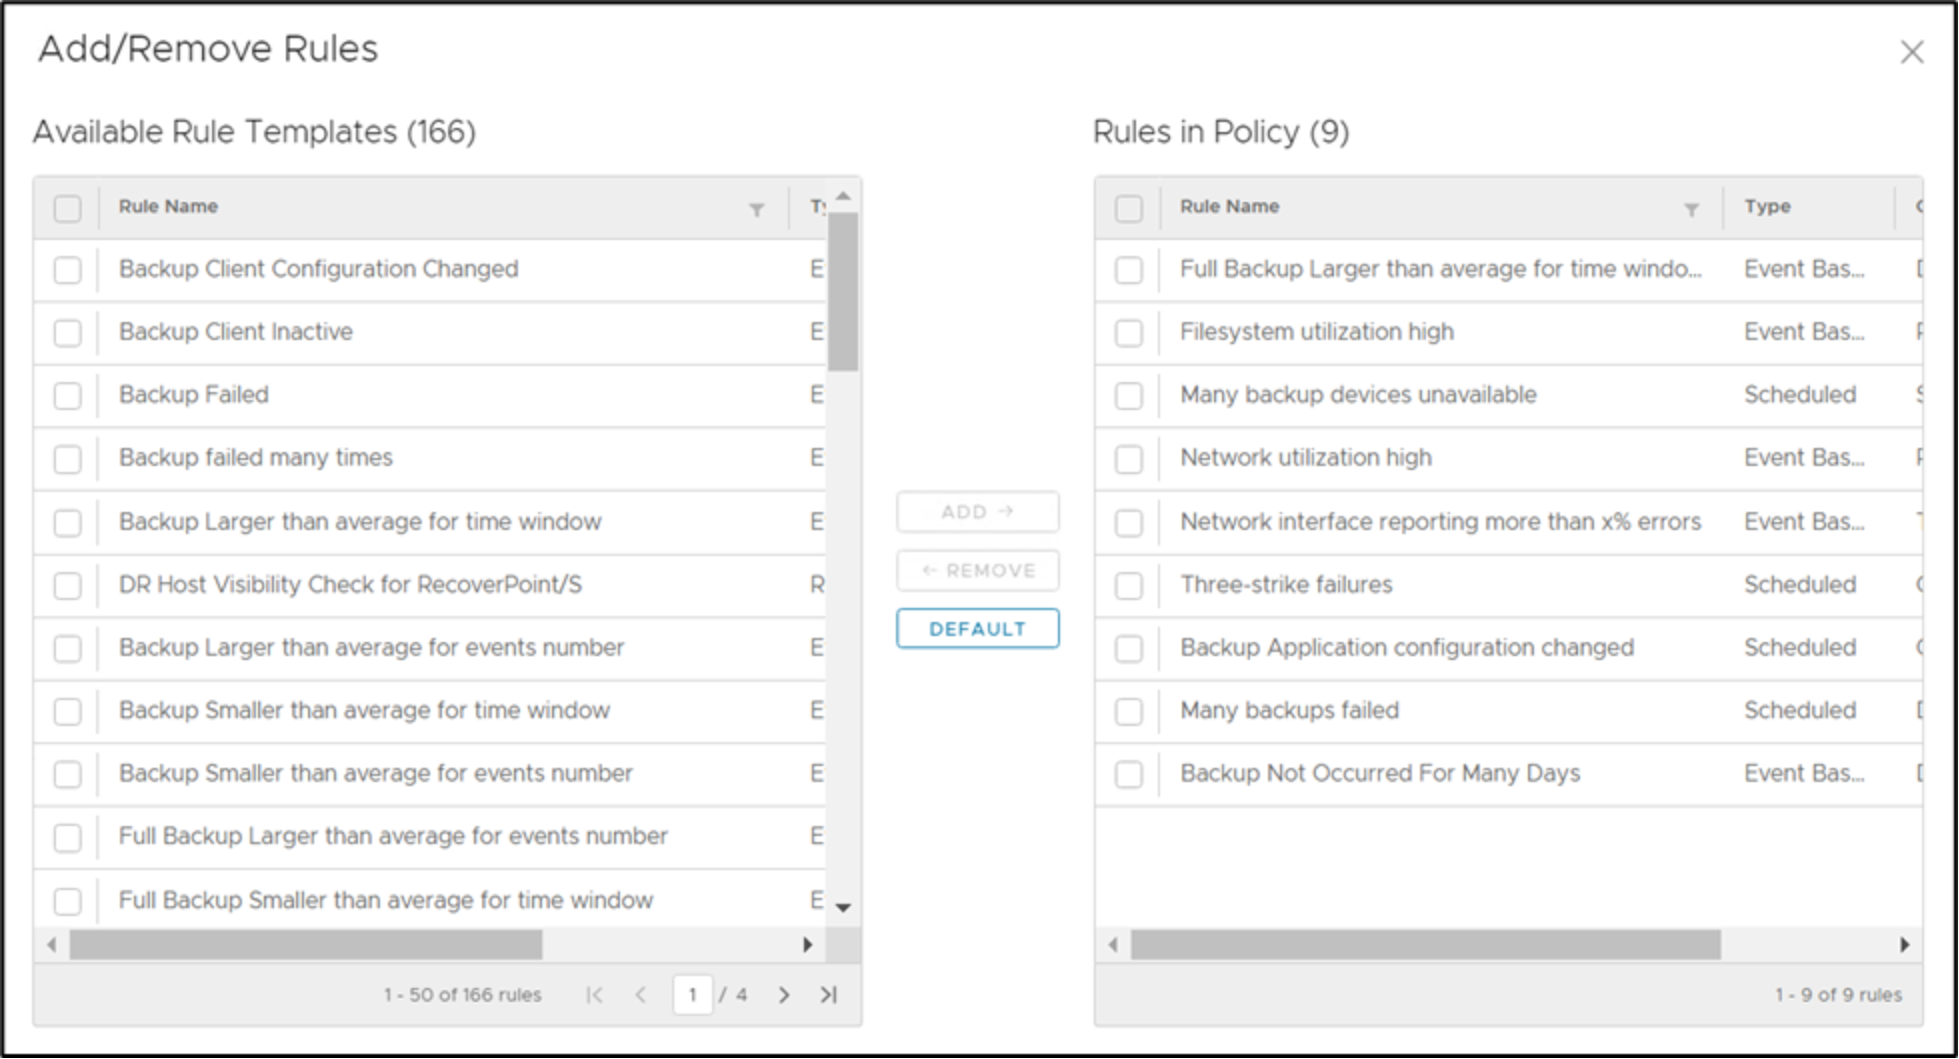
Figure 47. Add/remove analysis rule configuration
As an example, a sample analysis policy “Cyber Threat Anomaly Detection” is created with analysis rules and policy-based action as shown in Figure 48 and Figure 49.
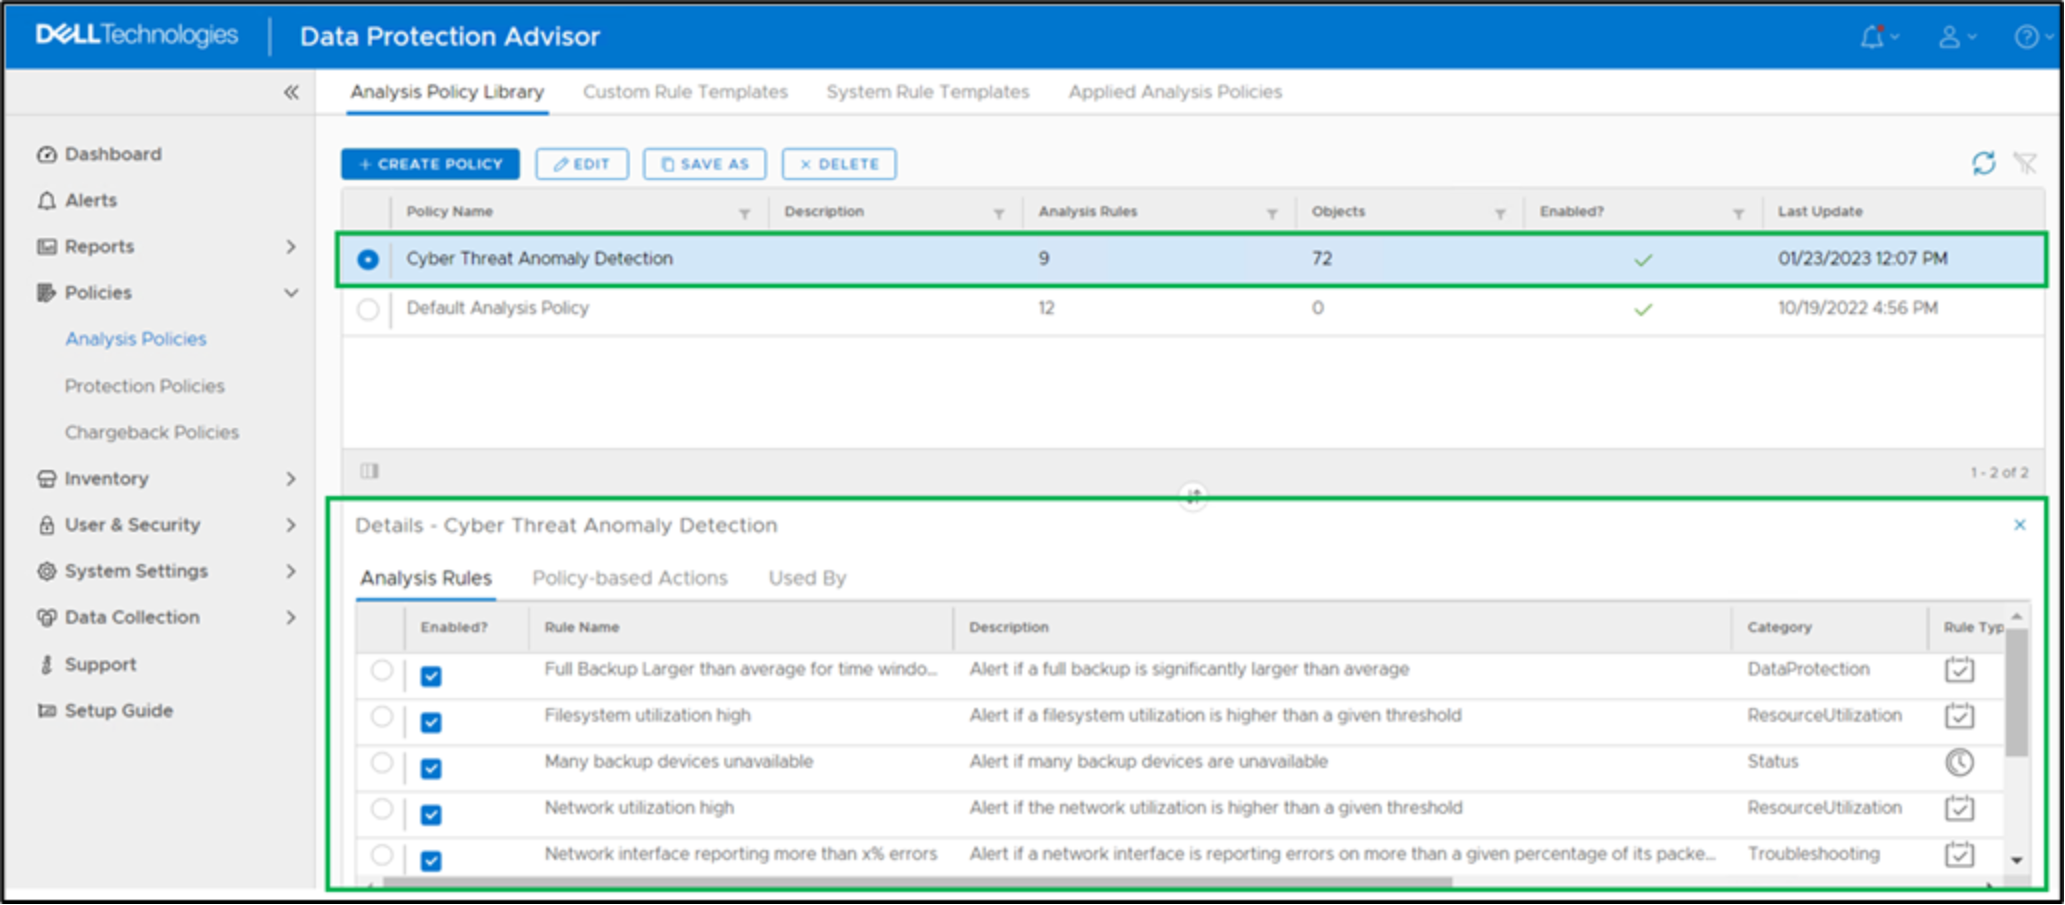
Figure 48. Sample analysis policy for Cyber threat anomaly detection
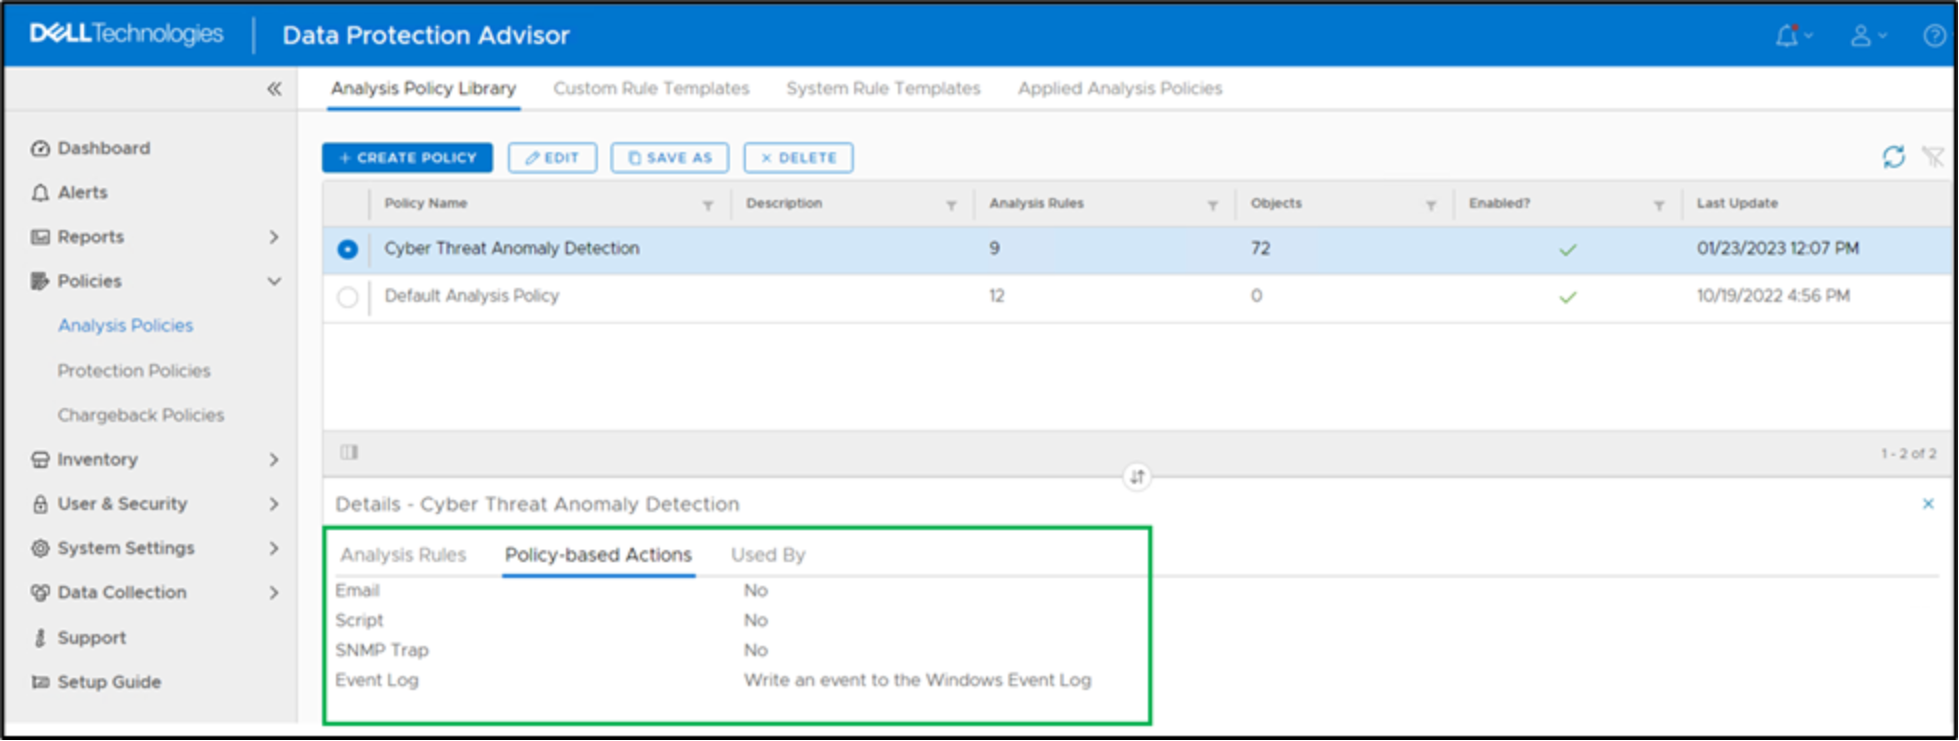
Figure 49. Policy-based action configuration in an analysis policy
Note: When creating an analysis policy, it is recommended to start with one rule and build the policy. If enabled simultaneously, you may be flooded with alerts.
Apply the analysis policy to groups, objects, and child objects respectively. In this example as shown in Figure 50, the analysis policy is applied to object “PowerProtect Data Manager Software”
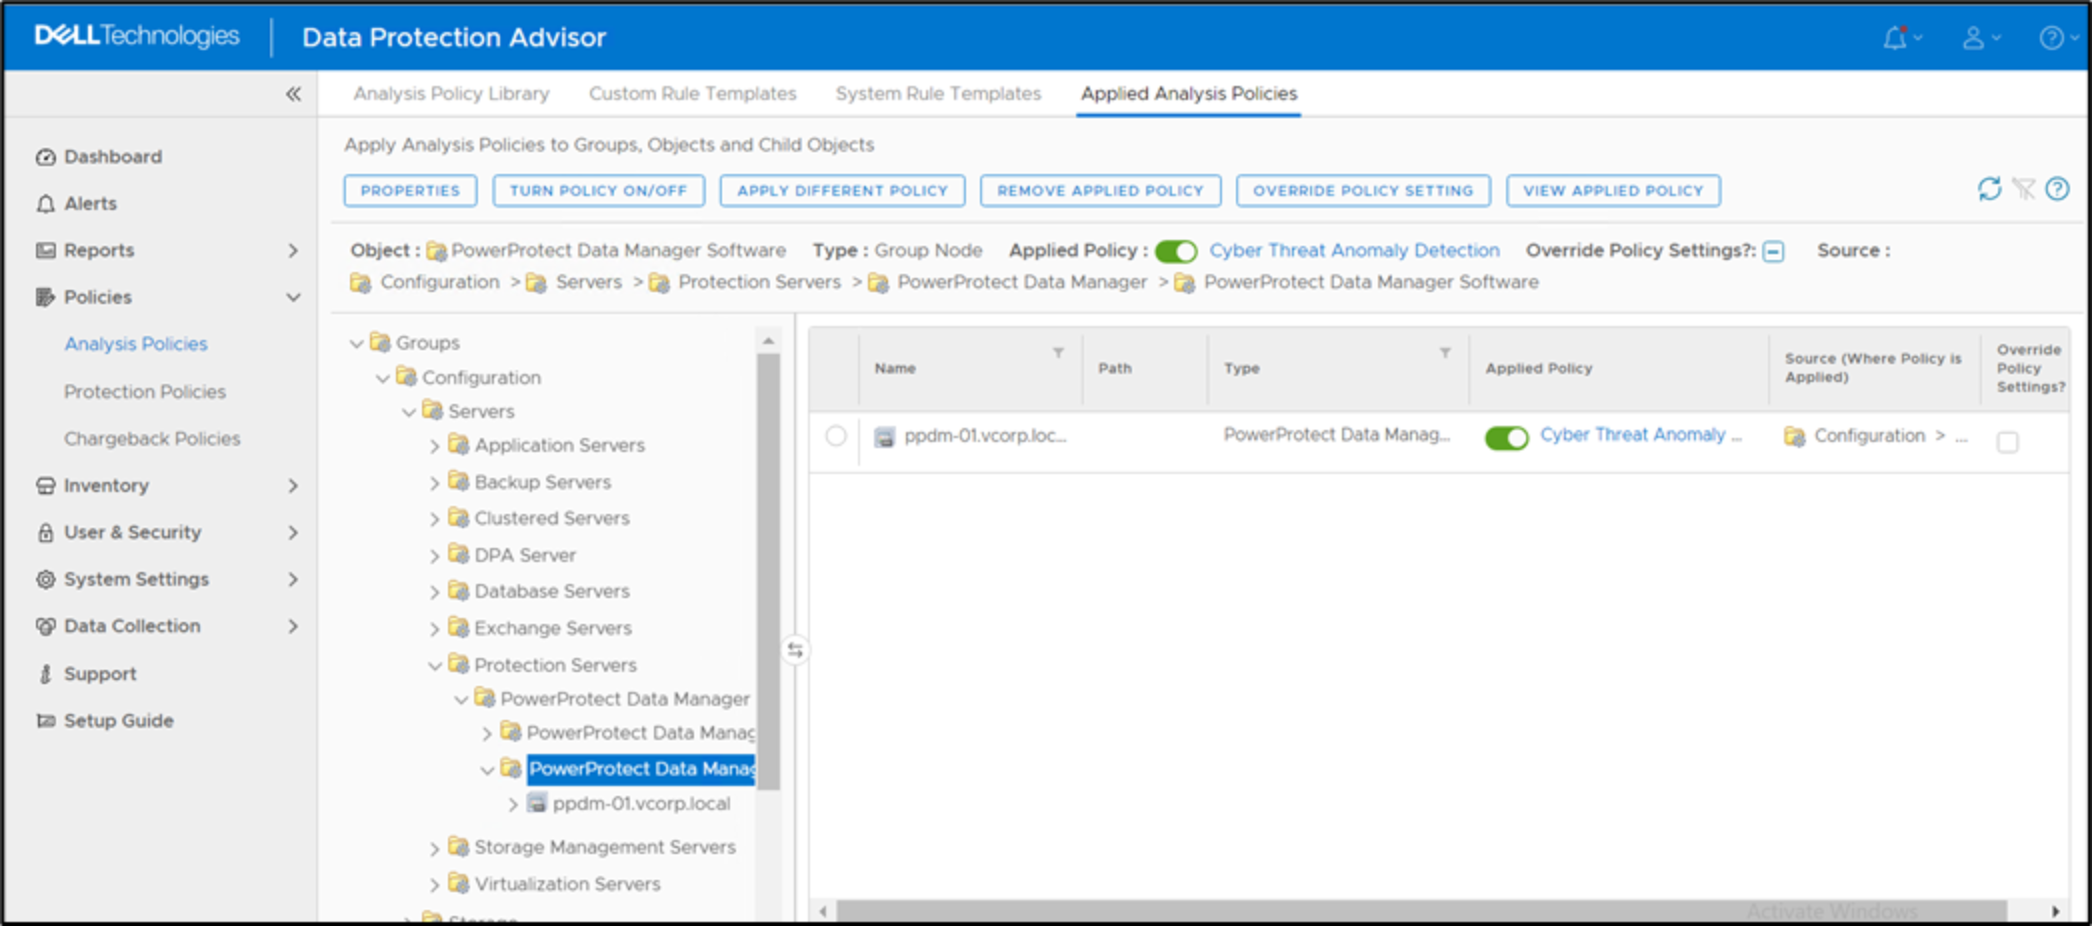
Figure 50. Section to apply analysis policy to groups, objects, and child objects
Configure a receiving port from the Splunk Web UI
A receiver is the Splunk instance that receives data from the forwarder. To enable the receiver, from the Splunk web UI, navigate to “Settings” and select “Forwarding and Receiving” as shown in Figure 51.
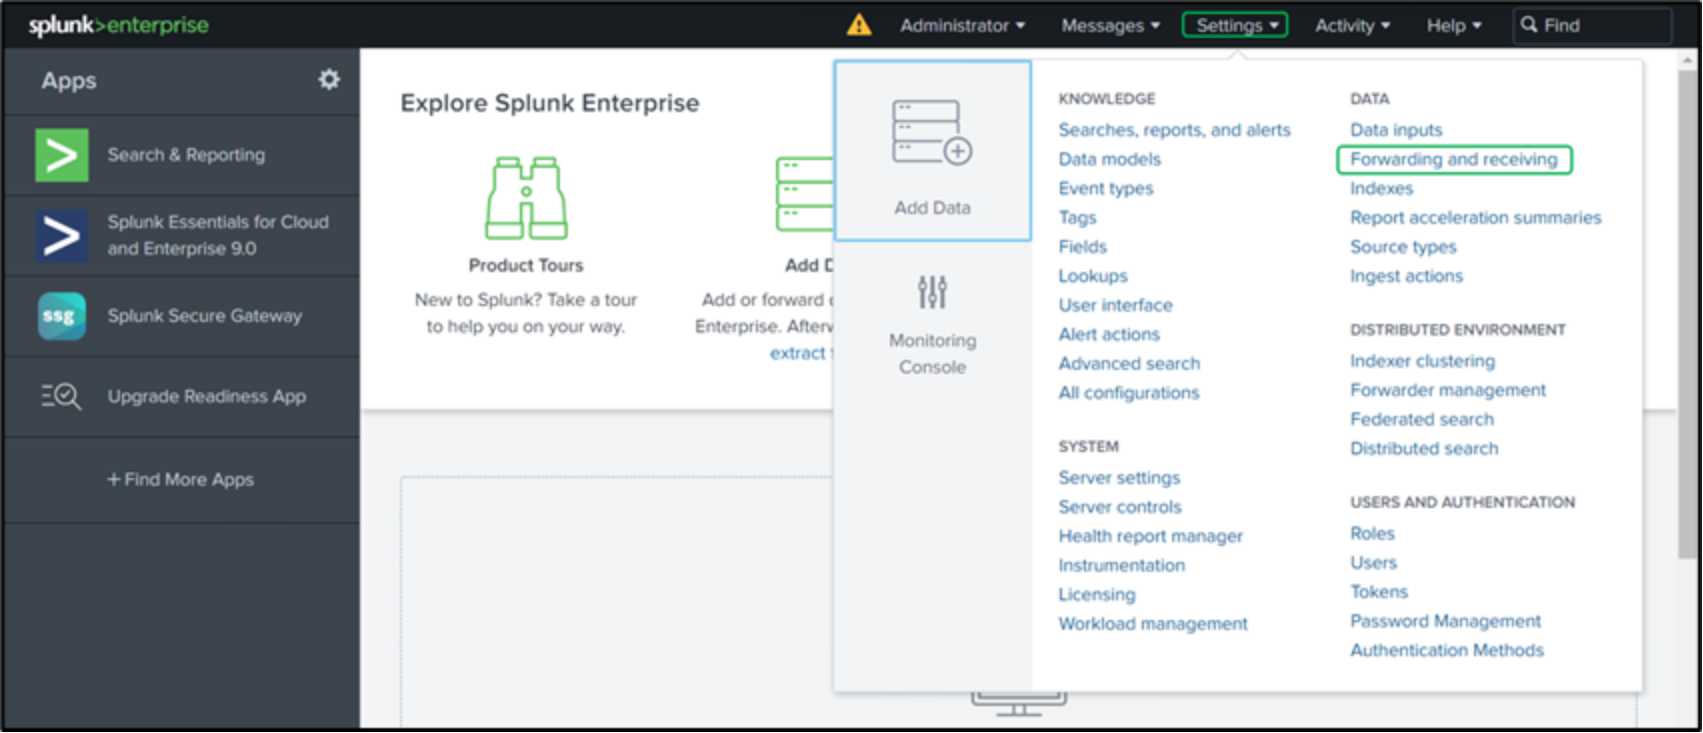
Figure 51. Forwarding and Receiving option in settings
As shown in Figure 52, in the “Receive data” section, click “Add new” next to the “Configure receiving” option.
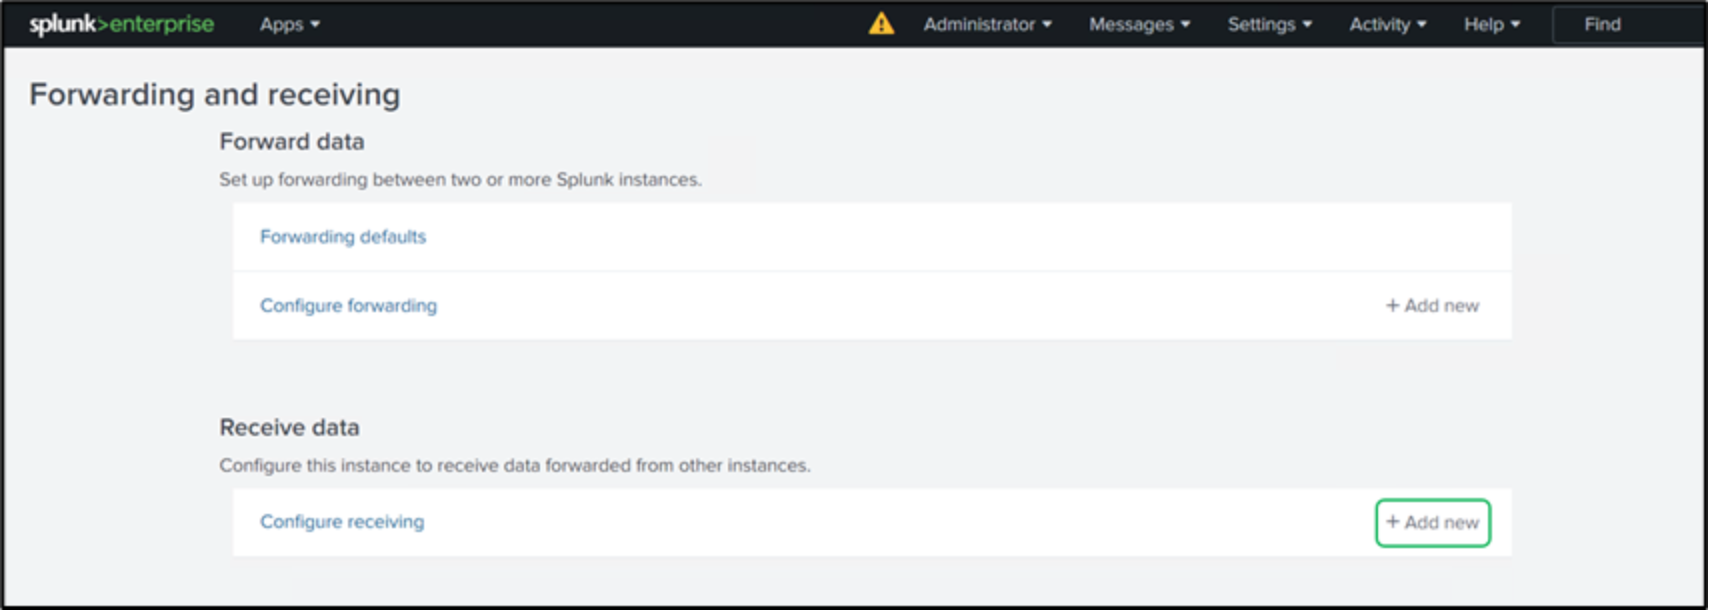
Figure 52. Forwarding and receiving configuration
Enter the port as “9997” in the “Listen on this port” section as shown in Figure 53. The conventional receiver port configured on indexers is port 9997.
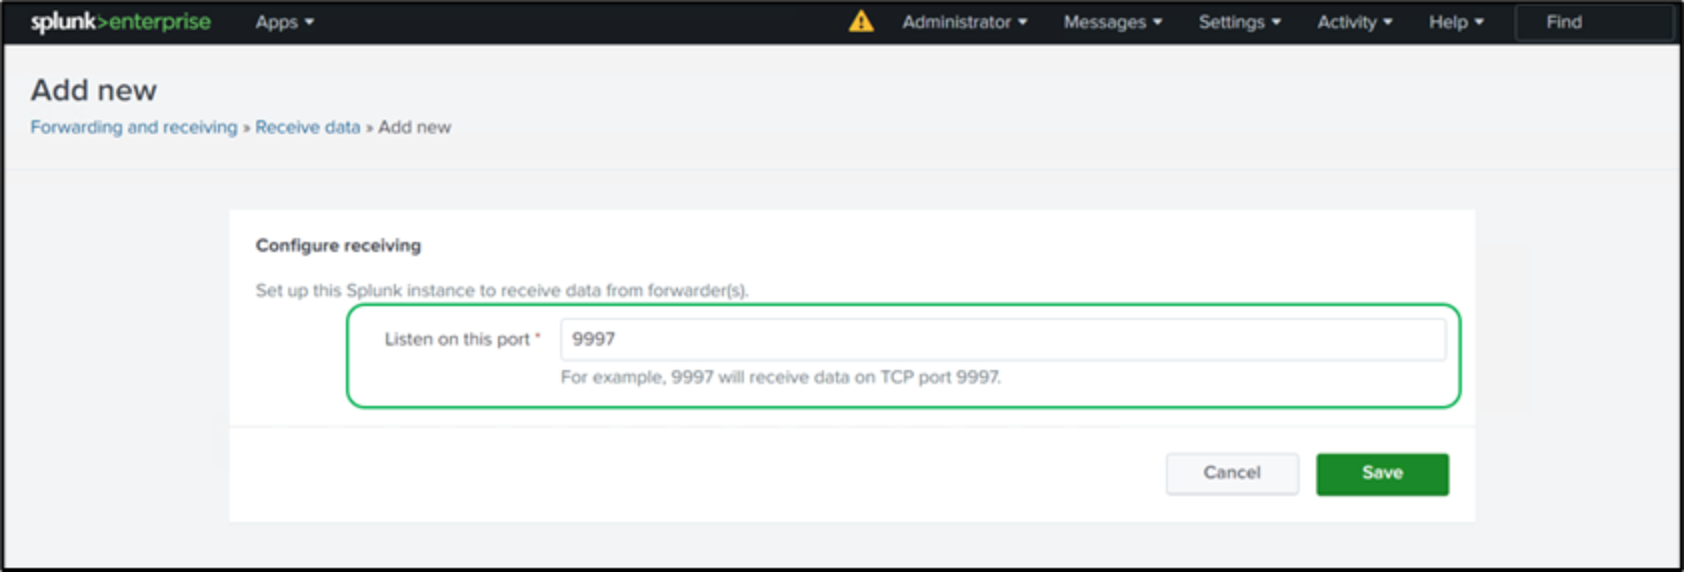
Figure 53. Section to input the receiver port
Figure 54 shows successful receiving port configuration from the Splunk UI.
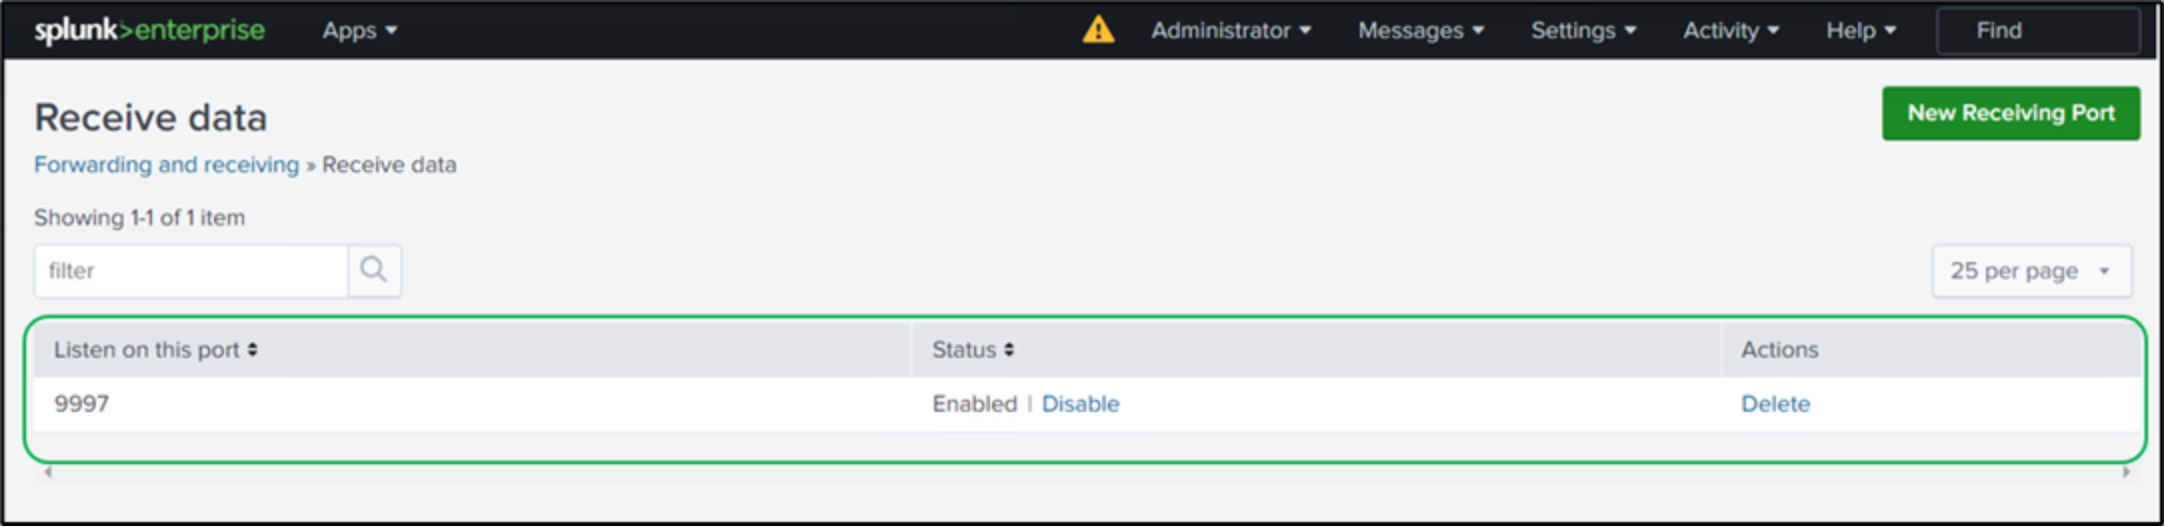
Figure 54. Successful receiving port configuration
Install the Splunk universal forwarder on Data Protection Advisor
Download the Splunk universal forwarder from splunk.com and copy it to the Data Protection Advisor application server. On the Data Protection Advisor application server, execute the MSI file to start the installation.
Check the box to accept the “License Agreement” and choose the option “An on-premises Splunk Enterprise instance”. Click “Customize Options” as shown in Figure 55.
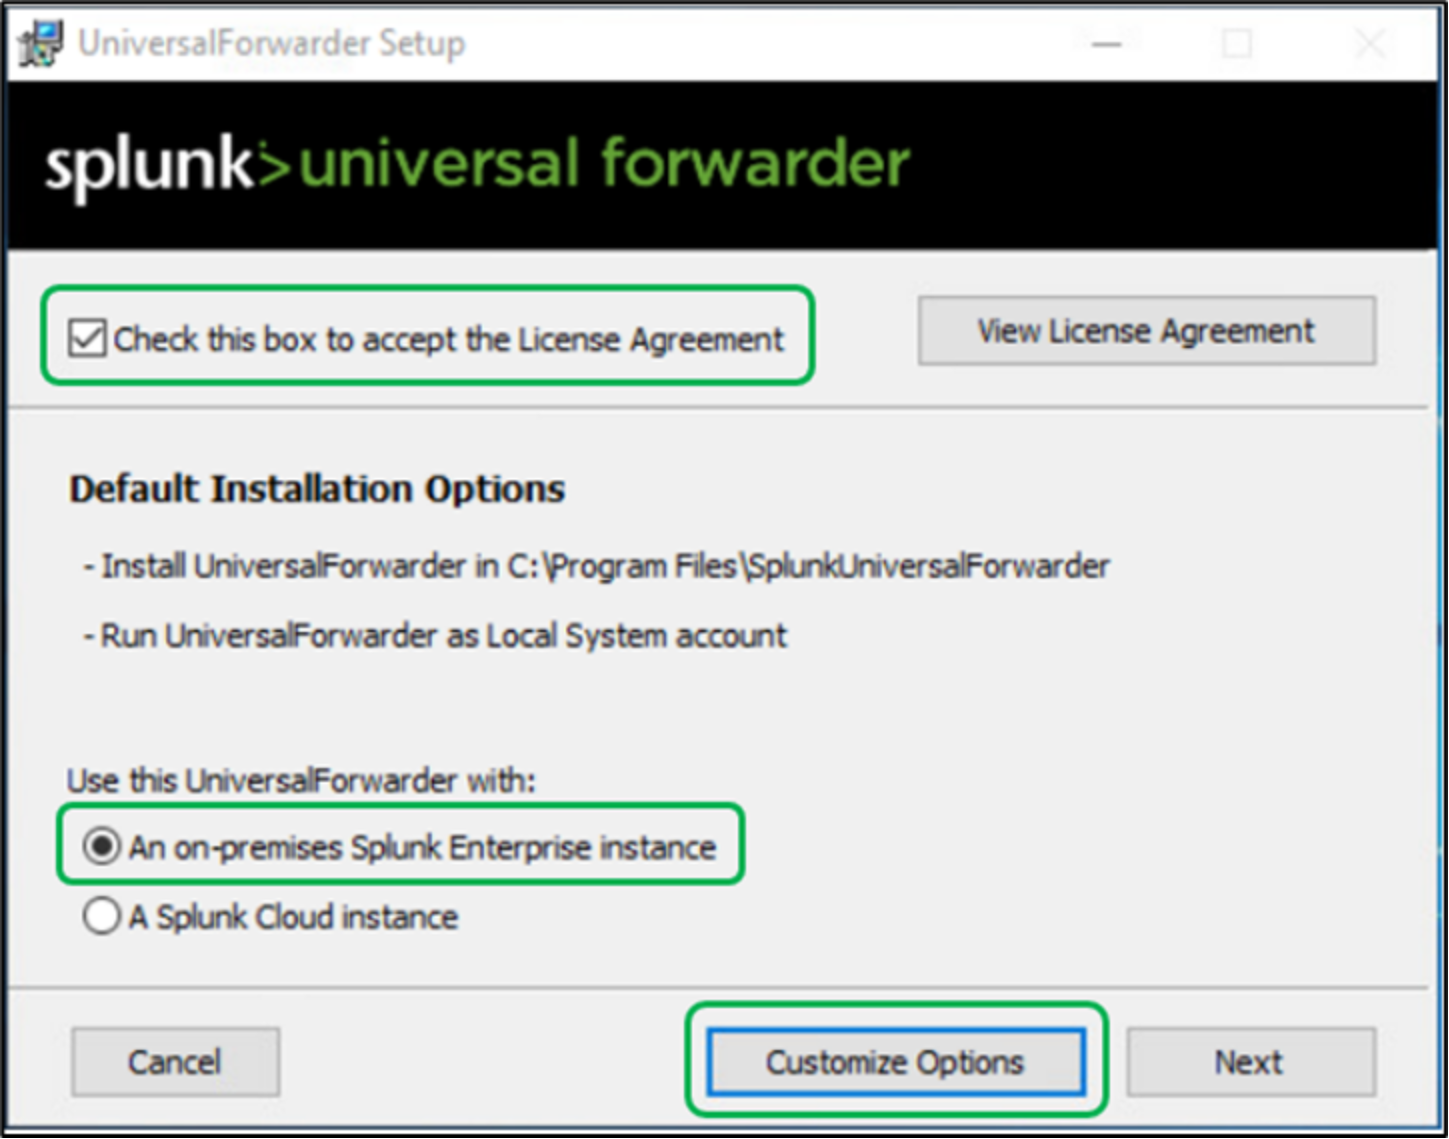
Figure 55. Splunk universal forwarder installation - License agreement
As shown in Figure 56, click “Next” after verifying the installation directory.
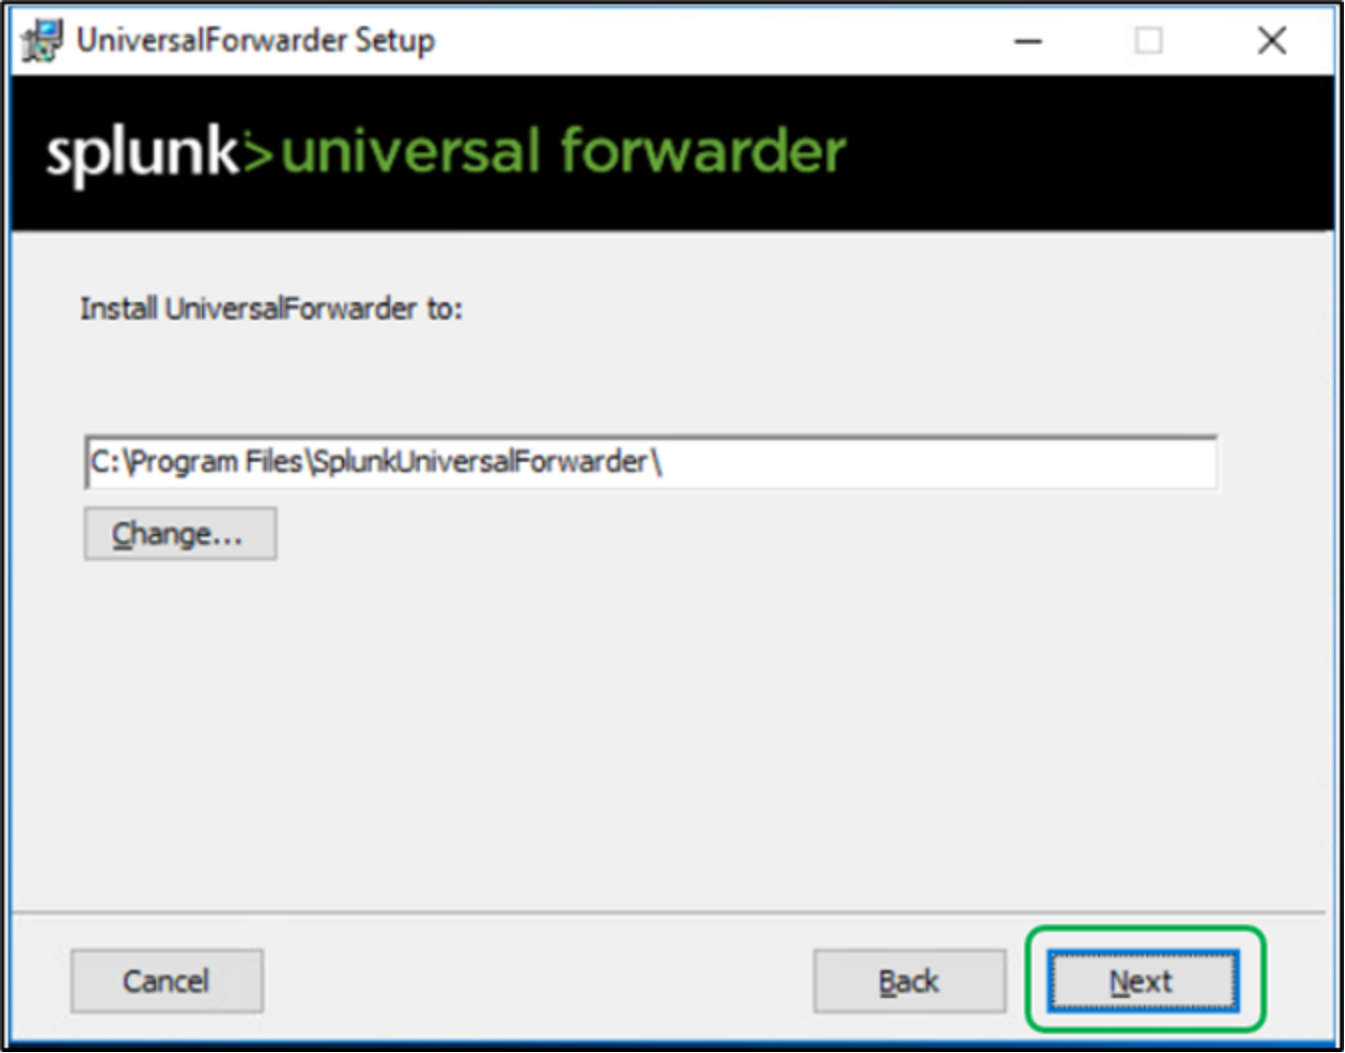
Figure 56. Splunk universal forwarder – installation directory
On the Certificate Information page, click “Next” as a best practice as shown in Figure 57.
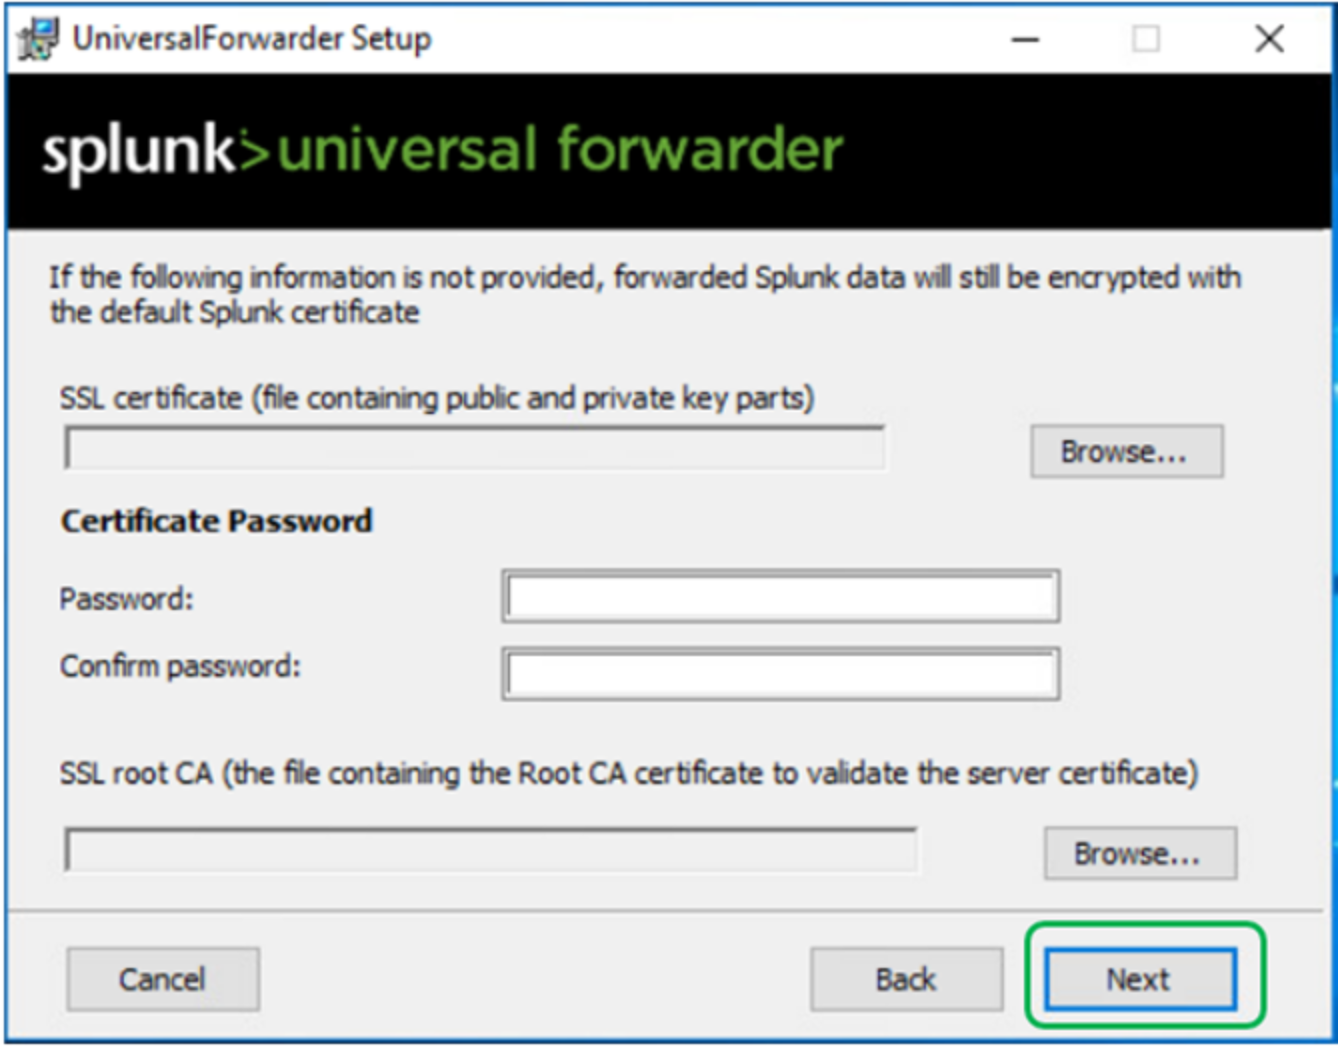
Figure 57. Splunk universal forwarder installation – SSL certificate
As shown in Figure 58, run the Universal Forwarder as the “Local System” user and click Next.
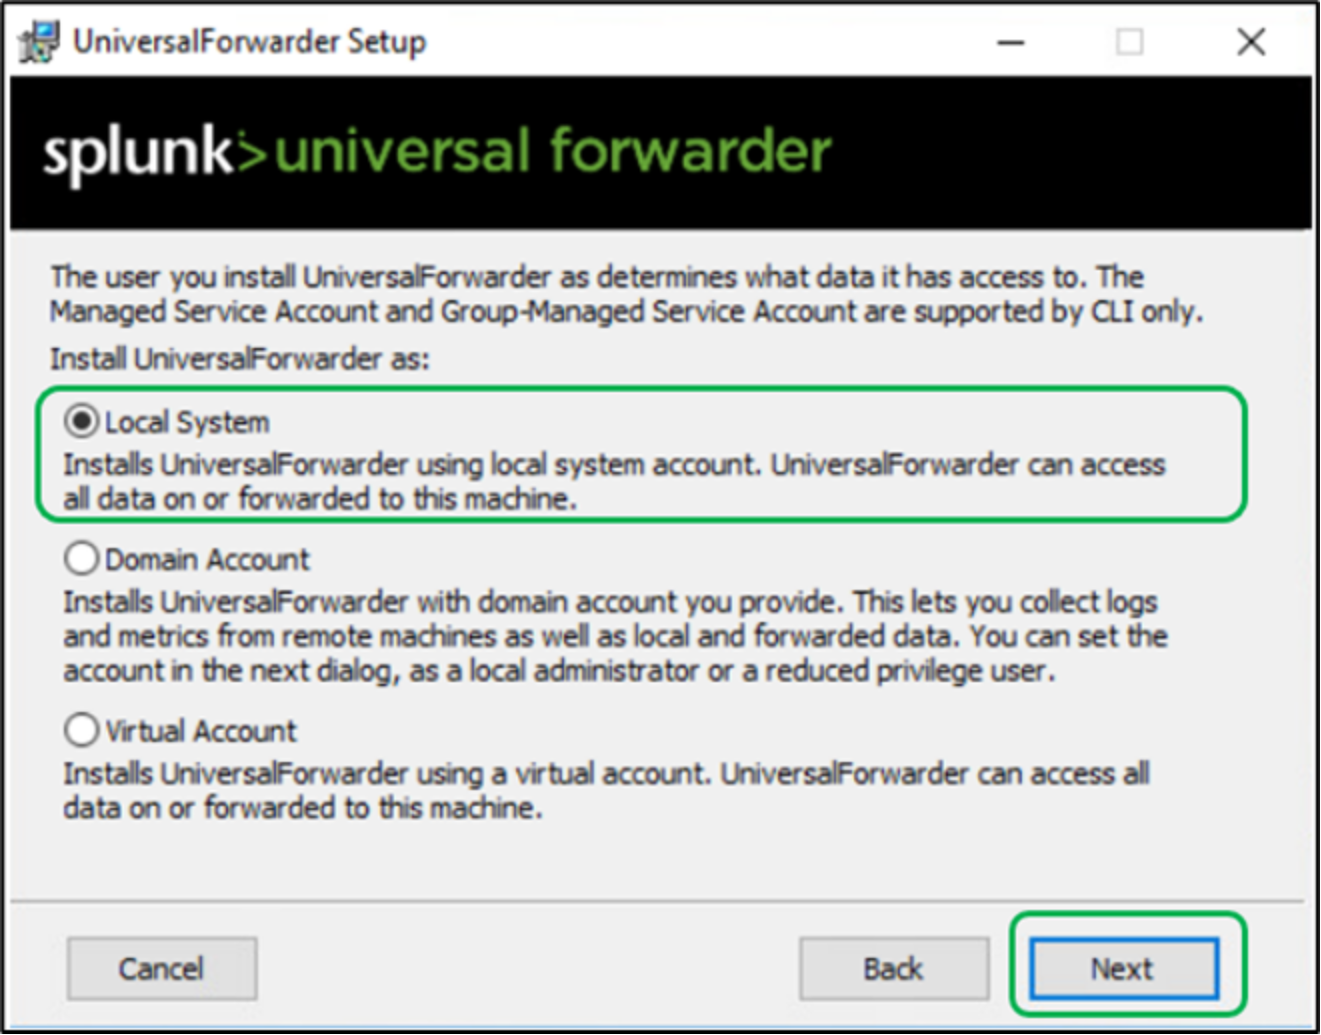
Figure 58. Splunk universal forwarder installation as Local System
From the “Windows Event Logs”, select “Application Logs” as shown in Figure 59.
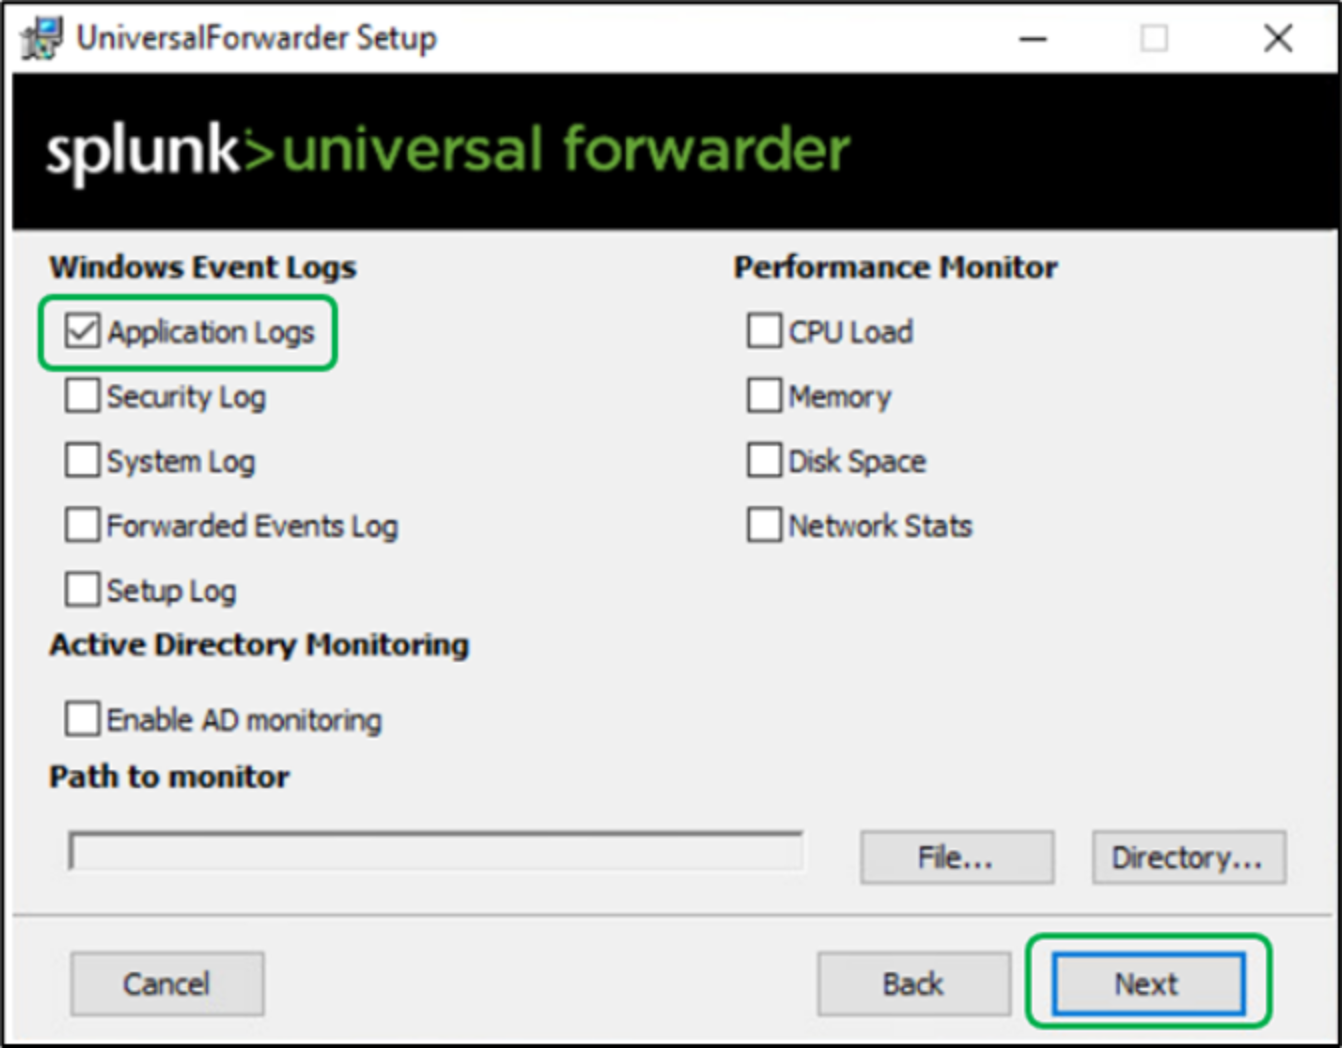
Figure 59. Splunk universal forwarder installation – Selecting Windows event application logs
As shown in Figure 60, enter the credentials for the administrator account.
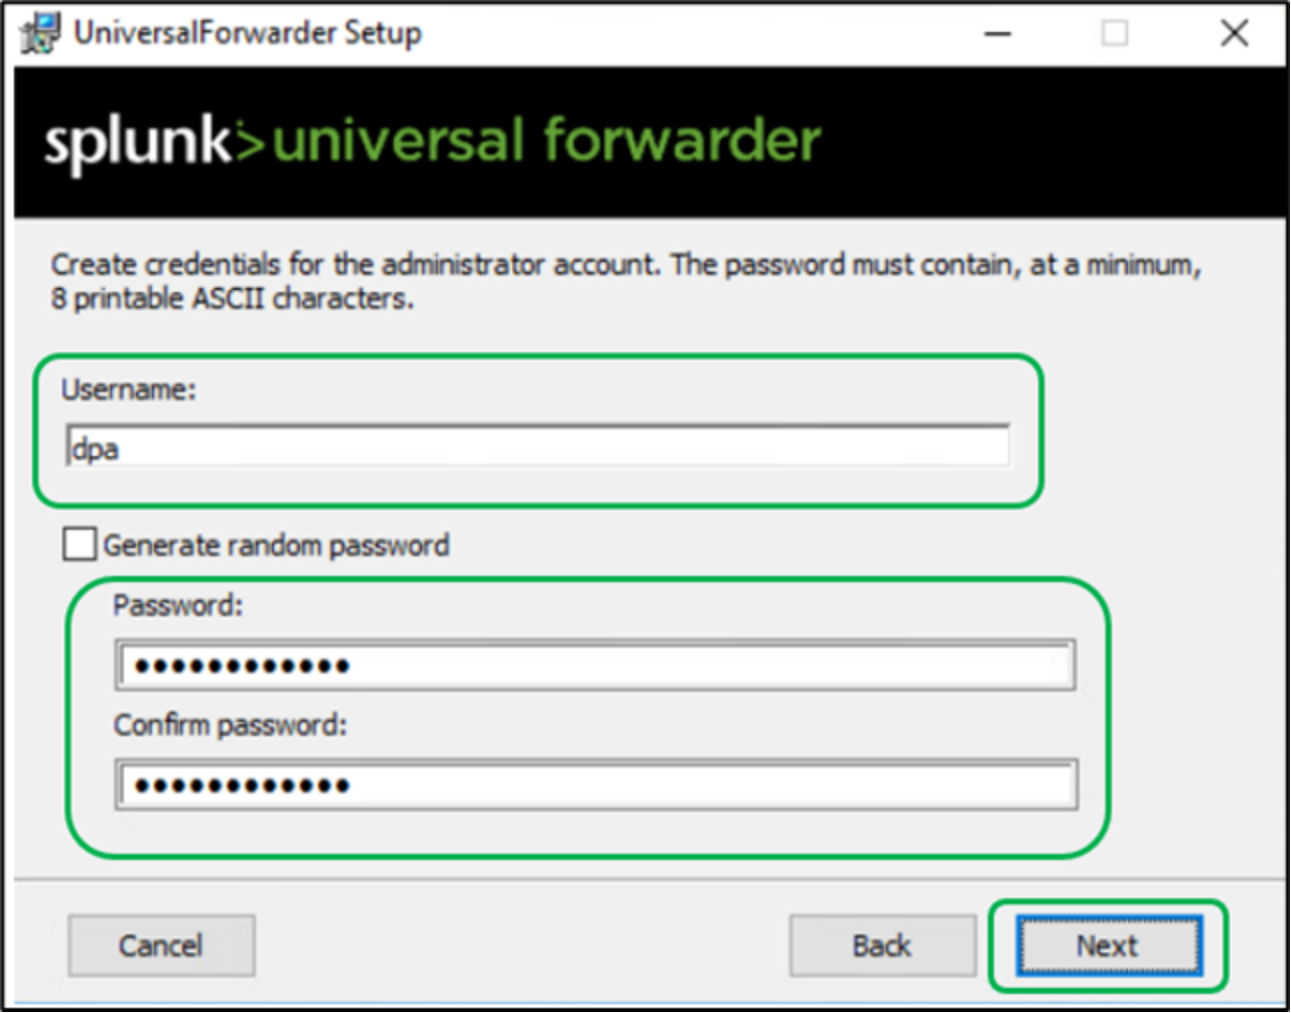
Figure 60. Splunk universal forwarder installation – administrator account credentials
In the Deployment Server page, select Next as shown in Figure 61.
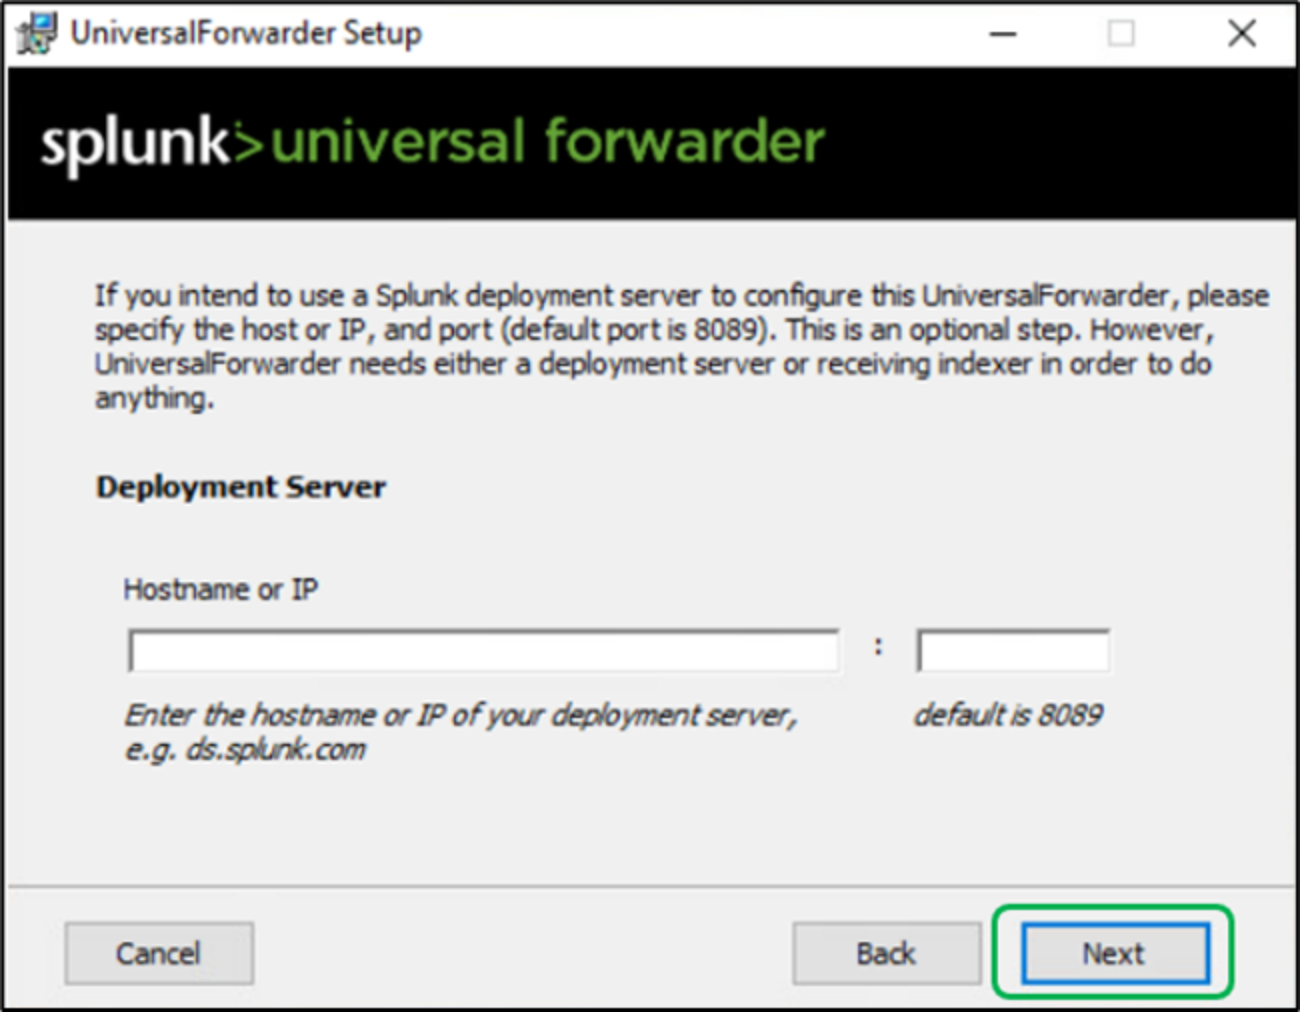
Figure 61. Splunk universal forwarder installation – Deployment server details
In the Receiving Indexer pane, enter a hostname or IP address and the receiving port as shown in Figure 62 for the receiving indexer that you want the universal forwarder to send data to and click Next.
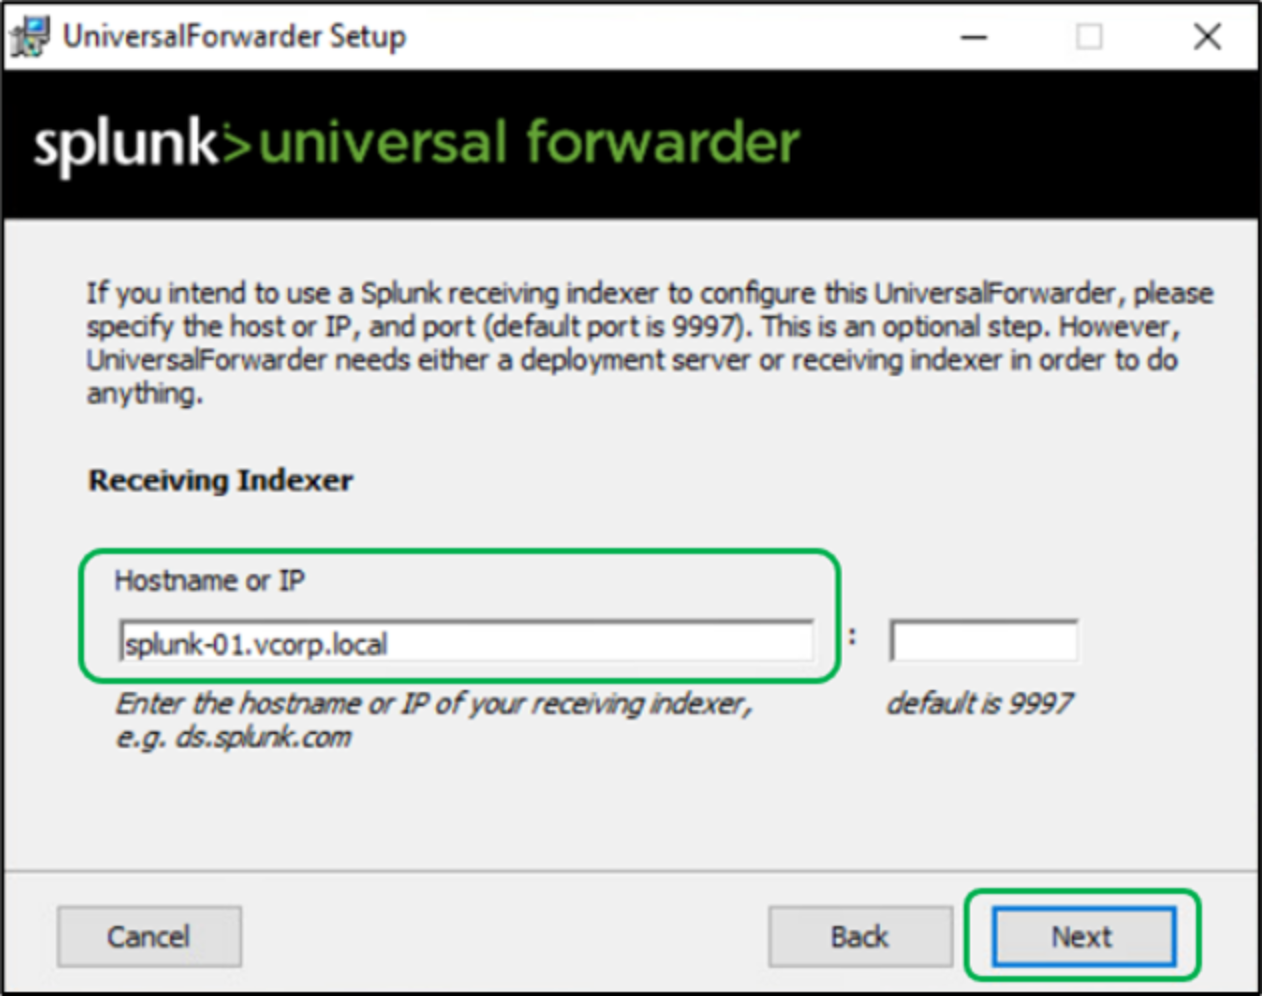
Figure 62. Splunk universal forwarder installation – Receiving indexer configuration
Click Install to proceed with the installation as shown in Figure 63.
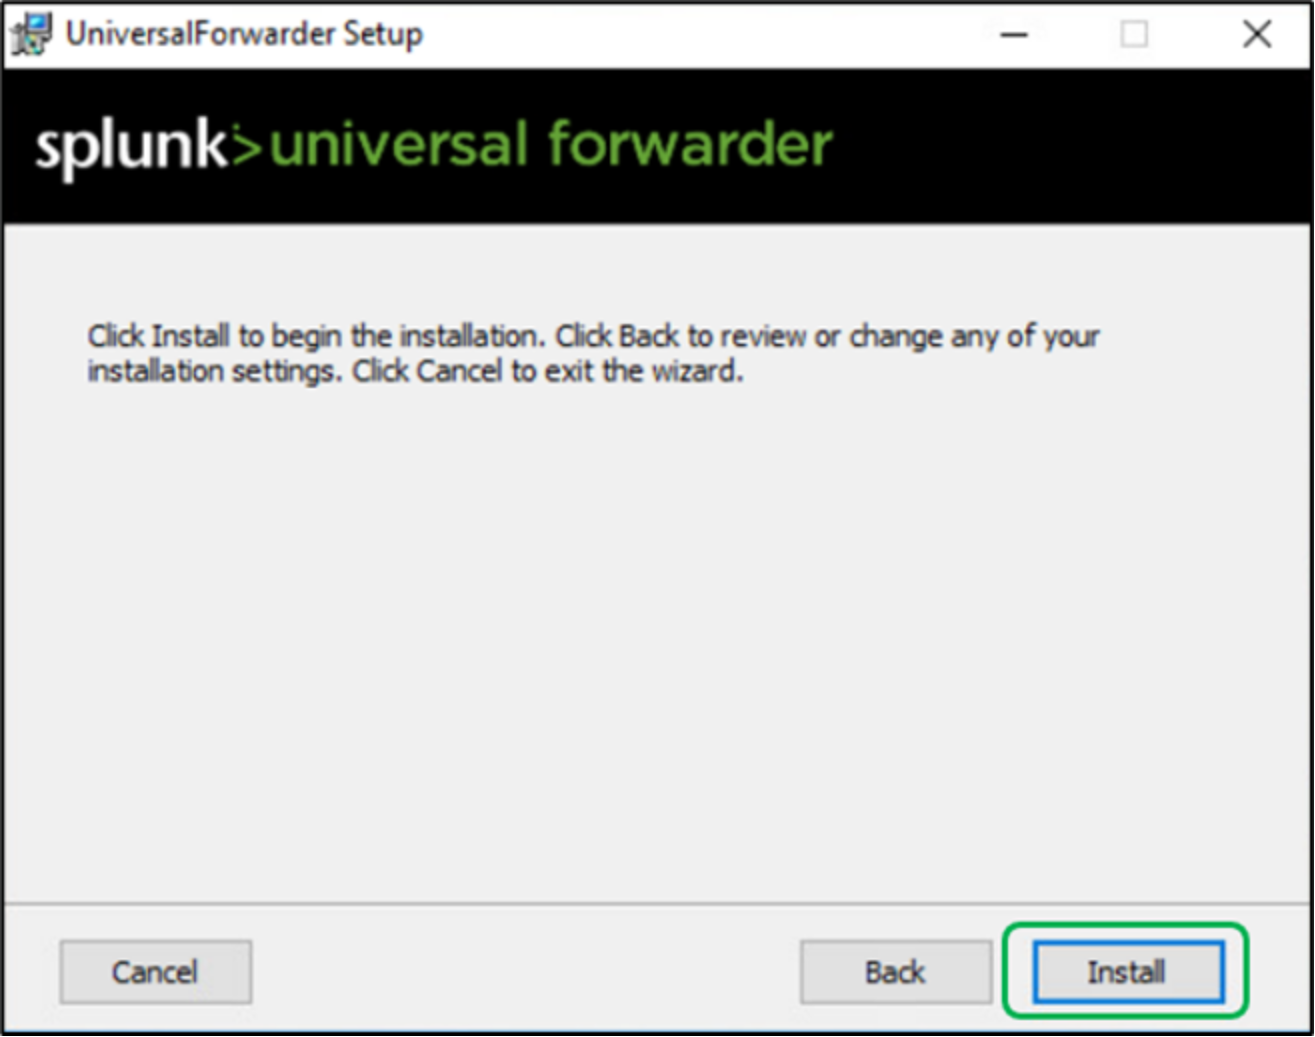
Figure 63. Splunk universal forwarder installation – Begin installation wizard
The installer runs and displays the Installation Completed dialog box as shown in Figure 64. The universal forwarder automatically starts.
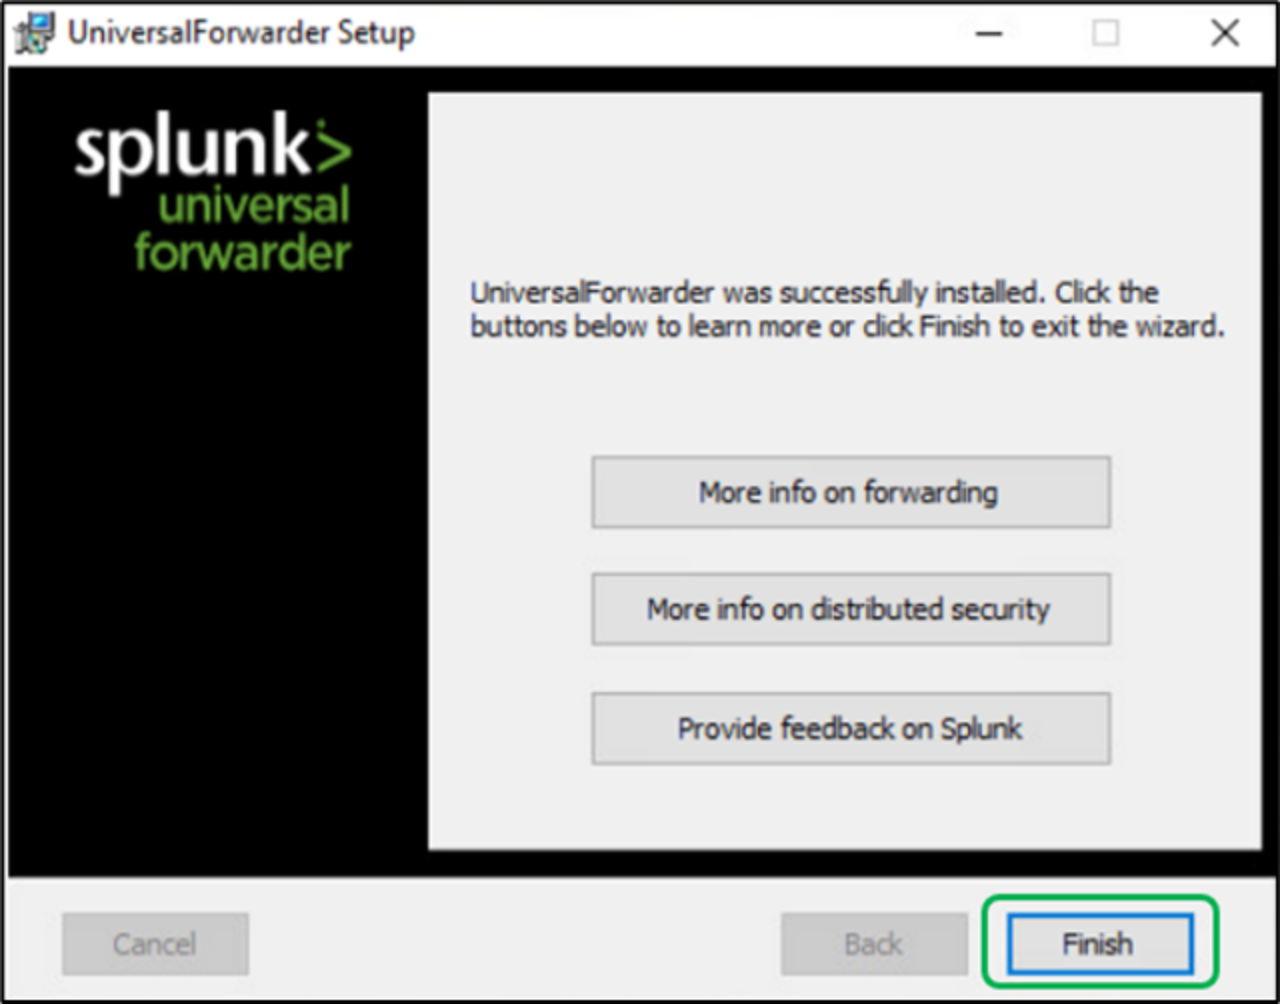
Figure 64. Splunk universal forwarder - Installation completed dialog box
Query the Splunk main index for events forwarded from Data Protection Advisor
From the Splunk web UI, Select the option “Search & Reporting” as shown in Figure 65.
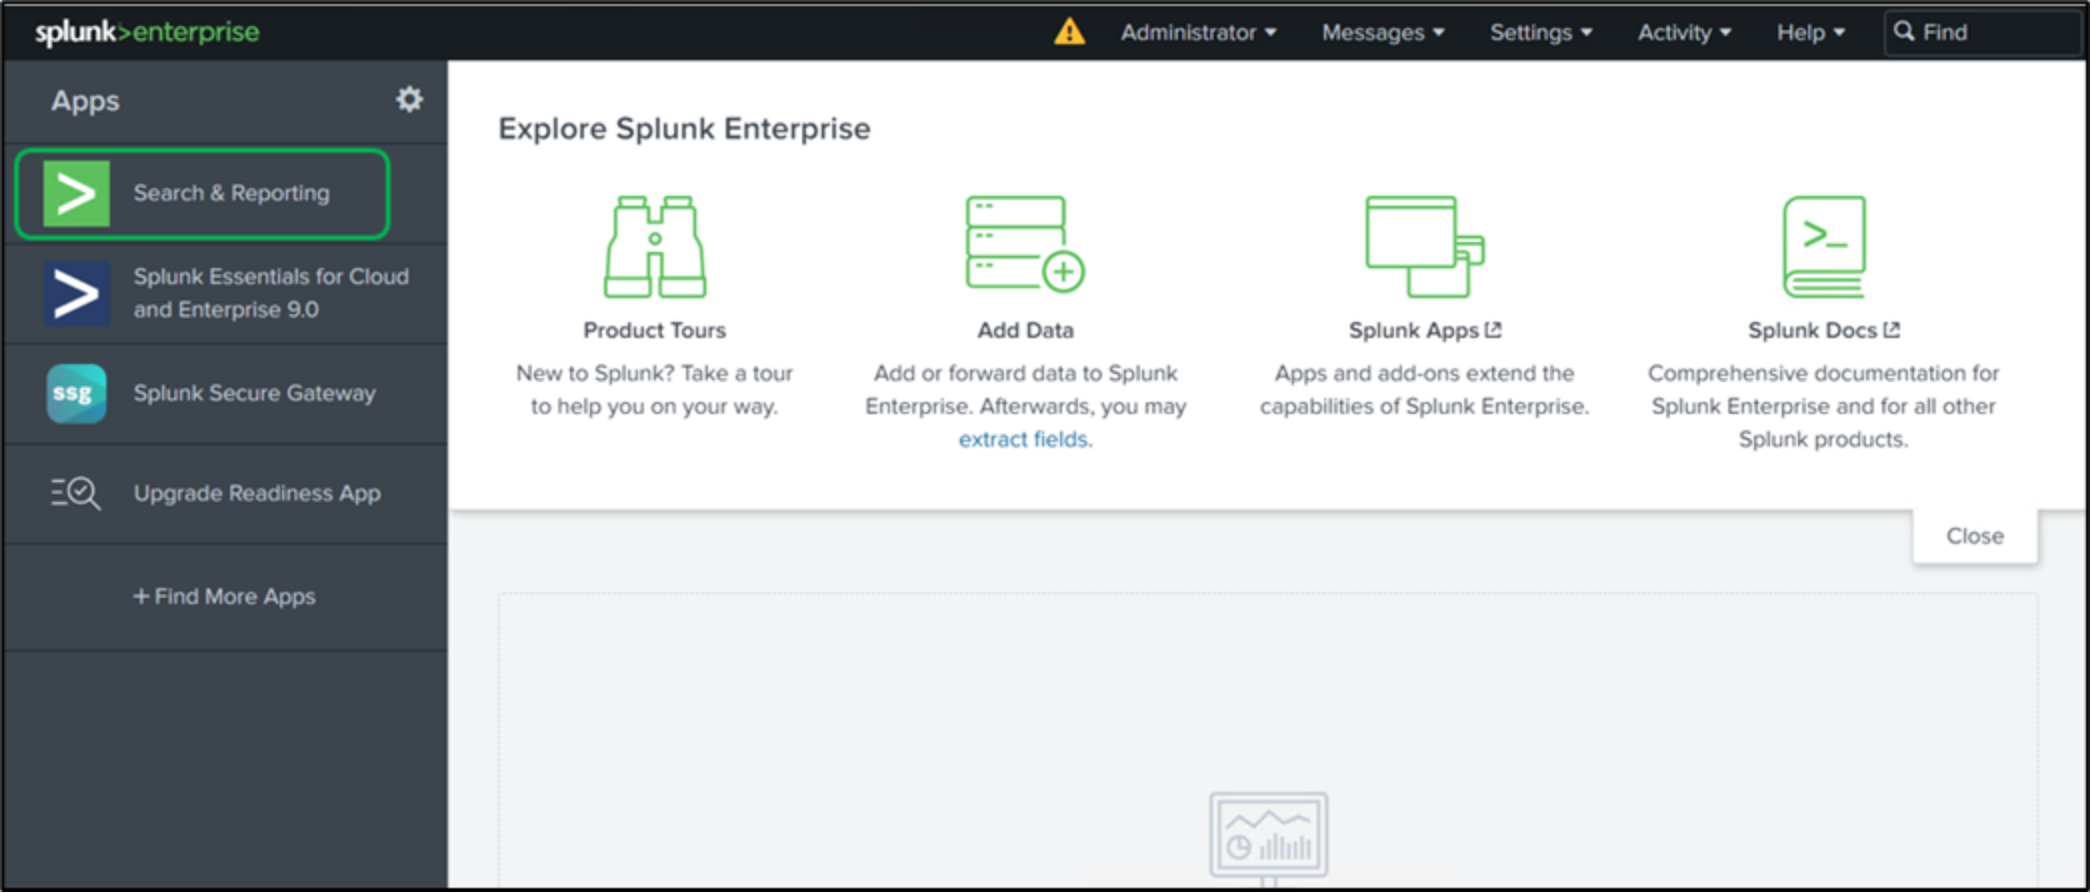
Figure 65. Selecting Search & Reporting option from Splunk web UI
In the “New Search” section, enter the keywords to search and select the respective time range you want to perform this search.
For example, all the Cyber threat events are categorized with event code 4096 in the Windows application logs.
When searching with “EventCode=4096” all the respective events are generated as shown in Figure 66.
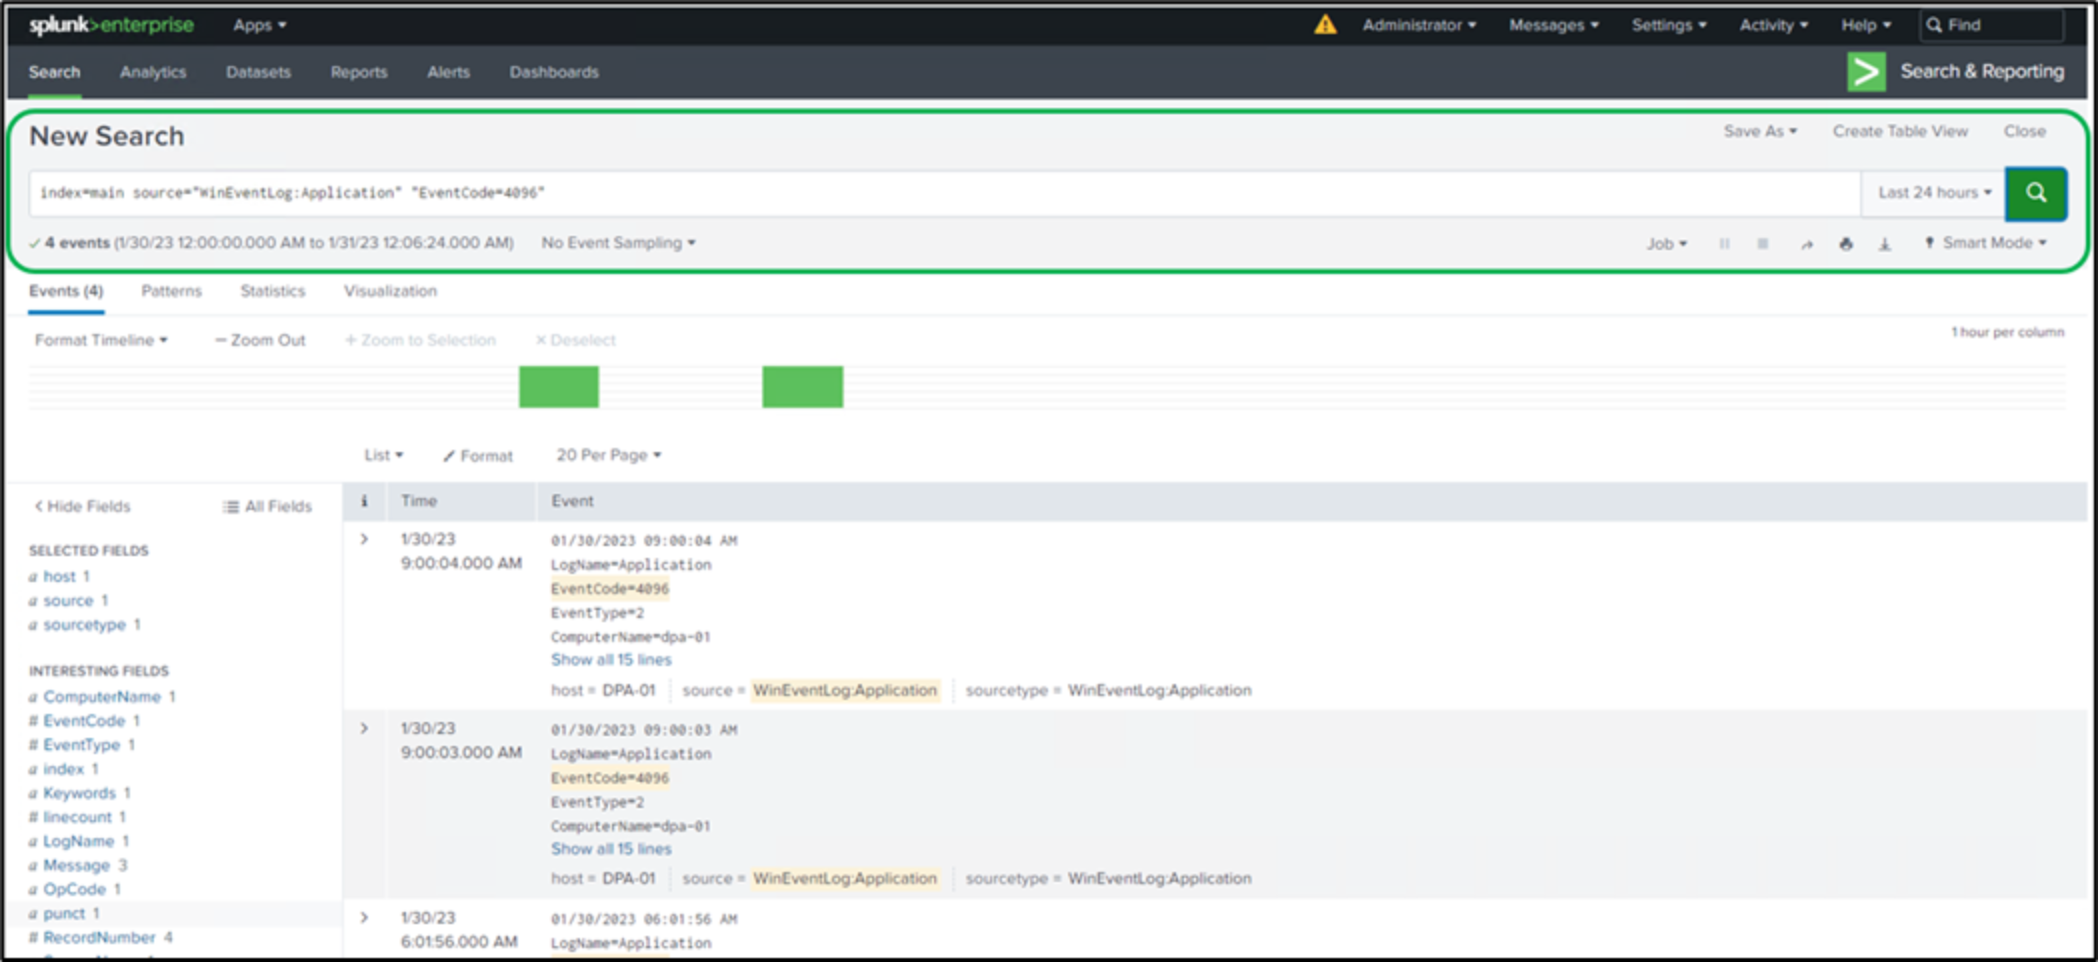
Figure 66. Search result for the sample query