
Change Cloud DR Server security groups’ inbound rules after deployment
Change Cloud DR Server security groups’ inbound rules after deployment
-
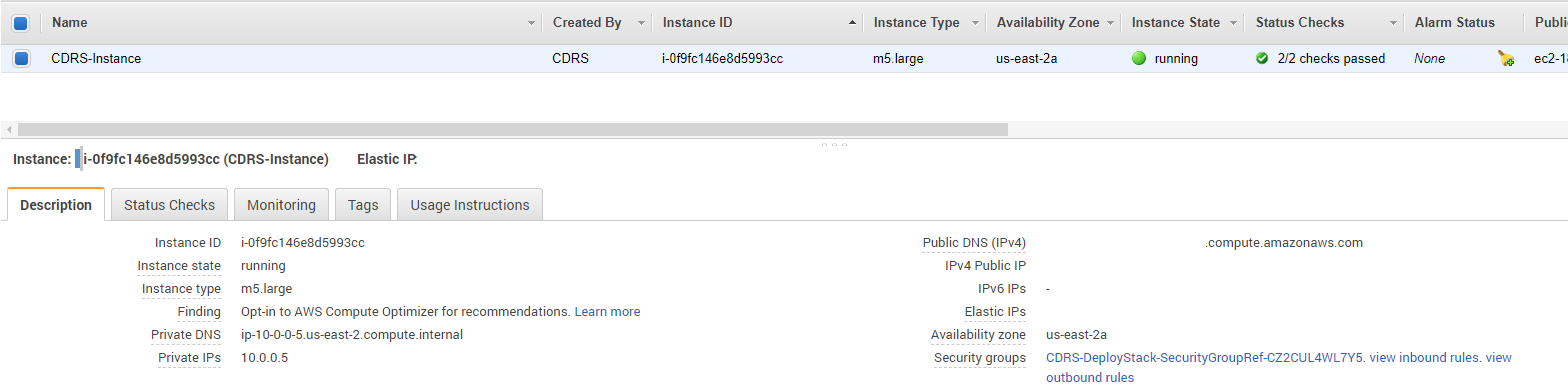
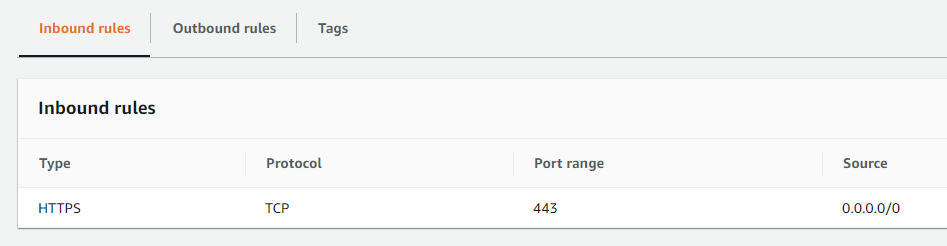
The deployment creates the Cloud DR Server instance with a default security group that allow all traffic access to the Cloud DR Server using HTTPS protocol (port 443) in order to allow you to log in after deployment.
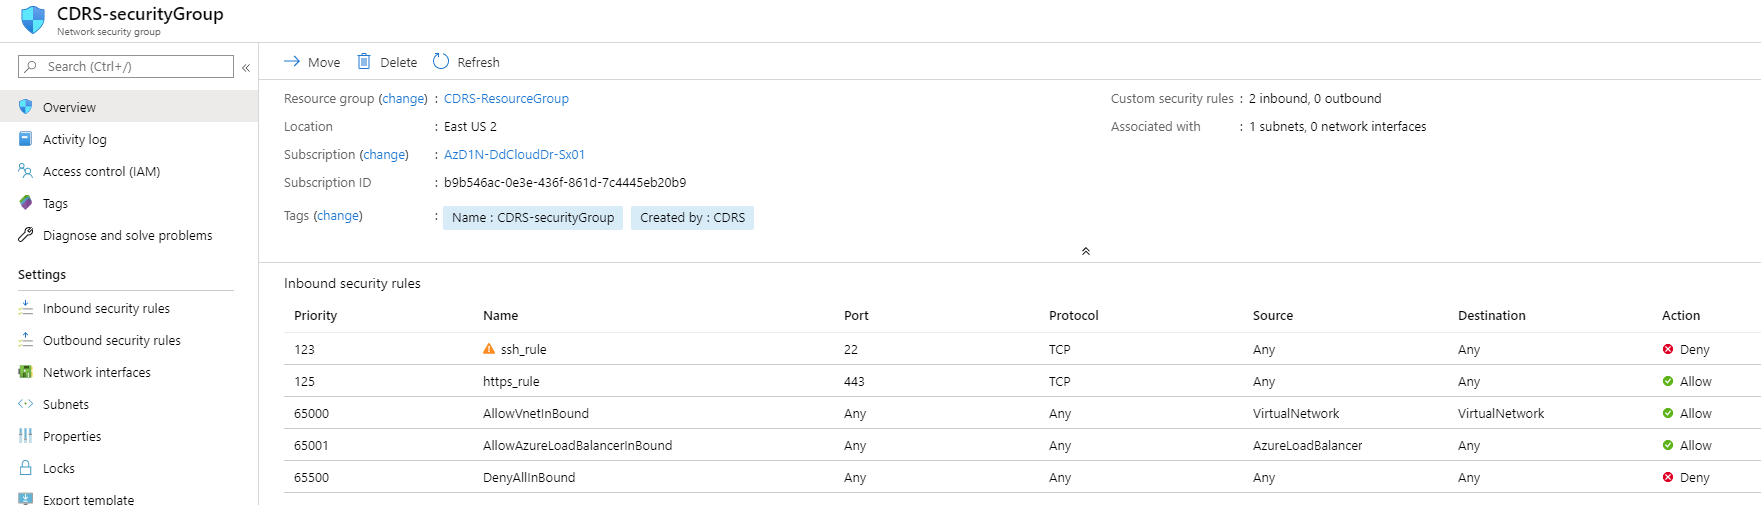
Make sure to edit this security group to allow HTTPS (port 443) inbound connection only from your authorized IP addresses and from the Cloud DR Add-on/PowerProtect Data Manager/RecoverPoint for VMs.
AWS
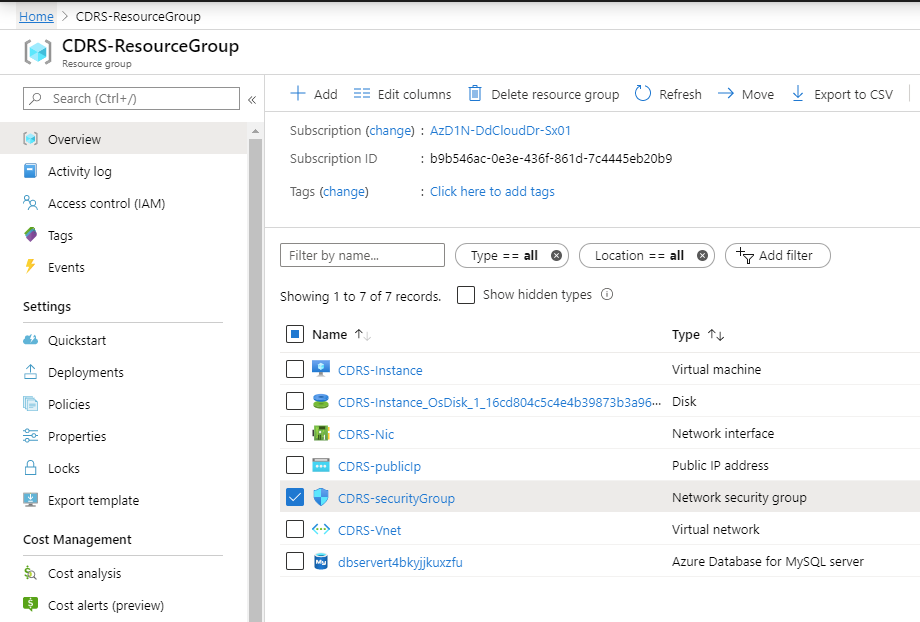
Azure
Cloud DR Server admin password expiration
After a successful deployment, the CDRS admin user’s password expiration is set to 90 days. It is recommended to keep track of this setting or change it to “never expires”. An expired password might cause connectivity problems between on-premises components and the Cloud DR Server.
VPN
In order to leverage your VPN connection, when deploying the Cloud DR Server, select an existing VPC/Vnet that is already connected on-premises using a VPN tunnel. The deployment will create a new public subnet (in Azure you will have an option to deploy to an existing subnet, use the new Subnet option) in that network and create a public IP address. After the deployment is completed you will be able to use the public IP address to access the Cloud DR Server and use the Cloud DR Add-on user interface and change the way it connects to the Cloud DR Server. Instead of the public IP, change it to use the private IP, this way you will be able to use the VPN connection established between your on-premises and your cloud account (and remove the public IP).
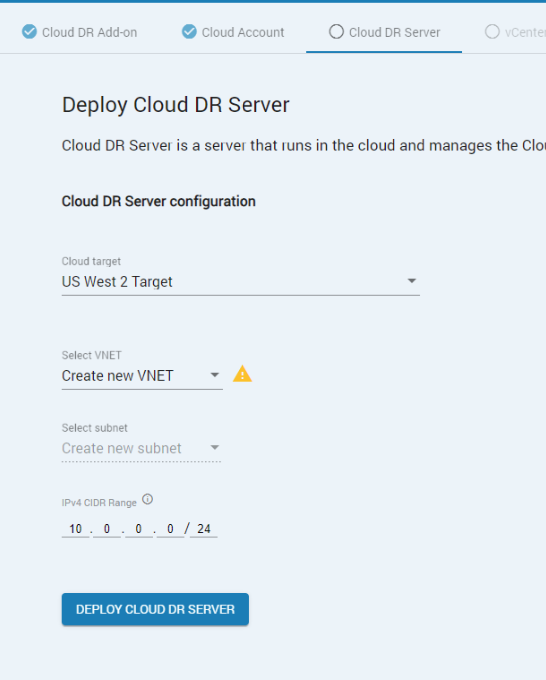
- During deployment, select an existing network (VPC for AWS or Vnet for Azure) and provide a legal private IPv4 range (CIDR) for the subnet that will contain the Cloud DR Server:
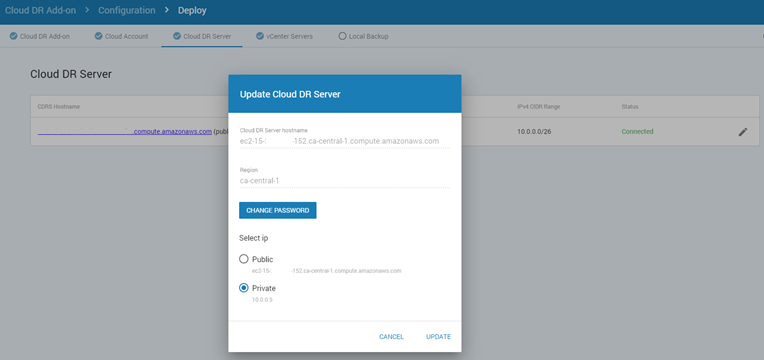
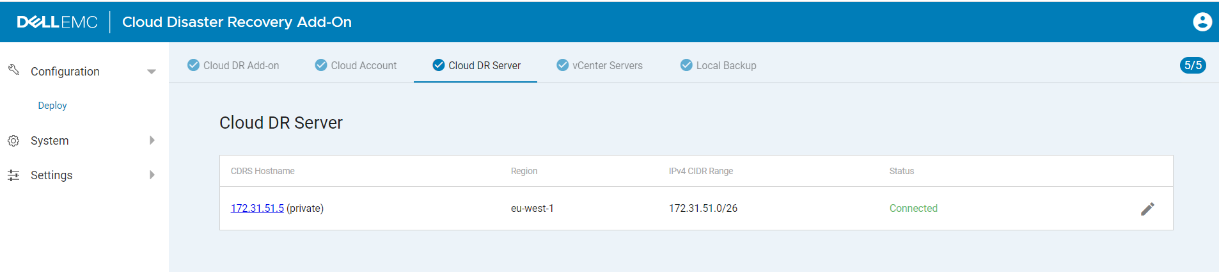
- After deployment, use the Cloud DR Add-on user interface to change the Cloud DR Server settings to use the private IP address.
- In AWS
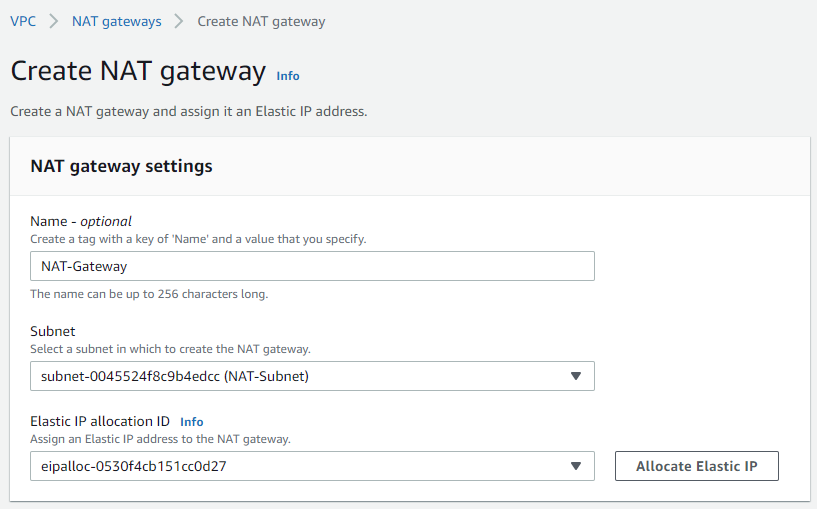
i The CDRS still needs Internet access to function (including communication with AWS services that cannot configure VPC endpoints), the way to do that without having an inbound Internet connectivity to the entire VPC is to create a new Subnet in the same VPC for NAT Gateway and create a NAT gateway in it with an Elastic IP associated with it.
ii Use the NAT Gateways page in the VPC service to create one:
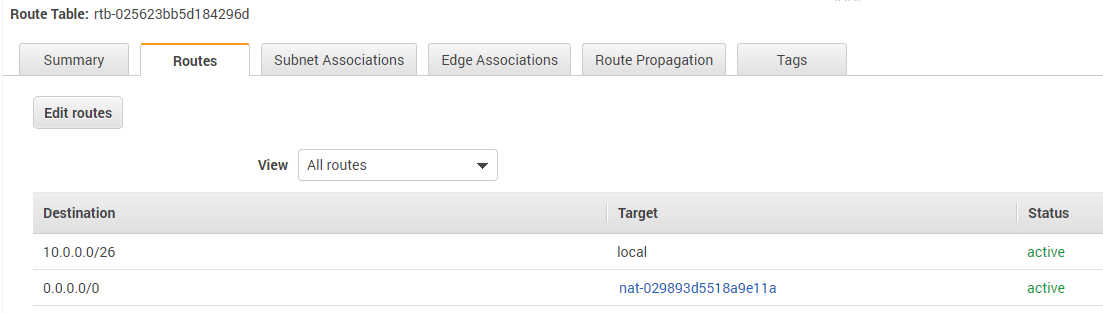
iii Update the route table of the CDRS-PublicSubnet to use the NAT gateway instead of the Internet Gateway; Use the Subnets page to locate the Route table name, and use the Route Tables page in the VPC service to edit the 0.0.0.0/0 entry and change its target to the NAT Gateway instead of the Internet Gateway (the 0.0.0.0/0 range should be limited to your IP addresses after the deployment).
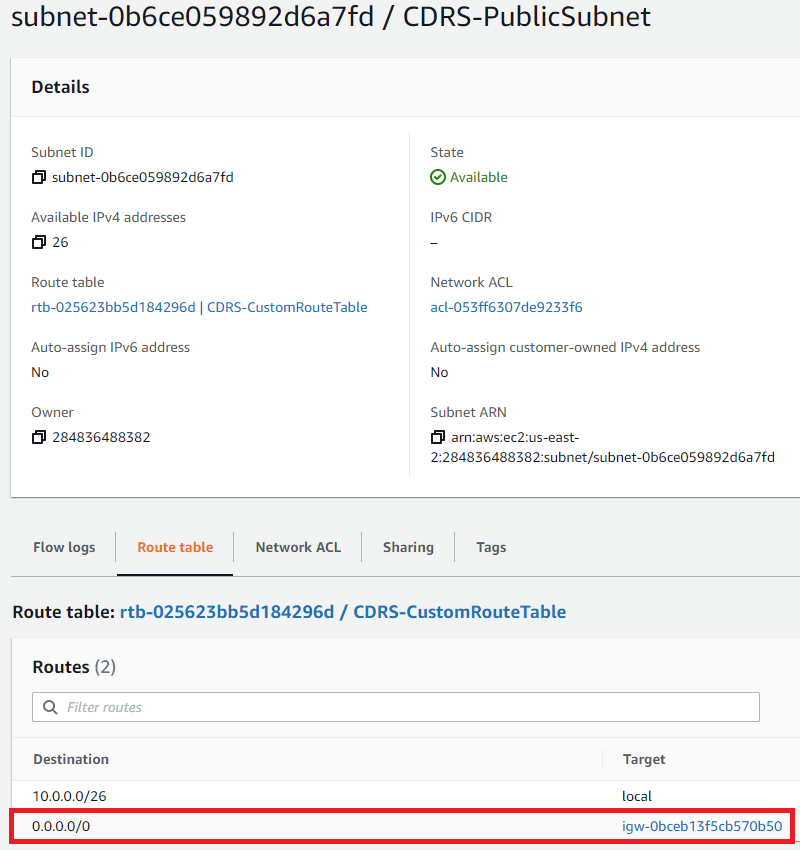
And this is the route table after the edit:
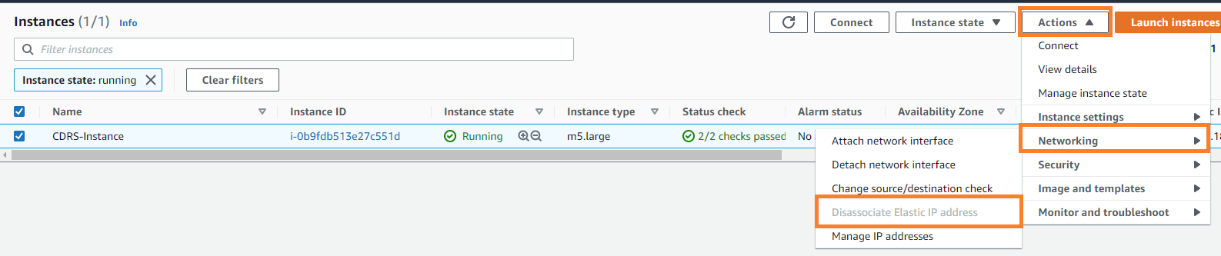
iv Disassociate the Elastic IP from The CDRS (it is recommended to keep it even for a short while before releasing it to make sure you will not need it again).
v Reboot the CDRS instance using the AWS console.
vi Use the CDRA to verify that the CDRS is in a “Connected” status.
- In Azure
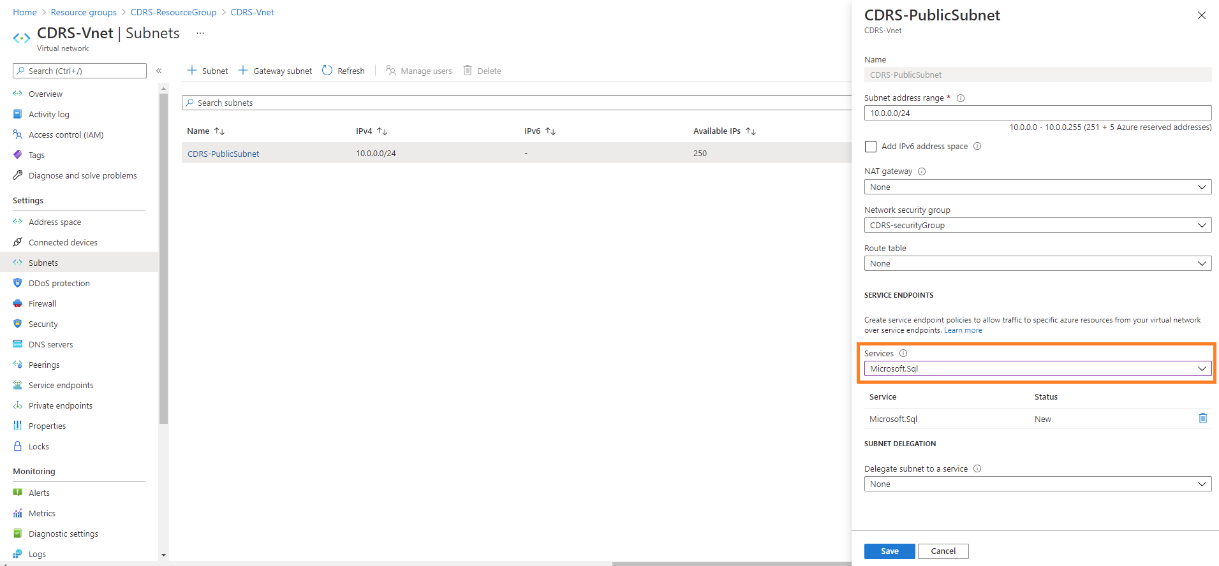
i Edit the Public Subnet of the CDRS and configure the Service Endpoints: Add the “Microsoft.Sql” Service and save.
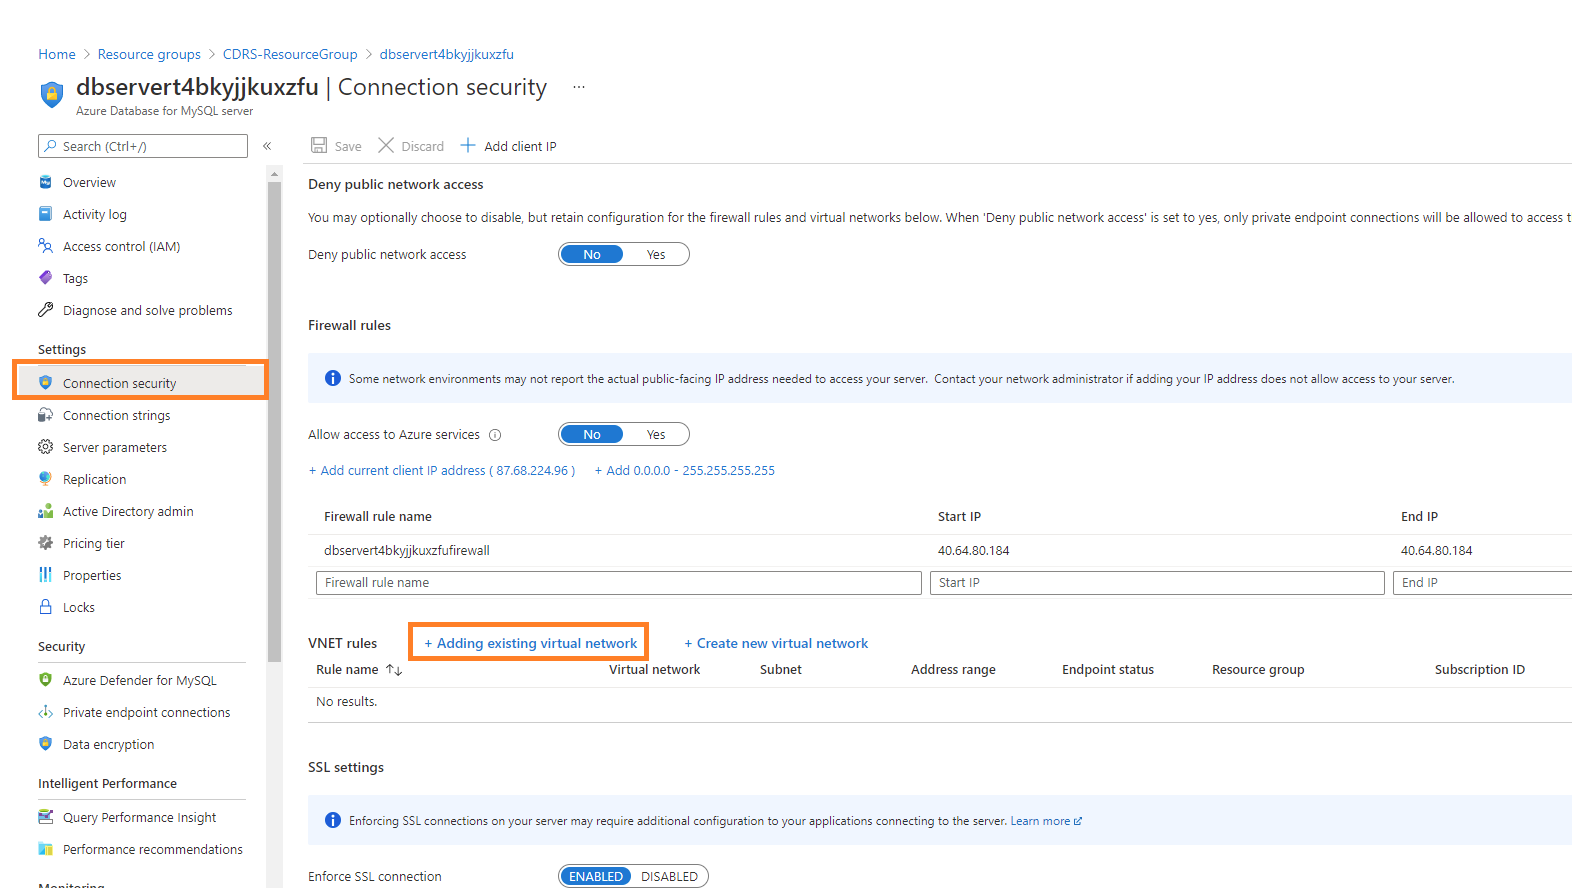
ii Find and open the MySQL Instance in the CDRS resource group, then open the “Connection Security” options and add a new VNET rule: select the “Adding existing virtual network” option:
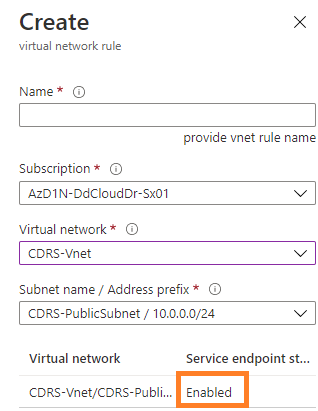
iii Select your Subscription, the Vnet, and Subnet of the CDRS (that was created during the deployment), and make sure the service endpoint is enabled:
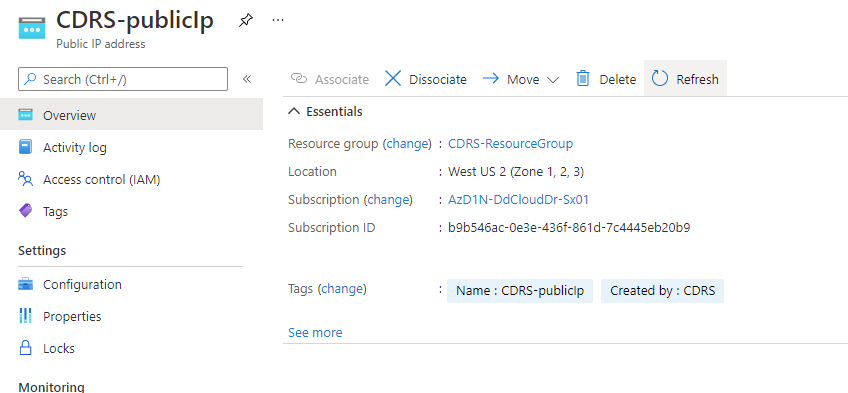
iv Dissociate the Public IP from the CDRS’ NIC and restart the CDRS VM using the Azure Portal.
v Use the CDRA to verify that the CDRS is in a “connected” status.
vi When everything runs without any issues, delete the Public IP and remove the IP from the MySQL instance’s Firewall rules.
Note: If you are using PowerProtect DP with a CDRA older than 19.5 and want to use your VPN, you need to make sure that none of the subnets in your existing Vnet have delegations to other Azure services and none of the subnets have private endpoints configured. If you do, the deployment might fail, and you will need to install a standalone 19.5 (or newer) CDRA that contains a newer Azure SDK.
Email address
After a successful deployment, when using Cloud DR Add-on, it is recommended to configure an email address for the admin user of the Cloud DR Add-on using its interface in order to be able to recover a forgotten password.
Additionally, provide an email address for the Cloud DR Server monitor user using the Cloud DR Server user interface for the same reason.
CDRA - 2 Network interfaces and 2 gateways
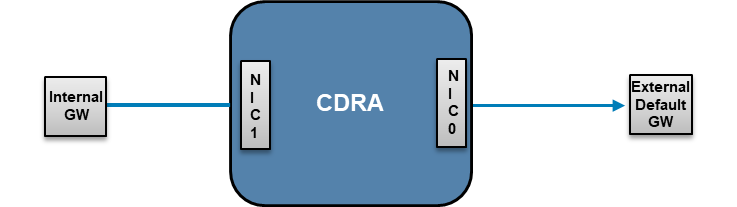
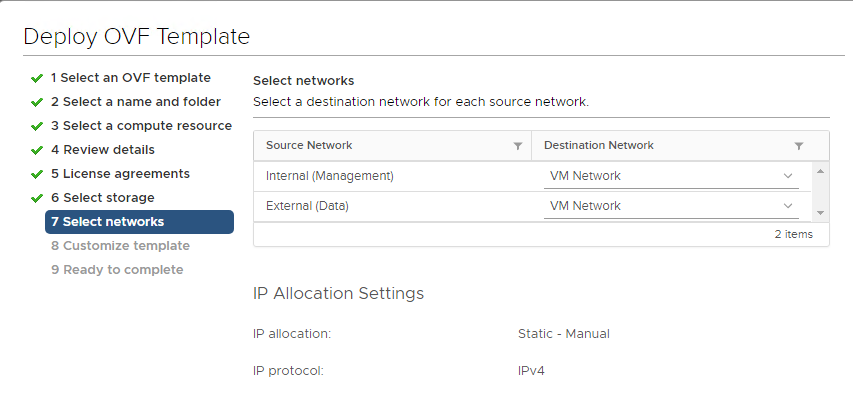
The CDRA supports having 2 different IP addresses, one could be used for outbound traffic to the cloud, and the other one for management and internal data-center communication. By default, you configure only one NIC that is labeled as External (Data), and it is used for all traffic. This is how it looks like from the OVA deployment wizard:
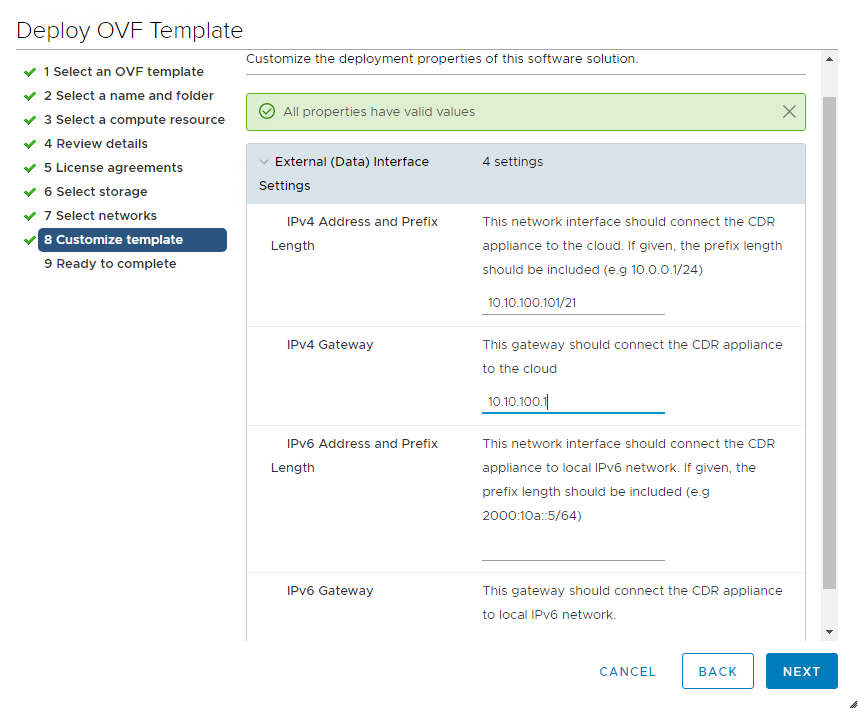
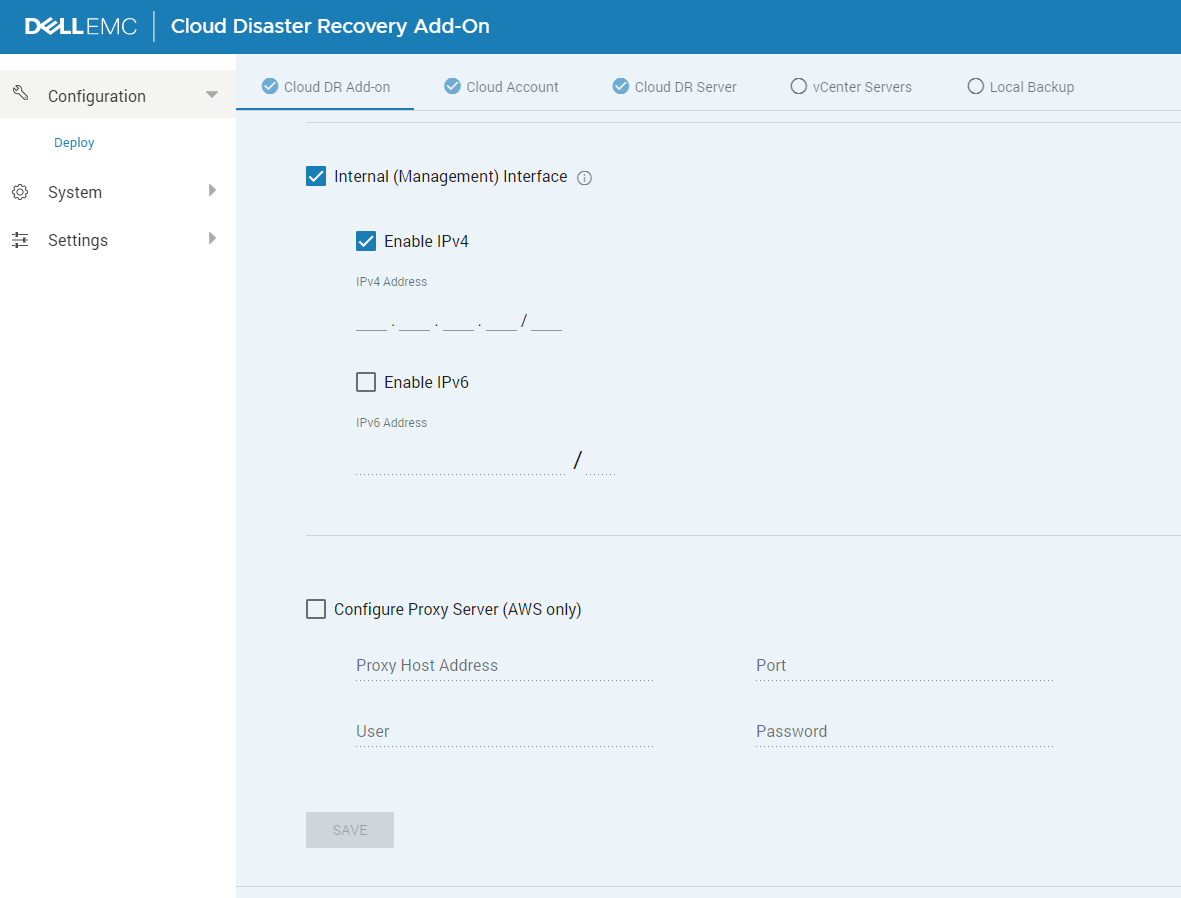
If you need to use a second NIC for internal traffic, you can use the CDRA UI to configure the IP address. Both NICs use the same default gateway provided during the OVA deployment.
If you need to set a different gateway to one of the NICs, use the following procedure:
- Deploy the CDRA VM and set the external IP and external GW (which would be the default gateway).
- Connect to the CDRA UI, change the default password.
- SSH to the CDRA using the cdr user and the password you changed in the previous step.
- Add static routes to the internal NIC in order to use another (internal) GW:
- For CDRAs running release 19.7 or anything before that (CDRAs that run CentOS 7):
i The NIC’s name is ens192.
ii Create the file: /etc/sysconfig/network-scripts/route-ens192.
iii Add internal network routes: network/prefix using <GW IP> dev ens192 (for example, 200.200.0.0/24 using 10.10.200.1 dev ens192).
iv Restart the network service: sudo service network restart.
- For CDRAs running release 19.8 or later (CDRAs that run SUSE Linux Enterprise 12 SP5):
i The NIC’s name is eth1.
ii Edit the routes file /etc/sysconfig/network/routes and add a new line:
network/prefix <GW IP> - <interface> (for example 200.200.0.0/24 10.10.200.1 – eth1).iii Restart the network service: sudo service network restart.