


Flexible Windows Bare-Metal Recovery with PowerProtect Data Manager

In today’s enterprise, it is certainly not a surprise to hear of a mission-critical application server experiencing downtime or degraded state due to disaster recovery situations, such as hardware failures and cyberattacks. In such situations, bare-metal recovery (BMR) is obviously one of the best disaster recovery solutions. Most users rely on the BMR procedure to restore mission-critical applications, operating environments, and data.
With Dell PowerProtect Data Manager, BMR for a Windows server can be performed efficiently with just a few clicks. Before we explore more about Windows server BMR with PowerProtect Data Manager, let us briefly take a look at BMR.
What is BMR?
BMR, also known as offline recovery, is used as part of a disaster recovery plan that provides protection when a server or a computer will not start after a catastrophic failure. The term bare metal is in reference to a computer without a base operating system or applications. The goal of BMR is to bring a server or computer to the state it was in before the failure.
When is BMR required?
BMR can be used to recover from the following situations:
- To recover a server or a computer entirely after a hardware failure that has been repaired.
- To recover data to a new server or a computer after a hardware failure that cannot be repaired. The new computer does not have an operating system, and the operating system files must also be recovered from the old computer.
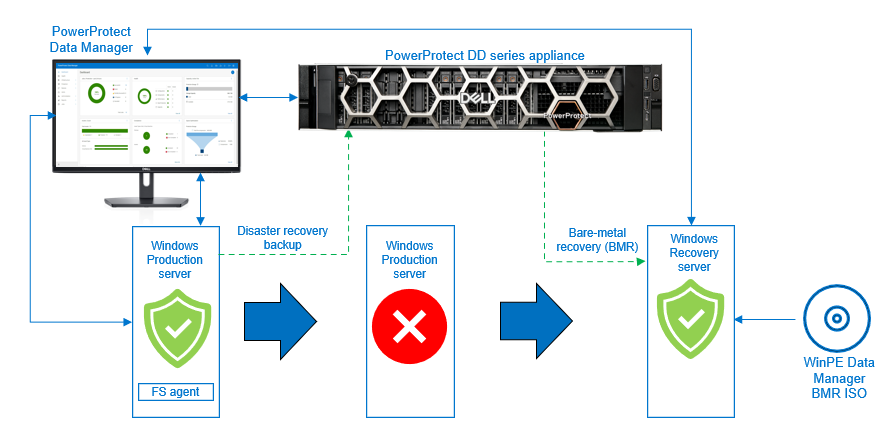
BMR of Windows host with PowerProtect Data Manager
Starting with version 19.10, PowerProtect Data Manager supports the file system agent to back up the disaster recovery asset and perform a BMR of a Windows host.
You can use BMR for the following operations:
- Physical machine to physical machine (P2P)
- Physical machine to virtual machine (P2V)
- Virtual machine to virtual machine (V2V)
With PowerProtect Data Manager, you can perform BMR by backing up the disaster recovery asset. When a file system agent backup is performed, there is an extra asset—”disaster recovery”—that is backed up. This asset includes the information required to rebuild the Windows system back to its state at the time of the backup. The data in the disaster recovery asset, plus volume information for those file systems that contain operating system data (critical volumes), are also backed up.
After the disaster recovery asset backup is successful, you can perform the BMR using the customized PowerProtect Data Manager WinPE ISO image. By default, each BMR backup is system state enabled.
Backing up Windows disaster recovery assets
After you install the file system agent on the Windows file system host and it is approved in the PowerProtect Data Manager UI, the disaster recovery asset is discovered along with the other file system assets.
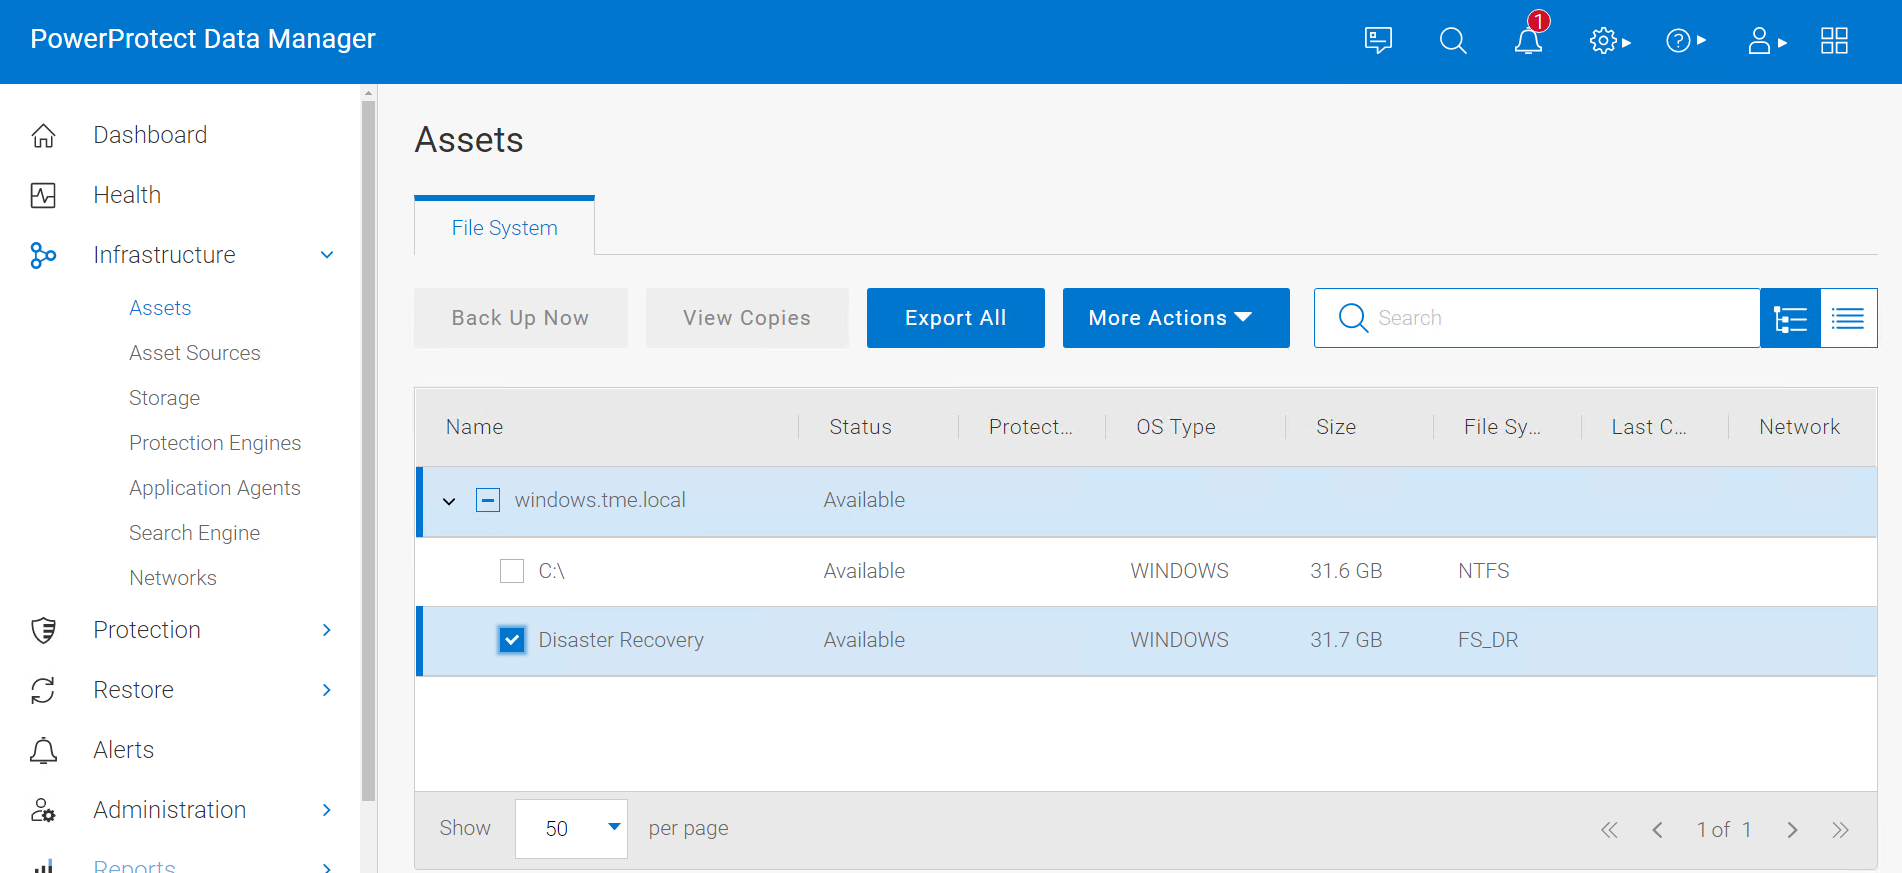
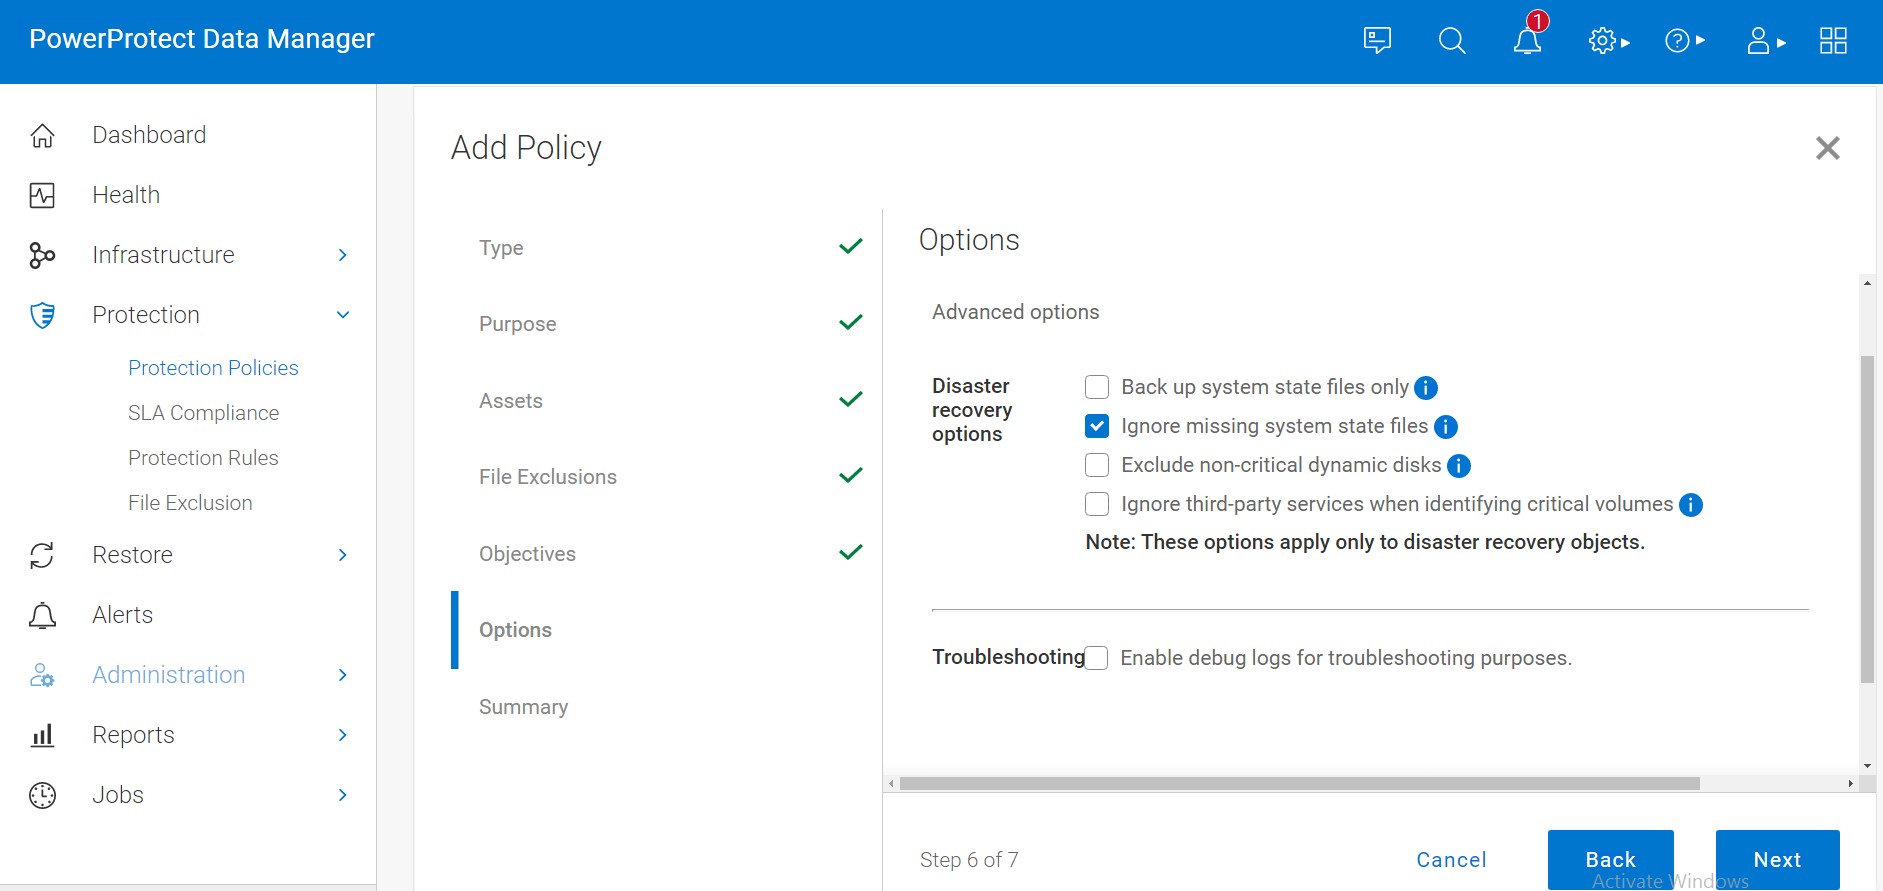
After the disaster recovery asset is discovered in PowerProtect Data Manager UI, you can create a file system protection policy and configure it to back up the disaster recovery asset. A disaster recovery protection policy should contain objects to be backed up, which include critical volumes and system state recovery files.
After the disaster recovery asset backup is successful, you can perform BMR using the customized PowerProtect Data Manager WinPE ISO image.
BMR data consists of the following:
- The operating system files and all data except user data on critical volumes
Note: Critical volumes include the boot volume, the system volume, and the volume that hosts system state data, such as Active Directory and application services.
- All system state information
By default, each BMR backup is system state enabled.
To protect a Windows host entirely, we recommend that you back up BMR data for critical volumes and separately back up regular assets that contain user data.
Performing Windows BMR
PowerProtect Data Manager provides a custom WinPE image that allows you to recover a source host to a target host without installing an operating system. Because local disks are not in use by the operating system, the recovery process can replace files without conflict. The custom PowerProtect Data Manager WinPE image is based on Windows PE 10.0 and contains the NIC and disk drivers for the Windows versions that the WinPE image supports.
Before you perform a BMR, verify that the environment meets the requirements and that you have the necessary information.
Note: For BMR requirements, see the the PowerProtect Data Manager File System User Guide.
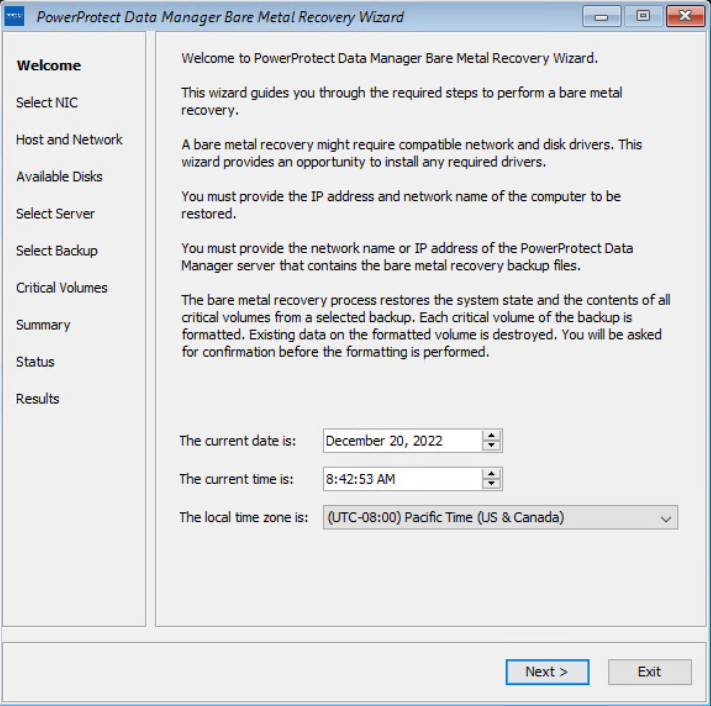
When a recovery of a system is required, you can download the Windows BMR ISO image from the PowerProtect Data Manager UI. The image contains the necessary files to boot and create a WinPE system. The image includes a PowerProtect Data Manager Bare Metal Recovery Wizard that is launched and used as part of the restore.
Note: Ensure that the hardware on the target computer is operational and that the target computer is similar in make, model, and hardware configuration to the source computer to be recovered. For more details about the BMR requirements, see the PowerProtect Data Manager File System User Guide.
The target host boots with the custom WinPE image, either locally or over the network. The Welcome page of the PowerProtect Data Manager Bare Metal Recovery Wizard is displayed.
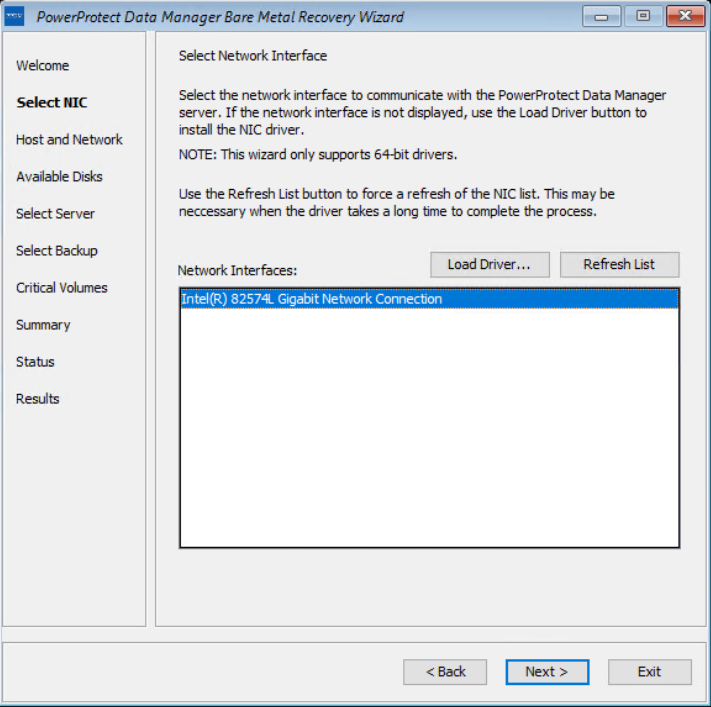
On the Select NIC page, you can select the network interface for communication with Data Manager during the BMR. If the required NIC driver is not in the list, click Load Driver to browse to it.
Note: The driver must not require a restart. The WinPE environment loads only in memory, and changes are not persistent across a restart. If a restart prompt appears, you might be able to ignore the prompt. Most NIC drivers are plug-and-play.
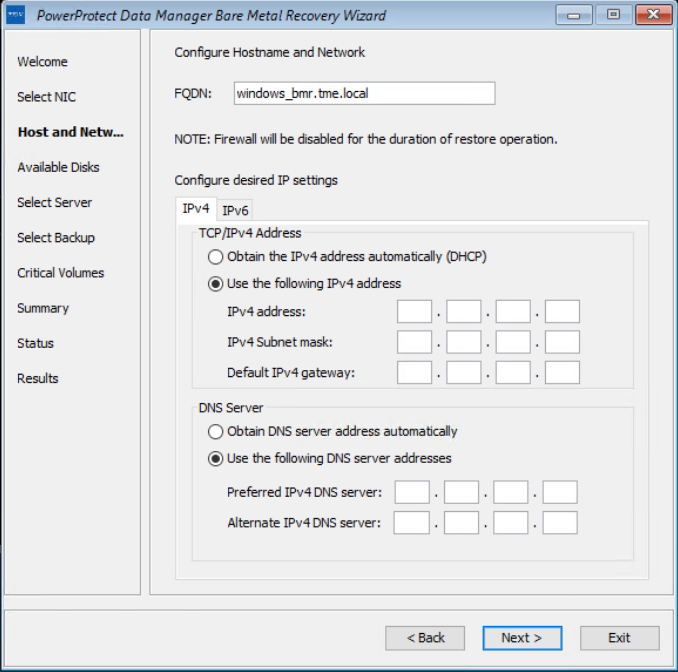
On the Host and Network Configuration page, enter the hostname of the target host and the domain name for the host.
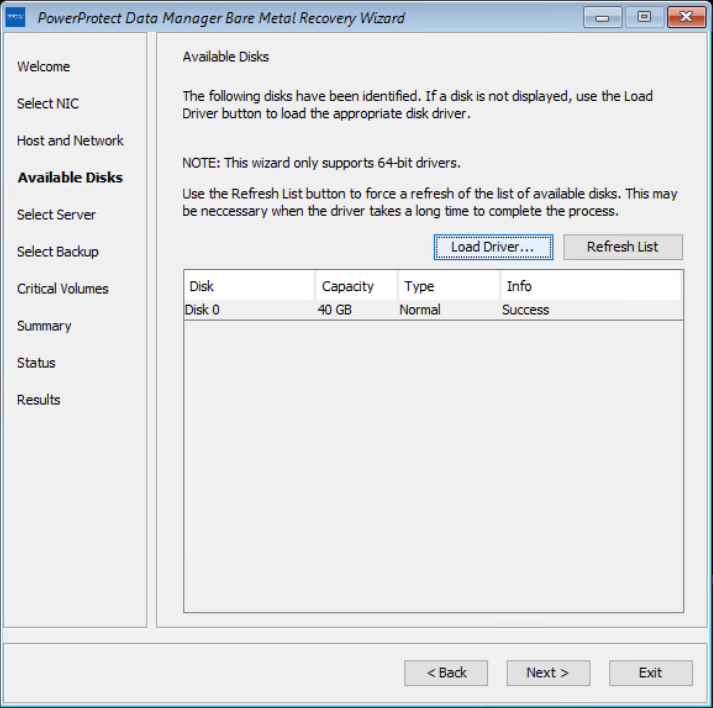
On the Available Disks page, verify the disk configuration. The size and number of hard disks that are added to the target machine should be either equal to or greater than the size and number of disks on the source machine.
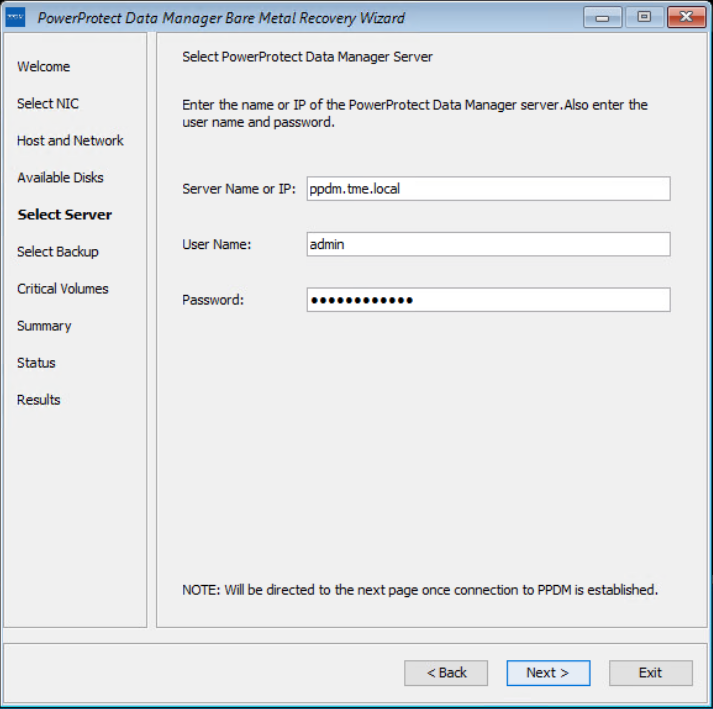
On the Select Server page, enter the PowerProtect Data Manager server and source hostname details. In the Server Name or IP field, add the IP of the server or FQDN only.
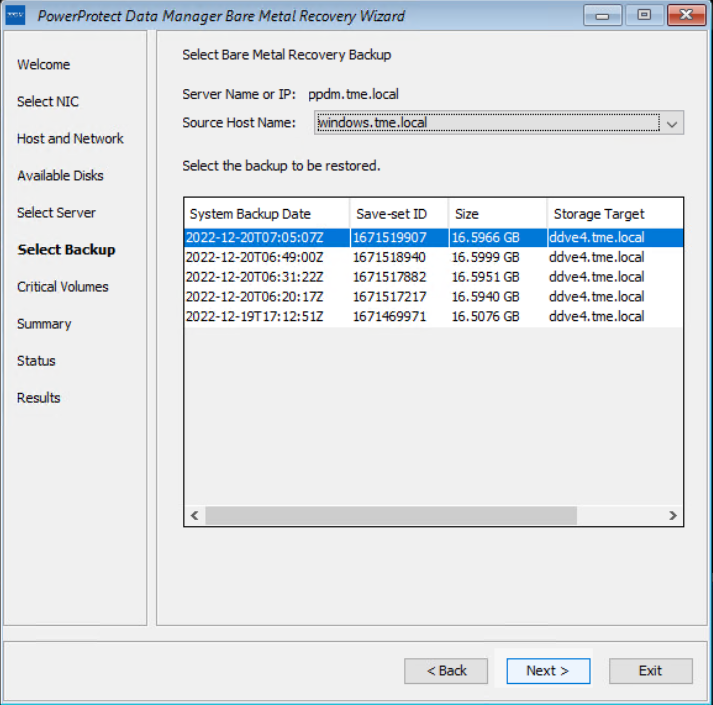
On the Select Backup page, select the respective host from the Source Host Name list and BMR data to restore to the destination host. Backups appear in the list in descending order from the most to least recent.
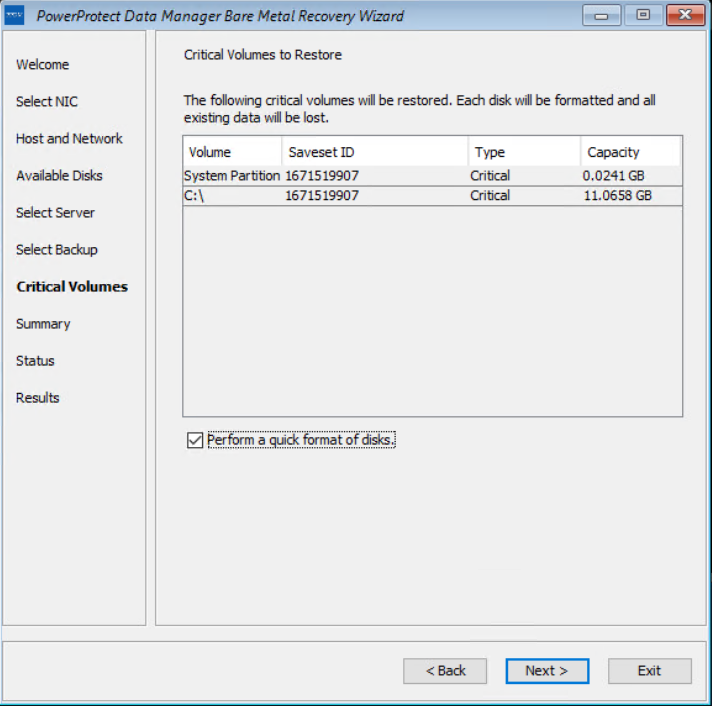
The Critical Volumes page displays the volumes that will be restored and the option to enable a quick disk format.
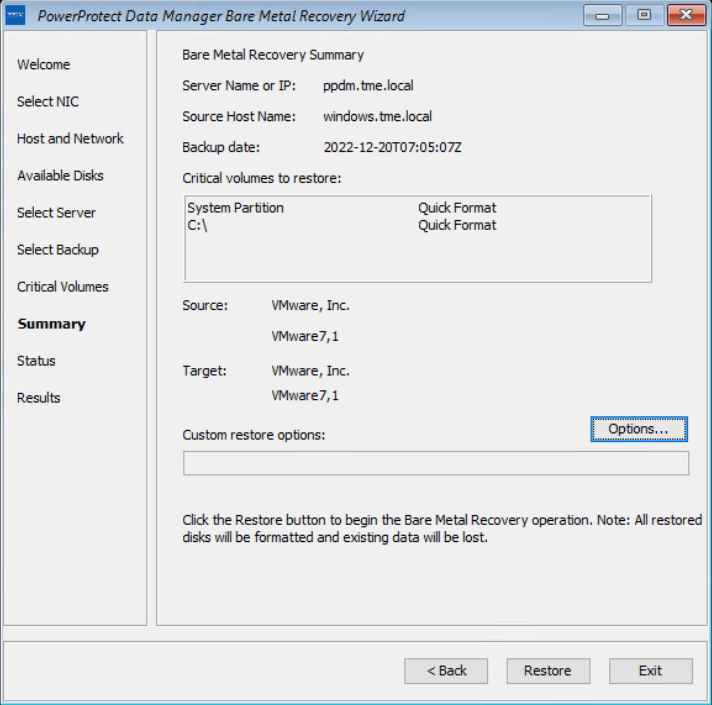
The PowerProtect Data Manager BMR wizard fetches information to perform a BMR, and the Summary page is displayed. To add custom BMR options, next to Custom restore options, click Options.
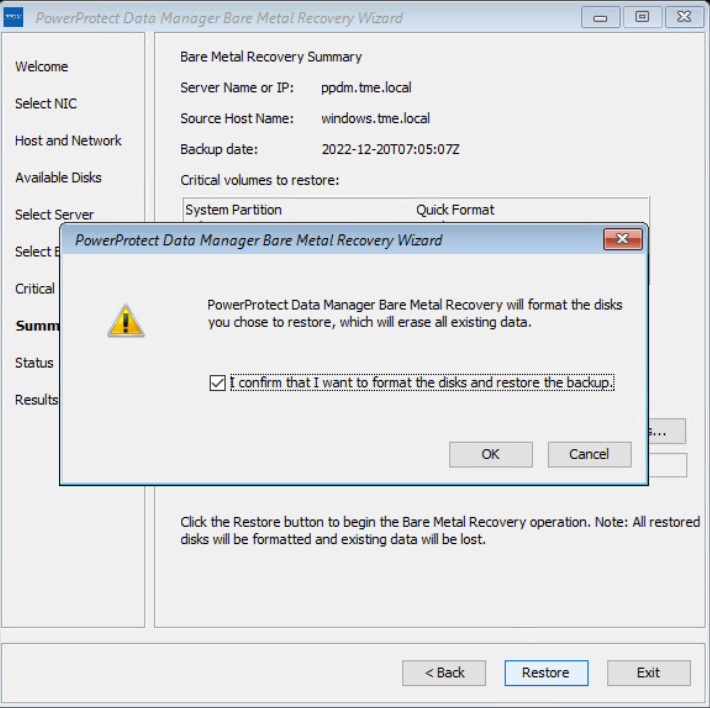
Confirm the quick format of disks and restore the backup.
The Status page shows the restore progress.
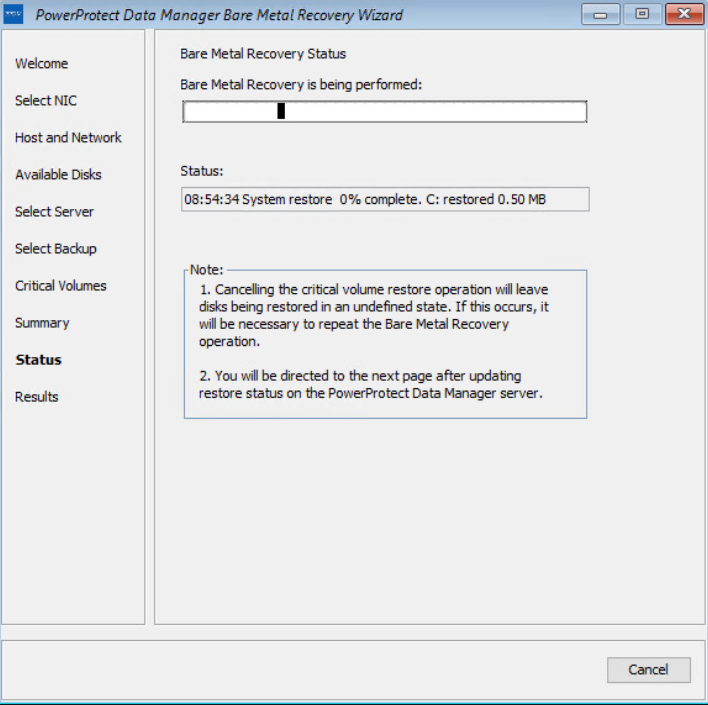
You can also monitor the Bare Metal Recovery job status in the PowerProtect Data Manager UI at Jobs > Protection Jobs.
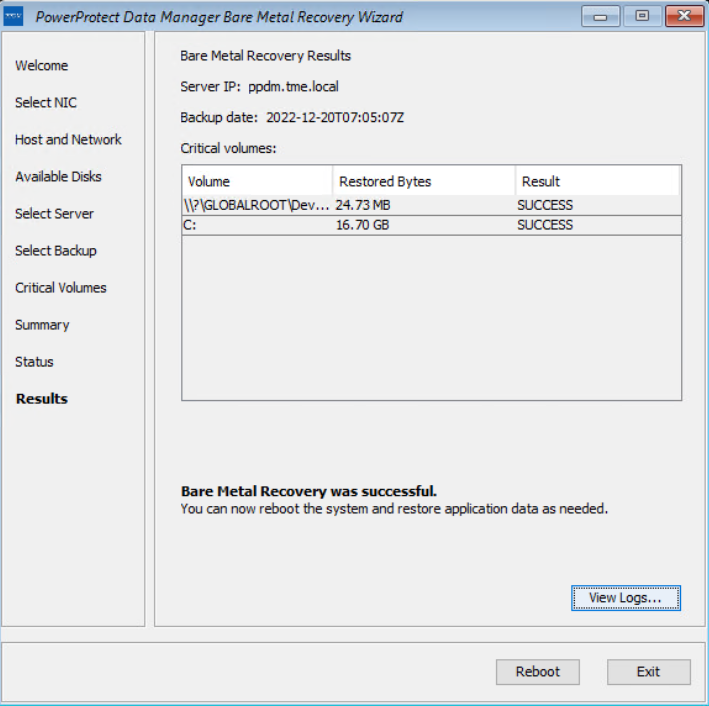
The BMR wizard displays the results. After the recovery is successful, you can reboot the system and restore the application data as required.
With this easy BMR solution with PowerProtect Data Manager, Dell Technologies empowers Windows administrators to recover their business-critical Windows servers quickly and resume their operations.
For more details about disaster recovery for Windows with PowerProtect Data Manager, see the technical white paper and PowerProtect Data Manager: File System User Guide.
For more details about data protection with PowerProtect Data Manager, see the PowerProtect Data Manager website.
Author: Vinod Kumar Kumaresan, Principal Engineering Technologist, Data Protection Division