Home > Storage > PowerStore > Virtualization and Cloud > Dell Storage with VMware Cloud Foundation > Dell storage configuration
Dell storage configuration
-
This section details the steps for each of the various arrays to prepare the NFS mount points for VMware Cloud Foundation.
Dell Unity NFS share creation
To create the NFSv3 share on the Unity array, follow these steps:
- From within the Unity Unisphere interface, under Storage click File, click the NAS Servers section, and click the plus sign (+) to add a NAS server.

- Follow the wizard and specify the settings unique to your environment. Any configuration pages that require special attention are described in the following steps.
- On the Interface page, specify an IP address within the VLAN of the NFS network pool that was created earlier from the SDDC Manager, and click Next.

- On the Sharing Protocols page, select Linux/Unix shares (NFS) and click Next.
- On the Summary page, click Finish to create the NAS server.
Next, create the file system for the NFS share.
- Select the File Systems section and click the plus (+) to add a file system.
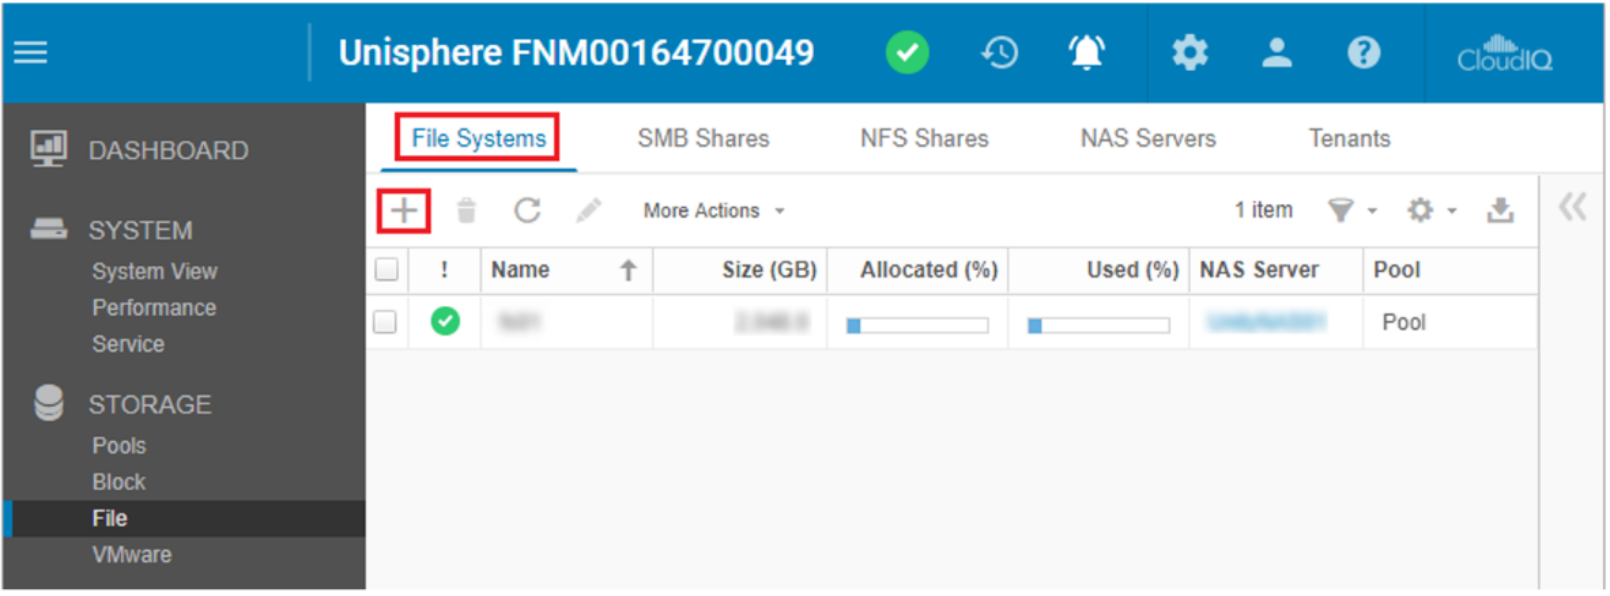
- On the Protocol page, select Linux/Unix Shares (NFS), select the NAS Server that was created previously, and click Next.

- Specify the options for the Name and click Next.
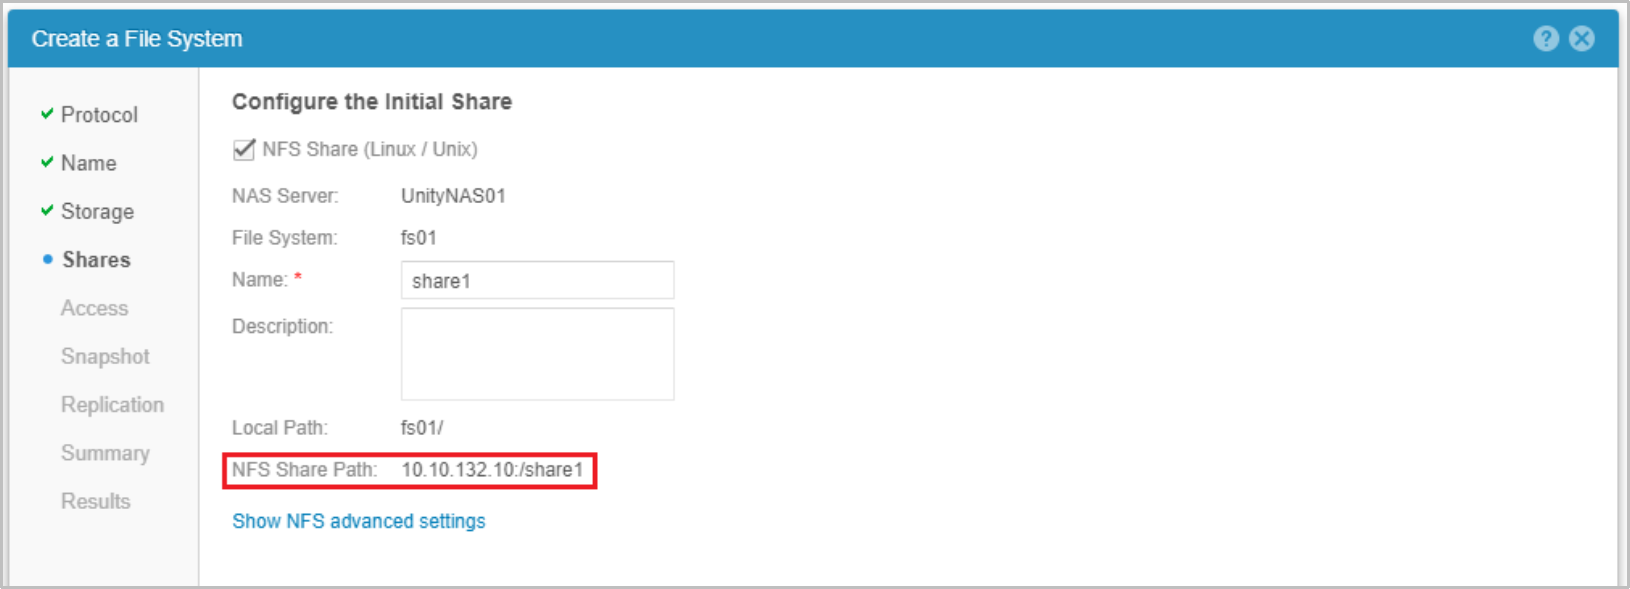
- On the Shares page, check the NFS Share (Linux/Unix) box, specify a share name, and click Next.
- Make note of the NFS Share Path for use later in configuring the NFS share from within the SDDC Manager.
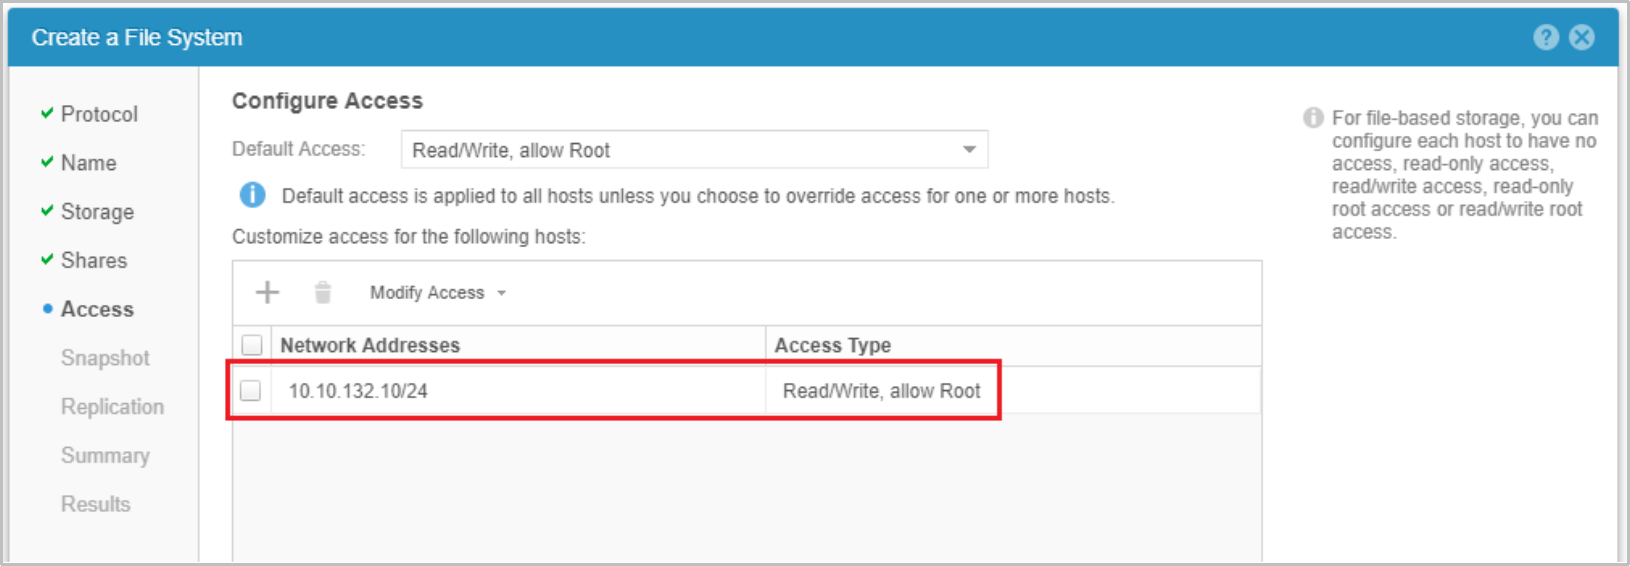
- On the Access page, set the Default Access to Read/Write, allow root, and click the plus sign (+) to customize the host access. In the section Customize access for the following hosts, add the Included IP Address Ranges assigned to the NFS network pool created in VMware Cloud Foundation network pool configuration. Click Next.
- Specify the options for the Snapshot and Replication pages. At the Summary page, click Finish.
Note: If the NFS share was previously created in Dell Unity NFS share creation, skip this section and perform the steps in PowerMax NFS share creation.
If the NFS share has not yet been created, perform the following steps.
- Select the NFS Shares section and click the plus (+) to add an NFS share.
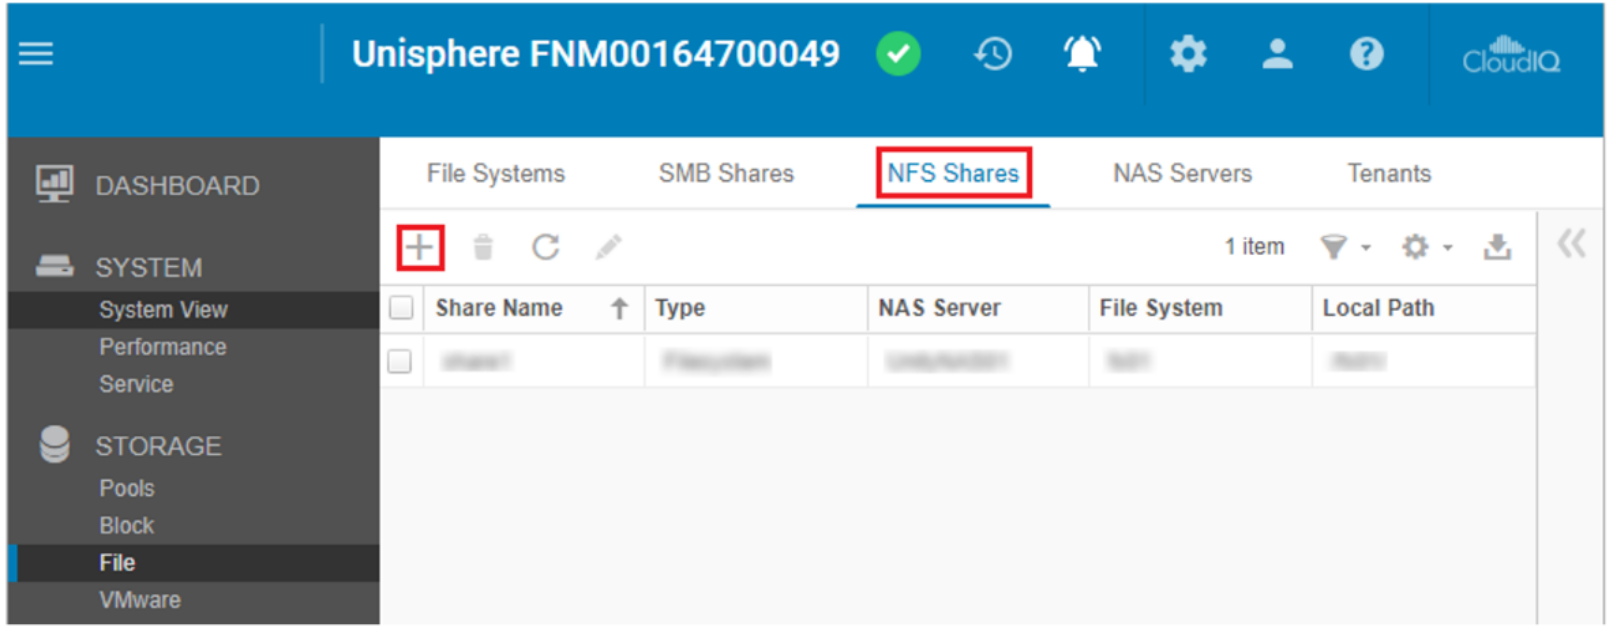
- On the File System page, select the file system that was created in the previous step and click Next.
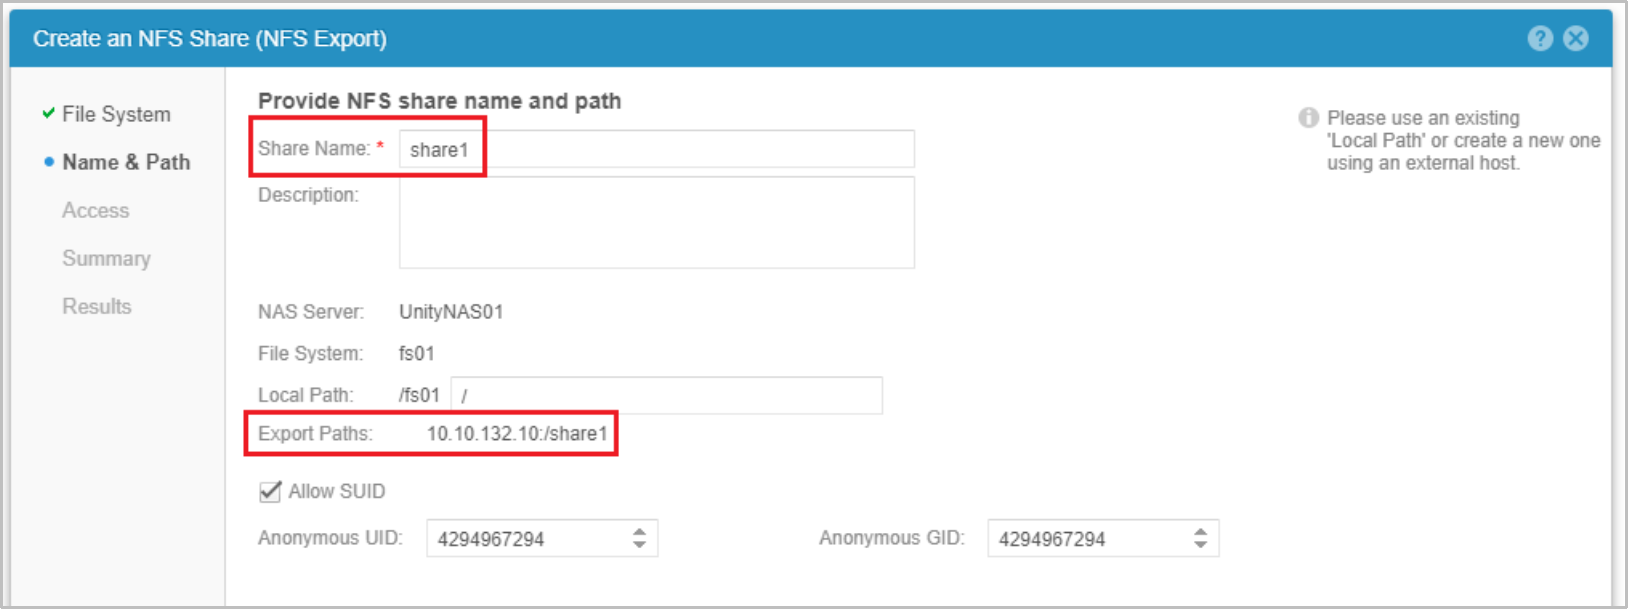
- On the Name & Path page, specify the Share Name. Keep note of the Export Paths address for use later when configuring the NFS share from within the SDDC Manager.
- On the Access page, set the Default Access to Read/Write, allow root and click the plus (+) to customize the host access. In the Customize access for the following hosts section, add the Included IP Address Ranges assigned to the NFS network pool created in VMware Cloud Foundation network pool configuration.

PowerMax NFS share creation
To create the NFS share on the PowerMax array, follow these steps:
- In the Unisphere interface, click System > File.
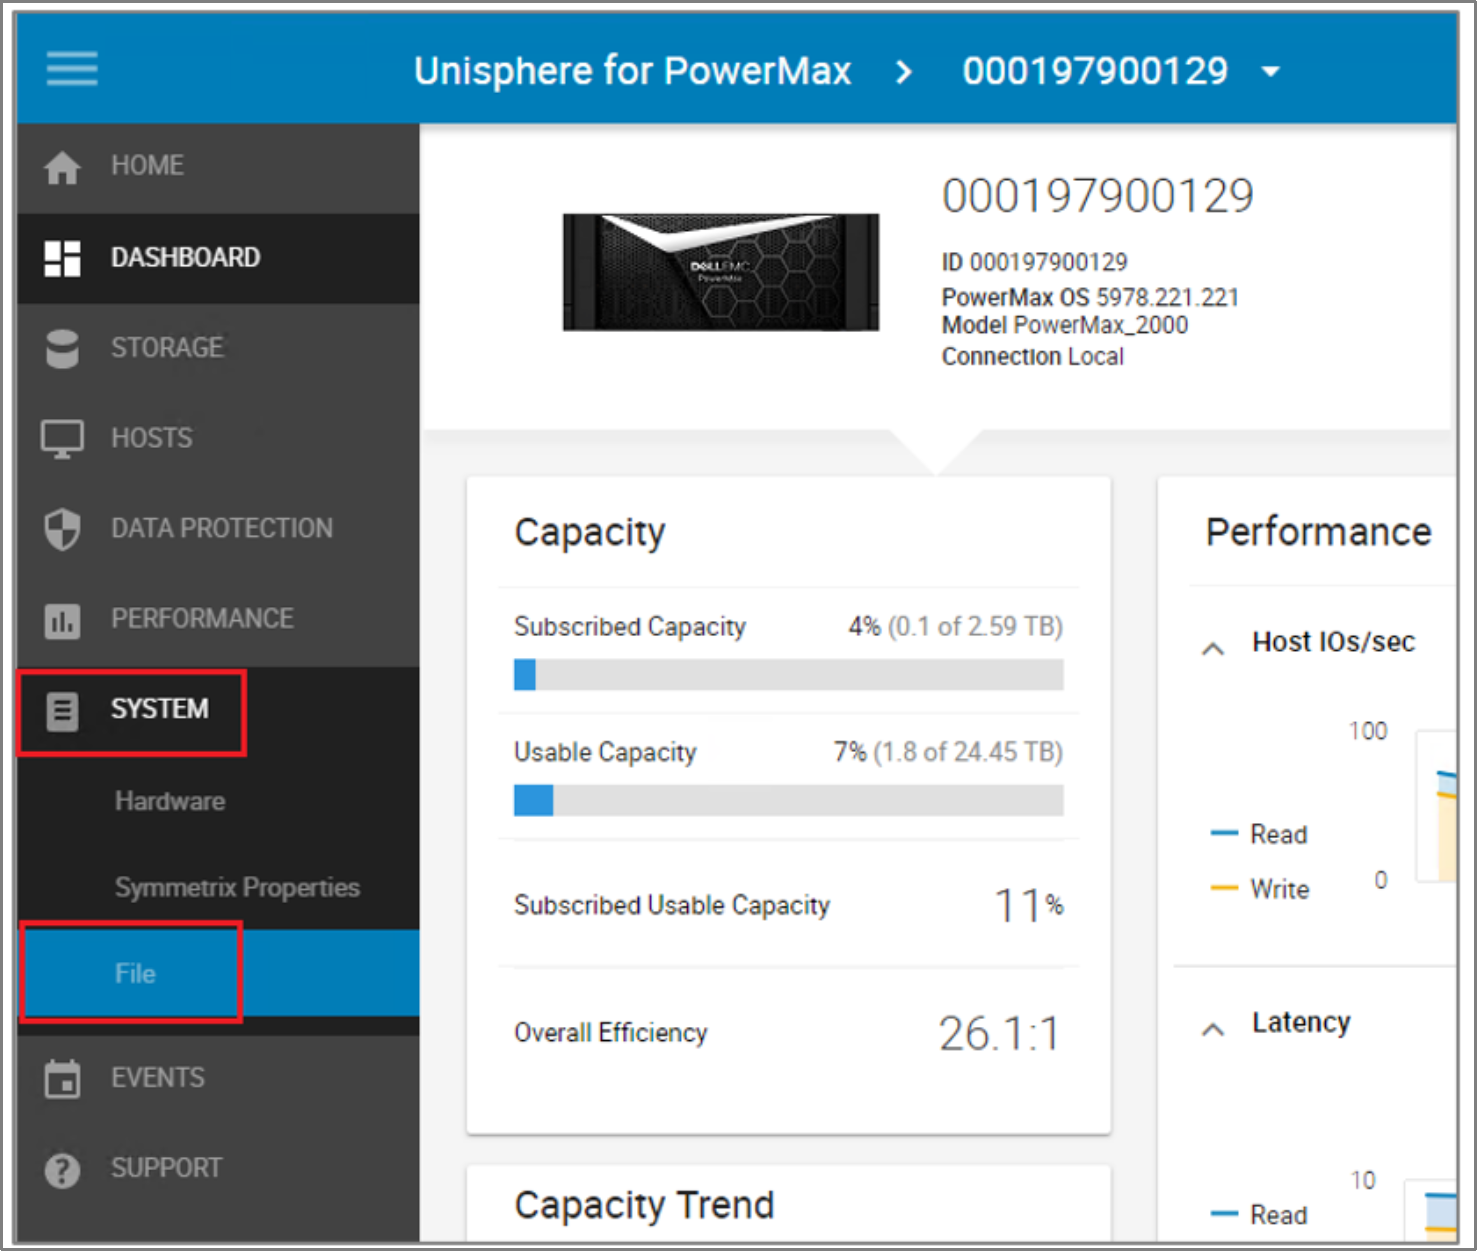
- In the Actions pane, click Provision Storage for File.

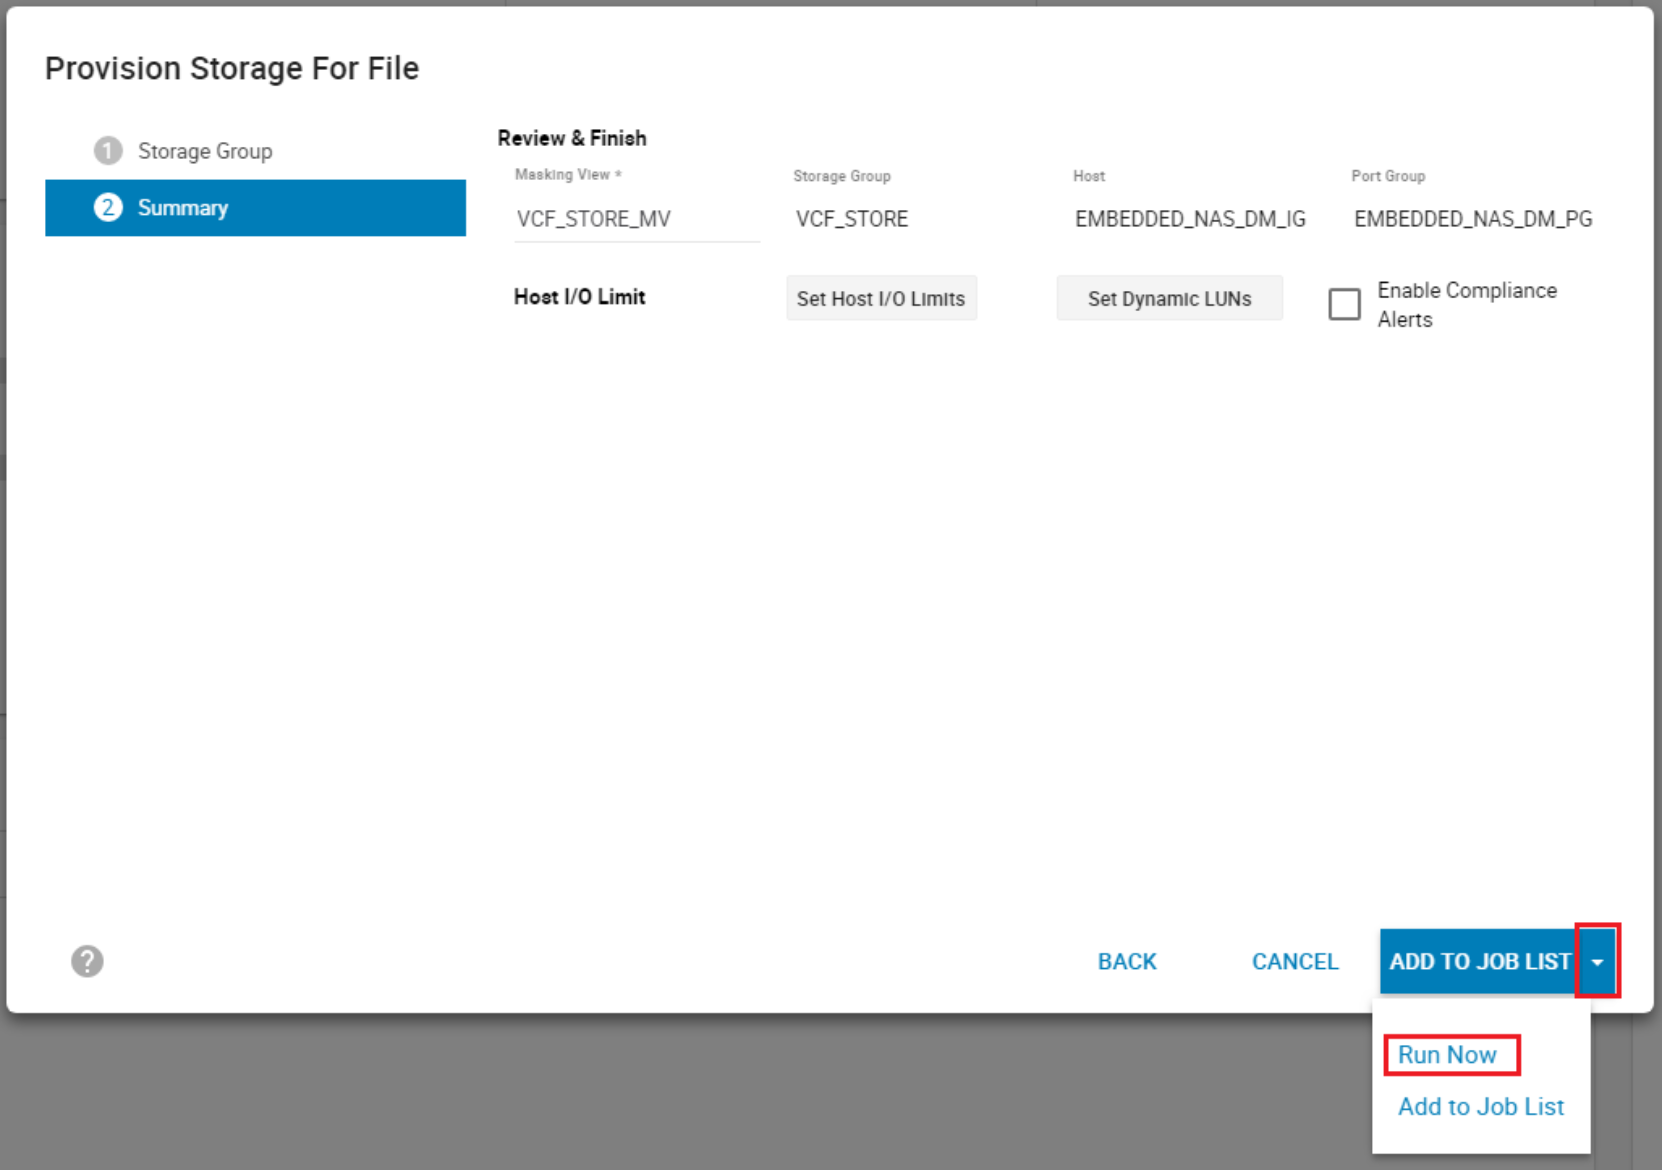
- In the Storage Group section, specify the Storage Group Name, select the Storage Resource Pool and the Service Level. Next, set Volumes to 1, set the Volume Capacity, and click Next.
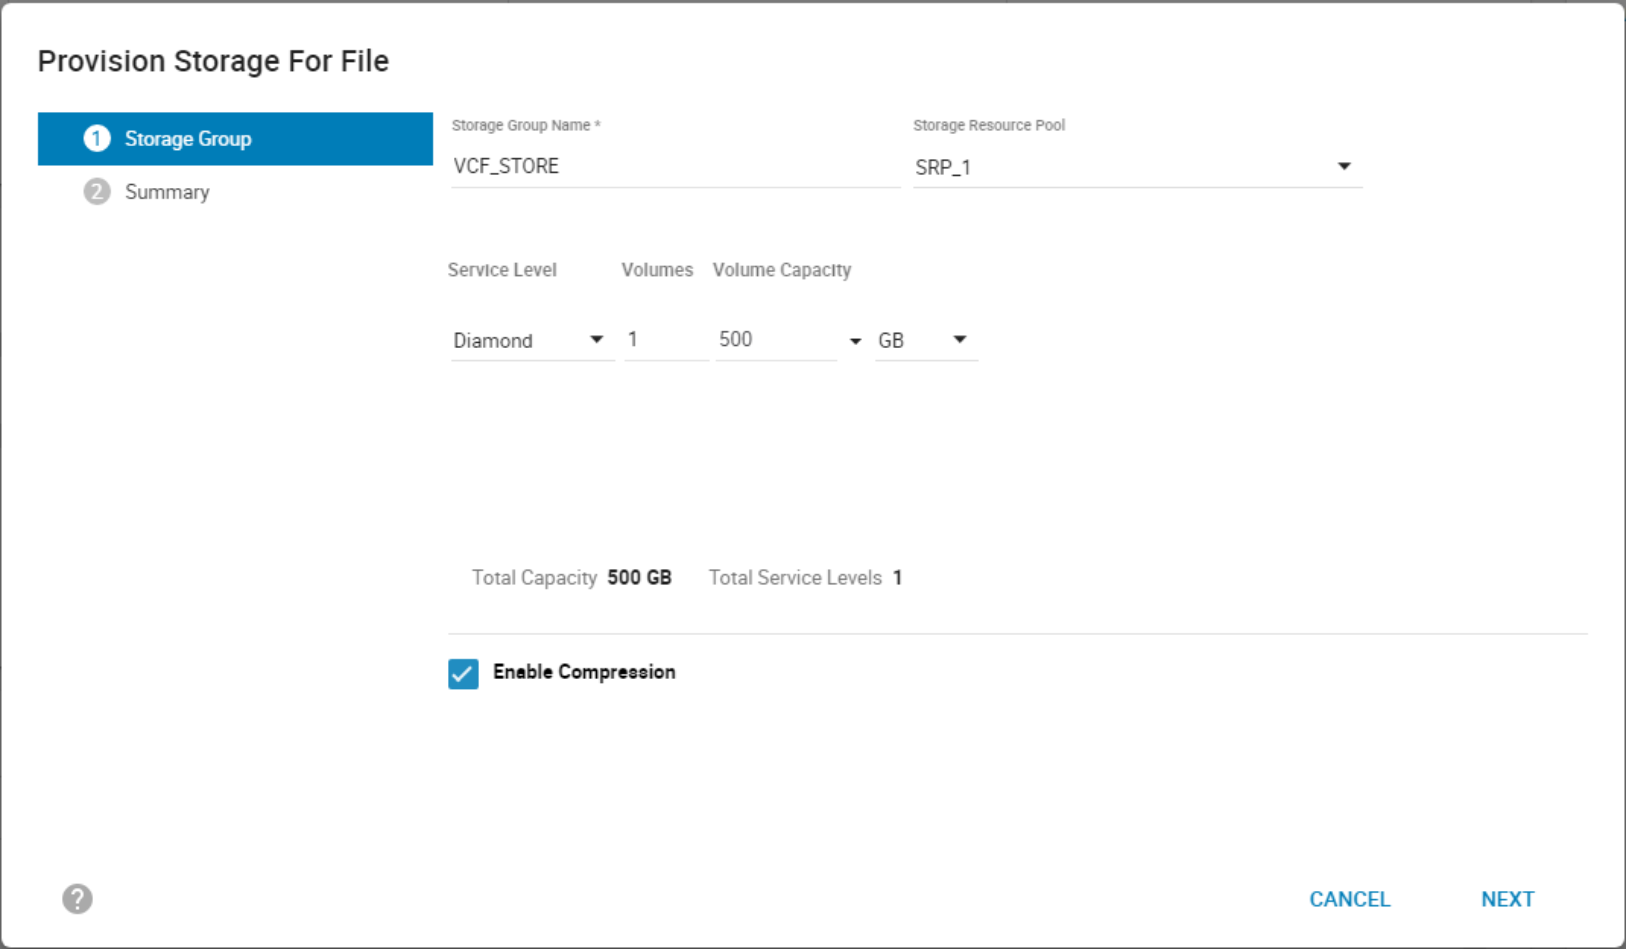
- On the Summary page, review the settings. Click the drop-down arrow next to Add to Job List and select Run Now.
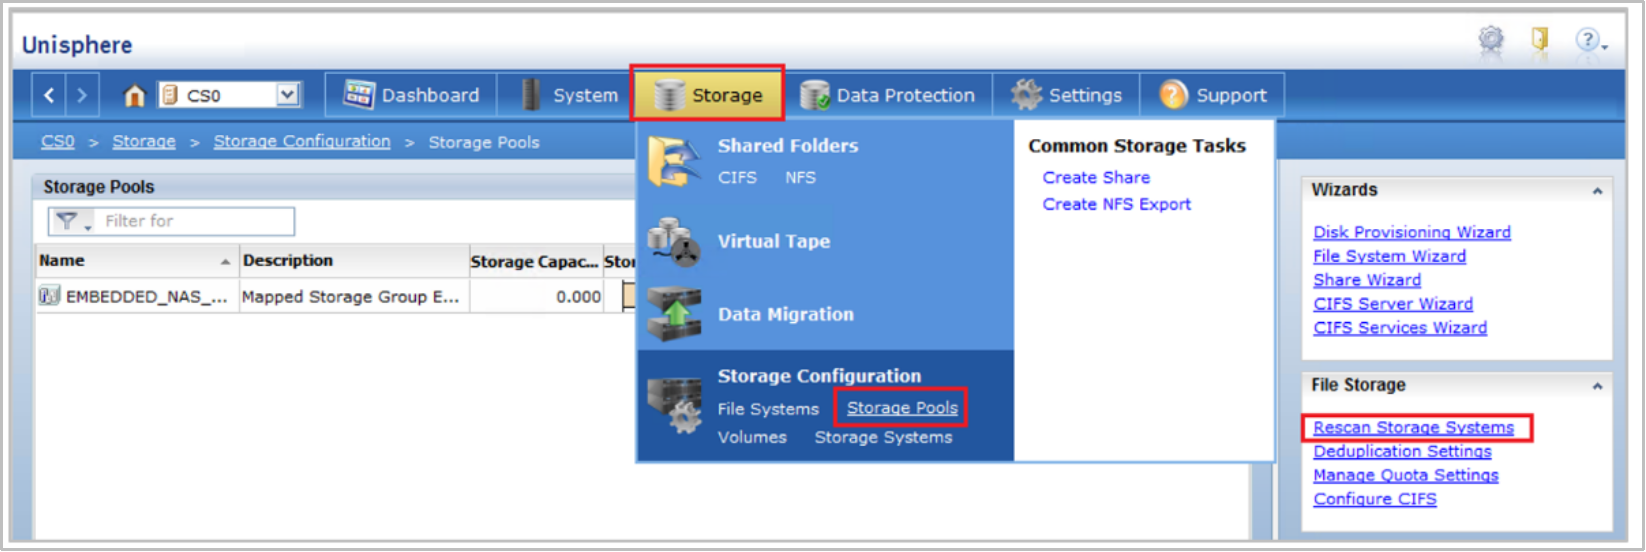
- Launch Unisphere for VNX.

- When the administrative console opens, click Storage, Storage Pool. When the pane opens, click Rescan Storage Systems. When the dialog opens, click OK.
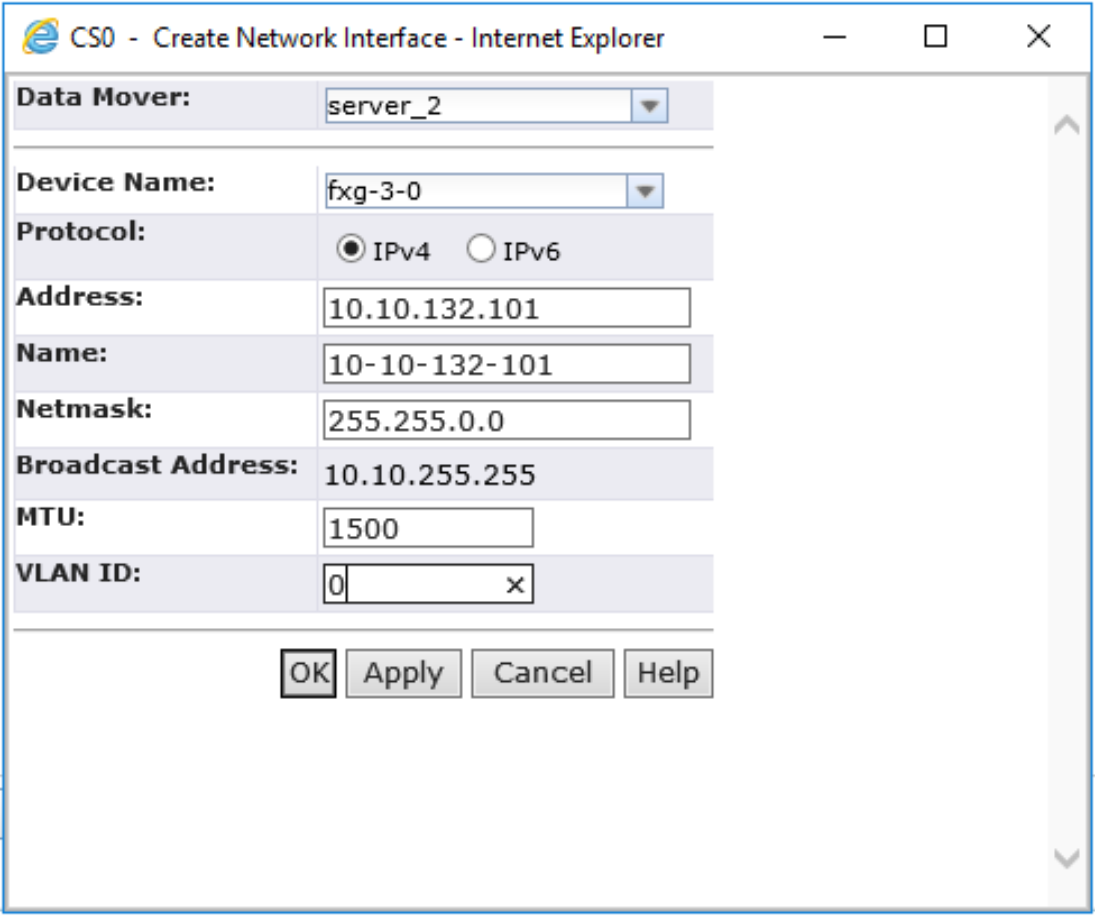
- To create the interface, click Settings > Network and click Interfaces.

- At the bottom of the pane, click Create. Specify the interface settings and click OK.
Note this IP address for use in VMware Cloud Foundation workload domain deployment.
- To create the file system, click Storage > Storage Configuration > File Systems and click Create.
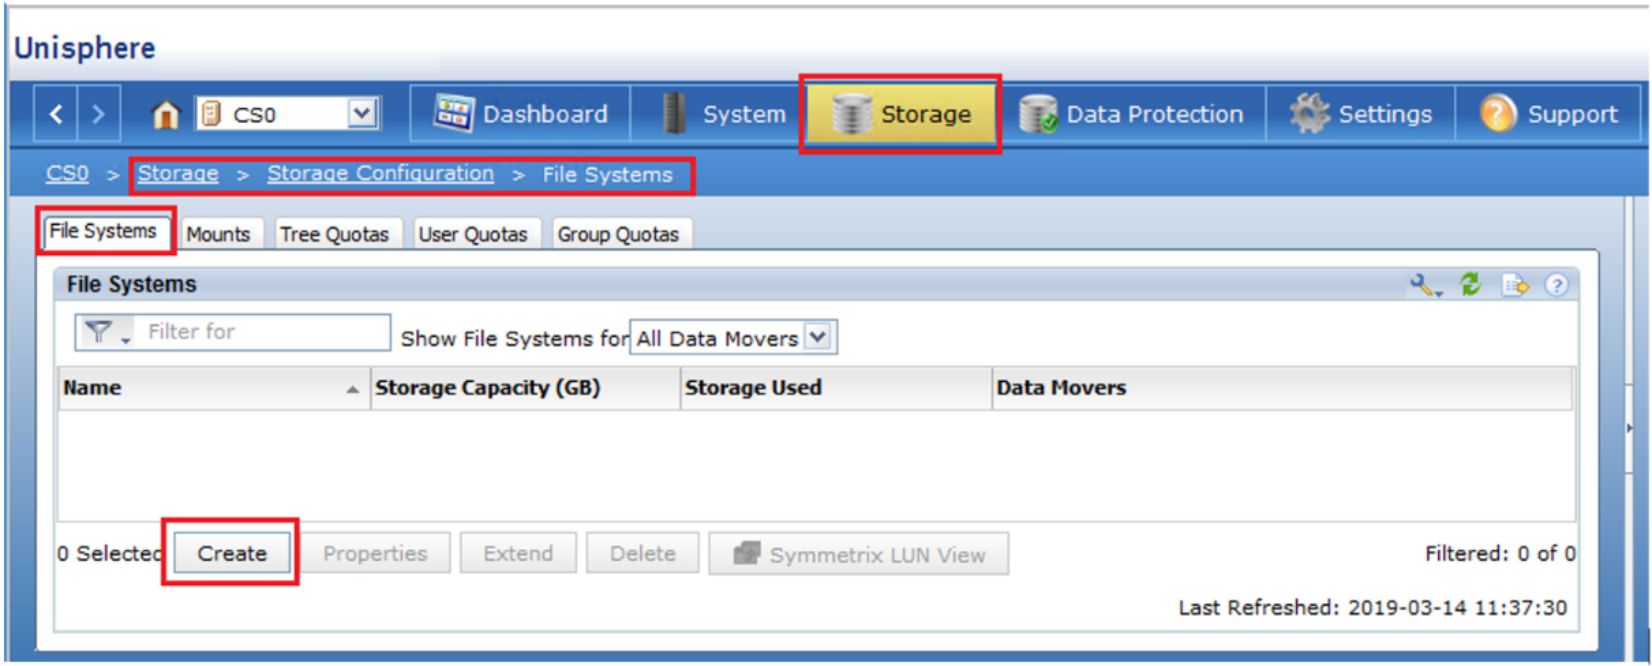
- Specify the options for the file system and click OK.
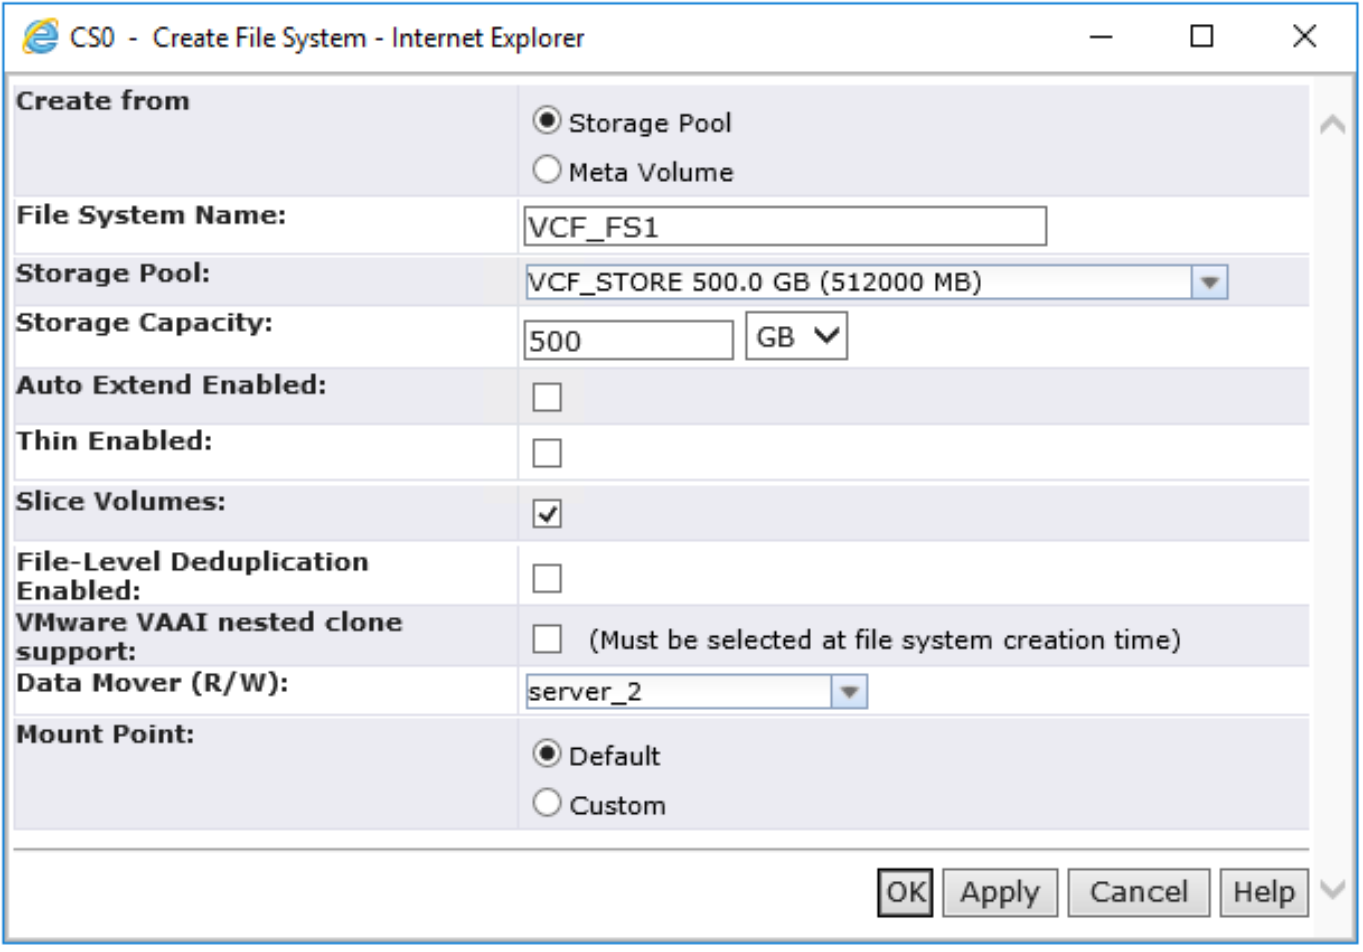
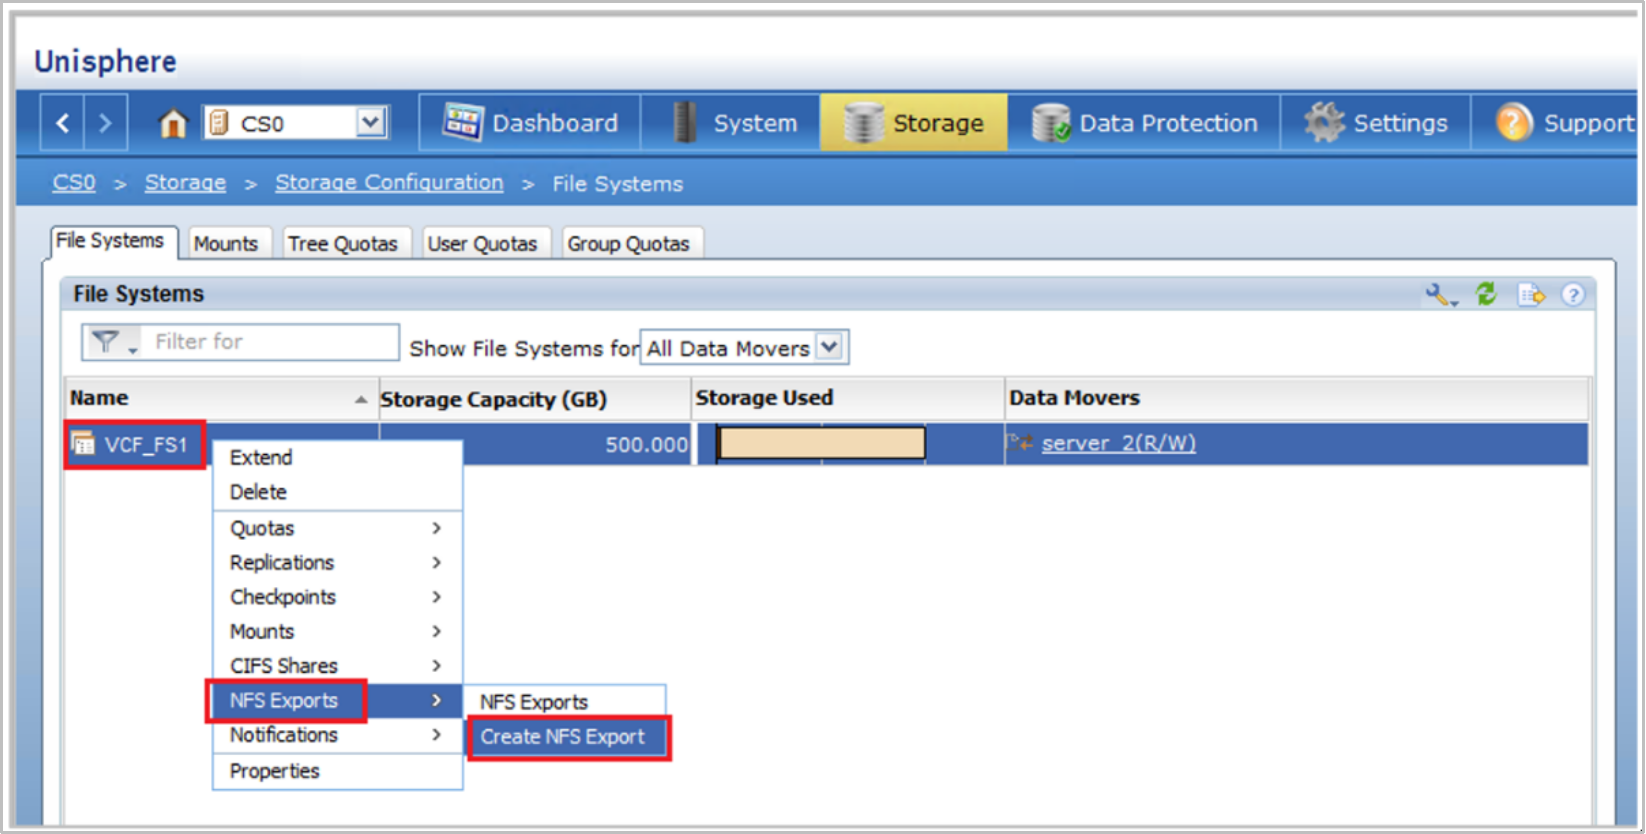
- To create the NFS export, right-click the file system, click NFS Exports, and click Create NFS Export.
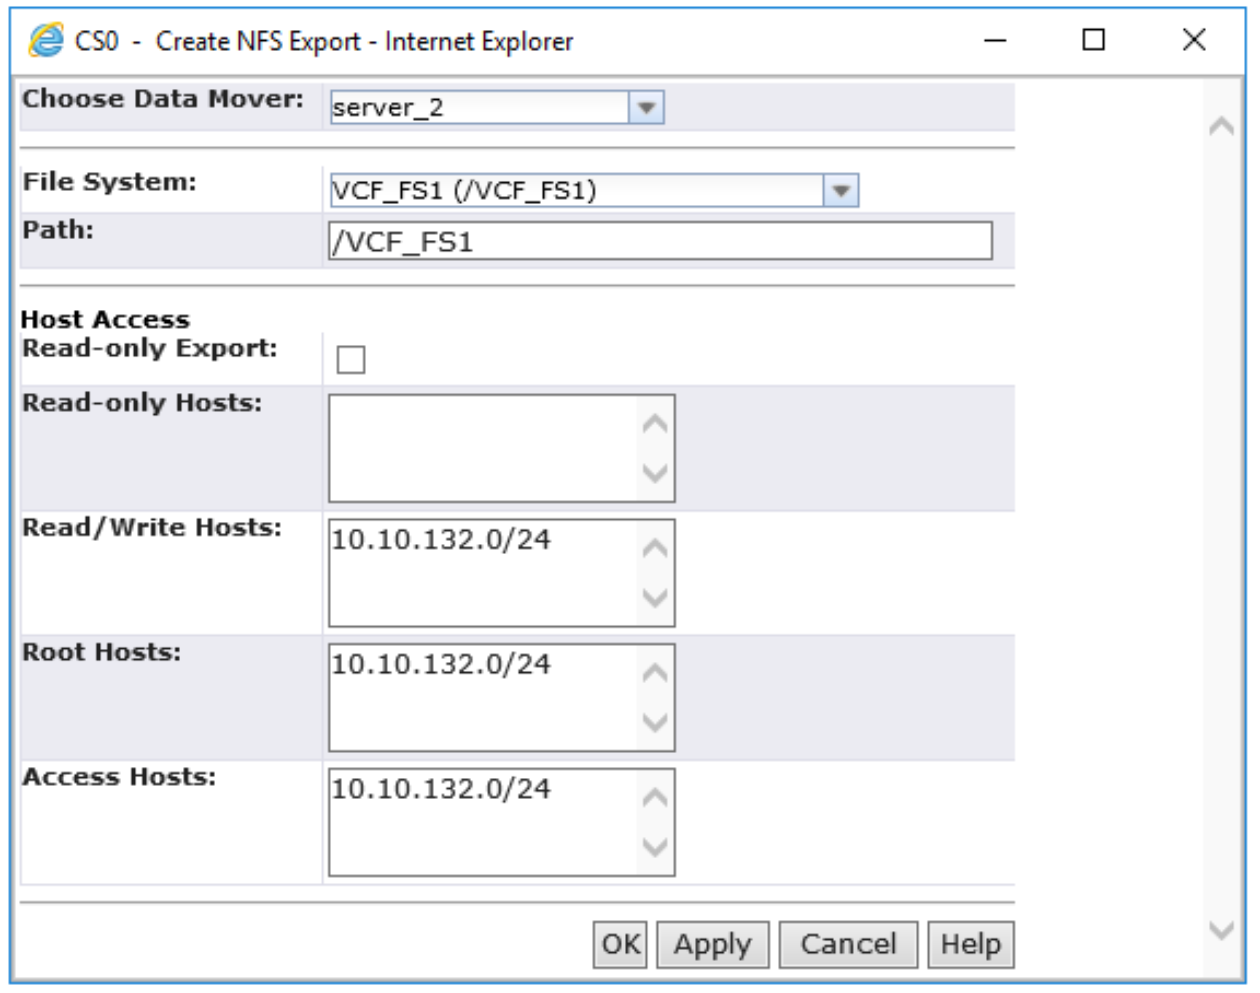
- In the Create NFS Export configuration dialog, enter the export and host information and click OK.
- Click Storage > Shared Folders and click NFS to reveal the share information needed for VMware Cloud Foundation workload domain deployment.

In this example, the NFS share is 10.10.132.101:VCF_FS1.
PowerStore NFS share creation
To create the NFSv3 share on the PowerStore appliance, follow these steps:
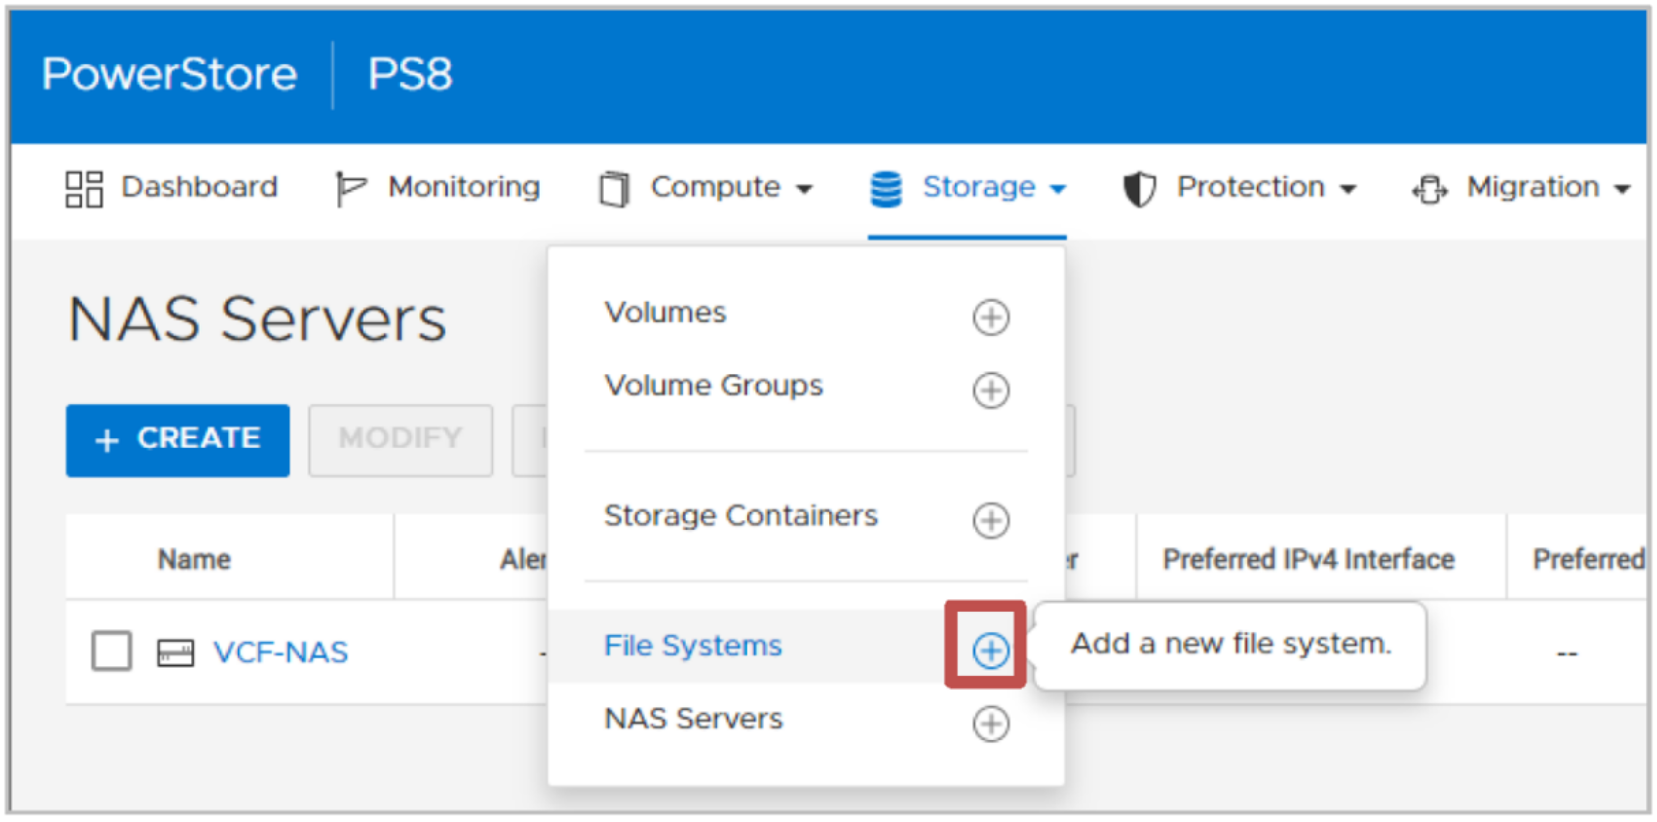
- From within the PowerStore Manager, click Storage, and click the plus sign (+) next to NAS Servers.
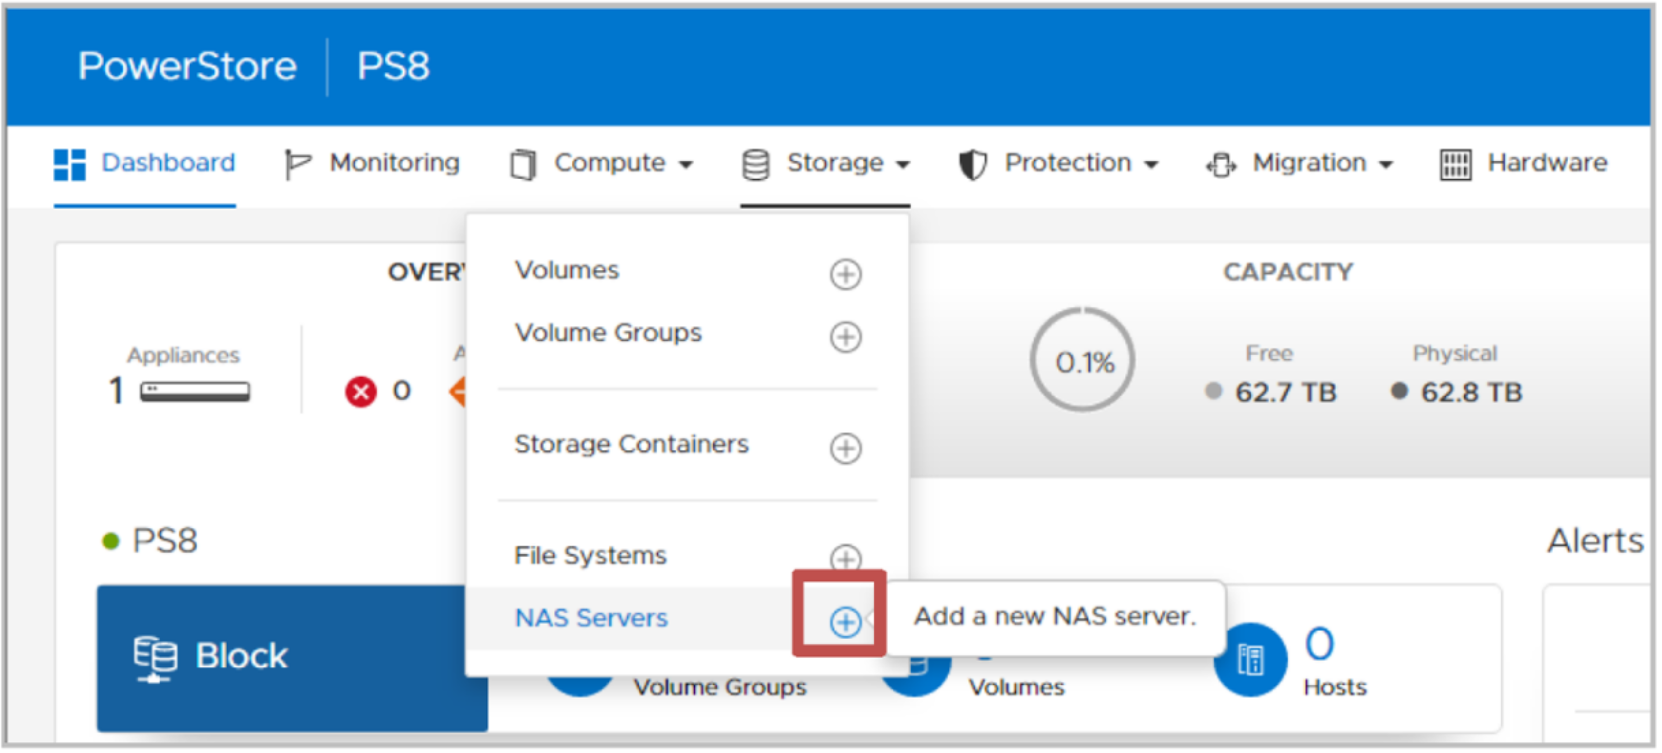
- Proceed through the wizard to specify the settings unique to your environment. Any configuration pages that require special attention are covered in the following steps.
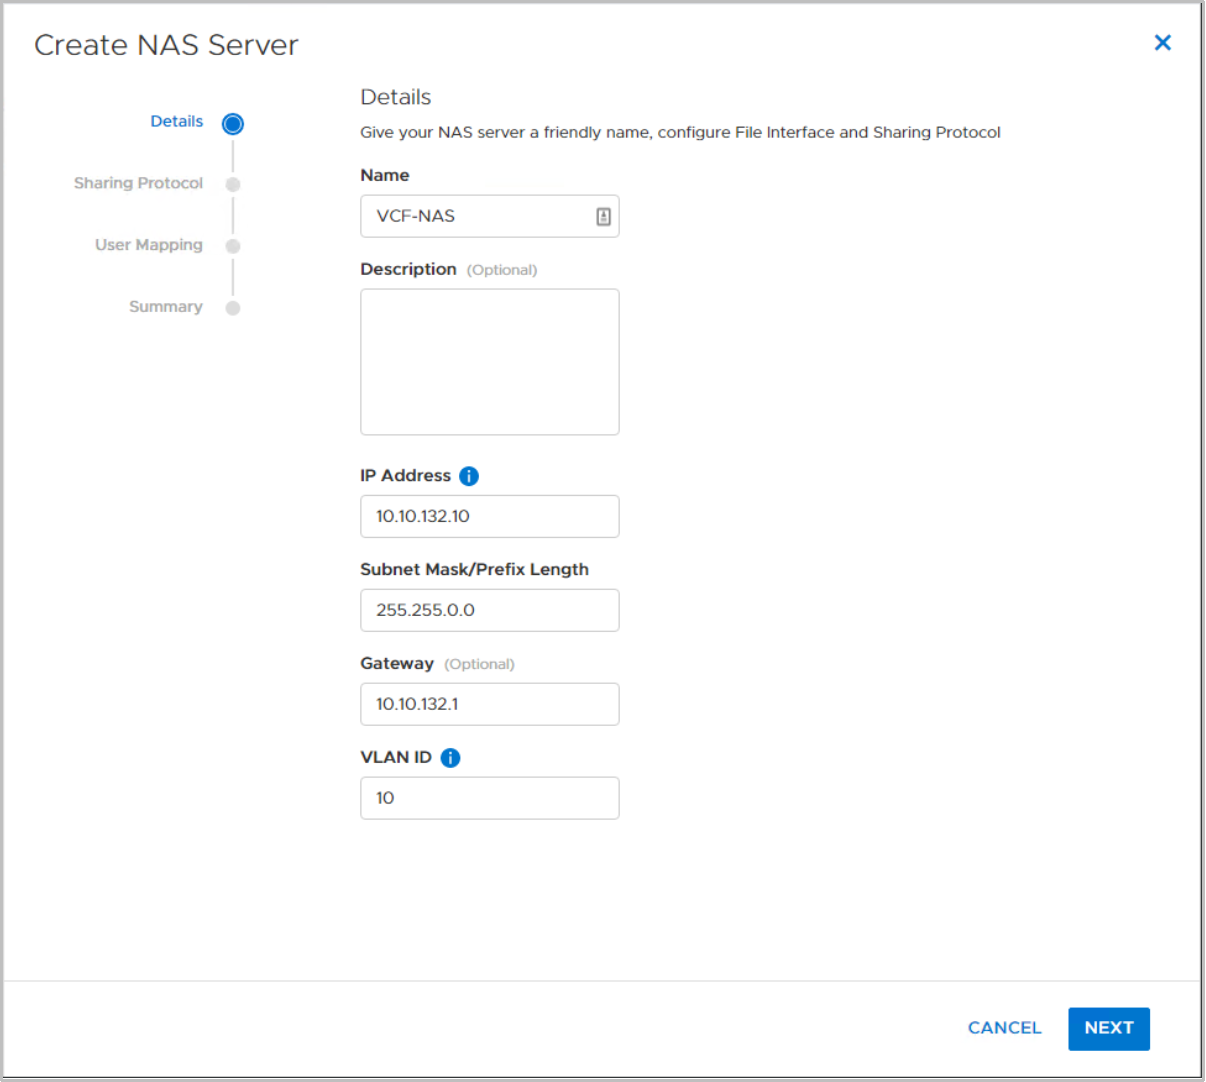
- In the Details section, specify the name, and IP address for the NAS server. Ensure that the NAS server IP address is within the VLAN of the NFS network pool that was created earlier from the SDDC Manager and click Next.
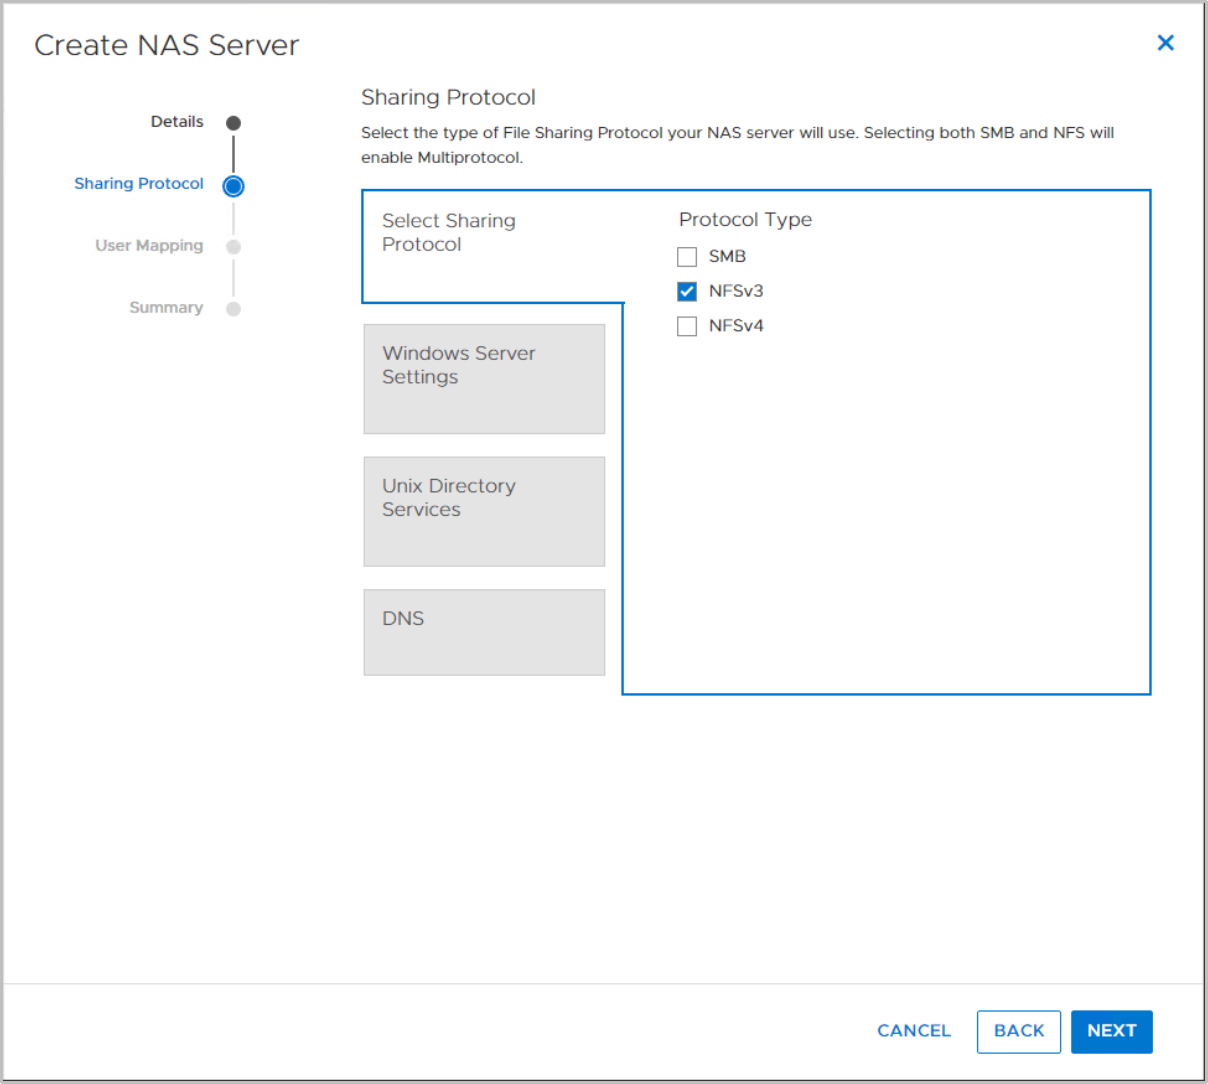
- In the Sharing Protocol section, select NFSv3, and click Next.
- (Optional) If using UNIX Directory Services, configure the settings, and click Next.
- (Optional) Configure the NAS Server DNS and click Next.
- At the Summary page, review the settings, and click CREATE NAS SERVER.

Next, create the file system for the NFS share.
- To create the file system, click Storage, and click the plus (+) next to File Systems.
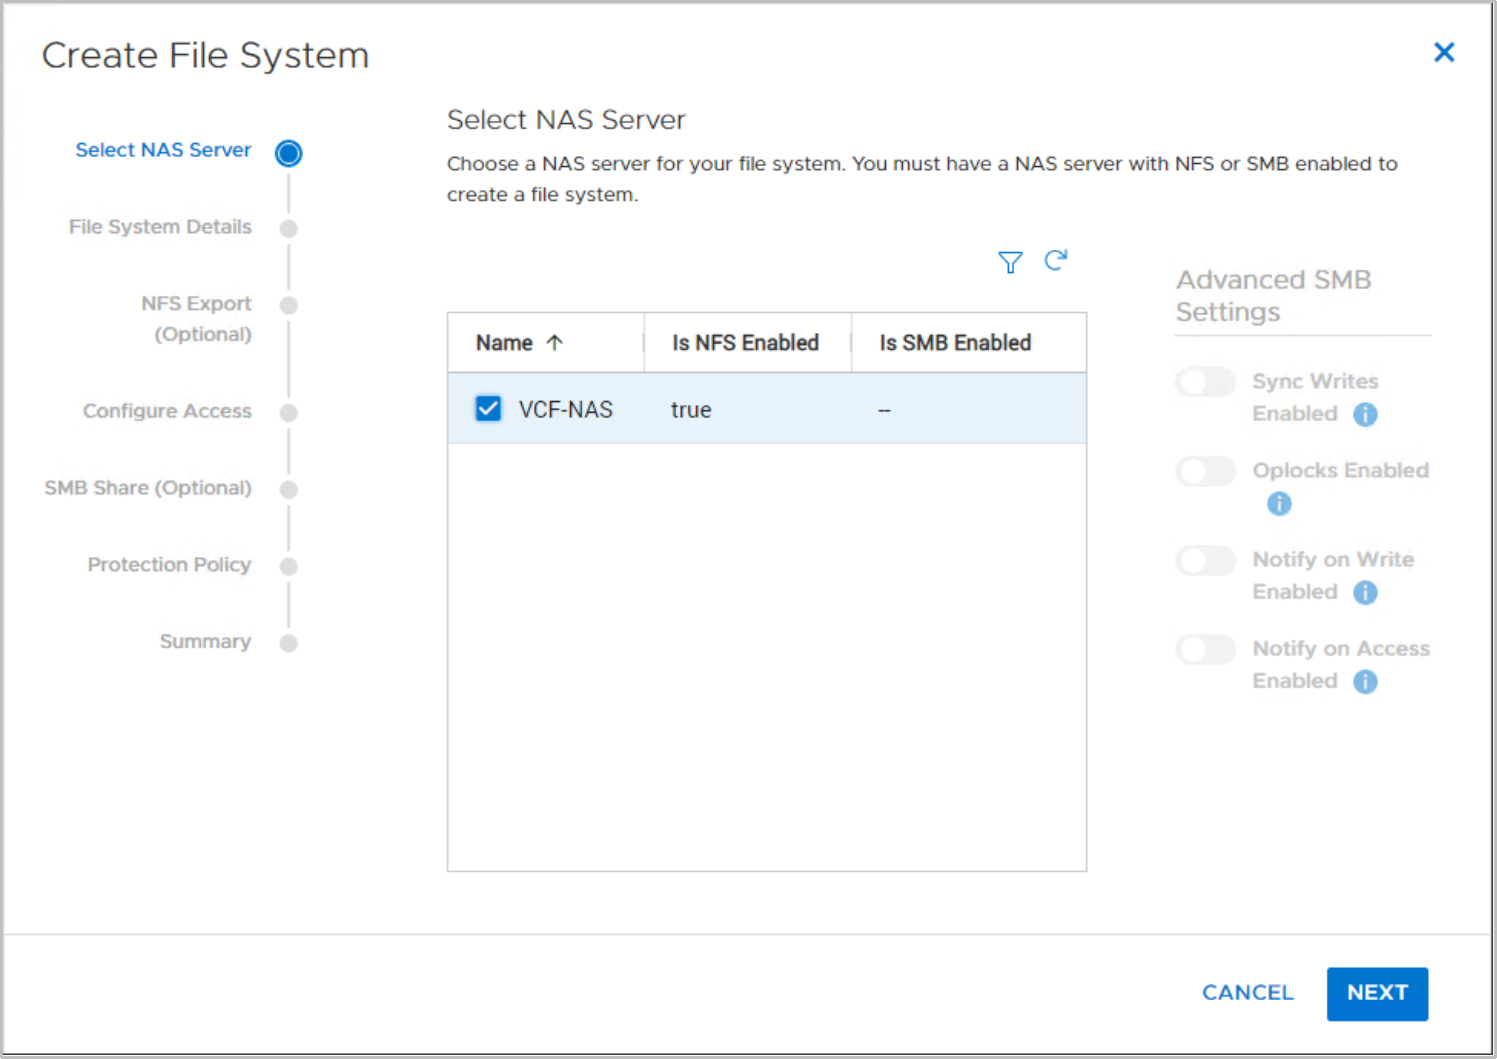
- In the Select NAS Server section, select the NAS server that was created previously, and click Next.
- In the File System Details, specify a name and size for the file system, and click Next.
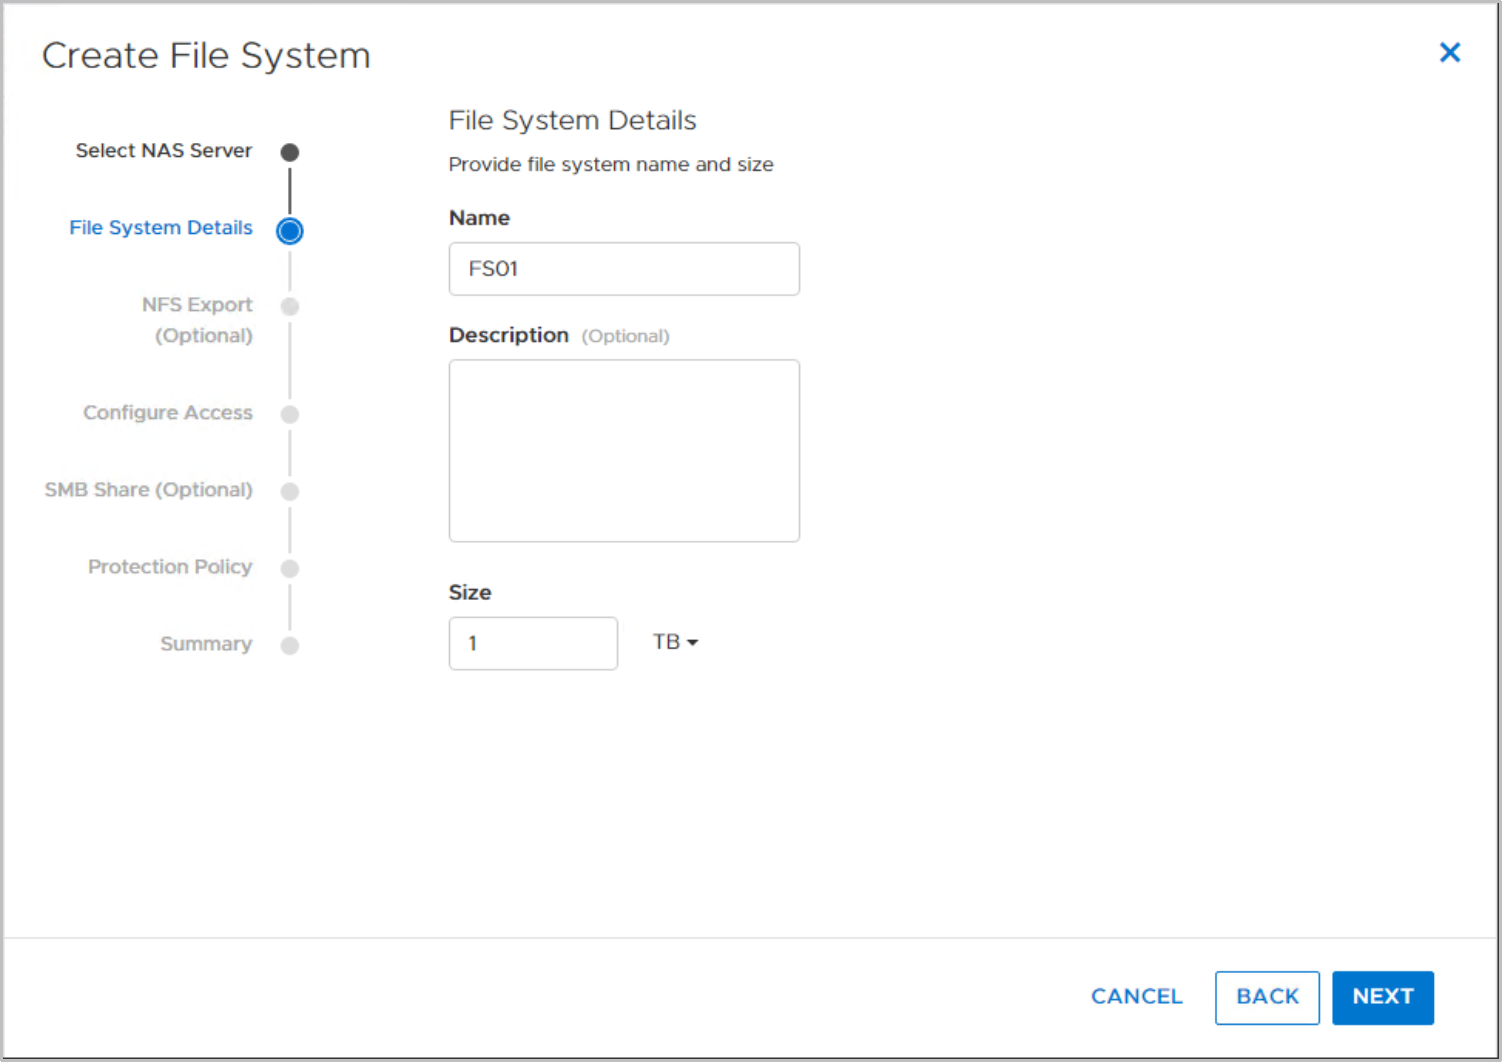
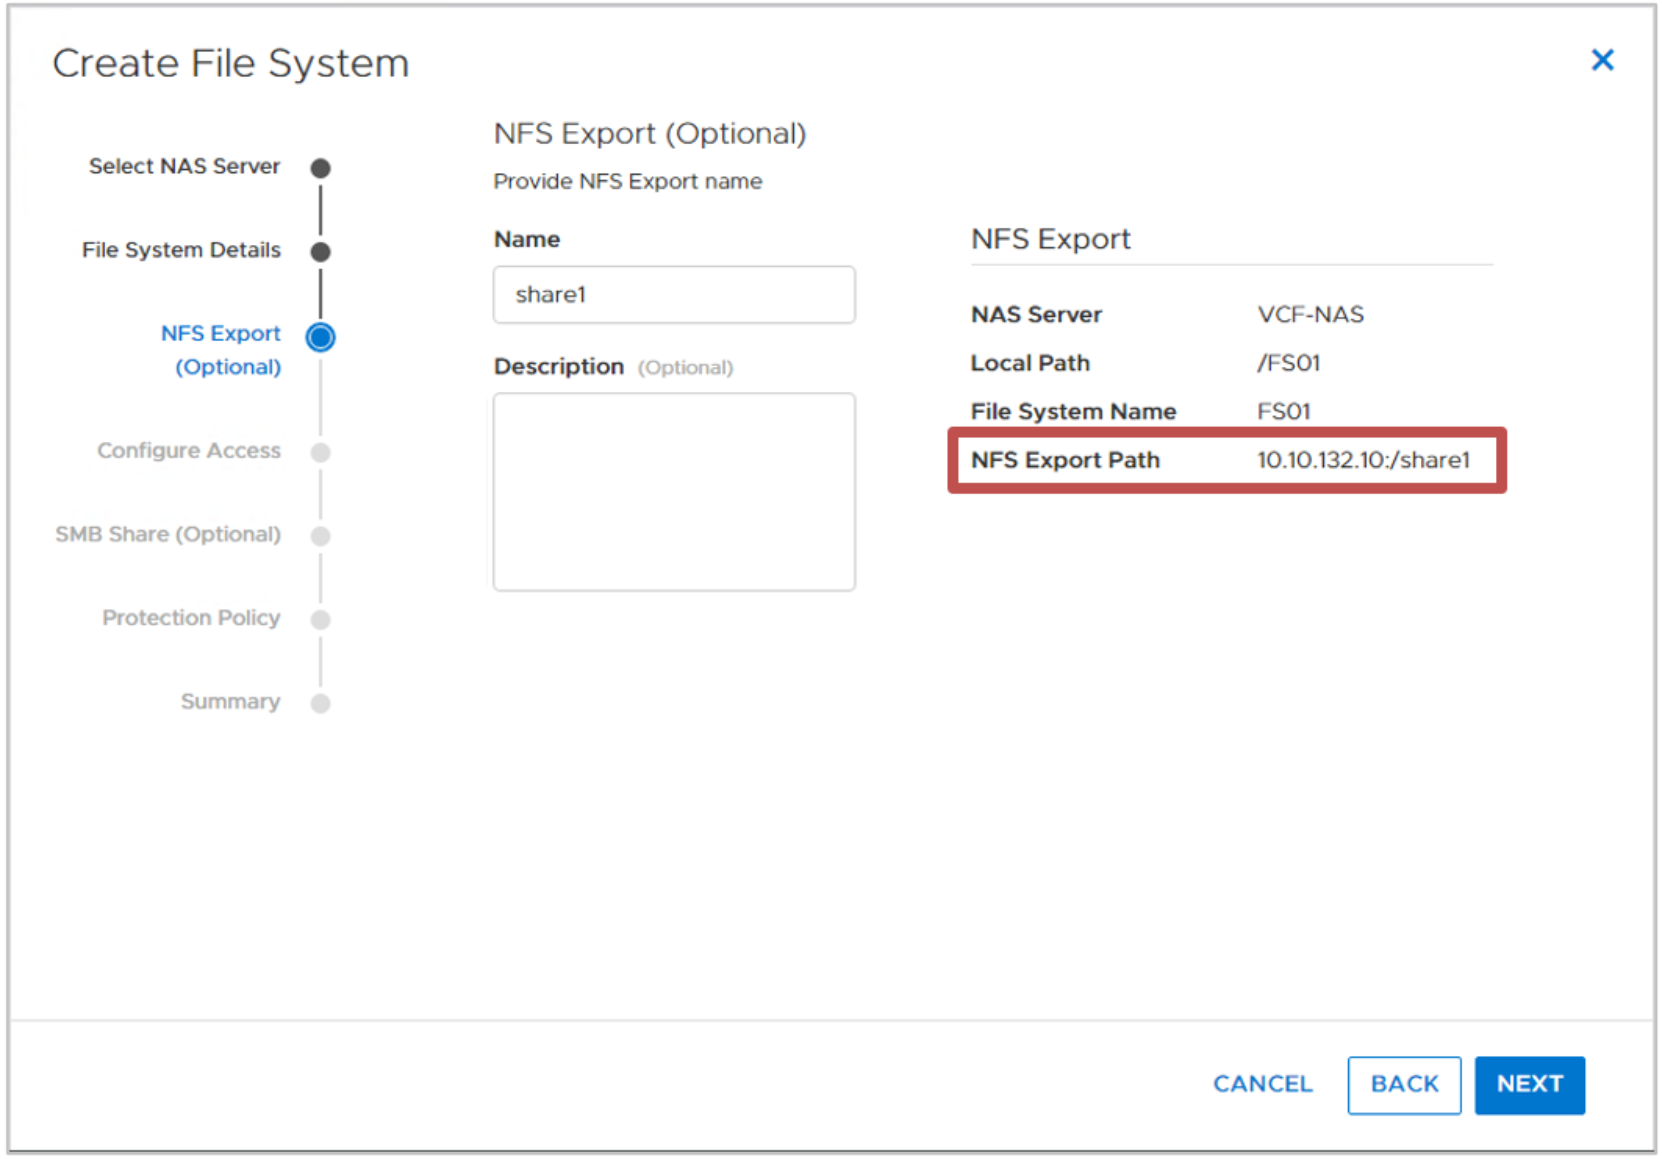
- On the NFS Export page, specify the Name for the export. Make note of the NFS Export Path for use later in configuring NFS options from within the SDDC Manager.
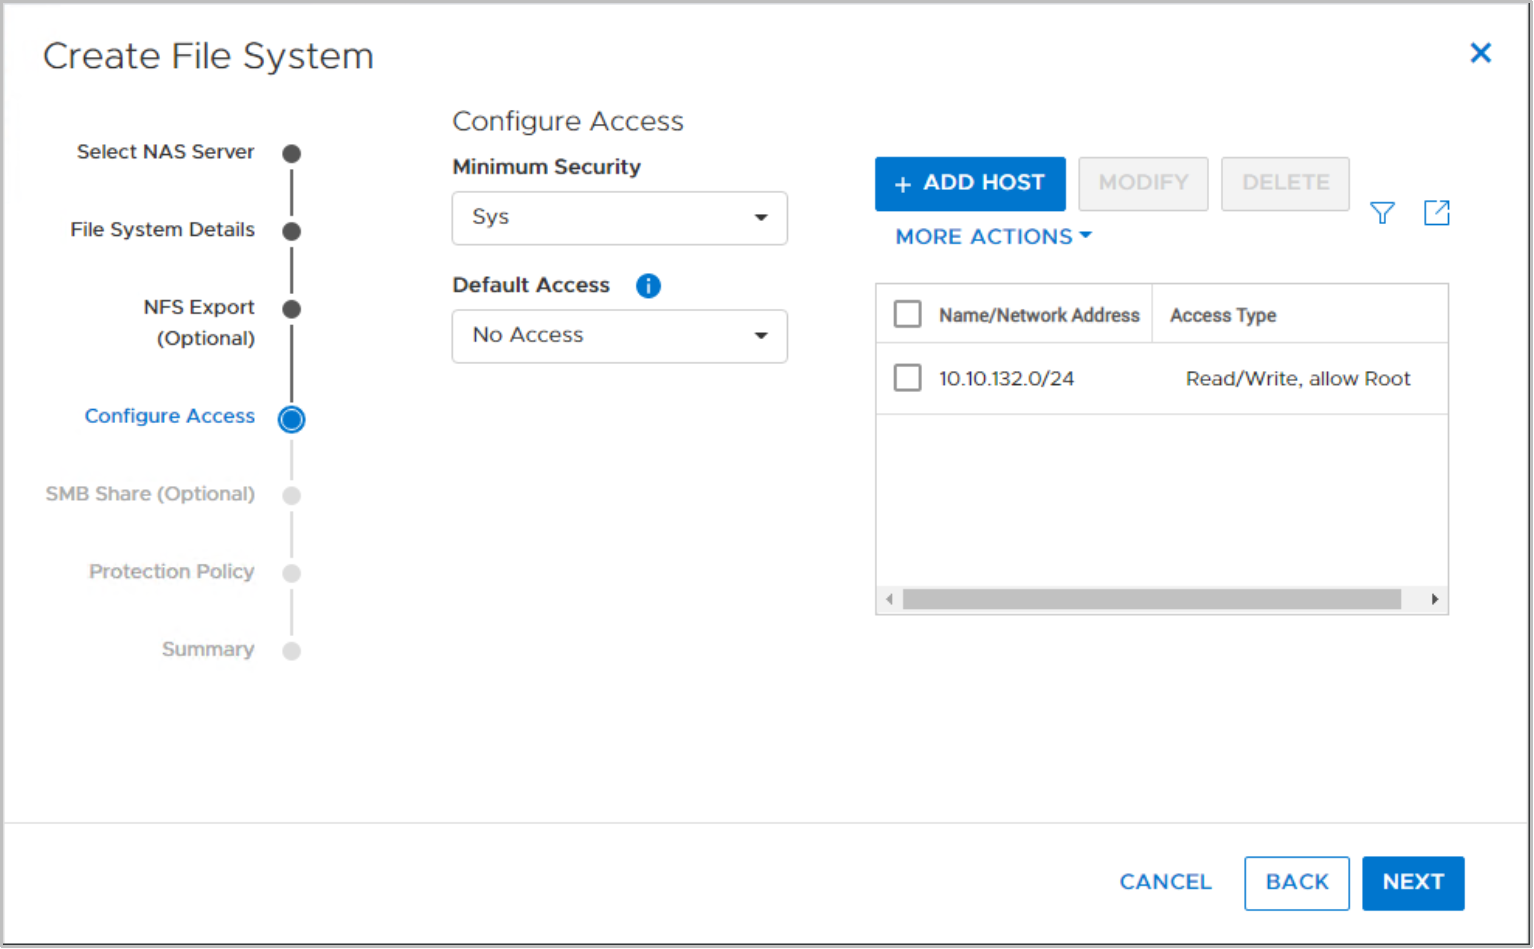
- On the Configure Access page, click ADD HOST to add the Included IP Address Ranges assigned to the NFS network pool created in VMware Cloud Foundation network pool configuration; assign Read/Write, allow root permissions.
- On the Protection Policy page, select the protection policy for the file system, and then click Next.
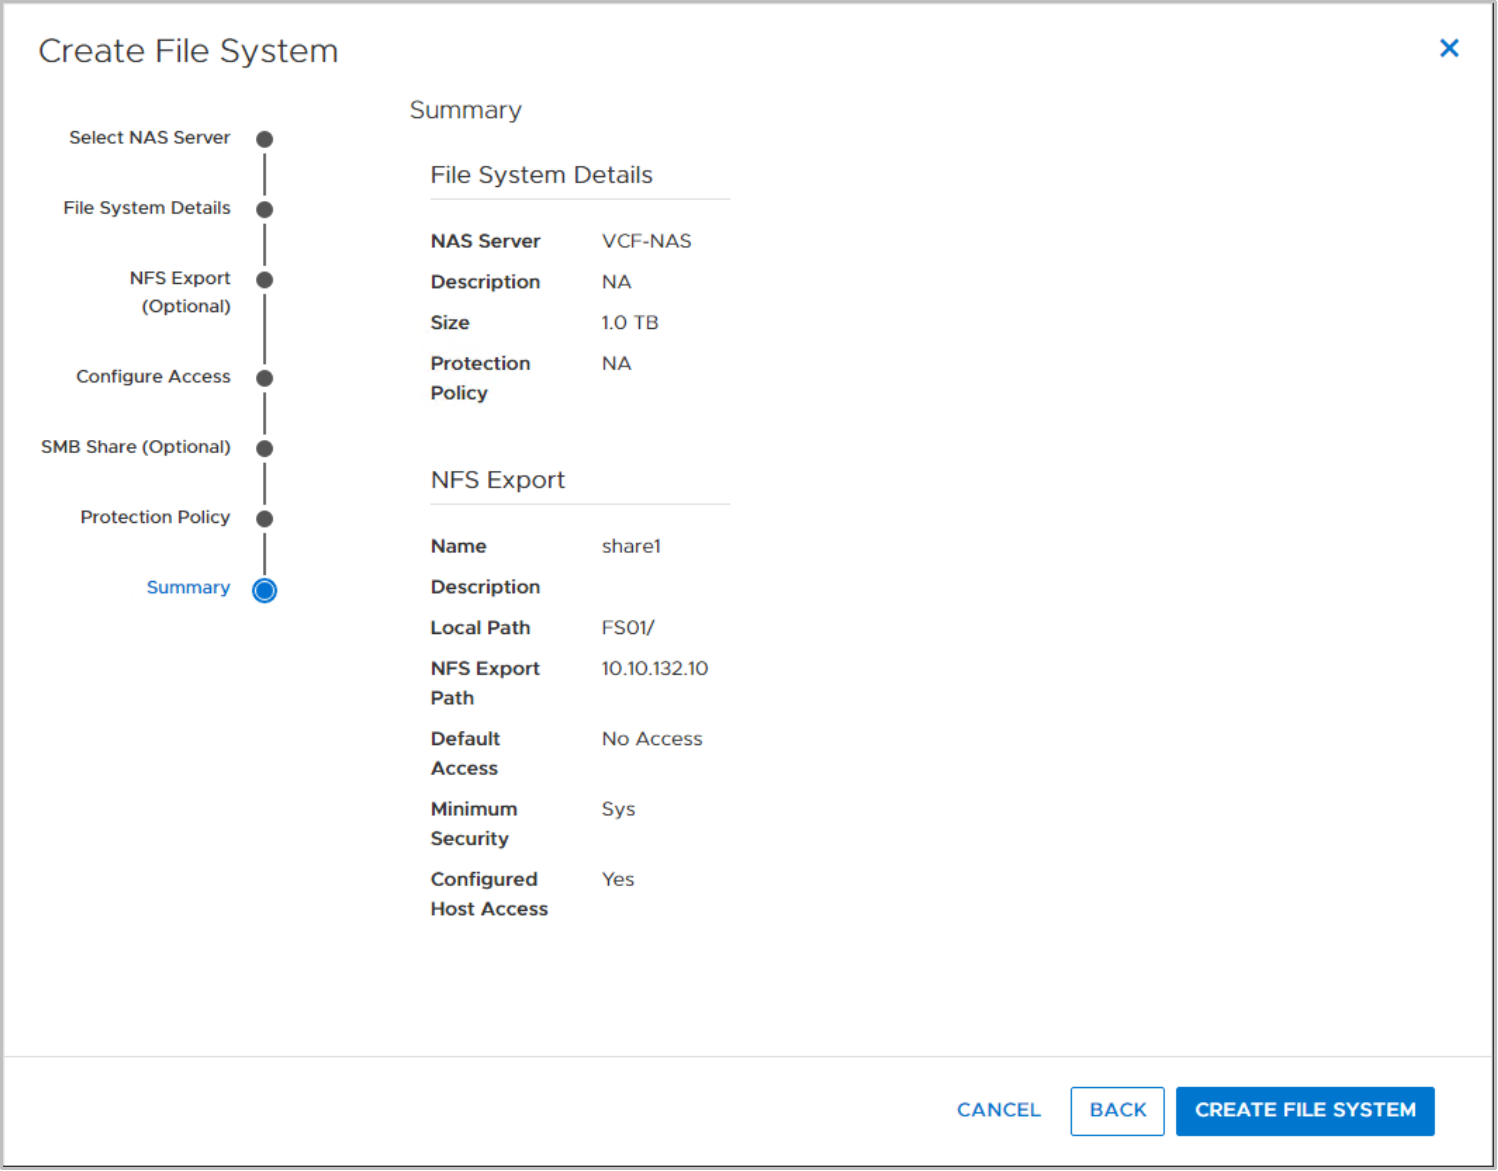
- At the Summary page, review the settings, and click CREATE FILE SYSTEM.
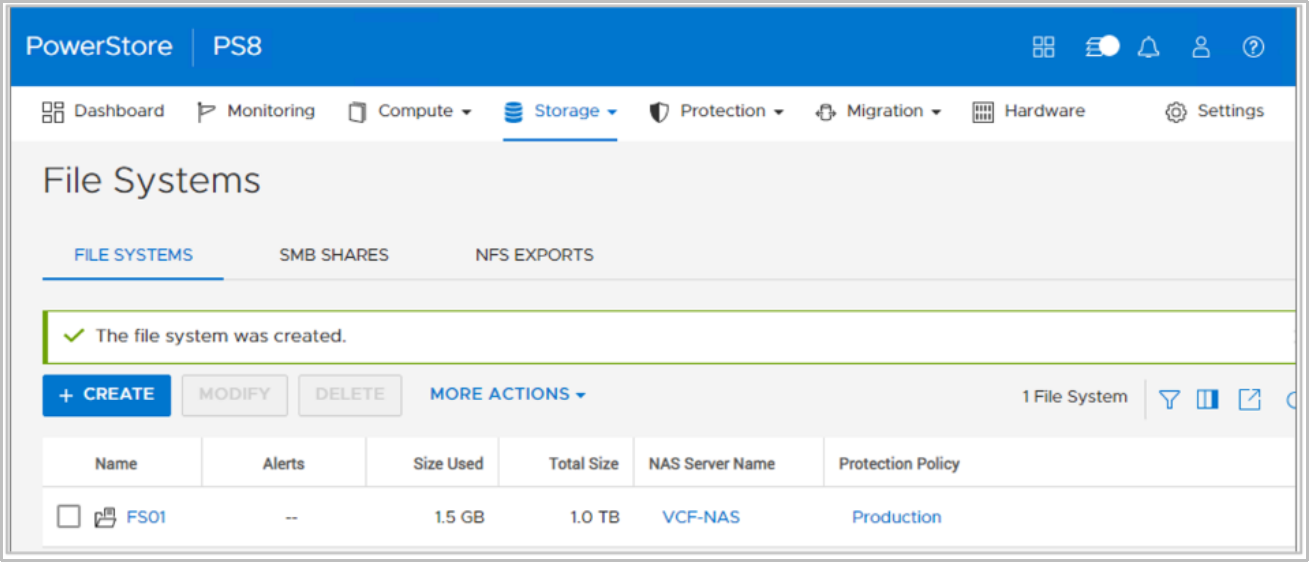
- When the file system is created, go to VMware Cloud Foundation workload domain deployment.
