To add new VxRail node interfaces to the server profile and assign networks, perform the following steps:
- Under Server Interface Profile, click +IMPORT FROM FABRIC. The Discovered Server Interface page displays. For VxRail node interfaces, the Server Type column indicates VxRail.
Figure 75. New VxRail node interfaces discovered in SFS. 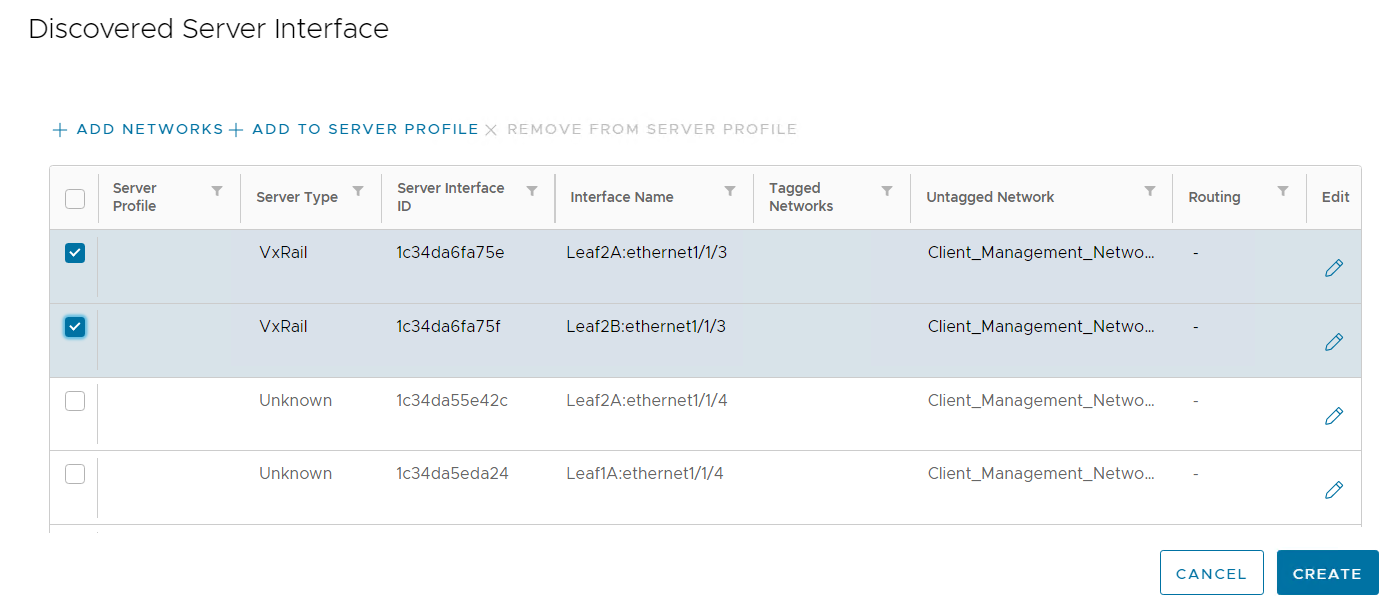
- In the Server Profile dialog box:
- Next to Server Profile ID, select the existing profile, named vxrail-profile in this example, from the drop-down menu.
Figure 76. Existing Server Profile selected. 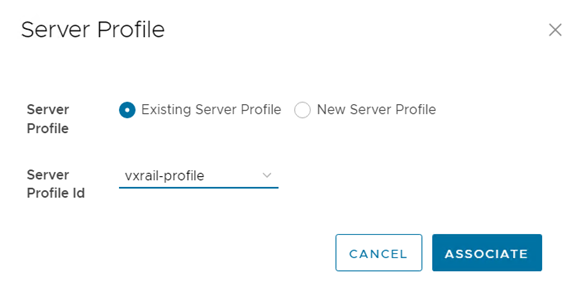
- Next to Server Profile ID, select the existing profile, named vxrail-profile in this example, from the drop-down menu.
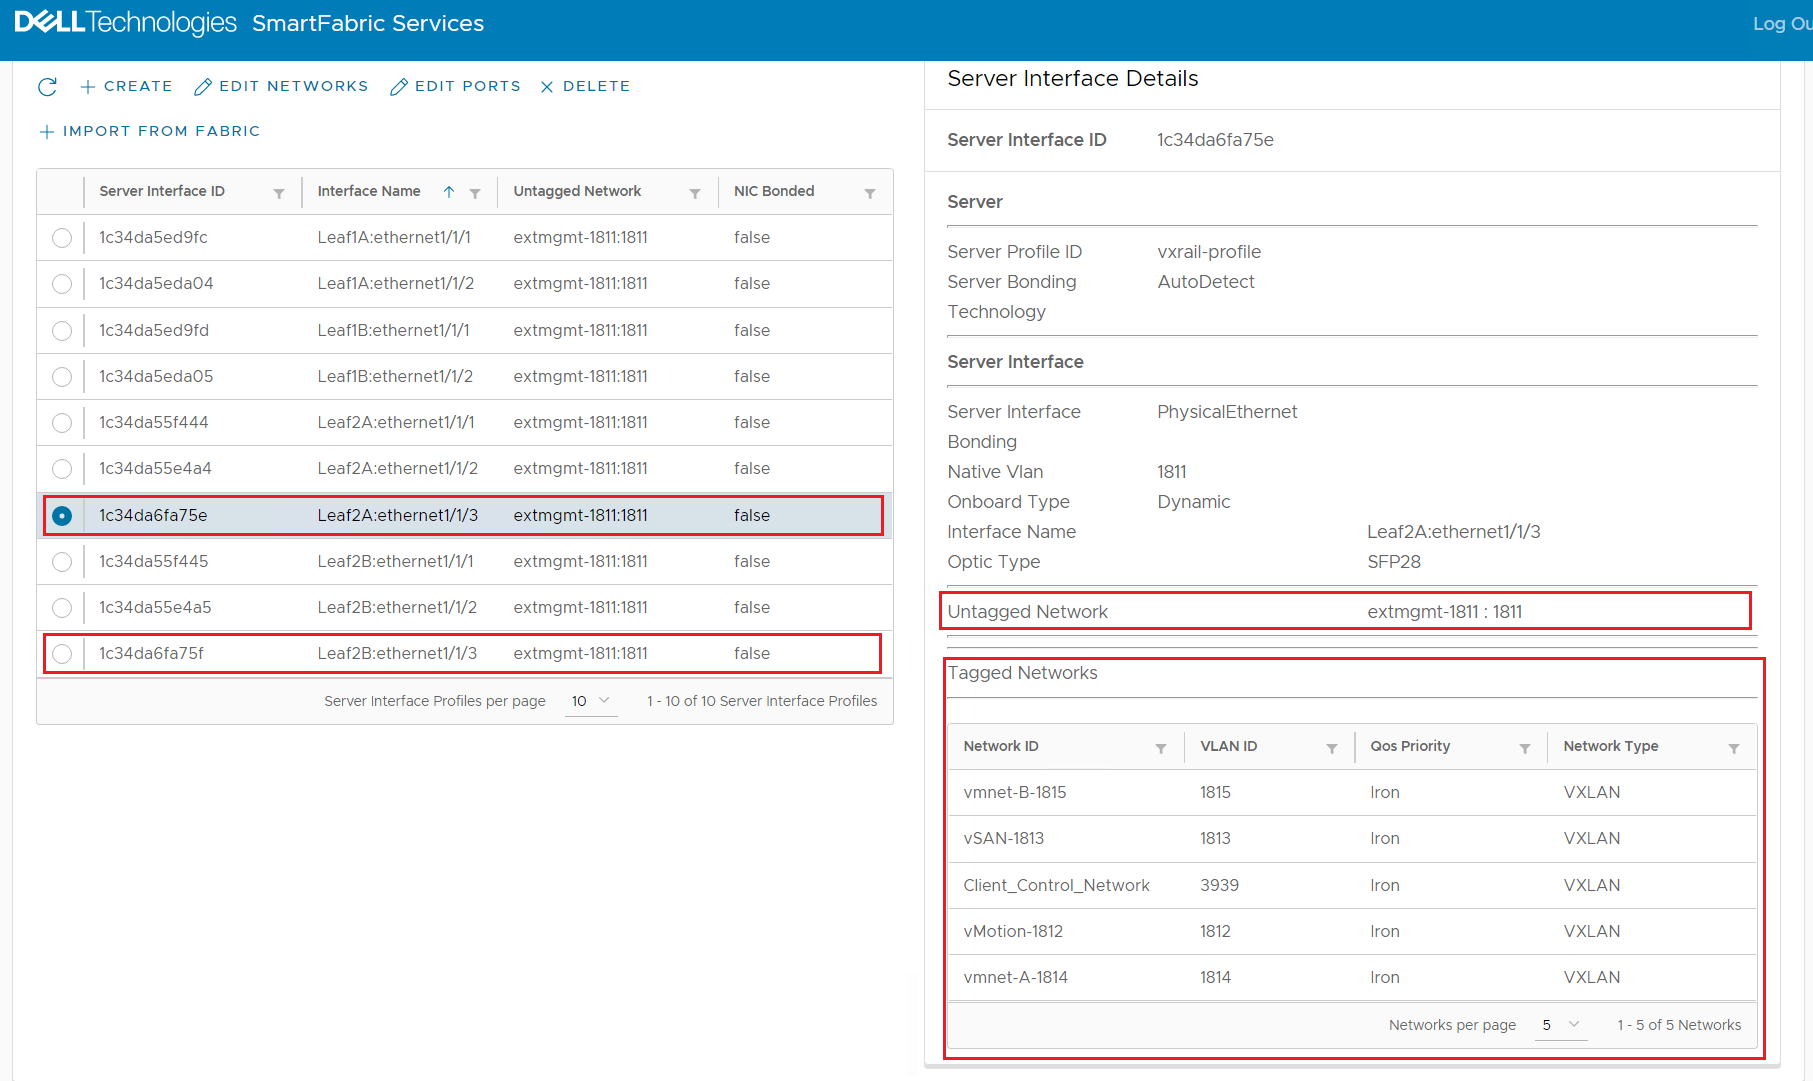
- Click the box next to the new VxRail node interfaces and click CREATE to apply the configuration. Note:
VxRail node ports are untagged in the External Management VLAN in the example used in this guide. Depending on your existing infrastructure, you can tag ports in the External Management VLAN if required.
Figure 77. New node interfaces placed in VxRail networks and server profile associated.