
- Enter the vCenter IP/FQDN and vCenter credentials. Verify that the Registered and Automation radio buttons are both set to True.
Figure 101. Add a vCenter instance 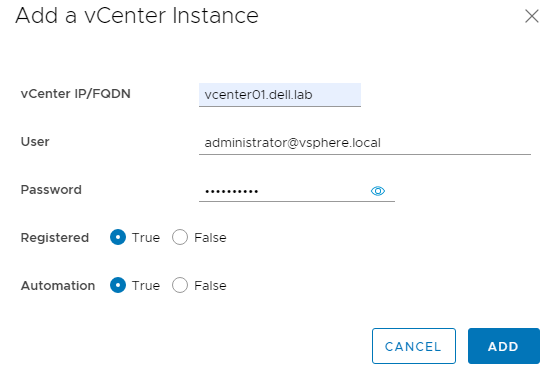
- Click ADD. The Success message displays.
Figure 102. vCenter registration Success notification 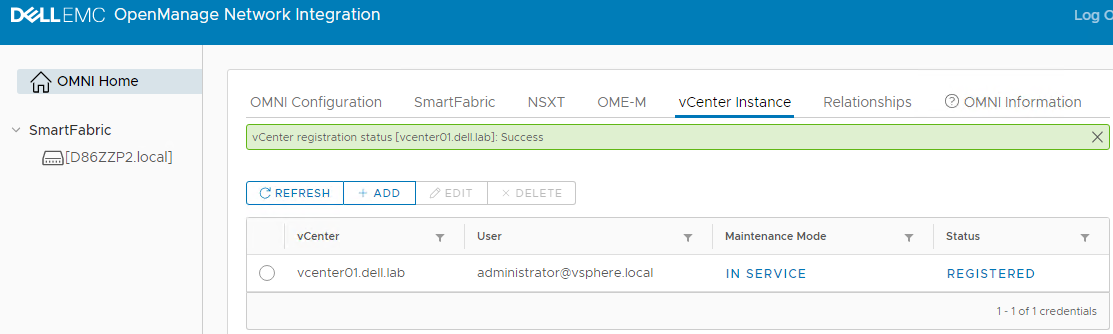
OMNI registration with vCenter also installs a plug-in to the vSphere Client.
If you are logged into the vSphere Client when the plug-in is installed, a banner appears at the top of the screen, outlined in red in the figure below. Click the REFRESH BROWSER button that appears in the banner.
Figure 103. OMNI extension notification 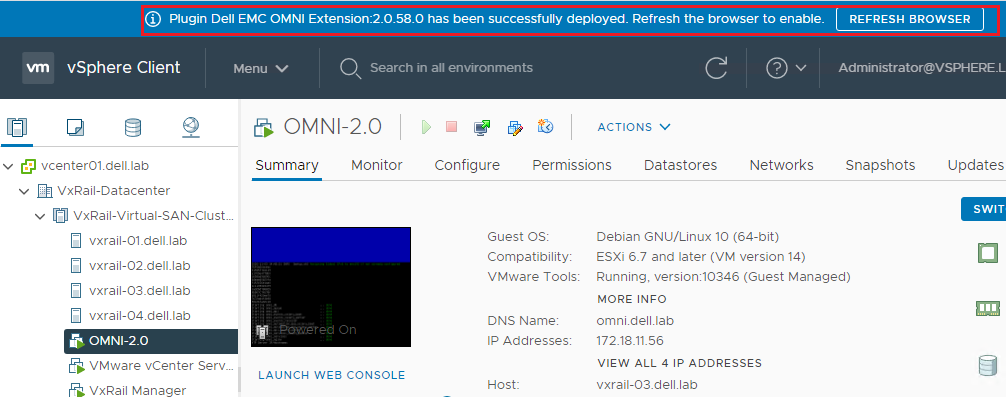 Note: If there are other messages present, such as a license warning, the message shown in the figure above may be located behind the other messages. When there are multiple messages, there are < and > icons present to the left of the banner to cycle through the messages.
Note: After OMNI is deployed, use OMNI for switch configuration instead of the SFS web UI. The SFS web UI is intended for initial deployment only.
Note: For more information, see the SmartFabric Services for OpenManage Network Integration User Guide, Release 2.0. The guide is available on the Dell EMC OpenManage Network Integration for VMware vCenter website.