Home > Storage > PowerFlex > White Papers > Amazon Elastic Kubernetes Service Anywhere Bare Metal on Dell PowerFlex > Installing the PowerFlex CSI driver
Installing the PowerFlex CSI driver
-
To install the PowerFlex CSI driver, follow these steps:
- Run the following command to download the installation source files from GitHub:
$ git clone https://github.com/dell/csi-vxflexos
- Run the following command to create a namespace called vxflexos:
$ kubectl create namespace vxflexos
- Run the following script to collect information from the PowerFlex SDC: get_vxflexos_info.sh.
- Copy the csi-vxflexos/values.yaml script into a myvalues.yaml file in the same directory as the csi-install.sh script.
- Edit the myvalues.yaml file to set the parameters such as file system types, volume name prefix, and controller count for the installation.
- Create a config.json file for driver configuration. This file contains information such as the PowerFlex system IP details and credentials.
- Run the following command to proceed with the installation:
$ sh csi-install.sh --namespace vxflexos –values myvalues.yaml
- Run the following command to check the vxflexos namespace for running pods to verify it is deployed correctly:
$ kubectl get pods -n vxflexos
For more information about CSI driver installation, see GitHub.
- Storage classes can be created through the following kubectl commands. For more information about creating storage classes, see Storage Classes.
$ kubectl apply -f storageclass.yaml
$ kubectl apply -f storageclass-xfs.yaml
- Ensure that the PowerFlex CSI driver is running on the Amazon EKS-A Cluster, as shown in the following status example:

- Test the deployment workflow of a simple pod on PowerFlex storage. For more information, see Test PowerFlex CSI Driver.
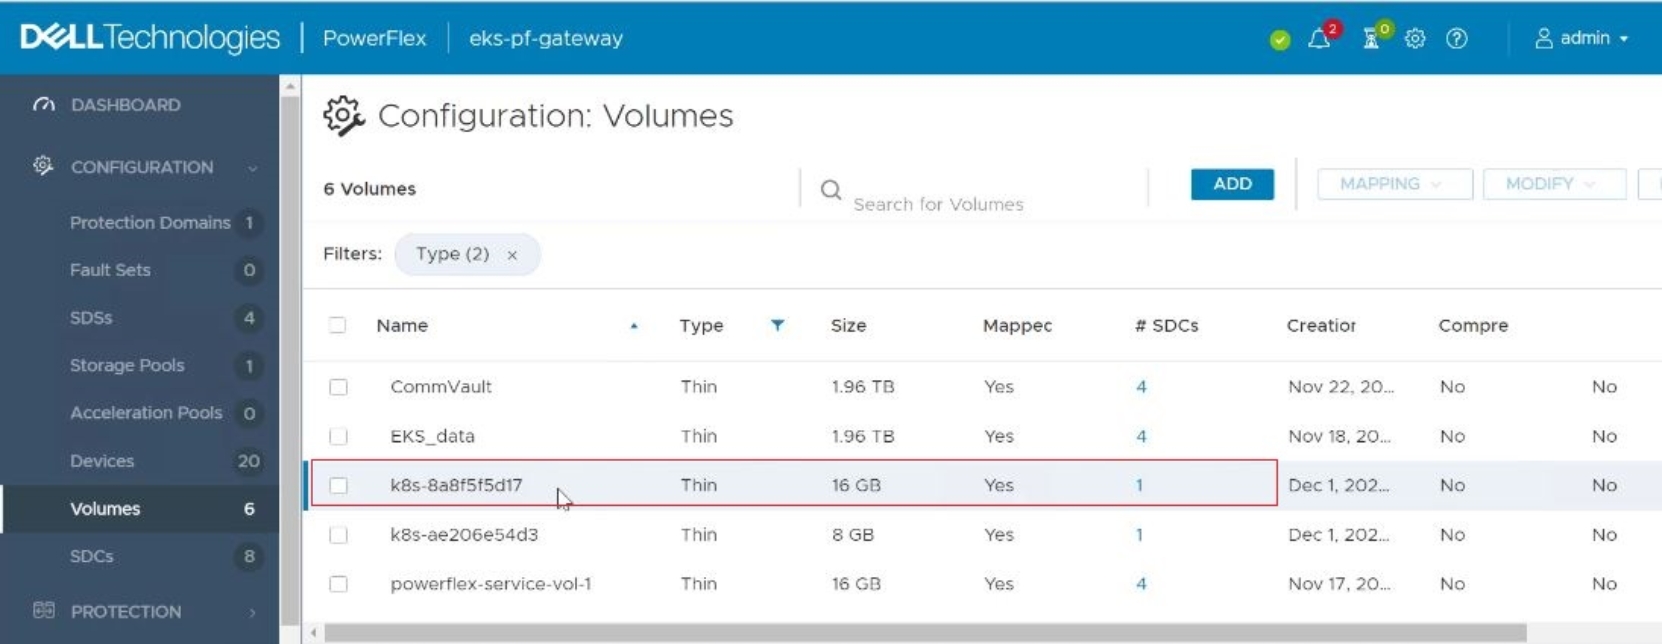
- Ensure that the persistent volume is created in the PowerFlex cluster using the PowerFlex UI, as shown in the following figure:

