


Let’s Talk File (#4) – SMB Protocol Overview

Introduction
A file access protocol enables clients and storage systems to transmit data using a common syntax and defined rules. PowerStore file supports a wide range of protocols, including SMB, NFS, FTP, and SFTP. In this blog, we’ll focus on a commonly used protocol for file sharing called Server Message Block (SMB). SMB is commonly used for use cases such as departmental shares, home directories, Microsoft SQL Server, Hyper-V, Exchange, and more.
SMB versions
The SMB option on the NAS server enables or disables SMB connectivity to the file systems.
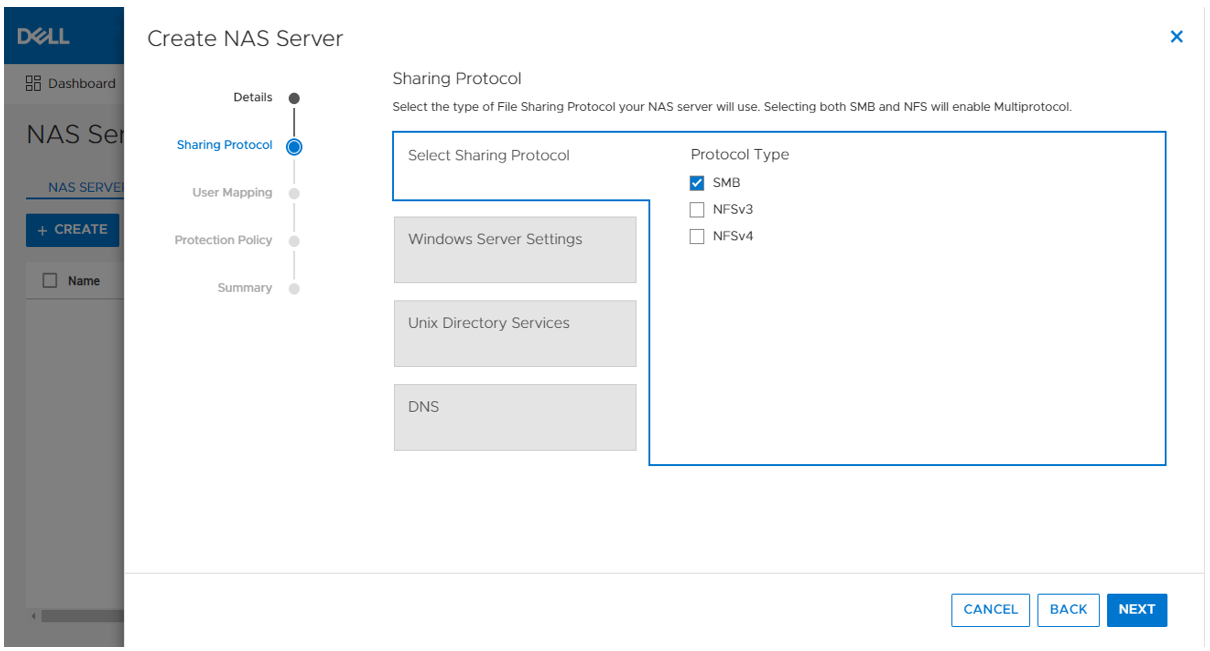
PowerStore file supports SMB1 through 3.1.1. The SMB version that is negotiated depends on the client operating system:
- CIFS: Windows NT 4.0
- SMB1: Windows 2000, Windows XP, Windows Server 2003, and Windows Server 2003 R2
- SMB2: Windows Vista (SP1 or later) and Windows Server 2008
- SMB2.1: Windows 7 and Windows Server 2008 R2
- SMB3.0: Windows 8 and Windows Server 2012
- SMB3.02: Windows 8.1 and Windows Server 2012 R2
- SMB3.1.1: Windows 10 and Windows Server 2016 and Windows Server 2019
Due to the age of the protocol and potential security vulnerabilities, client access using SMB1 is disabled by default. If client access using SMB1 is required, it can be enabled by modifying the cifs.smb1.disabled parameter. Using SMB2 at a minimum is recommended because it provides security enhancements and increases efficiency, as compared to SMB1.
NAS servers use SMB2 to communicate with the domain controllers for operations such as authentication, SID lookups, Group Policies, and so on. If SMB2 is not available, the NAS server attempts to use SMB1 as a backup option. This means that any domain controllers that are running older operating systems that only support SMB1 can continue to function.
Standalone SMB server configuration
When enabling SMB support on a NAS server, the SMB server can either be standalone or Active Directory (AD) domain-joined. Standalone SMB servers are not associated with an AD domain so they only support local authentication. The information required when configuring a new standalone SMB server is shown in the following table.
Name | Description |
Workgroup | Name of the Windows workgroup where the file systems will be shared. |
Netbios Name | Network name of the standalone SMB server (15 characters maximum). |
Administrator Password | Set the initial password for the local Administrator user. |
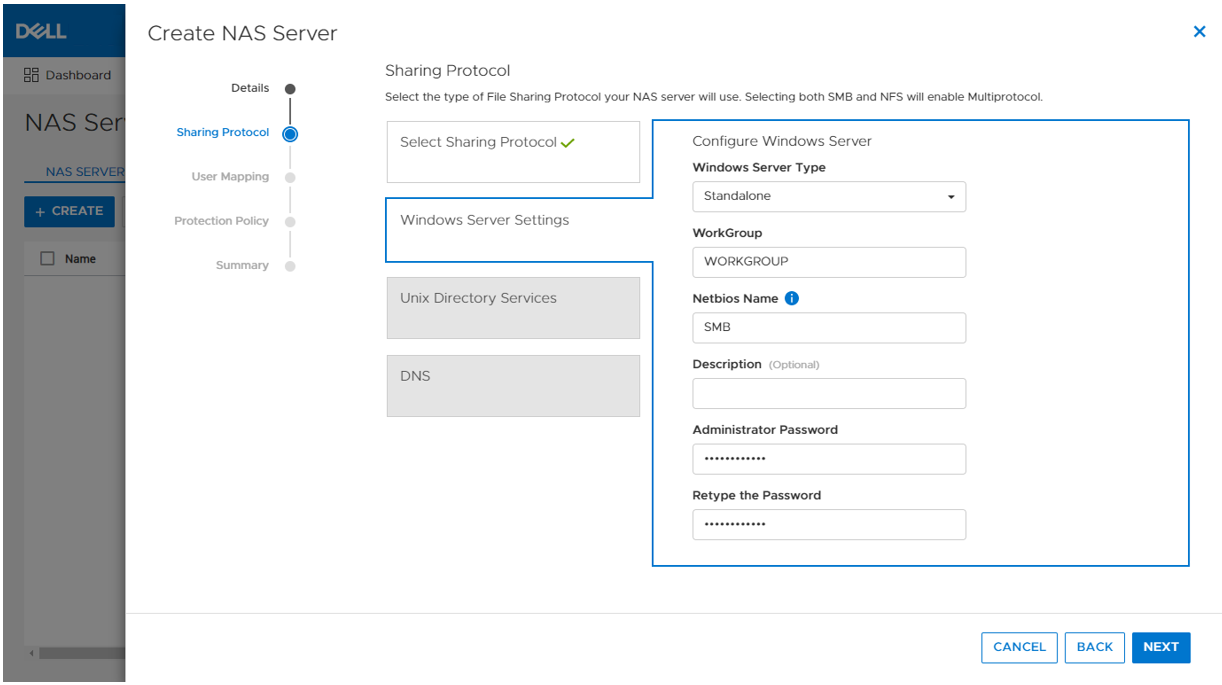
On the next step in the wizard, you can also optionally enable DNS on the standalone SMB server for IP address and name resolution.
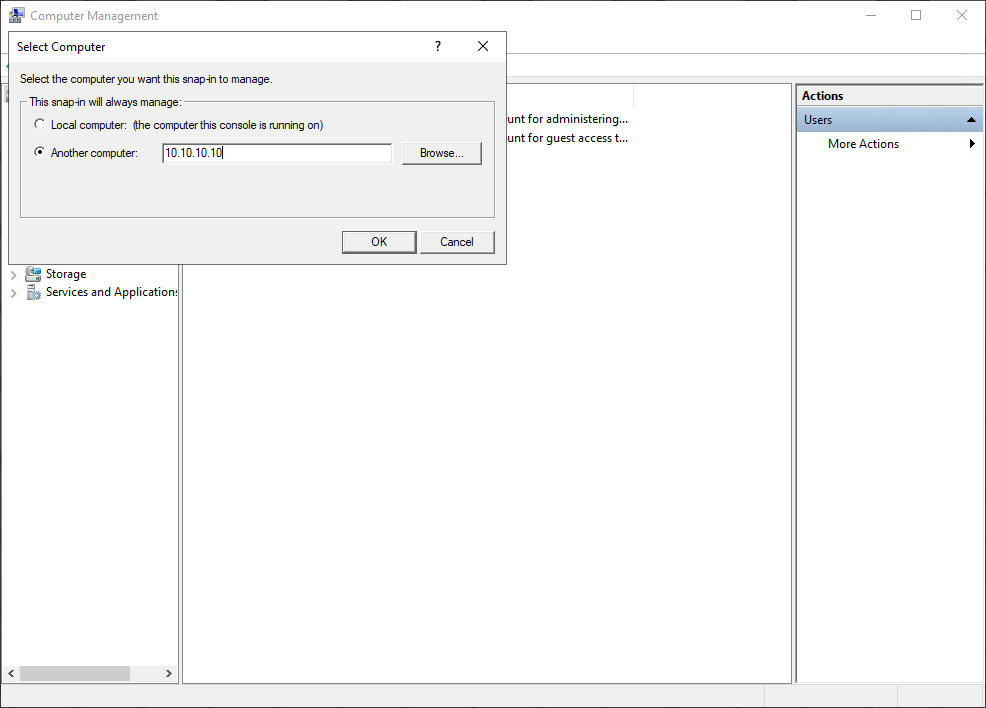
When the SMB server is created, it’s designed to have the same behavior and support many of the same tools as a Windows server. The administrator can manage it using standard Microsoft Windows tools such as the Computer Management MMC Console. These are the same tools that are used to manage a standard Windows server deployment, reducing the learning curve for administrators who are transitioning to PowerStore. There are also lots of tutorials and applicable documentation available online.
You can connect to the standalone SMB server by connecting to another computer and specifying the IP address of the NAS server.
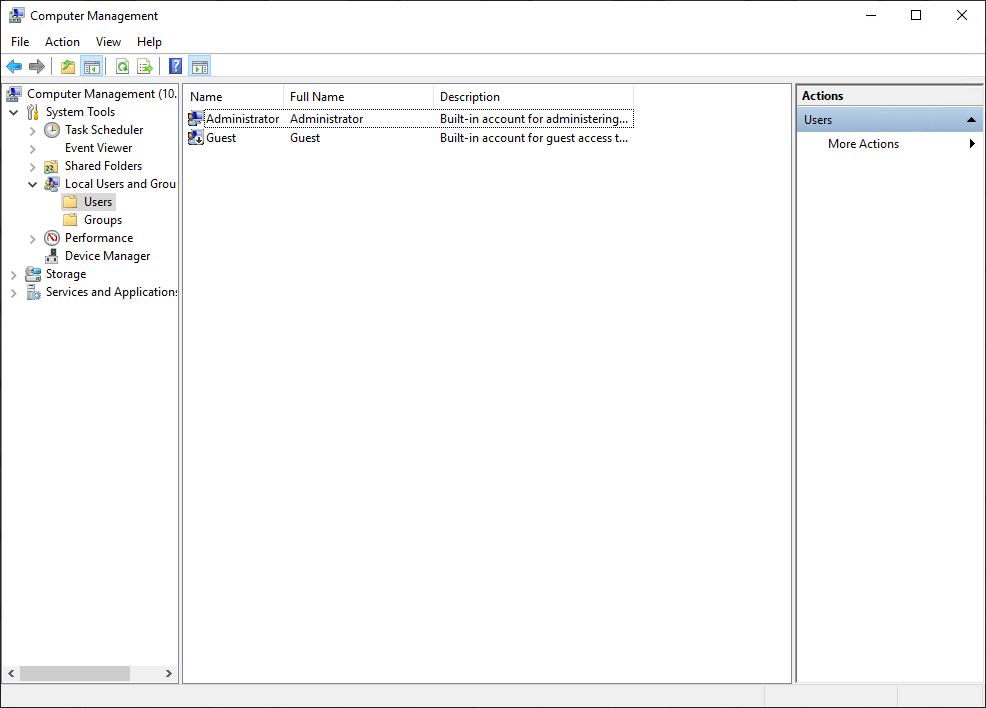
The local users are stored in the Local Users and Groups Database. Upon creation of a new standalone SMB server, only the local Administrator user is available. In the following figure, the Guest account is disabled by default, as noted by the down arrow at the bottom left corner of the Guest icon. Additional users and groups can be created here, if needed.
Domain-joined SMB server configuration
Domain-joined SMB servers are associated with an AD domain. AD is leveraged for centralized user authentication, applying group policies, enforcing security, implementing password requirements, and more.
The following information is required when configuring a new standalone SMB server:
Name | Description |
SMB Computer Name | Name of the computer object to be created in Active Directory |
Windows Domain | Name of the domain to which to join the SMB server |
Domain Username | Username of an account that has domain joining privileges |
Password | Password for the specified user |
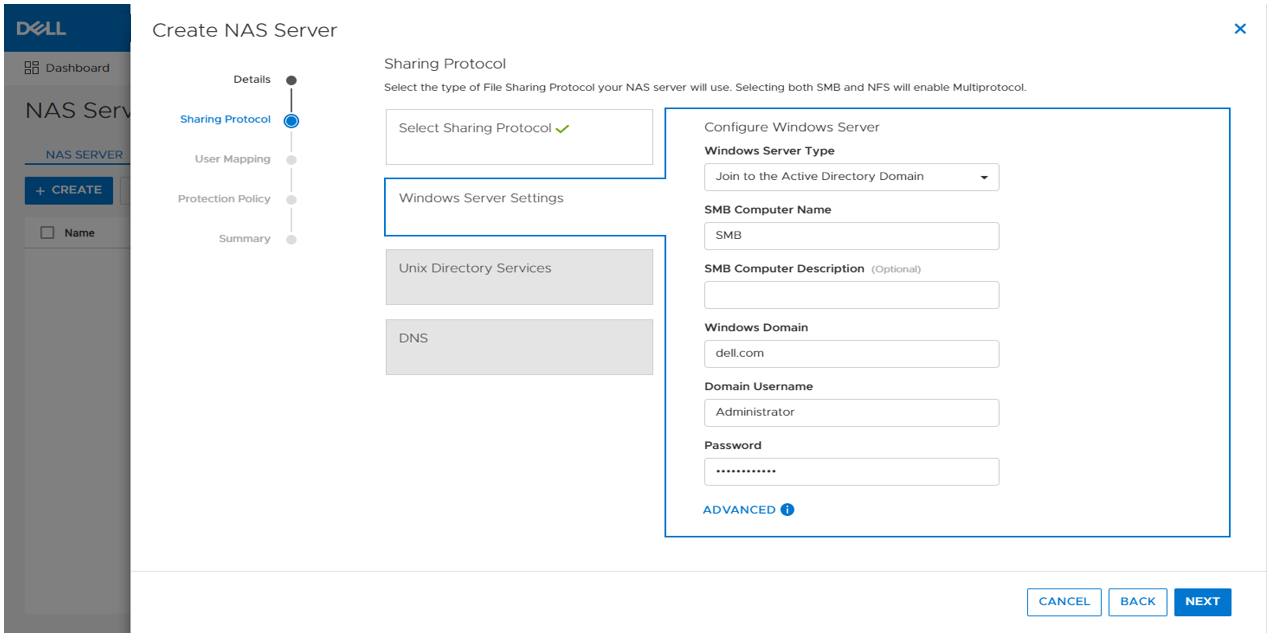
As part of the domain joining process, a computer object is created in the AD domain and DNS entries are created for IP address and name resolution. Domain-joined SMB servers require DNS to be configured, but this configuration is optional for standalone SMB servers. Domain-joined NAS servers are placed in the CN=Computers container, by default. The computer object can be configured to be stored in a different OU location in the advanced settings.
SMB shares
When the SMB server is configured, you can provision a file system along with an SMB share. The SMB share provides a path that clients can map to access the file system. The initial SMB share can be created as part of the file system provisioning wizard. Additional SMB shares can also be created on existing file systems, as long as the path exists.
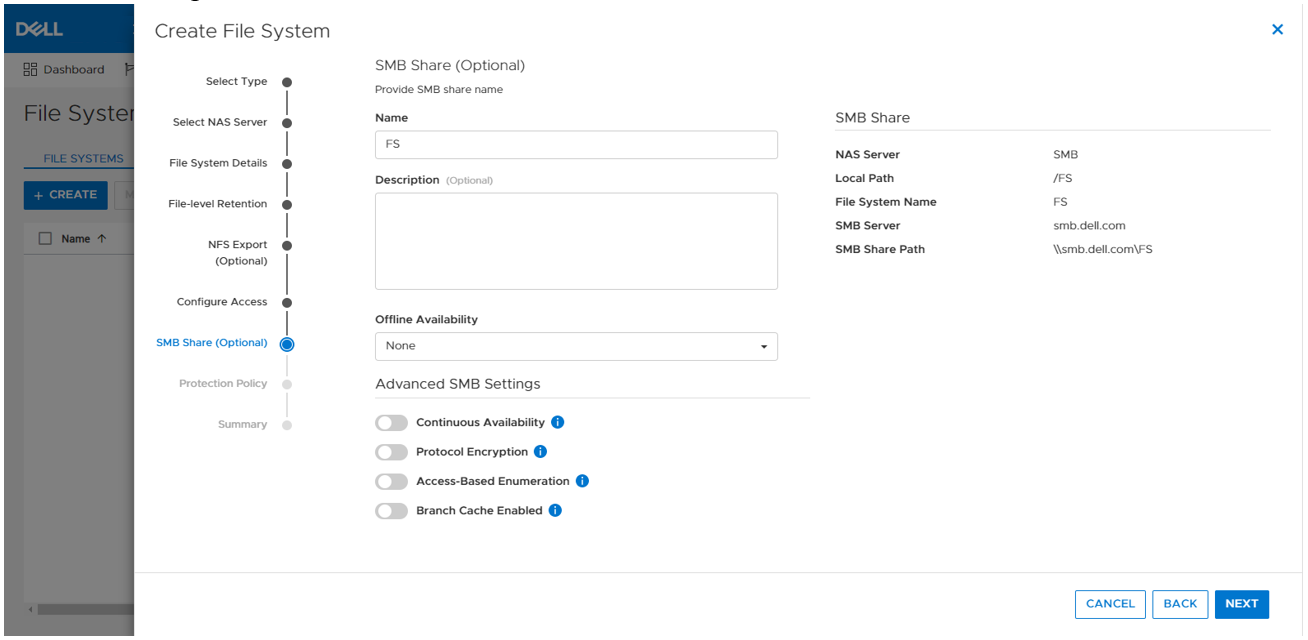
The figure below shows the SMB share step of the file system provisioning wizard. The only required field is the name for the share. On the right, you can also see the name of the NAS Server, local path, file system name, SMB server name, and the SMB share path for the share.
Take note of the SMB share path because that is what you will use to map the share from the client. This is called a UNC (Universal Naming Convention) path and the format is \\<SMB_Server>\<SMB_Share_Name>. For example, \\smb\fs.
You can disregard the other advanced SMB settings for now. We’ll cover those in a later blog.
Mapping a share
Now we are ready to map the share on a client. On a client, you can simply enter the UNC path into MS Explorer to access the share, as shown below.
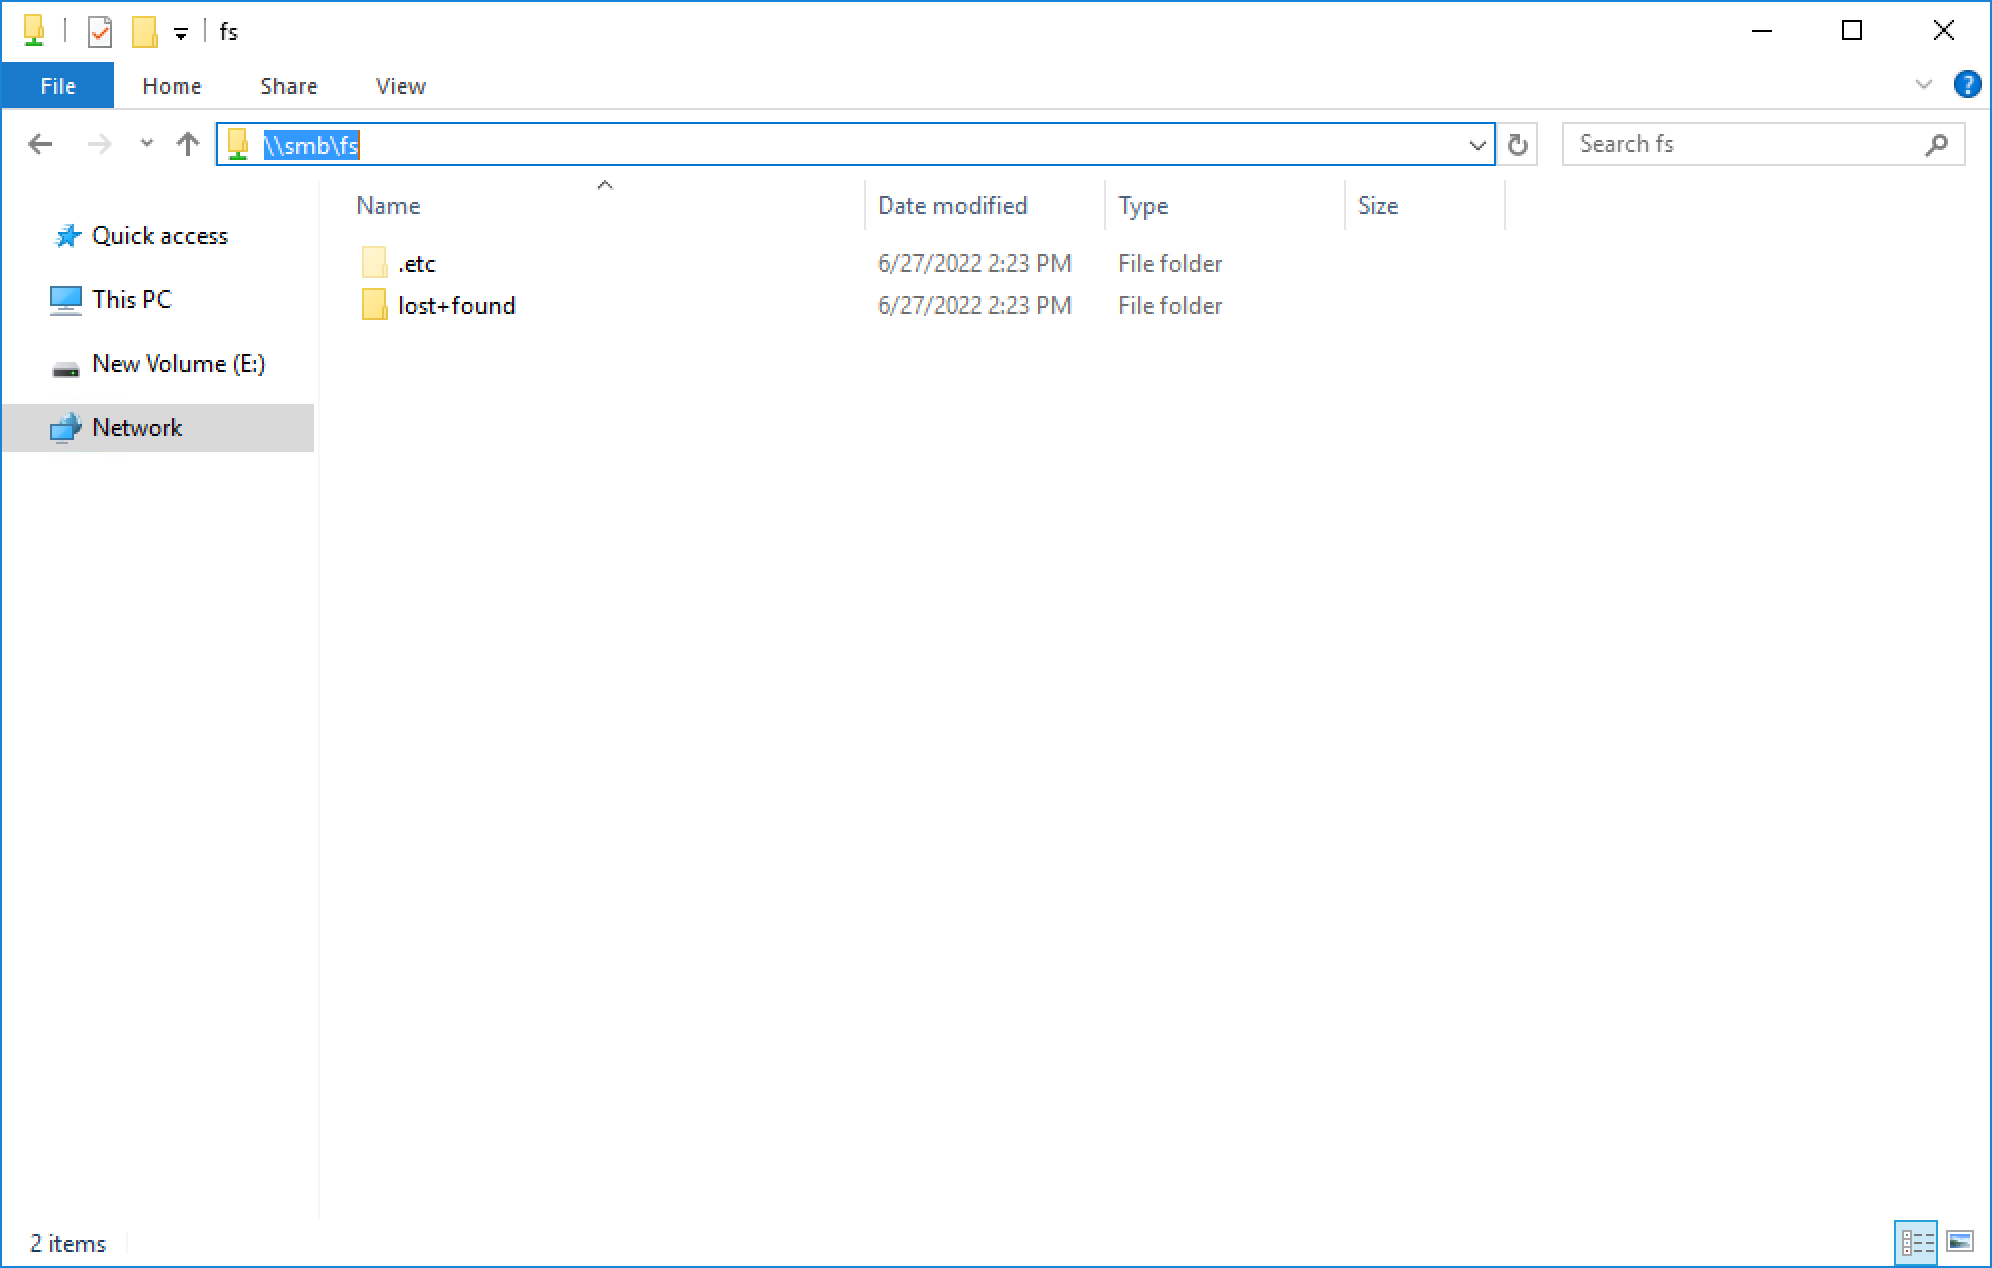
If your client is logged in using an account that is on the same domain as the domain-joined SMB server, your credentials are passed automatically and the share opens. If you’re attempting to map an SMB server that is in a foreign domain, you are prompted for credentials in order to access the share. Alternatively, you can also connect using a local user’s credentials.
For standalone SMB servers, you can only connect using a local user’s credentials. You are prompted for the username and password when connecting to the share. By default, only the local Administrator user exists and the password is set during the initial configuration of the standalone SMB server.
To map the share to a drive letter (so that you can easily access it in the future), click the Map Network Drive button in Explorer, as shown here.
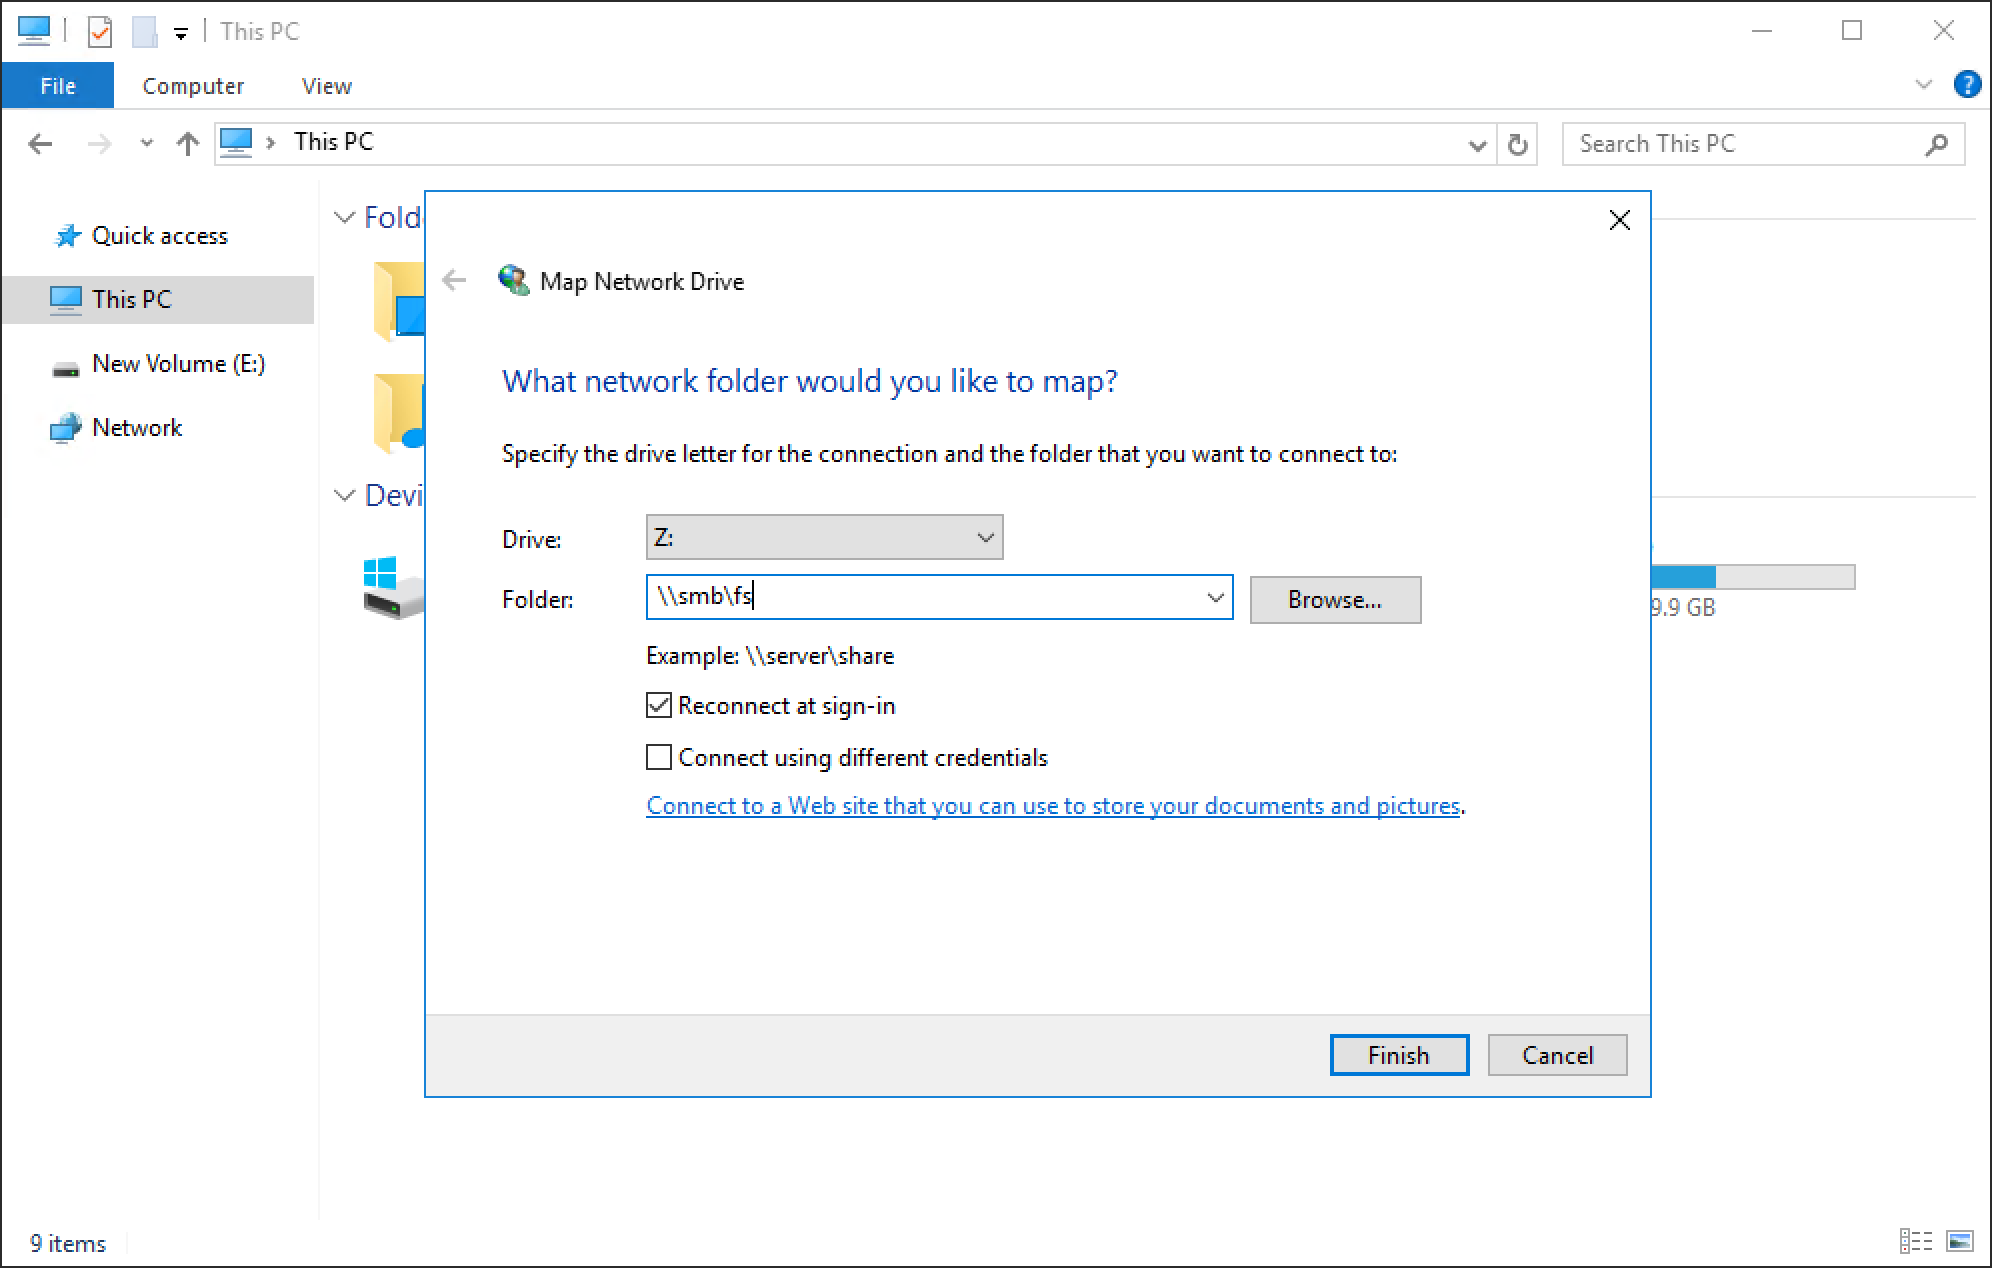
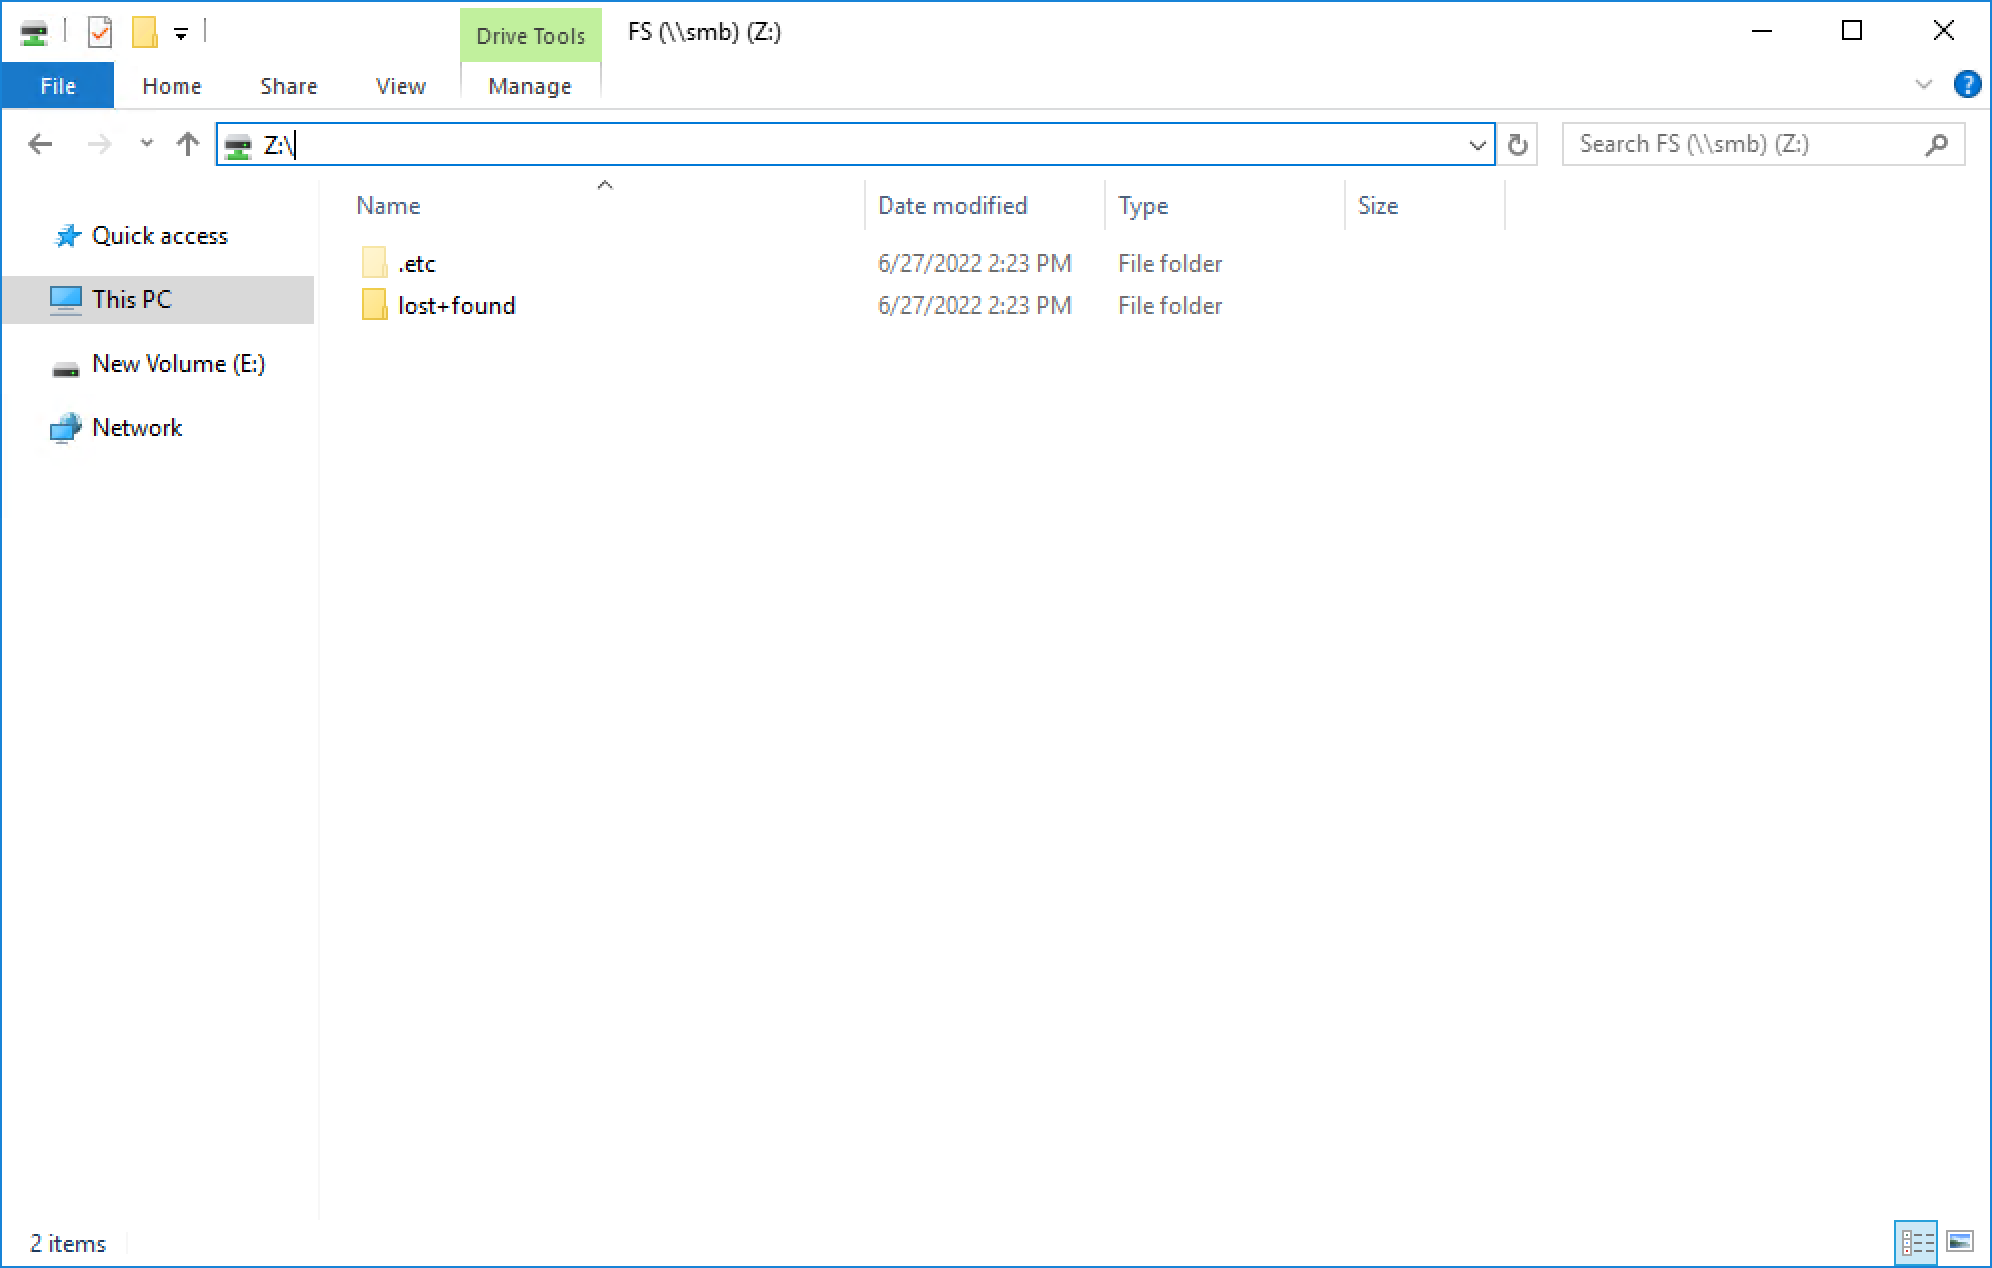
You can select a drive letter to which to map the drive, specify the UNC path, and select options such as reconnect at sign-in or connect using different credentials. When the drive is mapped, you can access it using the assigned drive letter, as shown in the following figure.
Conclusion
Great job! You are now familiar with how to use the SMB protocol for file system access. This enables you to start configuring environments using SMB for many use cases and applications. Stay tuned for the next blog in this series where we’ll take a look at another commonly used file protocol: NFS.
Resources
Author: Wei Chen, Senior Principal Engineering Technologist