
Dell PowerProtect DD Series Appliances with Veeam Backup and Replication: Configuration Guide
Configure DD series appliance with DDboost as backup target
Configure DD series appliance with DDboost as backup target
-
Veeam Backup and Replication leverages two components of DD series appliance to support the DD Boost technology,
- DD Boost Library: DD Boost library is embedded into the Veeam Data Mover Service setup. The DD Boost library is automatically installed on the added server together with the data mover service when Microsoft Windows server is added to the backup Infrastructure.
- DD Boost Server: The DD Boost server runs on the operating system of DD series appliance storage system. It is a target-end component.
This section provides how to set up DD series appliance as a backup target and to assign the backup repository role to DD series appliance storage systems with DDboost. The user must be added to the Data Domain which has access from Veeam infrastructure. The user must have the storage unit attached.
Create User for DDboost
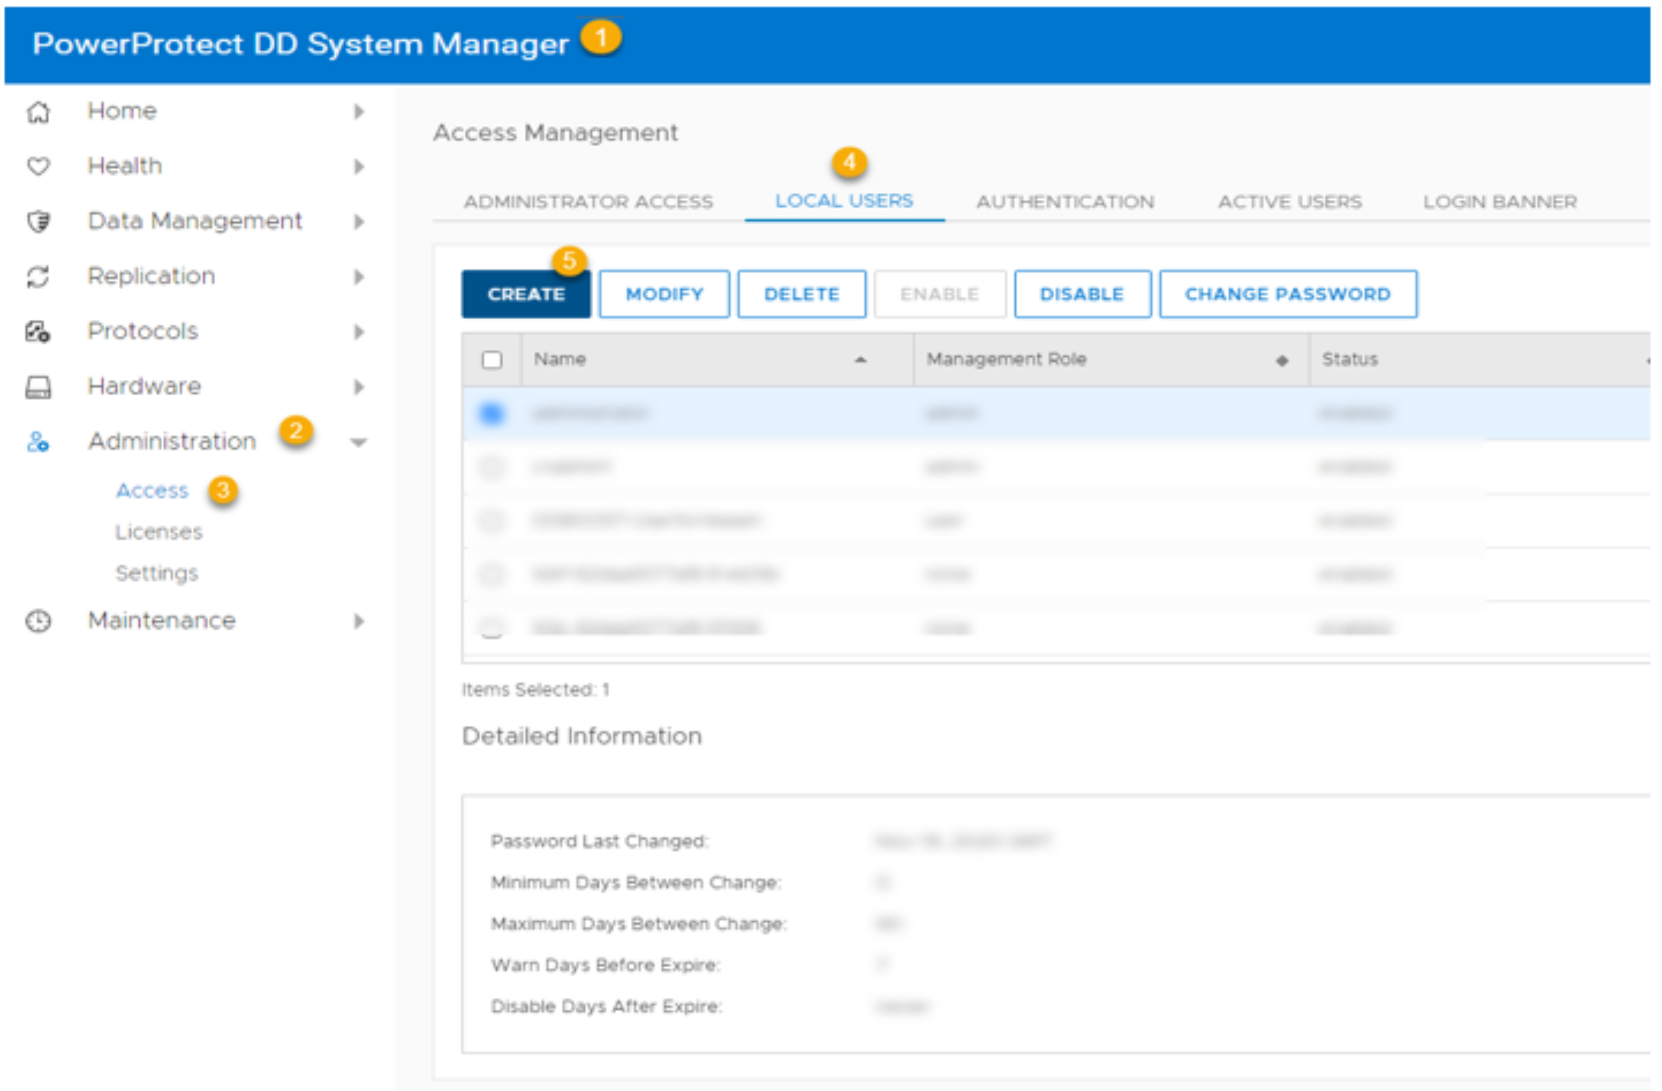
- Login to the DD System Manager
- Navigate to Administration on the left pane of the dashboard
- Click the drop down menu and Select Access
- Select LOCAL USERS from Access Management
- Click CREATE
- Enter the details
General:
- User: Specify the username
- Password: Specify the password
- Management Role: Select the role from the drop down menu
- Advanced: This option is to manage the advanced features of user for example: to access the Password aging policy and to disable the user account
- Click OK
Create Storage Unit
- Login to the DD System Manager
- Navigate to Protocols on the left pane of the dashboard
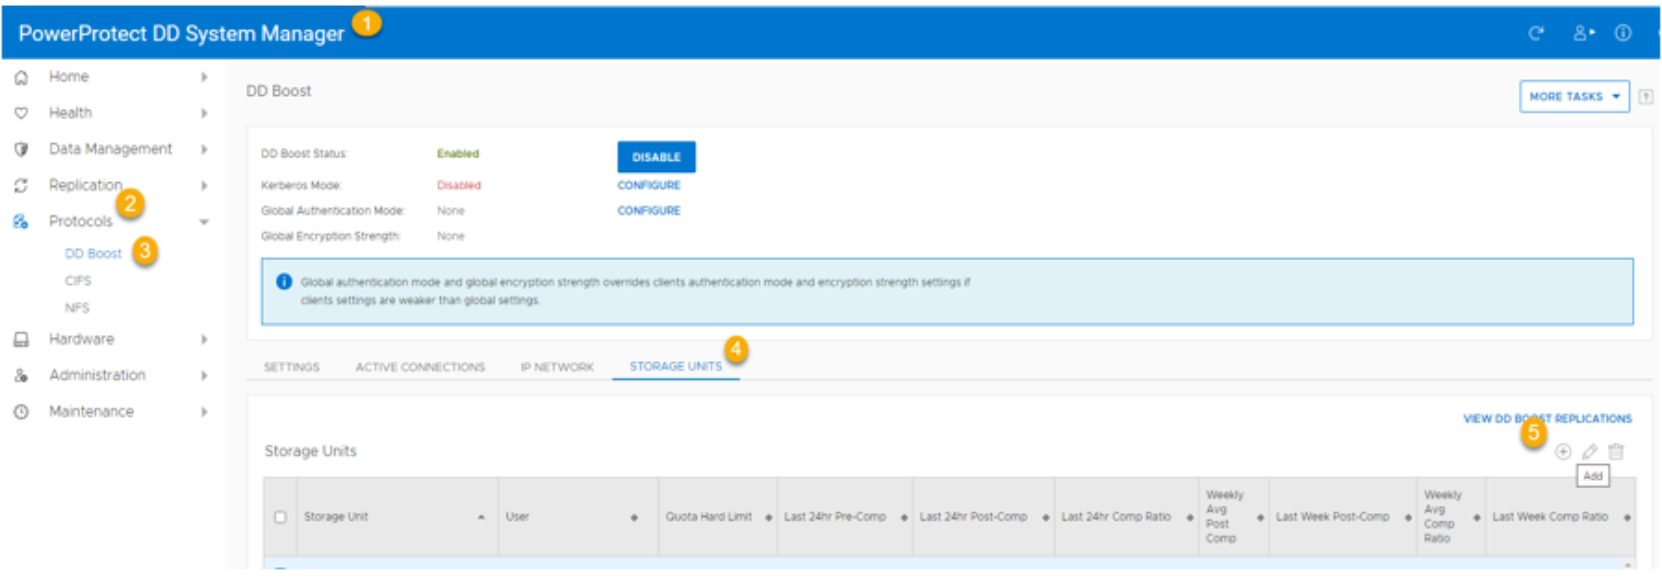
- Click DD Boost
- Click STORAGE UNITS
- Click Add sign (+) to create storage unit
- Specify the Name and select or create user from the dropdown
- Click CREATE
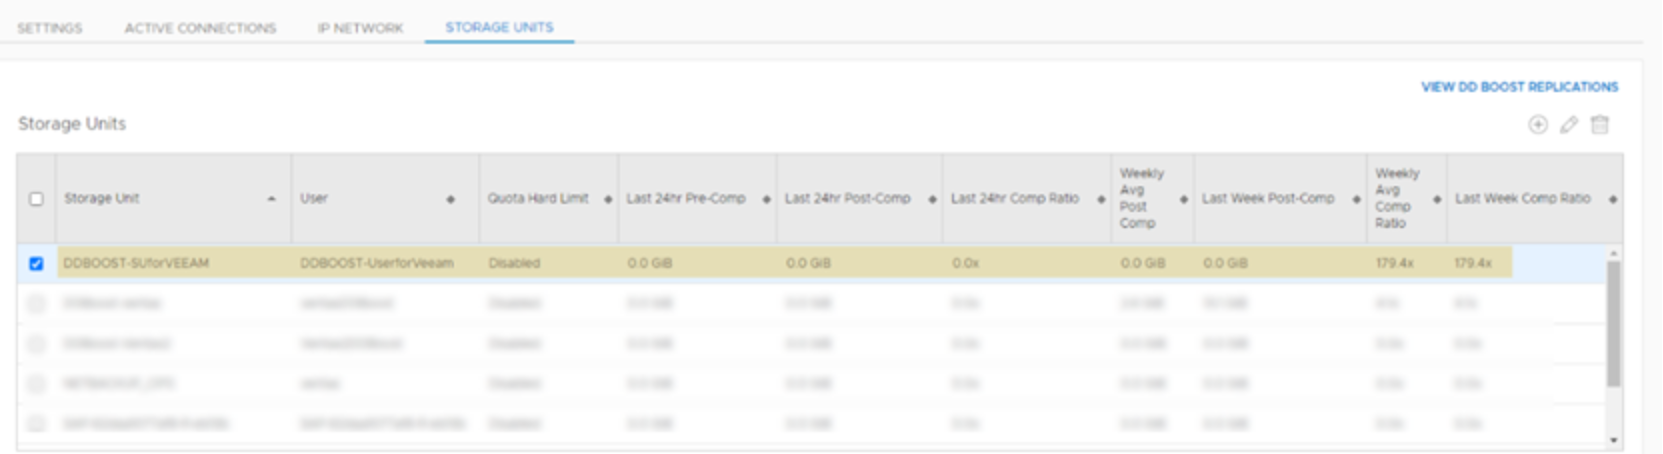
- Storage unit is created and is available under storage unit list.
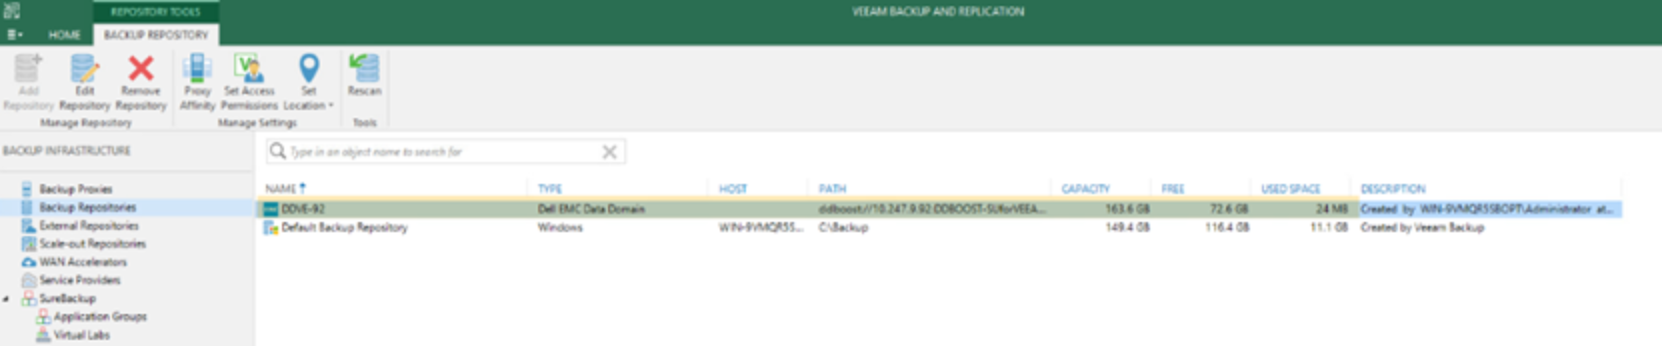
Configure Backup Repository
- Login to the Veeam Backup and Replication console
- Click BACKUP INFRASTRUCTURE on the left pane of dashboard
- Click Backup Repositories
- Click Add Repository on the top (Or right click and select Add Repository)
- Select Deduplicating Storage Appliance
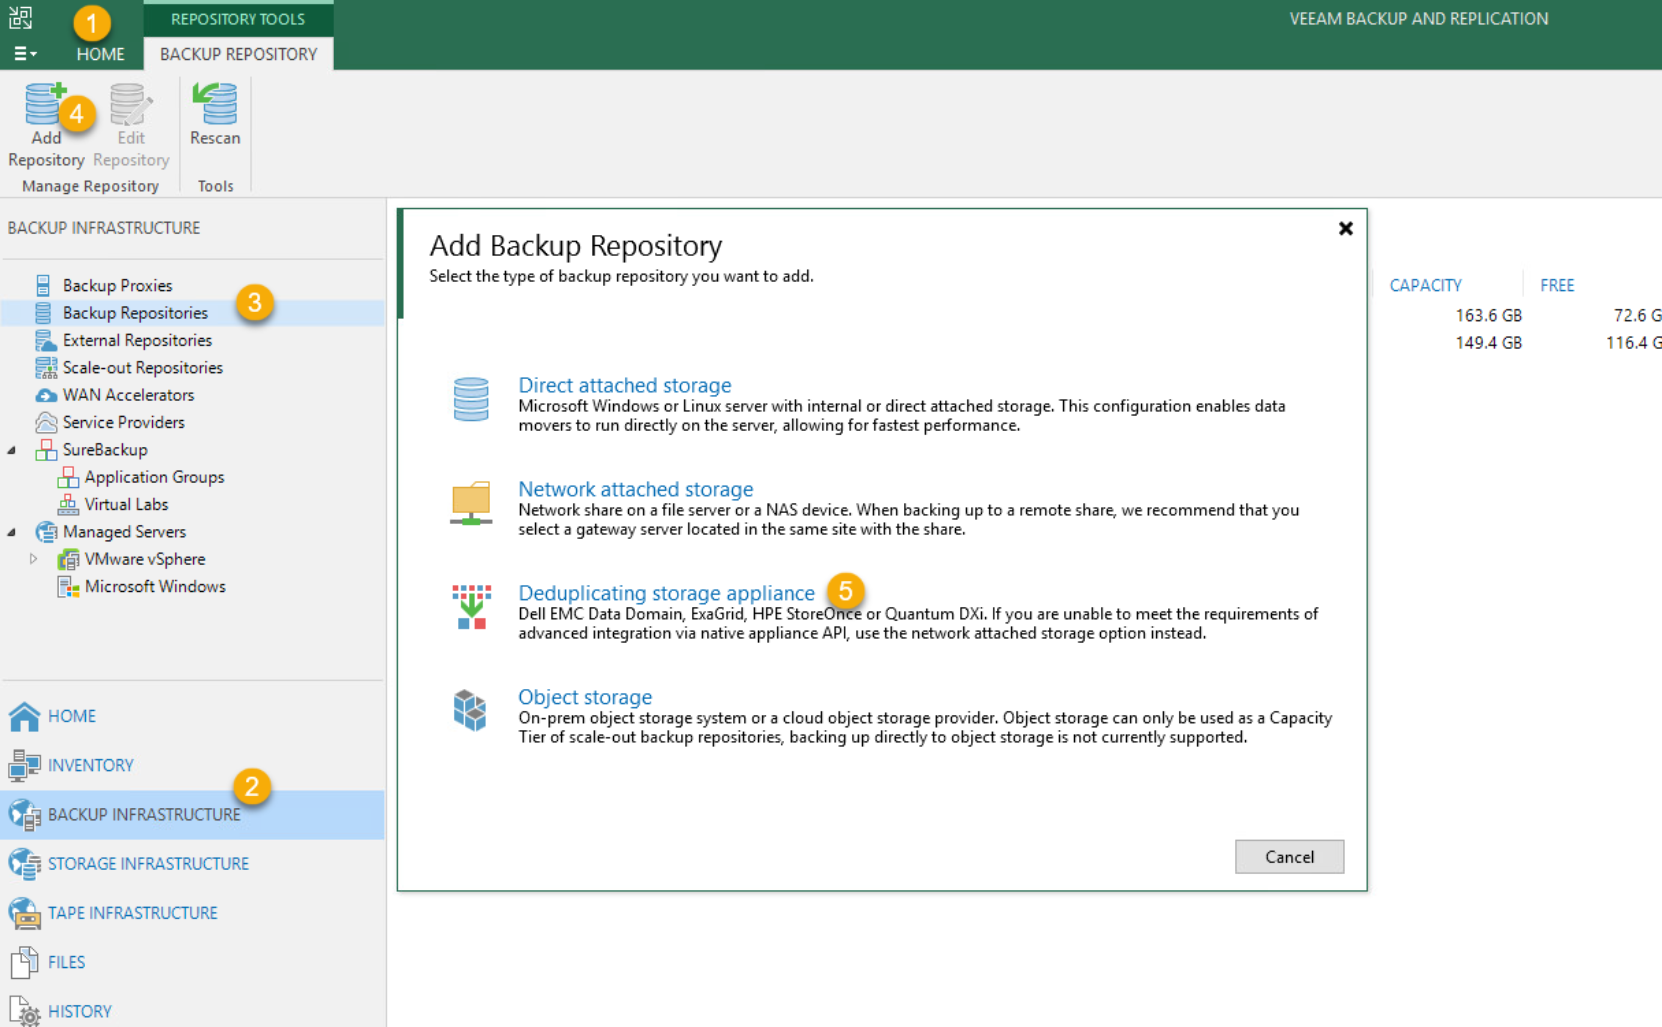
- Select Dell PowerProtect Data Domain and specify the details
- Name: Type in a name and description for this backup repository
- Dell PowerProtect Data Domain: If the Data Domain system works over TCP, specify the FQDN or IP address. If Data Domain system works over FC, specify the data domain server name. A gateway server must be defined explicitly to communicate with the Dell PowerProtect Data Domain.
- Type in Data Domain Name: Specify the name of the Dell EMC Data Domain server name
- Credentials: Specify the user that is created to access the Data domain and click Next
- Repository: Specify the storage Unit created to access and click Next
- Mount Server: Specify if there is any other mount server or else it takes the default server
- Review and click Apply
- Port: Specify the port number (By default, VMware web services port is 443)
- Click Apply
- Verify the certificate and click Continue
- Click Finish
Configure Backup Proxy

- Login to Veeam Backup and Replication console
- Click BACKUP INFRASTUCTURE on the left pane of dashboard
- Select Backup Proxies
- Click Add Proxy at the top (or Right click Add VMware backup proxy)
- Click VMware vSphere to add proxy
- Select New VMware Proxy and specify the details
- Server: Choose a server for VMware backup proxy. You can choose between any Microsoft Windows or Linux servers added to the managed servers which are not assigned a VMware backup proxy already.
- Choose Server: Specify the server details (the backup sever is by default selected)
- Proxy Description: Specify if there is any description
- Transport Mode: Choose applicable transport Mode (Automatic Selection is by default)
- Connected Datastores: Choose applicable datastores (Automatic Detection is by default)
- Max concurrent tasks: Specify the number of tasks
- Traffic Rules: Review the network traffic encryption and throttling rules which apply to this backup proxy.
- Click Apply and wait while required components are installed and configured.
- Click Next and the Summary tab confirms that the backup proxy is created successfully
- Click Finish.
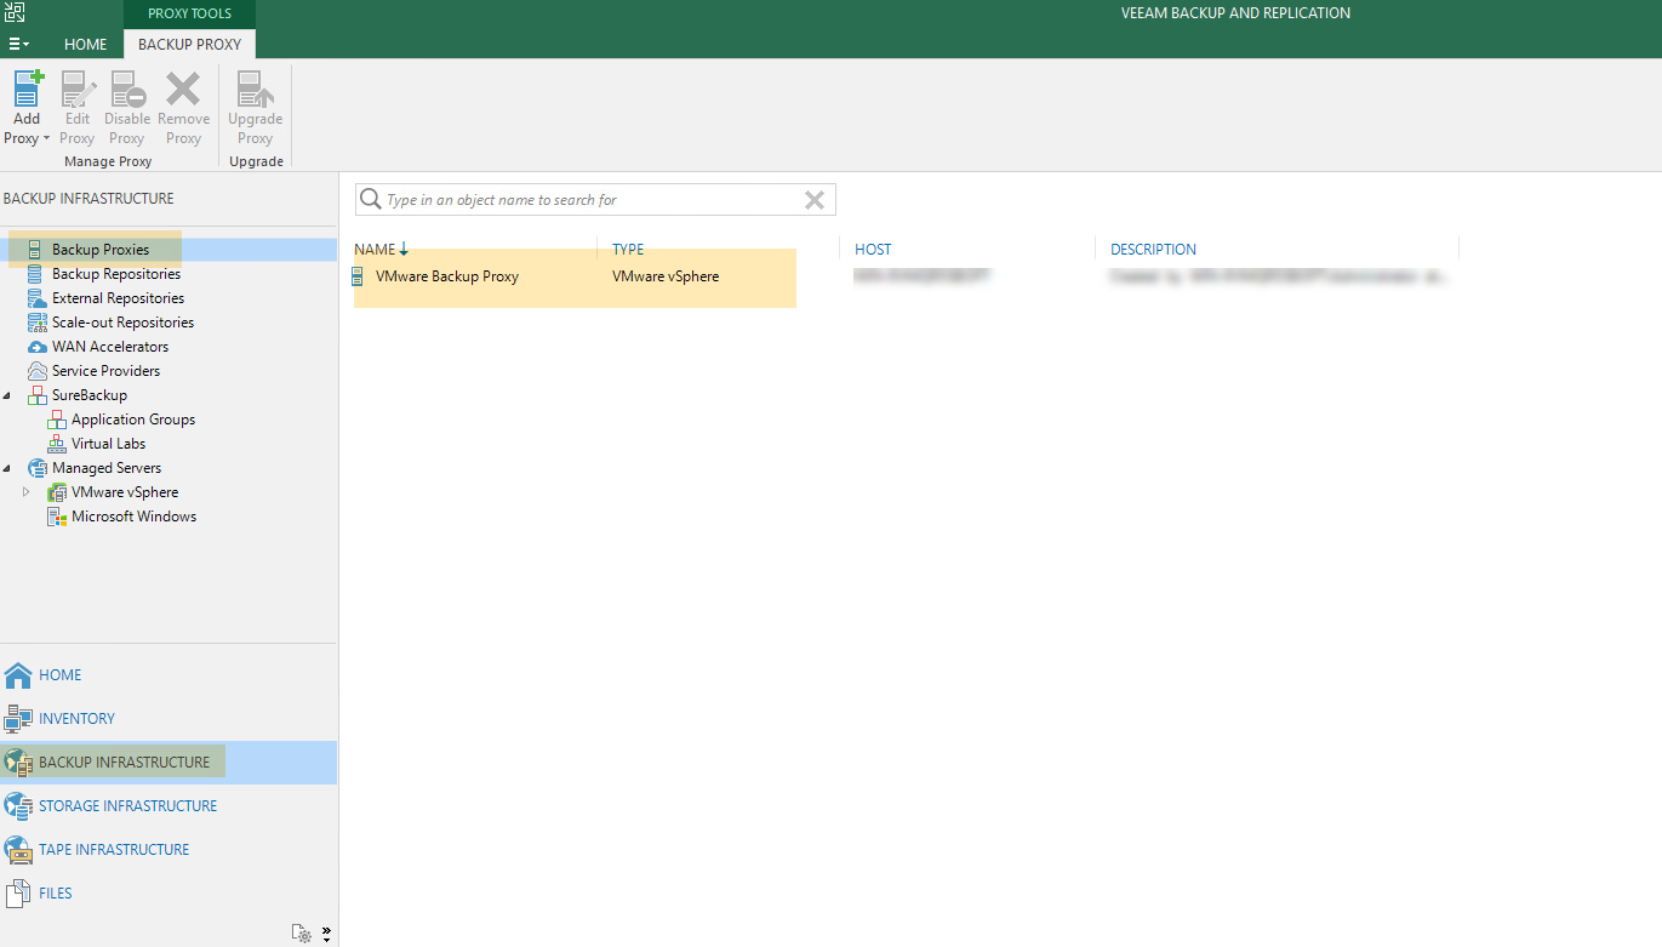
- Backup Proxy is successfully added