
Recovering the Active Directory
Recovering the Active Directory
-
To recover the Active Directory, you must choose only NTDS writer and perform an Active Directory restore.
To recover the Active Directory, perform the following steps:
- Configure the client.
- Recover the Active Directory at the image-level (system state recovery).
- Recover the Active Directory at the granular restore.
- Perform an authoritative or nonauthoritative Microsoft restore based on the user configuration.
Active Directory image-level restore (system state recovery)
After you have configured the client to boot into Directory Services Restore Mode (DSRM), you can recover the Active Directory from disaster-recovery data at the image-level.
To perform AD image-level recovery, you can select the desired backup copy and click System State Restore as shown in the following figure:
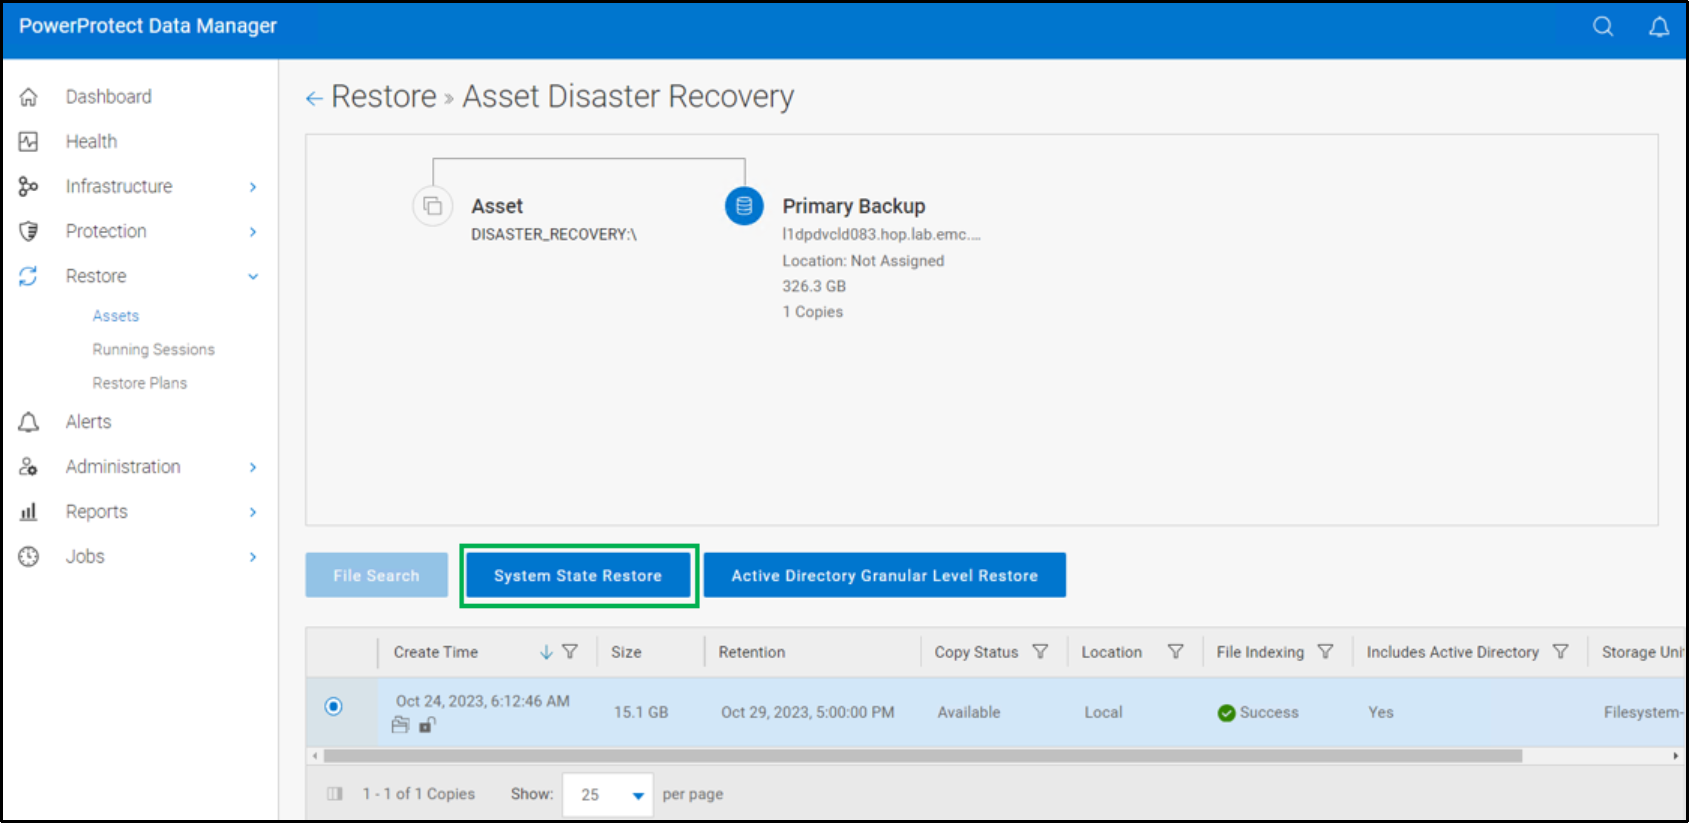
Figure 11. Active Directory image-level restore
Once the copies are mounted, you can select the Windows NT Directory Services (NTDS) writer in the Disaster Recovery folder and click “Next” to proceed with the restore as shown in the following figure.
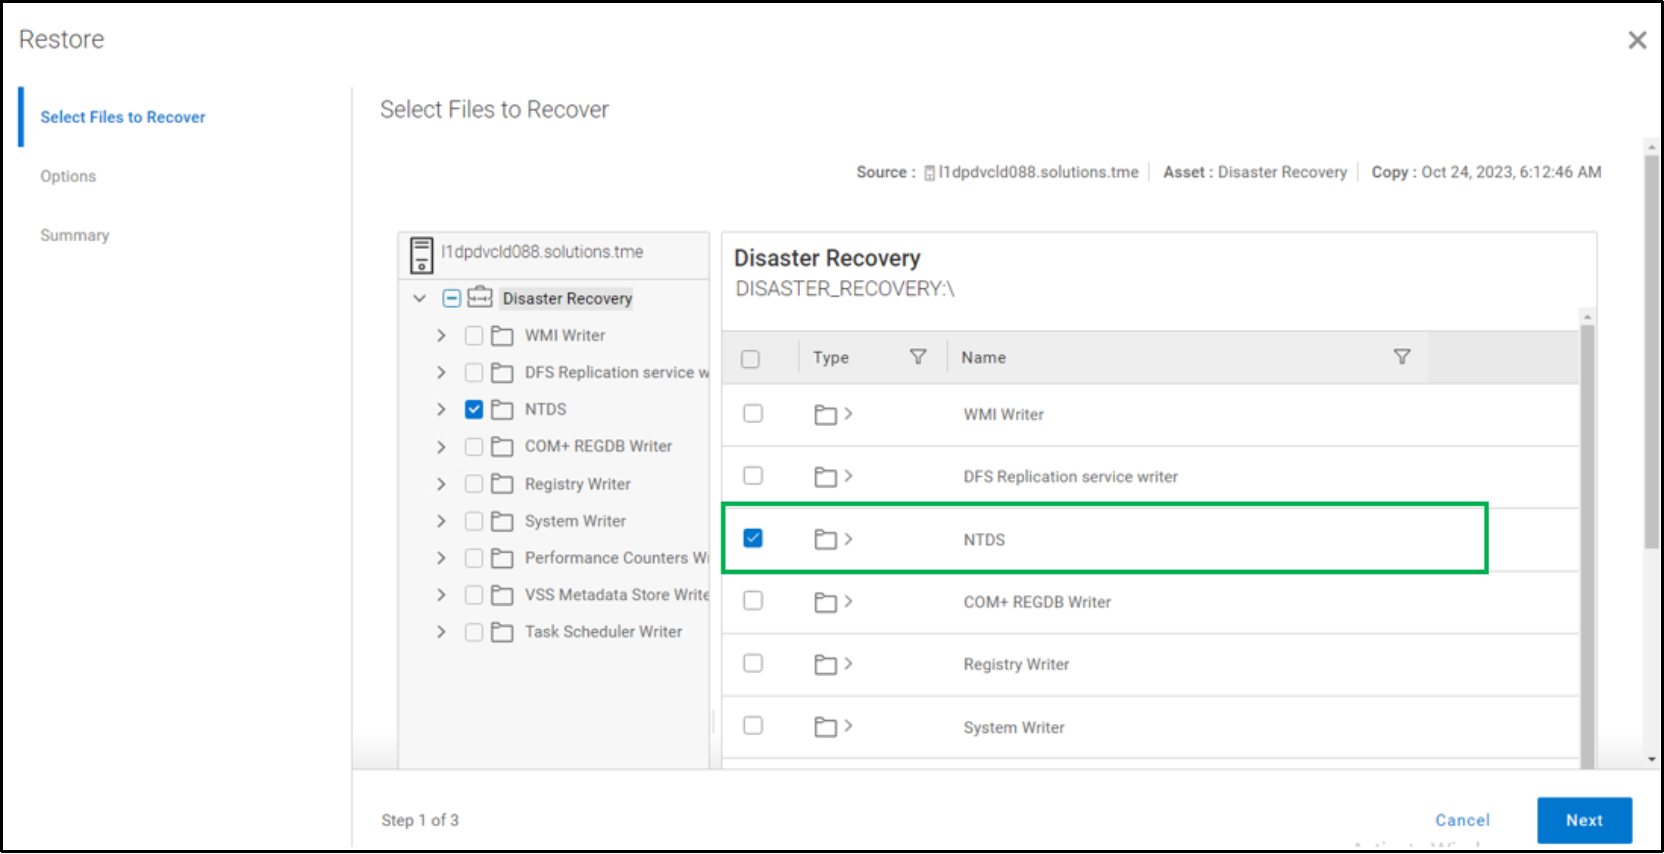
Figure 12. Option to select NTDS folder for restore
After the system-state recovery (SSR) is complete, the host will require a reboot after restoring.
Note: While performing SSR restore of all writers, if an NTDS writer is a part of the backup, restore the NTDS writer alone in the DSRM, restart the system in normal mode and then restore other remaining writers excluding NTDS writer.
Active Directory granular level restore
You can browse AD backups, mount, search and restore AD objects through the central PowerProtect Data Manager UI. This feature allows you to restore granular AD objects such as User objects, Computer Objects, Printer Objects, Shared folders, Group/Group Policy Objects, Organizational Units, Contact Objects and one or more attributes.
To perform AD granular recovery, select the desired backup copy and click “Active Directory Granular Restore” as shown in below.
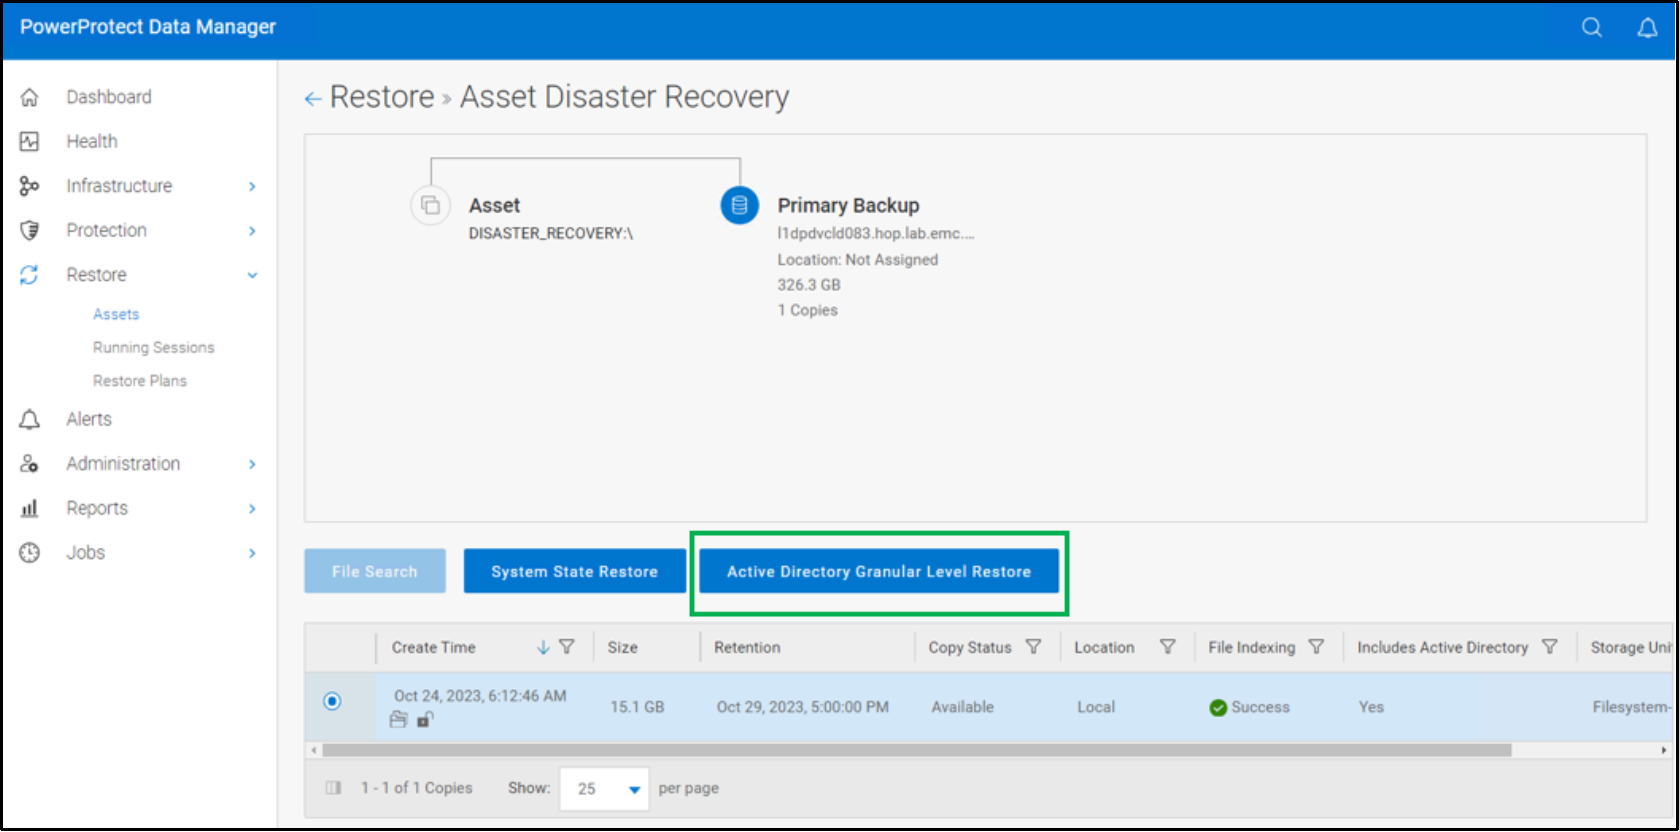
Figure 13. Restore page to choose backup copy for AD restore
You can choose the restore location either “Restore to Original host” or “”Restore to alternate host” as shown in the following figure.
In the “Run As” section, provide the domain admin credentials of the host and click mount.
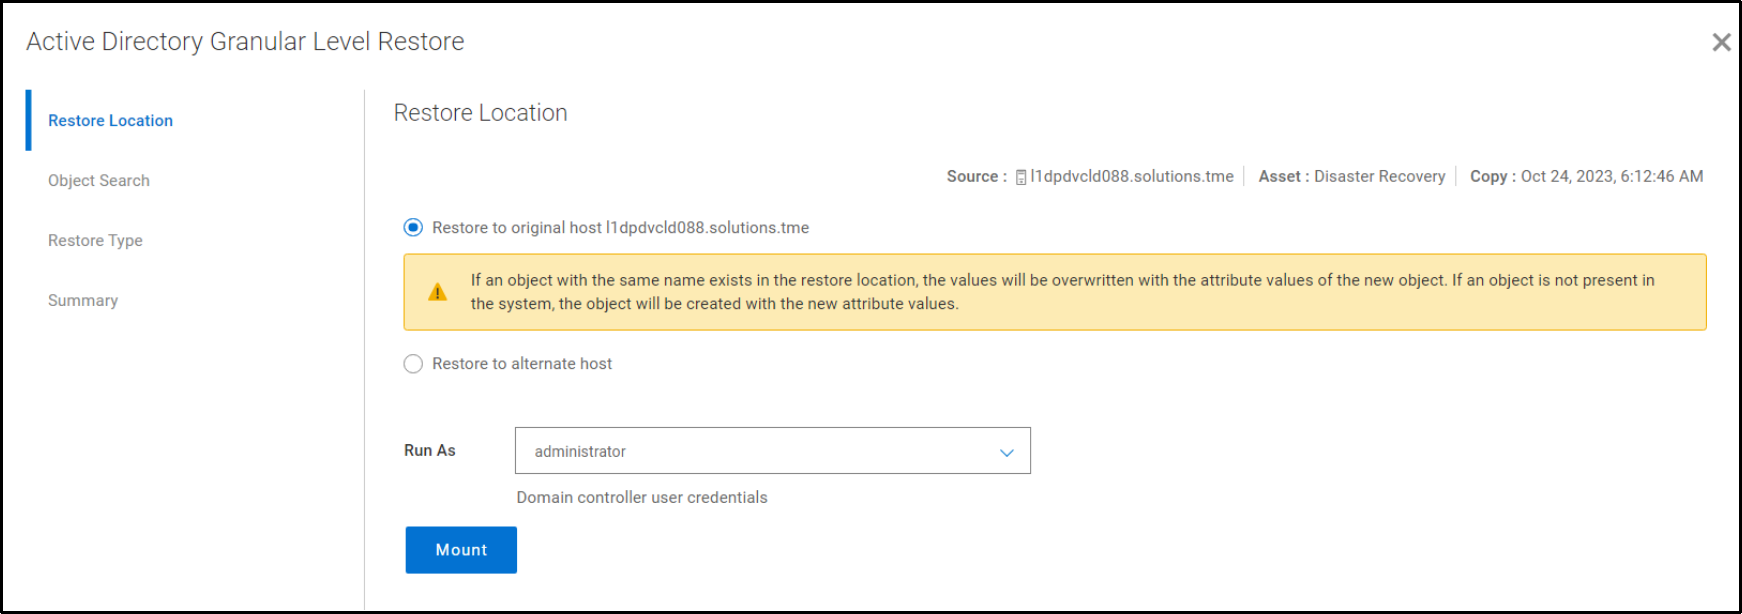
Figure 14. Restore location page for AD restore
After mounting is successfully completed, we have the “Add Attributes” option as shown in the following figure to select and choose the attributes to be displayed on the object search page.
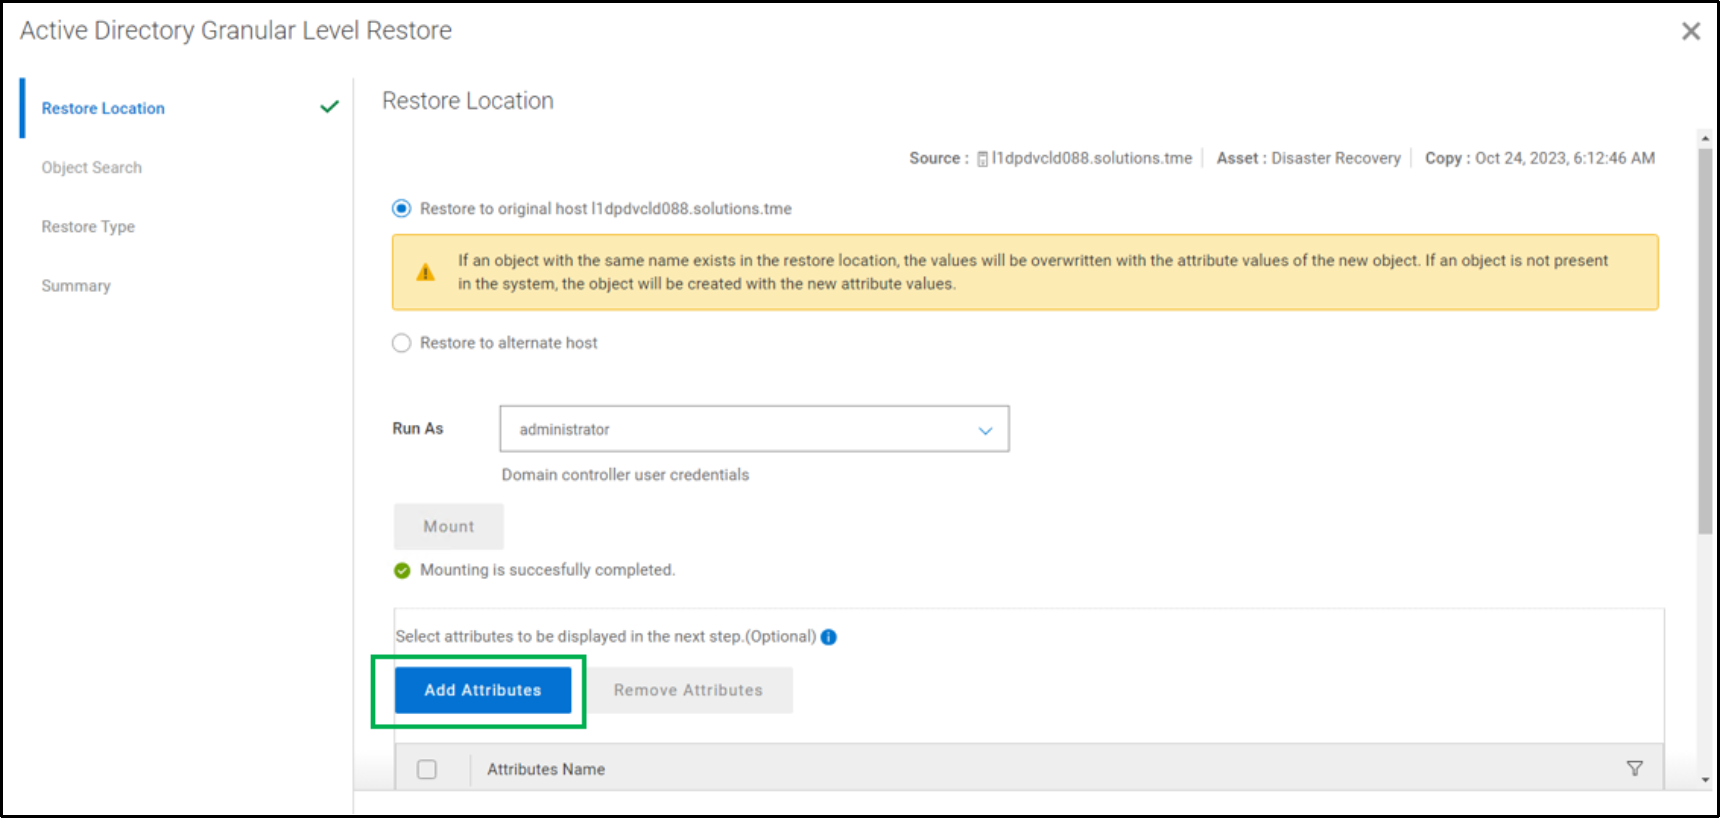
Figure 15. Optional Add/Remove attributes for object search page
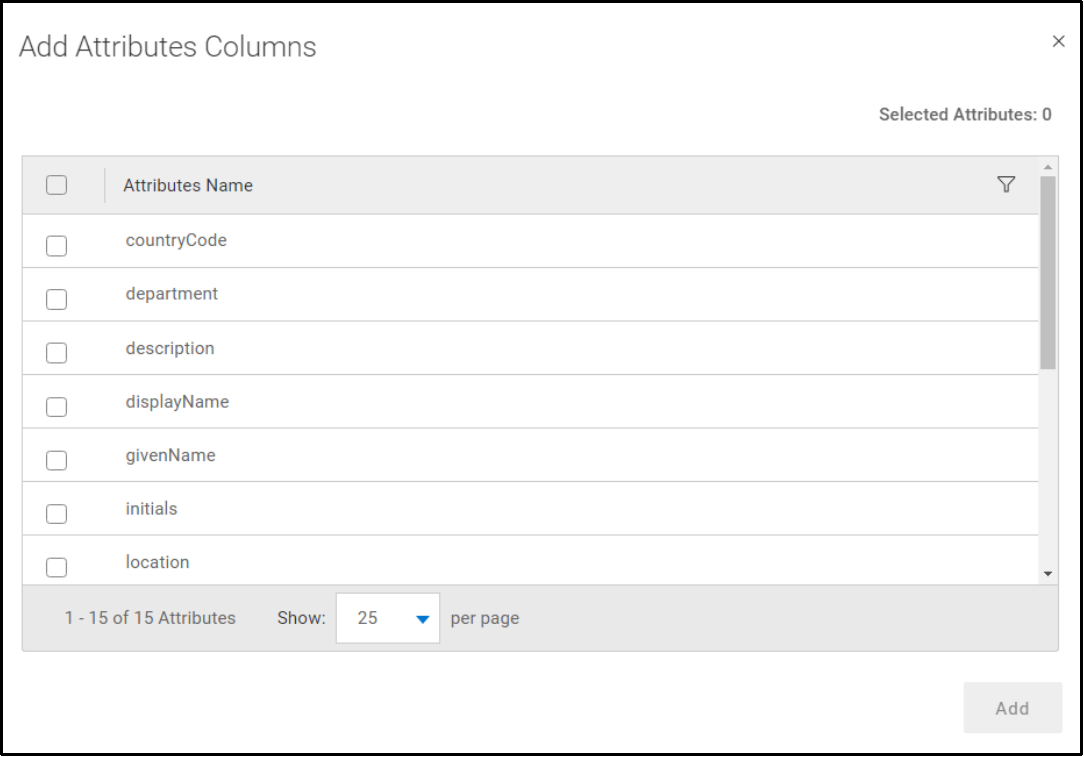
Figure 16. Add attributes option to choose attributes
Click Add to add the required object for restore by performing browse or search operation as shown in the following figure.
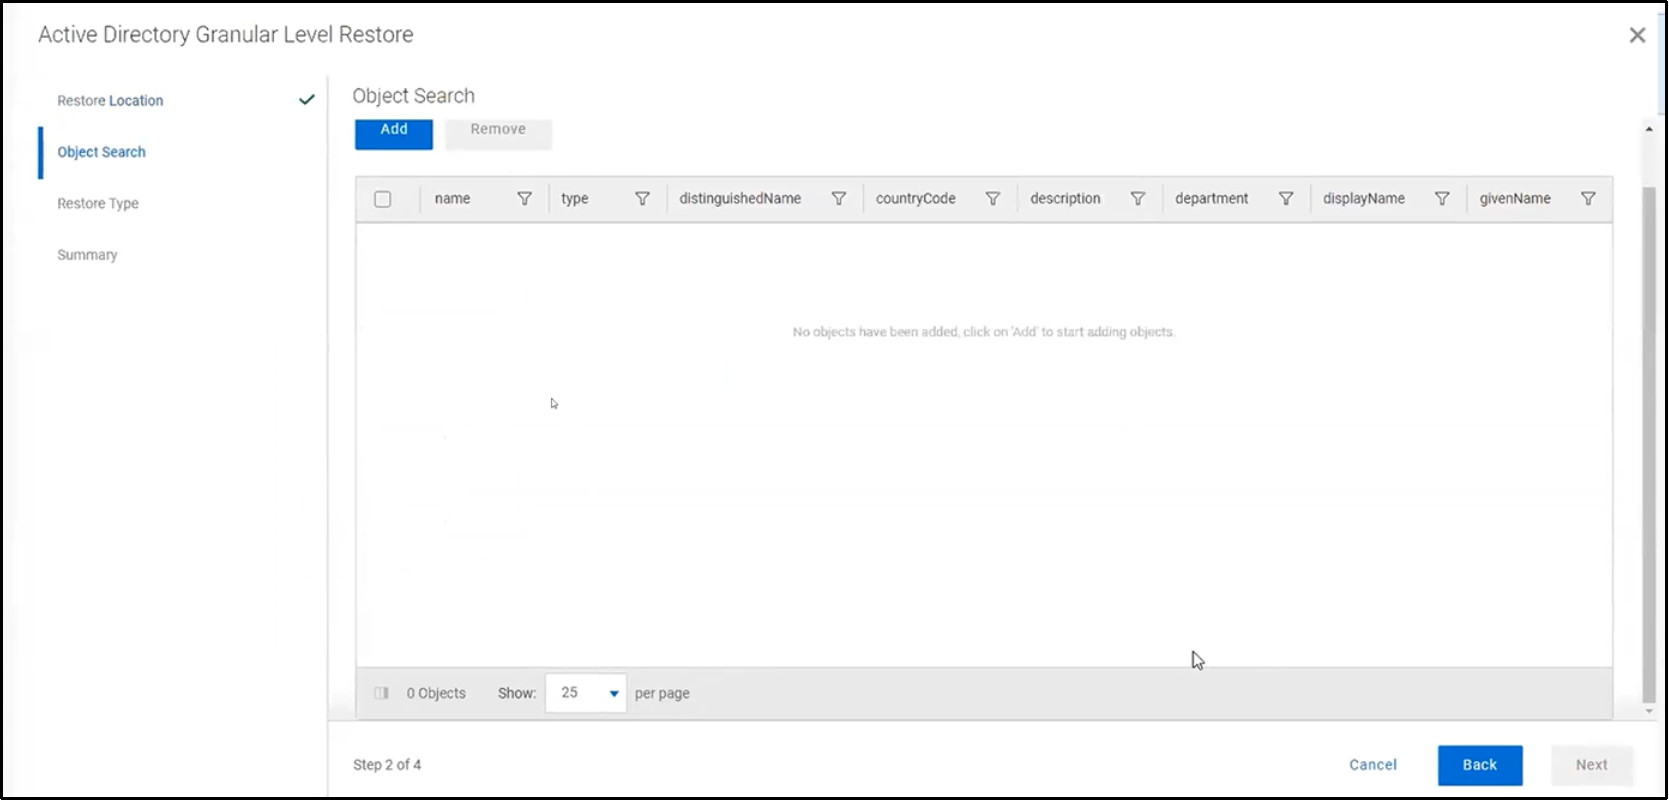
Figure 17. Object search page to add/remove objects for restore
The following figure shows the option to browse and choose the required object for restore.

Figure 18. Option to browse and choose the required object for restore
The following figure shows the search option to narrow down the object search.

Figure 19. Object search option
After adding the objects for restore, user can choose to restore to original container or restore to alternate container. If choosing "Restore to alternate container user can browse and choose the container for restore from the “Alternate Container” section as shown in The following figure.
In the “Restore Settings section user can choose to restore the entire object or restore only the selected attributes.

Figure 20. Option to choose restore type and restore settings
The “Options” page shown in the following figure is applicable only to the selected user objects.
This page provides the “Password Options” to choose either Domain admin to set password manually or to set the default password for users.
Additional Options available to disable the user account and to enable option for the user to change password at next logon.
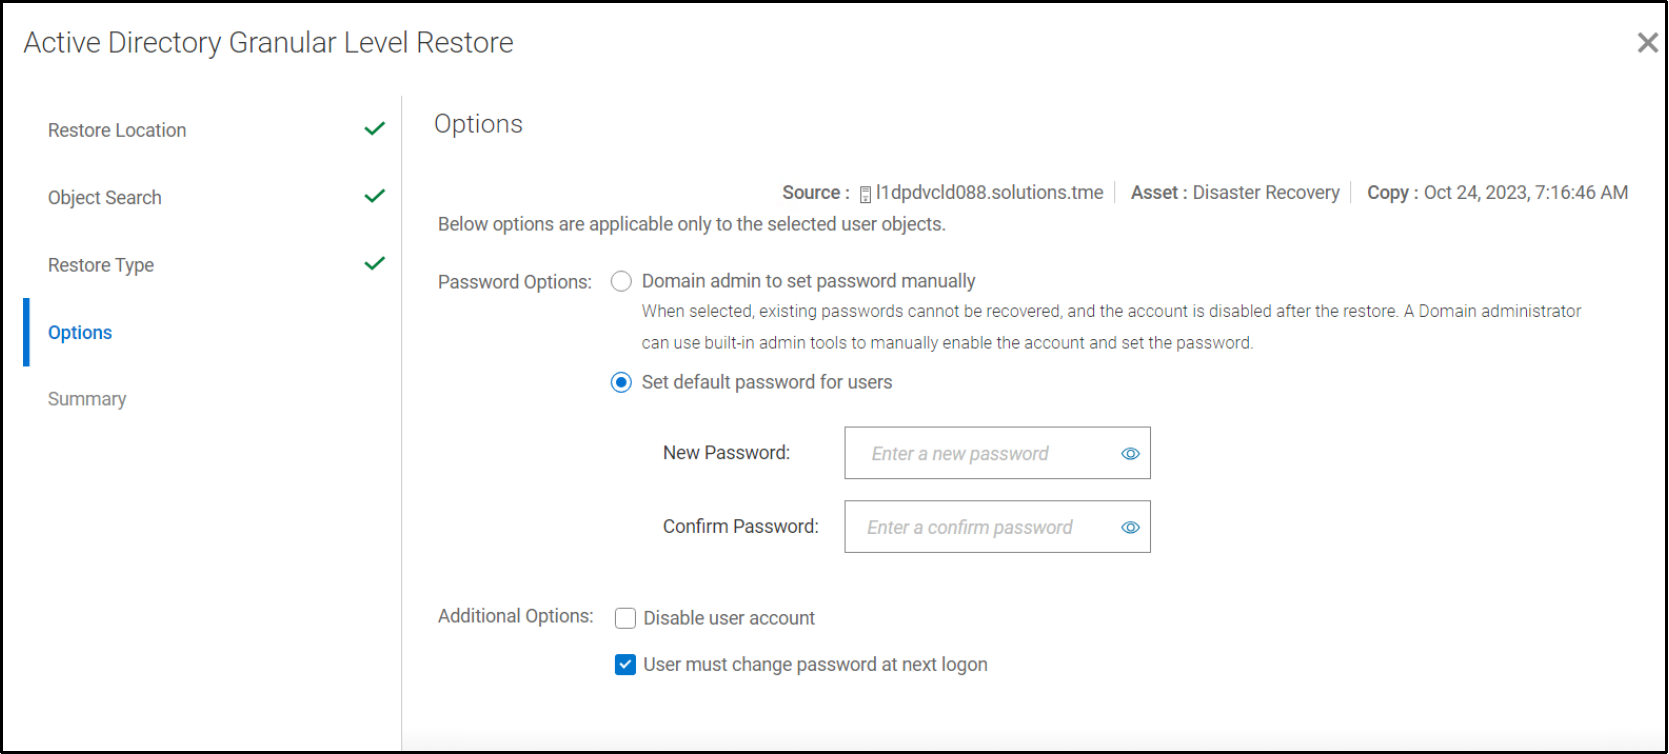
Figure 21. Password options page for user objects restore
 The following figure shows the successful user object restore step log details.
Figure 22. Successful AD granular restore job details
For more details about performing an Active Directory restore, see the PowerProtect Data Manager File System User Guide.