


Best practices for deployment and life cycle management of Dell CSM Modules


The Dell CSM Kubernetes Operator packages the CSI driver and other storage services (Container Storage Modules or CSMs) for observability, replication, authorization, and node resiliency. This single operator supports PowerFlex, PowerStore, PowerScale, and Unity platforms (see Support Matrix). In this blog post, we lay out some best practices for deployment and lifecycle management of Dell CSMs.
Use Helm Charts where you can
Kubernetes operators provide a framework where the Kubernetes controller-CRD framework can be extended for any functionality. However for day one deployment and upgrades, HELM charts provide a simple solution. If you prefer not to use the Operator framework on platforms like Red Hat OpenShift, we recommend using Helm charts to install the CSMs. Here is how you can add the Helm repository for Dell and quickly see the Helm charts available for the different CSI drivers and CSMs:

Use the Installation Wizard (manifest generator)
Whether you use Helm Charts or the CSM Operator, the CSM Installation wizard is an essential deployment tool that provides a simple web interface for you to create YAML manifests. Select the method of installation (Operator or Helm), the Dell Storage platform, and specify all the features and attributes you need:
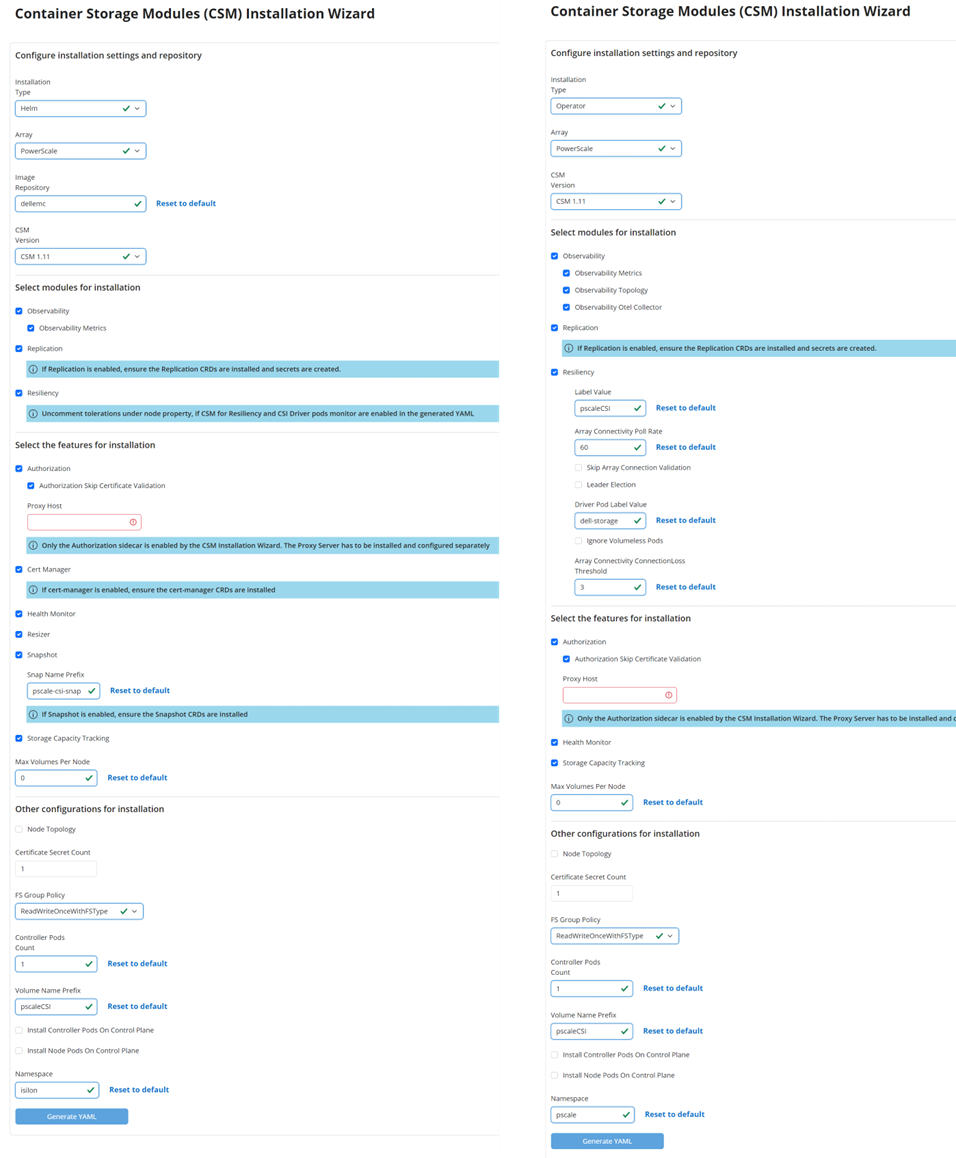
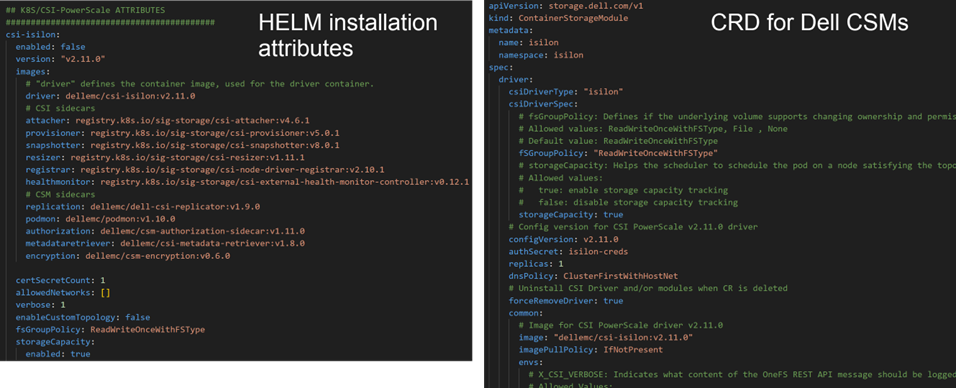
Note that when you select Helm as the installation setup, the generated YAML is the configuration that contains all the attributes based on the storage platform, features, and parameters selected for the Helm Chart installation. When you select Operator as the installation method, you generate the CRD that the Operator uses to install the CSMs. Here is how both YAML files look:
Most important step – Store configuration in a versioning system
After the YAML files are generated (and possibly modified) and used to install (Helm or Operator), they should be saved in a version control system. This is very important during the times of upgrade when you may need to compare against a later install manifest to upgrade CSMs. An integrated option is to use a GitOps agent to store the installation files and apply them. Here is an example with Azure ARC/FluxCD and here is ArgoCD.
Upgrades with Helm
CSI and CSM upgrades are straightforward with Helm charts. Once again, you can use the wizard to generate the Helm installation manifest for the version you want to upgrade to and then use helm upgrade with the new manifest. Note that you can decide to enable or disable new modules, but you need to use customization as you did to generate the version of the manifest at the time of installation. For example if you changed the default volume prefix you have to update it again.
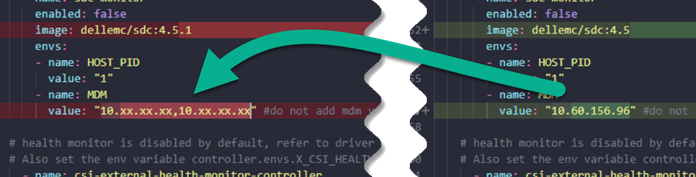
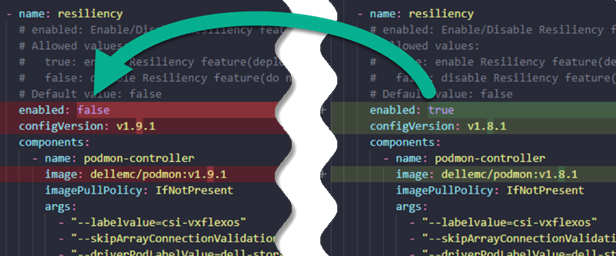
Here is where it makes sense to do a quick compare of the new manifest file and the manifest that was used during the time of installation. At CLI you can do a file comparison with a tool like GIT DIFF. Visual Studio Code editor has a great tool to do the same in a GUI. This step is to make sure you have the same attributes and features selected in the new manifest.
Upgrades with Operator
In the Operator framework, the Operator itself must updated first. Each Operator version supports three versions of the CSMs (n, n-1, n-2). The best way to check this is by visiting the GitHub page dell/csm-operator and looking at the samples folder to see the list of CRD versions for each storage platform:
Once you upgrade Operator (either manually or through the auto-upgrade selection in OpenShift), you must configure the latest CRD. Here is how you do this (same as YAML file compare step in HELM upgrades):
- Generate the CRD using the wizard (it would be useful to remember the options you used to select the original version during the time of initial installation; otherwise you can resolve the CRD manifest differences using file diff as mentioned below).
- Compare the latest CRD with the original CRD used in the current setup. At CLI you can do a file comparison using GIT DIFF or Visual Studio Code:

- Make changes to the new CRD to get it to the same attribute selections. Since this is an upgrade, you will see version number differences in multiple locations (this is expected). However, changes related to your environment and Feature selections should be reconciled. Here are some of the changes that may have to be made manually:
- Details such as changed terminology (less probable):

- Details of your environment:
- Details of features and attributes selected in the Wizard:
- Details such as changed terminology (less probable):
There are two ways to install with the new CRD, using the Red Hat OpenShift GUI, or the kubectl CLI.
For Red Hat OpenShift GUI:
- Open the Red Hat OpenShift GUI and navigate to the CRD YAML section.
- Copy new YAML file contents.
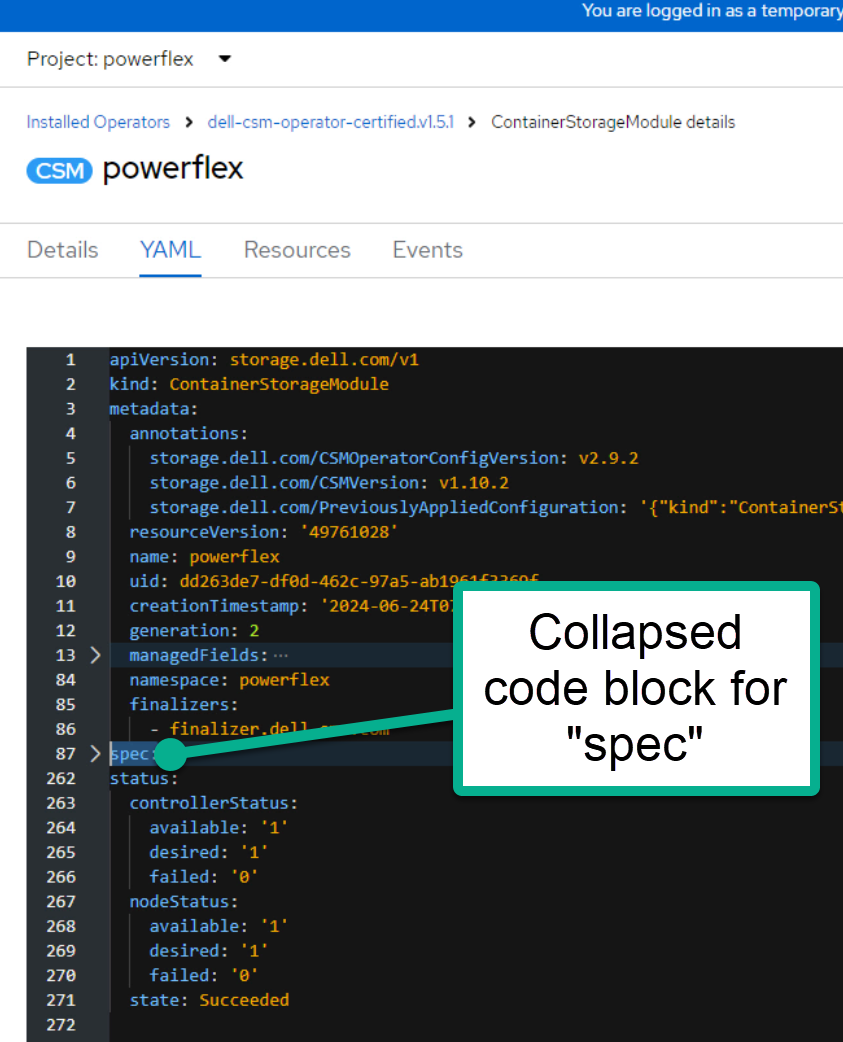
- Replace the spec section of the CRD (not the metadata section). See the below screenshot.
- Save the CRD. The Operator takes the latest CRD and updates the CRMs.
For kubectl CLI:
Here is the best way to delete the existing CRMs and reinstall with the new YAML version which was updated with the necessary changes:
$ kubectl delete ContainerStorageModule
$ kubectl create -f new_CRD.yaml
We hope this post helps you make your CSM upgrades smoothly. For more questions or assistance, feel free to reach out to the community on GitHub or Slack.
Authors:
Parasar Kodati, Engineering Technologist
Florian Coulombel, Engineering Technologist