Home > Storage > PowerFlex > White Papers > SUSE Rancher and RKE Kubernetes cluster using CSI Driver on DELL EMC PowerFlex > Steps to install CSI drives for PowerFlex
Steps to install CSI drives for PowerFlex
-
- Run the following command to download the installation source files from GitHub:
$ git clone https://github.com/dell/csi-vxflexos
- Run the following command to create the namespace called vxflexos:
$ kubectl create namespace vxflexos
- Collect information from the PowerFlex SDC by running the get_vxflexos_info.sh script.
- Copy the csi-vxflexos/values.yaml into a file called myvalues.yaml in the same directory as the csi-install.sh script.
- Edit myvalues.yaml to set the parameters like file system types, volume name prefix, and controller count, for the installation.
- Create a config.json for driver configuration. This file contains information like the PowerFlex system IP details and credentials.
- Run the following sh csi-install.sh command to proceed with the installation:
$ sh csi-install.sh --namespace vxflexos –values myvalues.yaml
- Run the following commands to check the vxflexos namespace for running pods to verify it is deployed correctly:
$ kubectl get pods -n vxflexos
NAME READY STATUS RESTARTS AGE
vxflexos-controller-5855b6969f-jbbpq 5/5 Running 0 15d
vxflexos-node-6gnlc 2/2 Running 0 15d
vxflexos-node-vswl2 2/2 Running 0 15d
vxflexos-node-zr2r4 2/2 Running 0 15d
$
For more information about CSI driver installation, see GitHub.
- Create the storage classes through the Rancher graphical UI.
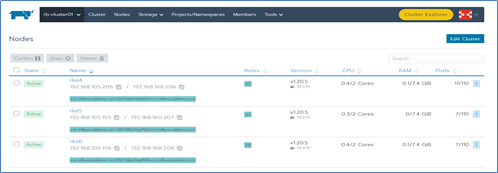
- Ensure that the PowerFlex CSI driver is running on a Rancher Kubernetes cluster and the PowerFlex Storage classes are listed in the SUSE Rancher menu for any application that is launched in the SUSE Rancher Kubernetes cluster.

Figure 6. SUSE Rancher menu

Figure 7. Cluster explorer
- Test the deployment workflow of a simple pod on PowerFlex storage, For more information, see Test PowerFlex CSI Driver.
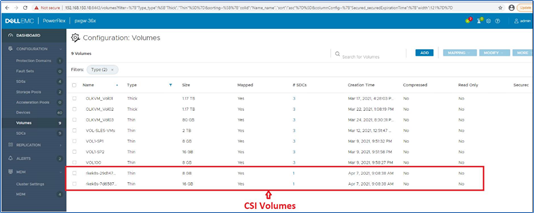
- Verify that the persistent volume is created in PowerFlex cluster using the Power Flex graphical user interface.

Figure 8. PowerFlex graphical user interphase
- Verify the following output from SUSE Rancher UI and confirm that PowerFlex Persistent Volumes are used by the Kubernetes pods running under the test namespace:

Figure 9. Kubernetes pods running under test namespace
