Home > Storage > PowerFlex > White Papers > Amazon Elastic Kubernetes Service Anywhere on Dell PowerFlex > Steps to Install the CSI driver for PowerFlex
Steps to Install the CSI driver for PowerFlex
-
1. Run the following command to download the installation source files from GitHub:
$ git clone https://github.com/dell/csi-vxflexos
2. Run the following command to create a namespace called vxflexos:
$ kubectl create namespace vxflexos
3. Run the following script to collect information from the PowerFlex SDC:
get_vxflexos_info.sh.
4. Copy the csi-vxflexos/values.yaml script into a myvalues.yaml file in the same directory as the csi-install.sh script.
5. Edit the myvalues.yaml file to set the parameters such as file system types, volume name prefix, and controller count for the installation.
6. Create a config.json file for driver configuration. This file contains information such as the PowerFlex system IP details and credentials.
7. Run the following command to proceed with the installation:
$ sh csi-install.sh --namespace vxflexos –values myvalues.yaml
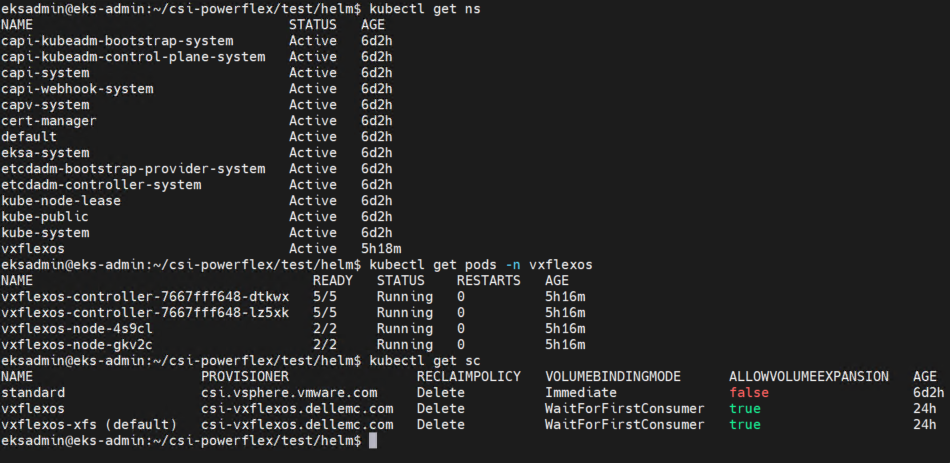
8. Run the following command to check the vxflexos namespace for running pods to verify it is deployed correctly:
$ kubectl get pods -n vxflexos
For more information about CSI driver installation, see GitHub.
9. Storage classes can be created through kubectl commands. For more information about creating storage classes, see Storage Classes.
eksadmin@eks-admin:~/csi-powerflex/samples/storageclass$ kubectl apply -f storageclass.yaml
eksadmin@eks-admin:~/csi-powerflex/samples/storageclass$ kubectl apply -f storageclass-xfs.yaml
10. Ensure that the PowerFlex CSI driver is running on the EKS A Cluster, as shown in the following status example:

Figure 19. CSI pod status
11. Test the deployment workflow of a simple pod on PowerFlex storage. For more information, see Test PowerFlex CSI Driver.
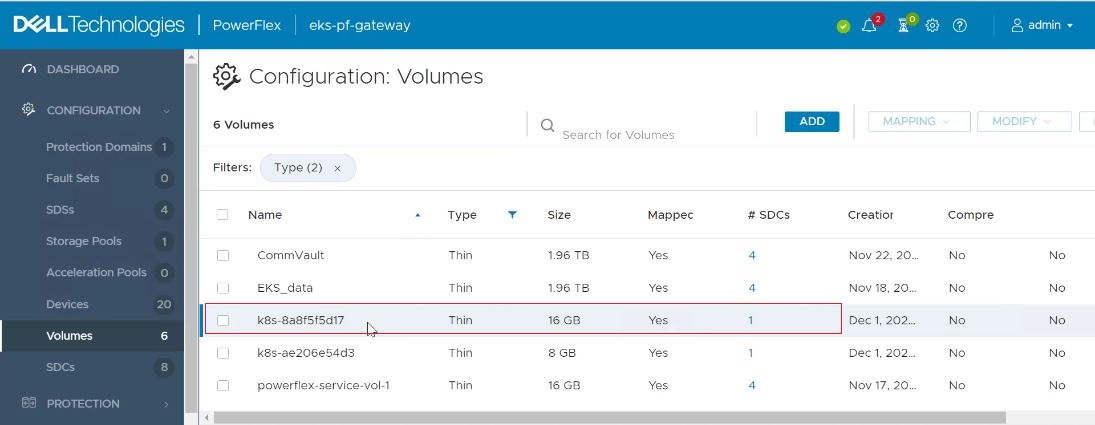
12. Verify that the persistent volume is created in PowerFlex cluster using the PowerFlex UI, as shown in the following figure:

Figure 20. PowerFlex UI
