Home > Storage > PowerFlex > White Papers > Amazon Elastic Kubernetes Service Anywhere on Dell PowerFlex > Set up Ubuntu administrative machine
Set up Ubuntu administrative machine
-
Run the following commands from the admin VM to set up the Ubuntu administrative machine:
sudo apt update
sudo apt install -y docker.io
sudo usermod -a -G docker $USER
wget https://distro.eks.amazonaws.com/kubernetes-1-19/releases/4/artifacts/kubernetes/v1.19.8/bin/linux/amd64/kubectl
mkdir -p $HOME/bin
chmod +x kubectl
mv kubectl $HOME/bin/
echo 'export PATH=$PATH:$HOME/bin' >> ~/.bashrc
Log out and log in back into the system to obtain the correct group permissions and path.
Install EKS Anywhere CLI tool
To install the CLI tool, run the eks-a command, extract the prebuilt binaries from the provided archive. Provide the eks-a binary run permission and move it to the $HOME/bin folder.
curl "https://github.com/weaveworks/eksctl/releases/latest/download/eksctl_$(uname -s)_amd64.tar.gz" \
--silent --location \
| tar xz -C /tmp
sudo mv /tmp/eksctl /usr/local/bin/
Copy
Install the eksctl-anywhere plugin.
chmod +x ./eks-a
mv ./eks-a $HOME/bin/
Import an OVA/OVF template to vSphere
Amazon EKS Anywhere deployment is provided as an OVA file. Download the OVA from the AWS website and then follow the steps to deploy it.
vCenter OVF template deployment steps
1. Right-click your data center and select Deploy OVF Template.
The following figure shows the vSphere Client for the environment:

Figure 3. vSphere OVF template
2. Select an OVF template using the URL or by selecting a local OVF file and clicking Next, as shown in the following figure. If you cannot select an OVF template using the URL, download the file and use the Local file option.
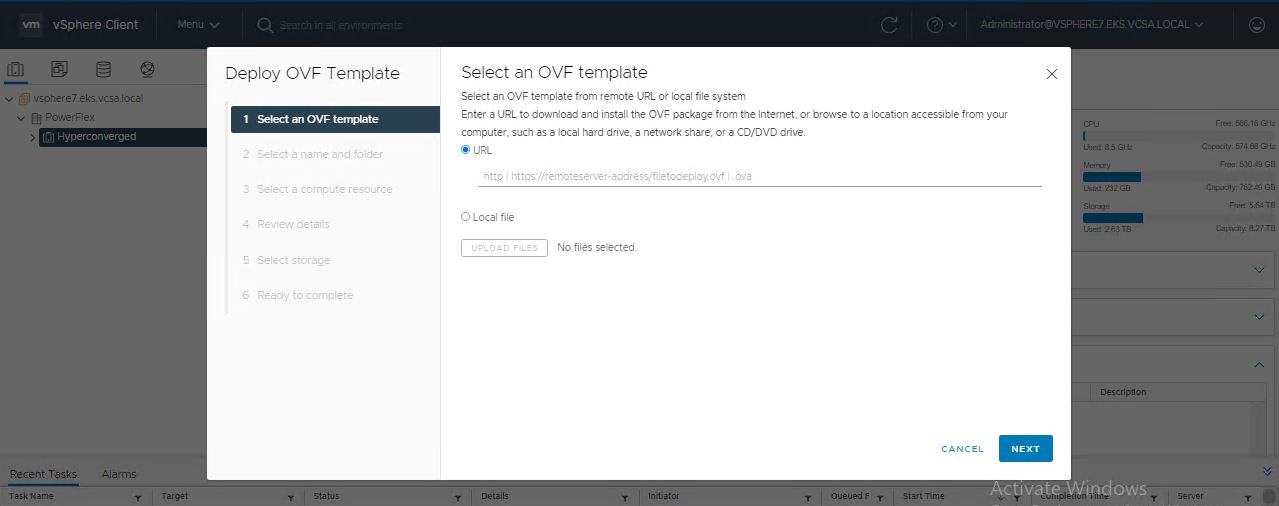
Figure 4. Downloading OVF template
3. Select a folder in which you want to deploy your OVF package and click Next, as shown in the following figure:
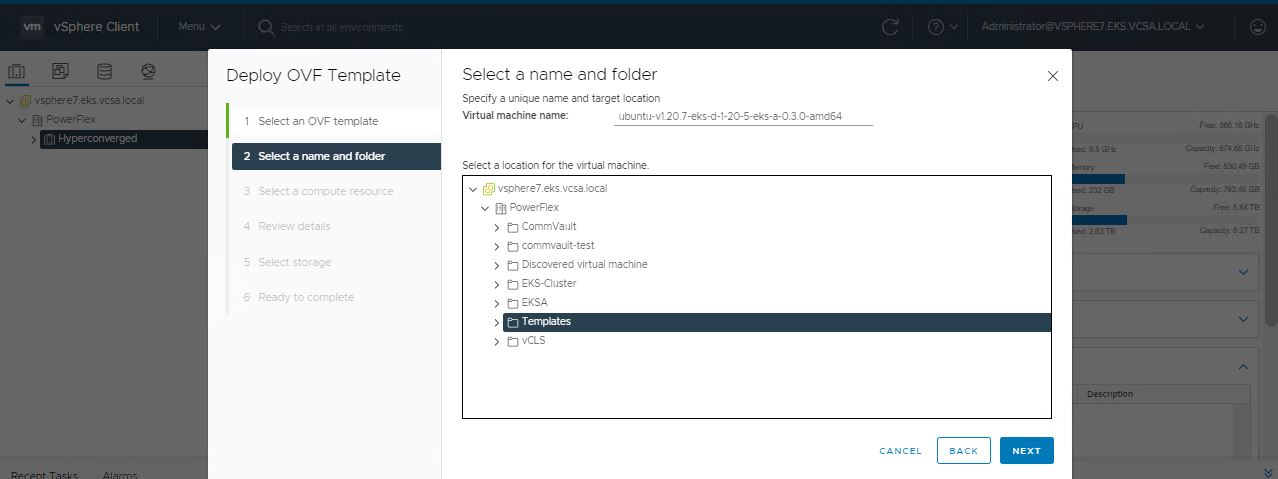
Figure 5. Deploying OVF template
Note: You cannot have two OVF templates with the same name in one directory. For workload VM templates, leave the Kubernetes version in the template name for reference. A workload VM template supports at least one prior Kubernetes major version.
4. Select a compute resource.
5. Review the details and click Next.
6. Accept the agreement and click Next.
7. Select the appropriate storage and click Next.
8. Select the destination network, click Next, and then click Finish.
9. Take a snapshot of the VM, as shown in the following figure. Right-click the imported VM and select Snapshots > Take snapshot.
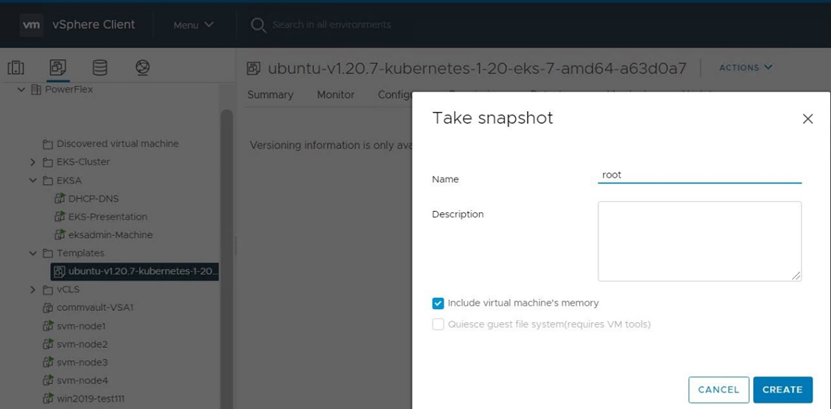
Figure 6. Taking a snapshot
10. Name your snapshot and click Create.
Snapshots for the imported VM are displayed under the Snapshots tab for the VM, as shown in the following figure:
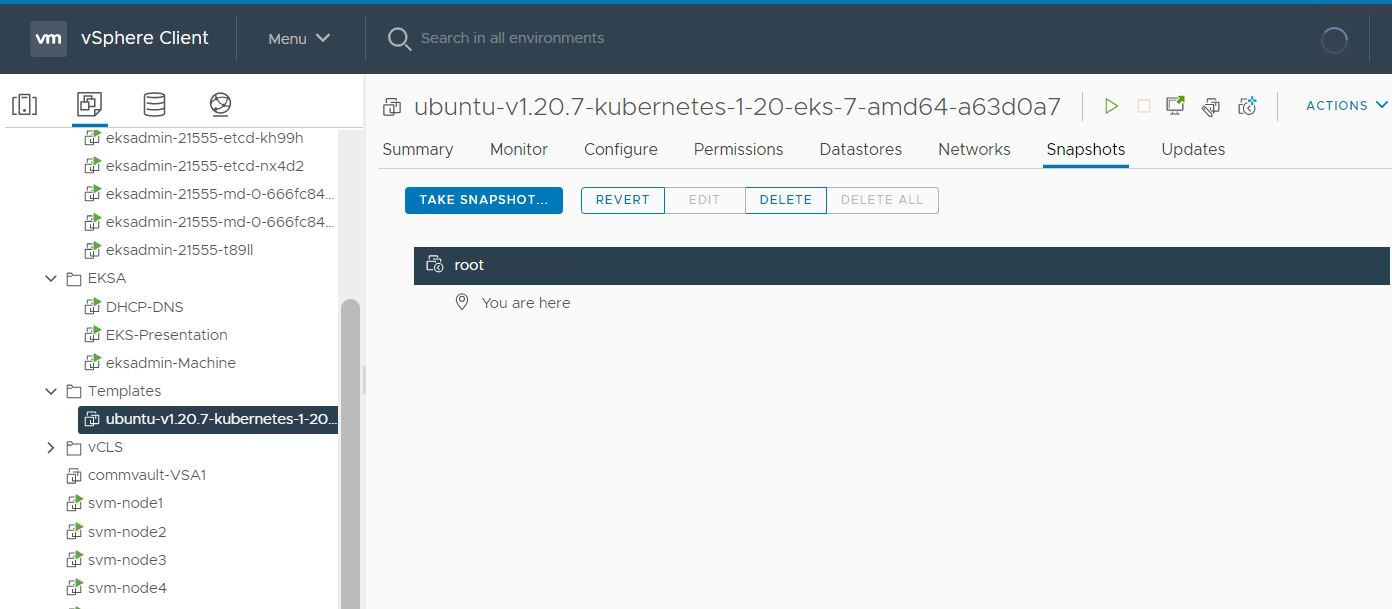
Figure 7. Managing a snapshot
11. Right-click the imported VM and select Template > Convert to Template, as shown in the following figure:
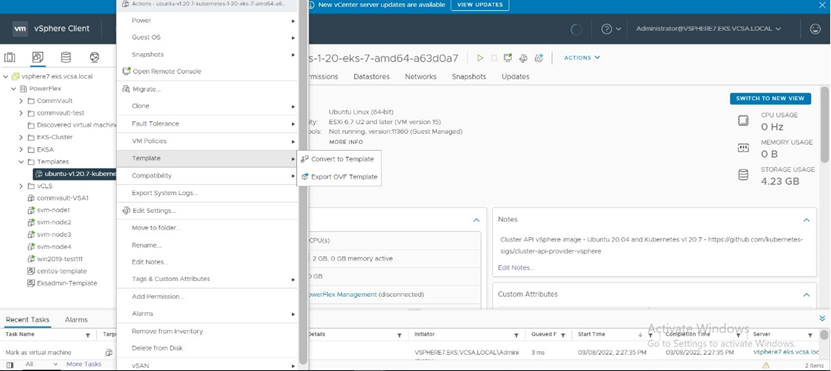
Figure 8. Converting to template
Tag the OVA
You need to create tag categories and associate them with the OVA templates.
Tag to indicate operating system Family
1. Select the newly created template and go to Summary > Tags, as shown in the following figure.
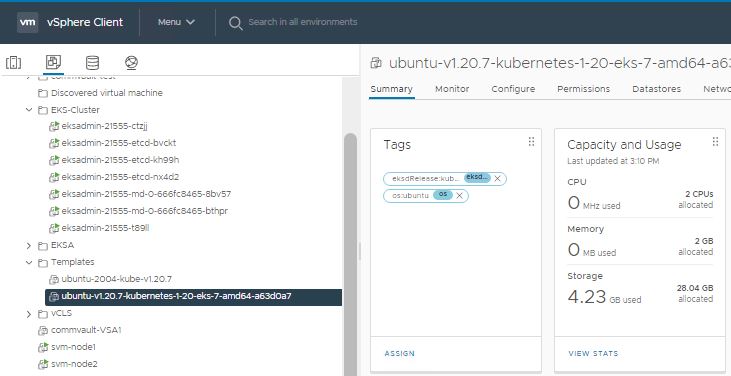
Figure 9. Selecting the new template
2. Click Assign and then click Add Tag to create a tag and attach it
Name the tag: os:ubuntu as shown in the following figure.
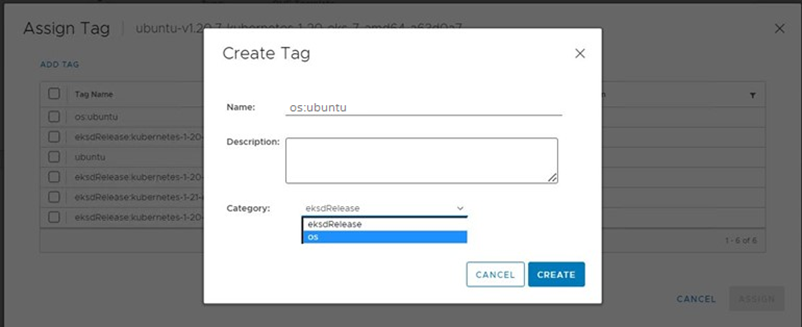
Figure 10. Creating a tag
The following figure shows the Assign Tag window:
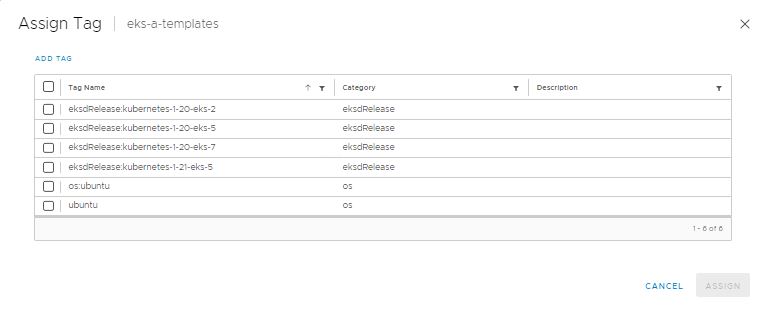
Figure 11. Assigning a tag
Tag to indicate eksd release
1. Select the new template and go to Summary > Tags, as shown in the following figure:
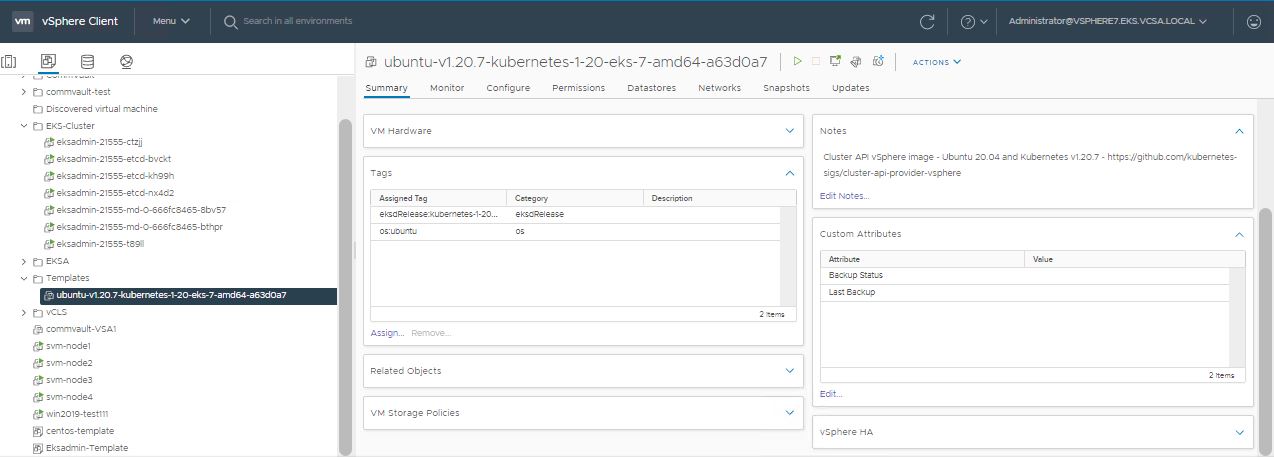
Figure 12. Selecting the new template
2. Click Assign and then click Add Tag to create a new tag, as shown in the following figure.
If you are adding an eksdRelease tag for the first time, create the category first. Click Create New Category and name it eksdRelease.
The following figure shows the Create Tag window where you can create a new category:
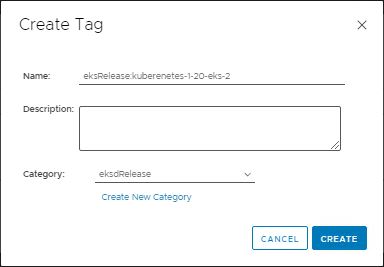
Figure 13. Creating a tag
The following figure shows the Assign Tag window:
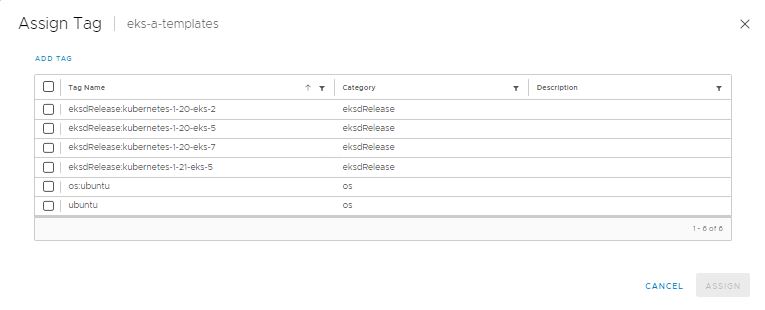
Figure 14. Assigning a tag
3. Name the tag eksdRelease, for example, eksdRelease:kubernetes-1-20-eks-5 for the 1.20 ova.
Note: If the tags are not applied as shown, eks -a template validation fails and CLI operations stop.
