


Setting Up PowerScale for Google Cloud SmartConnect
Wed, 29 Dec 2021 17:48:23 -0000
|Read Time: 0 minutes
In the Dell EMC PowerScale for Google Cloud solution, OneFS uses the cluster service FQDN as its SmartConnect Zone name with a round-robin client-connection balancing policy. The round-robin policy is a default setting and is recommended for most cases in OneFS. (For more details about the OneFS SmartConnect load-balancing policy, see the Load Balancing section of the white paper Dell EMC PowerScale: Network Design Considerations.)
After the cluster is deployed, you must find the OneFS SmartConnect service IP in the clusters page within Google Cloud Console. Then, configure your DNS server to delegate the cluster service FQDN zone to the OneFS Service IP. You need to configure a forwarding rule in Google Cloud DNS which forwards the cluster service FQDN query to the DNS server, and set up a zone delegation on the DNS server that points to the cluster service IP. The following figure shows the DNS query flow by leveraging Google Cloud DNS along with a DNS server in the project.
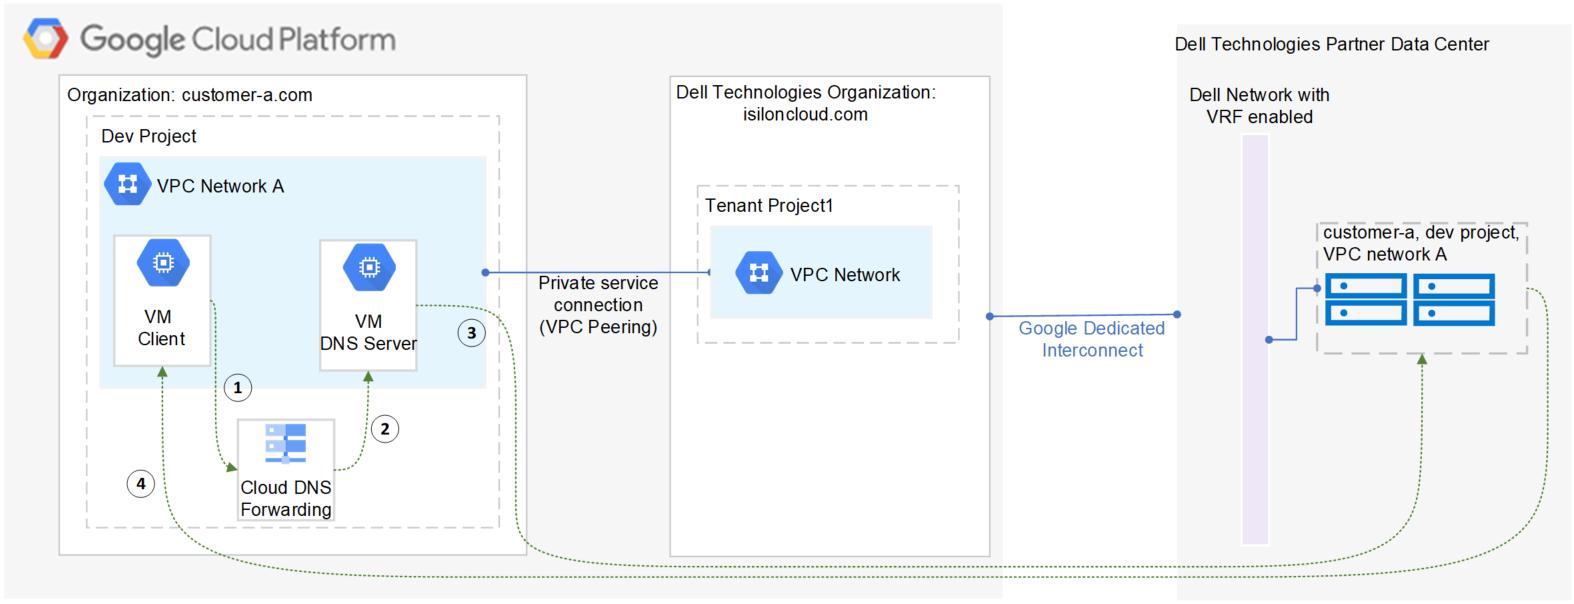
- VM clients send a DNS request for Cluster service FQDN to the Google Cloud DNS service.
- Google Cloud DNS forwards the request to the DNS server.
- The DNS server forwards the request to the cluster service IP. The service IP is responsible for translating the cluster service IP into an available node IP.
- SmartConnect returns a node IP to the client. The client can now access cluster data.
Because Google Cloud DNS cannot communicate with the OneFS cluster directly, we use a DNS server that is located in the authorized VPC network to forward the SmartConnect DNS request to the cluster. You can use either a Windows server or a Linux server. In this blog we use a Windows server to show the detailed steps.
Obtain required cluster information
The following information is required before setting up SmartConnect:
- Cluster service FQDN -- This is the OneFS SmartConnect zone name used by clients.
- Service IP -- This is the OneFS SmartConnect service IP that is responsible for resolving the client DNS request and returning an available node IP to clients.
- Authorized network -- By default, only the machines on an authorized VPC network can access a PowerScale cluster.
To obtain this required information, do the following:
- In the Google Cloud Console navigation menu, click PowerScale and then click Clusters.
- Find your cluster row, where you can see the cluster service FQDN and service IP:

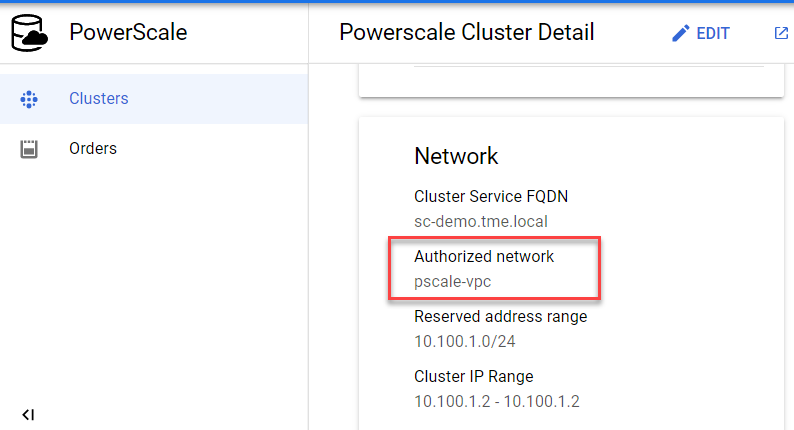
3. To find the authorized network information, click the name of the cluster. From the PowerScale Cluster Details page, find the authorized network from the Network information, highlighted here:
Set up a DNS server
If you already have an available DNS server that is connected to the cluster authorized network, you can use this existing DNS server and skip Step 1 and Step 2 below.
- In the Google Cloud Console navigation menu, click Compute Engine and then click VM instances. In this example, we are creating a Windows VM instance as a DNS server. Make sure your DNS server is connected to the cluster authorized network.
- Log into the DNS server and install DNS Server Role in the Windows machine. (If you are using a Linux machine, you can use Bind software instead.)
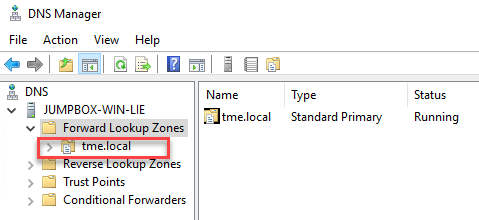
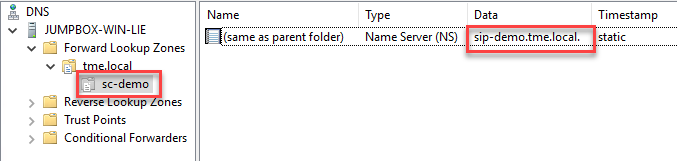
- Create a new DNS zone in the DNS server:
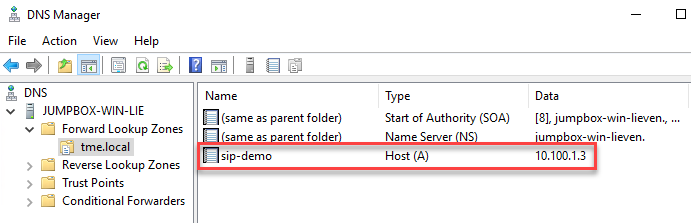
4. Create an (A) record for the cluster service IP. (See the section DNS delegation best practices of the white paper Dell EMC PowerScale: Network Design Considerations for more details.)
5. Create a new delegation for your cluster service FQDN (sc-demo.tme.local in this example) and point the delegation server to your cluster service IP (A) record created above (sip-demo.tme.local in this example), as shown here:
Configure Cloud DNS and firewall rules
- In the Google Cloud Console navigation menu, click Network services and then click Cloud DNS.
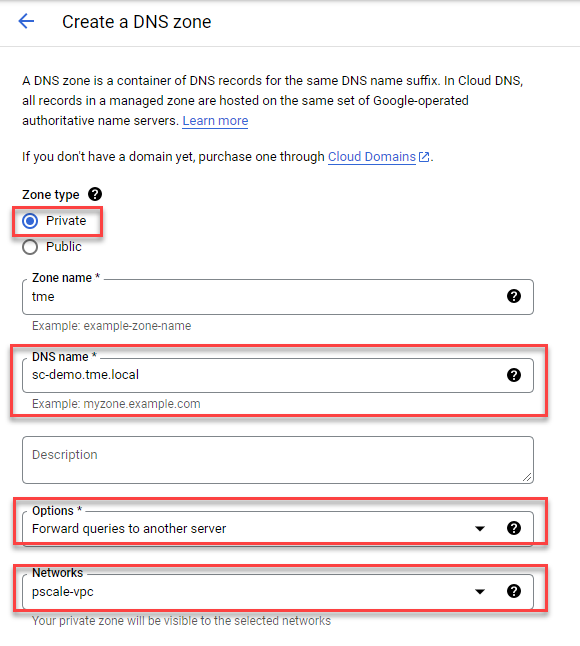
- Click the CREATE ZONE button.
- Choose the Private zone type and enter your Cluster Service FQDN in the DNS name field. Choose Forward queries to another server and your cluster authorized network, as shown here:
4. Obtain the DNS server IP address that you configured in the ‘Set up a DNS server’ step.
5. Point the destination DNS server to your own DNS server IP address, then click the Create button.

6. Add firewall rules to allow ingress DNS traffic to your DNS server from Cloud DNS. In the Google Cloud Console navigation menu, click VPC network and then click Firewall.
7. Click the CREATE FIREWALL RULE button.
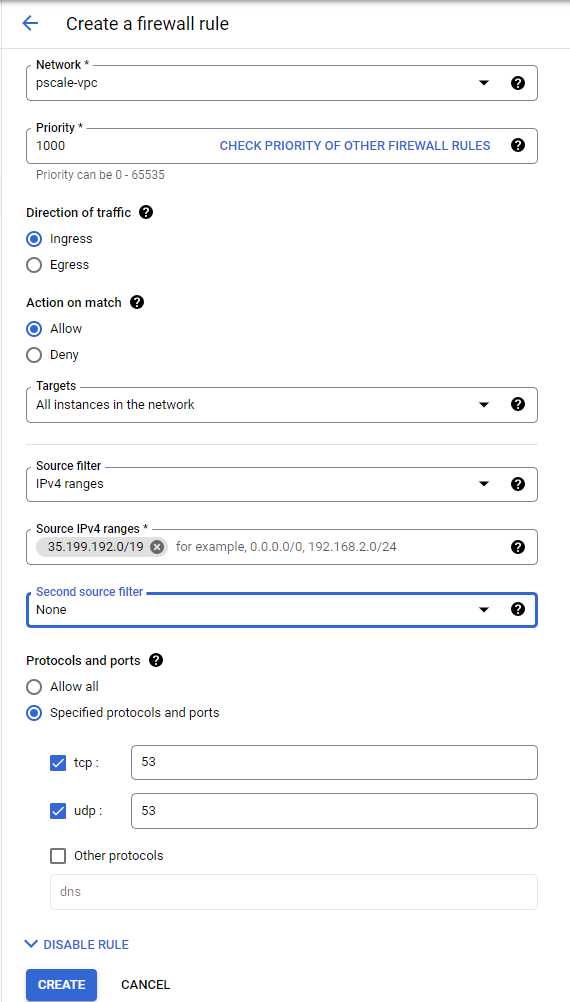
8. Create a new Firewall rule and include the following options:
- In the Network field, make sure the cluster authorized network is selected.
- Source filter: IPv4 ranges
- Source IPv4 ranges: 35.199.192.0/19. This is the IP range Cloud DNS requests will originate from. See Cloud DNS zones overview for more details.
- Protocols and ports: TCP 53 and UDP 53.
See the following example:
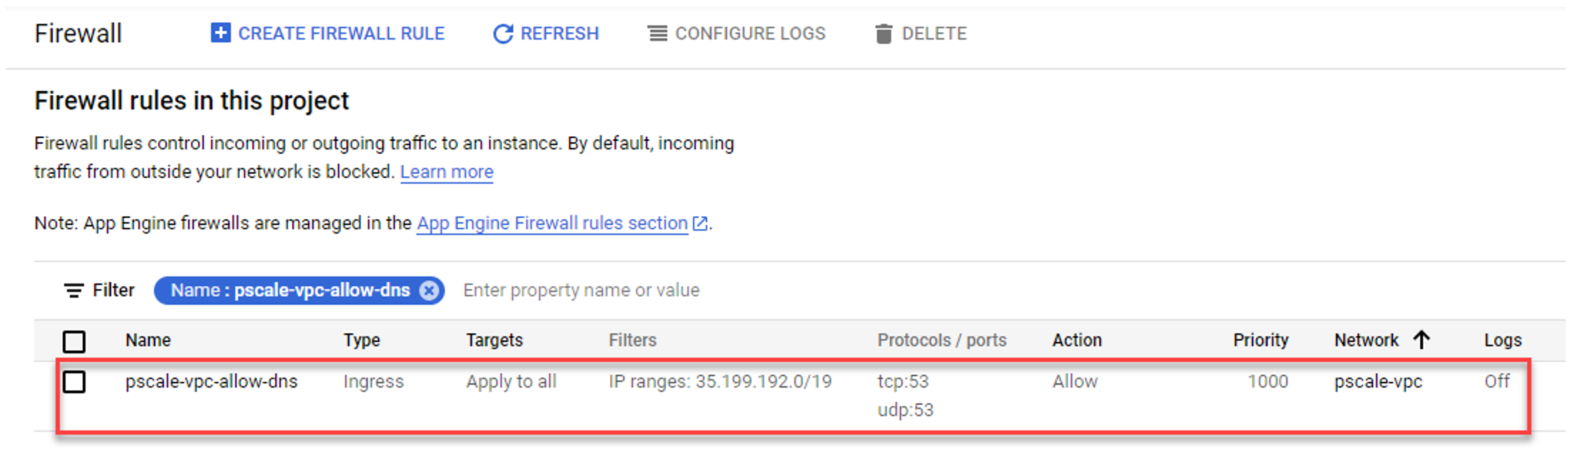
4. The resulting firewall rule in Google Cloud will appear as follows:
Verify your SmartConnect
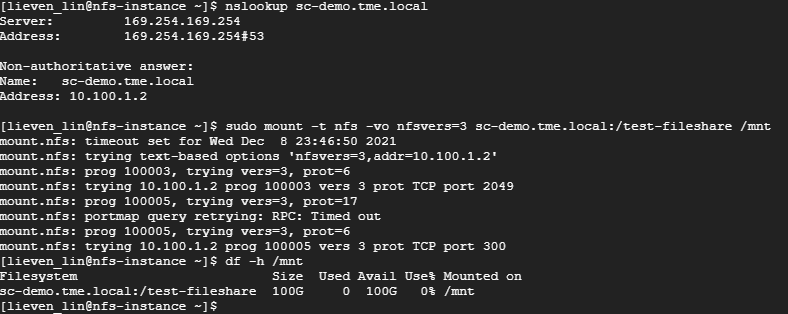
- Log into a VM instance that is connected to an authorized network. (This example uses a Linux machine.)
- Resolve the cluster service FQDN via nslookup and mount a file share via NFS.
Conclusion
PowerScale cluster is a distributed file system composed of multiple nodes. We always recommend using the SmartConnect feature to balance the client connections to all cluster nodes. This way, you can maximize PowerScale cluster performance to provide maximum value to your business. Try it now in your Dell EMC PowerScale for Google Cloud solution.
Author: Lieven Lin