
Perform a BMR with Data Manager custom WinPE ISO image
Perform a BMR with Data Manager custom WinPE ISO image
-
The PowerProtect Data Manager and Windows files that are part of the ISO image enable the system to boot and run the PowerProtect Data Manager system Recovery Wizard.
Note: Ensure that the hardware on the target computer is operational and that the target computer is similar in make, model, and hardware configuration to the source computer to be recovered. For more details, see the PowerProtect Data Manager File System User Guide.
The target host boots with the custom WinPE image, either locally or over the network. Run the PowerProtect Data Manager Bare Metal Recovery Wizard as follows:
- On the Welcome page, specify the date, time, and time zone for the host.
The default value is the system date and time of the local host.

Figure 24. PowerProtect Data Manager BMR welcome page
- On the Select NIC page, select the network interface for communication with Data Manager during the BMR. If the required NIC driver is not in the list, click Load Driver to browse to it.
Note: The driver must not require a restart. The WinPE environment loads only in memory, and changes are not persistent across a restart. If a restart prompt appears, you may be able to ignore the prompt. Most NIC drivers are plug-and-play.
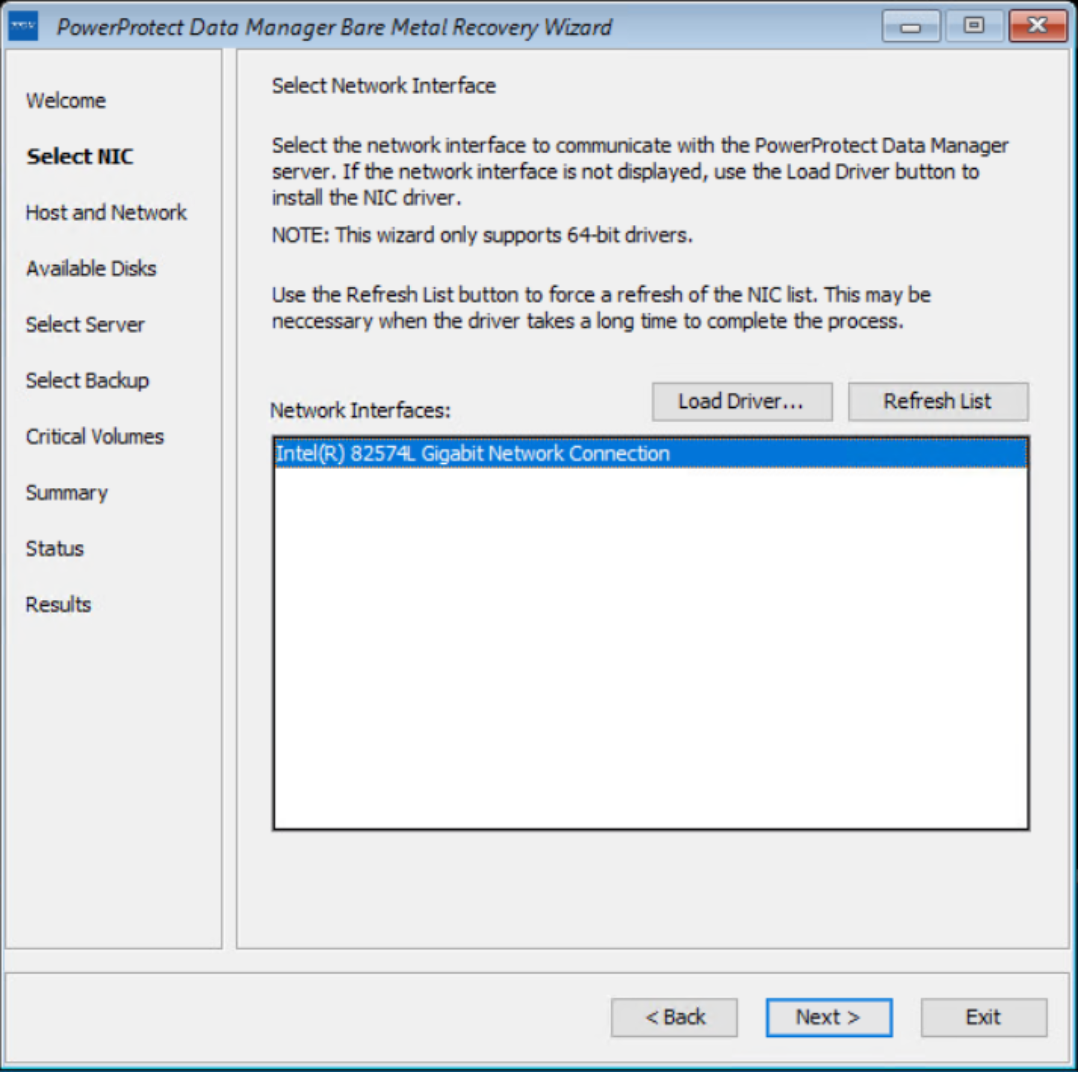
Figure 25. Selecting the network interface
- On the Host and Network Configuration page, enter the hostname of the target host and the domain name for the host.

Figure 26. Host configuration page
- On the Available Disks page, verify the disk configuration.
The size and number of hard disks that are added to the target machine should be either equal to or greater than the size and number of disks on the source machine.
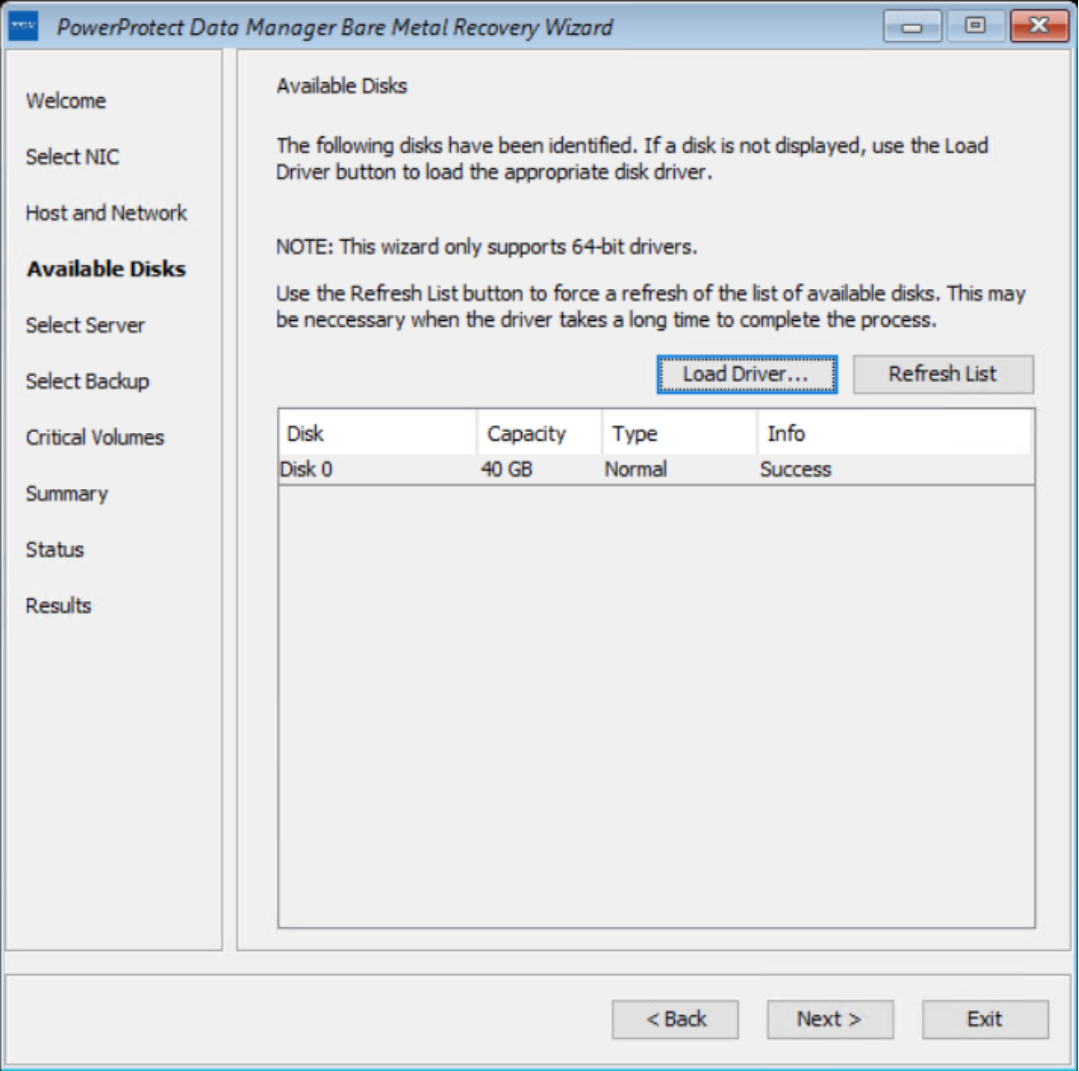
Figure 27. Disk configuration
- On the Select Server page, enter the PowerProtect Data Manager server and source hostname details. In the Server Name or IP field, add the IP of the server or FQDN only.

Figure 28. Page to add the Data Manager server details
- On the Select Backup page, select the source host from the Source Host Name list, and select the backup to be restored to the destination host.
Backups appear in the list in descending order from the most to least recent.
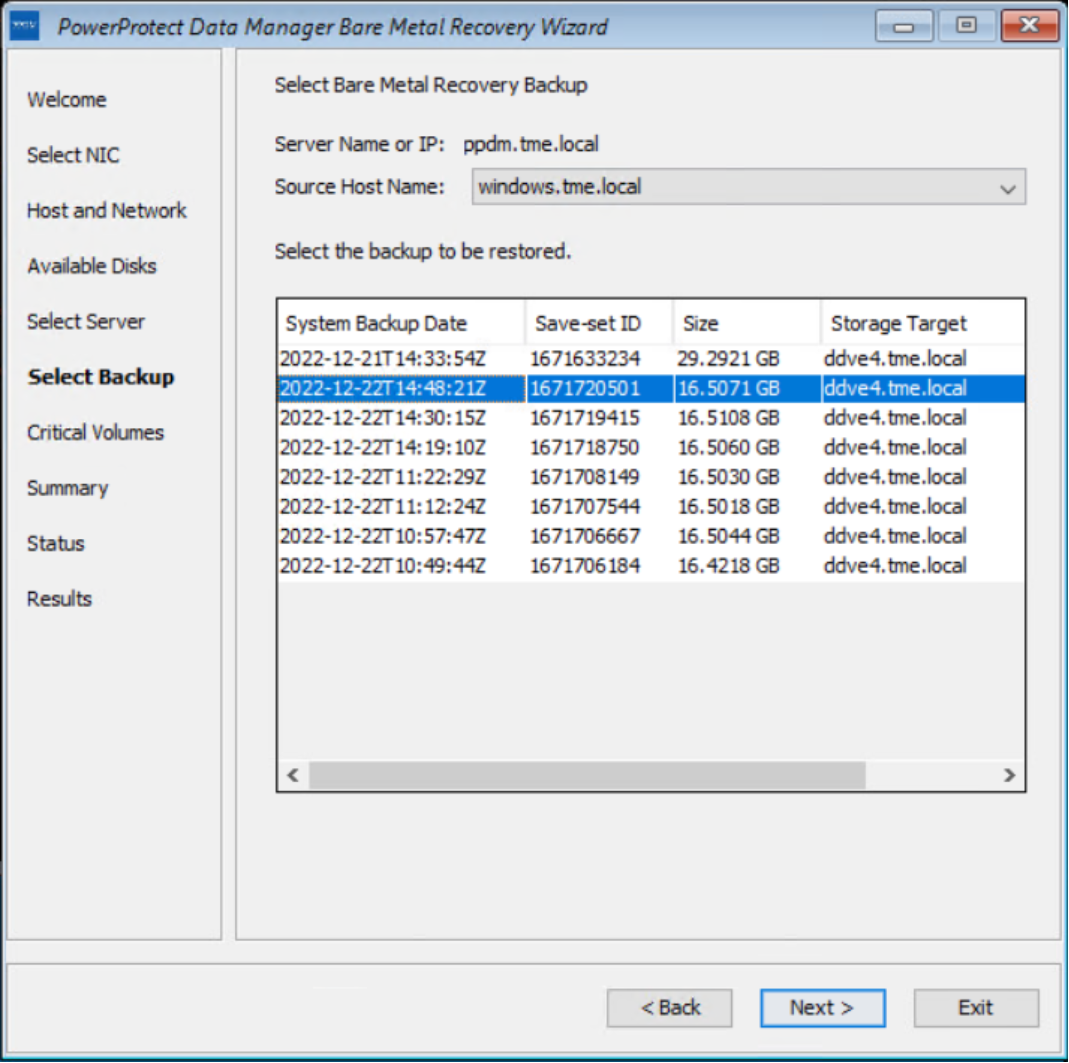
Figure 29. Choose the backup
The Critical Volume page displays the volumes that will be restored and the option to enable a quick disk format.
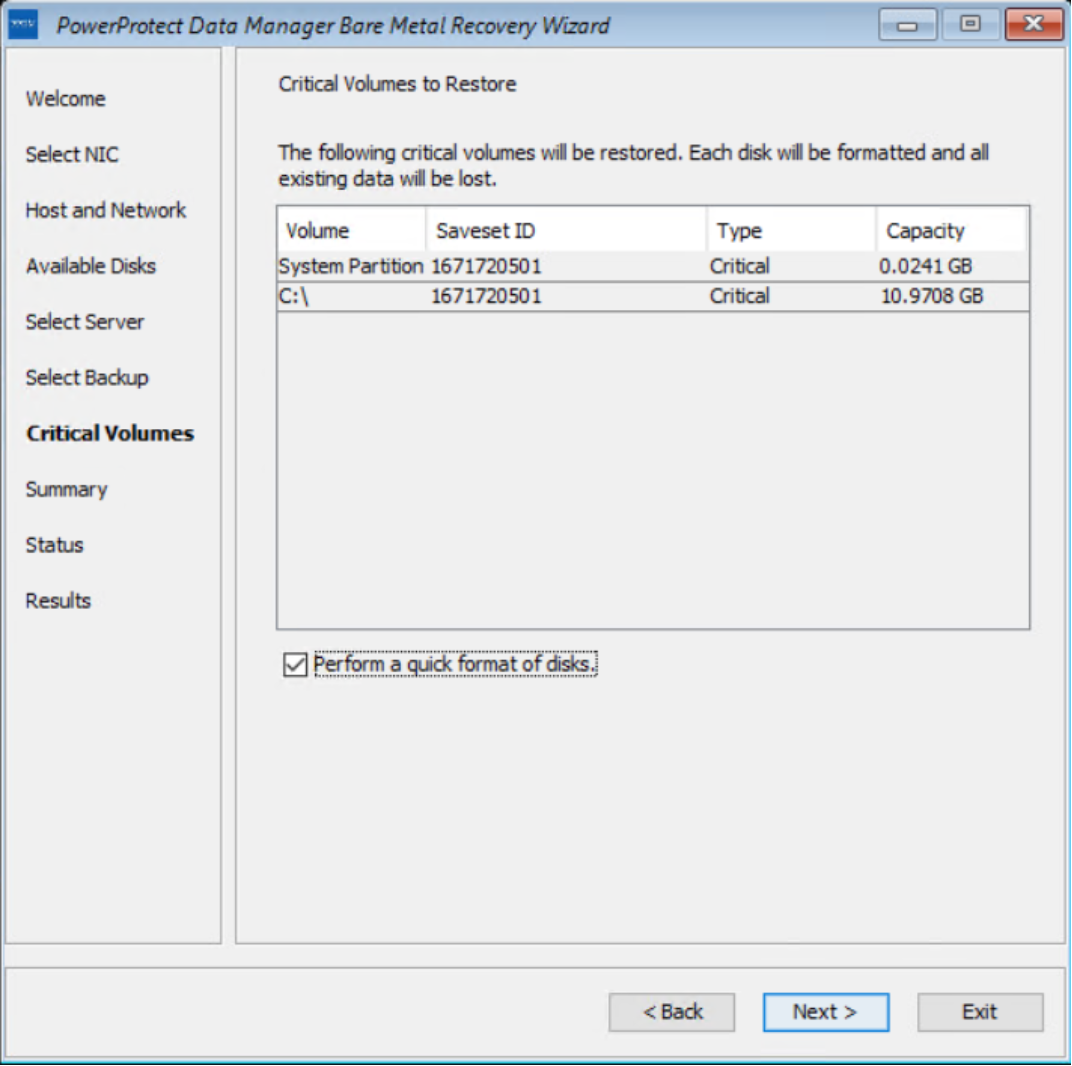
Figure 30. Page displaying the critical volumes to restore
The PowerProtect Data Manager BMR wizard fetches information to perform a BMR.
- To add custom BMR options, click Options next to Custom restore options.

Figure 31. PowerProtect Data Manager BMR wizard fetching information
- Confirm the quick format of disks and restore the backup.
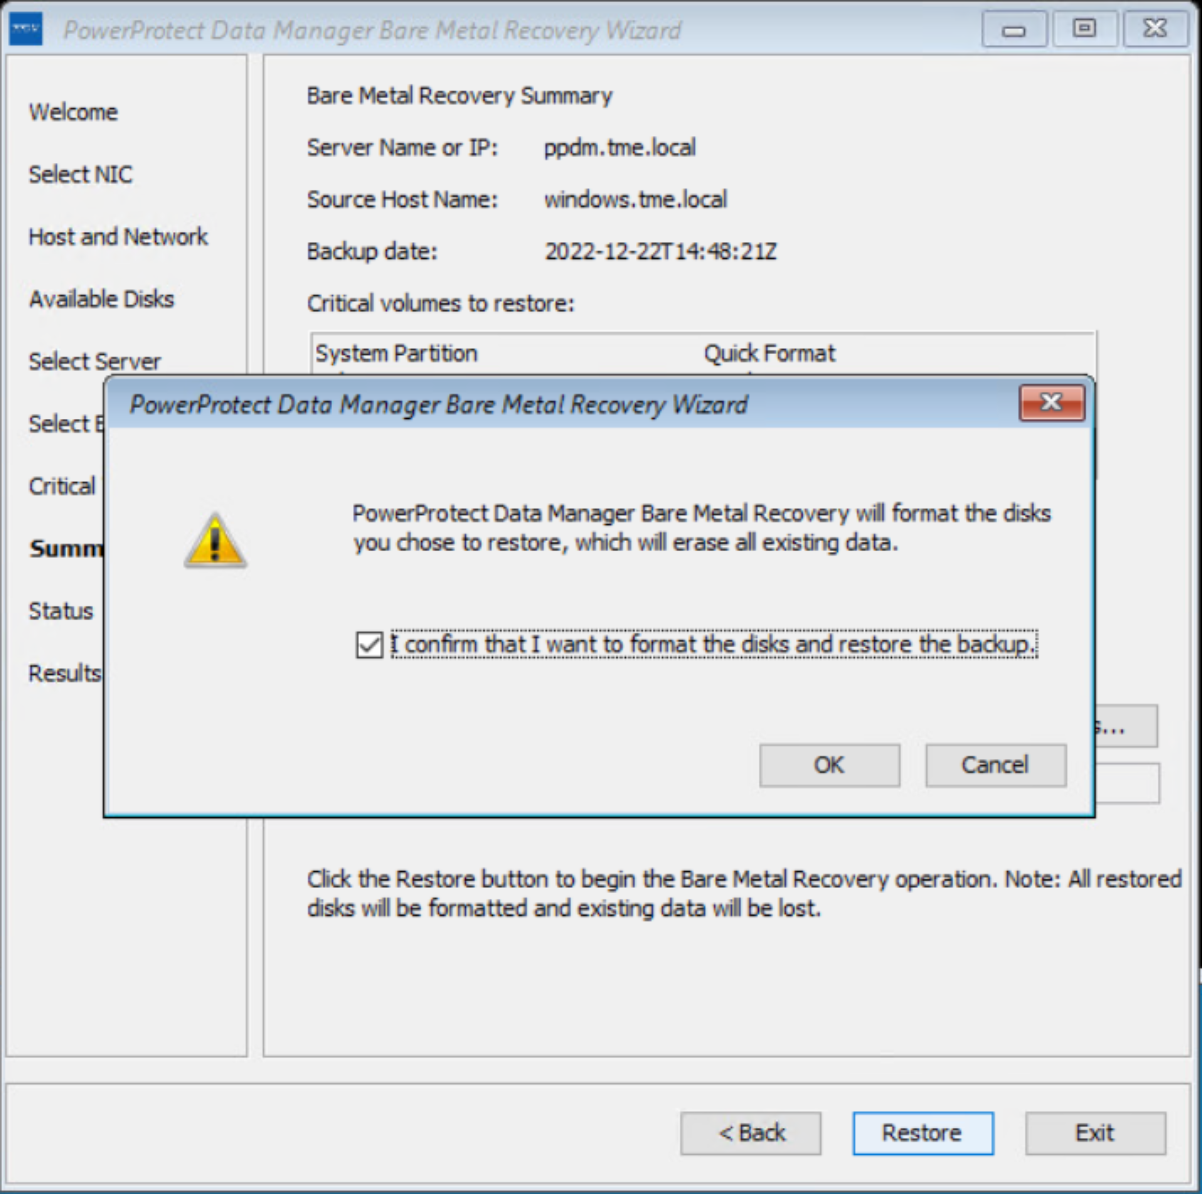
Figure 32. Confirm quick format of disks and restore the backup
The Bare Metal Recovery Status displays the restore progress.
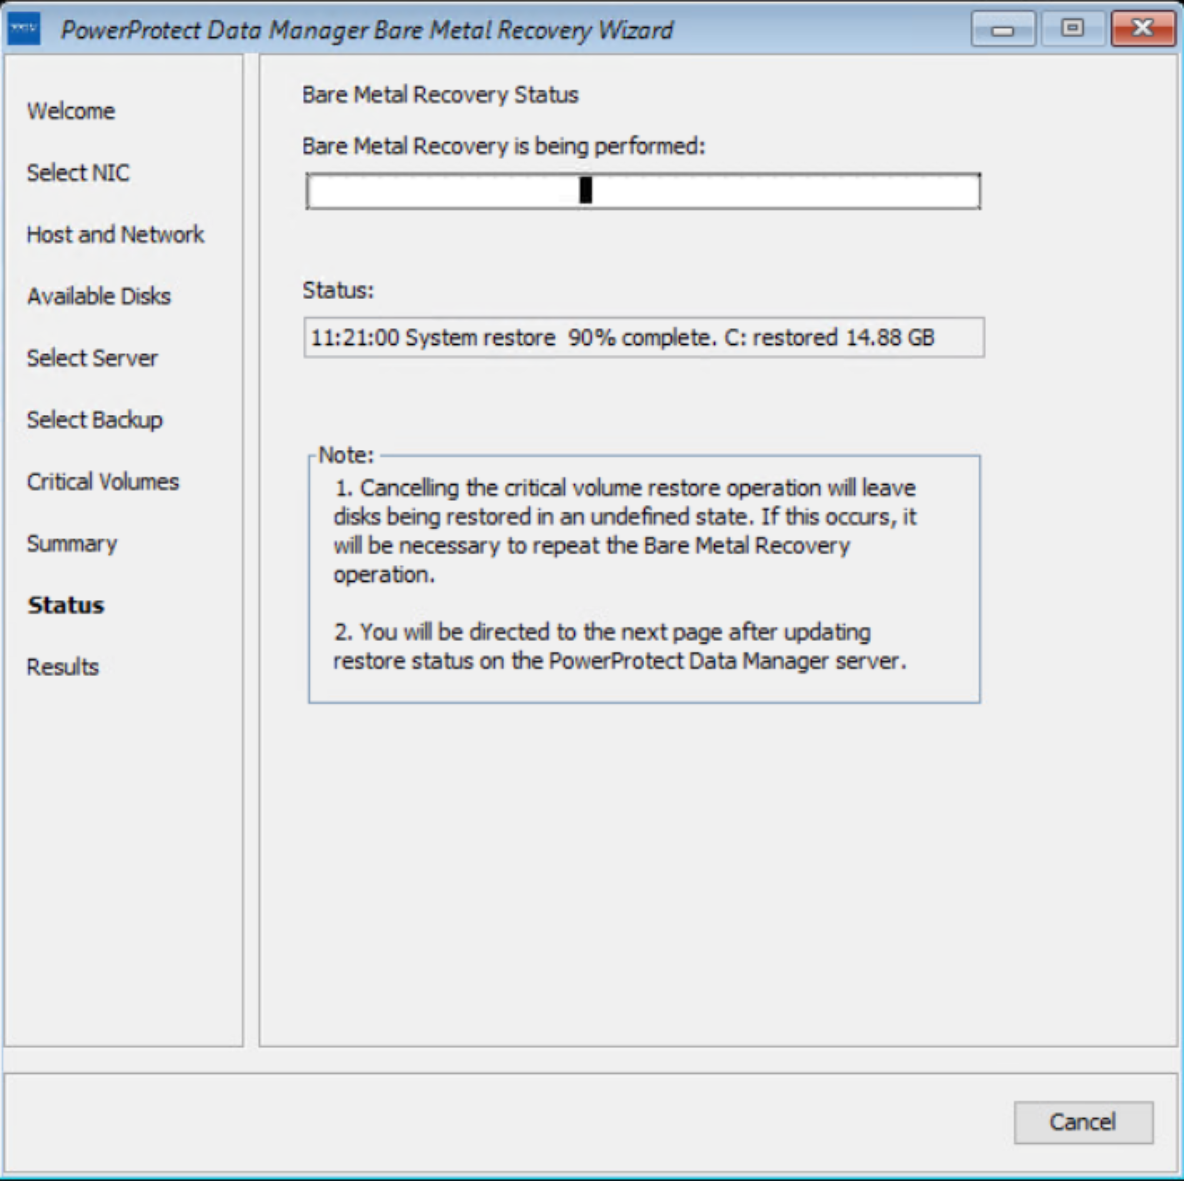
Figure 33. Bare Metal Recovery Status