
Provisioning
Provisioning
-
Creating an NFS datastore using the vSphere Client
Begin by accessing the same wizard shown in Figure 9 to create a datastore.
The New Datastore wizard on startup presents a summary of the required steps to provision a new datastore in vSphere, as seen in the highlighted box in Figure 21. Select the NFS radio button. Select the Type NFS.
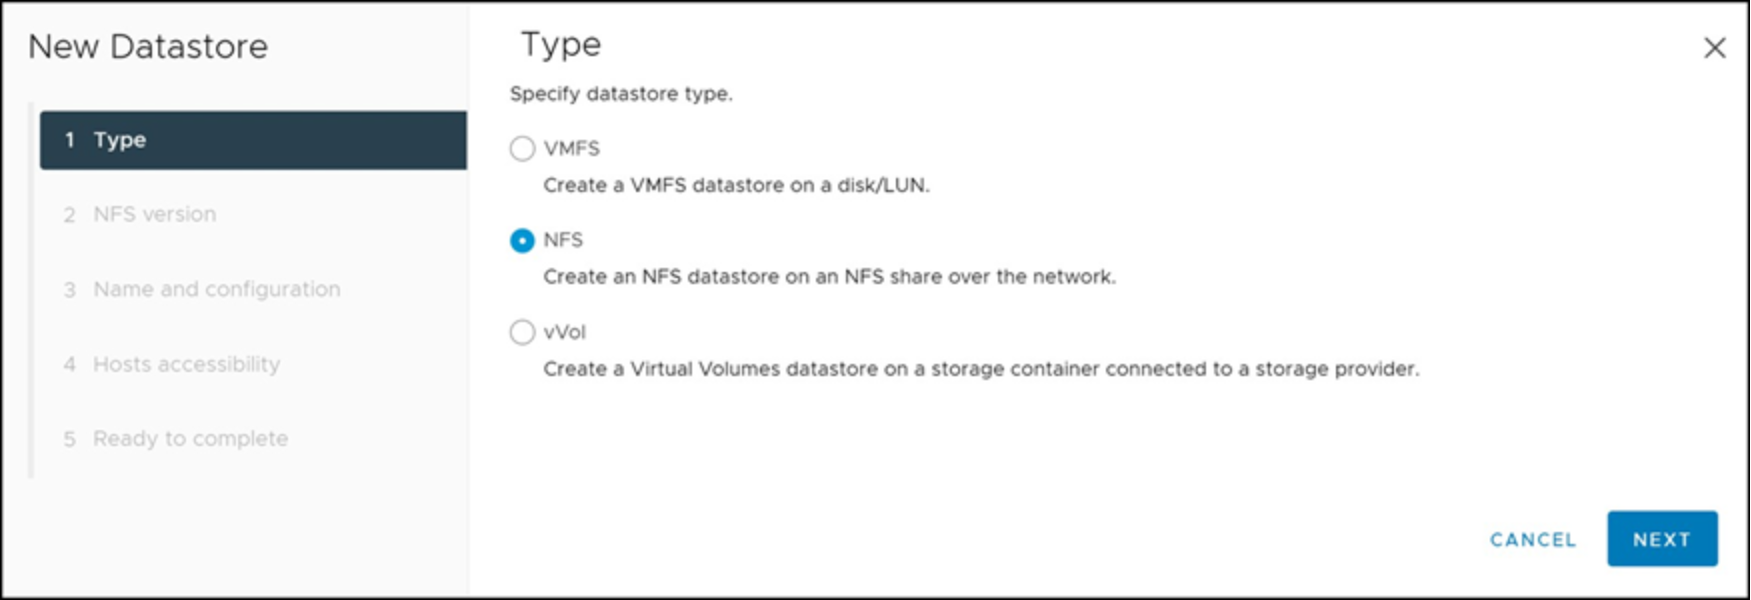
Figure 21. Provisioning a new NFS datastore in the vSphere Client—Type
Selecting the NEXT button in the wizard presents two different options for the NFS version: NFS 3 and NFS 4.1 in Figure 22. Generally, NFS 4.1 is preferable as it has Kerberos support and multipathing; however, in this example NFS 3 is selected.
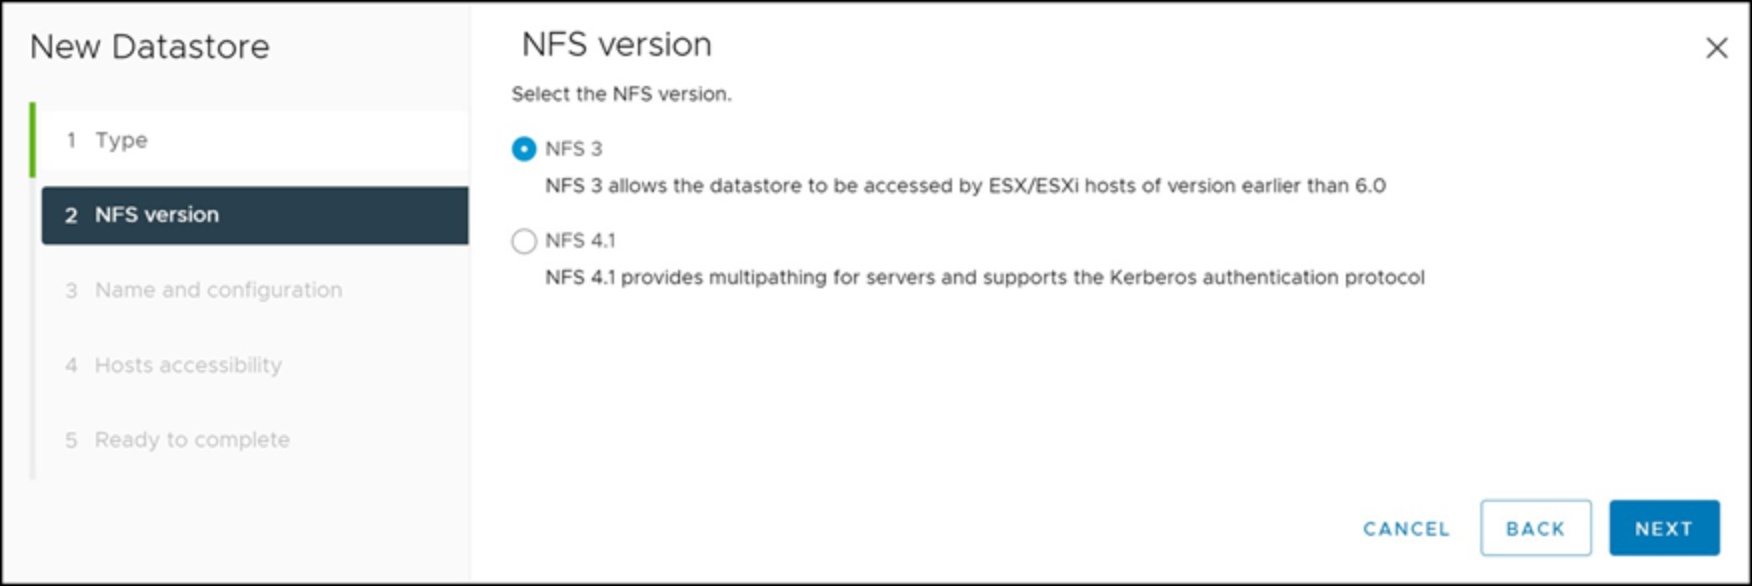
Figure 22. Provisioning a new NFS datastore in the vSphere Client—NFS version
In step 3, all the NFS details are entered. While the Folder and Server values must match the entries from Figure 17, the name of the datastore itself can be any value. In this example, in Figure 23, the same name is selected for continuity.
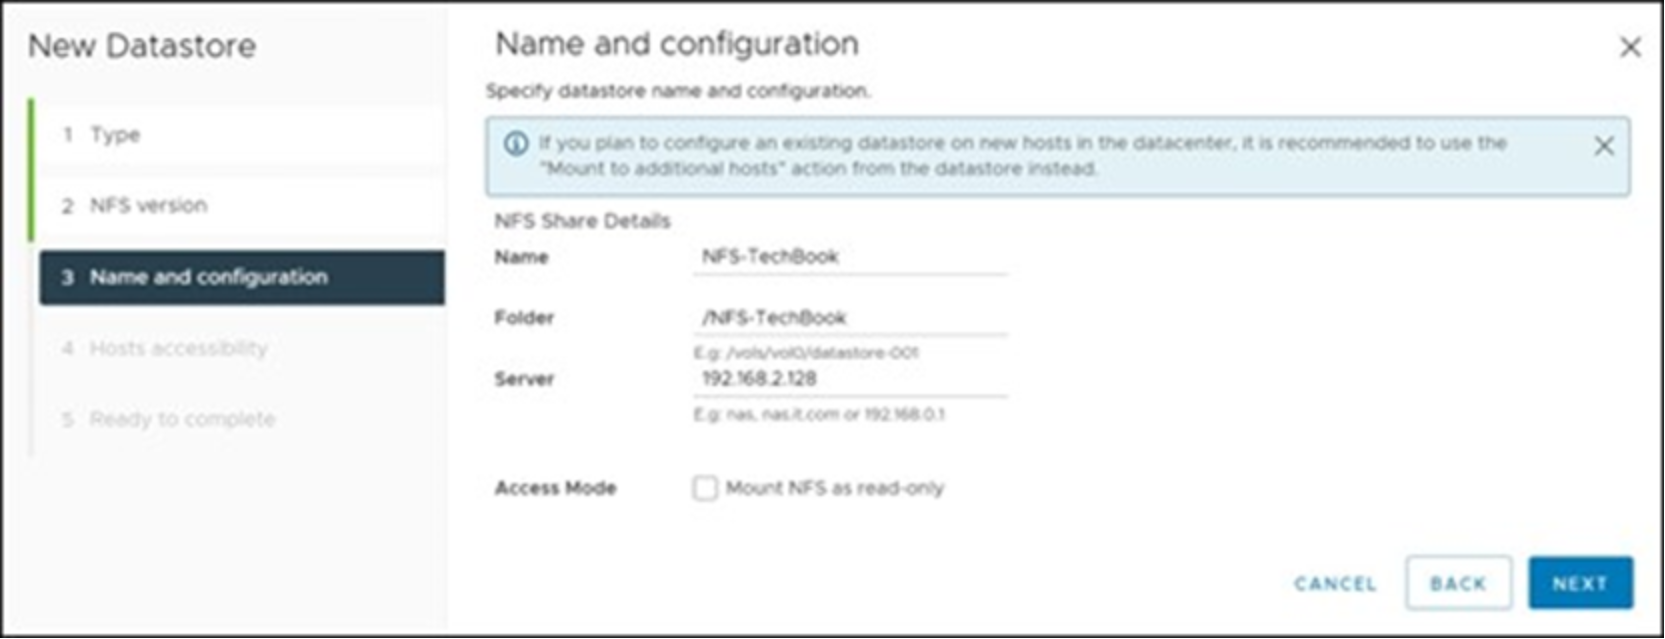
Figure 23. Provisioning a new NFS datastore in the vSphere Client—Name and configuration
In the next screen in Figure 24, choose which hosts in the vSphere Cluster should mount the share. For any file system, the same NFS version should be used across any ESXi host accessing it. In other words, do not mount the NFS-TechBook NFS on one ESXi host using NFS 3, and then on a different ESXi host use NFS 4.1. Using different NFS versions is not supported.

Figure 24. Provisioning a new NFS datastore in the vSphere Client—Host accessibility
The final screen provides a summary, as seen in Figure 25.
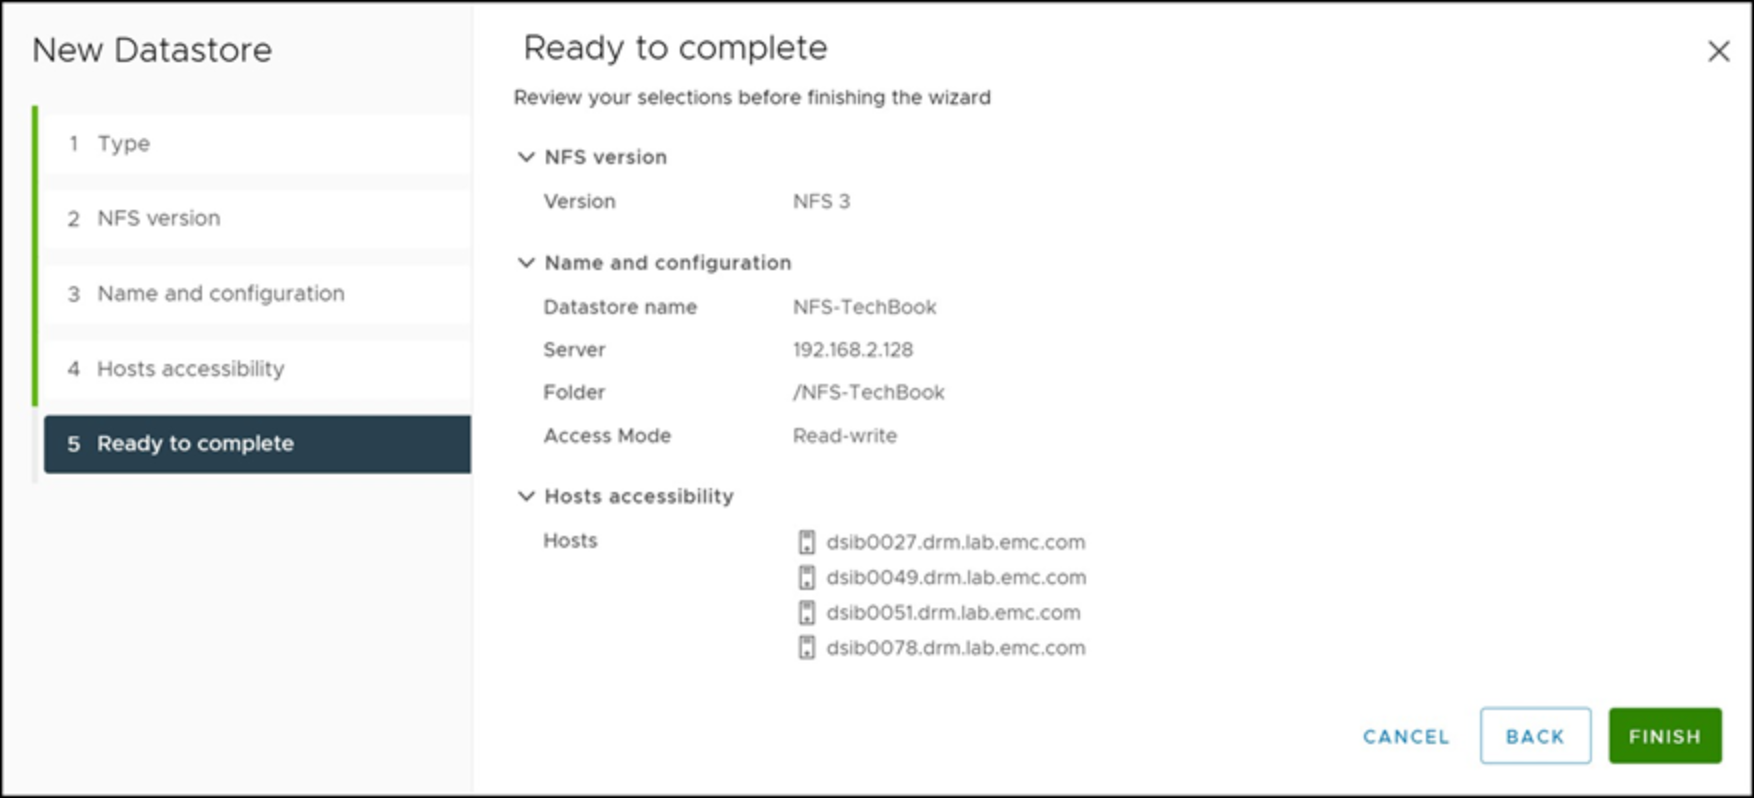
Figure 25. Provisioning a new NFS datastore in the vSphere Client—Summary
Creating an NFS datastore using command-line utilities
VMware ESXi provides a command-line utility, esxcli storage nfs (nfs41 for 4) add, to create NFS datastores. An example is seen in Figure 26.
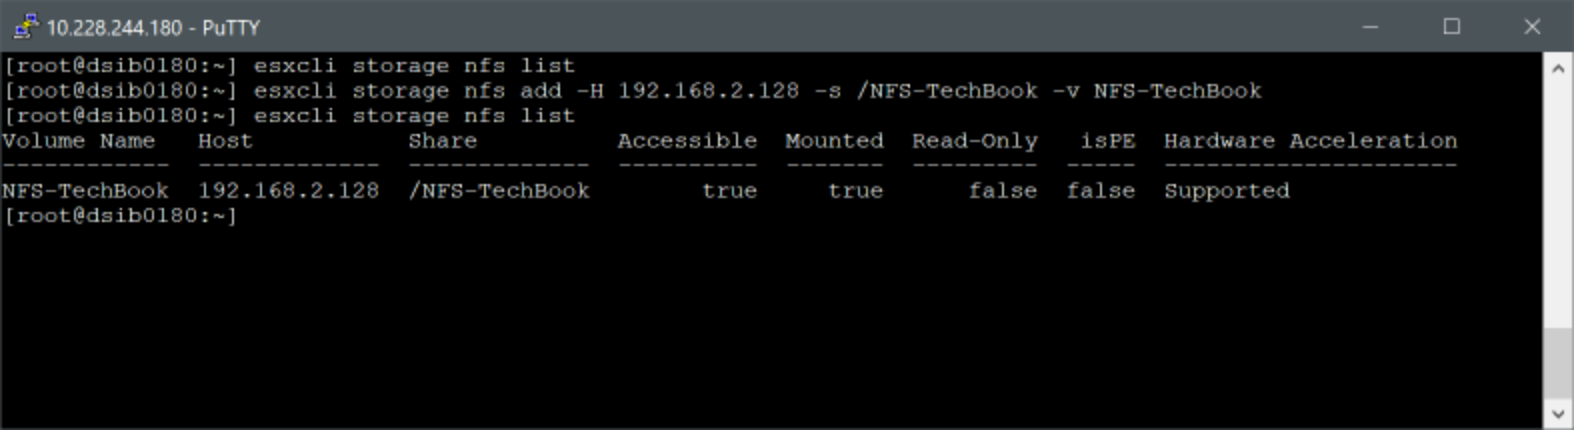
Figure 26. esxcli storage nfs datastore creation
Due to the complexity involved in using command-line utilities, VMware and Dell recommend use of the vSphere Client to create a VMware datastore on Dell PowerMax devices.
Upgrading VMFS volumes from VMFS 5 to VMFS 6
VMware does not support upgrading from VMFS 5 to VMFS 6 datastores because of the changes in metadata in VMFS 6 to make it 4k aligned. VMware offers several detailed use cases on how to move from to VMFS 6. They can be found in VMware article 316475. For most environments a simple Storage vMotion of the VM from VMFS 5 to VMFS 6 is sufficient.