
Blogs

Dell Technologies VEP4600 BIOS/Firmware Upgrade
Thu, 25 Aug 2022 17:11:09 -0000
|Read Time: 0 minutes
This document discusses how to use Dell Unified Firmware upgrade (UFW) utility to upgrade VEP4600 BIOS and other firmware.
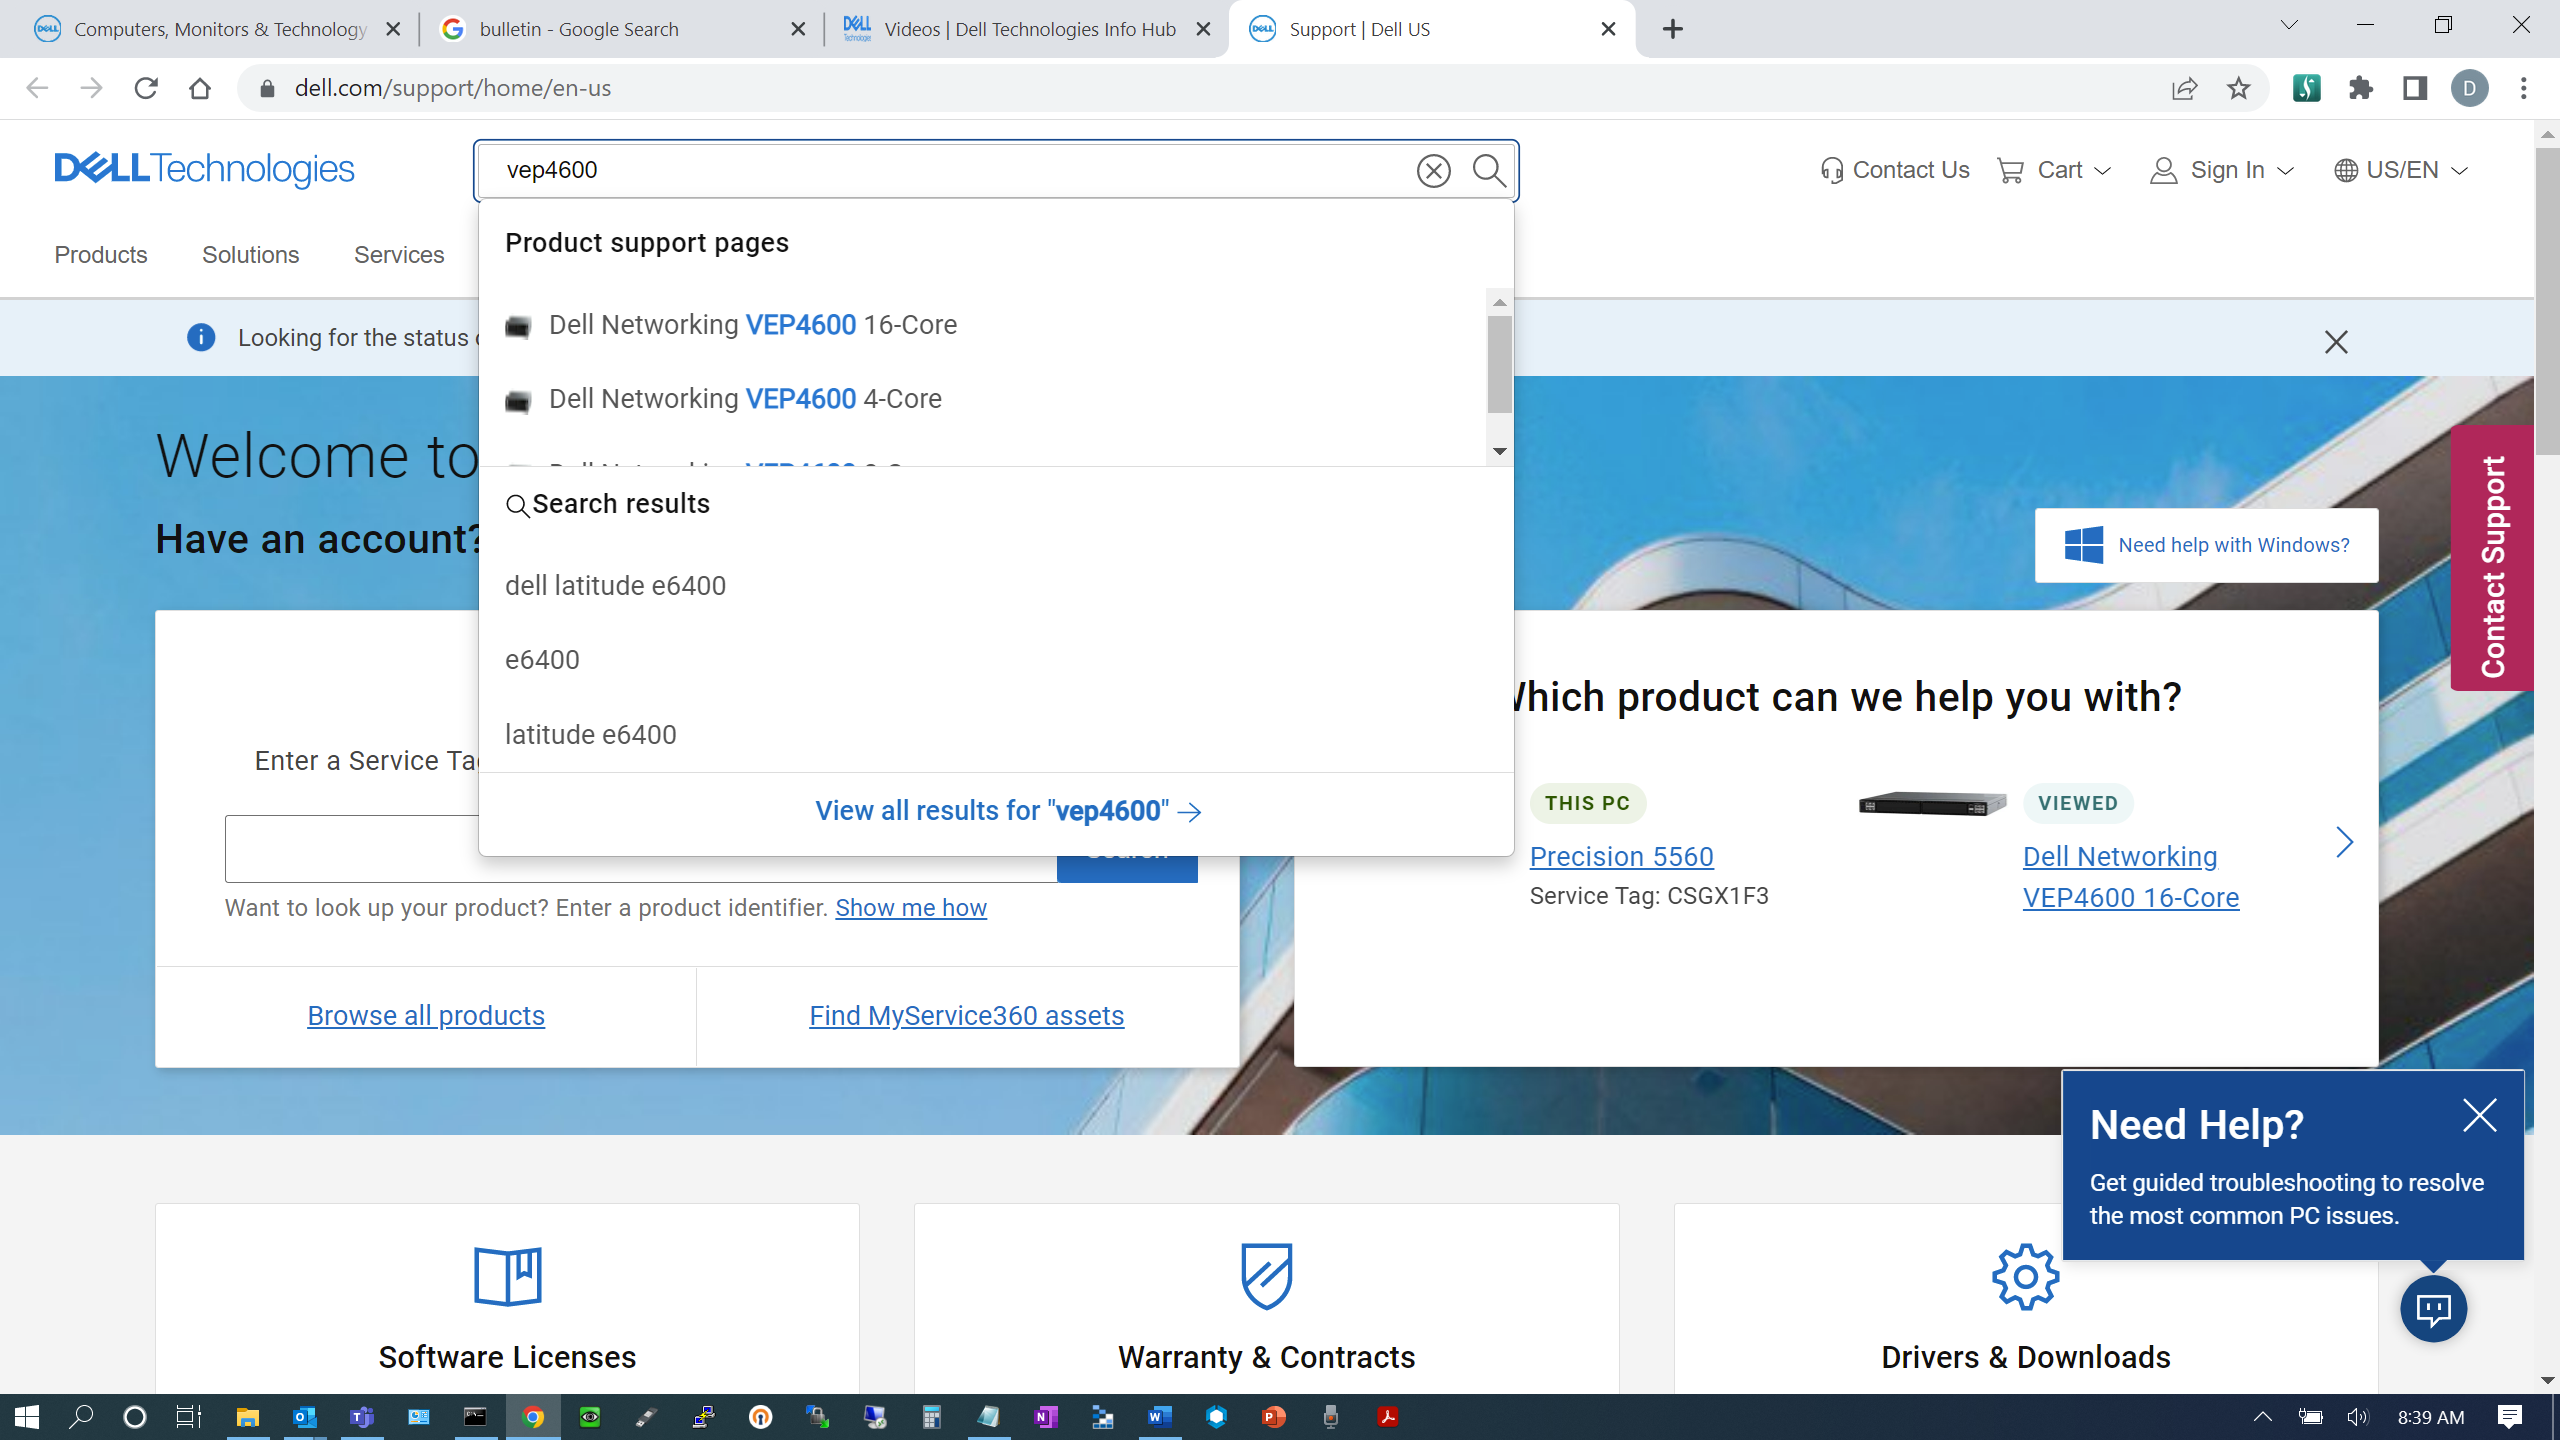
1. Download UFW (Unified Firmware Upgrader) from Dell support portal and search VEP4600, as shown in the following image:
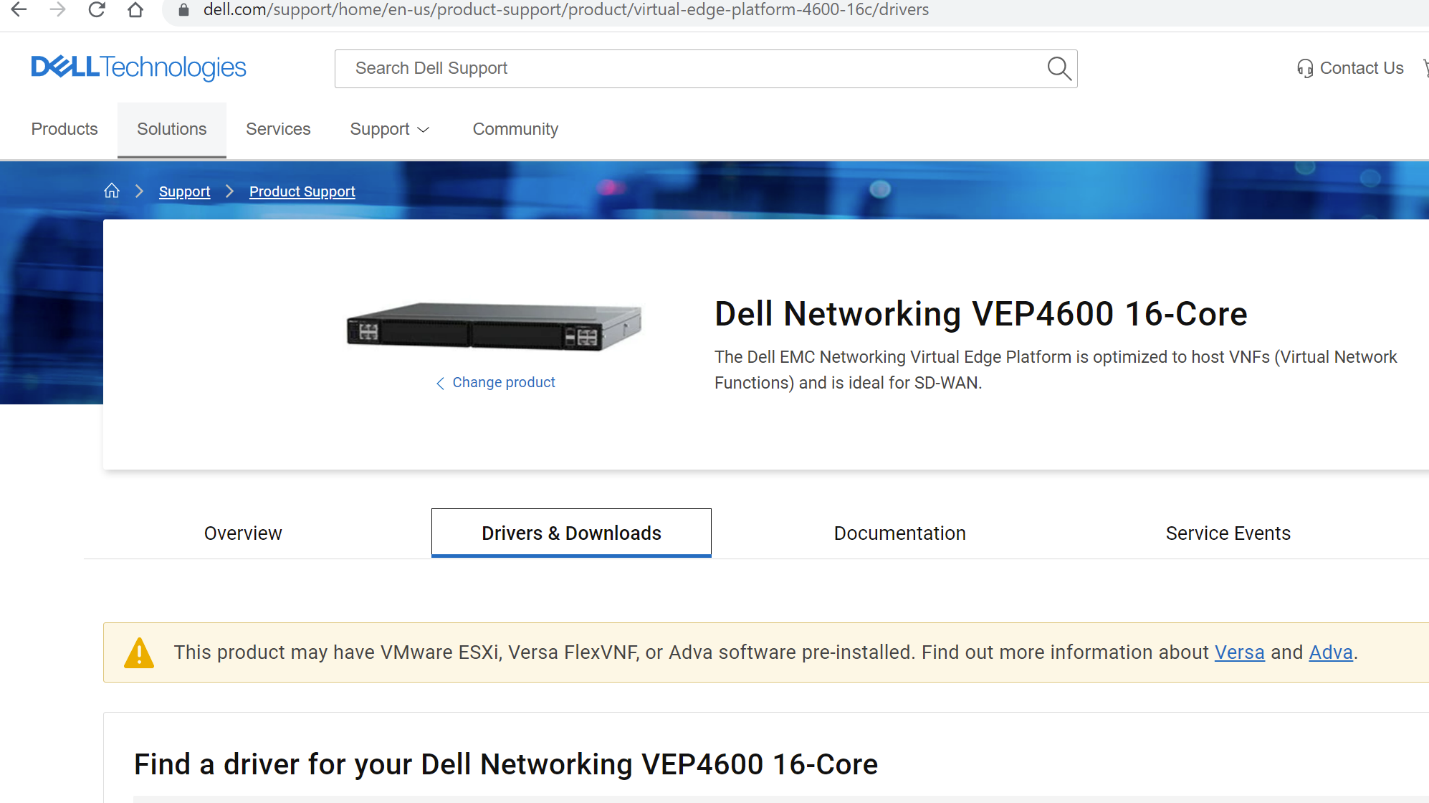
2. Select Dell Networking VEP4600 16-Core or any other VEP4600 models from the dropdown list (UFW works the same on all VEP4600 models).
3. Click the Drivers & Downloads tab.
4. Scroll down and select the following UFW file.
5. Expand Dell EMC Unified Firmware Updater V3.5 for VEP 4600 Switch as shown in the following image:
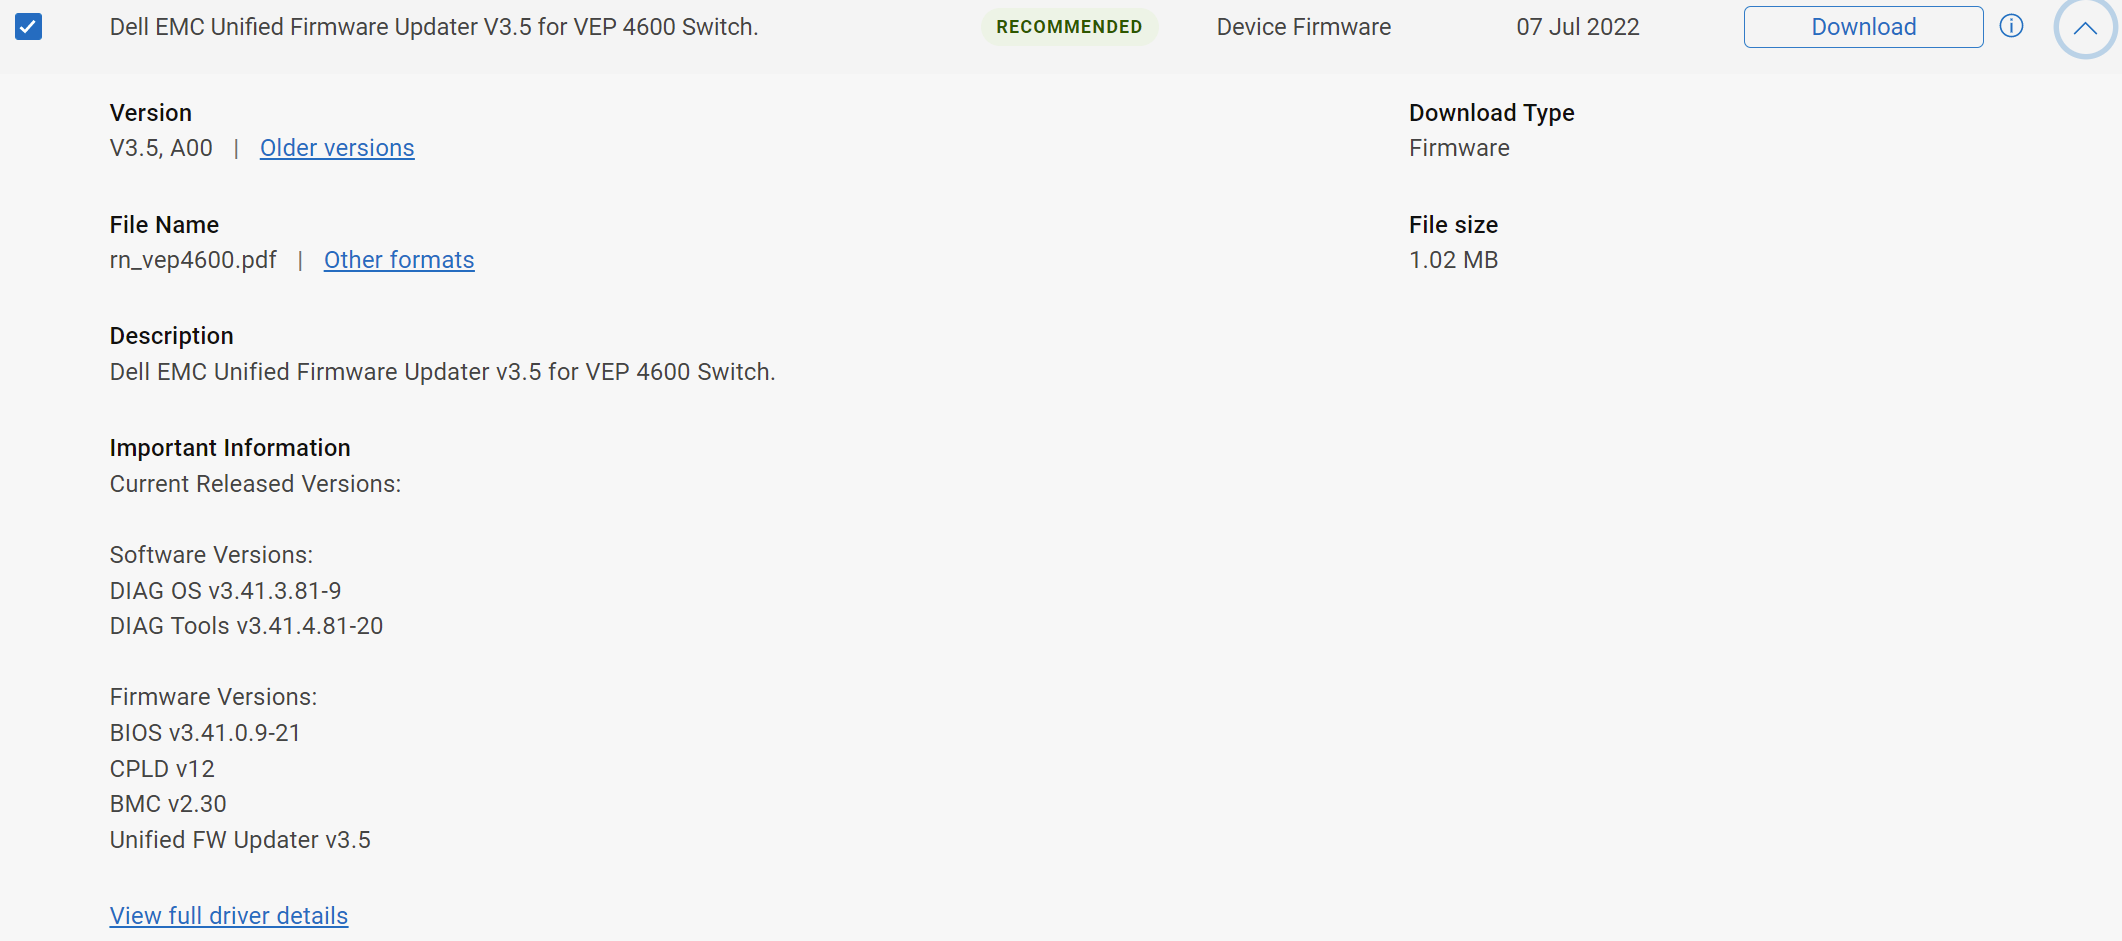
6. Select View full driver details and open the hyperlink
7. Click Download for both file formats to download the release notes and UFW zip file
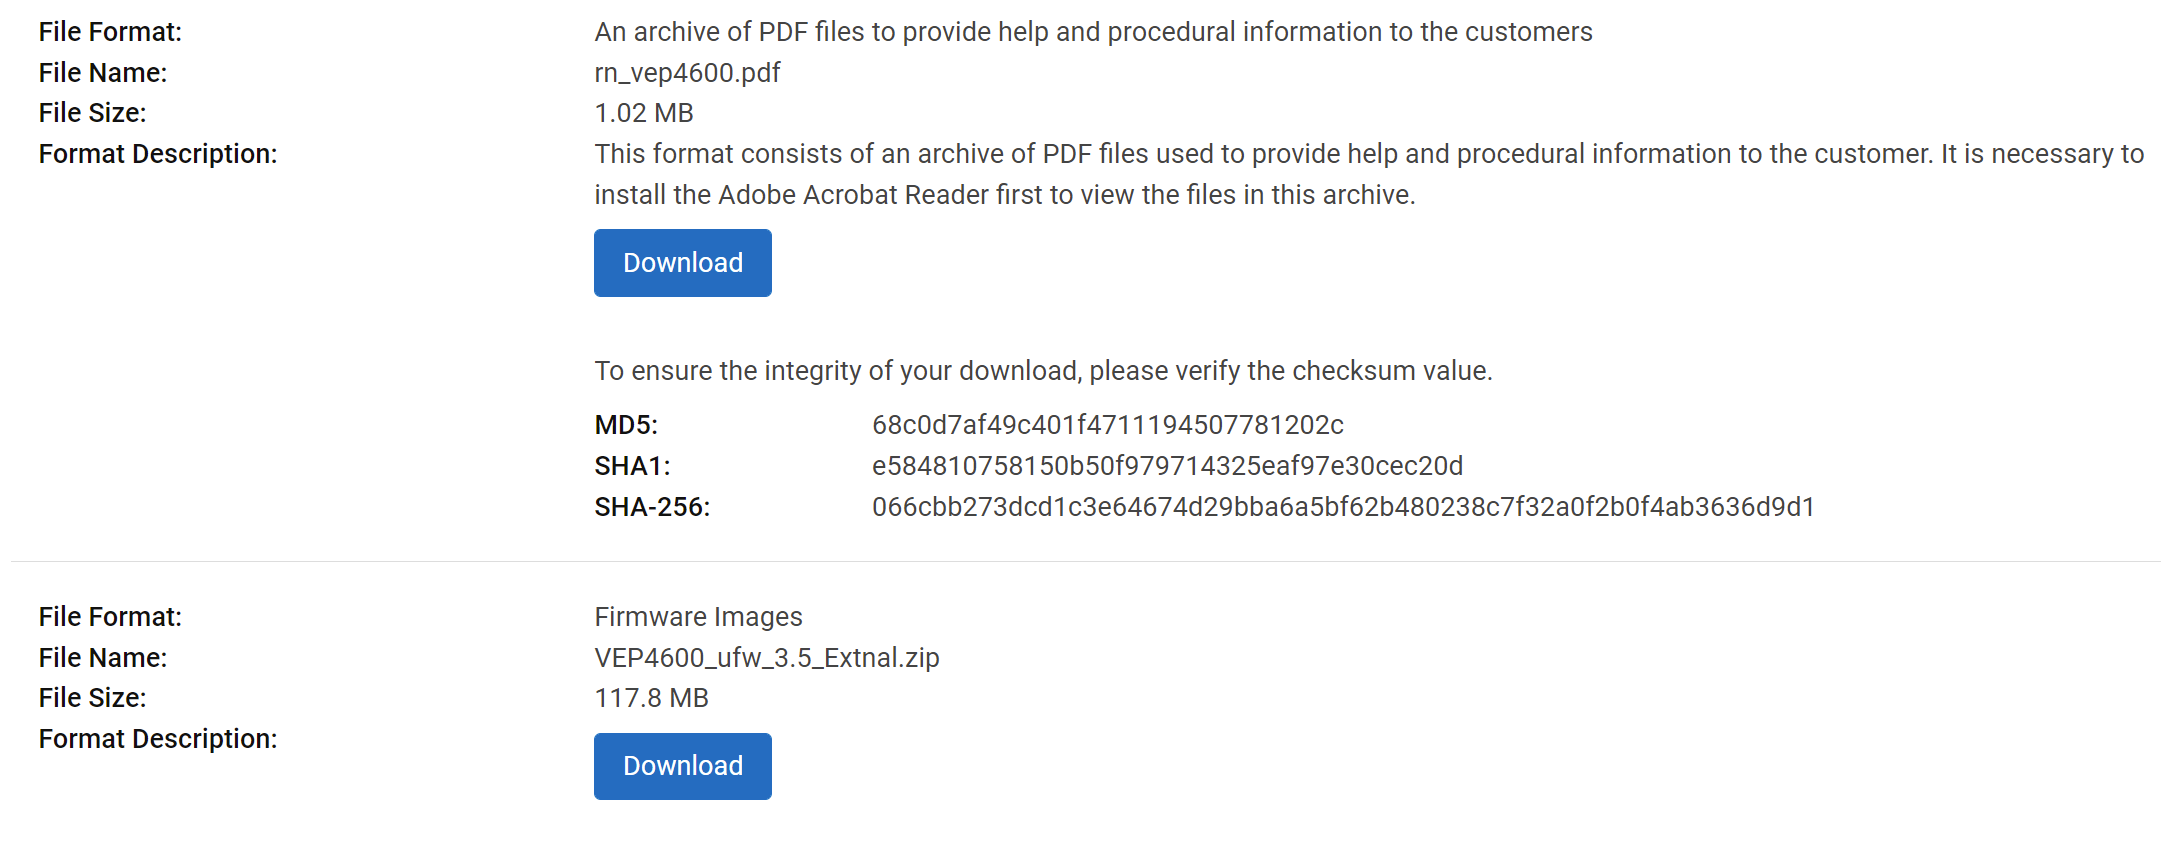
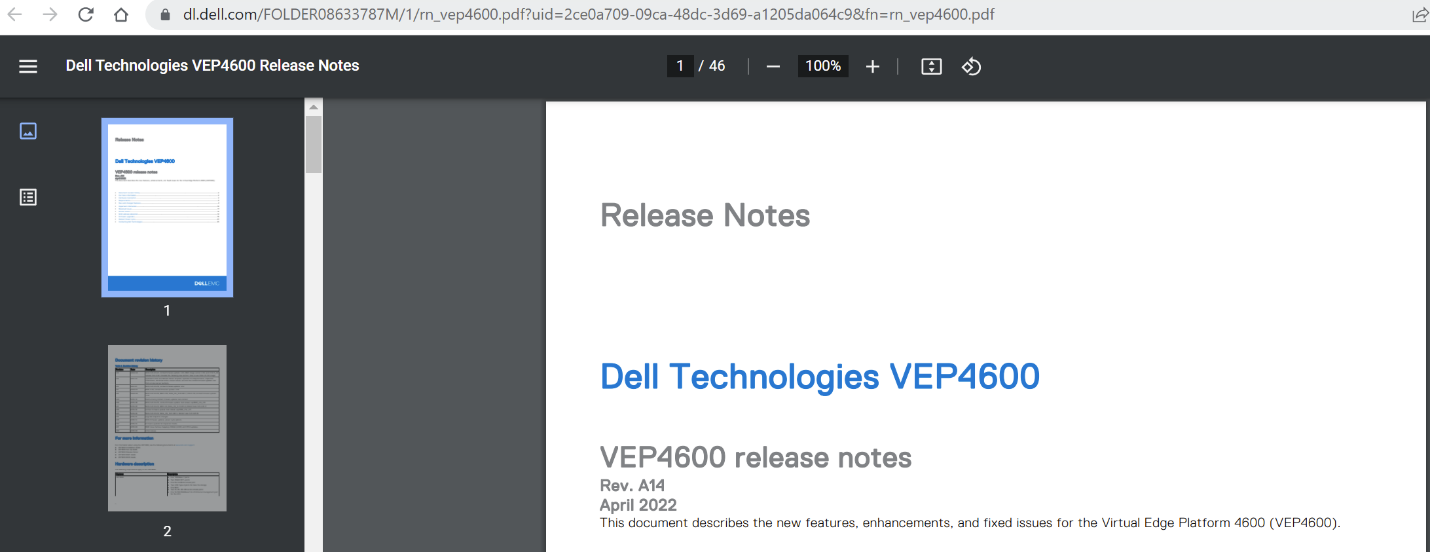
8. Download the rn_vep4600.pdf to open the UFW release notes.
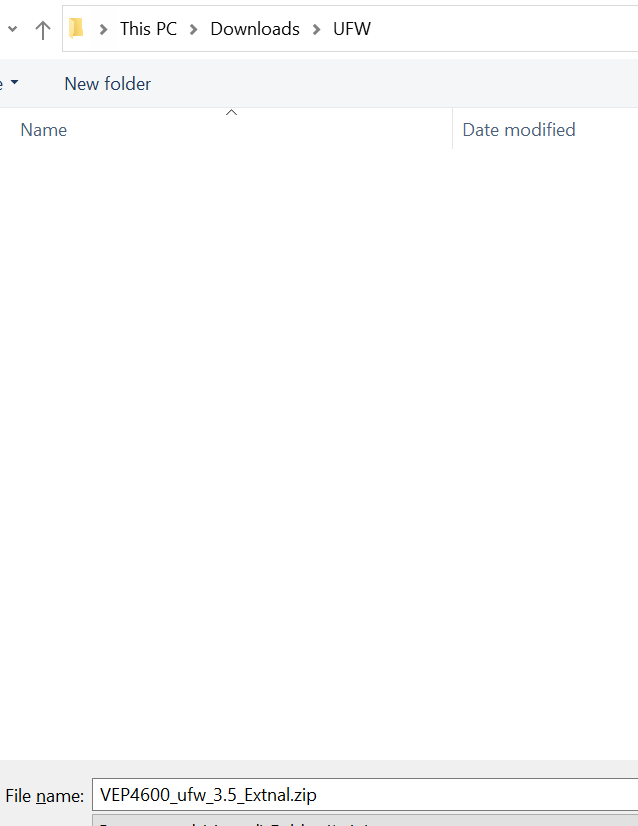 9. Open and download the VEP4600_ufw_3.5_External.zip file.
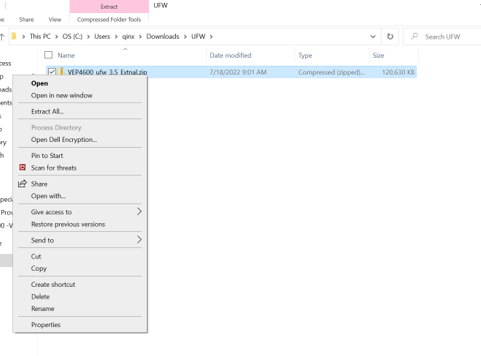
10. Save and unzip the file to a new folder, right click the filename to pop up the file process menu, select Extract All… from the drop down list.
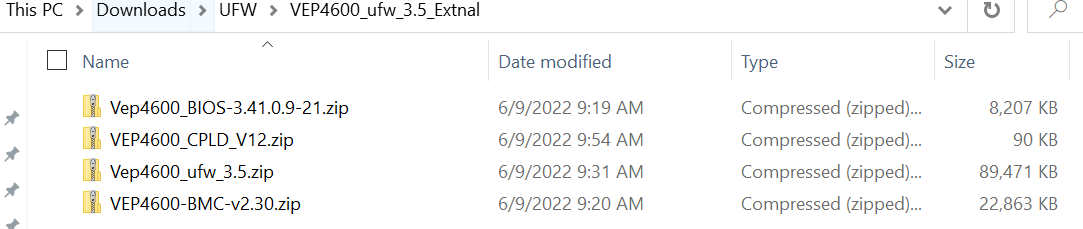
13. Right click the VEP4600_ufw_3.5.zip file name and repeat the extraction process to generate a new subfolder.

14. These are the actual VEP4600 UFW file and md5 hash signature of the file. There are three options to run UFW to upgrade BIOS firmware in VEP4600:
- Run UFW through a bootable USB with diagOS
- Run UFW natively in Linux Operating Systems (Ubuntu, Red Hat, CentOS, and Dell diagOS based on Debian)
- Run UFW remotely through BMC/IPMI network
See the release notes (filename rn_vep4600.pdf, page 15) for more details about running UFW on VEP4600 system.

Dell Technologies VEP4600 BMC/IPMI Feature Introduction
Mon, 17 Oct 2022 14:52:26 -0000
|Read Time: 0 minutes
VEP4600 system includes a BMC (Baseboard Management Controller) controller to provide out of band (OOB) hardware management. This controller has the following features:
- BMC RJ-45 serial console
- IPMI standard API library support through BMC network
- BMC web-based UI
The following screenshot provides a sample of the Putty BMC serial console screen shot:
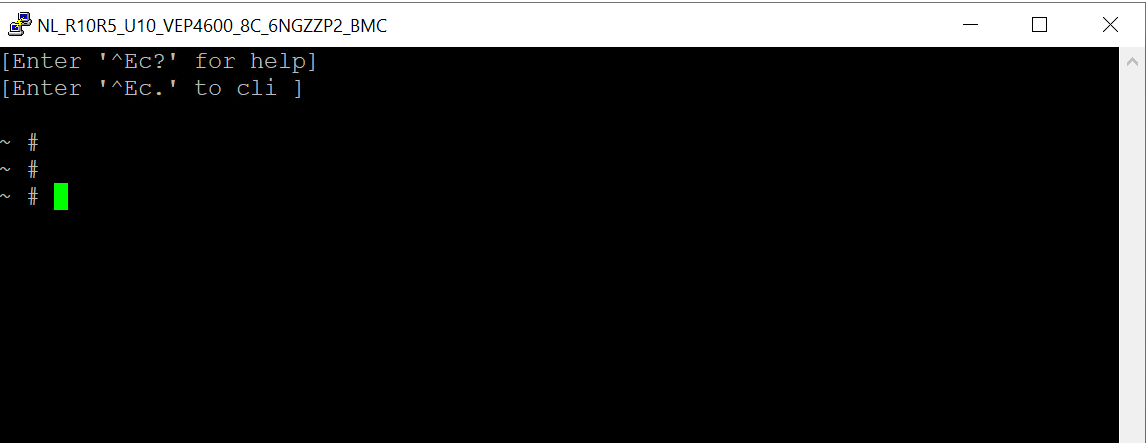
The BMC software is a lightweight Linux OS running on SoC chipset. It can run the following Linux commands to check OS version, NIC connectivity, file system, memory capacity, and standard IPMI API calls.
uname -a
Linux BMC3C2C301BD209 3.14.17-ami #1 Tue Jun 16 14:05:05 GMT 2020 armv6l GNU/Linux
df -h
Filesystem Size Used Available Use% Mounted on
/dev/root 45.4M 45.4M 0 100% /
devtmpfs 323.9M 0 323.9M 0% /dev
/dev/shm 362.0M 220.0K 361.8M 0% /var
/dev/shm 362.0M 76.0K 361.9M 0% /run
/dev/mtdblock1 960.0K 288.0K 672.0K 30% /conf
/dev/mtdblock3 1.6M 1.6M 0 100% /usr/local/www
~ # free -m
total used free shared buffers
Mem: 723 88 635 0 14
-/+ buffers: 74 649
Swap: 0 0 0
~ # route -n
Kernel IP routing table
Destination Gateway Genmask Flags Metric Ref Use Iface
0.0.0.0 172.17.76.254 0.0.0.0 UG 0 0 0 eth0
172.17.76.0 0.0.0.0 255.255.255.0 U 0 0 0 eth0
~ # ethtool eth0
Settings for eth0:
Supported ports: [ TP MII ]
Supported link modes: 10baseT/Half 10baseT/Full
100baseT/Half 100baseT/Full
1000baseT/Full
Supported pause frame use: Symmetric
Supports auto-negotiation: Yes
Advertised link modes: 10baseT/Half 10baseT/Full
100baseT/Half 100baseT/Full
1000baseT/Full
Advertised pause frame use: Symmetric
Advertised auto-negotiation: Yes
Speed: 1000Mb/s
Duplex: Full
Port: Twisted Pair
PHYAD: 0
Transceiver: internal
Auto-negotiation: on
MDI-X: Unknown
Link detected: yes
IPMI API calls
ipmitest power status
Chassis Power is on
Turn VEP4600 CPU on and off
ipmitest power reset
ipmitest power off
ipmitest power cycle
Reboot VEP4600 and park the system at BIOS settings
ipmitest chassis bootparam set bootflag force_bios
ipmitest power reset
Display VEP4600 hardware components status
ipmitool sel list
ipmitest sel list
1 | 12/31/1999 | 19:00:08 | Microcontroller/Coprocessor | Transition to Running
2 | 12/31/1999 | 19:00:09 | Power Supply #0x71 | Presence detected | Asserted
3 | 12/31/1999 | 19:00:09 | Power Supply #0x72 | Failure detected | Asserted
4 | 12/31/1999 | 19:00:09 | Power Supply #0x72 | Power Supply AC lost | Asserted
5 | 12/31/1999 | 19:00:09 | System ACPI Power State #0x77 | S0/G0: working | Asserted
…
29a | 01/01/2000 | 00:01:03 | System Event #0xff | Timestamp Clock Sync | Asserted
29b | 07/12/2022 | 20:12:59 | System Event #0xff | Timestamp Clock Sync | Asserted
29c | 07/12/2022 | 20:13:00 | System Event | Timestamp Clock Sync | Asserted
ipmitest sensor
PSU1_Status | 0x0 | discrete | 0x0180| na | na | na | na | na | na
PSU2_Status | 0x0 | discrete | 0x0080| na | na | na | na | na | na
AC_Status | 0x0 | discrete | 0x0080| na | na | na | na | na | na
Watchdog2 | 0x0 | discrete | 0x0080| na | na | na | na | na | na
SEL | 0x0 | discrete | 0x0080| na | na | na | na | na | na
Power_Status | 0x0 | discrete | 0x0180| na | na | na | na | na | na
Fan1_Status | 0x0 | discrete | 0x0180| na | na | na | na | na | na
…
VCCIO_CP | 0.994 | Volts | ok | 0.504 | 0.602 | 0.700 | 1.197 | 1.302 | 1.400
VCCIN_CP | 1.775 | Volts | ok | 0.898 | 1.081 | 1.265 | 2.162 | 2.336 | 2.519
VCCSA_CP | 0.840 | Volts | ok | 0.259 | 0.343 | 0.427 | 1.190 | 1.274 | 1.358
1. IPMI standard API calls through BMC network
ipmitool -I lanplus -H <BMC IP address> -U admin -P admin power status
ipmitool -I lanplus -H <BMC IP address> -U admin -P admin power reset
ipmitool -I lanplus -H <BMC IP address> -U admin -P admin power off
ipmitool -I lanplus -H <BMC IP address> -U admin -P admin power on
ipmitool -I lanplus -H <BMC IP address> -U admin -P admin power cycle
ipmitool -I lanplus -H <BMC IP address> -U admin -P admin chassis bootparam set bootflag force_bios
ipmitool -I lanplus -H <BMC IP address> -U admin -P admin power reset
ipmitool -I lanplus -H <BMC IP address> -U admin -P admin sel list
ipmitool -I lanplus -H <BMC IP address> -U admin -P admin sensor
ipmitool -I lanplus -H <BMC IP address> -U admin -P admin sol activate
ipmitool -I lanplus -H <BMC IP address> -U admin -P admin sol deactivate
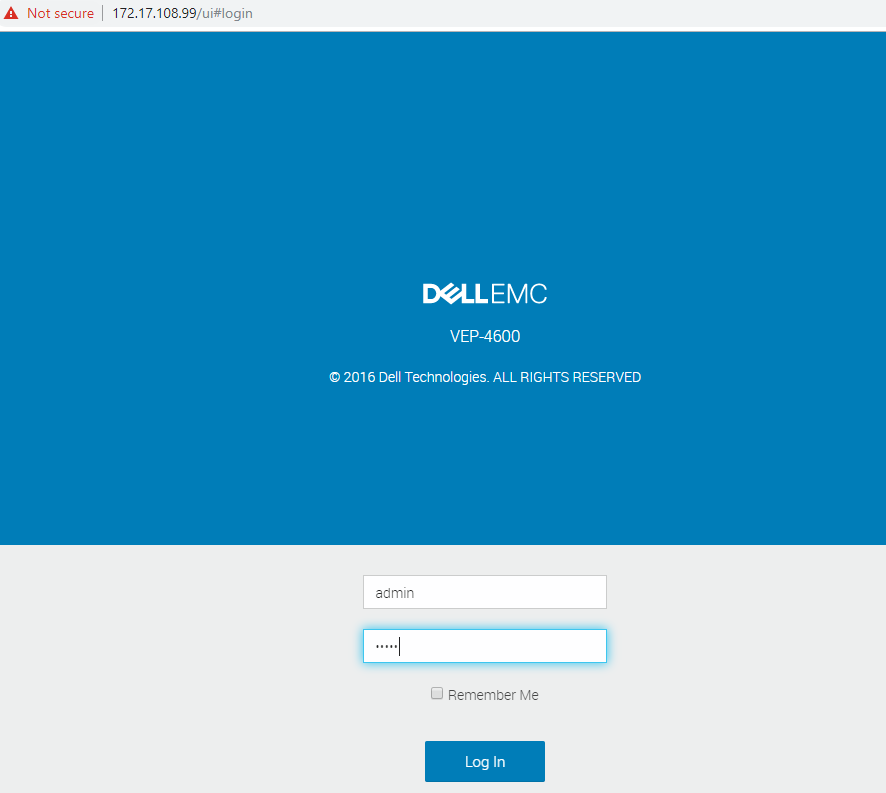
BMC Web based UI feature
In addition to BMC Command Line Interaction (CLI) feature, BMC also supports WEB based UI functions and features.
1. Open the following URL in a web browser:
https://<BMC IP address>/ui
Note: Make sure you type out the full URL or the web page will not be displayed.
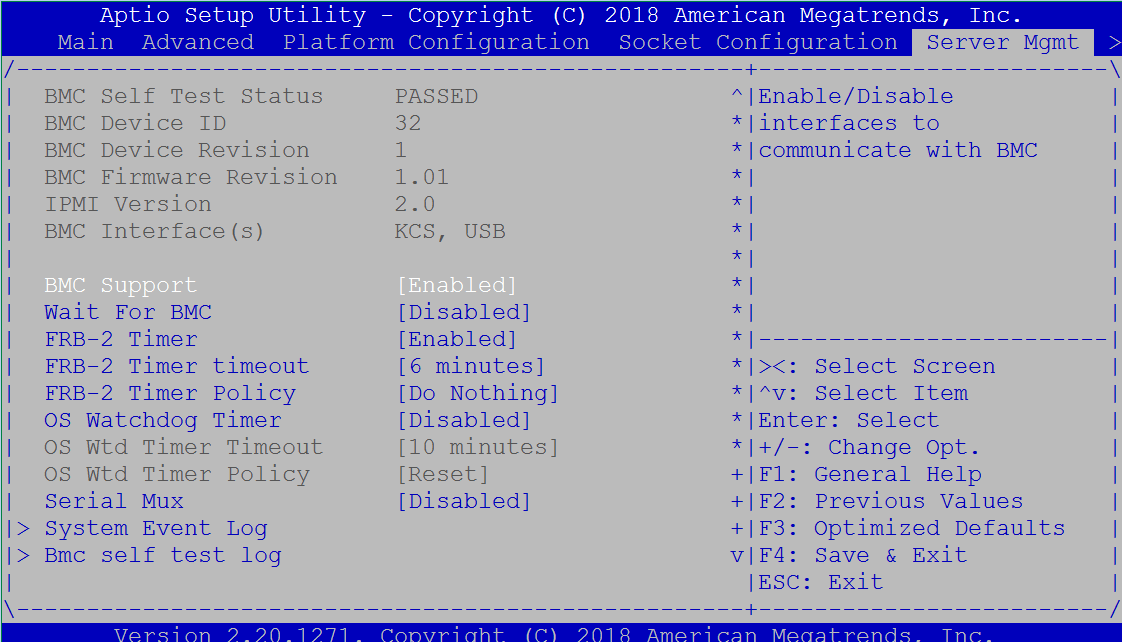
2. Configure BMC network and credentials in BIOS settings
3. Enable BMC Support in a BIOS Server Management tab
4. The following image shows the BMC/IPMI network setup. Navigate to the BMC network configuration and click Enter.
5. Navigate to BMC network setup address source configuration and click Enter.
6. Go to BMC/IPMI network setup address source configuration and select Static or DynamicBmcDhcp.
7. Navigate to BMC/IPMI network setup Static Address configuration and click Enter.
8. Go to BMC/IPMI network setup BMC interface IP address and click Enter.
9. Use ctrl-h to erase 0.0.0.0 and enter a new IP address.
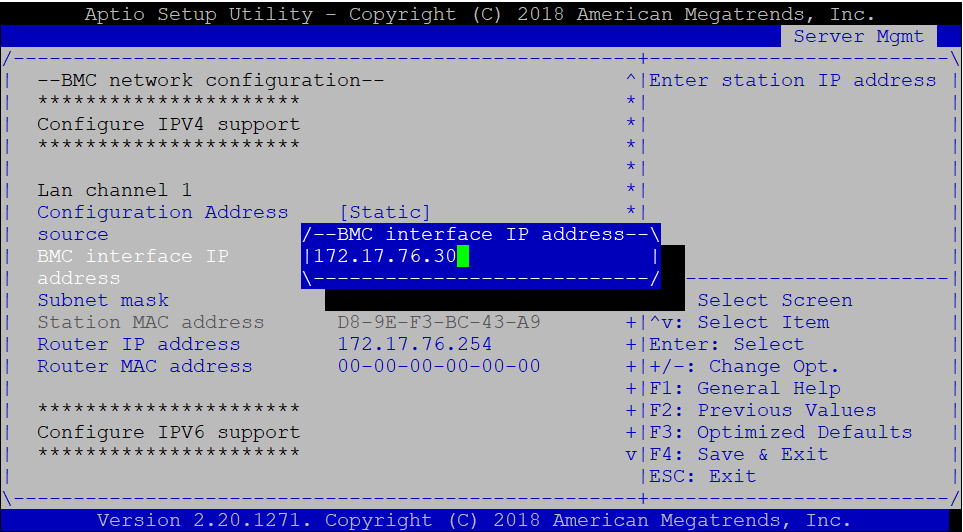 10. Go to BMC/IPMI network setup BMC interface IP address, enter the new IP address, and click Enter.
11. Use BMC/IPMI network setup and configure the Subnet mask and Router IP address.
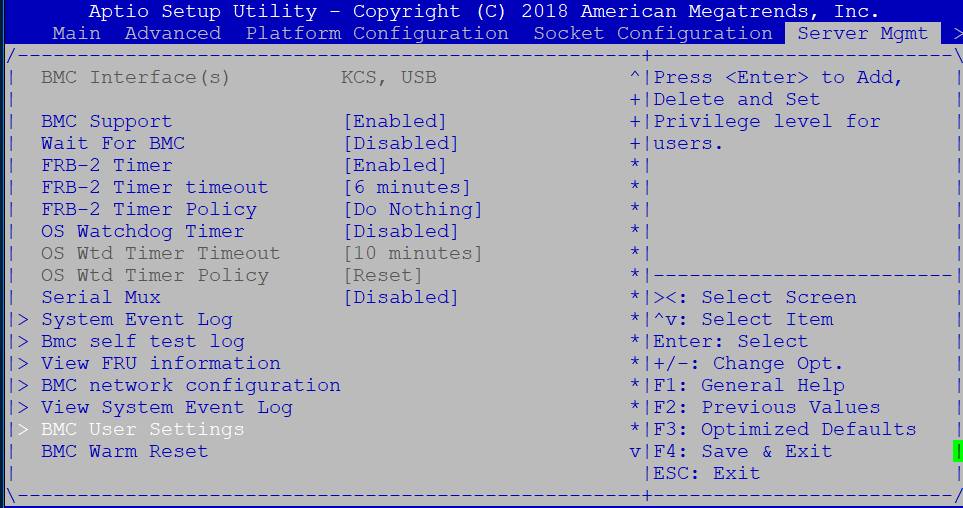 Note: The following graphic describes the BMC User Settings:
12. Go to the BMC User Settings and click Enter.
13. BMC User Settings Add User (hit enter)
14. Go to BMC User Settings, type in the username, and hit enter.
15. Go to BMC User Settings, type in the user password, and hit Enter.
16. Go to BMC User Settings Enable User Access and click Enter.
That concludes all of the BIOS configuration steps to configure BMC related features.

Dell Technologies VEP1405 system BIOS/Firmware Upgrade
Thu, 25 Aug 2022 17:11:09 -0000
|Read Time: 0 minutes
This document provides steps to perform a Dell Unified Firmware upgrade (UFW) utility to upgrade VEP1405 BIOS and other firmware.
- Download UFW (Unified Firmware Upgrader) from Dell support portal.
- Type VEP14 in the search bar, as shown in the following screenshot.
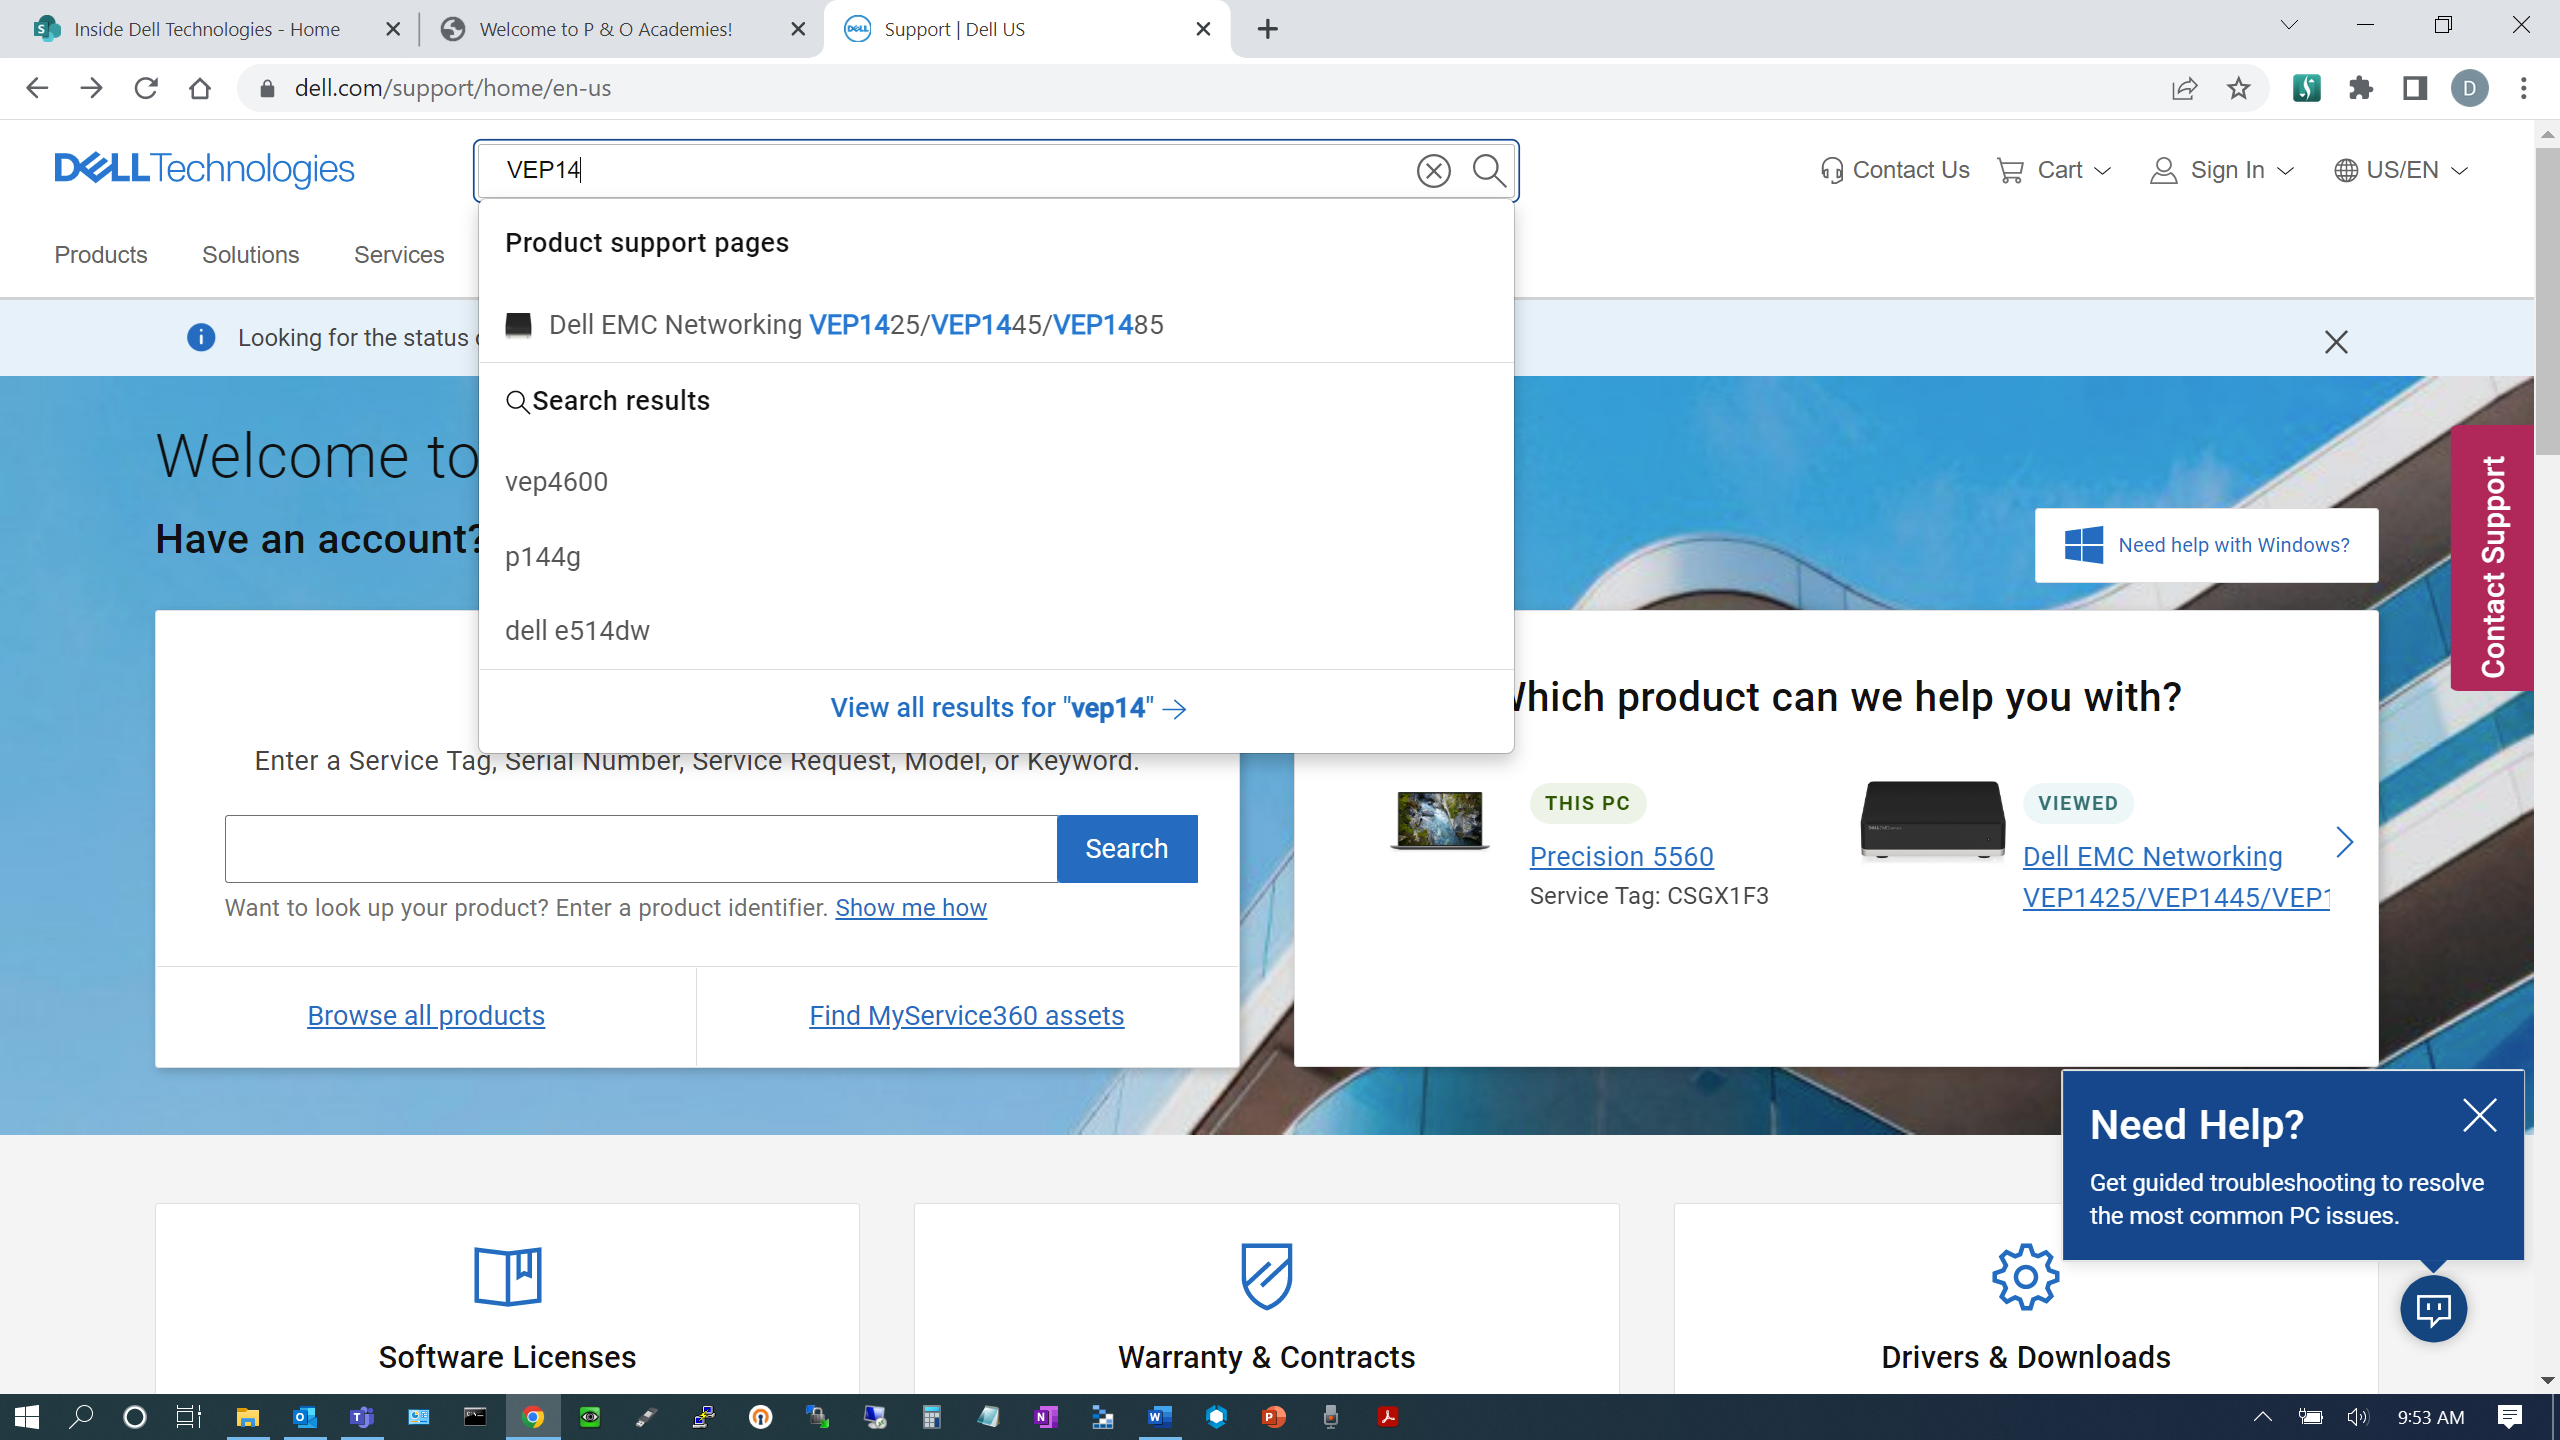
- Select Dell Networking VEP1425/VEP1445/VEP1485 from the dropdown list.
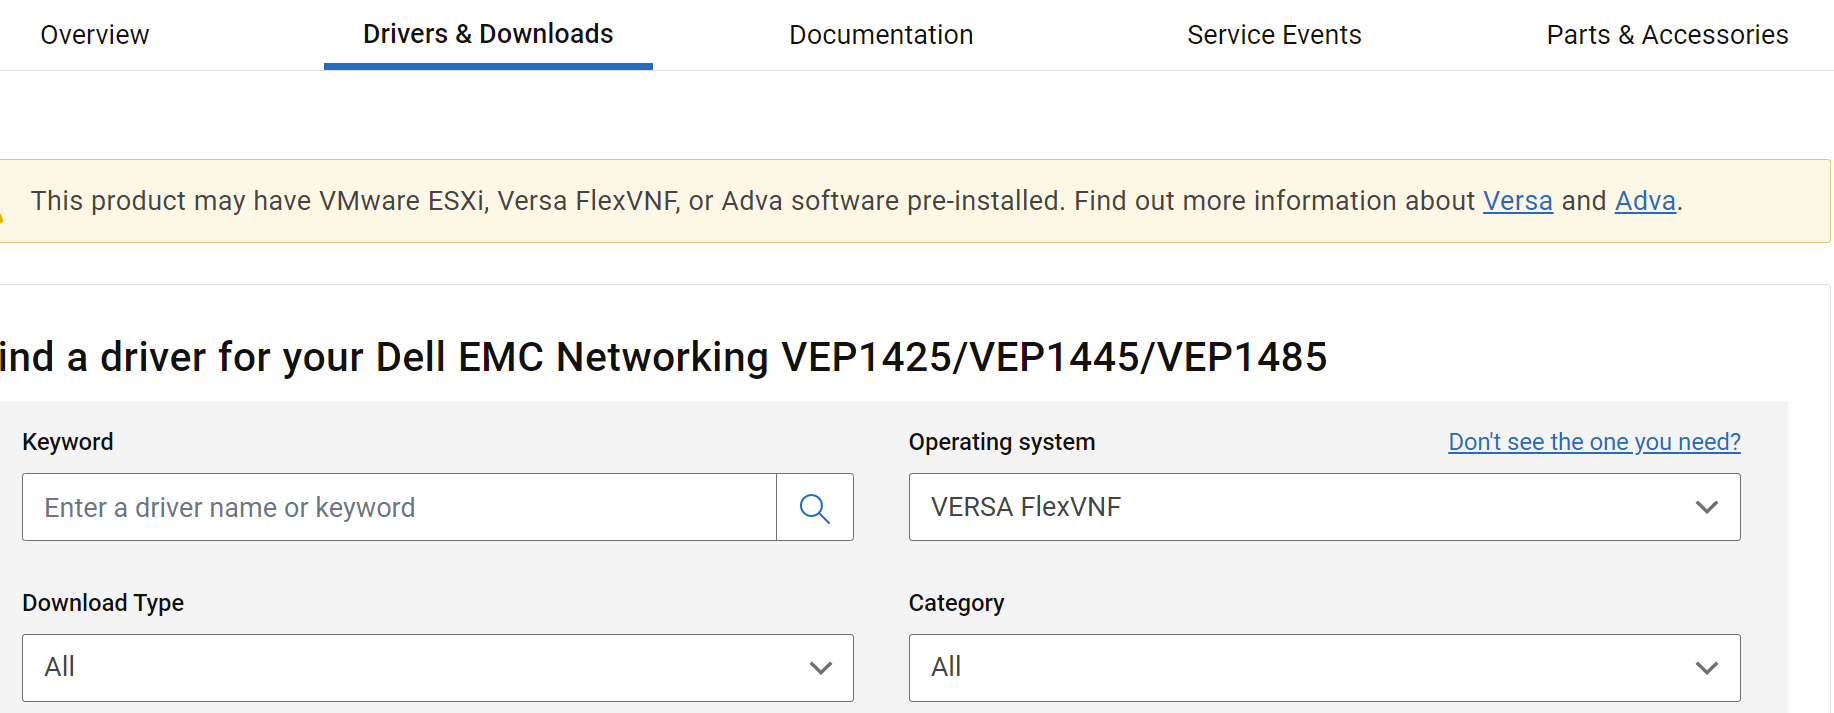
- Select the Drivers & Downloads tab.
- Scroll down and select the following UFW file.
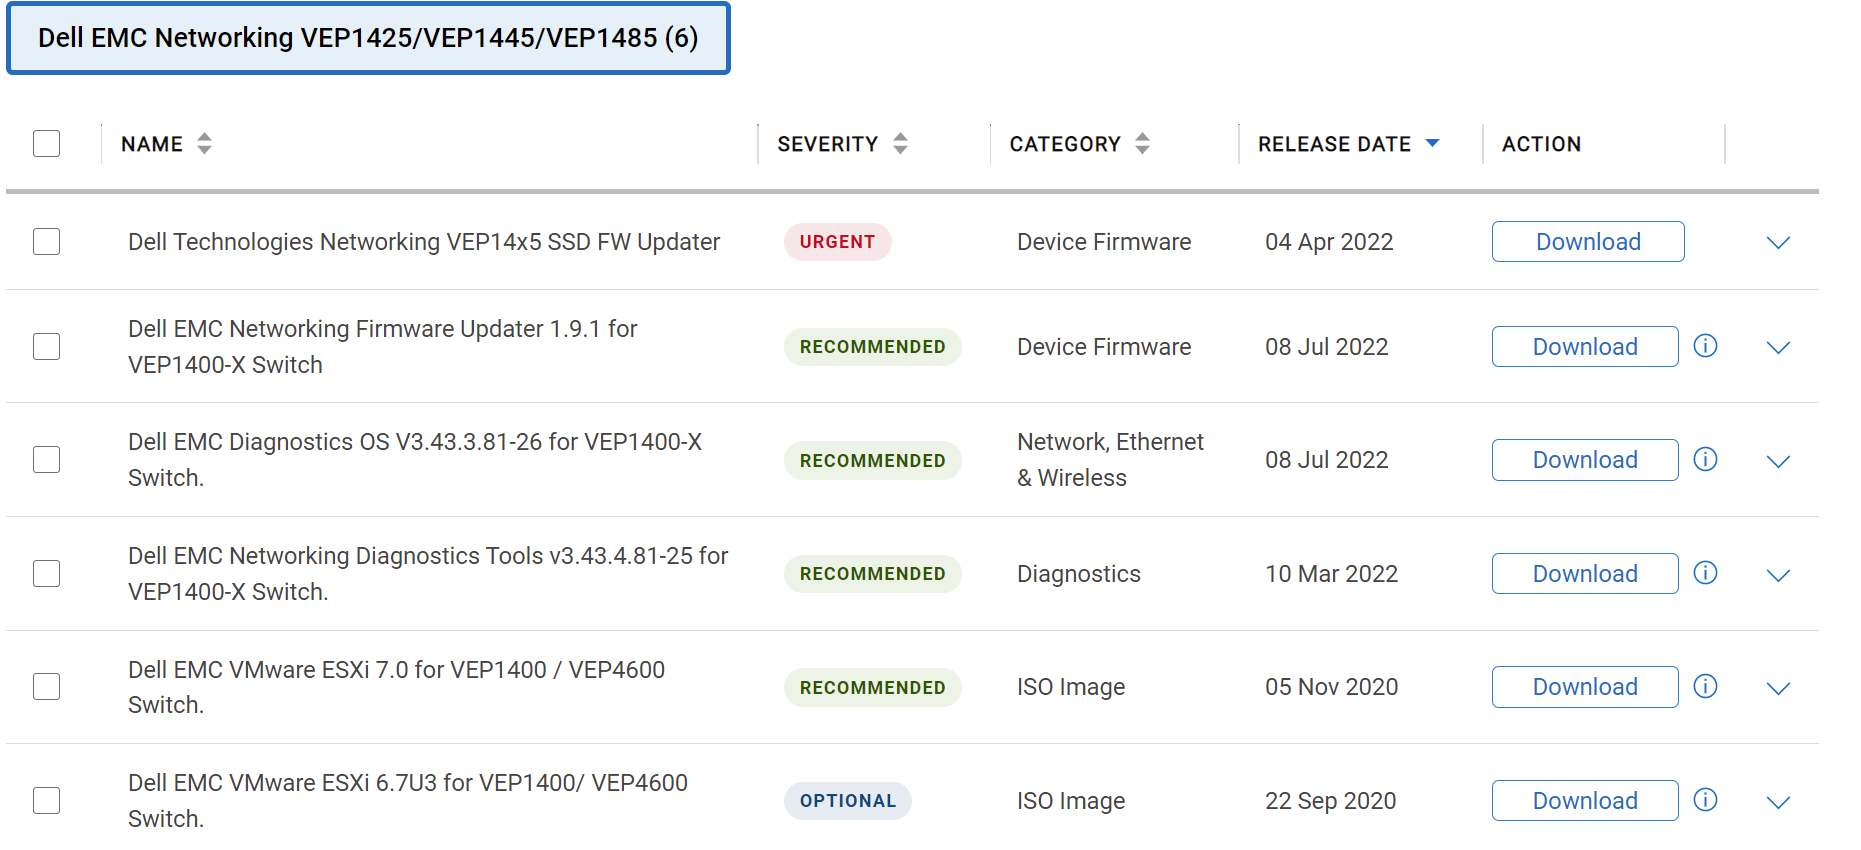
- Expand the Dell EMC Networking Firmware Updater 1.9.1 for VEP1400-X Switch tab.
- Click View Full Driver Details and open the hyperlink.
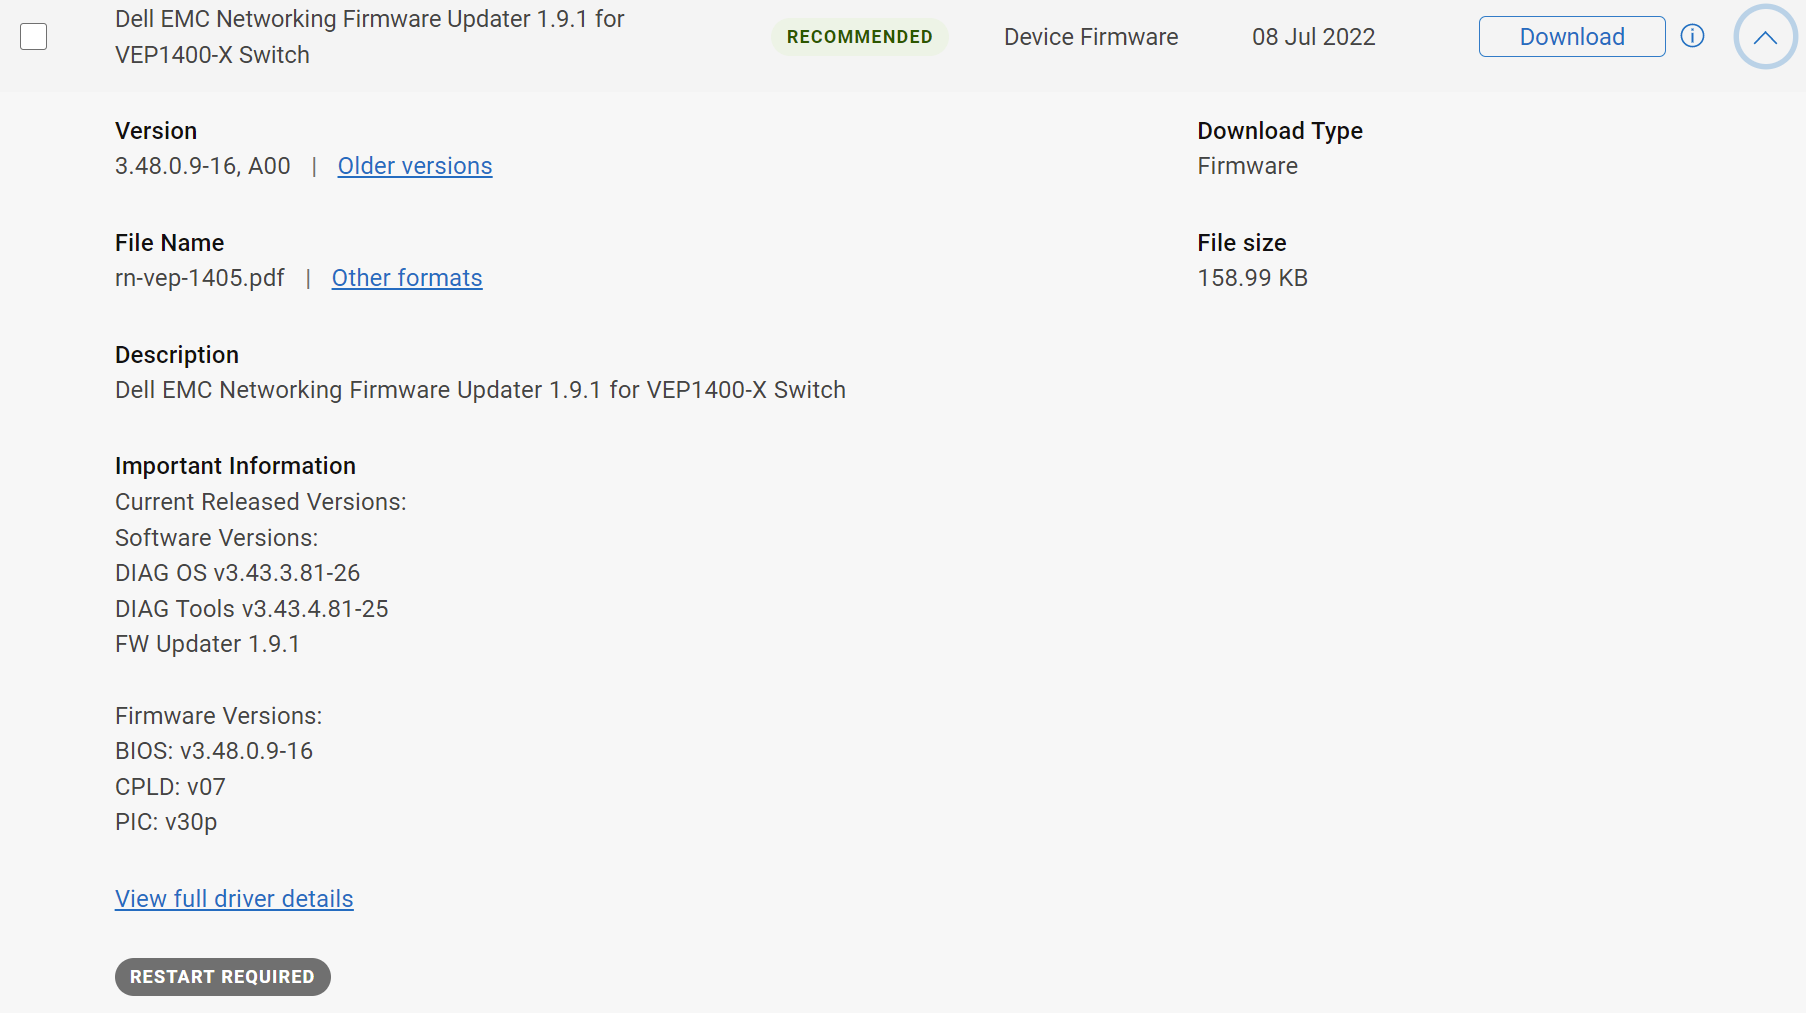
- Download the release notes and UFW zip file.

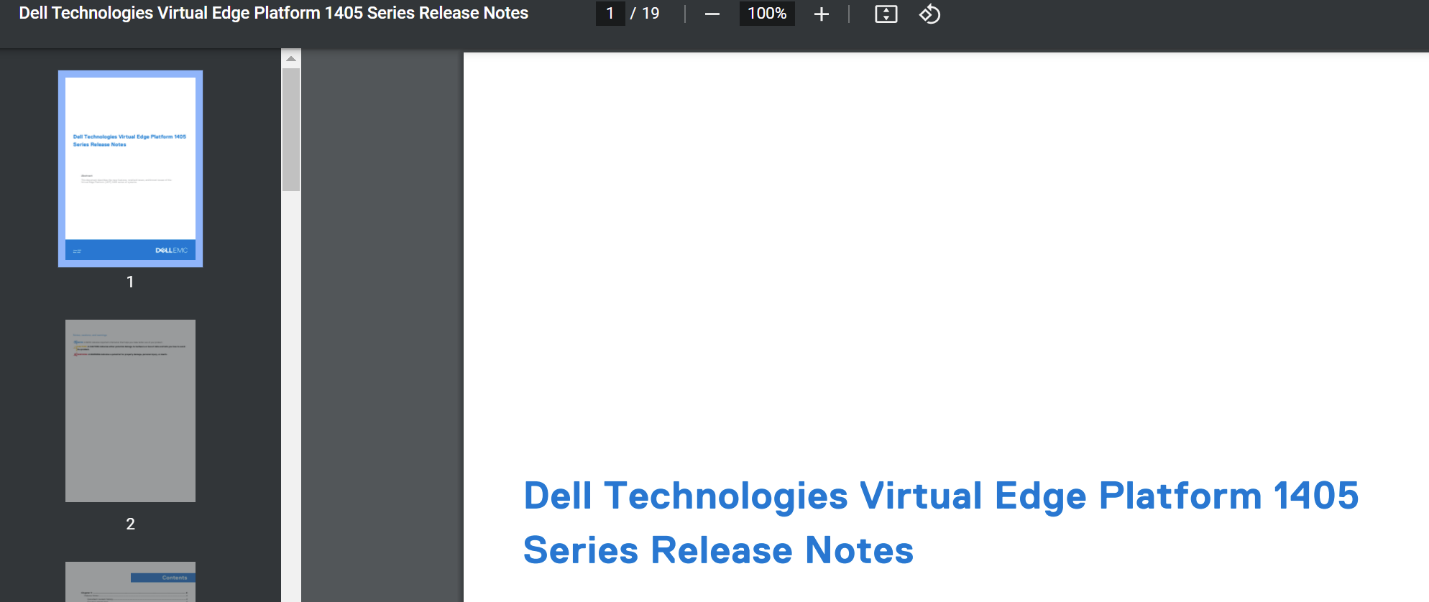
9. Download the rn-vep-1405.pdf and open the UFW release notes in a new browser window or tab.
10. Download the VEP1400_BIOS-3.48.0.9-16_UFW1.9.1_External.zip file and download this zip file to Windows Explorer.
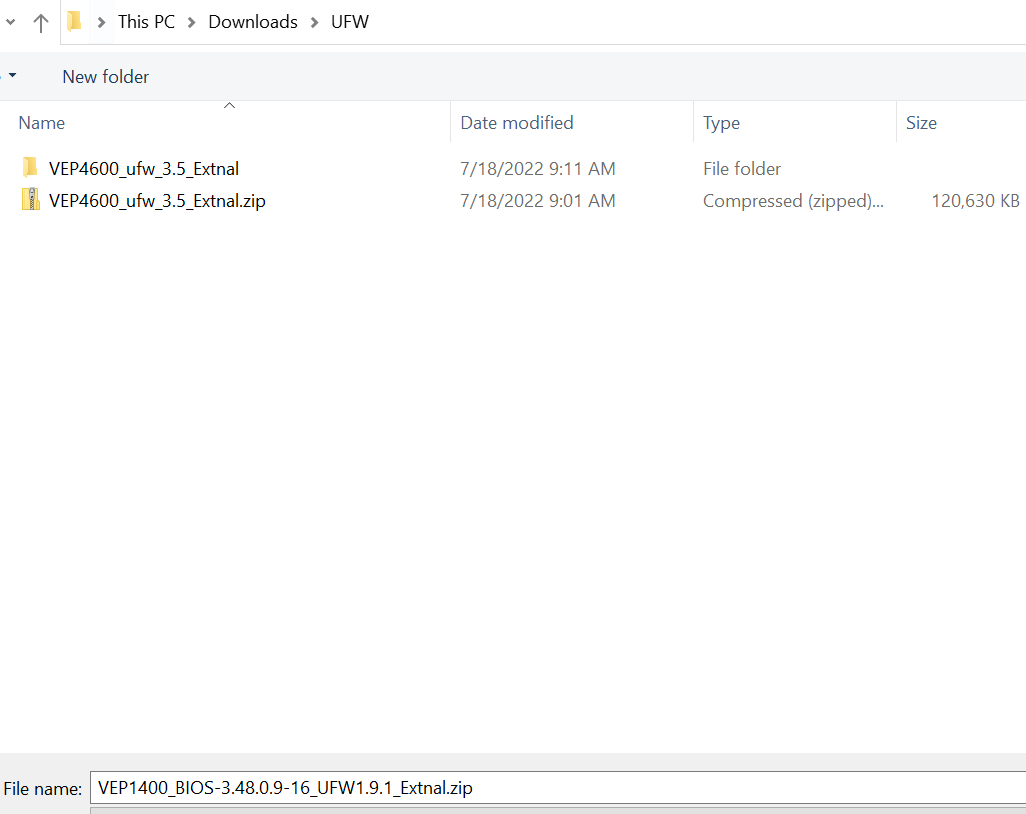
11. Save and unzip the file to a new folder. Right click the filename to open the file process menu and select Extract All…
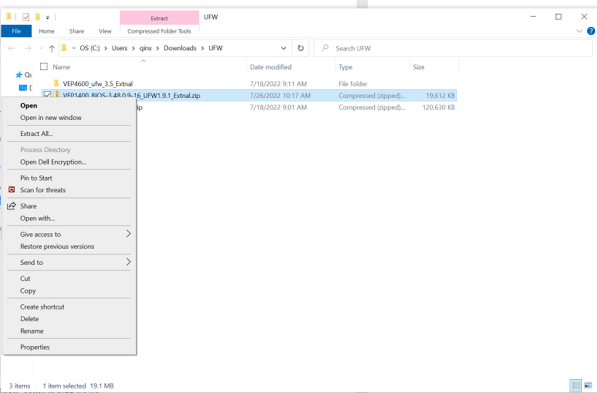
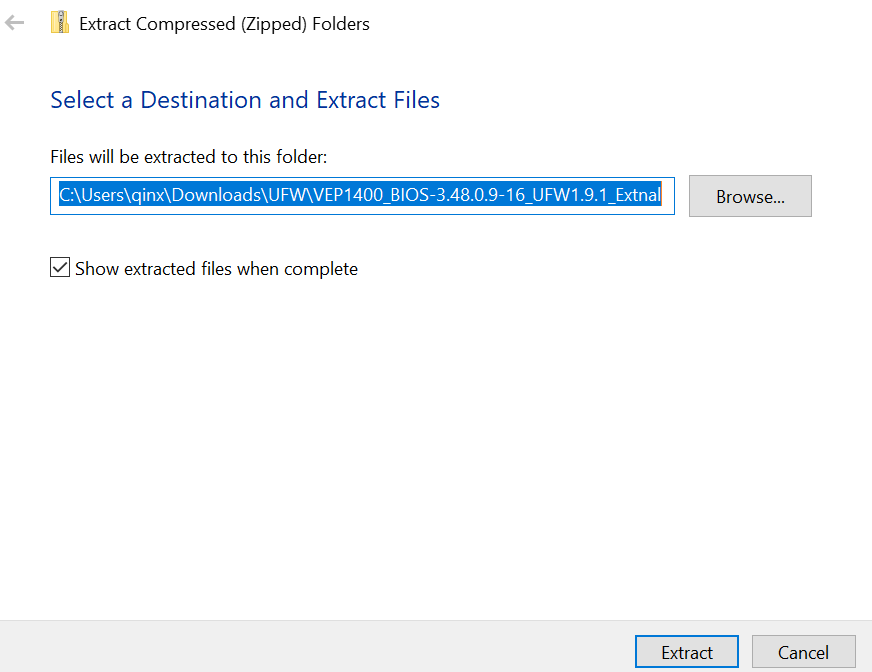
12. Click Extract to unzip the file.
13. This generates the following files in the new unzipped directory:
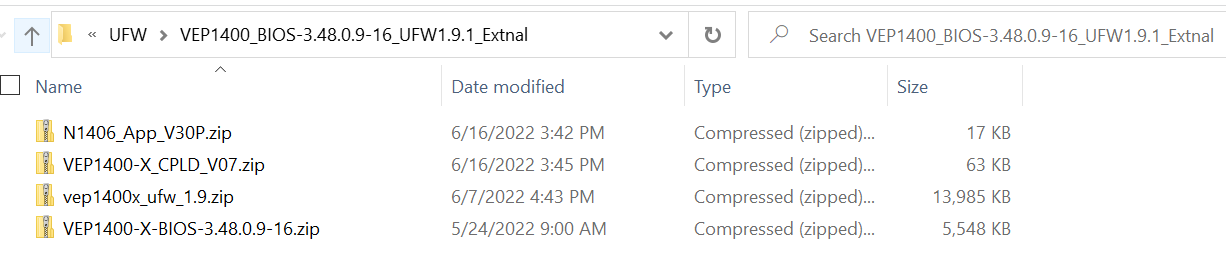
14. Right click the vep1400x_ufw_1.9.zip file and repeat the extraction process to generate a new subfolder.
15. The following image provides the VEP1400 UFW file and md5 hash signature of the file. Boot VEP1405 system to Dell diagOS running on eMMC storage and follow the instructions document in UFW release notes (rn-vep-1405.pdf, page 17).

16. There are two options to run UFW to upgrade BIOS firmware in VEP1405:
- Boot into diagOS that is hosted on eMMC storage system and run UFW there
- Run UFW natively in Versa OS and other Linux Operating Systems.
See the release notes (filename rn-vep-1405.pdf, page 17) for more details about running UFW on VEP1405 platforms.