


uCPE Hypervisor Network Functions Virtualization Sizing Guideline
Tue, 06 Sep 2022 17:56:43 -0000
|Read Time: 0 minutes
This document describes how to make proper NFV sizing estimate and choose a right VEP model.
VEP4600 powered by Intel Xeon D CPU, hyperthreading function can be enabled or disabled in BIOS settings. The following screenshot shows the BIOS hyperthreading enable configuration.
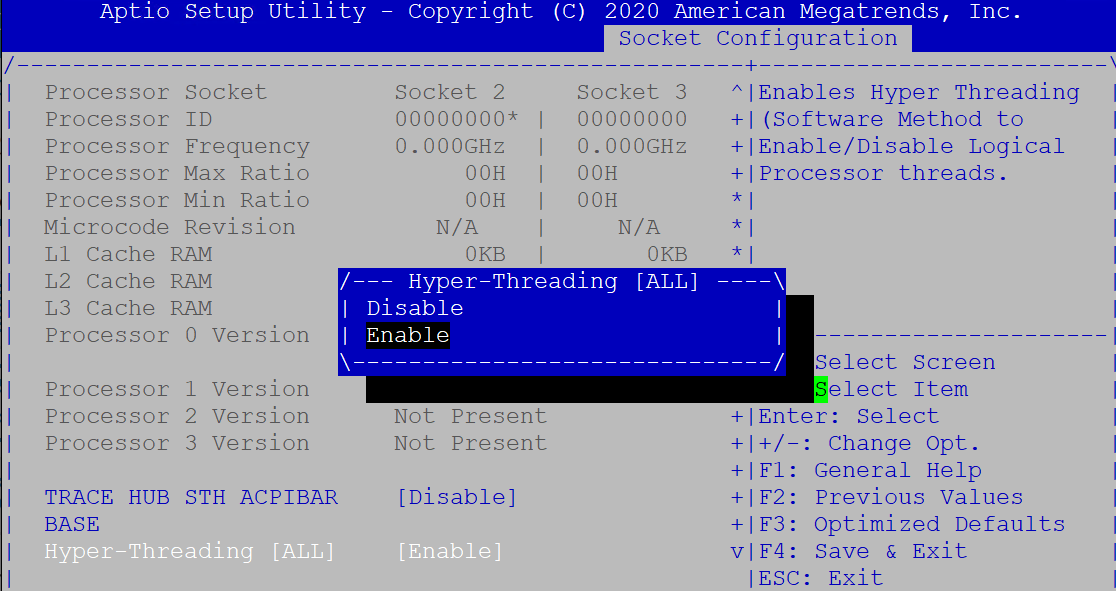
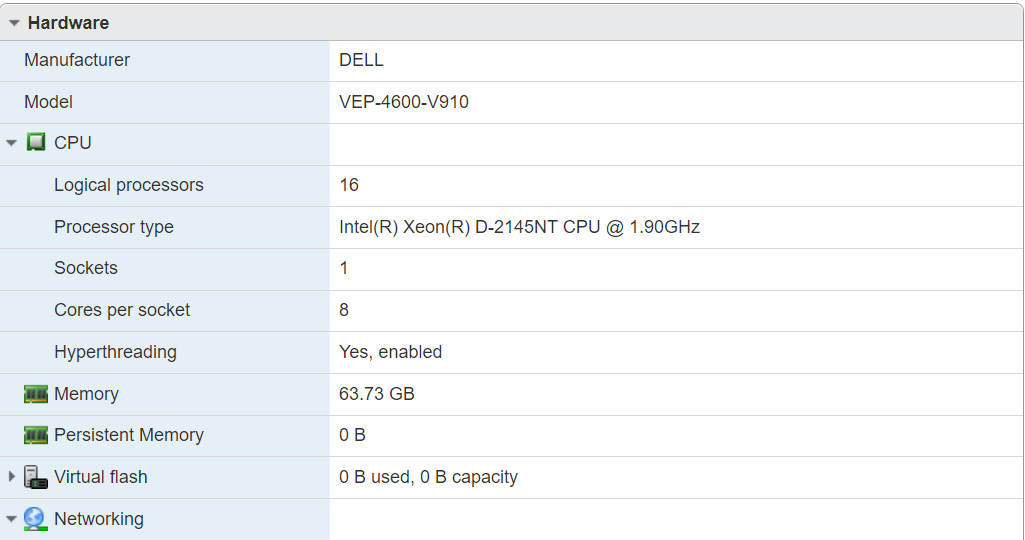
If hyperthreading is enabled in VEP4600 BIOS settings, ESXi web UI displays that the logical processor count is 16, which is the double of physical CPU core count.
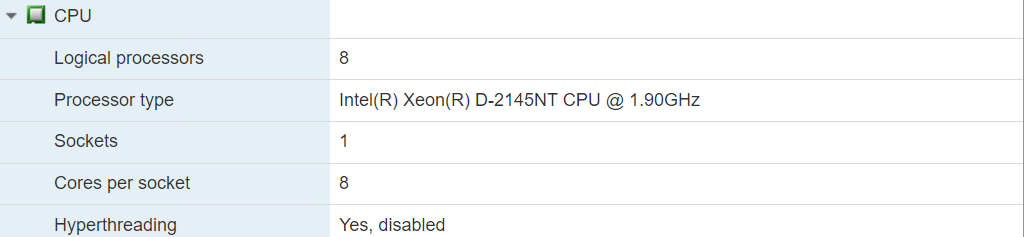
 If hyperthreading is disabled, ESXi displays that the logical core count is the same as CPU core count.
Hypervisor undersubscription and oversubscription
Size of VM/NFV
Here is a sample profile of VMware SD-WAN Edge running as a VM in ESXi.
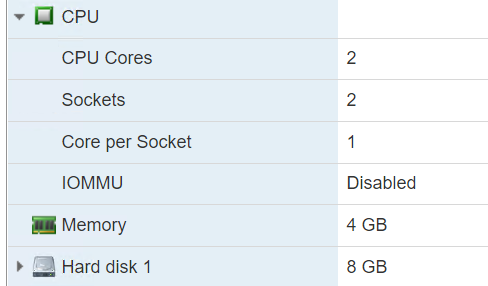
It takes two CPU cores from the total logical core/processor count in ESXi. If the total core count is larger than the ESXi core count, for example, in our previous VEP4600 eight core ESXi model, with hyperthreading enabled, the total core count is 16. If total VM/NFV core count is bigger than 16, then the ESXi hypervisor is running in oversubscription mode, meaning the hypervisor has to multiplexer among these NFVs, suspend one of them from time to time. If the total core count is less than 16, ESXi is running in undersubscription mode, no multiplexer is required, all NFVs can run simultaneously in ESXi hypervisor.
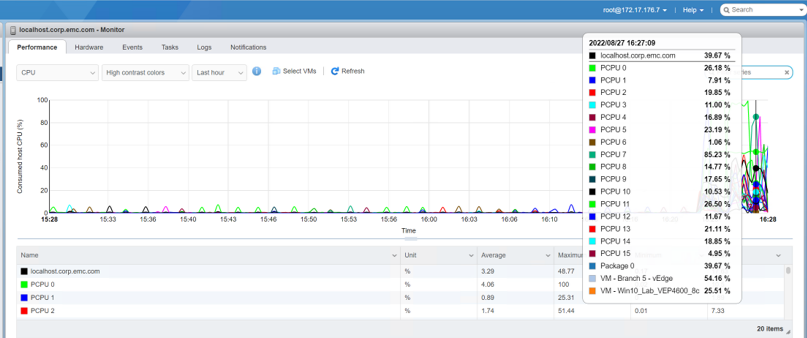
Use ESXi monitor feature to display graphical view of CPU/core performance.
VEP1405 Atom/Denverton CPU
In VEP1405 platform, Intel Deverton CPU does not support hyperthreading, the logical core count is always the same as physical CPU core count.
Summary
In VEP4600 platform, make sure to enable hyperthreading in BIOS to double the core count. Check every NFV/VM profile running in ESXi to make sure the total core count is not larger than the ESXi core count, so that it can run ESXi in undersubscription mode. It is still possible to run ESXi in over subscription mode if some of the VMs are not required to constantly hug CPU resource, for example if a VM is a DNS server, then most likely it is not constantly processing DNS client queries.
Related Blog Posts

Dell Enterprise SONiC Flexible and Robust VLAN QinQ, VXLAN, and VLAN Translation Solutions
Wed, 24 May 2023 17:24:24 -0000
|Read Time: 0 minutes
As a corporate business grows through mergers, acquisitions, and expansions, it must add or extend new business branches in many different locations. The network infrastructure must evolve to accommodate these new locations. Compute and network virtualization have also brought strong demand and requirements to transport local VLAN over WAN (Wide Area Network), Telco (Telecommunication), and many other network infrastructures.

Figure 1. Transport VLAN network through WAN network
In Figure 1, Laptop 1 is connected to the corporate network in San Francisco. Soon after, Laptop 2 was added to the same corporate network in New York. The users of these two laptops are in the same corporate business unit (BU), such as engineering, finance, or HR. Corporate IT wants to apply the same set of policies for network access, security, and service to these laptops. These policies are implemented through VLAN IDs, subnets, and other network provision parameters. Therefore, IT must transport the VLAN ID over WAN and its network infrastructures. Often, on corporate networks, endpoints must be on the same VLAN. These endpoints can be laptops, VMs, applications, and Virtual Network Function (VNF) entities, to name a few.
To help customers meet these network transport requirements, Dell Enterprise SONiC has built the new IEEE 802.1ad VLAN QinQ feature. This feature adds another VLAN tag in the original dot1q frame, creating a double-tagged VLAN frame.
The figures below demonstrate how the outer tag is used to identify the Telco provider’s traffic, while the inner tag is still the local dot1q VLAN ID. This process allows endpoints to use the same VLAN ID while traveling through Telco network infrastructures.
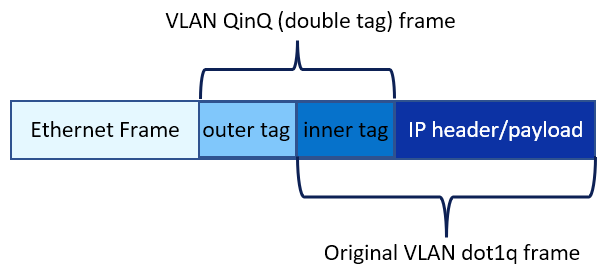
Figure 2. VLAN QinQ frame
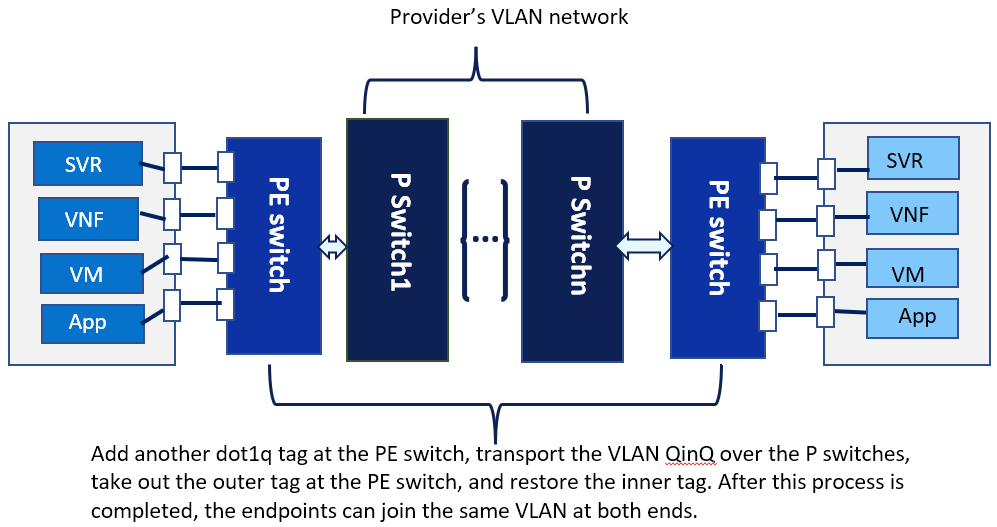
Figure 3. Transport local dot1q VLAN over VLAN QinQ enables switches
Dell Enterprise SONiC VXLAN (Virtual Extensible LAN) solution is designed to transport VLANs in Layer 4, the User Datagram Protocol (UDP) transport layer, which is defined in the Open Systems Interconnection (OSI) model. Packets that VXLAN encapsulates are not aware of the underlay networking protocols.
The figures below demonstrate how the VXLAN IP/UDP header is created in a VXLAN tunnel endpoint (VTEP) ingress tunnel server and decapsulated in the egress VTEP server.
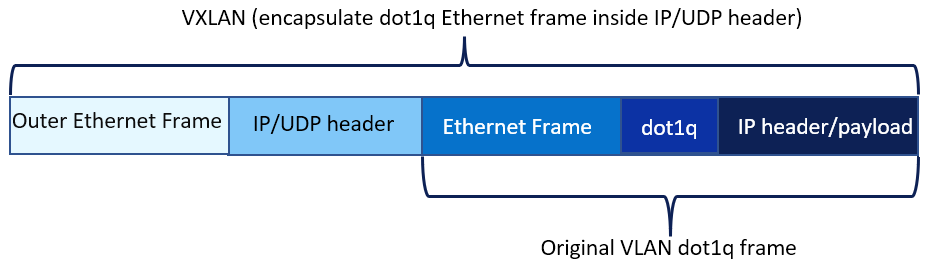
Figure 4. VXLAN header to encapsulate dot1q VLAN frame
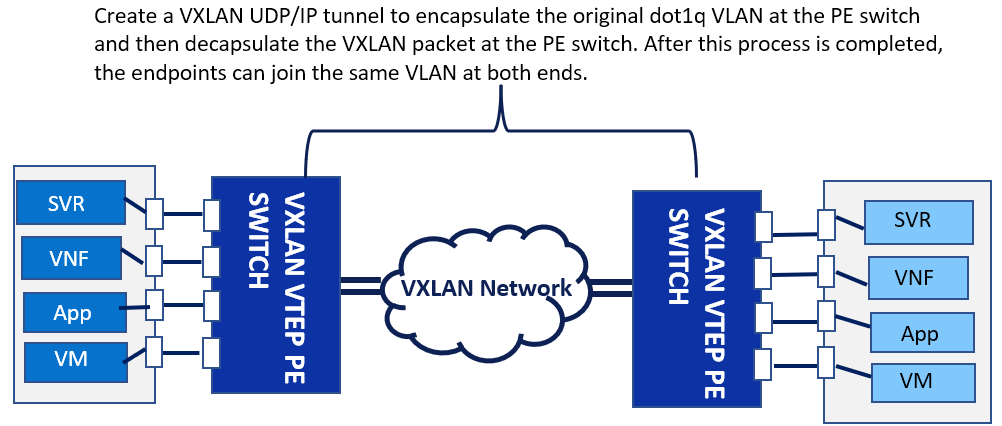
Figure 5. Transport dot1q VLAN frame over VXLAN enabled network infrastructure
Network infrastructures in Telco, Communication Service Provider (CSP), data center, and cloud providers often consist of different types of VLAN transportation technologies like QinQ, VXLAN, and dot1q. To transport VLAN frames over a mix of VLAN protocol networks, Dell Enterprise SONiC introduces the VLAN translation feature with the following options:
- Dynamically modify the tag in a single tag VLAN frame
- Dynamically modify one tag and remove the other in a double tag VLAN frame
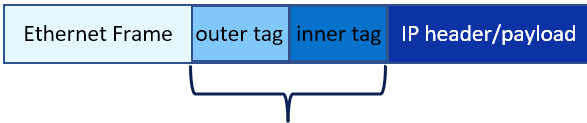
Figure 6. VLAN translation to modify VLAN tags
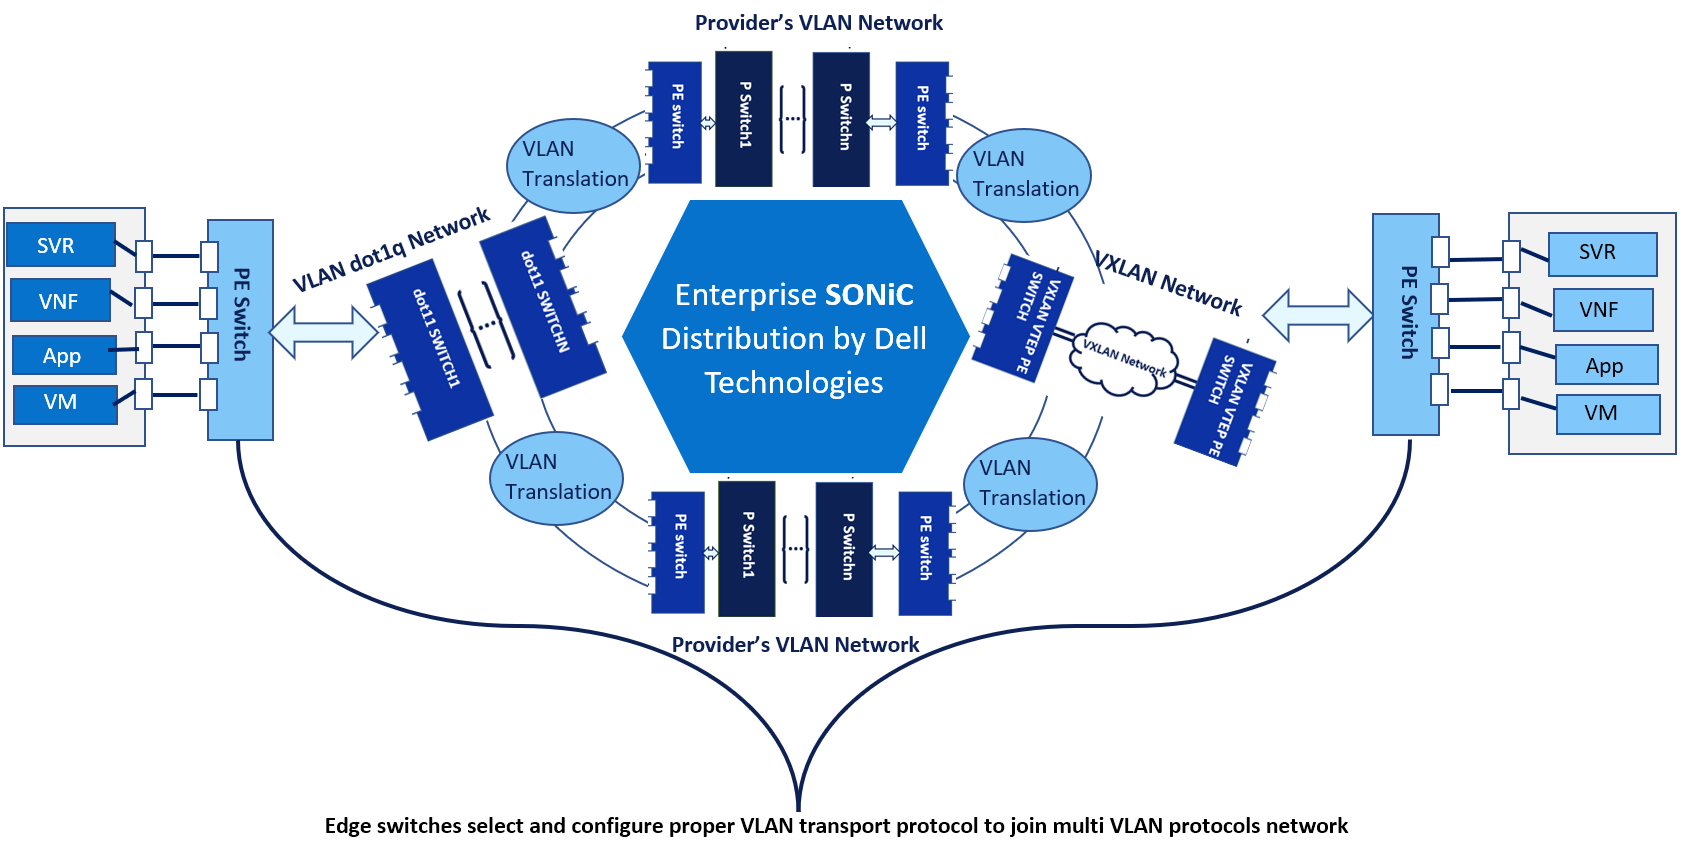
Figure 7. Illustration of Dell SONiC VLAN translation, QinQ, and VXLAN sample scenarios
Network service providers constantly face technical challenges and stringent requirements. For example, one common challenge is determining how to scale bandwidth up and out to address fast and spontaneous traffic growth. Other challenge include protecting and securing the networks through user and tenant isolations, or improving network efficiency.
Open source-based SONiC network software provides rapid feature development and a broad selection of network orchestration tools through a vibrant ecosystem and community. On top of that, Dell Enterprise SONiC has added special features and verifications, such as world class technical support for Dell networking hardware. This support can improve network security and flexibility, as well as increase network provisioning and monitoring capabilities.
Contact a Dell SONiC sales representative for additional information about Dell Enterprise SONiC solutions and technologies.
Contact Dell SONiC Sales representatives
Resources
To learn more about Dell Enterprise SONiC features, see the Enterprise SONiC Spec Sheet.
To learn more about Enterprise SONiC Distribution by Dell Technologies, see Enterprise SONiC Networking Solutions, Enterprise SONiC Distribution By Dell Technologies, and Dell SONiC Solution Overview.
For more information about specific steps and commands, see the Dell SONiC User’s Guide available on the Dell Digital Library.

Installing ESXi7.0 with Small Storage Footprint
Tue, 06 Sep 2022 17:56:43 -0000
|Read Time: 0 minutes
This blog provides instructions for installing ESXi7.0 on Dell VEP4600/1405 platforms with small hard disk space consumption.
In ESXi7.0 release, the default storage used by ESXi is about 138GB, see the following link for more information:
https://kb.vmware.com/s/article/81166
This release offers the option to reduce the storage consumption. This blog provides information on how to install ESXi7.0 with small storage footprint.
The ESXI image used in this demonstration is: VMware-VMvisor-Installer-7.0.0.update03-19482537.x86_64-DellEMC_Customized-A04.iso
This image was tested on VEP4600 8 core model.
Use Rufus on Windows to prepare a bootable USB thumb drive. Select the right ESXi7.0.3 ISO file.
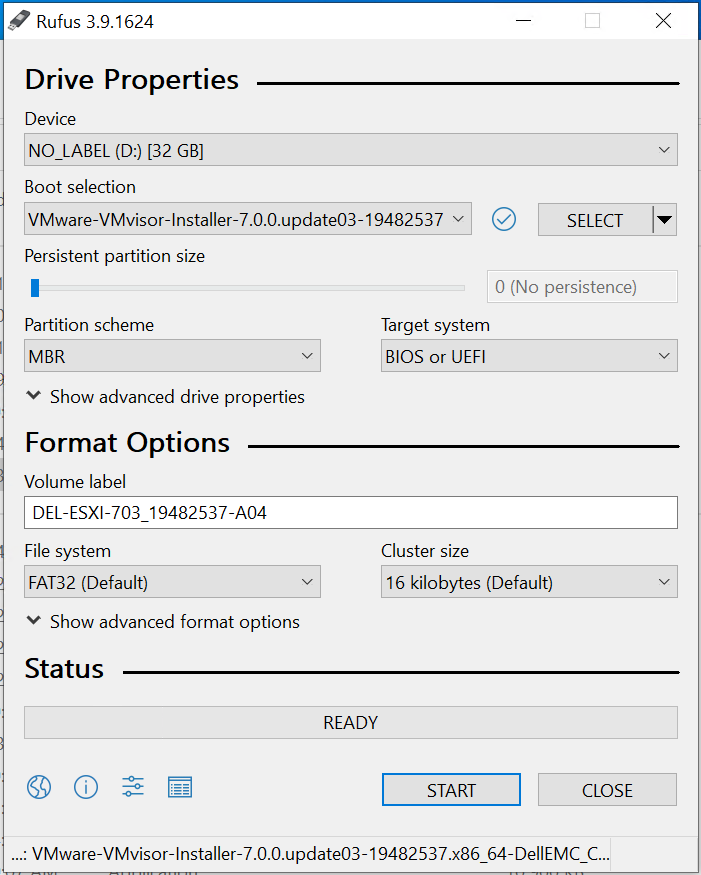
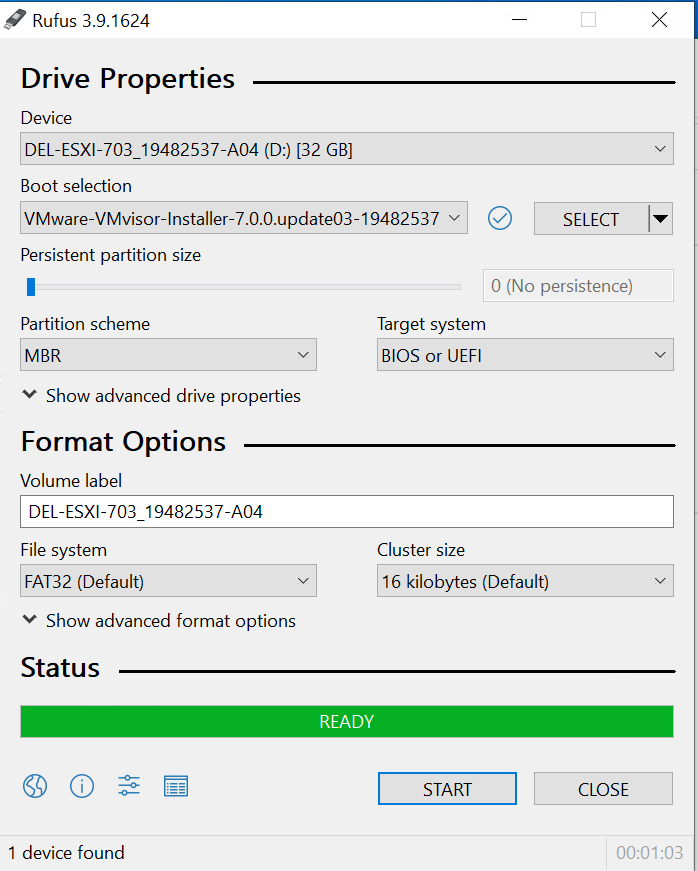
Use the default settings for all other options. Click OK to start the USB preparation process.
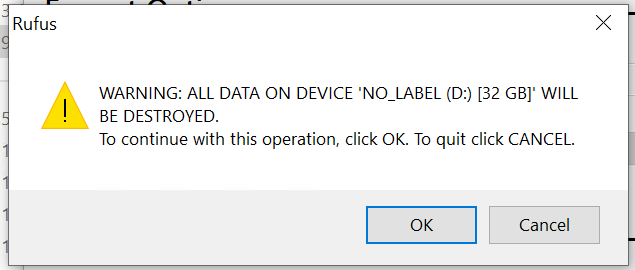
Once the process is complete, close Rufus.
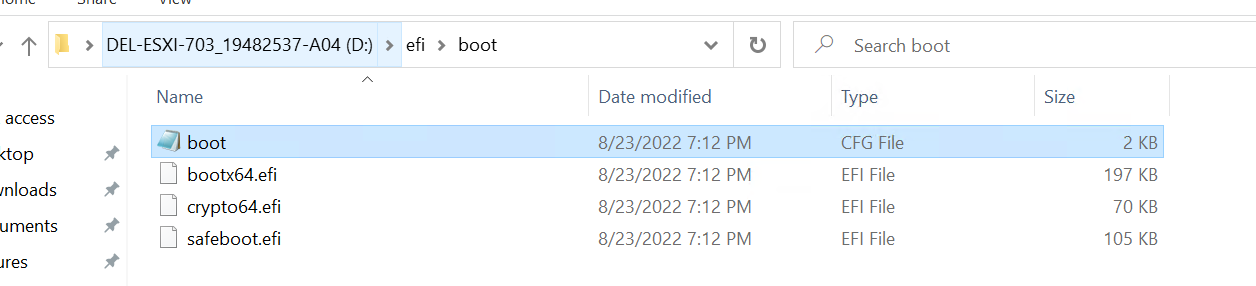
Open Windows File Explorer, go to the following file on the prepared bootable USB thumb drive:
ESXi bootable USB->efi->boot.cfg
Open the file using Windows notepad utility.
Modify this line in the file:
Before: kernelopt=runweasel cdromBoot
After: kernelopt=runweasel cdromBoot systemMediaSize=min
Choose from the following configuration options for the systemMediaSize:
- min 33GB, for single disk or embedded servers
- small 69GB, for servers with at least 512GB RAM
- max all available space, for multi-terabyte servers

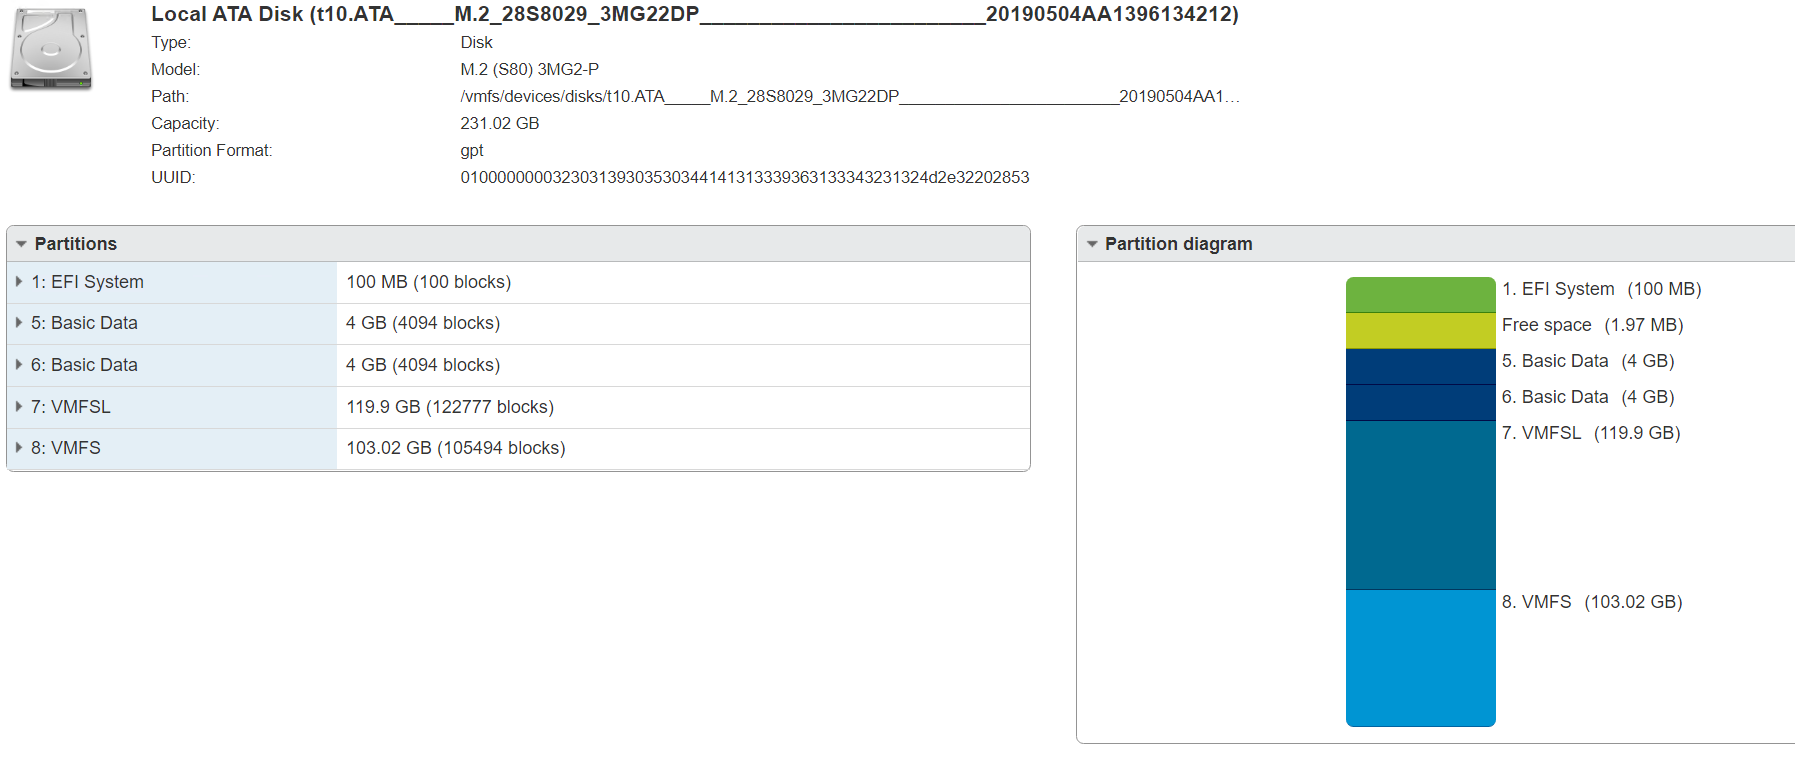
After the installation, log on to ESXi vSphere web ui. Click the storage menu on the left side panel and then click the devices tab on the right side of the screen.
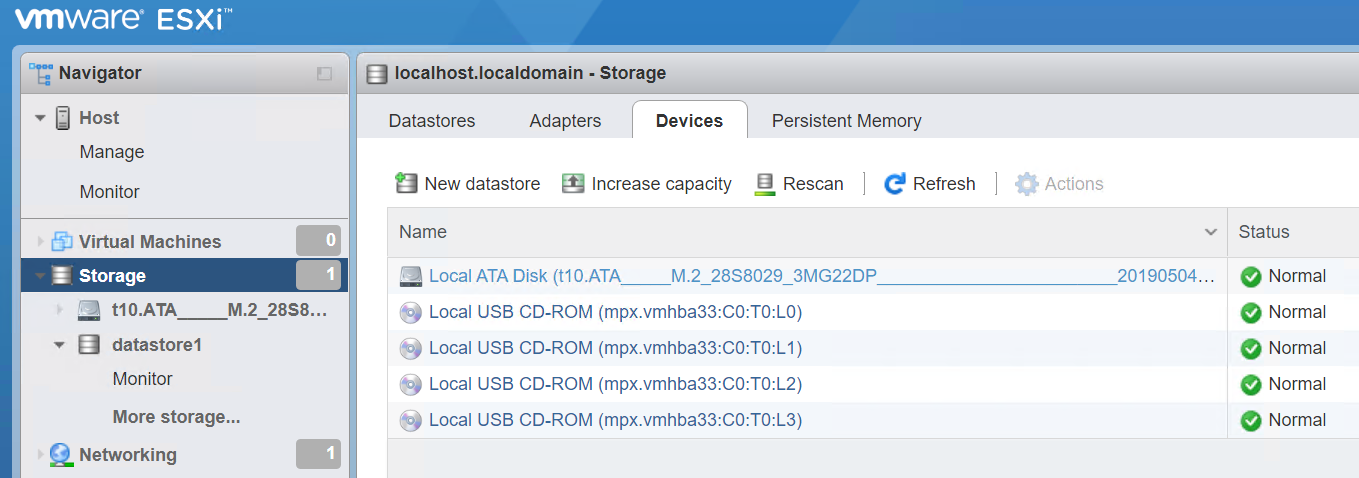
Click the first hard disk device.
VMFSL is the new partition introduced in ESXi7.0. with the min systemMediaSzie option. VMFSL uses about 24 GB.
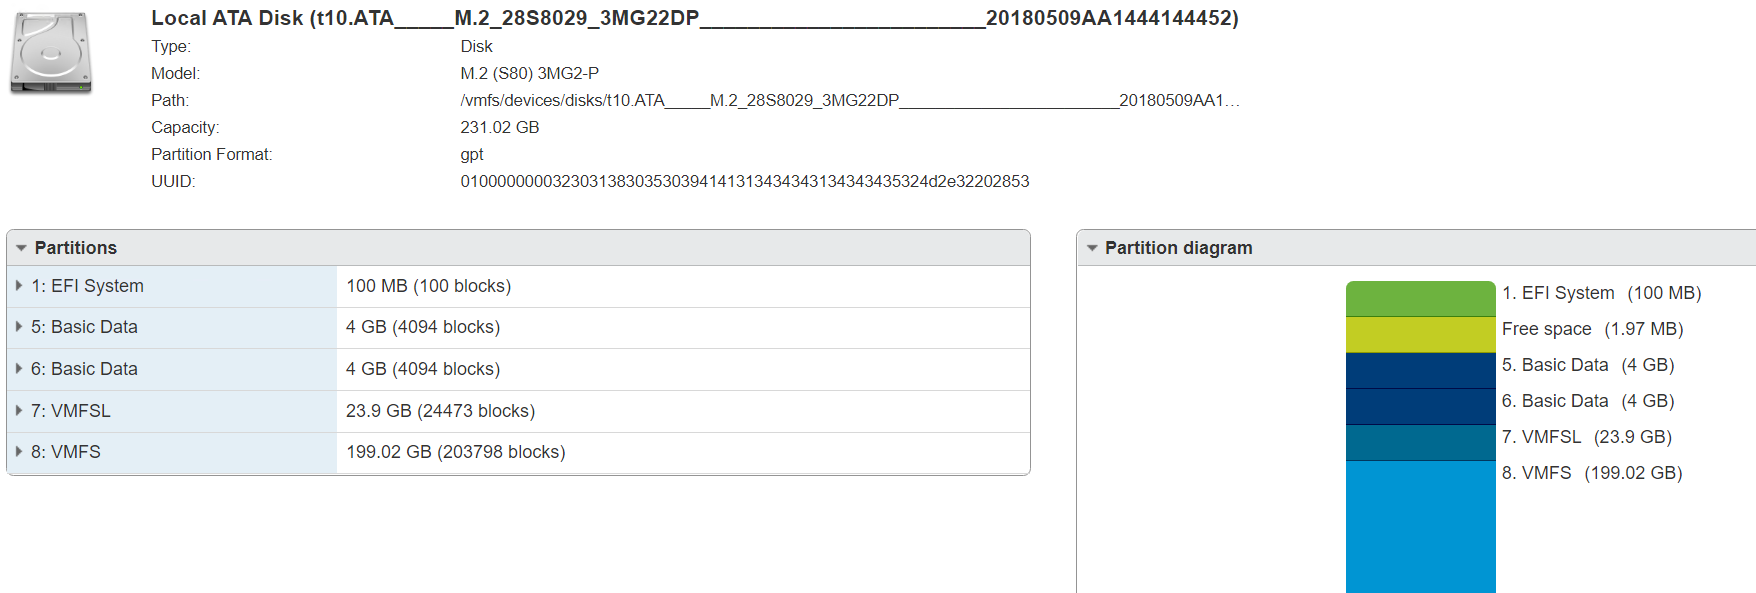
The default systemMediaSize is about 120GB.
In summary, we can use this systemMediaSize option in the bootable USB to control the hard disk space consumption. This can be especially useful when installing ESXi7.0 in some VEP models that come with a small SSD capacity.