
Symmetrix Access Controls
Symmetrix Access Controls
-
Many product applications, such as Unisphere for PowerMax, TimeFinder, and SRDF can issue management commands to any device in a PowerMax array. By default, anyone with access to PowerMax-based management software can execute any function on any PowerMax device.
Shared systems such as these may be vulnerable to one host, accidentally or intentionally, tampering with another’s devices. To prevent this, the symacl command can be used by an administrator of the PowerMax storage site to set up and restrict host access to defined sets of devices, or access pools, across the various PowerMax arrays.
This SYMCLI component supports Symmetrix Access Control requirements. The Access Control command allows you to set up and maintain an access-controlled environment over the PowerMax access pools. The command, symacl, sets up access control mechanisms and changes access control entries in the access control database[56].
Note: Symmetrix Access Control is not supported on the PowerMax 2500/8500.
A PowerMax-based access control database contains all the mechanisms or information to govern access to PowerMax access pools.
Information about the following access control mechanisms comprise the access control database:
- Access Control groups. Unique access IDs and names are assigned (together) to hosts and then sorted into access control groups according to similar needs (determined by an Administrator). Access groups are allowed to act on access pools based on permissions (access types) granted by the Administrator.
- Access pools. Permissions (or access types), such as BCV, SRDF, ADMIN, are assigned to allow a host to perform certain Solutions Enabler functionality on a specified set of devices. These sets of devices are referred to as access pools.
- Access Control Entries (ACEs). Once the group and access pool mechanisms are established, the access control entries (ACEs) are created, which grant permissions to these pools. The ACEs of the various access groups (along with groups and pools) are managed and stored in the access control database.
- Access Control Lists (ACLs). A group of ACEs that are associated with the same group.
SRM Appliance
Implementing the security settings will require modifying Solutions Enabler files as well as executing SYMCLI commands. On SRM Windows this is a straightforward process, but on the SRM Appliance, since the local Solutions Enabler runs inside a Docker container, the container must be accessed directly to run any SYMCLI commands, though the SE configuration files can be changed through the SRM Appliance Management.
Start by downloading the configuration archive from either the protection or recovery site shown in Figure 180.
Figure 180. Download configuration archive

Extract the archive file keeping the existing directory structure. As the Appliance is Linux-based, it is best to extract and edit the files on a similar OS. If Windows is used, be sure there are no extra characters in the file when saving it. There is no syntax checking of the files when the archive is uploaded, and any incorrect information may cause the software to operate incorrectly or not at all.
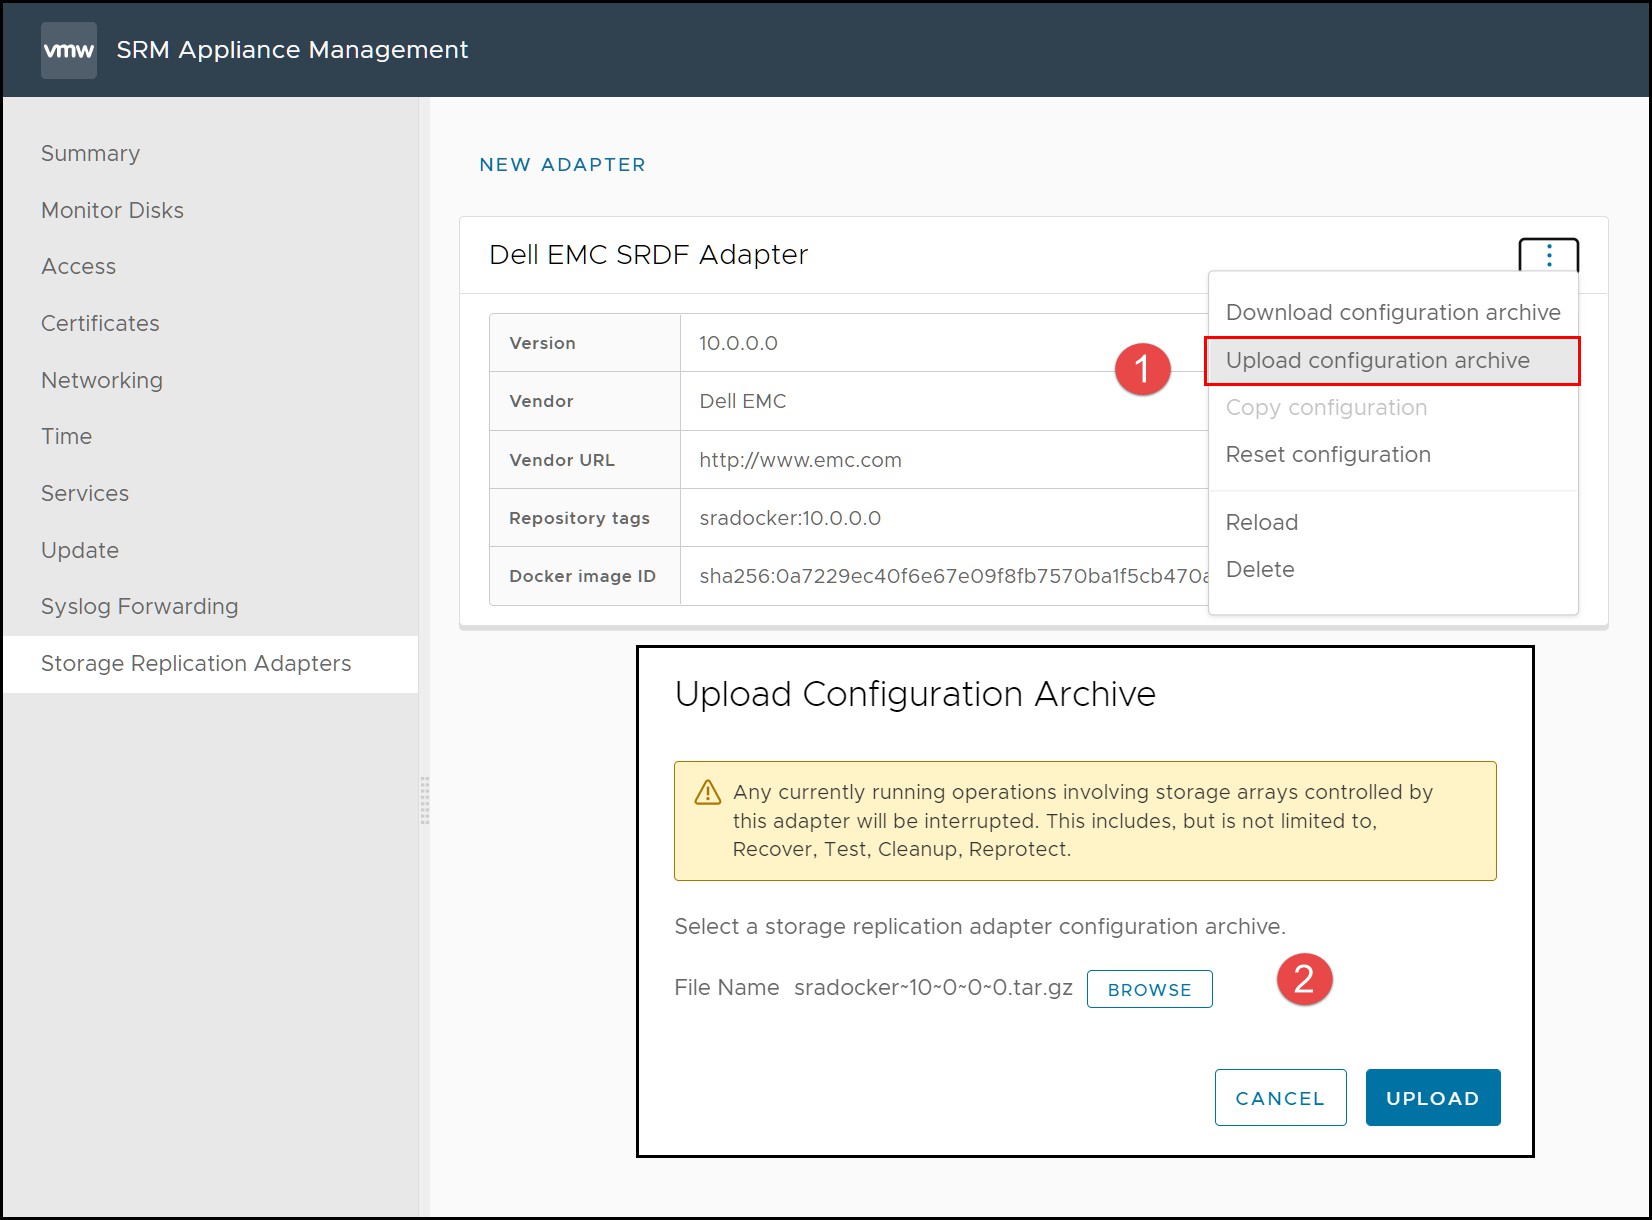
Modify the necessary SE files. When complete, tar and compress all the configuration files, maintaining the directory structure. Upload the configuration archive using the SRM Appliance Management interface in Figure 181 for both the protection and recovery sites.
Figure 181. Uploading SRDF SRA configuration archive
Whenever SE files are changed, the SRDF SRA must be reloaded so that the changes can be incorporated. Using the same SRM Management interface, run a Reload as in Figure 182.
Figure 182. Reloading SRDF SRA configuration archive
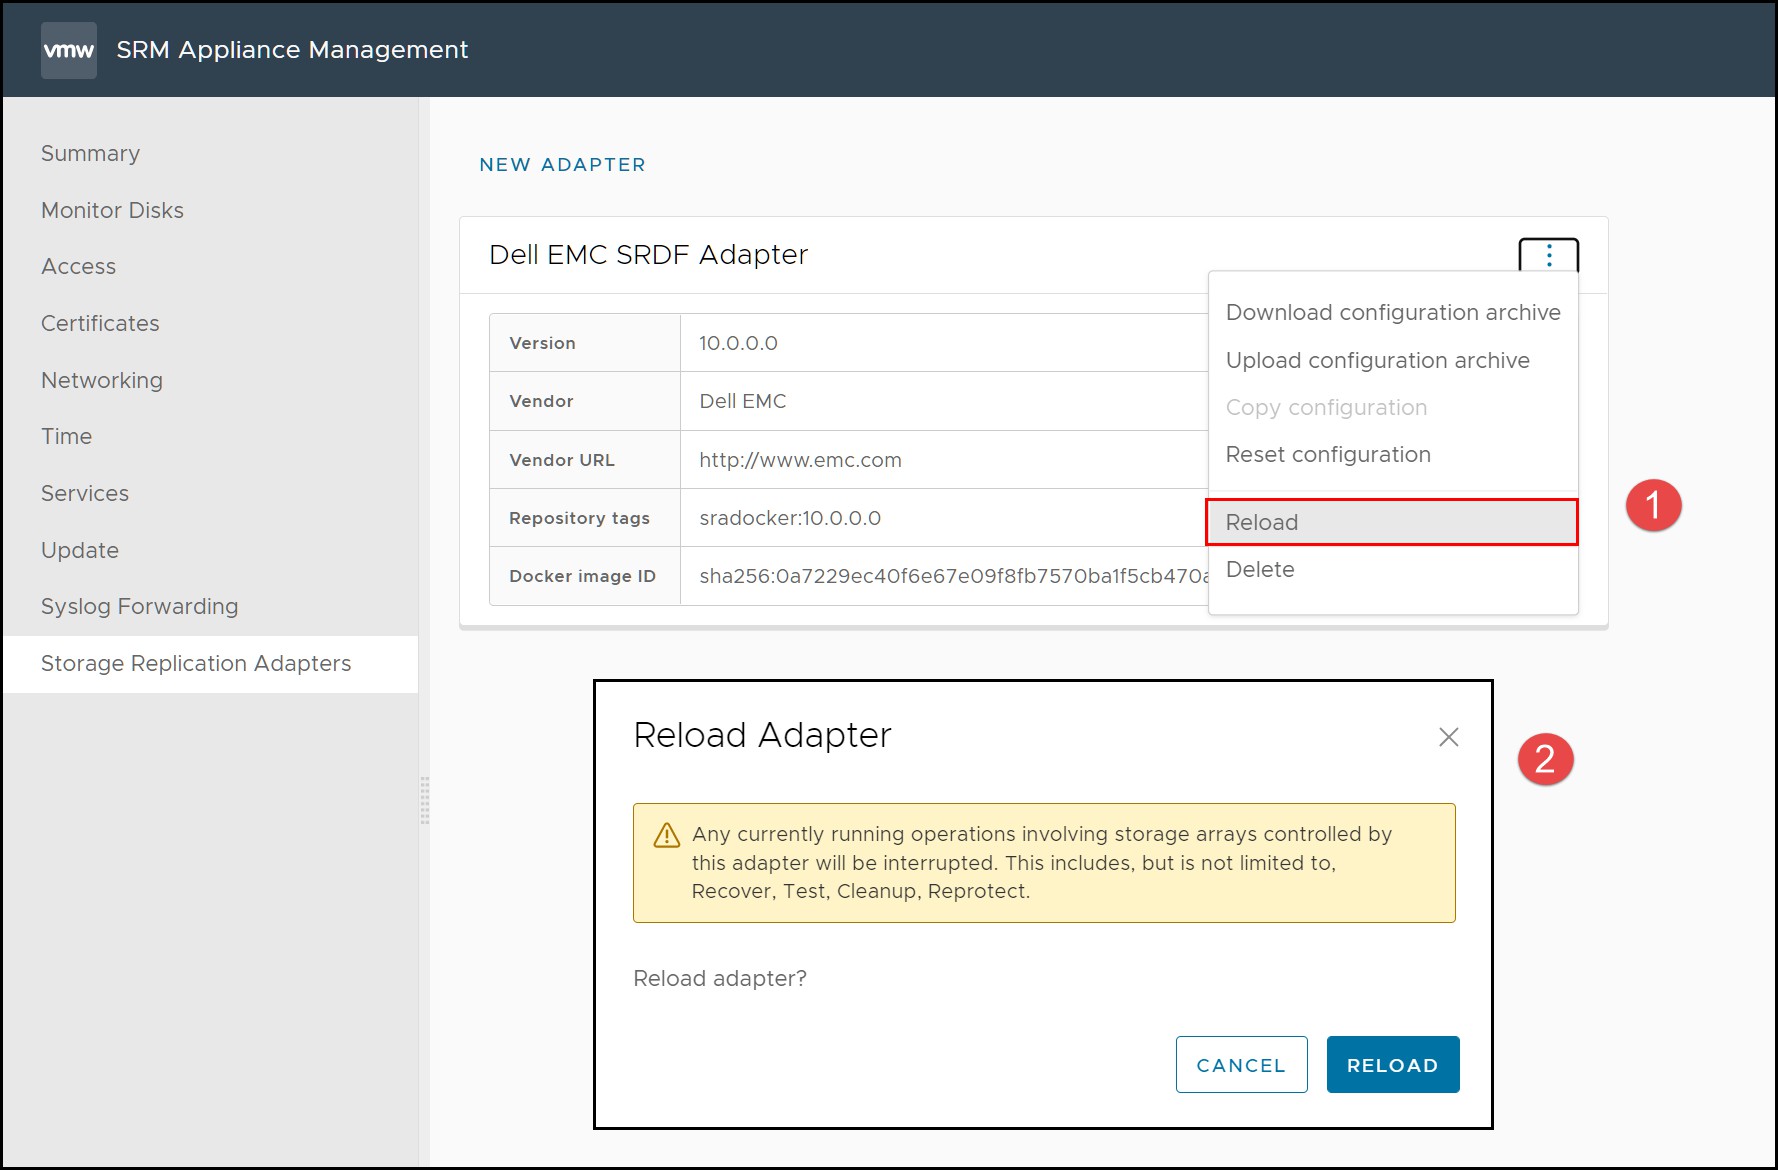
During a reload, the SE daemons will be restarted and use the new settings.
When it is necessary to run SYMCLI commands, the Docker container must be accessed directly.
In order to run Solutions Enabler commands on the SRM Appliance, it is necessary to access the running Docker container directly. Docker provides the commands to do this. Follow the outlined steps below.
- Login to the SRM protection Appliance as the “admin” user and switch to the “root” user.
- Determine the container id by executing docker ps
- Using the container id, access a bash shell in the container: docker exec -it <container_id> /bin/bash
- Run the desired SYMCLI commands
- Note that if the Solutions Enabler configuration files are updated manually using this process, as opposed to using the configuration archive, it is still necessary to reload the adapter in Figure 182 after completion.
An example of these steps is shown in Figure 183.
Figure 183. Running SYMCLI in Docker container

SYMACL Unique Identifiers
The first step in the process of configuring SYMACLs is to create the access control groups by gathering the SYMACL unique identifiers.
If the Solutions Enabler servers are configured to be local (they have direct access to Gatekeepers) the unique identifier of the Solutions Enabler instance installed on the SRM server should be retrieved.
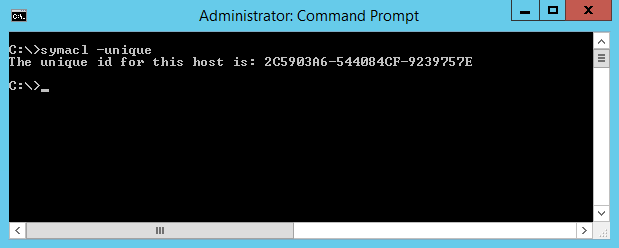
This identifier can be obtained by opening up the Windows command prompt on the local server and executing the following command:
symacl -unique
Figure 184 shows a printout of this command where the unique identifier of the local install of Solutions Enabler is returned.
Figure 184. Retrieving the SYMACL unique identifier with Solutions Enabler
Symmetrix Access Control identifies individual management hosts with an access ID. There are two different approaches to generating access IDs:
- Hardware-based access ID: By default, a host's access ID is derived from hardware characteristics of that host. On x86 (32-bit Intel), x86_64 (64-bit Intel/AMD), and IA 64 platforms, a network interface MAC address is used. On other platforms, different characteristics of the host, such as a processor identifier, are used.
- Alternate access ID: Optionally, a host's access ID can be generated at random or from a provided passphrase and stored to a secure location on the local disk. This functionality is supported for all platforms but is strongly recommended on platforms where the access ID is derived from a network interface MAC address.
- Alternate access IDs
Alternate access IDs are available for all platforms. Alternate access IDs do not utilize the host’s hardware identifiers (such as MAC address) to generate an encrypted access ID. When enabled, Solutions Enabler can:
- Randomly generate an alternate access ID
- Generate an alternate access ID based on a passphrase or file
- To use alternate access IDs users must enable the Solutions Enabler SYMAPI_ALTERNATE_ACCESS_ID option in the following file:
<Solutions Enabler_HOME>/config/options
To activate an alternate access ID randomly:
symacl -unique -passphrase Passphrase
To activate an alternate access ID using a passphrase:
symacl -unique -passphrase Passphrase
To activate an alternate access ID using a passphrase stored in a file on the local disk:
symacl -unique -passphrase -file pathname
Access control in client/server mode
Anyone with access to PowerMax management software can execute functions on any PowerMax device. Many applications can issue management commands to any device in a PowerMax deployment.
Such shared systems may be vulnerable to a host (accidentally or intentionally) tampering with another’s devices. To prevent this, the symacl command can be used by to set up and restrict host access to defined sets of devices across the PowerMax arrays.
By default, client/server mode operations are executed on the server host using the access ID of the server. Access control checks are performed against the rules established for the server host, regardless of which client host initiated the operations.
Users can use the access ID of the client host instead of the server host. When this is enabled, access control rules must be established for, and checked against, the client hosts from which the operations are issued.
To use the access ID of the client host, users must make changes in the options file on the client and the server host, as explained in the following sections.
Server host options file settings
On the server host, the following option controls the source of the access ID used for the client/server sessions:
SYMAPI_USE_ACCESS_ID = CLIENT | SERVER | ANY
The behavior of this option is as follows:
- When set to CLIENT, an access ID supplied by the client host is used. If the client did not provide an access ID, operations fail.
- When set to SERVER (default), the server always uses its own access ID and ignores an access ID, if any, provided by the clients.
- When set to ANY, the server uses an access ID provided by a client. If one is not provided, the server uses its own access ID.
- Client host options file settings
The use of the alternate access ID, described earlier, must be enabled to use this functionality:
SYMAPI_ALTERNATE_ACCESS_ID = ENABLE
Additionally, users must set the following option to control whether the client can send its own access ID to the server for use there:
SYMAPI_CLIENT_SIDE_ACCESS_ID = ENABLE
The behavior of this option is as follows:
- When set to ENABLE, the client sends its access ID to the server in client/server mode (recommended).
- When set to DISABLE (default), the client does not send its access ID to the server in client/server mode.
- Note: After enabling the above two options, you must then run the symacl -unique command on the client side to generate the access ID and store it in the lockbox on the client side.
Enabling PowerMax ACLs
SYMACLs can be created and configured through the use of Unisphere for PowerMax, or Solutions Enabler command line utilities. The GUI is the preferred method for configuration as it offers a simple, wizard-based interface for setting up ACLs. Figure 185 shows how to access SYMACL configuration from within Unisphere for PowerMax.
Figure 185. Configuring SYMACLs with Unisphere for PowerMax

Note: Configuring SYMACLs requires the PIN created when the SYMACL database was initialized. This PIN, while customer provided, can only be set by Dell personnel when the database is created. For security reasons, this PIN cannot be changed or viewed with customer management tools such as Unisphere for PowerMax or Solutions Enabler CLI.
[56] For more information about the syntax of the symacl command, refer to the Dell Solutions Enabler CLI Command Reference.