
2-node vSAN cluster configuration using Quickstart with a dedicated witness server sled
2-node vSAN cluster configuration using Quickstart with a dedicated witness server sled
-
Perform the following steps to configure a 2-node vSAN cluster using a dedicated witness sled.
- Log into the management vCenter using the administrator account.
- Create a Datacenter.
- Create an empty cluster in the Datacenter with vSAN, HA, and DRS enabled.
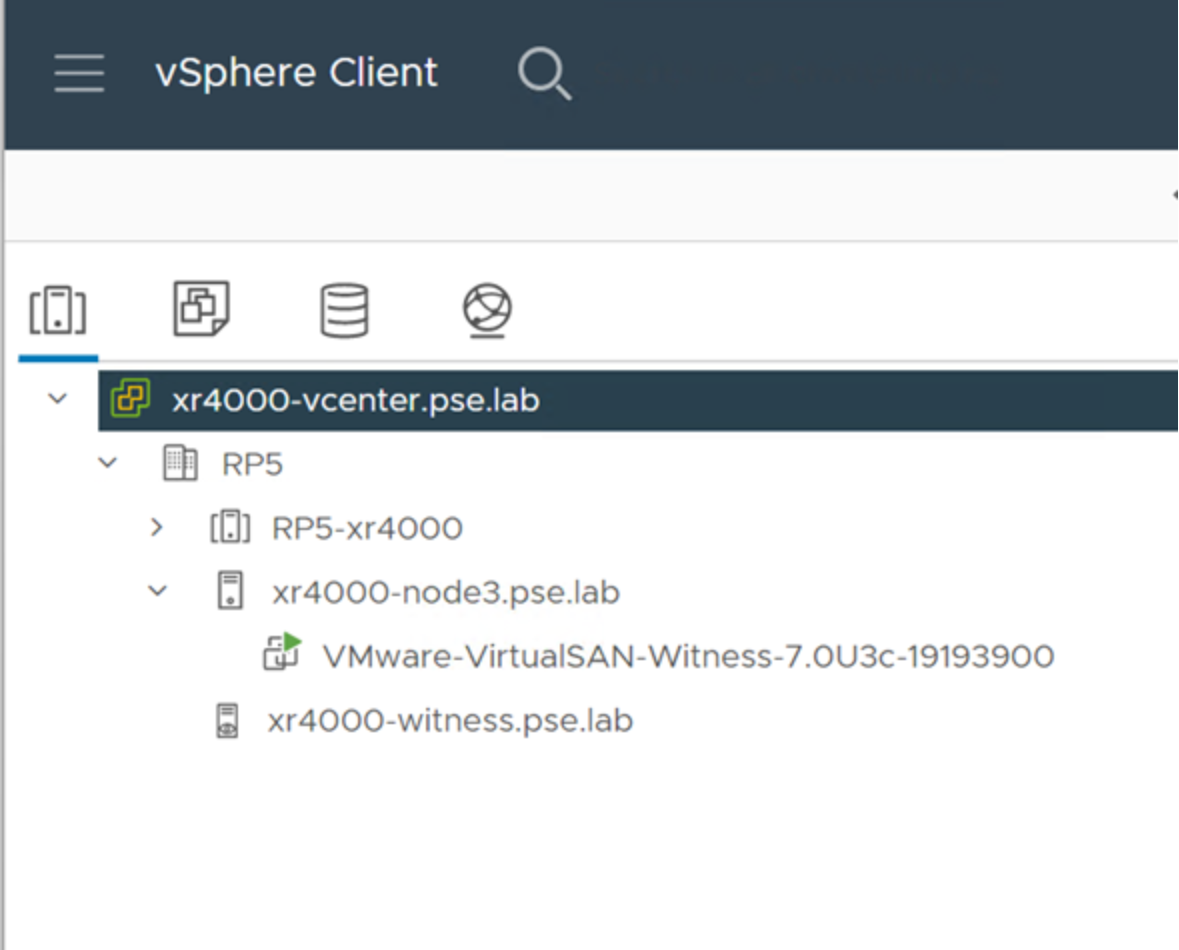
- Add the Nano node to the Datacenter (not the cluster). (This is “xr4000-node3” in the following screenshot.)
- Deploy the witness appliance on the Nano node.
- Note that Dell pre-configures the witness appliance on the nano node from the factory. Customers may choose to use that as is. The root password preset for the factory configured vSAN Witness appliance is @witness123!. For details, see the XR4000w Installation and Service Manual.
- If you prefer to deploy a newer version of the VMware vSAN witness appliance, you can do that from vCenter:
Right-click the xr4000-node3 host and select Deploy OVF Template.
Select the ova which is downloaded from the VMware download page (in the section VMware vSAN Tools, Plug-ins and Appliances).
- Add the witness appliance IP/hostname to the Datacenter (not the cluster). To do this, right-click the Datacenter and choose “Add Host”.
At this point, we have a Datacenter with an empty cluster, and the nano node (xr4000-node3) and witness appliance (xr4000-witness) are added to the Datacenter.
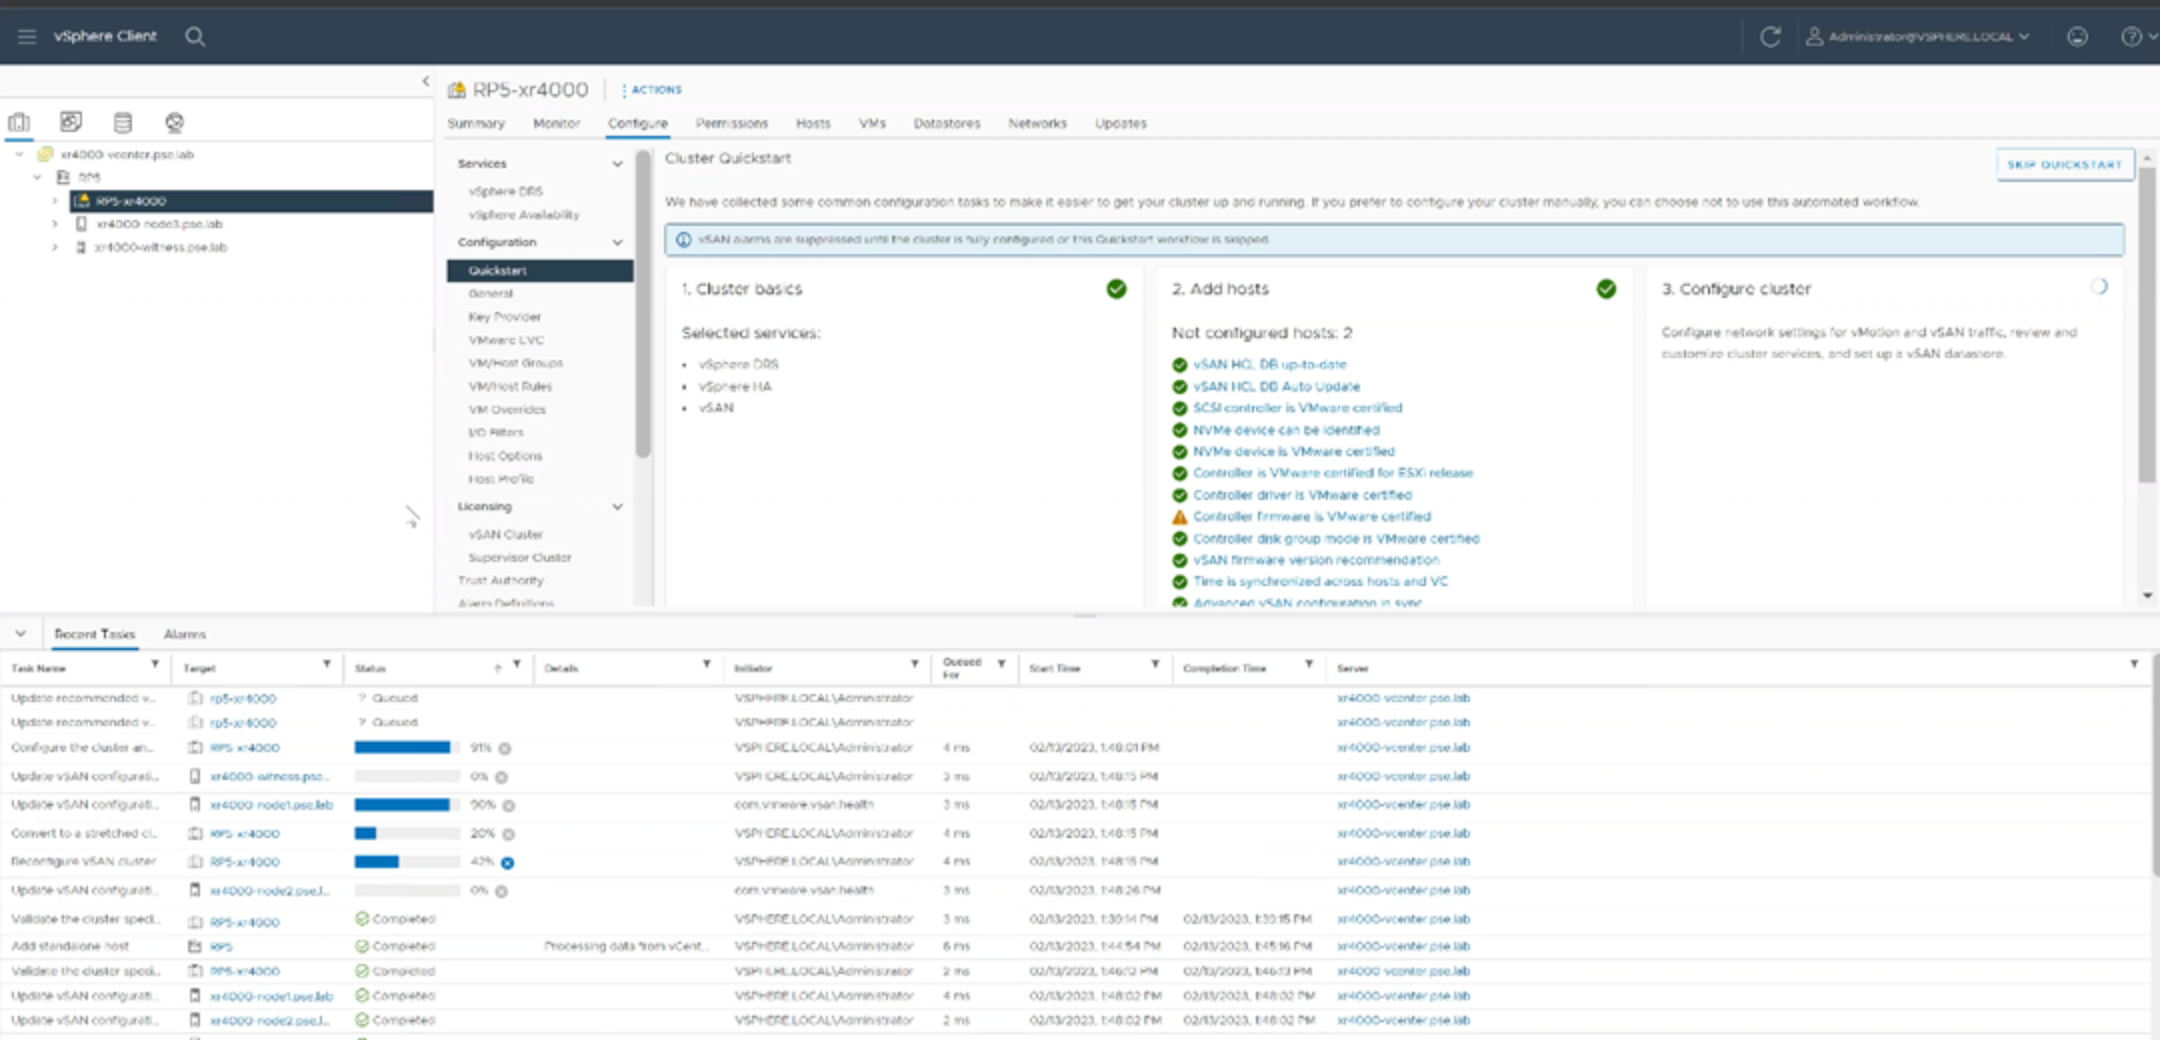
Next, select the empty cluster, click the Configure tab and select QuickStart. The QuickStart wizard now walks you through the process of setting up the cluster.
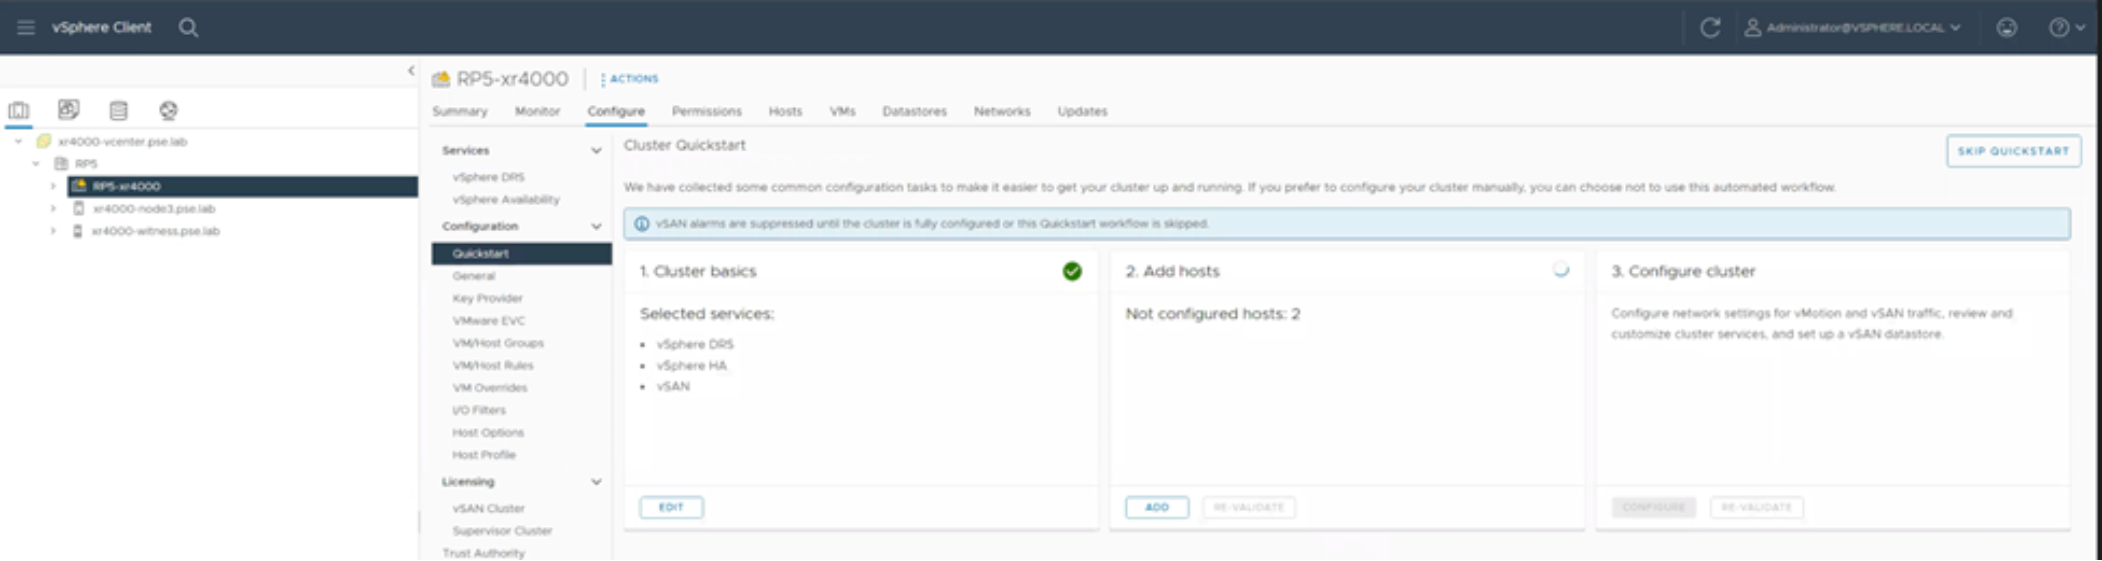
Some key points to be aware of in the QuickStart wizard:
- Make sure DRS, HA and vSAN are enabled in Step 1
- Use the same NTP server that you used for the ESXi nodes earlier.
- As an example, this document uses the following network configuration:
- Create two Distributed Switches.
- DSwitch1 – vmnic0 and vmnic1 for management and workload traffic.
- DSwitch2 – vmnic2 and vmnic3 for vMotion and vSAN. This DVS will need the max MTU set to 9000 under Settings, Advanced, MTU (Bytes) of this DVS.
- Under Advanced options, make sure to select Two node vSAN Cluster (see the following figure).
- Ensure that all the NVMe disks do not have any existing partitions so that they are available to claim the disks for vSAN. If any of the NVMe disks are unavailable, you can ‘crypto erase’ them by selecting system BIOS > Device Settings > (select the device) > Physical operations available for the device > CryptoErase.
- Add your witness host (the VM running on the Nano sled). See the following figure.
- Claim disks for the nodes and the witness appliance.
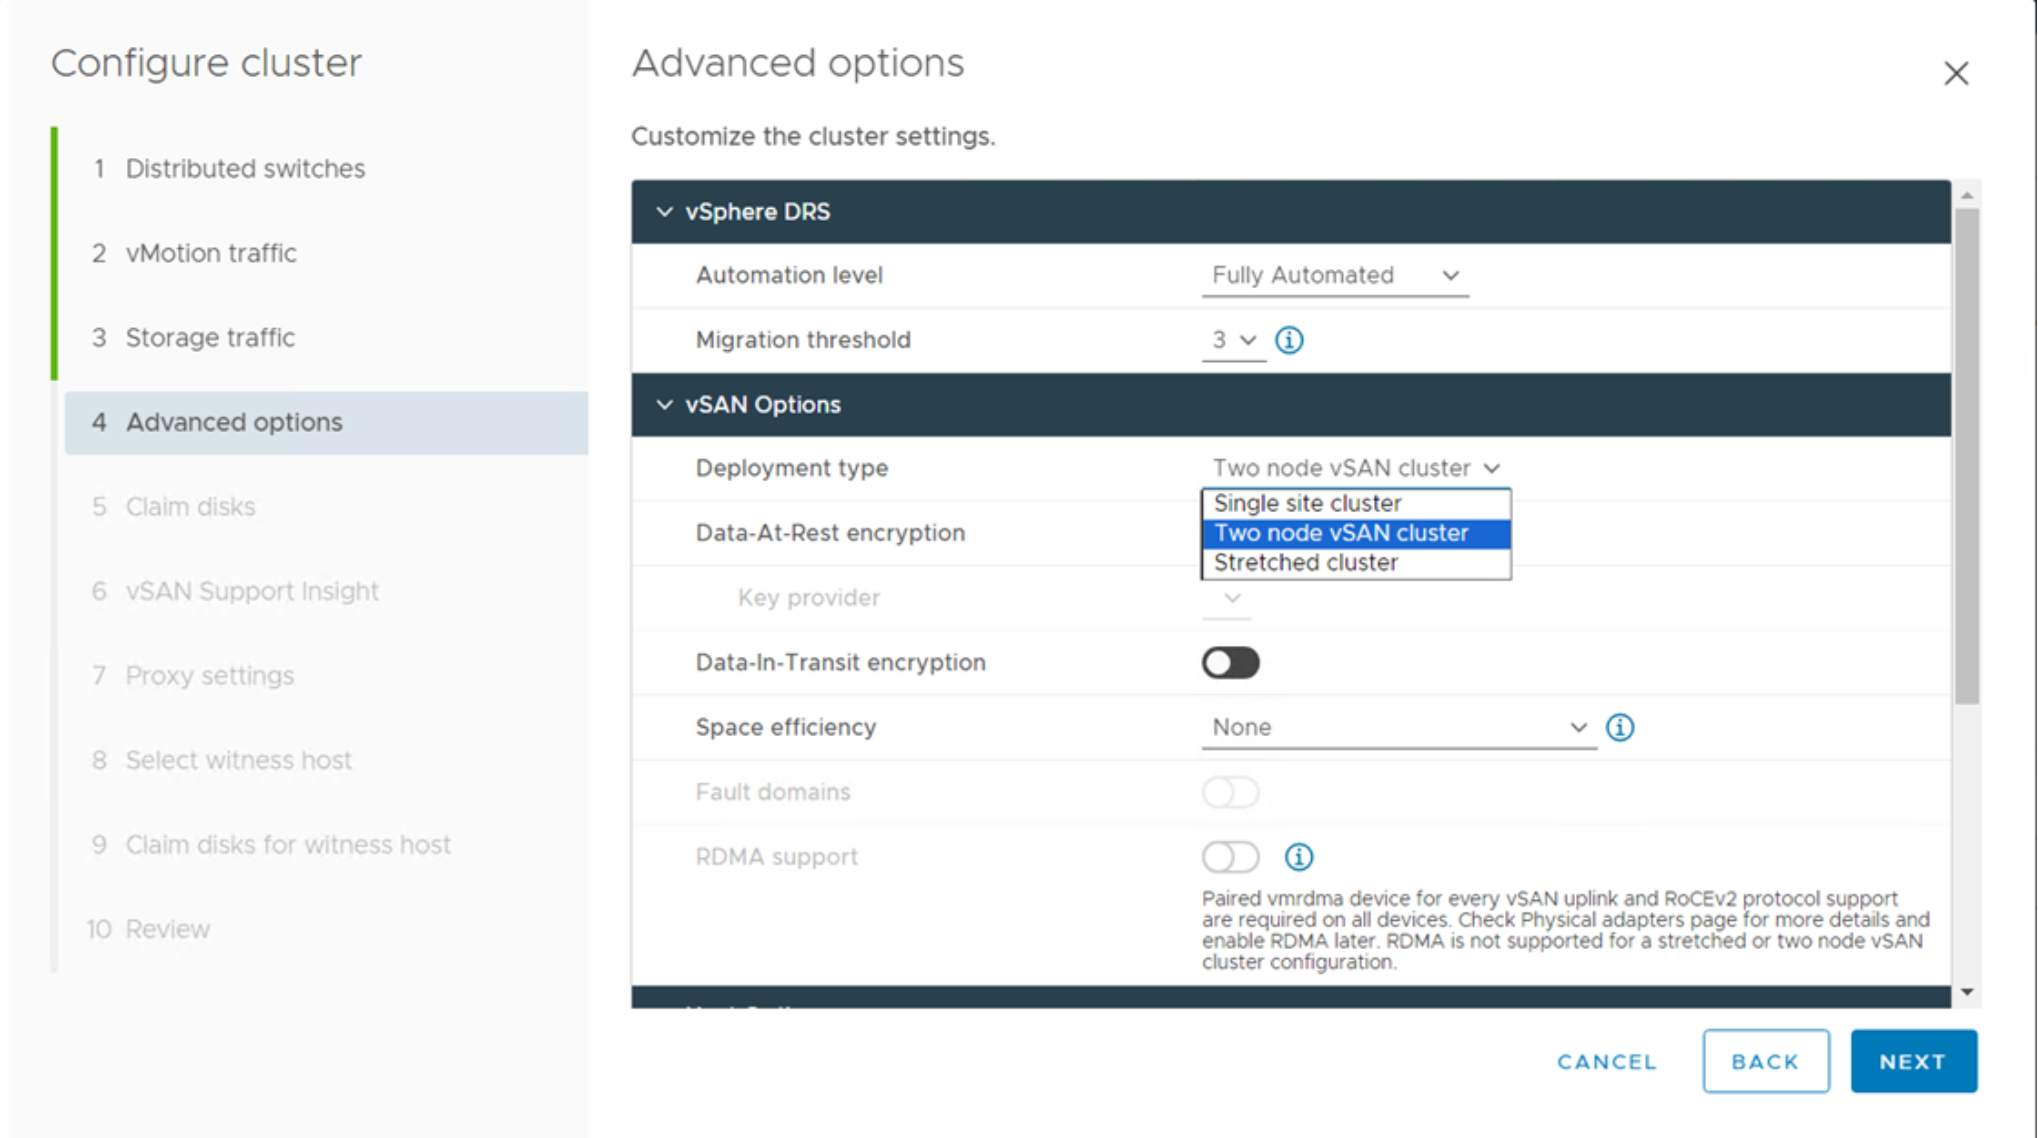
Figure 2. Selecting the cluster type in QuickStart
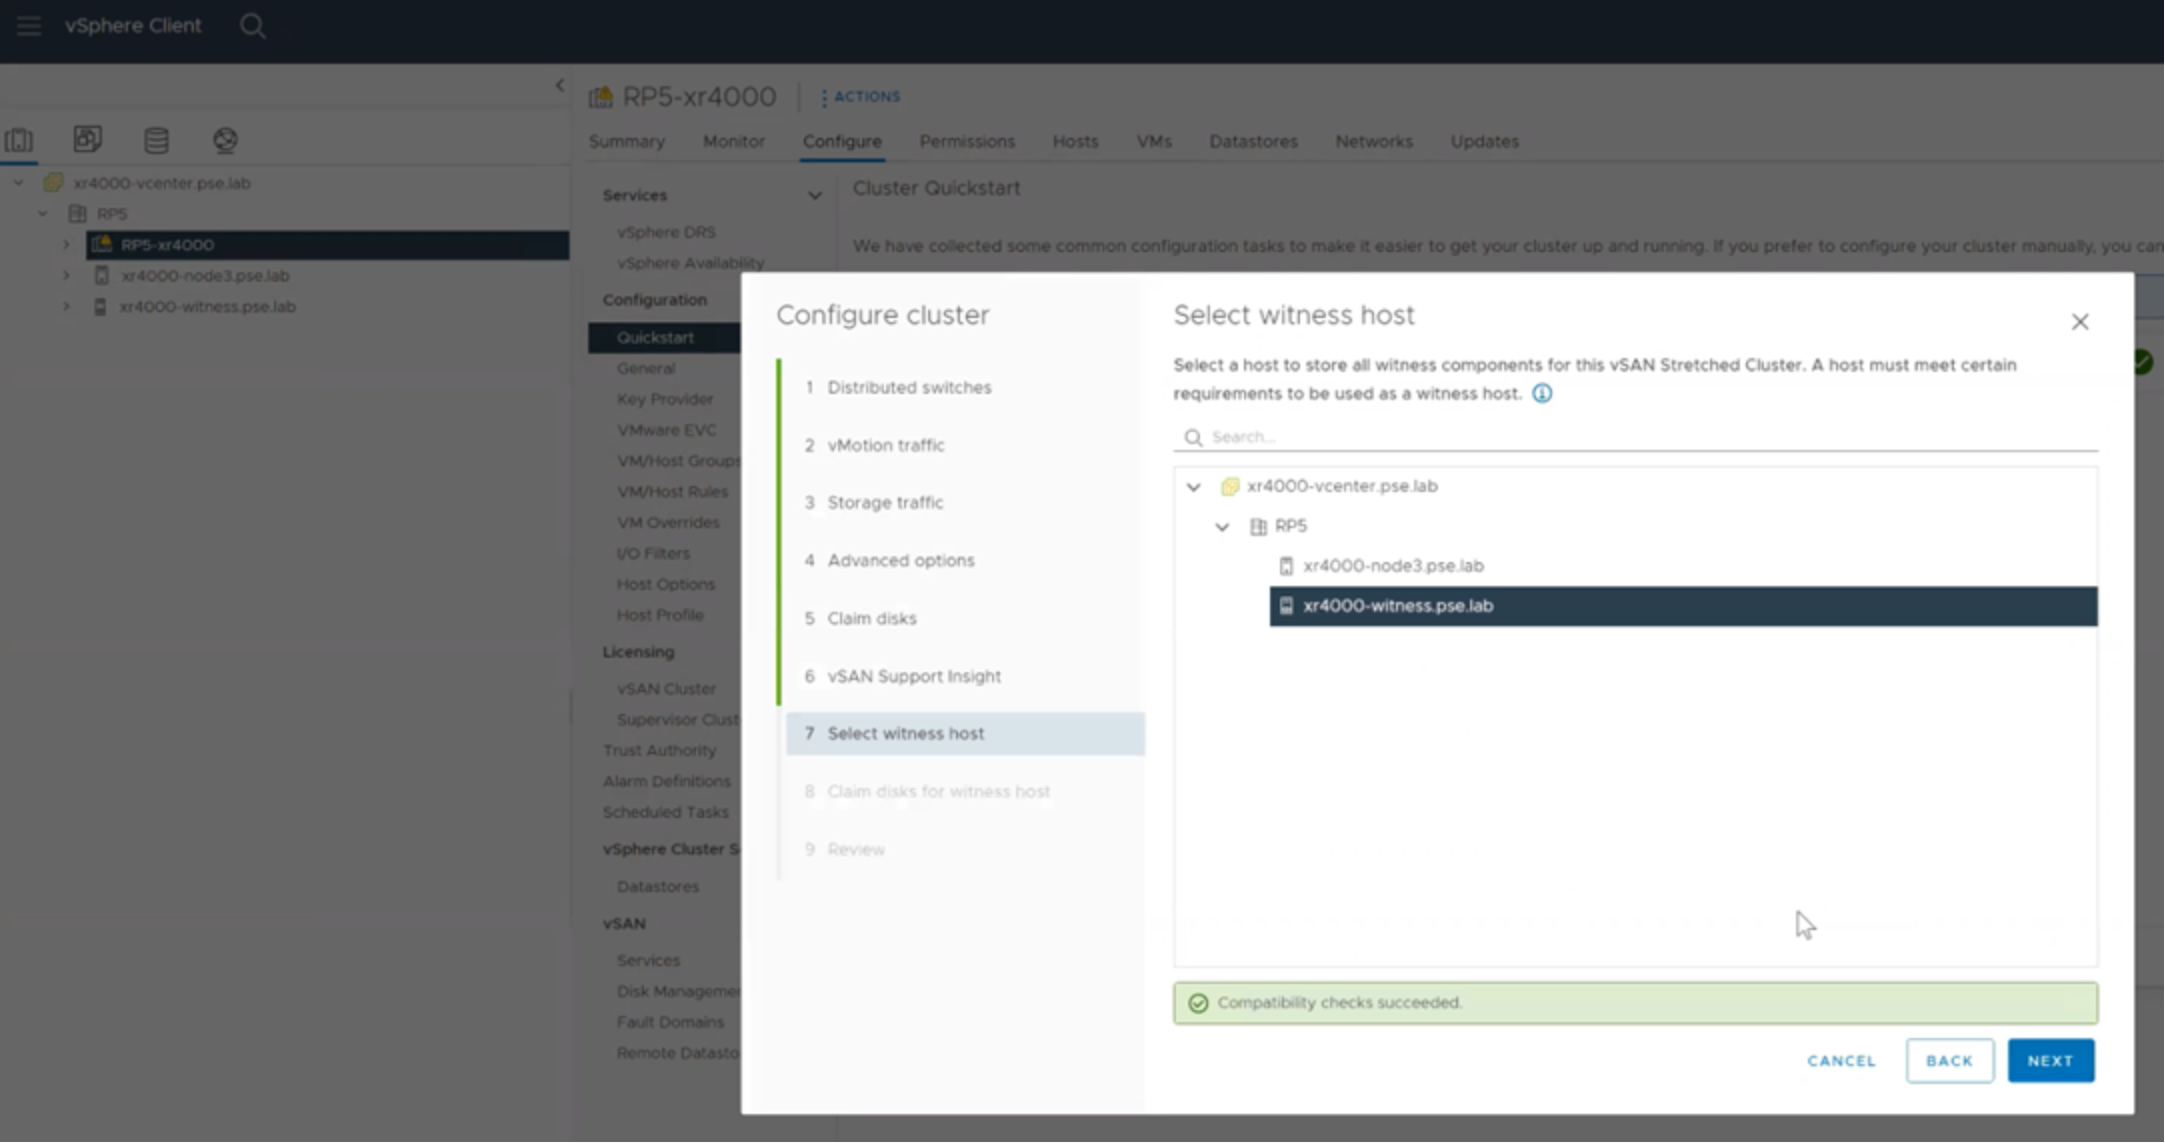
Figure 3. Adding the witness in QuickStart
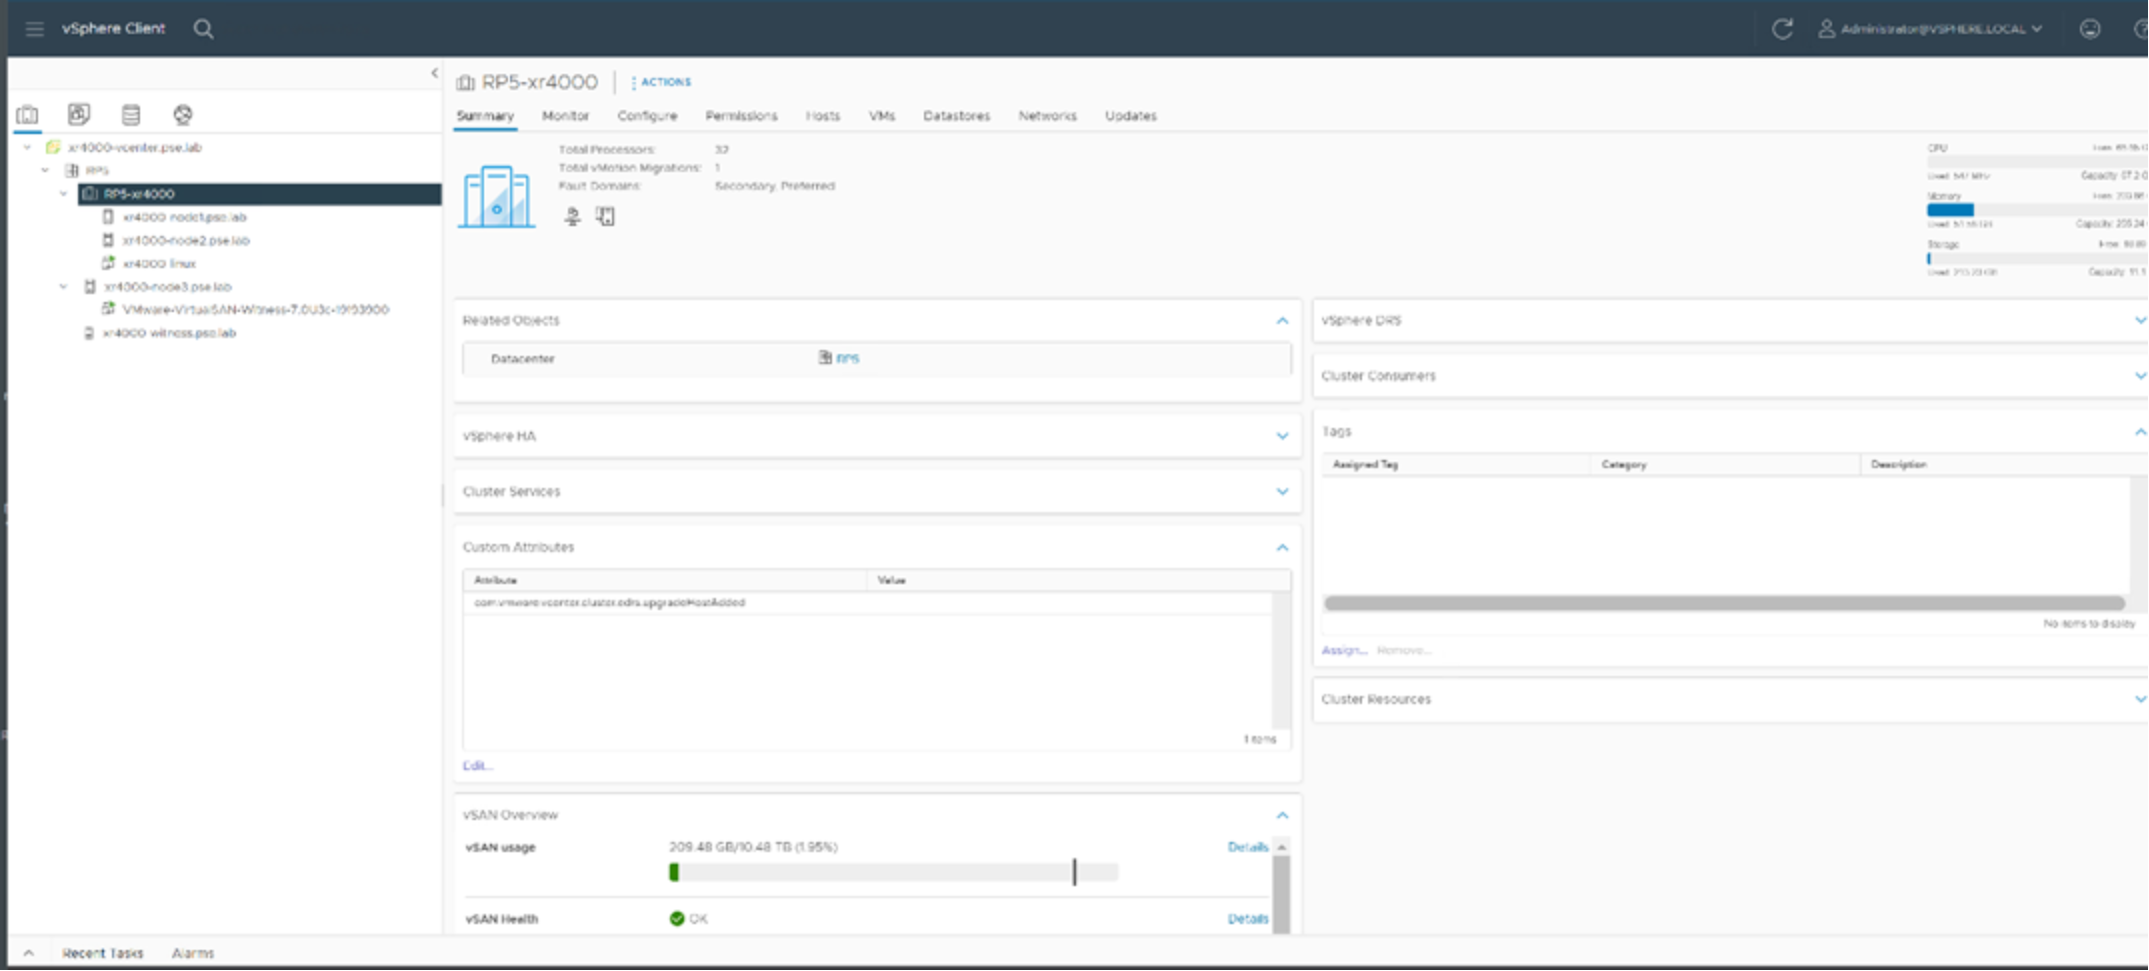
After you complete the wizard, it will take a few minutes as the cluster is created.
After the cluster is created, it is configured as shown in the following figure.
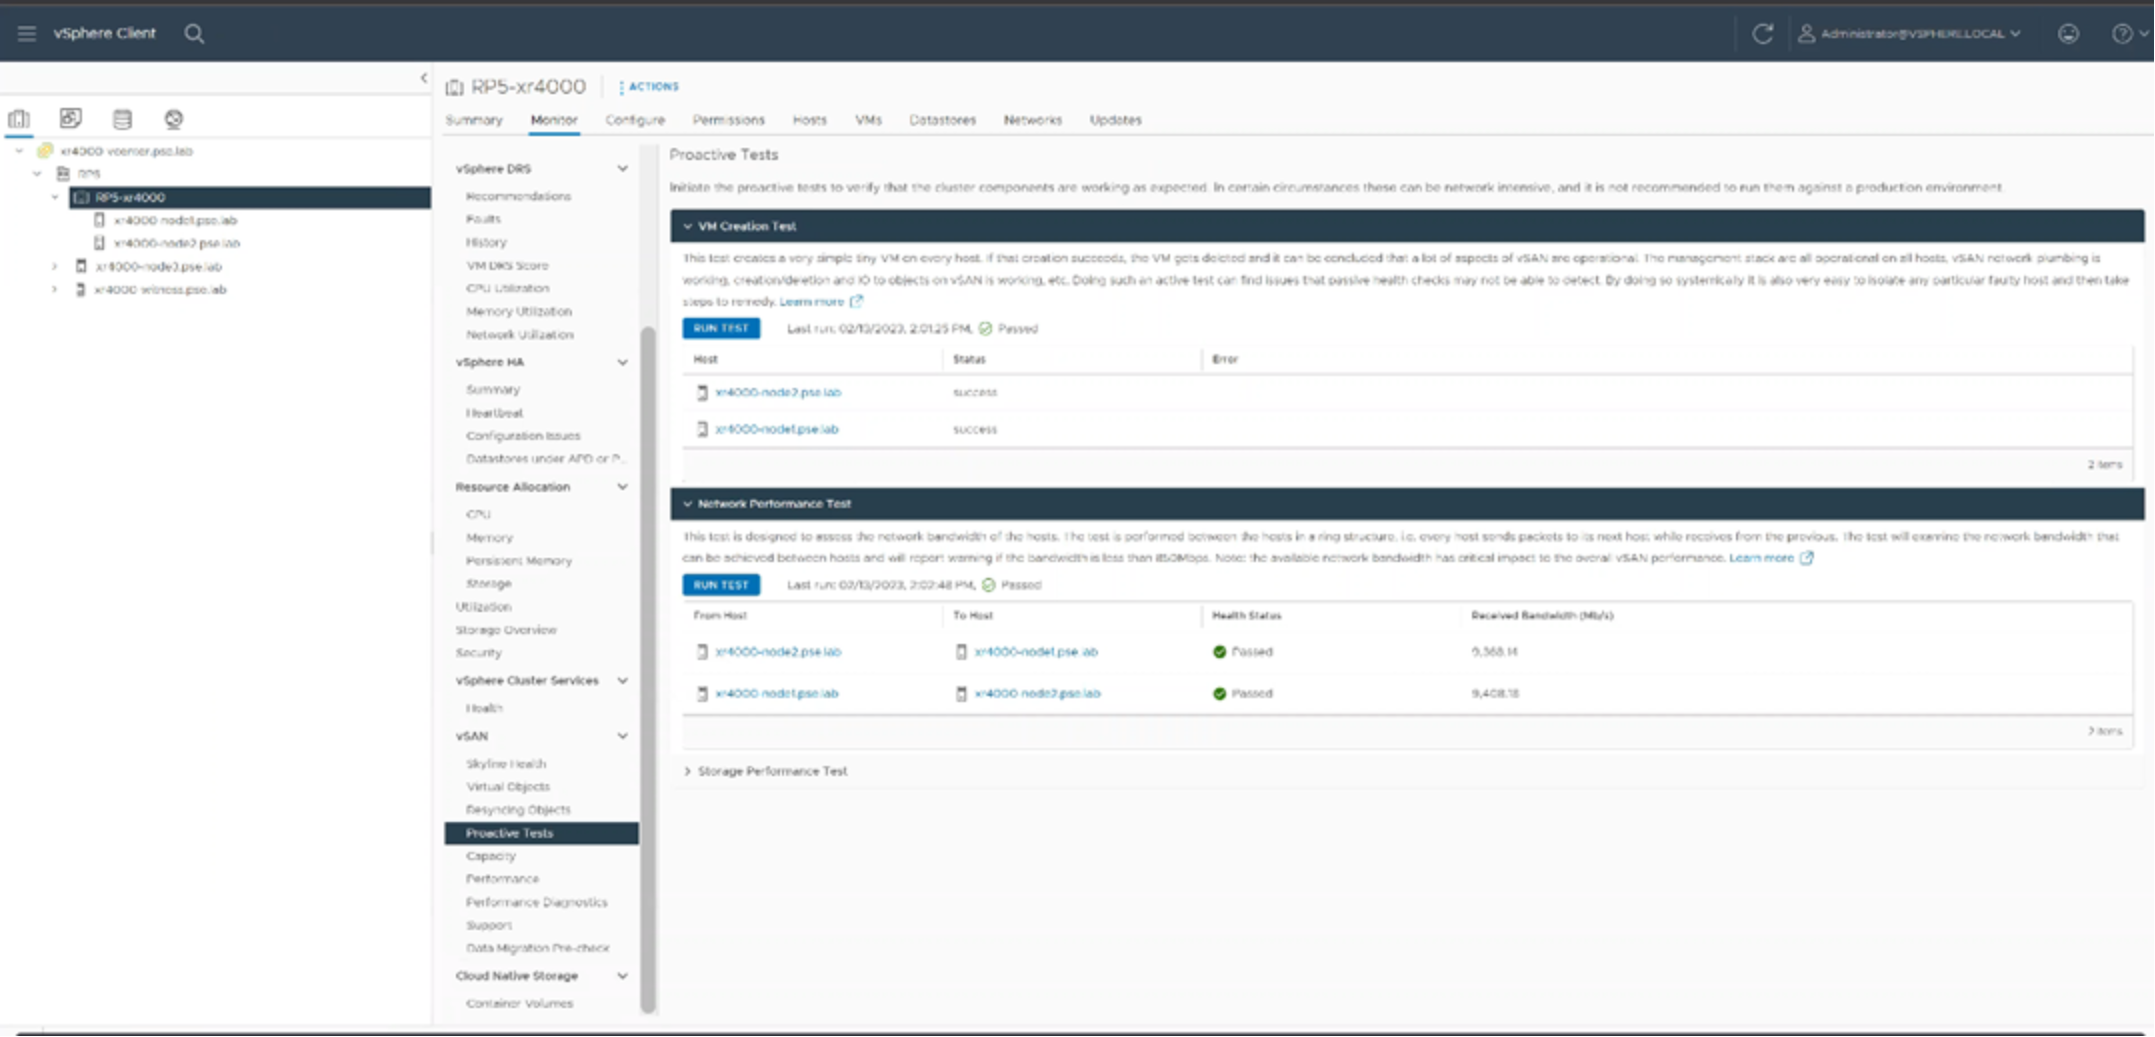
After the installation, run the proactive disk and network tests to make sure the installation succeeded.
To ensure the optimal performance and compatibility all nodes in a vSAN cluster, the witness VM and vCenter should be the same version of vSphere. See the VMware Product Interoperability Matrix for product versioning and compatibility.