


Simple RAG with Ollama and LlamaIndex with Kubernetes on a Dell PowerEdge XE9680 Server with AMD GPUs
Mon, 26 Aug 2024 11:43:22 -0000
|Read Time: 0 minutes
Introduction
This blog provides an analogy about Kubernetes and open-source code to deploy a RAG agent using Ollama and LlamaIndex with Kubernetes on the Dell PowerEdge XE9680 server with AMD MI300X GPUs.
It is a continuation of deploying RAG with Ollama and LlamaIndex on a Dell PowerEdge XE9680 Server with AMD Instinct MI300X GPUs. In this blog, we continue the development by deploying the service on Kubernetes with an explanation of key components using a cricket analogy.
Hardware and software stack
The following table shows the hardware and software packages, and the required versions. For a detailed infrastructure design of the lab setup, see the Generative AI in the Enterprise with AMD Accelerators design guide.
Component | Required versions |
Platform | Dell PowerEdge XE9680 server |
Operating system | Ubuntu 22.04.4 |
GPUs | AMD Instinct MI300X x 8 |
ROCm | ROCm 6.1.2 |
Python | Python 3.10.14 |
Model serving | Ollama 0.1.48 serving Llama 3 70 B |
LLM framework | Llama Index 0.10.38 |
Table 1: Hardware and software stack
The following figure shows the Dell PowerEdge XE9680 server:
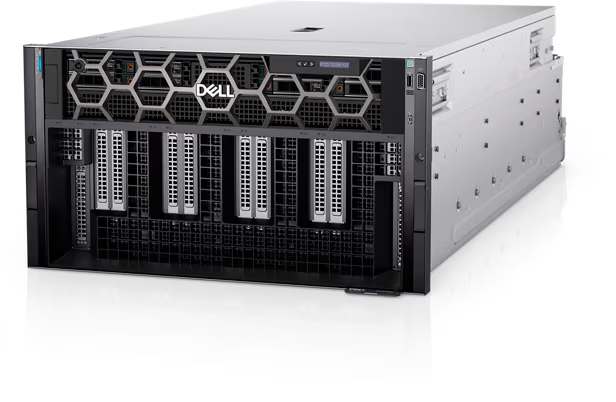
Figure 1: Front-side view of the Dell PowerEdge XE9680 server
The Dell PowerEdge XE9680 server is a powerhouse designed to undertake the most demanding artificial intelligence, machine learning, and deep learning tasks, making it an ideal choice for your generative AI applications. With up to two 5th Generation Intel Xeon Scalable processors, boasting up to 64 cores per processor, this server delivers exceptional performance and scalability.
Additionally, the PowerEdge XE9680 server’s support for DDR5 memory, with speeds of up to 5600 MT/s, complements the AMD GPUs by facilitating faster data transfer rates, enhancing the overall efficiency of AI model training and execution. With up to 4 TB of RDIMM memory and various storage options, including NVMe SSDs, the PowerEdge XE9680 server can handle vast datasets and complex neural network models with ease.
The AMD Instinct MI300X GPUs, with their advanced architecture, provide a massive leap in computational capabilities, which is essential for intensive generative AI workloads. The server’s support for these GPUs means that you can expect rapid model training times and efficient handling of large datasets, which is critical for AI tasks such as natural language processing and image generation. This GPU configuration provides the necessary power to develop, train, and deploy large machine learning models rapidly.
Key Kubernetes components
To continue with the cricket analogy from the previous blog, we revisit Bobby’s cricket team. The Kubernetes ecosystem can be broken down into a few easy-to-understand key concepts in terms of a cricket club, as shown in the following figure:
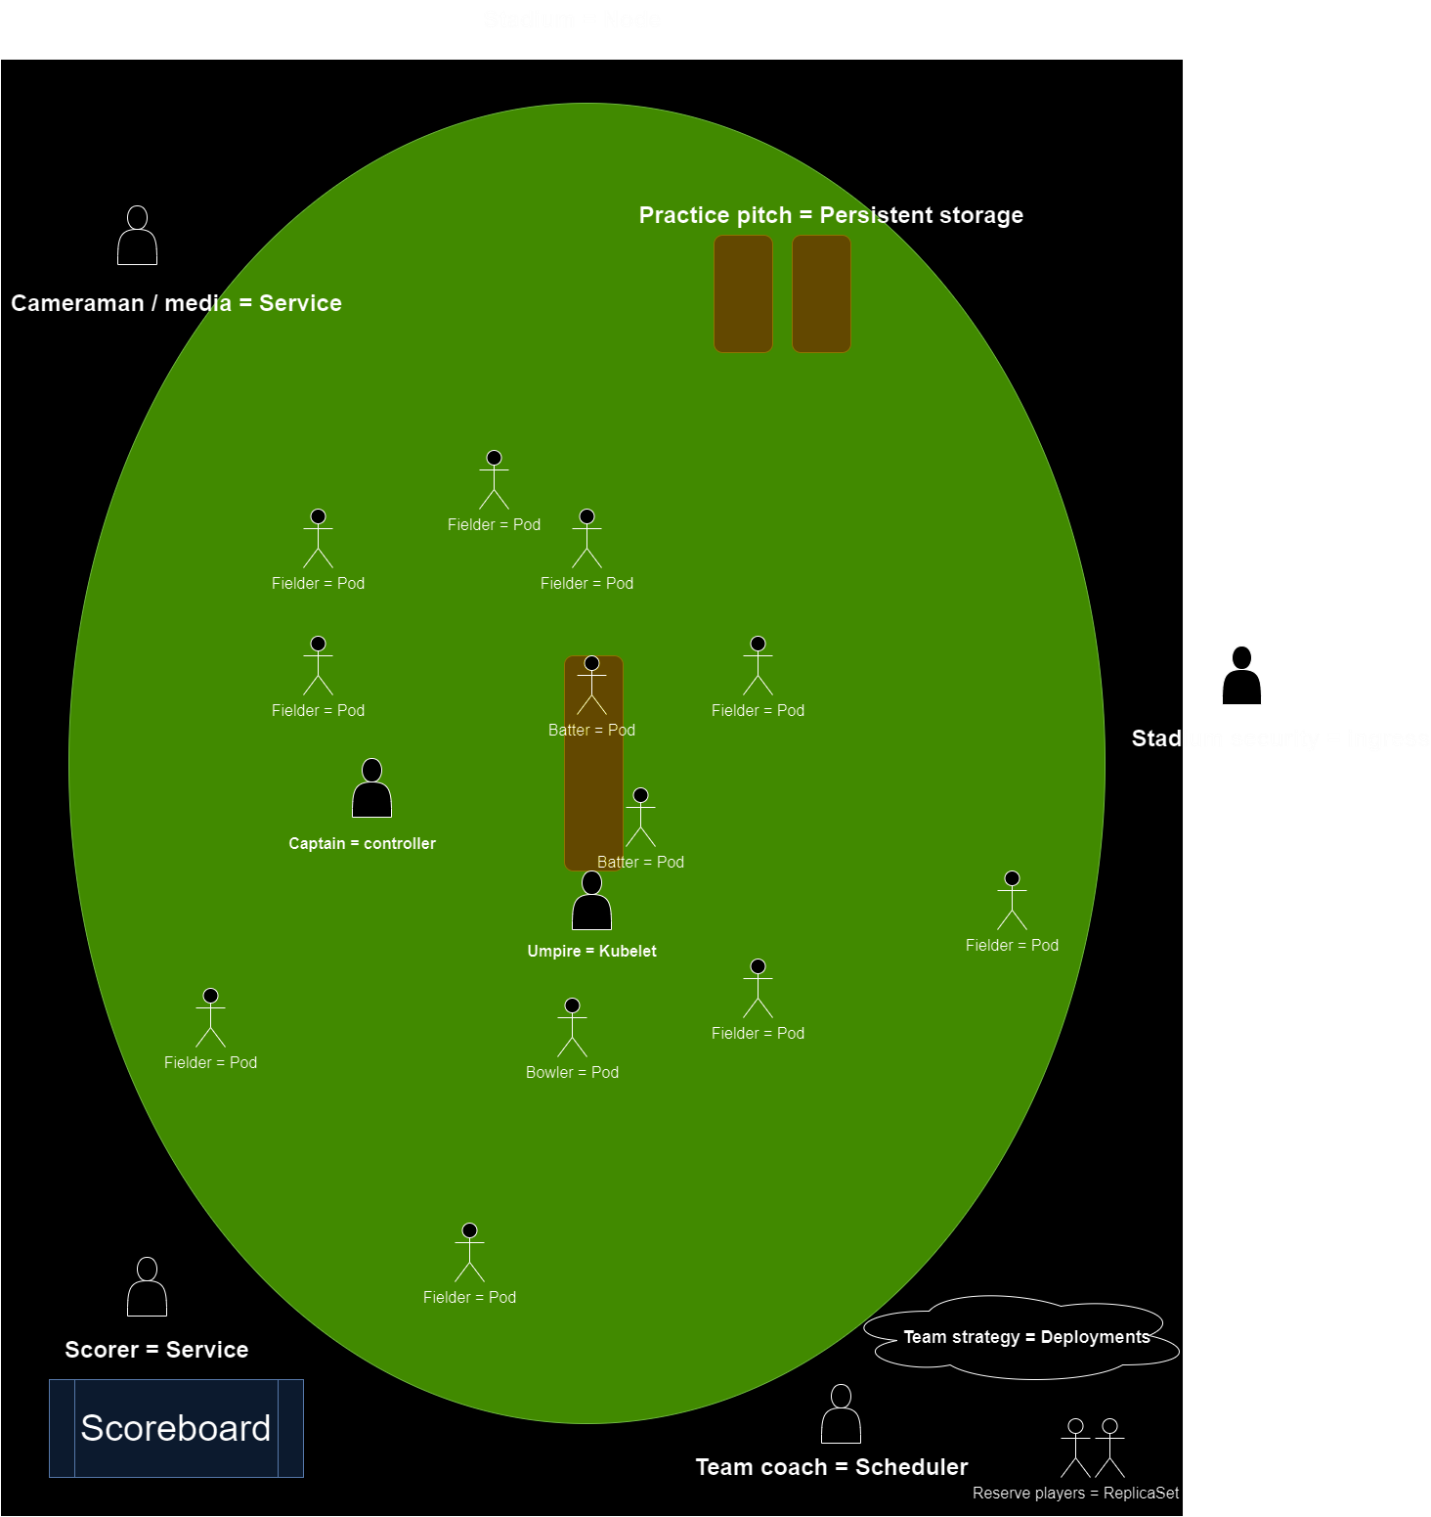
Figure 2: High-level architecture diagram showcasing the various components at play
The most fundamental component in Kubernetes is a pod, which can be mapped directly to a player on the field. Each player stands in a unique fielding position with a specific role but can be moved around to perform various tasks. However, each player can perform multiple tasks on a cricket field, similar to how a pod can run one or more containers for the service. The coaching staff on the sidelines who decide game (deployment) strategies act like the controllers. For example, if a pod fails or if a player is injured on the field, the coach decides the best substitute for that position.
Cricket is a sport played around the world. You can think of the various stadiums as physical or virtual nodes. The cricket ground is the environment in which the sport is played; analogously the compute resources (CPU, GPU, memory, and so on) are essential for the pods to run. Some stadiums are maintained with world-class care, such as the Lord’s Cricket Ground. However, with the right players (pods), cricket can be played (deployed) in a makeshift street format with a slight adjustment in the interpretation of the rules.
No professional sport can be played without an umpire whose job is to enforce the rules during live action. Similarly, a kubelet runs on each node (stadium) and reports the health status of the pods to the controller.
When interviewed, most athletes thank their fellow teammates and organization but never fail to thank their fans for their loyalty and support. An example of services in Kubernetes can be seen in fans who want to know how to access their heroes. Whether it is through a meet-and-greet or an interview on television, services broadcast this information so fans (applications) can interact with the players (pods). However, this task must be managed through ingress so that the athletes are not overwhelmed on social media platforms or in person. Ingress manages access requests from outside of the node that are inbound to the node (stadium).
There are more components that can be compared to cricket, but for this blog , the components that we have described are sufficient.
Building the Dockerfile
Before setting up the Kubernetes environment, create a Dockerfile and push it to a local container registry. Based on your platform’s operating system, follow the instructions to install Docker. When Docker has been installed, follow the instructions to set up the local container registry.
When the local Docker container registry has been set up, create an empty file called Dockerfile and populate it with the following code for running a basic RAG use case inside a container:
FROM ubuntu:22.04

ENV DEBIAN_FRONTEND=noninteractive

RUN apt-get update && \
    apt-get install -y \
    python3 \
    python3-pip \
    curl \
    wget && \
    apt-get clean

RUN pip3 install \
    llama-index-core \
     llama-index-readers-file \
     llama-index-llms-ollama \
     llama-index-embeddings-huggingface \
    llama-index \
     llama-index-llms-huggingface \
    llama-index-readers-web \
    transformers \
    accelerate \
    EbookLib \
    html2text

WORKDIR /work
# RUN mkdir "./test"
# PLEASE READ - Scale your own database of ePUB files by replicating these lines and adding as many as you wish
RUN mkdir -p "./test/library/<BOOK_TITLE>" && \
    wget <DOWNLOADABLE_EPUB_LINK> -O "./test/library/<AUTHOR>/<BOOK_TITLE>.epub"

RUN curl -fsSL https://ollama.com/install.sh | sh

RUN echo '#!/bin/bash' > /entrypoint.sh && \
    echo 'sudo curl -fsSL https://ollama.com/install.sh | sh' >> /entrypoint.sh && \
    echo 'ollama serve &> /ollama.log &' >> /entrypoint.sh && \
    echo 'ollama pull llama3' >> /entrypoint.sh && \
    echo 'ollama pull nomic-embed-text' >> /entrypoint.sh && \
    echo 'exec "$@"' >> /entrypoint.sh && \
    chmod +x /entrypoint.sh
EXPOSE 11434

RUN pip3 install llama-index-llms-ollama \
     llama-index-embeddings-ollama

ENTRYPOINT ["/entrypoint.sh"]
In addition to pulling a base image and installing the requirements, this Dockerfile creates a dataset. Choose the e-Books and follow the code shown above. Furthermore, mount and run a separate Python file inside the container. Create the rag.py file that contains the following code:
from llama_index.core import VectorStoreIndex, SimpleDirectoryReader, Settings, SummaryIndex
from llama_index.embeddings.ollama import OllamaEmbedding
from llama_index.llms.ollama import Ollama

loader = SimpleDirectoryReader(input_dir="./test/", recursive=True, required_exts=[".epub"],)
documents = loader.load_data()

# nomic embedding model
Settings.embed_model = OllamaEmbedding(model_name="nomic-embed-text")

# ollama
Settings.llm = Ollama(model="llama3", request_timeout=360.0)
index = VectorStoreIndex.from_documents(documents,)
query_engine = index.as_query_engine()
response = query_engine.query("What did the author do growing up?")
print(response)
The code in the rag.py file begins with the core imports. Following the imports, define the vector store database and pull the embeddings and model from Ollama. When you define the query engine, you can pose a simple query to the agent about one of the books in the database.
Based on how you set up your local container registry, named your Dockerfile, and your tagging strategy, build the container:
docker build –f Dockerfile –t <IMAGE_TAG>
Before accessing the container, let’s take a closer look at the Dockerfile. The code can be broken down into a few key components. We begin by installing the various container-level and rag-specific dependencies. To simplify the dataset process of the RAG example, we pull the books in ePUB file formats and place them into a test/ directory inside the container. If you want to use different data, either mount a local folder with the data of your choice to your container or build the container as is and download the dataset and ensure paths are as expected. Following the dataset setup, an entrypoint shell script installs and loads the model and embeddings through Ollama. When the image has been built, enter the container:
docker run --device /dev/dri --device /dev/kfd --network=host --ipc=host --cap-add SYS_PTRACE --group-add video --security-opt seccomp=unconfined --rm -it -v /path/to/local/rag.py:/path/inside/container <IMAGE_ID> bash
where /path/to/local/rag.py:/path/inside/container is the accurate path and <IMAGE_ID> is your real image ID.
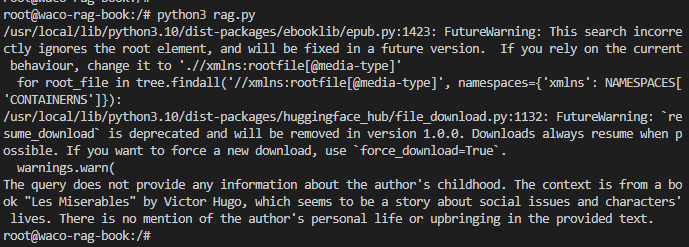
When you are in the container, run the rag.py file:
python3 rag.py
The following figure shows example output of the command:

When you receive a response from the RAG agent, tag and push it to the local container registry:
docker tag <IMAGE_ID> <DOCKER_REGISTRY_URL>/<TAG>
docker push <DOCKER_REGISTRY_URL>/<TAG>
Kubernetes manifest file
Before setting up the Kubernetes manifest file and creating the pods, ensure that Kubernetes has been installed and set up correctly based on your platform. Ensure that your image has been correctly tagged and pushed to your local container registry. When you have ensured that the image has been pushed to the container registry where your Kubernetes platform is also set up, create a manifest file called rag.yaml and populate it with the following code:
apiVersion: v1
kind: Pod
metadata:
  name: waco-rag-book
  labels:
    app: waco-rag-book
spec:
  volumes:
  - name: devmount
    hostPath:
      path: /dev/
  containers:
    - name: waco-rag-book
      image: <IMAGE_ID>
      command: ["/bin/bash", "-c"]
      args:
        # ["while true; do sleep 1; done"]
        #- |
          #!/bin/bash
          echo "Running script..."
         cd

          bash /entrypoint.sh
          python3 /rag.py
          echo "Script completed."
      resources:
        requests:
          amd.com/gpu: 8
        limits:
           amd.com/gpu: 8
Save the file. Then, create the pod and check its status:
kubectl create –f rag.yaml
kubectl get pods
Enter the pod:
kubectl exec <pod-name> -it -- /bin/bash
When you have entered the pod, run python3 rag.py:
The value of Kubernetes can be seen when you consider scaling the number of RAG pipelines that you plan to build. In more complex RAG use cases, you can introduce multiple agents. With a manifest file like the one above, deploying multiple RAG agents across a cluster becomes simple with pods. Each agent is responsible for a specific task. Communication between pods is a standard Kubernetes feature.
Conclusion
Deploying our RAG agents on Kubernetes harnesses the platform’s robust orchestration capabilities to enhance the efficiency and reliability of applications. Kubernetes’ scalable environment adapts to the dynamic needs of RAG agents, ensuring optimal resource utilization and uninterrupted service. Moreover, Kubernetes’ self-healing feature maintains the agents’ high availability, automatically managing deployments and minimizing downtime. This synergy between RAG agents and Kubernetes unlocks a valuable path forward for AI applications in modern software environments. The technical specifications of the Dell PowerEdge XE9680 server, especially when paired with AMD Instinct MI300X GPUs, make it an excellent platform for deploying and running generative AI applications.
For more information, please see Generative AI in the Enterprise with AMD Accelerators.