
Migration
Migration
-
Migrating to vVols can be achieved easily by implementing the steps outlined in this chapter.
vVols configuration and migration overview
The migration process can be achieved by using the following procedure:
- Time synchronization
- Storage provider registration
- Create storage container
- Create virtual datastore for vVols
- Migrate the datastore and disks from VMFS to vVols using storage vMotion
It is recommended to synchronize the time for all the hosts and vCenter Server instances.
Time synchronization
Perform the following steps for all the hosts that will use vVols.
- Select the host in the vSphere inventory.
- Click the configure tab.
- In the System section, select Time Configuration.
- Click Add service or Edit and set up the NTP server.
- Select Use Network Time Protocol (Enable NTP client).
- Enter the IP addresses of the NTP servers to synchronize with.
- Click OK. The host synchronizes with the NTP server.
- Stop/Start as required.
Storage provider registration procedure
To use vVols, The VASA provider must be registered with the vCenter. The storage capabilities are exported and presented to VMware based virtual infrastructure by using the protocol end points enabled by VASA.
Use the following steps to register the storage provider:
- Login to vSphere client.
- Go to vCenter Server in the vSphere Web Client navigator.
- Click the Configure tab and click Storage Providers.
- Click the + Add icon to register a storage provider.
- Enter the connection details for the new storage provider, including the name, URL, and credentials.
- Click OK to complete the registration
- Once the VASA is registered, create a vVol based datastore to utilize vVol based services.
Virtual datastore creation procedure
- Login to the vSphere Web Client.
- Select the host in the vSphere inventory.
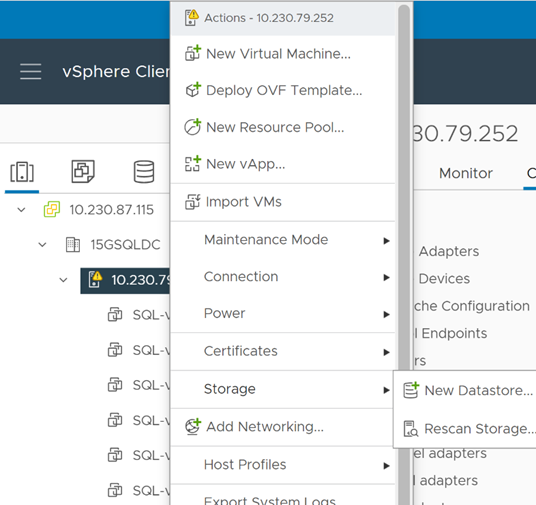
- Right-click on the host and select the storage menu.
- Click New Datastore.
- Enter a unique datastore name.
- Select vVol as the virtual datastore type.
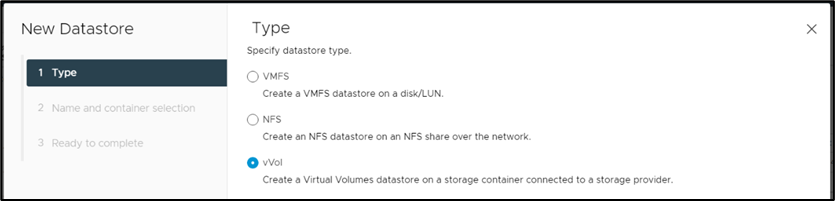
- Select the appropriate backing storage container which refers to the VASA that has been previously registered. This backing container will be used to host the virtual volumes.
- Click next to review the selections and click Finish.
- At the end of the procedure, the newly created datastore can be viewed on the host.
- To access the datastore on additional hosts, the datastore must be explicitly mounted on the required hosts as necessary.
Mounting the virtual datastore on additional hosts
- Perform this procedure from the Storage view of the vSphere Client.
- From the vSphere Client, go to the Storage view tab.
- Right-click on the preferred vVol virtual datastore and click Mount Datastore to Additional Hosts
- Select the available hosts to mount the Virtual Datastore and click OK.

Storage Policy Based Management
To create High IO priority/ High Qos Priority policy:
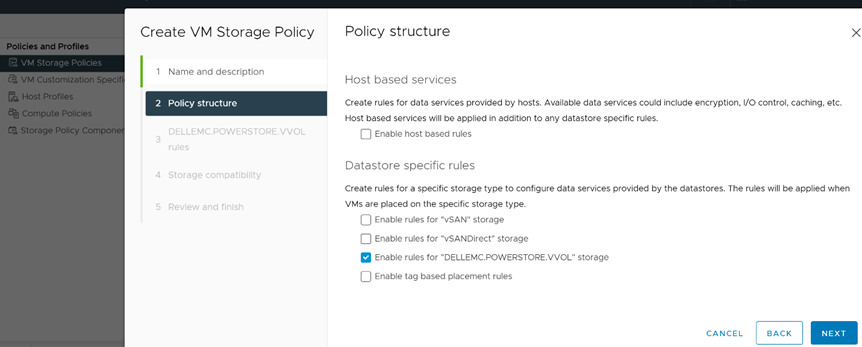
- Go to Policy and Profile
- Go to VM Storage Polices page in vSphere.
- Click CREATE and check Enable rules for “DELLEMC.POWERSTORE.VVOL” storage
Virtual Machine Migration with Storage vMotion
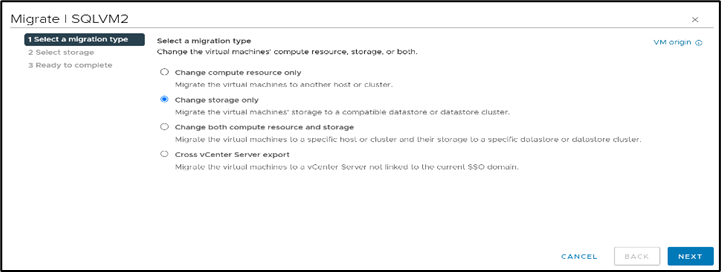
- Select the required virtual machine in the vSphere inventory and click Migrate.
- Select Change storage only and click Next.
- Select the vVol datastore destination storage, virtual disk format (thick provisioning), select High Priority Policy and click Next.
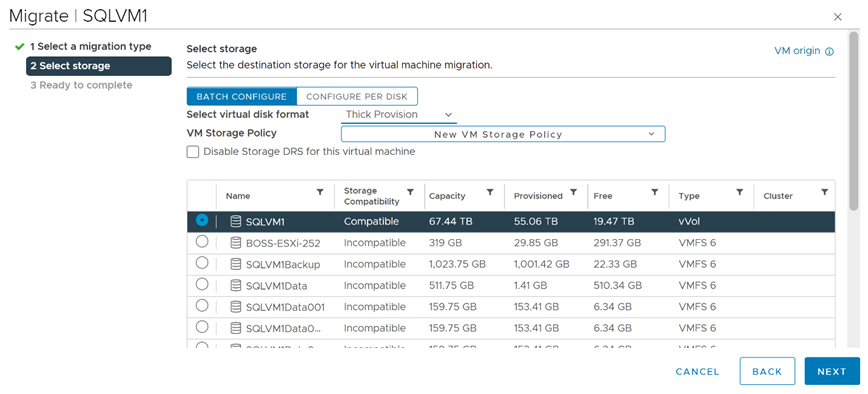
- Review the migration details including migration type, virtual datastore target, and disk format settings. Click Finish.
- Note: Depending on the number and size of the source virtual disks, it can take several minutes to complete the migration from VMFS to vVols.
- You can check the status of the migration under the recent tasks tab of the vSphere client.
- This migration process will create the necessary virtual volumes in the storage container of the storage system, as shown in the following screenshot.
- Confirm the availability and mapping of the new vVol datastore by browsing to the datastores tab of the VM.
See vSphere Virtual Volumes (vVols) and vVols Getting Started Guide for more information about implementing and migrating vVols.