
Enable Hybrid Analytics with Dell ECS and Snowflake
Configuring Power BI with Snowflake
Configuring Power BI with Snowflake
-
This section describes how to configure Power BI to connect with Snowflake. When the connection is made to Snowflake, Power BI can work with table data stored in ECS referenced by the Snowflake database.
Note: This example is using Use Case 1, where the data is being accessed directly from ECS residing on-premise.
- Launch Power BI then click Get Data from the Tool Bar.

Figure 3. Click ‘Get data’ to select a connector
- Select ‘More…’ and search for Snowflake, then select Snowflake and click ‘Connect’.
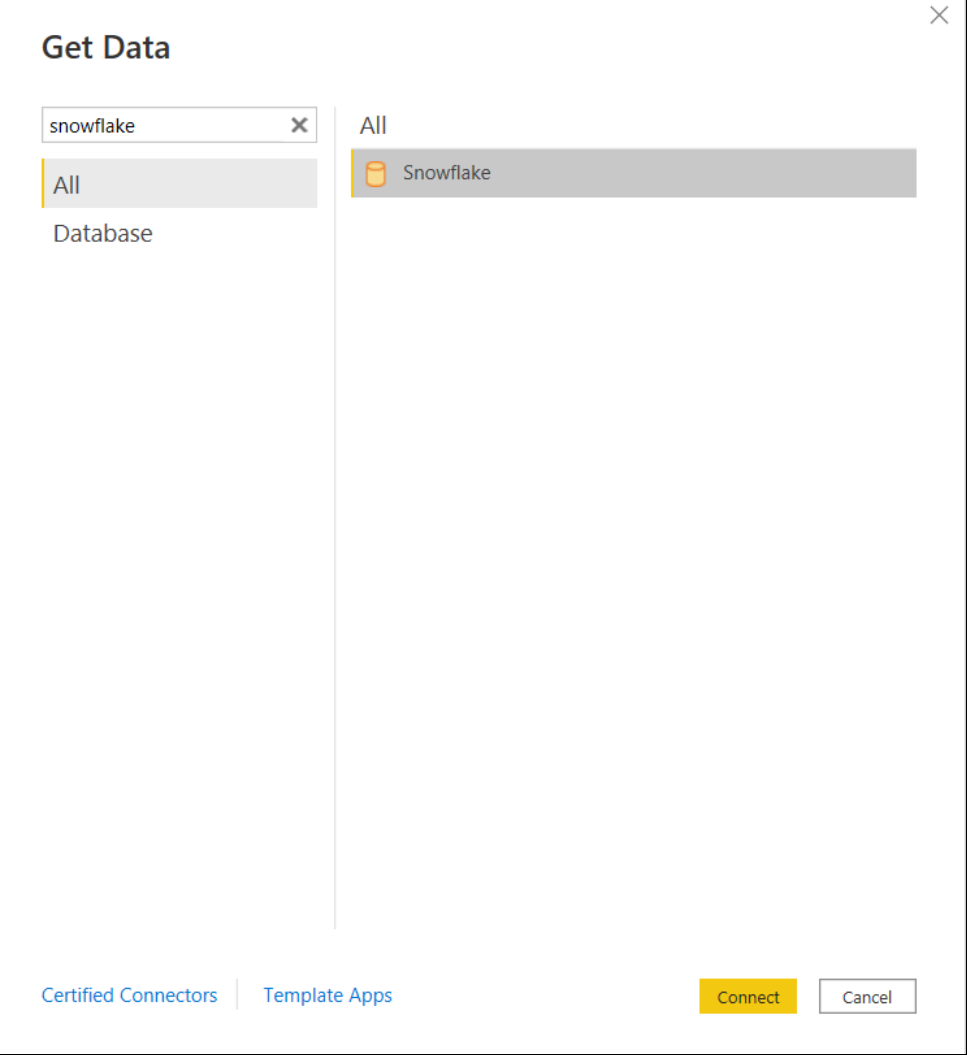
Figure 4. Search for the Snowflake connector
- Enter the Snowflake Data Cloud account URL, Warehouse, Database, and SQL query to execute, then click ‘OK’.
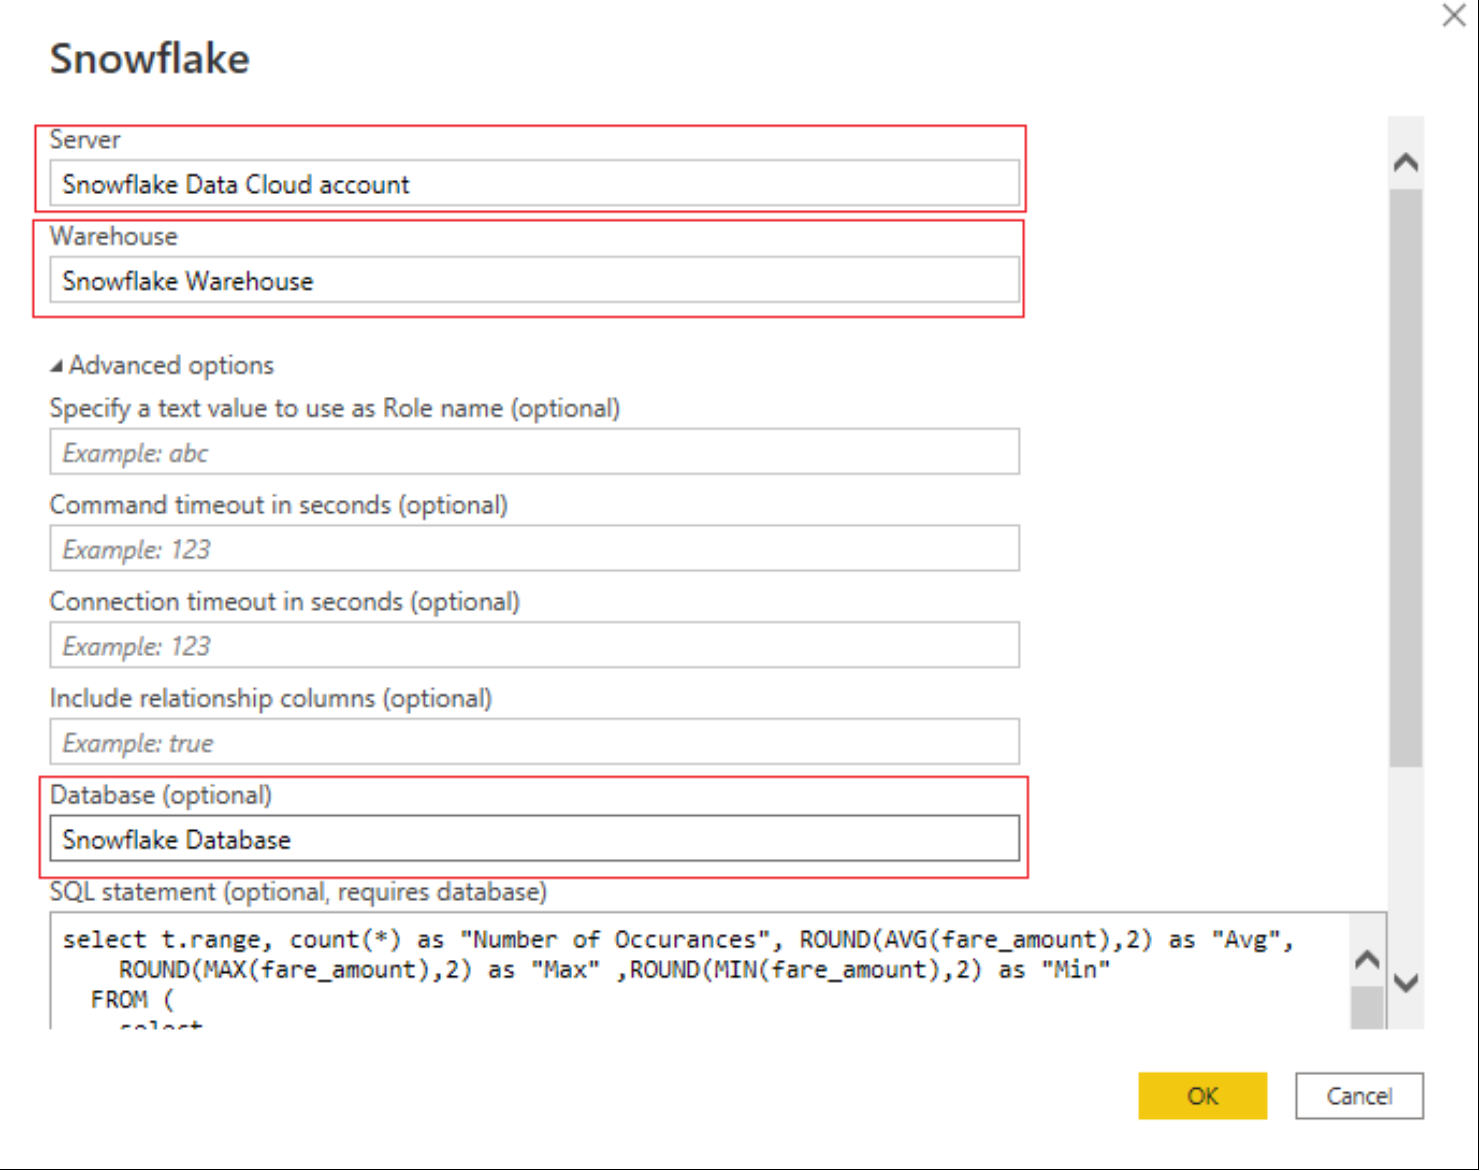
Figure 5. Enter the Snowflake account details
- Enter the login credentials for your Snowflake account.
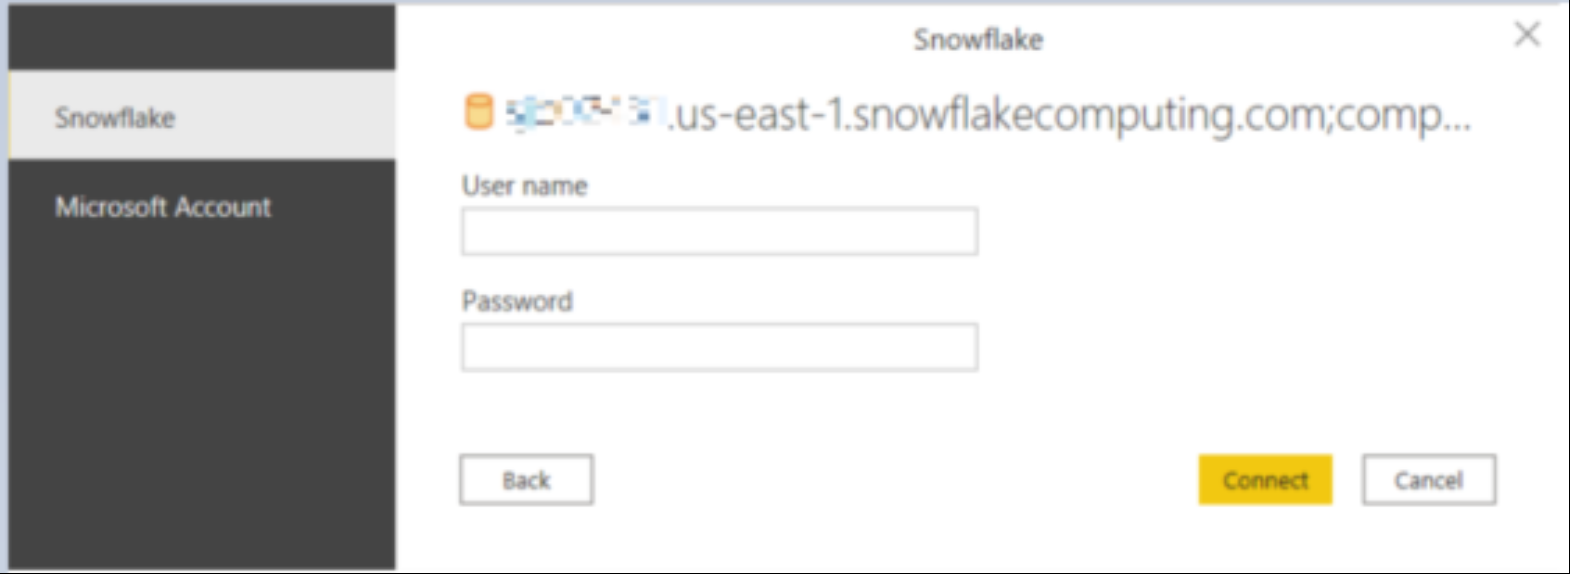
Figure 6. Enter the Snowflake account login credentials
- When connected, Power BI executes the query that was entered when setting up the Snowflake connector in the previous step and shows the results. From here you can load or transform the data. In our case, we select Load.
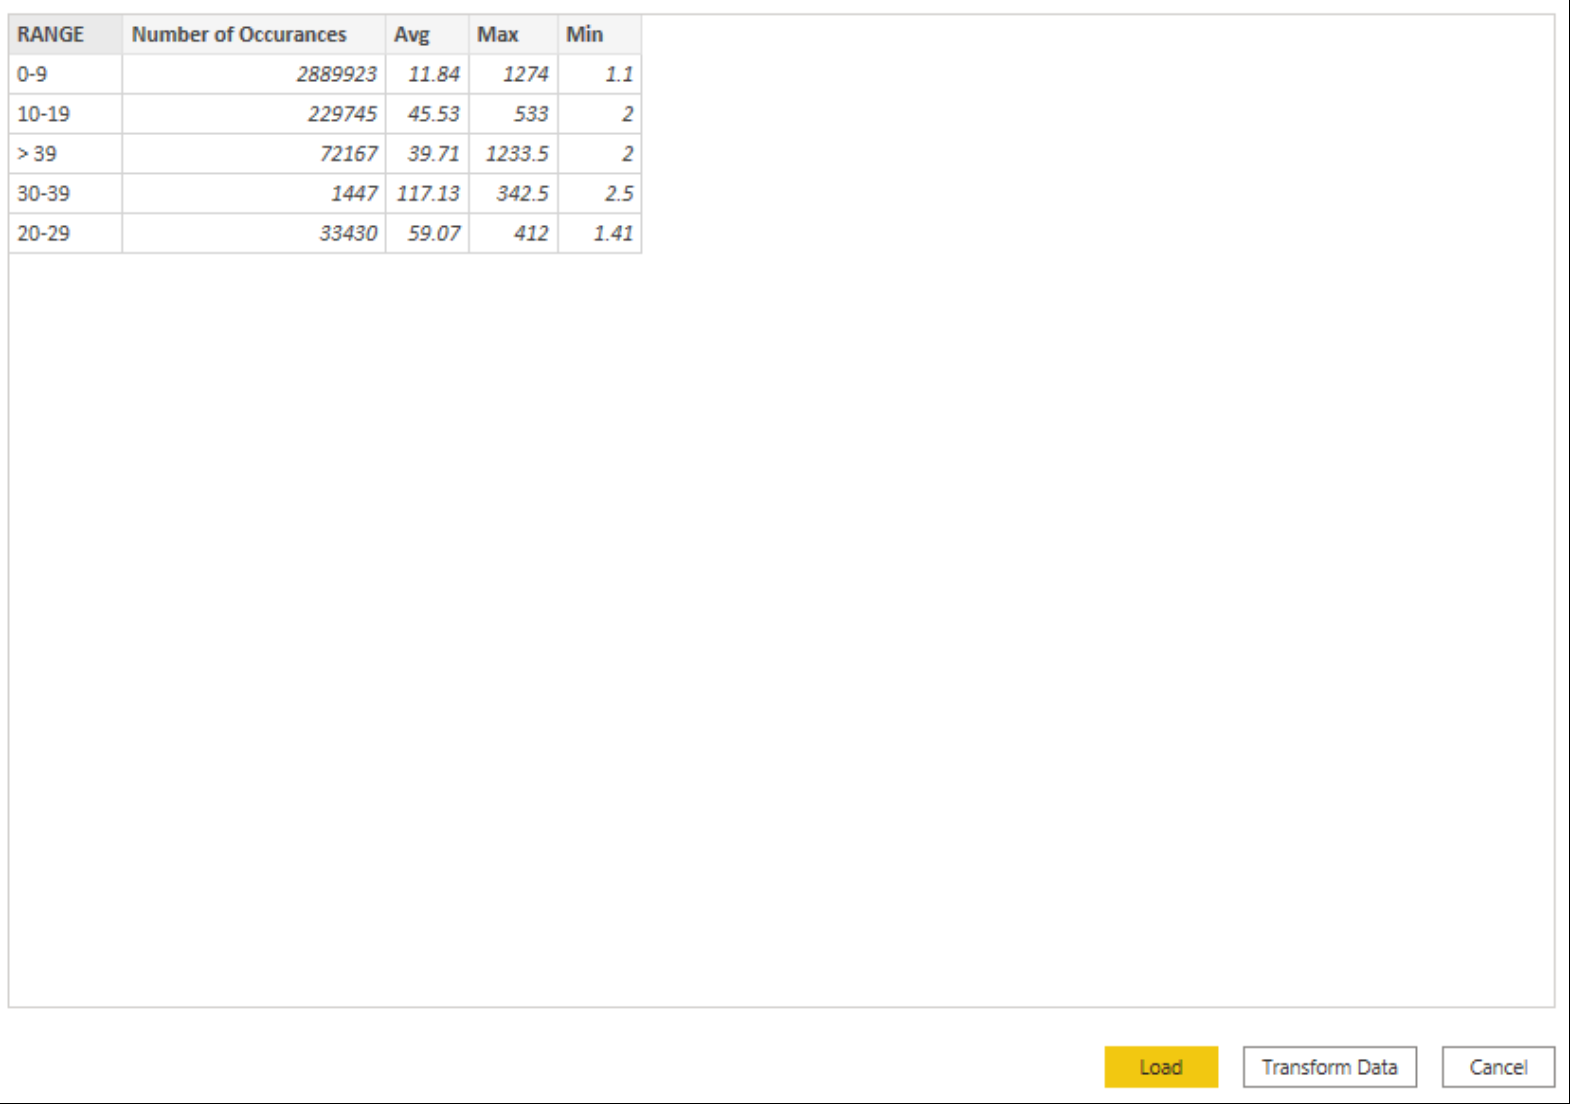
Figure 7. SQL Query results
- Select whether to Import the data or query the data directly. Select either option based on the use case, then click OK.
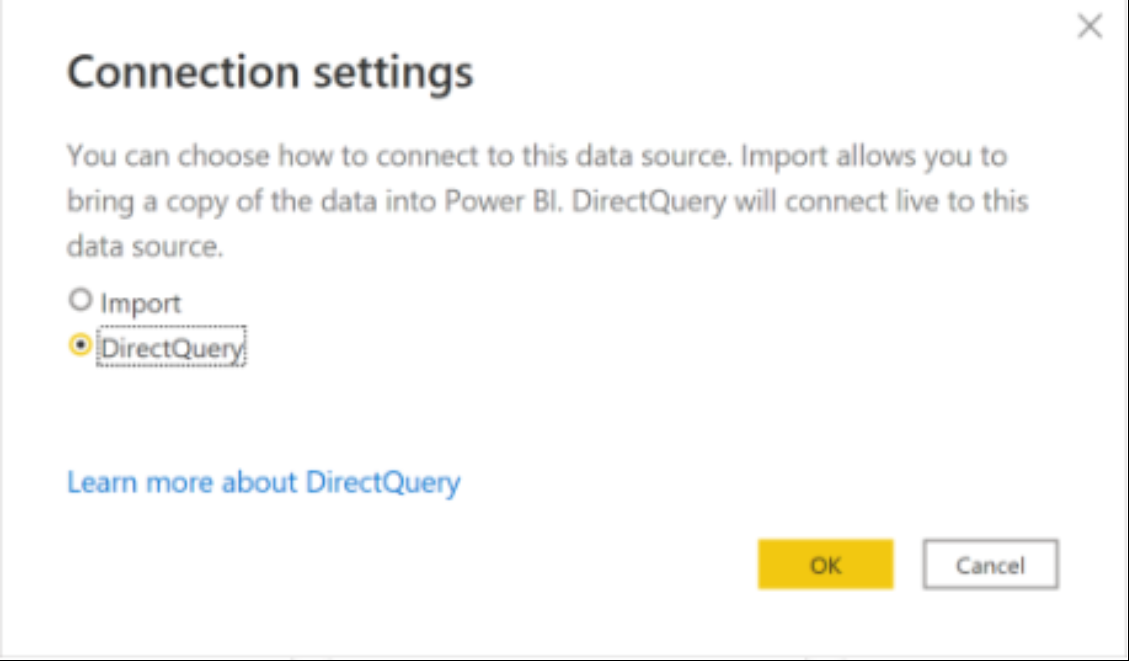
Figure 8. Choose whether to import the data locally or execute a direct query against Snowflake
- When the connection to Snowflake is established, start building your dashboard by selecting the fields on the right-most panel of the Power BI desktop.
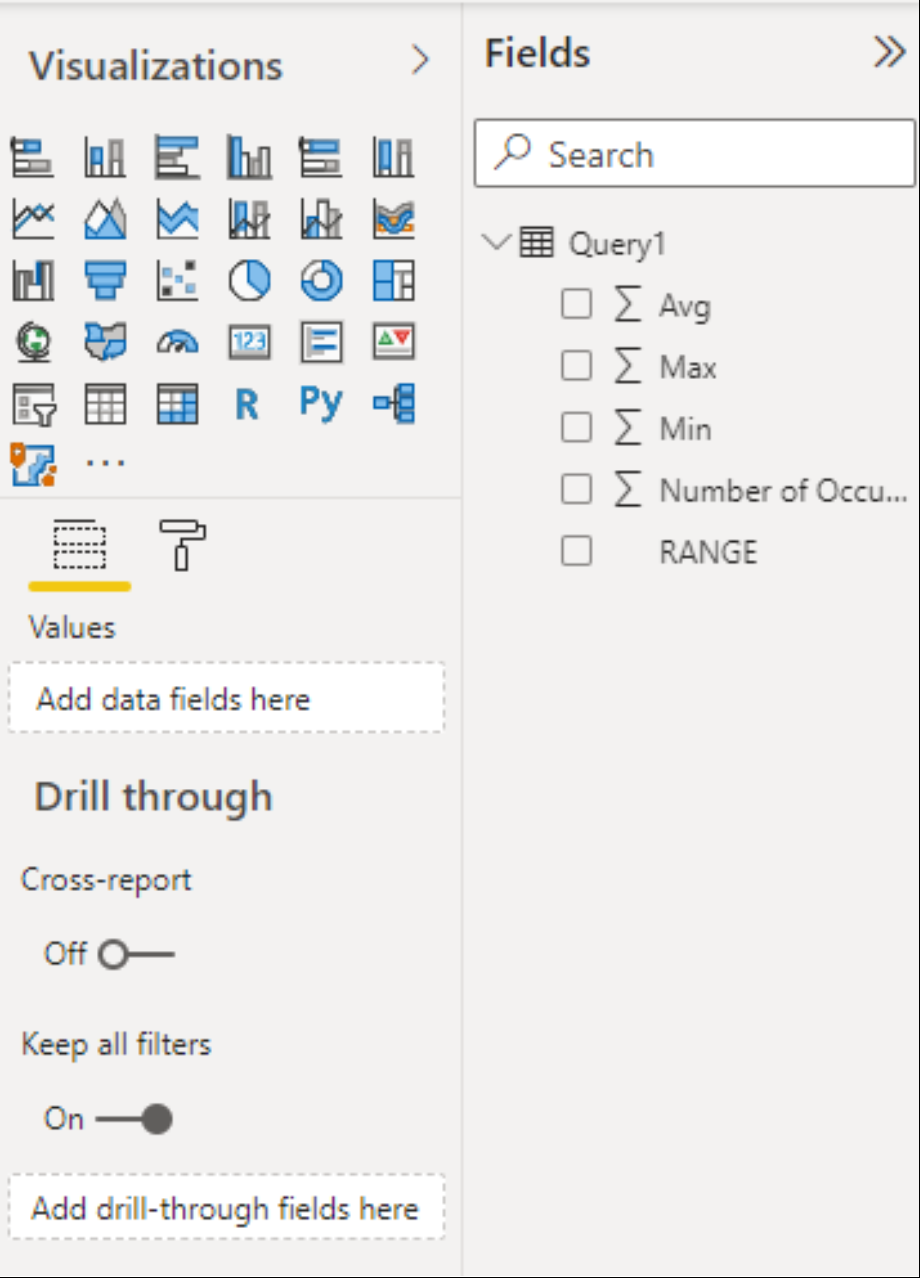
Figure 9. Start building your Dashboard