
Installing GRID Infrastructure and Oracle Database Software
Installing GRID Infrastructure and Oracle Database Software
-
Oracle software installation and maintenance can be a complex task that requires careful planning, patching, network setup, and other aspects. This section doesn’t provide these details and simply shows an example of the steps involved in setting up RAC with a single cluster node, and then adding additional nodes. The assumption is that if SRDF/Metro is added to an existing local RAC database, additional nodes can be added following a similar process. Alternatively, in a new environment, if SRDF/Metro is configured first, Oracle RAC can be installed at once on all the nodes (local and remote).
Step 1 - Installation of the GRID Infrastructure with a single node.
Launch the GUI for Grid Infrastructure installation. Select the Configuration Option to configure a New Cluster. Finish the installation procedures for a single cluster node.
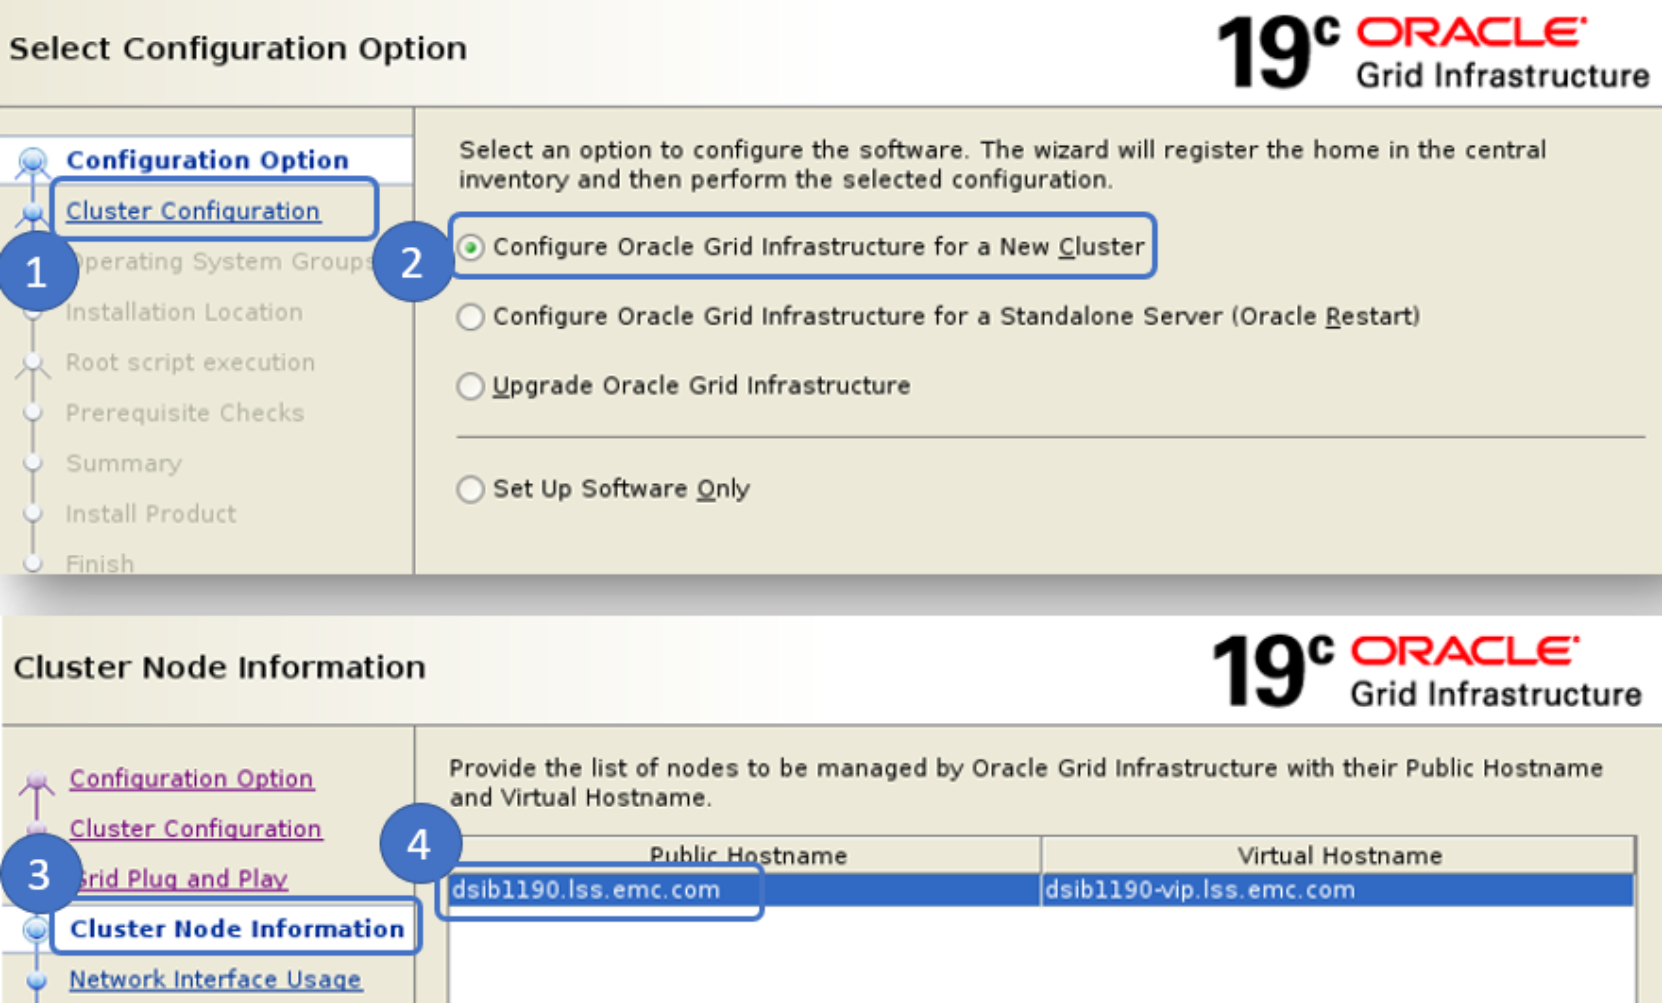
Figure 32. Oracle Grid Infrastructure Installation on a single node
Step 2 – Adding a second node to the cluster
Launch the GUI for Grid Infrastructure installation. Select the configuration option Add more nodes to the cluster. Complete the setup to the Cluster Add Node Information and select the node to add. This can be done using a hosts.ccf file.
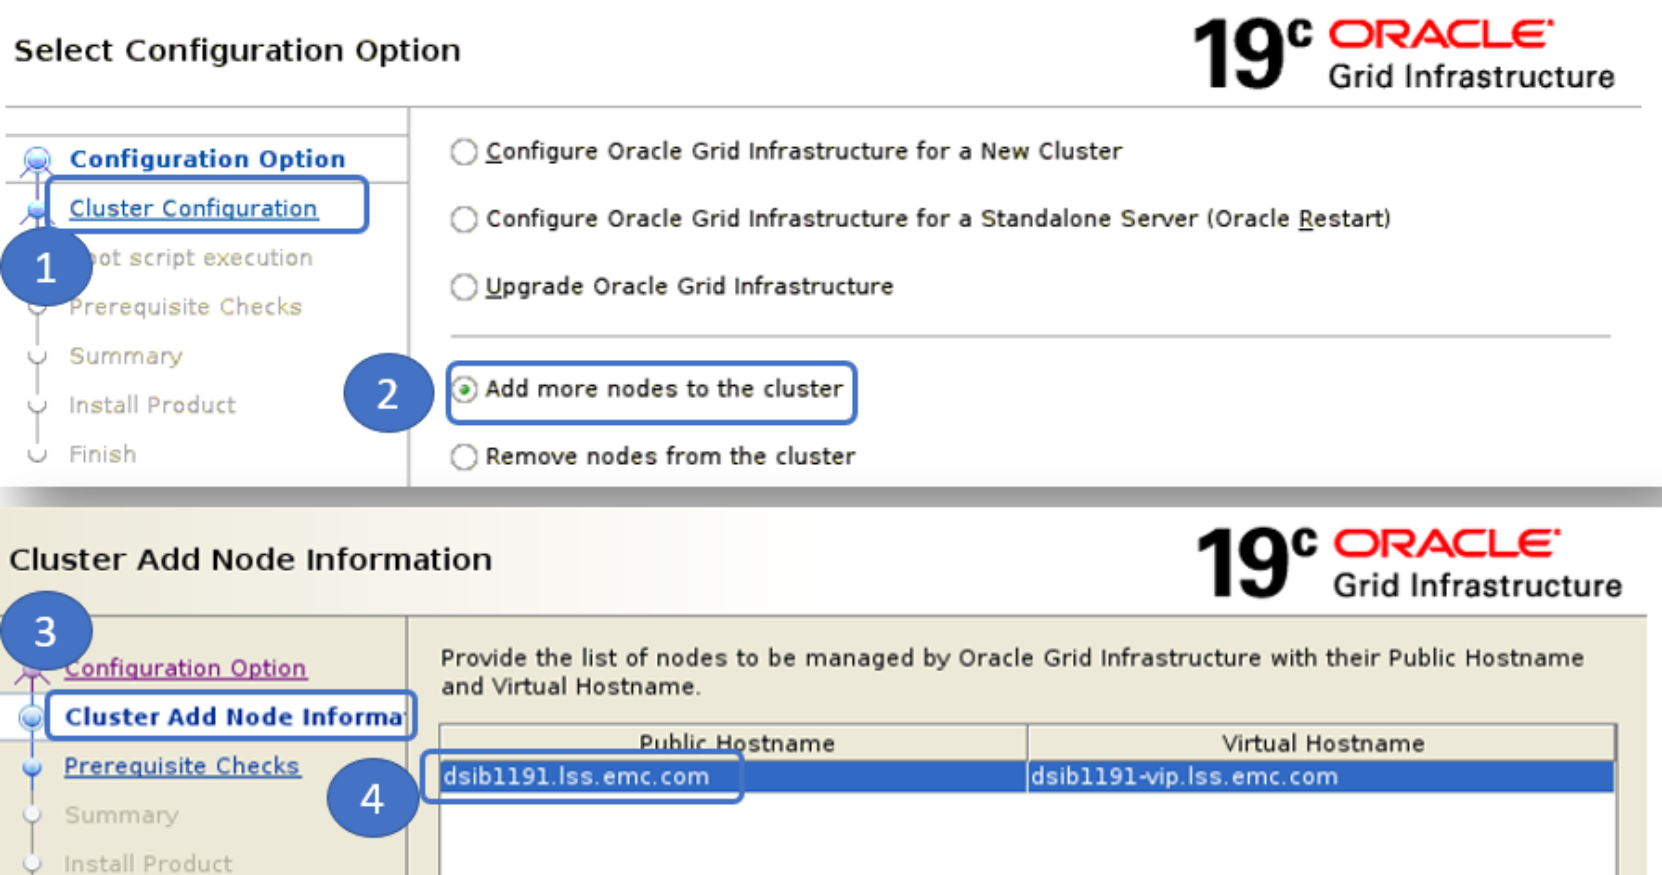
Figure 33. Add second node to existing cluster
Step 3 – Verify ASM includes both nodes and Disk Groups are mounted
After the Grid Infrastructure is installed for the single node cluster and the second node is added, launch the ASM GUI, verify that both nodes are seen by ASM and that all Disk Groups are mounted.
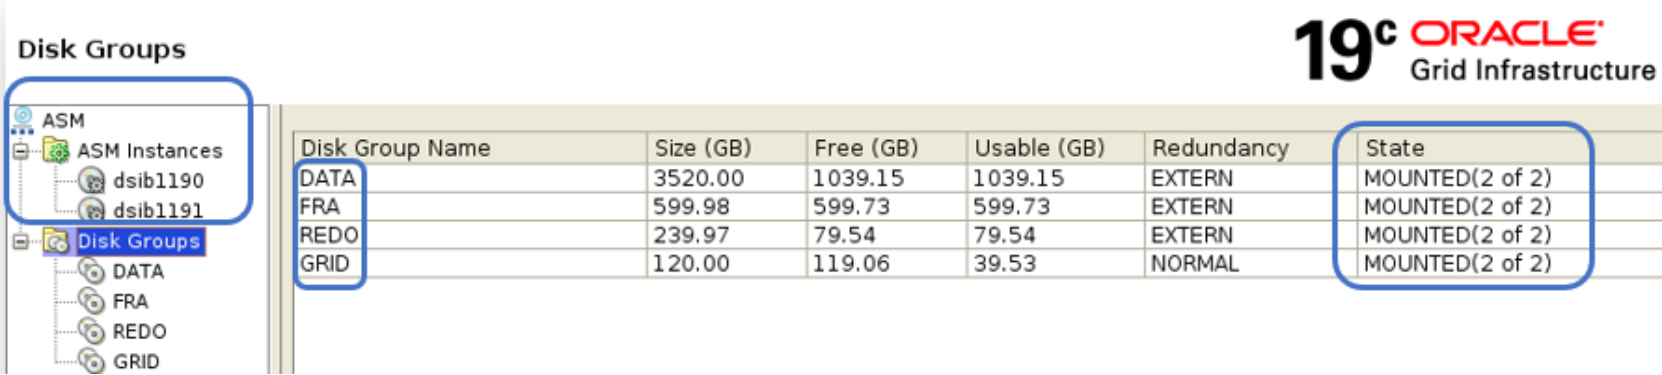
Figure 34. ASM instances and Disk Groups
Step 4 – Installing Oracle Database Software
Launch the Oracle software installer. From Configuration Option select “Set up Software Only” and click Next. Then select “Oracle Real Application Clusters database installation”. Continue with installation steps and verify that the installation was successful.
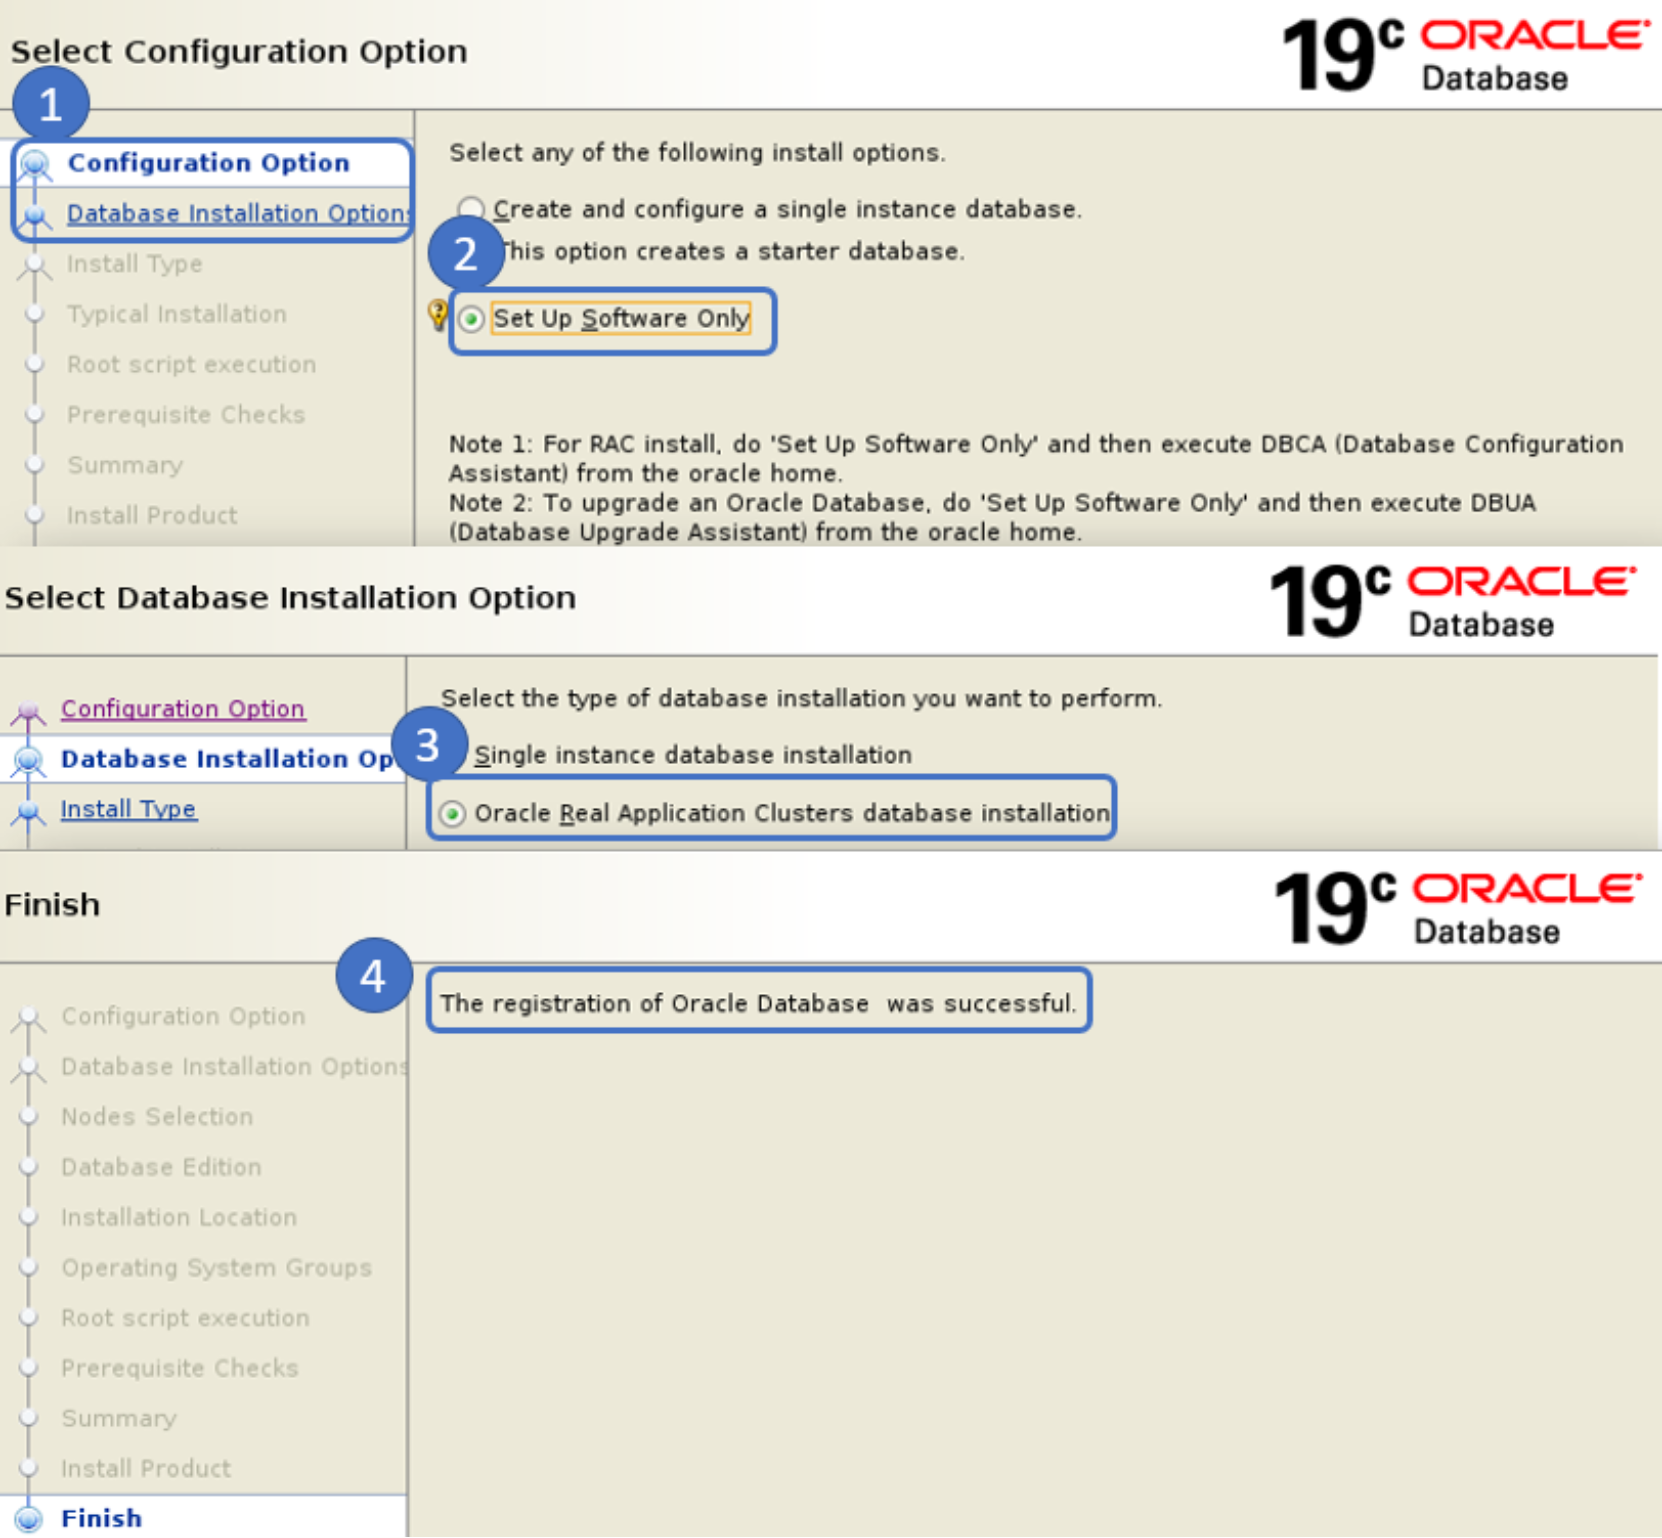
Figure 35. Installing Oracle Database Software