
Creating SRDF/Metro and Smart DR protection at the same time
Creating SRDF/Metro and Smart DR protection at the same time
-
This section shows the steps involved in creating an SRDF/Metro configuration with Smart DR at the same time. It is recommended to first read Step 0 – Before we start.
This process assumes that the user has already created an SRDF Connection on all three storage systems that are participating in this SRDF/Metro Smart DR (similar to Step 1 – Create an SRDF connection between the storage systems).
Step 1 – Create empty SRDF groups to be used in setup
Create empty SRDF groups with labels in each of the storage systems participating in the SRDF/Metro configuration – both for the SRDF/Metro SRDF groups, similar to Step 3 – Create empty SRDF groups with labels, as well for the DR array (SRDF/A), similar to Step 4 – Create Empty SRDF/A groups from the R2 side.
An example of the SRDF groups after their creation is below.
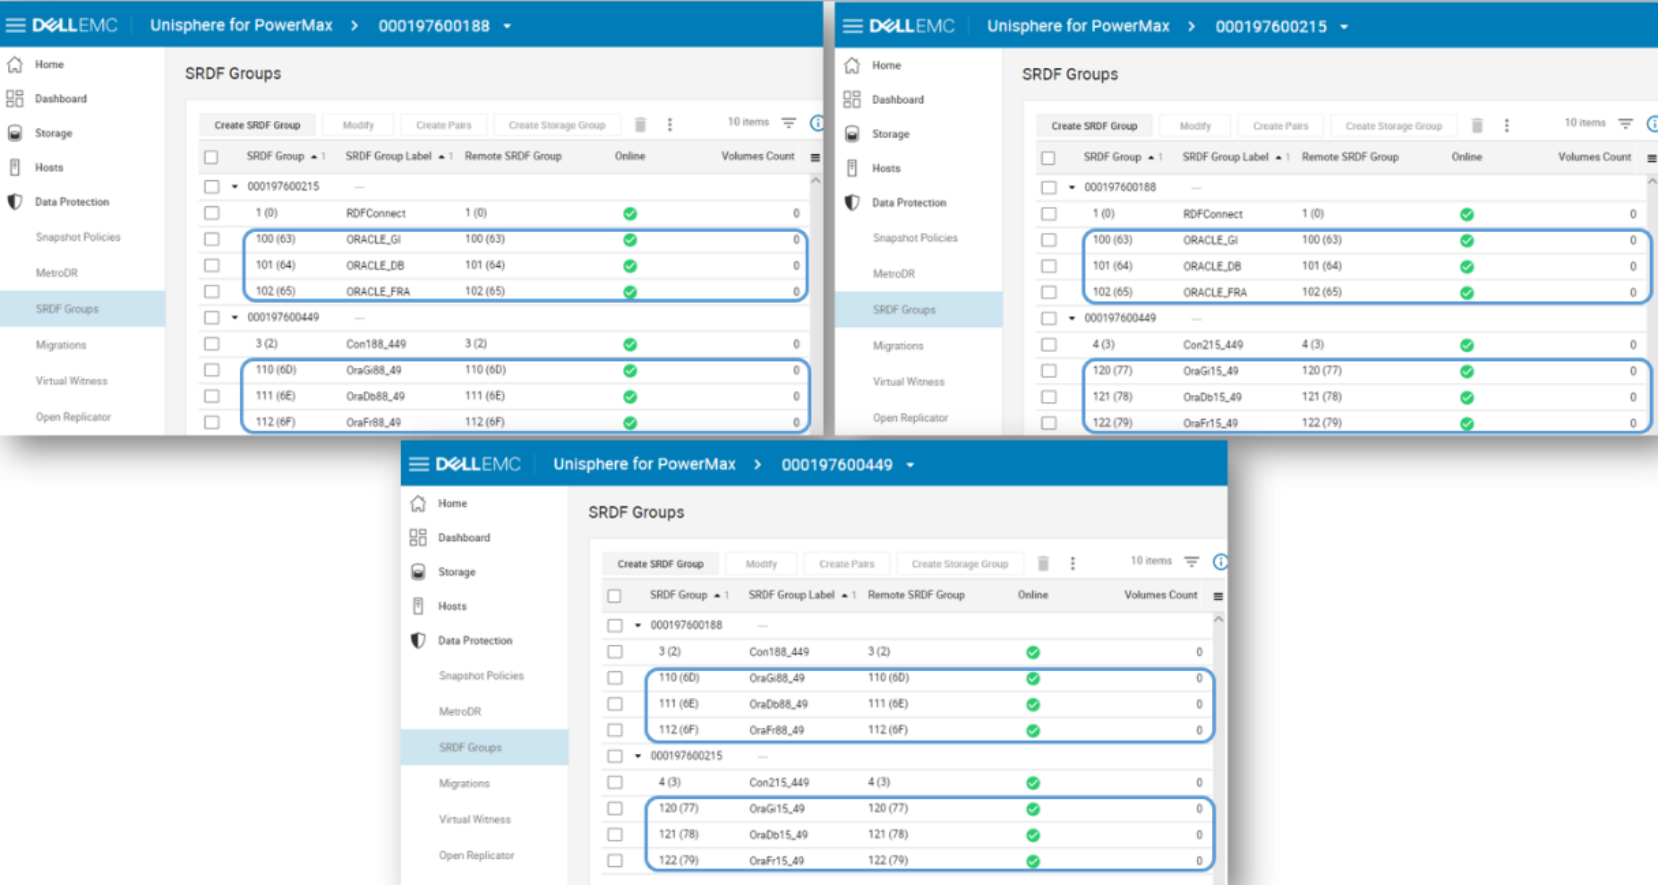
Figure 27. Empty SRDF Groups and Labels created
Step 2 – Setup SRDF/Metro Smart DR for a storage group to be protected
From the Storage menu select Storage Groups. Select a storage group to protect. Select Protect. Then select Setup High Availability with DR using SRDF/Metro Smart DR. Select the Metro R2 Array ID. Click on Manual, click on select and then select the SRDF Group.
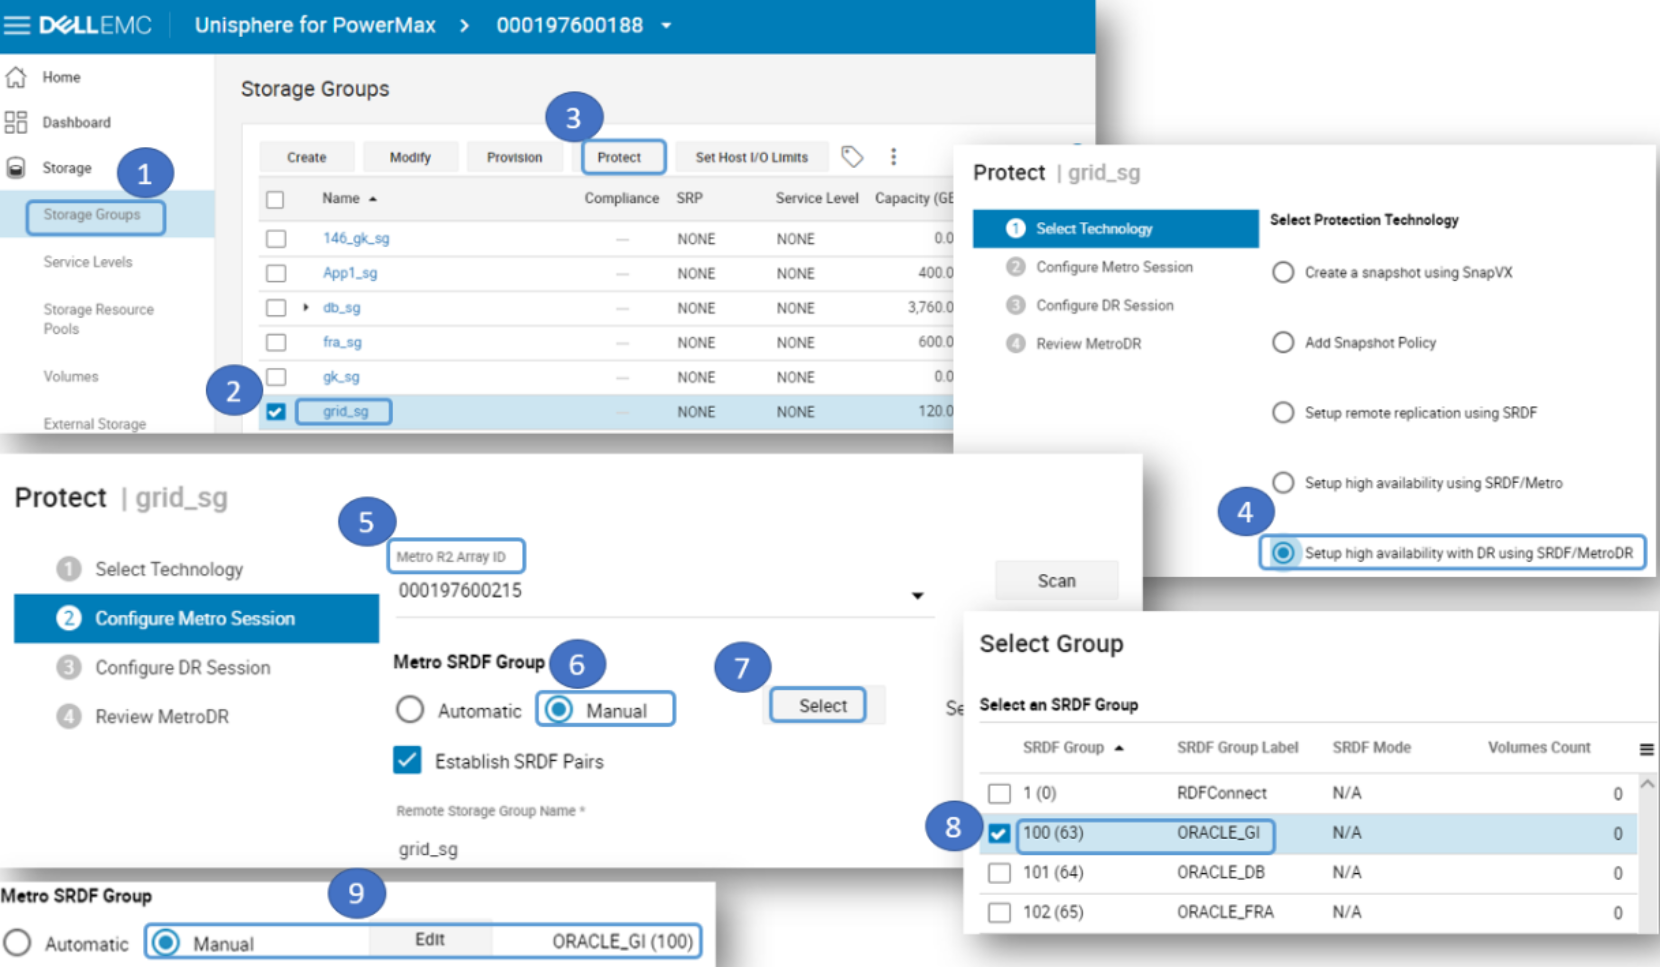
Figure 28. Selecting Storage Group to protect
Select the DR Array ID, click on Manual for both R1 and R2 DR SRDF Groups, then click on select to choose the groups. Verify the groups were selected.
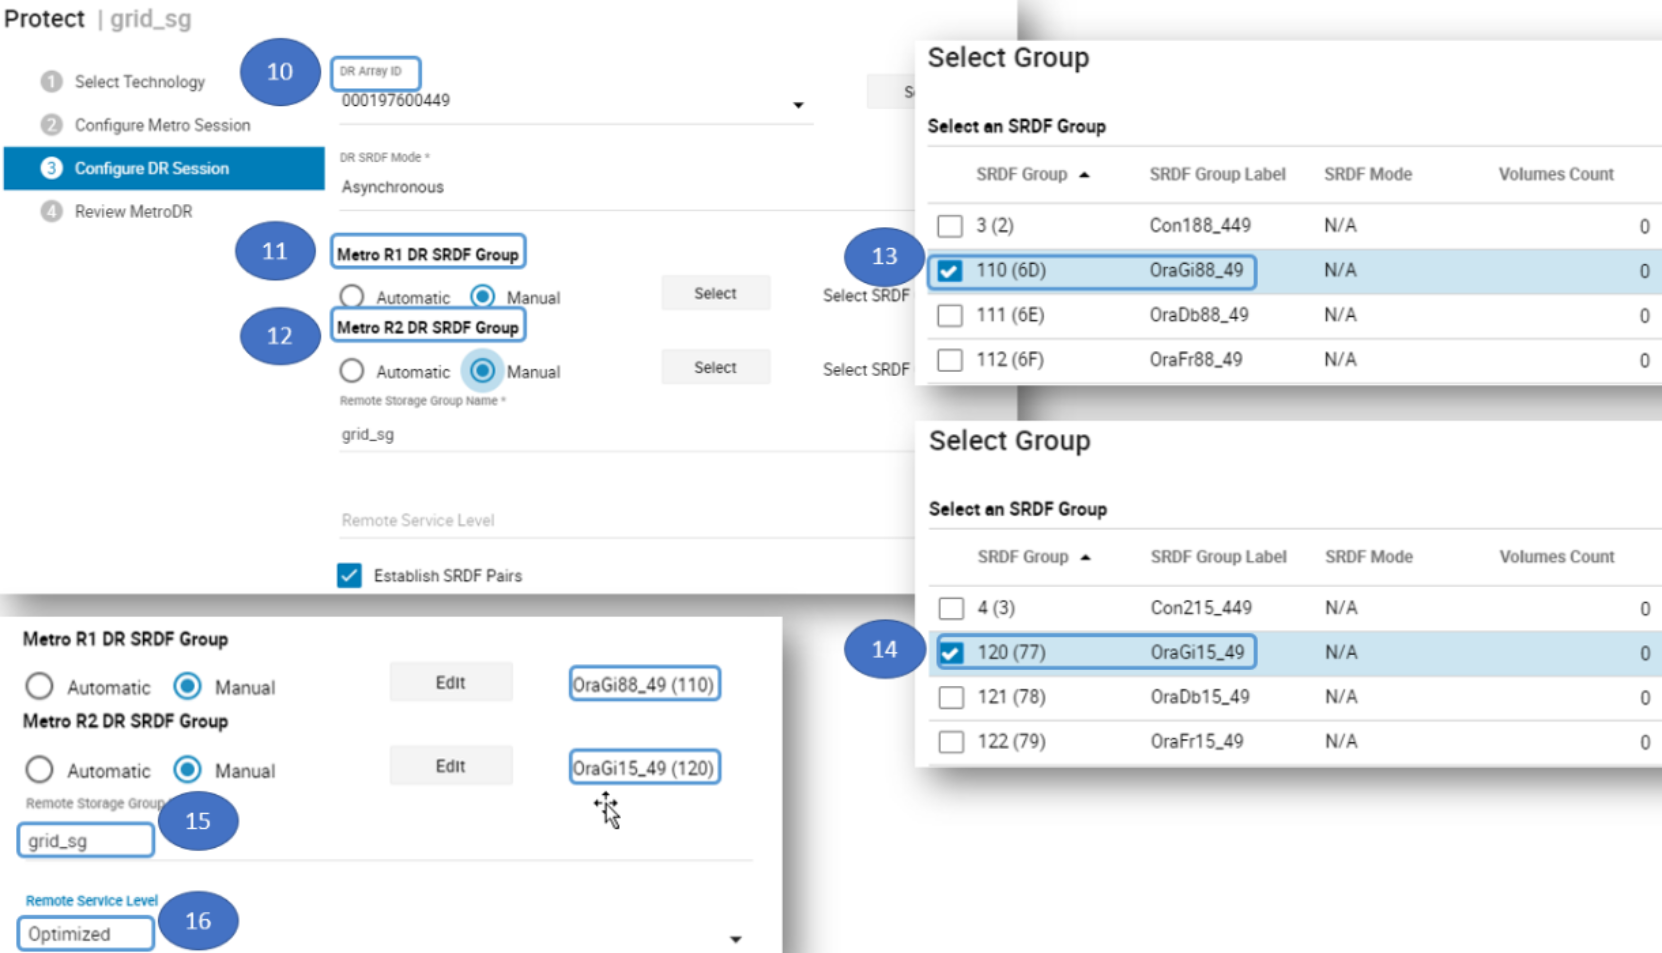
Figure 29. Setup of Storage Group to protect continued
Step 3 – Review setup summary and execute. Then verify status
After reviewing the setup summary, run the job. Verify that the MetroDR Environment was created and check its status.
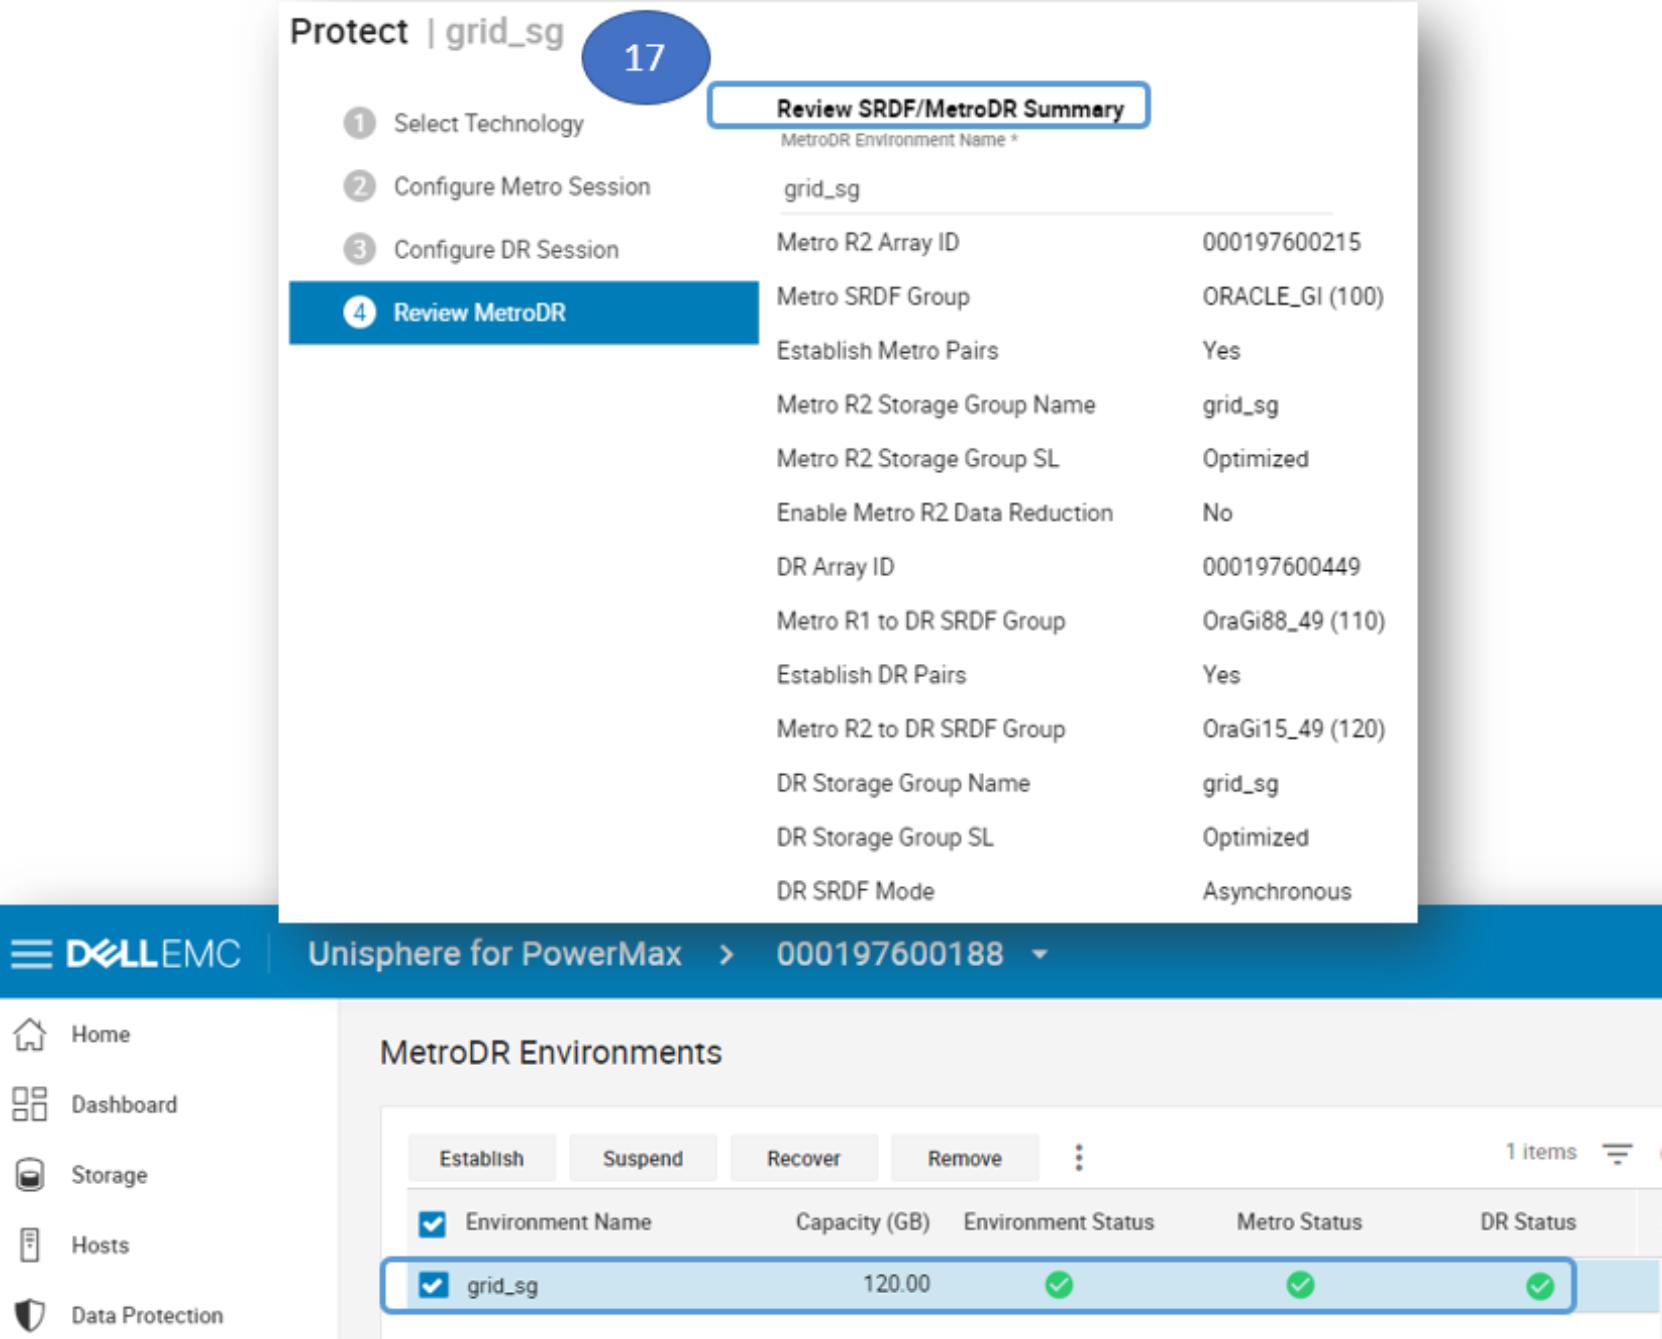
Figure 30. Review Summary and verify status after job execution
Step 4 – Repeat the steps for the other Storage Groups to protect
Repeat the steps for db_sg and fra_sg to be protected with SRDF/Metro Smart DR. Then verify that the environments were created.
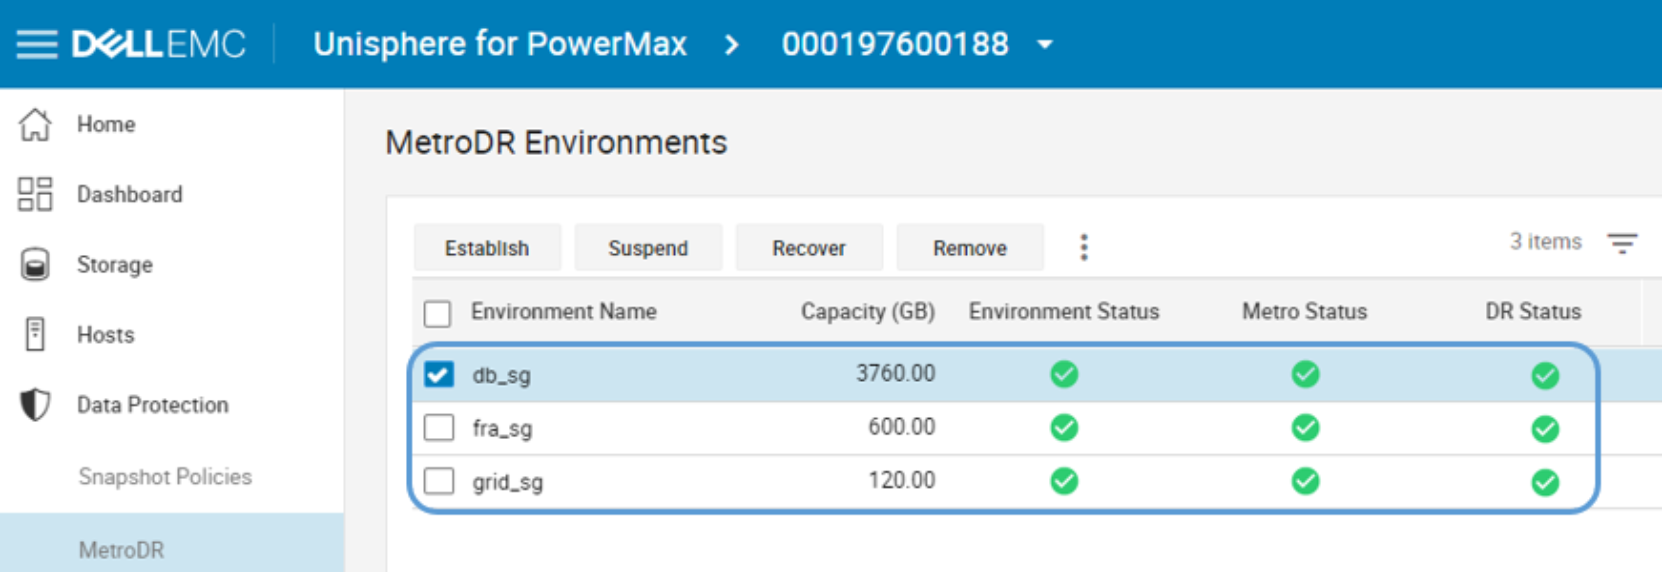
Figure 31. All MetroDR Environments were created and status good