
Using OneFS as an External NFS Server for CML Workspaces
Using OneFS as an External NFS Server for CML Workspaces
-
OneFS can be used to store the metadata and project information for a CML workspace. Reference detailed instructions on Using an External NFS Server on Cloudera Documentation website.
Step 1: Create a folder under the Access Zone on OneFS
For example. The access zone is located at /ifs/data/cdp
cd /ifs/data/cdp
mkdir -p cml/nfs-external
chown -R 8536:8536 cml
chmod -R 775 cml
hop-ps-f-1# ls -al /ifs/data/cdp/cml
total 96
drwxrwxrwx 3 8536 8536 30 Mar 7 13:58 .
drwxr-xr-x 6 root wheel 97 Mar 6 10:54 ..
drwxr-xr-x 9 8536 8536 174 Mar 12 09:02 nfs-external
Step 2: Create an NFS Export on OneFS
1. Navigate to Protocols>Unix Sharing (NFS)
2. Select the Access zone and Click ‘Create Export’
Enter the path that was created in Step 1 in the ‘Directory paths’ field
Click the check box ‘Enable mount access to subdirectories’
Add the clients that require read/write access (Note: The below example allows access for the entire subnet, it’s more secure to allow individual host IPs).
Click the ‘Save’ button
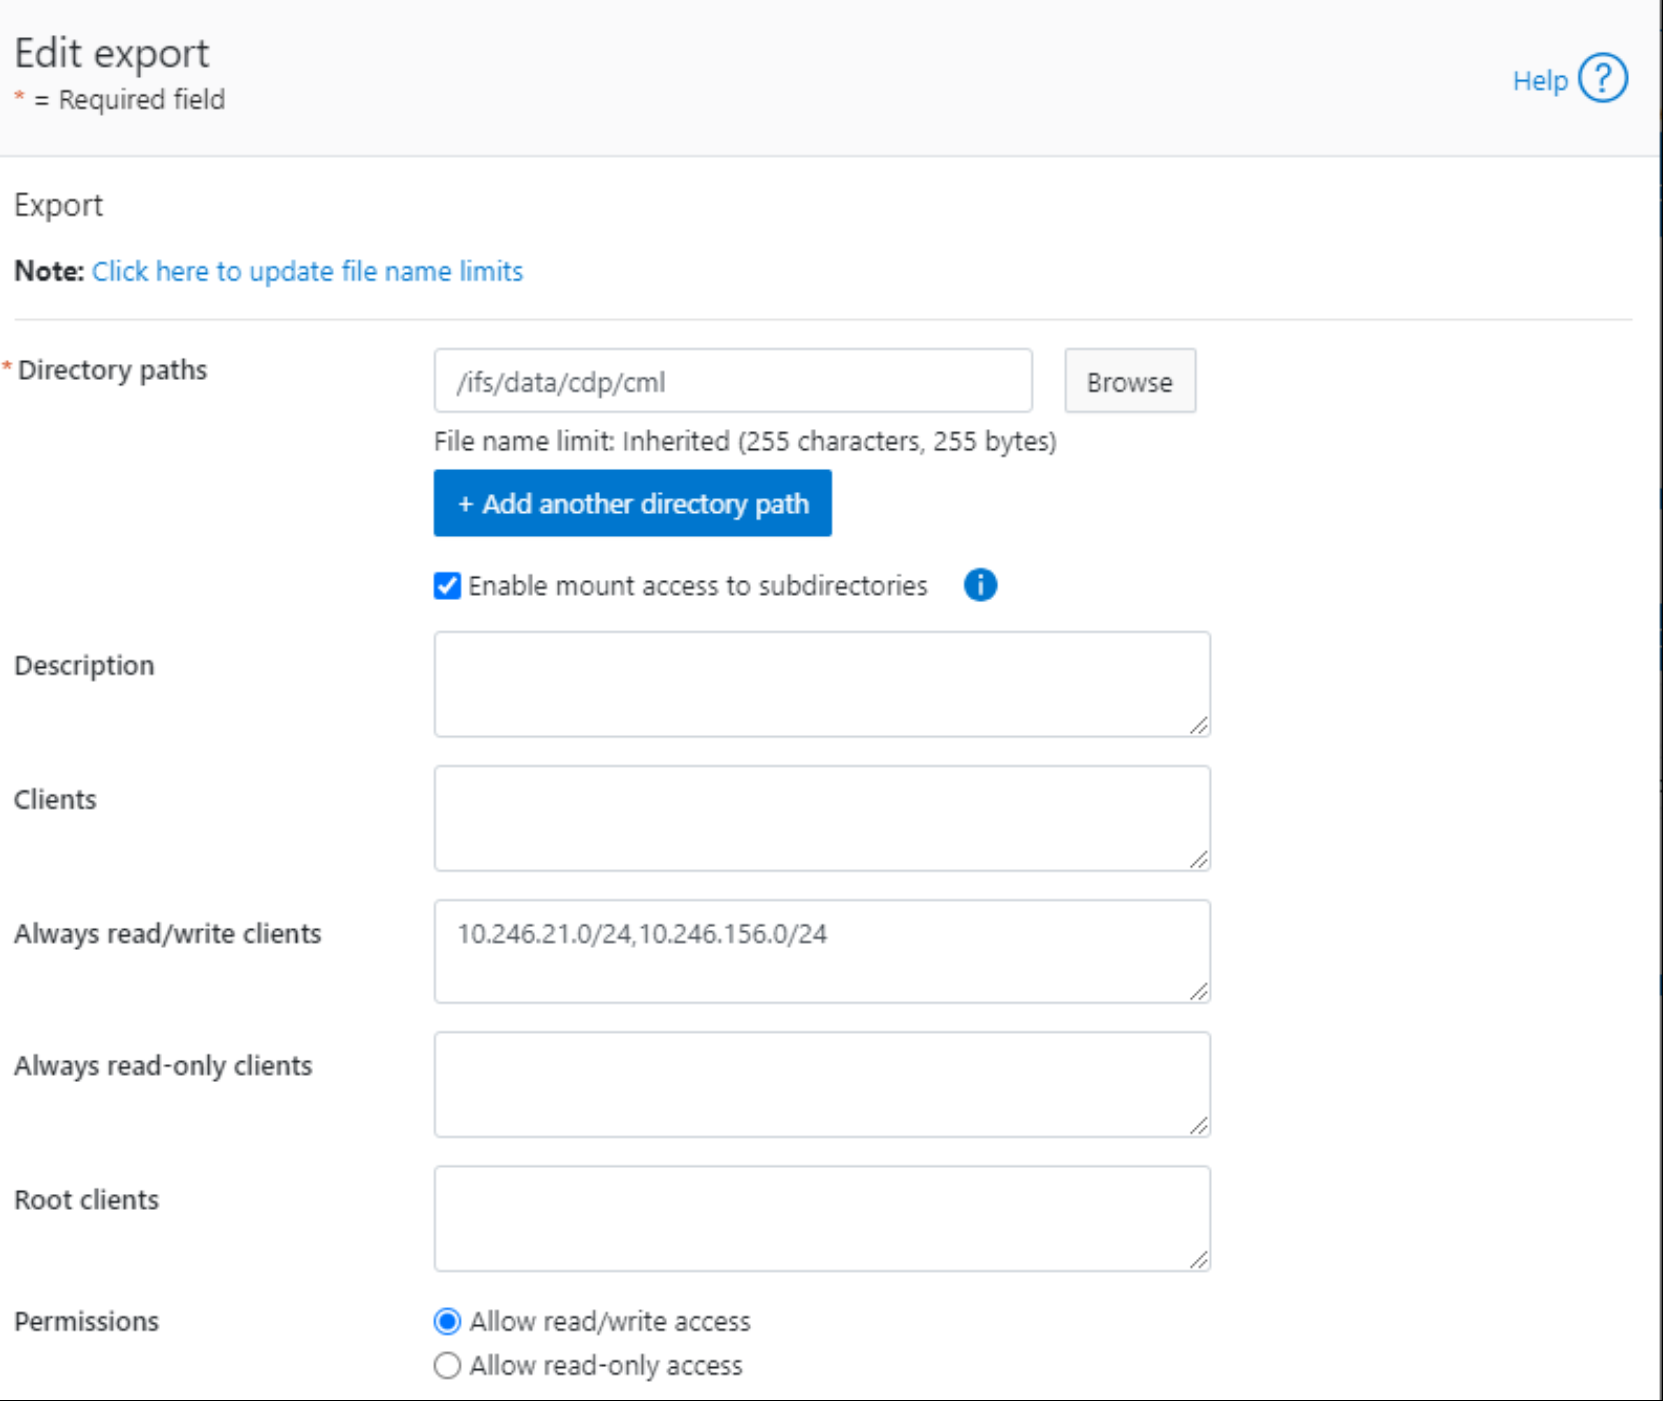
Figure 16. Create an NFS export on OneFS
Step 3: Create the CML workspace using the External Server option
Select the ‘NFS External’ radio button
Specify the SmartConnect zone name and complete path in the ‘Existing NFS’ field.
For example: nfs://cdp.solarch.lab.com:/ifs/data/cdp/cml/nfs-external
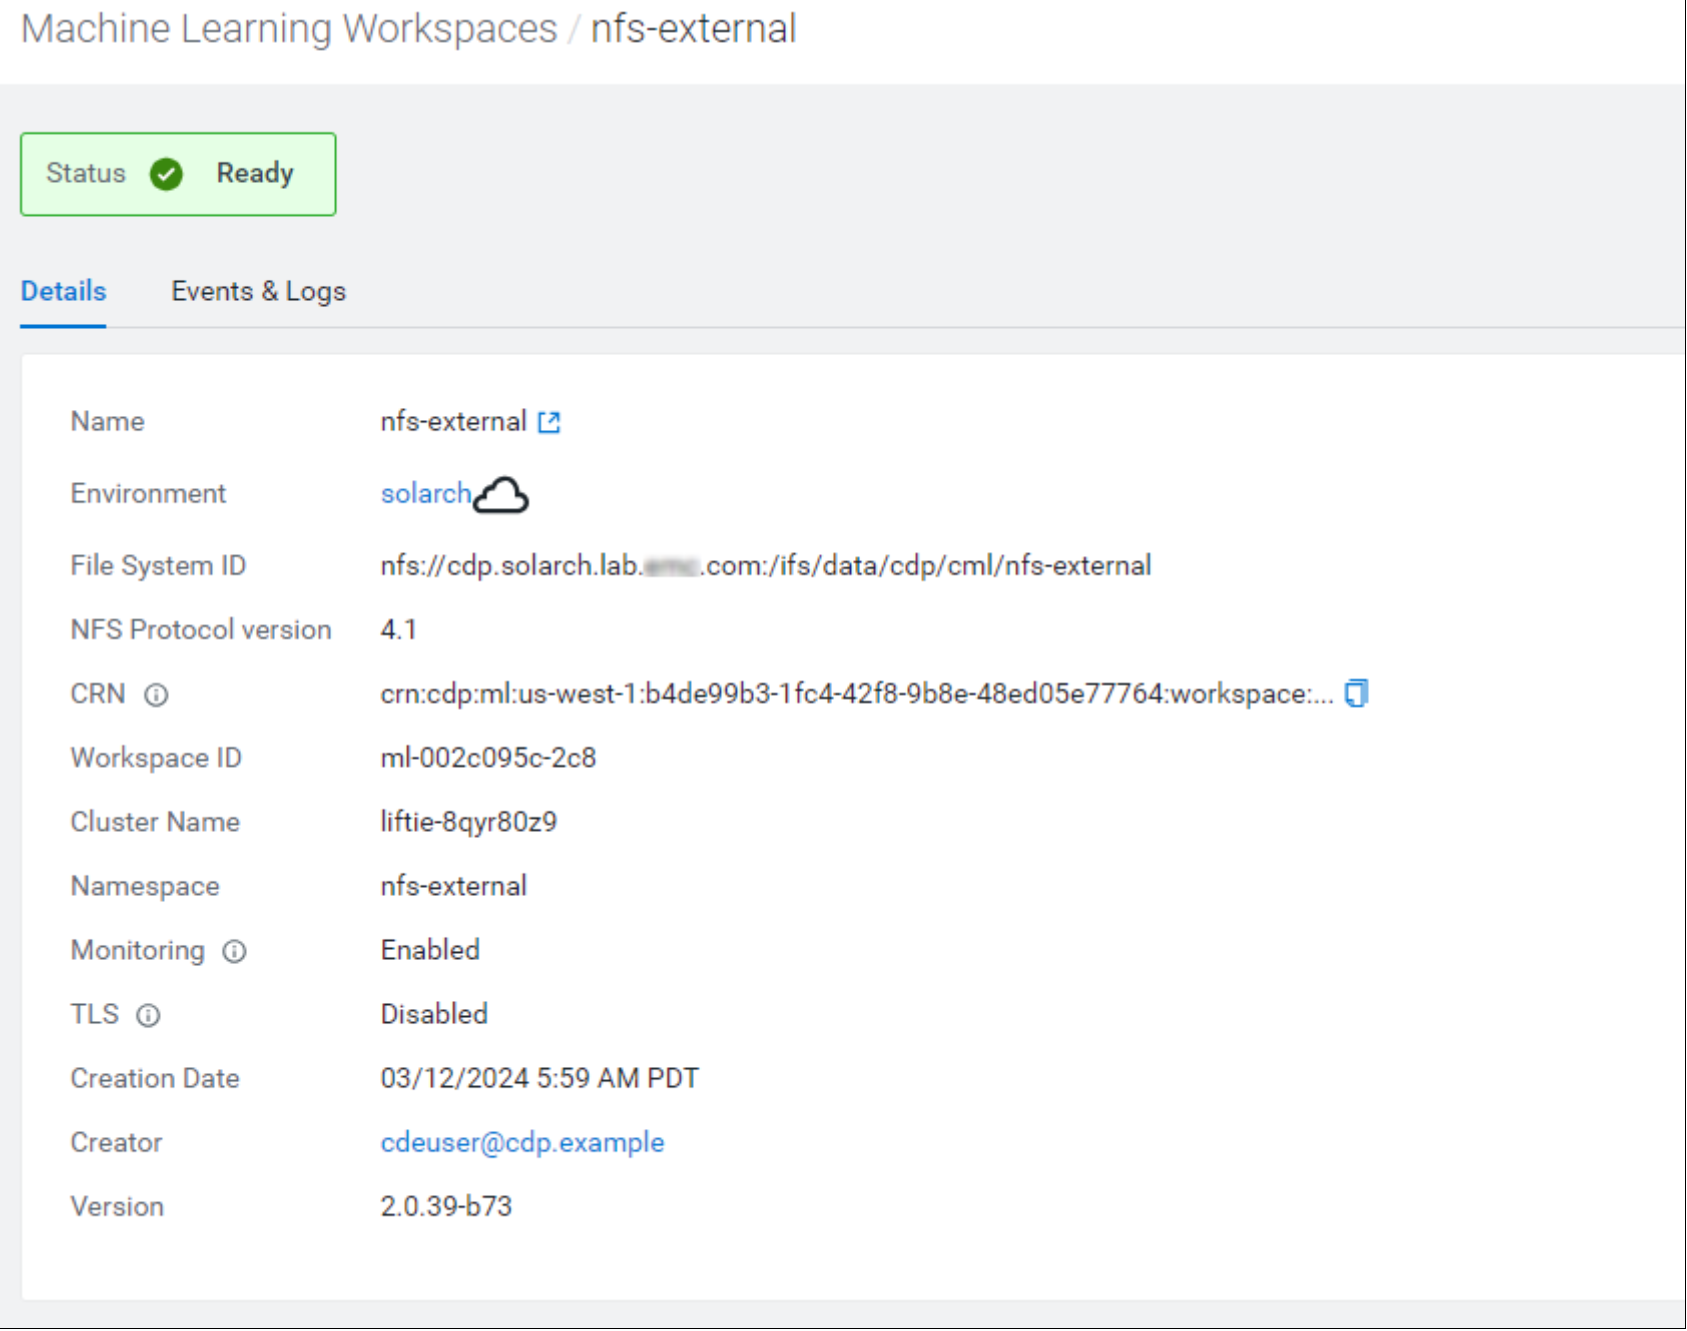
Figure 17. Create a CML workspace using OneFS as the External NFS Server