
Installation steps
Installation steps
-
This section details the steps for installing the Delphix engine using the Delphix supplied OVA file and using Dell PowerFlex storage for the underlying storage needs.
- Log in using the vSphere client to the vSphere server (or vCenter Server) where the Delphix engine needs to be installed.
- In the vSphere Client, click File.
- Select Deploy OVA Template.
- Navigate to the OVA file.
- Click Next.
- Select a hostname for the Delphix engine. This hostname will also be used in configuring the Delphix engine network.
- Select the data center where the Delphix engine will be located.
- Select the PowerFlex compute-only cluster and select the compute node running the ESXi hypervisor.
- Select a local datastore/volume to store data related to the Delphix operating system and Delphix virtual machine configuration. It should be thin-provisioned, with a minimum free space of 127 GB to store the data.
- Select the single virtual network that the Delphix engine uses.
- Click Finish. The installation begins, and the Delphix engine is created in the specified location.
- Once the installation has been completed, select the storage requirements as per the engine type requirements.
- For Continuous Data, edit the Delphix engine VM settings.
Create and add a minimum of four virtual disks that are provisioned from the PowerFlex storage volume created for data provisioning to store databases in the Delphix engine Continuous Data. The Delphix engine will stripe the database across these virtual disks, so for optimal I/O performance, each virtual disk should be equal in size and be configured as thick provisioned—Eager Zeroed. Additionally, these virtual disks should be distributed as evenly as possible across all SCSI I/O controllers, as shown in the following figure:
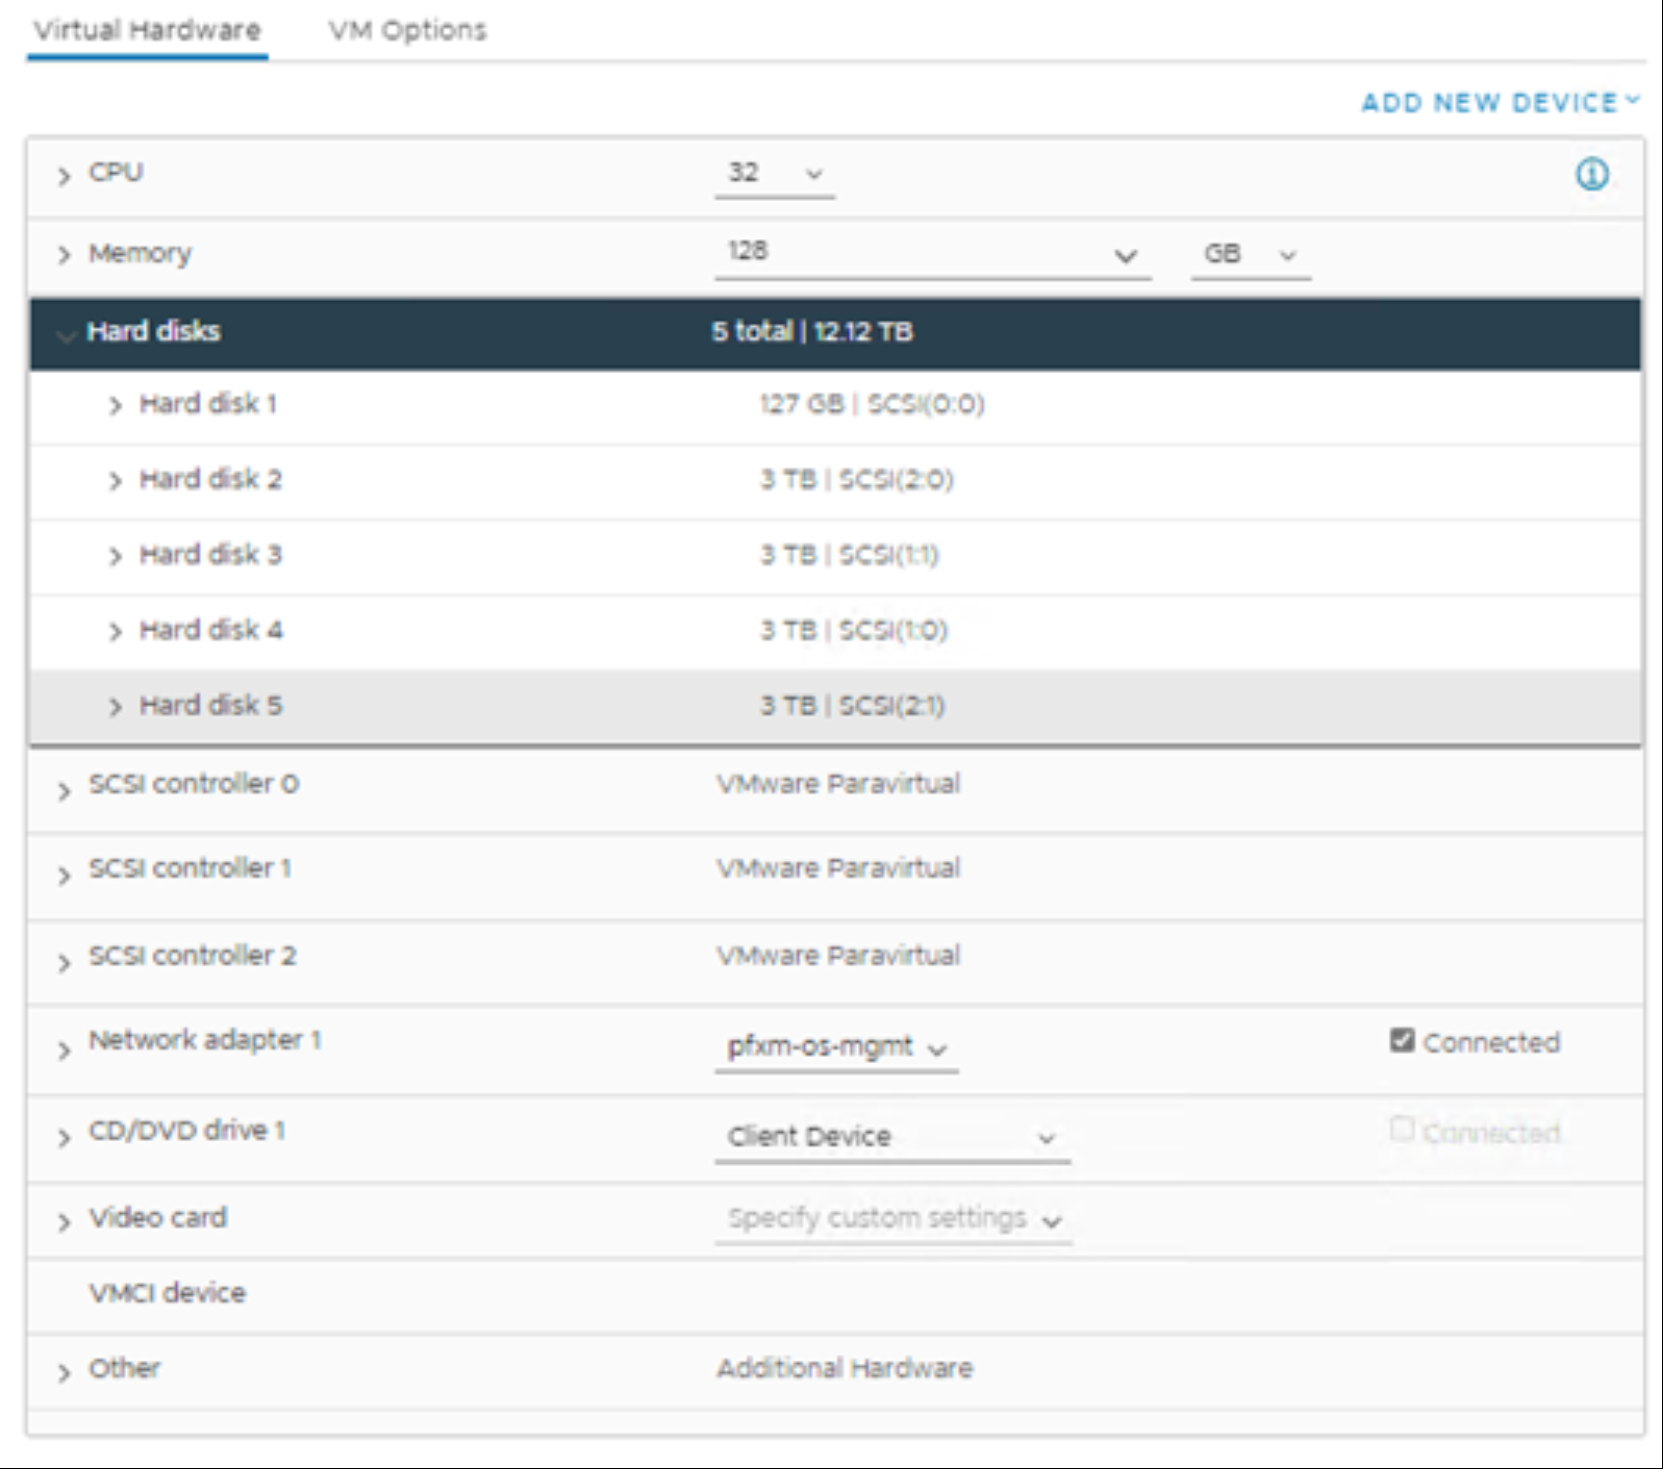
Figure 7. Delphix engine Continuous Data resource settings
- For Continuous Compliance, edit the Delphix engine VM settings.
Create and add a virtual disk that is provisioned from PowerFlex storage created for data masking to store data for Delphix engine Continuous Compliance operations.
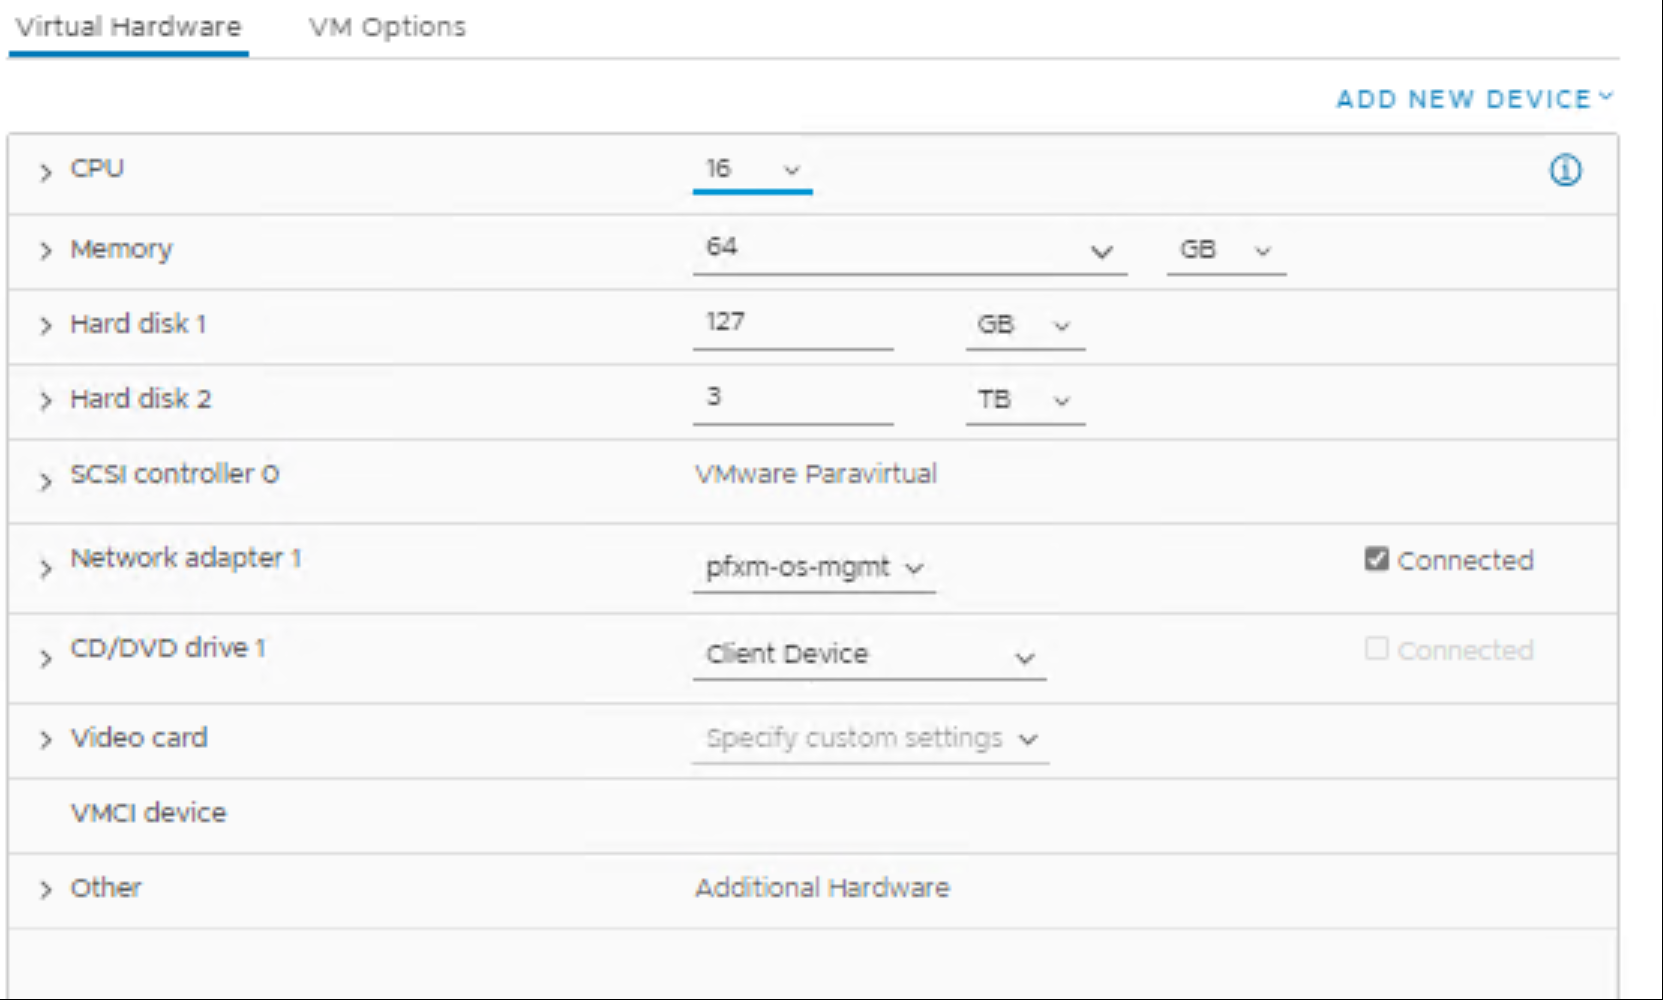
Figure 8. Delphix engine Continuous Compliance resource settings
- Power on the Delphix engine VM and proceed with the initial system configuration as described in Set up network access to the Delphix engine.
- For more information about the Delphix deployment on VMware, see Delphix deployment on VMware.
Set up network access to the Delphix engine
This section describes the steps for configuring the network access to the Delphix engine.
- Power on the Delphix engine VM and open the console.
- Wait for the Delphix management service and Delphix boot service to come online. This might take up to 10 minutes during the first boot.
- Press any key to access the sysadmin console.
- Enter sysadmin@SYSTEM for the username and sysadmin for the password.
The available network settings are shown along with the instructions for editing.
- Configure the hostname, DNS, static address, and default gateway.
- Commit the changes.
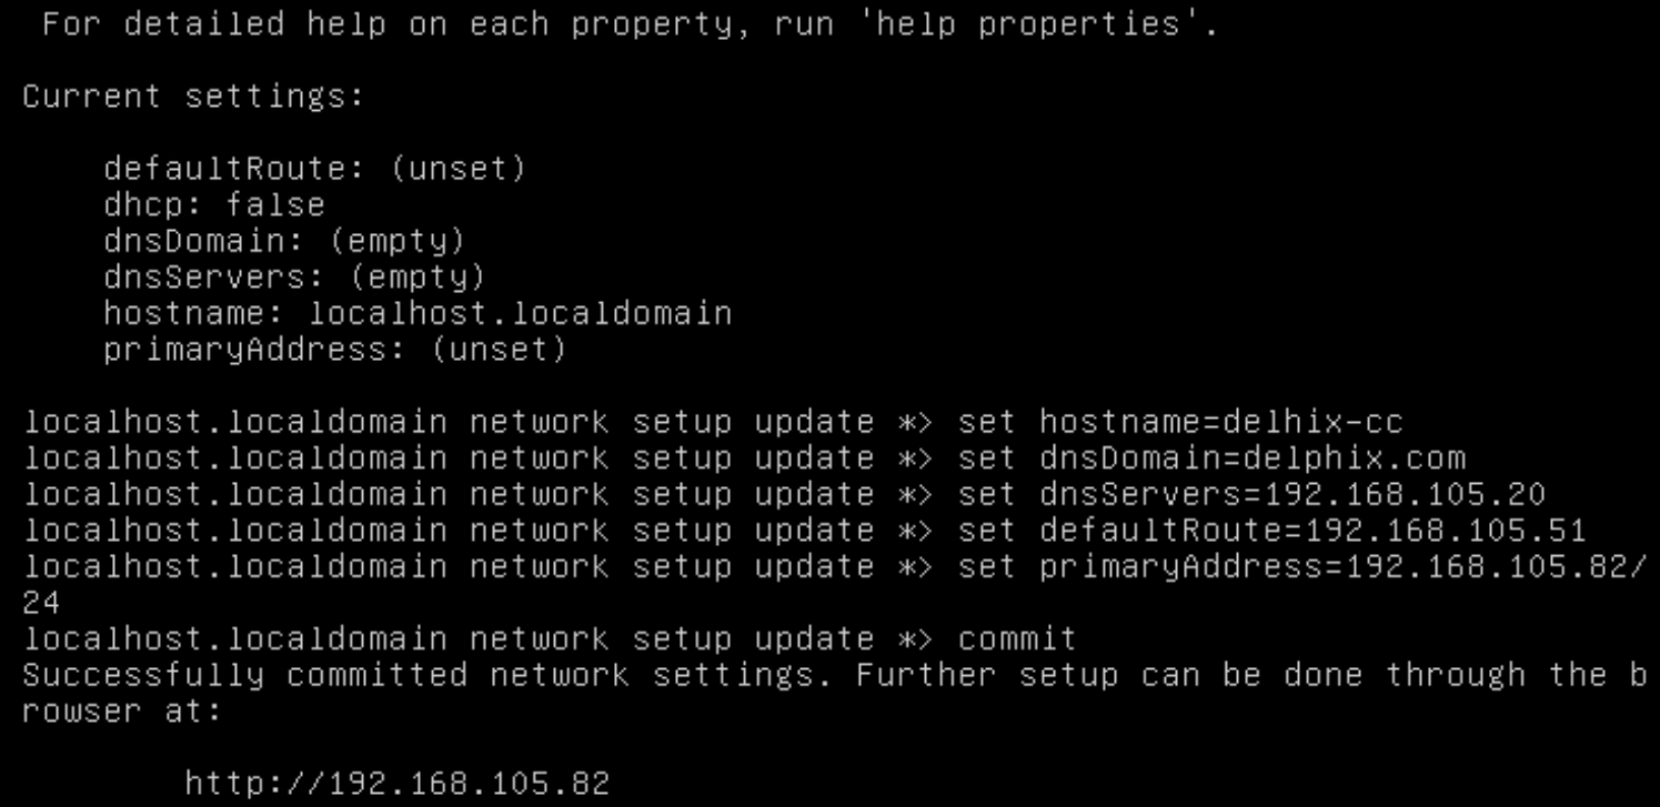
Figure 9. Network configuration
- Verify the Delphix engine access through a web browser by navigating to the displayed IP address.
- For more information about configuring the network access to the Delphix engine, see Network Access to the Delphix engine.
Initial setup of Delphix engine for Continuous Data
This section describes the steps for configuring the initial setup of the Delphix engine for Continuous Data through web interface.
- Connect to the Delphix engine Continuous Data at https://login/index.html#serverSetup.
- The Delphix setup application launches when it connects to the server.
Enter sysadmin login credentials, which initially default to the username sysadmin, with the initial default password of sysadmin. On the first login, which prompted it to change the initial default password. - The screen to configure the Delphix engine is shown as in the following figure:
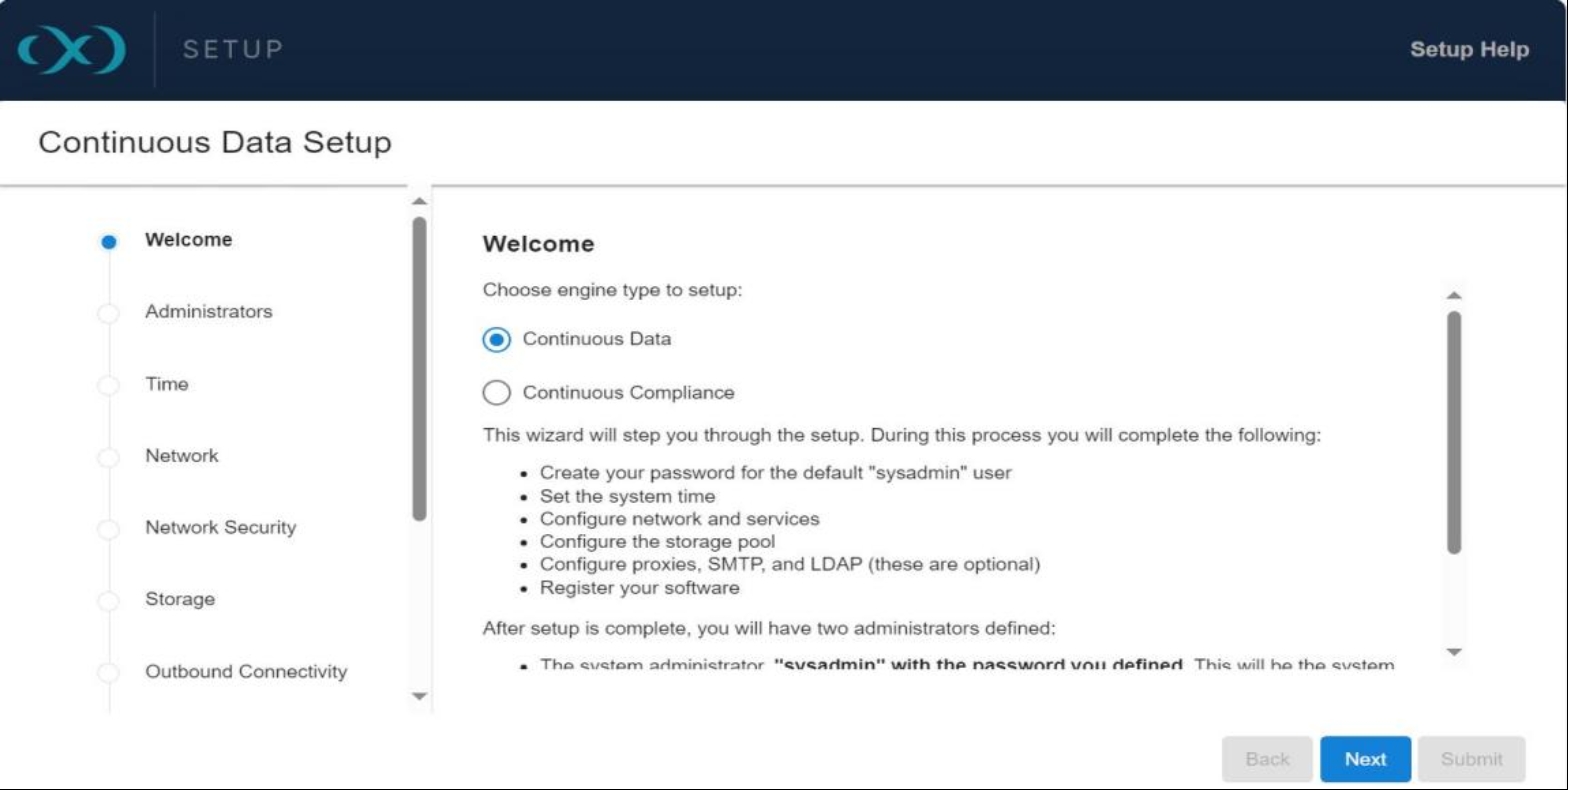
Figure 10. Delphix Continuous Data
- Select the engine type (Continuous Data or Continuous Compliance)
- Choose the engine type as Continuous Data for data virtualization.
Note: The setup for validation used two separate Delphix engines: one for Continuous Data and another for Continuous Compliance.
- Click Next.
- Configure user credentials for the following roles: System Administrator, Engine Administrator
- Select the storage configuration that is defined for the Delphix engine Continuous Data for data and logs.
- Select Network for access to the Delphix engine.
- Select System Time to synchronize the time between Virtual databases.
- Select Authentication as the default for enabling authentication services using user credentials defined for roles (System Administrator, Engine Administrator).
- Configure registration to allow Delphix support to access the Delphix engine. Note: the Delphix engine will work without it being registered.
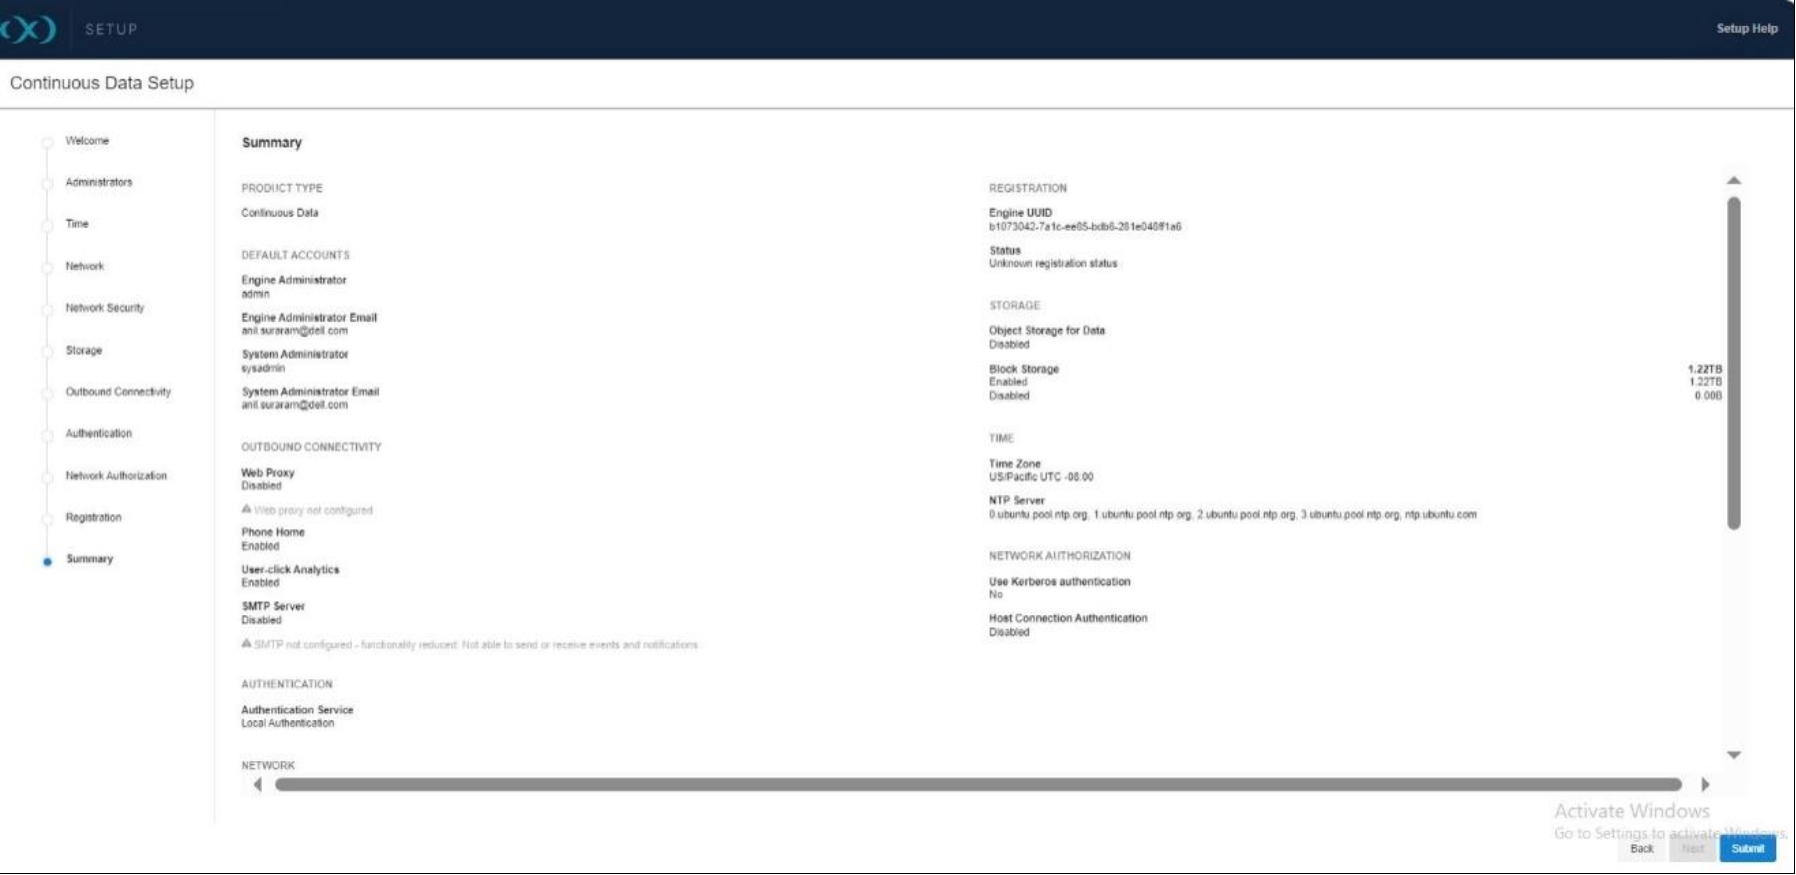
Figure 11. Delphix engine initial setup Summary
For more information about configuring the Delphix engine for Continuous Data, see Delphix engine initial setup.