


Velero Backup to PowerScale S3 Bucket

Velero is one of the most popular tools for backup and restore of Kubernetes resources.
You can use Velero for different backup options to protect your Kubernetes cluster. The three modes are:
- Protect the Kubernetes resource objects such as Pod, Namespace, and so on, with CRDs included
- Protect the PersistentVolume data with the help of VolumeSnapshot
- Protect the content of the PVs with the help of restic
In all cases, Velero syncs the information (YAML and restic data) to a storage object.
PowerScale is Dell Technologies’ leading scale-out NAS solution. It supports many different access protocols including NFS, SMB, HTTP, FTP, HDFS, and, in the case that interests us, S3!
Note: PowerScale is not 100% compatible with the AWS S3 protocol (for details, see the PowerScale OneFS S3 API Guide).
For a simple backup solution of a few terabytes of Kubernetes data, PowerScale and Velero are a perfect duo.
Deployment
To deploy this solution, you need to configure PowerScale and then install and configure Velero.
PowerScale S3 configuration
Prepare PowerScale to be a target for the backup as follows:
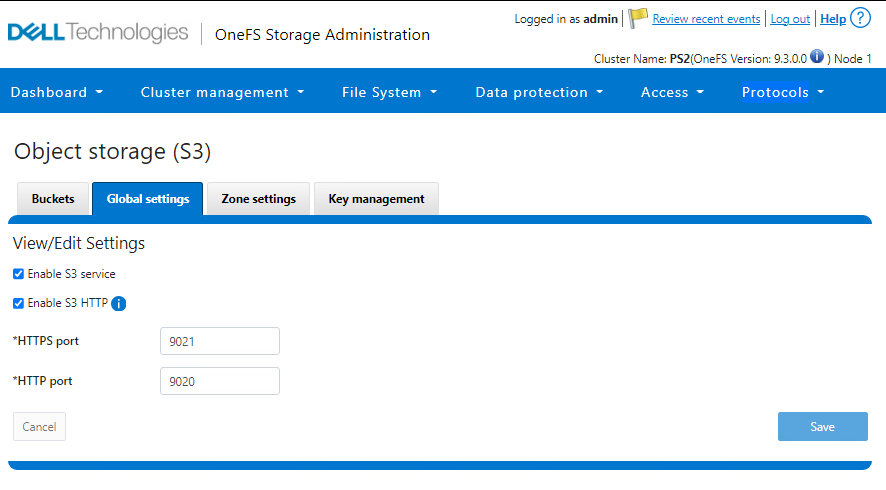
- Make sure the S3 protocol is enabled.
You can check that in the UI under Protocols > Object Storage (S3) > Global Settings or in the CLI.
In the UI:
In the CLI:
PS1-1% isi s3 settings global view
         HTTP Port: 9020
        HTTPS Port: 9021
        HTTPS only: No
S3 Service Enabled: Yes
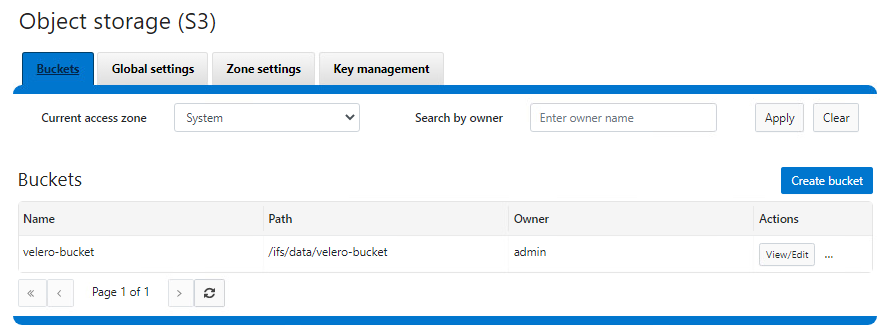
2. Create a bucket with the permission to write objects (at a minimum).
That action can also be done from the UI or CLI.
In the UI:
In the CLI:
See isi S3 buckets create in the PowerScale OneFS CLI Command Reference.
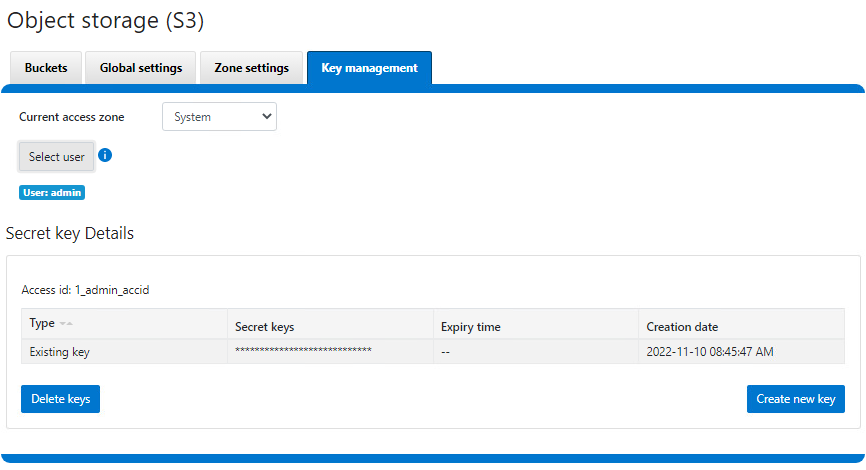
3. Create a key for the user that will be used to upload the objects.
Important notes:
- The username is the one indicated in the interface, not the one from the file system or provider (for example, here, the admin user is 1_admin_accid S3 user)
- The key is only displayed upon creation and cannot be retrieved later. Be sure to copy it right away.
Now that PowerScale is ready, we can proceed with the Velero deployment.
Velero installation and configuration
We assume that the Velero binary is installed and has access to the Kubernetes cluster. If not, see the Velero installation document for the deployment instructions.
Configure Velero:
- Create a file with the credentials previously obtained from PowerScale.
$ cat ~/credentials-velero
[default]
aws_access_key_id = 1_admin_accid
aws_secret_access_key = 0**************************i
…
- Optionally, obtain the PowerScale SSL certificate.
In our case, the HTTPS endpoint uses a self-signed certificate, so we have to get it and pass it to Velero. Note that we can use HTTP protocol, and that step can be skipped at the cost of plain text data transit. For more information on the self-signed certificates in the context of Velero, see https://velero.io/docs/v1.9/self-signed-certificates/. - Install Velero itself:
$ velero install \
    --provider aws \
    --plugins velero/velero-plugin-for-aws:v1.5.1 \
    --bucket velero-backup \
    --secret-file ./credentials-velero \
    --use-volume-snapshots=false \
    --cacert ./ps2-cacert.pem \
    --backup-location-config region=powerscale,s3ForcePathStyle="true",s3Url=https://192.168.1.21:9021
…
The preceding command shows how to use Velero most simplistically and securely.
It is possible to add parameters to enable protection with snapshots. Every Dell CSI driver has snapshot support. To take advantage of that support, we use the install command with this addition:
velero install \
--features=EnableCSI \
--plugins=velero/velero-plugin-for-aws:v1.5.1,velero/velero-plugin-for-csi:v0.3.0 \
--use-volume-snapshots=true
...
Now that CSI snaps are enabled, we can enable restic to move data out of those snapshots into our backup target by adding:
--use-restic
As you can see, we are using the velero/velero-plugin-for-aws:v1.5.1 image, which is the latest available at the time of the publication of this article. You can obtain the current version from GitHub: https://github.com/vmware-tanzu/velero-plugin-for-aws
After the Velero installation is done, check that everything is correct:
kubectl logs -n velero deployment/velero
If you have an error with the certificates, you should see it quickly.
You can now back up and restore your Kubernetes resources with the usual Velero commands. For example, to protect the entire Kubernetes except kube-system, including the data with PV snapshots:
velero backup create backup-all --exclude-namespaces kube-system
You can check the actual content directly from PowerScale file system explorer:
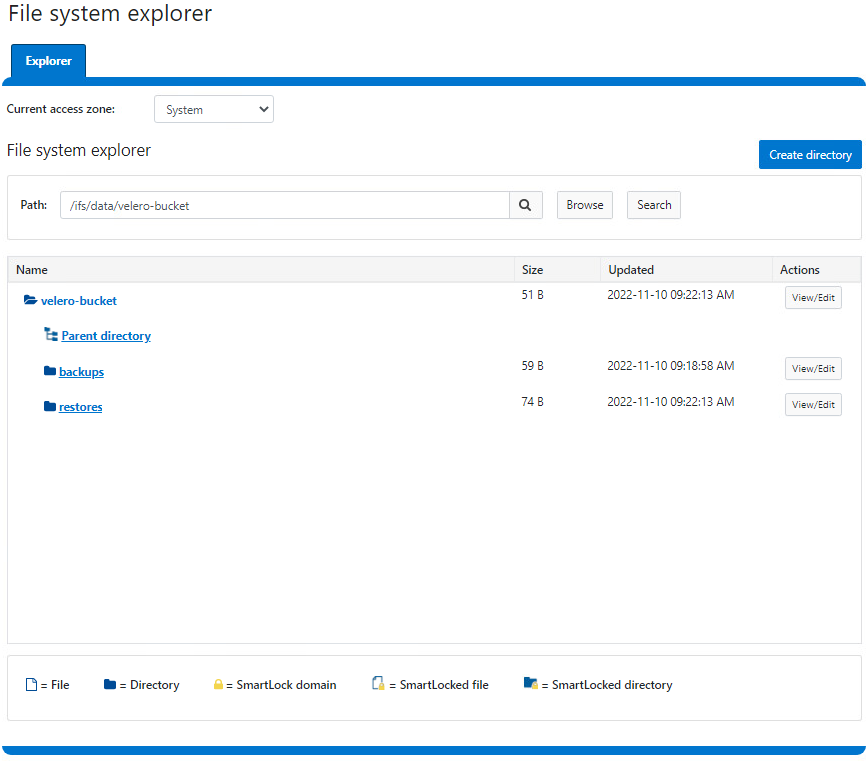
Here is a demo:
Conclusion
For easy protection of small Kubernetes clusters, Velero combined with PowerScale S3 is a great solution. If you are looking for broader features (for a greater amount of data or more destinations that go beyond Kubernetes), look to Dell PowerProtect Data Manager, a next-generation, comprehensive data protection solution.
Interestingly, Dell PowerProtect Data Manager uses the Velero plug-in to protect Kubernetes resources!
Resources