


Porting the CUDA p2pbandwidthLatencyTest to the HIP environment on Dell PowerEdge Servers with the AMD GPU
Mon, 29 Apr 2024 17:34:51 -0000
|Read Time: 0 minutes
Introduction
When writing code in CUDA, it is natural to ask if that code can be extended to other GPUs. This extension can allow the “write once, run anywhere” programming paradigm to materialize. While this programming paradigm is a lofty goal, we are in a position to achieve the benefits of porting code from CUDA (for NVIDIA GPUs) to HIP (for AMD GPUs) with little effort. This interoperability provides added value because developers do not have to rewrite code starting at the beginning. It not only saves time, but also saves system administrator efforts to run workloads on a data center depending on hardware resource availability.
This blog provides a brief overview of the AMD ROCm™ platform. It describes a use case that ports the peer-to-peer GPU bandwidth latency test (p2pbandwidthlatencytest) from CUDA to Heterogeneous-Computing Interface for Portability (HIP) to run on an AMD GPU.
Introduction to ROCm and HIP
ROCm is an open-source software platform for GPU-accelerated computing from AMD. It supports running of HPC and AI workloads across different vendors. The following figures show the core ROCm components and capabilities:
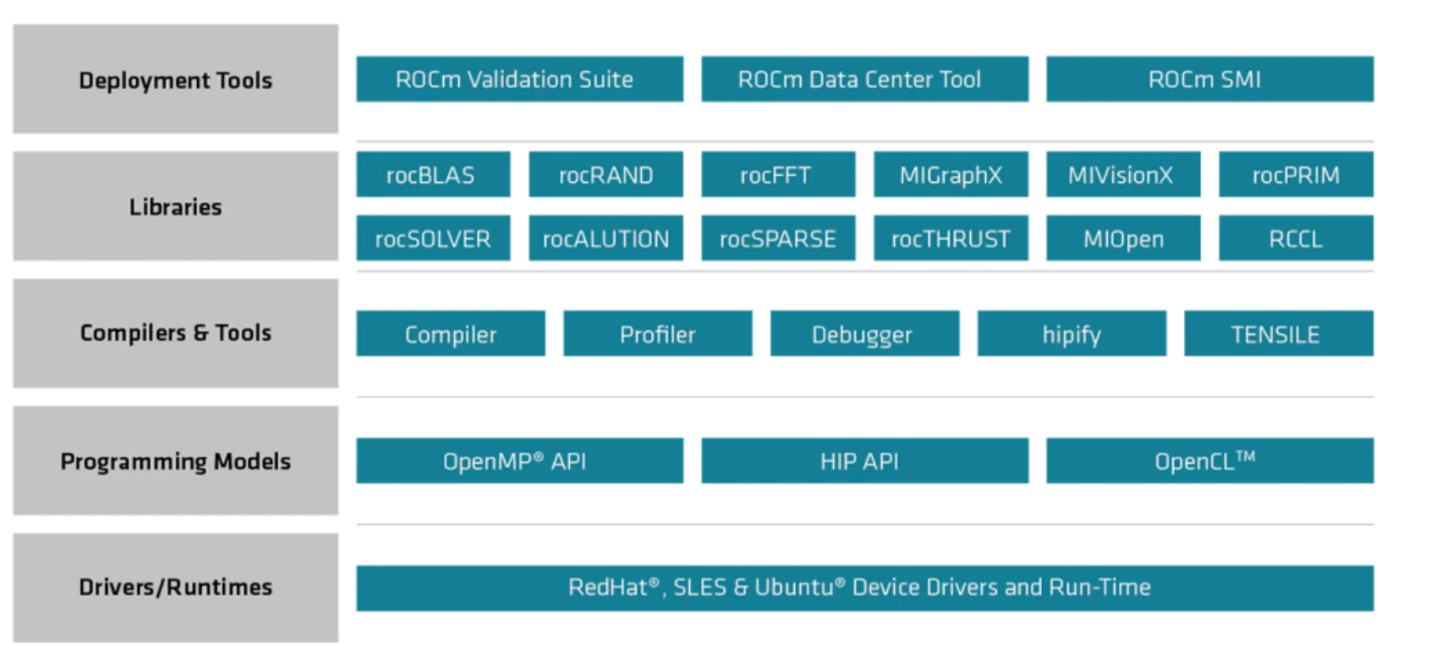
Figure 1: The ROCm libraries stack
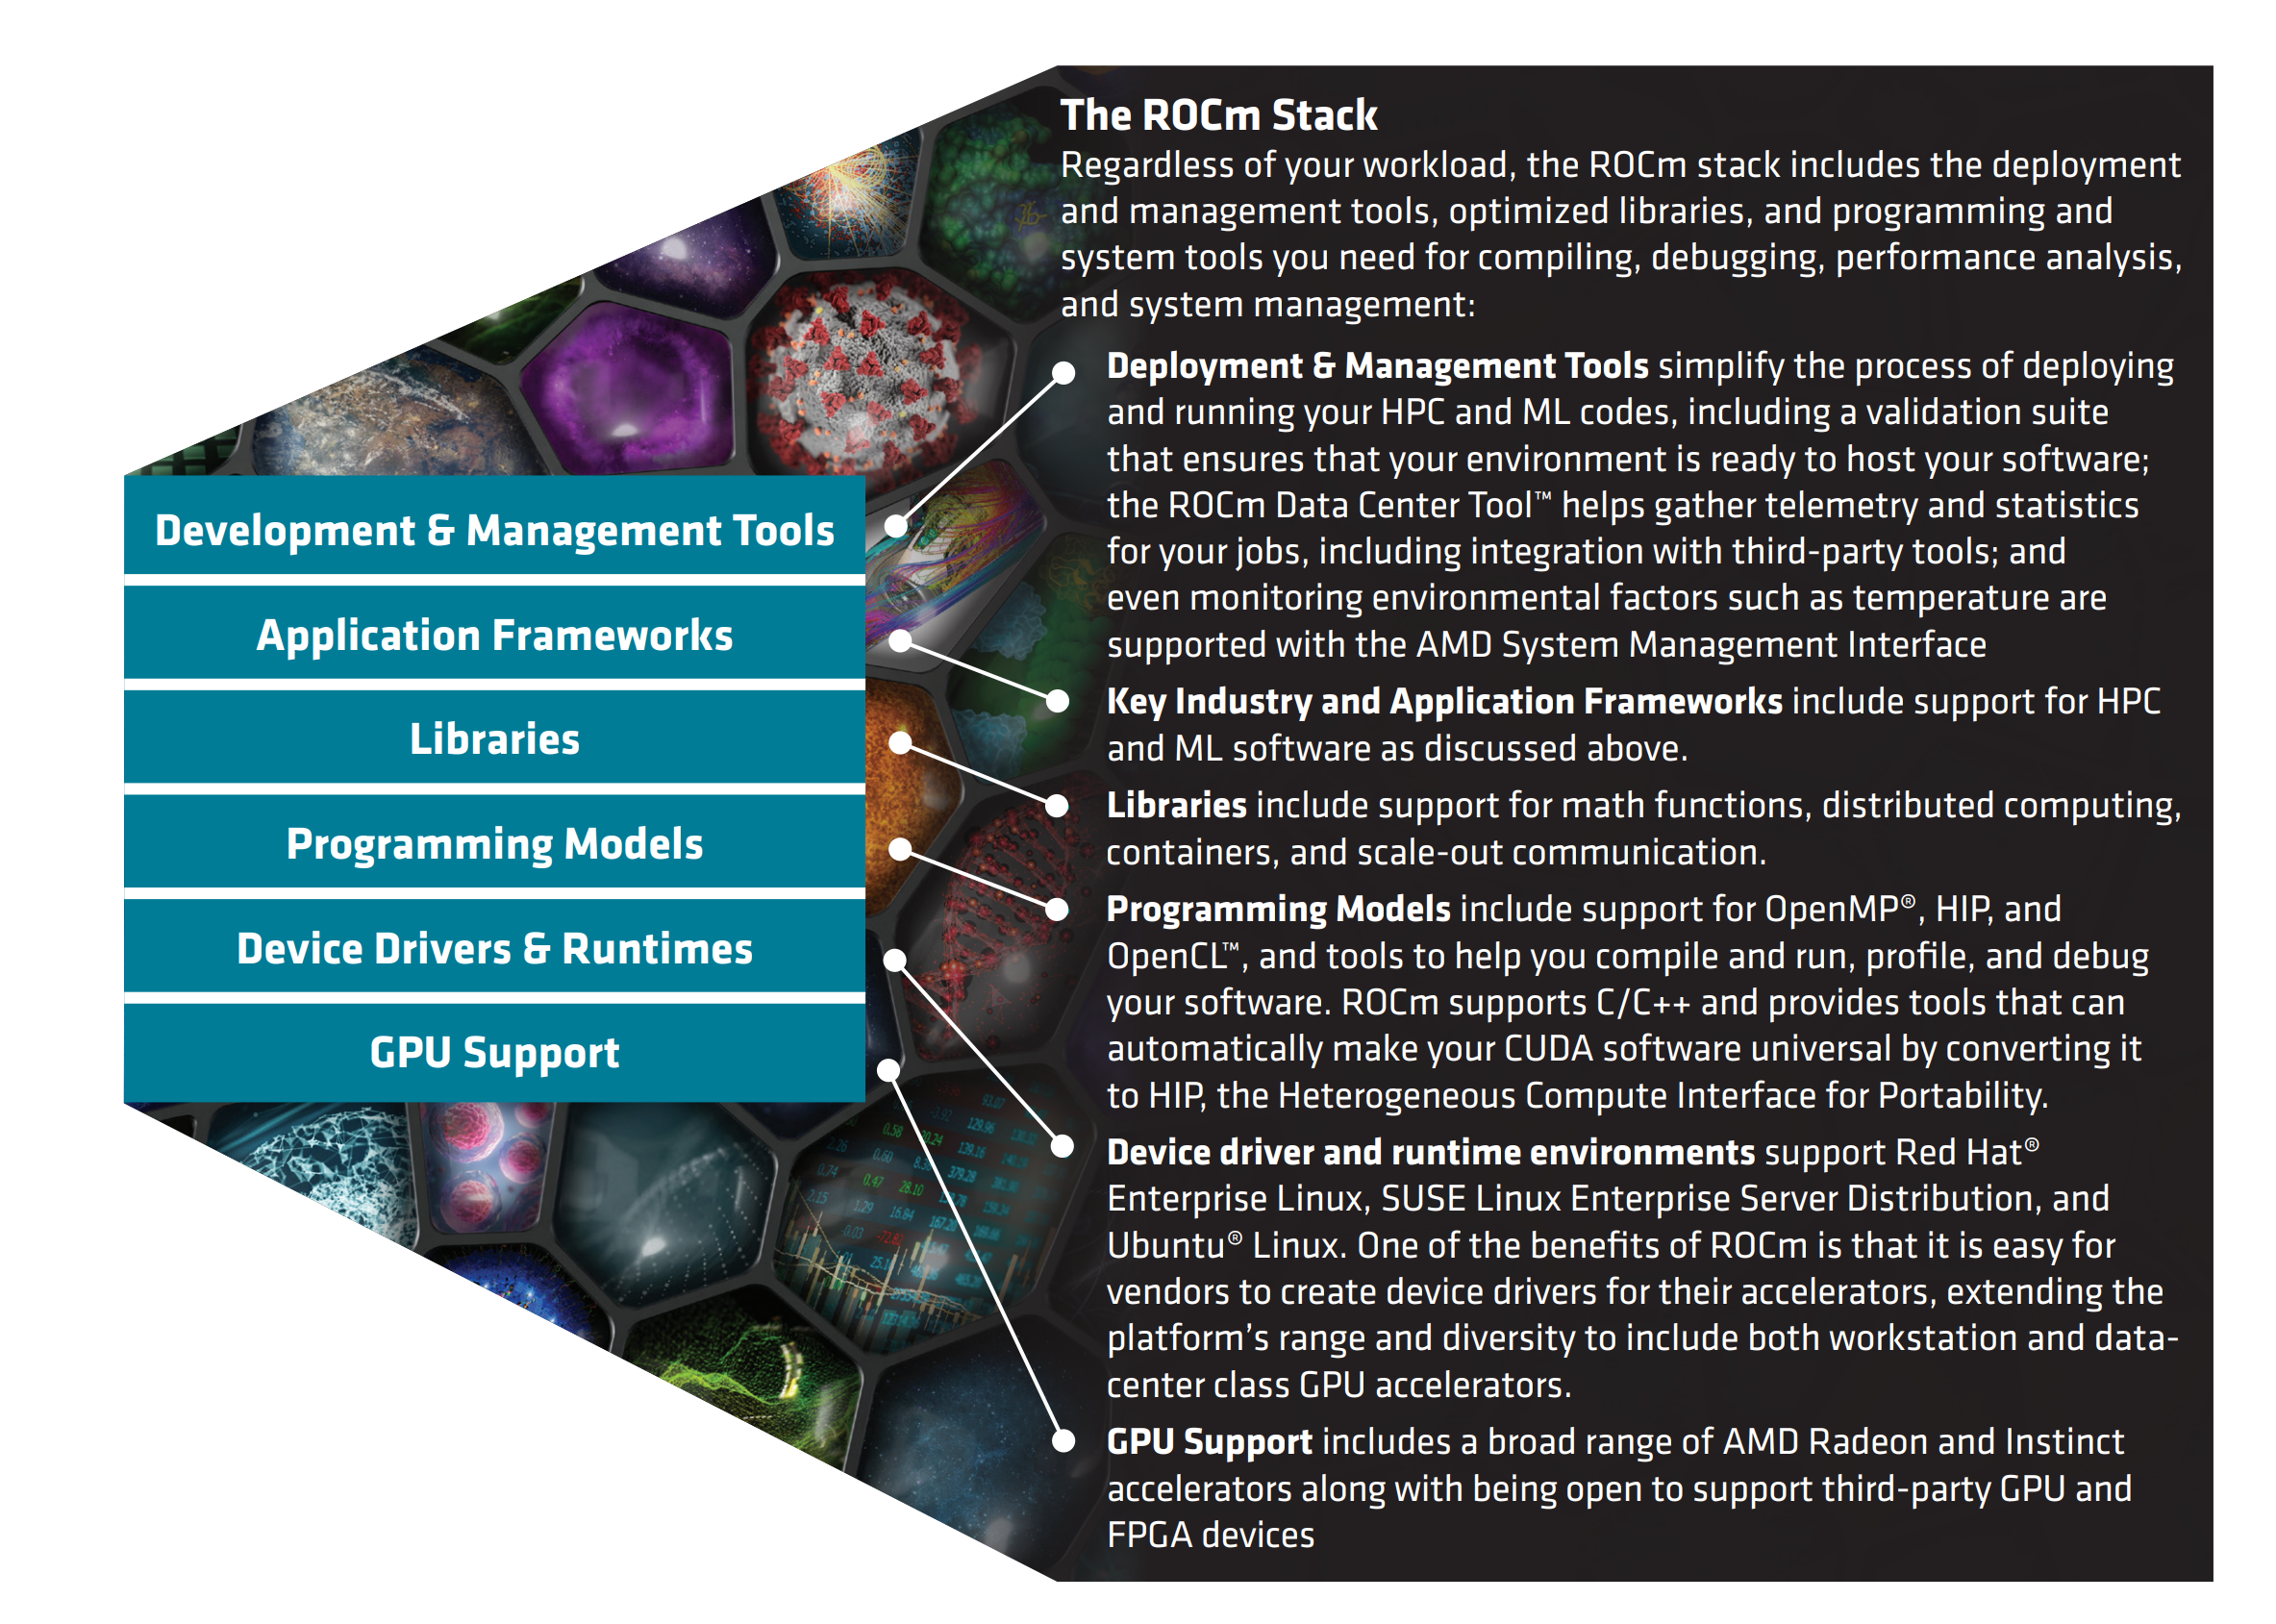
Figure 2: The ROCm stack
ROCm is a full package of all that is needed to run different HPC and AI workloads. It includes a collection of drivers, APIs, and other GPU tools that support AMD Instinct™ GPUs as well as other accelerators. To meet the objective of running workloads on other accelerators, HIP was introduced.
HIP is AMD’s GPU programming paradigm for designing kernels on GPU hardware. It is a C++ runtime API and a programming language that serves applications on different platforms.
One of the key features of HIP is the ability to convert CUDA code to HIP, which allows running CUDA applications on AMD GPUs. When the code is ported to HIP, it is possible to run HIP code on NVIDIA GPUs by using the CUDA platform-supported compilers (HIP is C++ code and it provides headers that support translation between HIP runtime APIs to CUDA runtime APIs). HIPify refers to the tools that translate CUDA source code into HIP C++.
Introduction to the CUDA p2pbandwidthLatencyTest
The p2pbwLatencyTest determines the data transfer speed between GPUs by computing latency and bandwidth. This test is useful to quantify the communication speed between GPUs and to ensure that these GPUs can communicate.
For example, during training of large-scale data and model parallel deep learning models, it is imperative to ensure that GPUs can communicate after a deadlock or other issues while building and debugging a model. There are other use cases for this test such as BIOS configuration performance improvements, driver update performance implications, and so on.
Porting the p2pbandwidthLatencyTest
The following steps port the p2pbandwidthLatencyTest from CUDA to HIP:
- Ensure that ROCm and HIP are installed in your machine. Follow the installation instructions in the ROCm Installation Guide at:
https://rocmdocs.amd.com/en/latest/Installation_Guide/Installation_new.html#rocm-installation-guide-v4-5
Note: The latest version of ROCm is v5.2.0. This blog describes a scenario running with ROCm v4.5. You can run ROCm v5.x, however, it is recommended that you see the ROCm Installation Guide v5.1.3 at:
https://docs.amd.com/bundle/ROCm-Installation-Guide-v5.1.3/page/Overview_of_ROCm_Installation_Methods.html. - Verify your installation by running the commands described in:
https://rocmdocs.amd.com/en/latest/Installation_Guide/Installation_new.html#verifying-rocm-installation - Optionally, ensure that HIP is installed as described at:
https://github.com/ROCm-Developer-Tools/HIP/blob/master/INSTALL.md#verify-your-installation
We recommend this step to ensure that the expected outputs are produced. - Install CUDA on your local machine to be able to convert CUDA source code to HIP.
To align version dependencies that need CUDA and LLVM +CLANG, see:
https://github.com/ROCm-Developer-Tools/HIPIFY#dependencies - Verify that your installation is successful by testing a sample source conversion and compilation. See the instructions at:
https://github.com/ROCm-Developer-Tools/HIP/tree/master/samples/0_Intro/square#squaremd
Clone this repo to perform the validation test. If you can run the following square.cpp program, the installation is successful: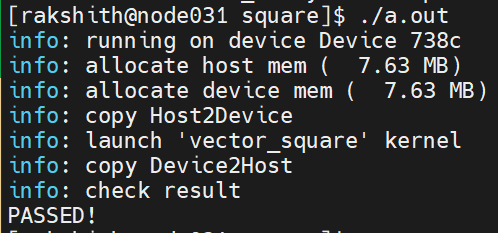
Congratulations! You can now run the conversion process for the p2pbwLatencyTest. - If you use the Bright Cluster Manager, load the CUDA module as follows:
module load cuda11.1/toolkit/11.1.0
Converting the p2pbwLatencyTest from CUDA to HIP
After you download the p2pbandwidthLatencyTest, convert the test from CUDA to HIP.
There are two approaches to convert CUDA to HIP:
- hipify-perl—A Perl script that uses regular expressions to convert CUDA to HIP replacements. It is useful when direct replacements can solve the porting problem. It is a naïve converter that does not check for valid CUDA code. A disadvantage of the script is that it cannot transform some constructs. For more information, see https://github.com/ROCm-Developer-Tools/HIPIFY#-hipify-perl.
- hipify-clang—A tool that translates CUDA source code into an abstract syntax tree, which is traversed by transformation matchers. After performing all the transformations, HIP output is produced. For more information, see https://github.com/ROCm-Developer-Tools/HIPIFY#-hipify-clang.
For more information about HIPify, see the HIPify Reference Guide at https://docs.amd.com/bundle/HIPify-Reference-Guide-v5.1/page/HIPify.html.
To convert the p2pbwLatencyTest from CUDA to HIP:
- Clone the CUDA sample repository and run the conversion:
git clone https://github.com/NVIDIA/cuda-samples.git
cd cuda-samples/Samples/5_Domain_Specific/p2pBandwidthLatencyTest
hipify-perl p2pBandwidthLatencyTest.cu > hip_converted.cpp
hipcc hip_converted.cpp -o p2pamd.ou
The following example shows the program output: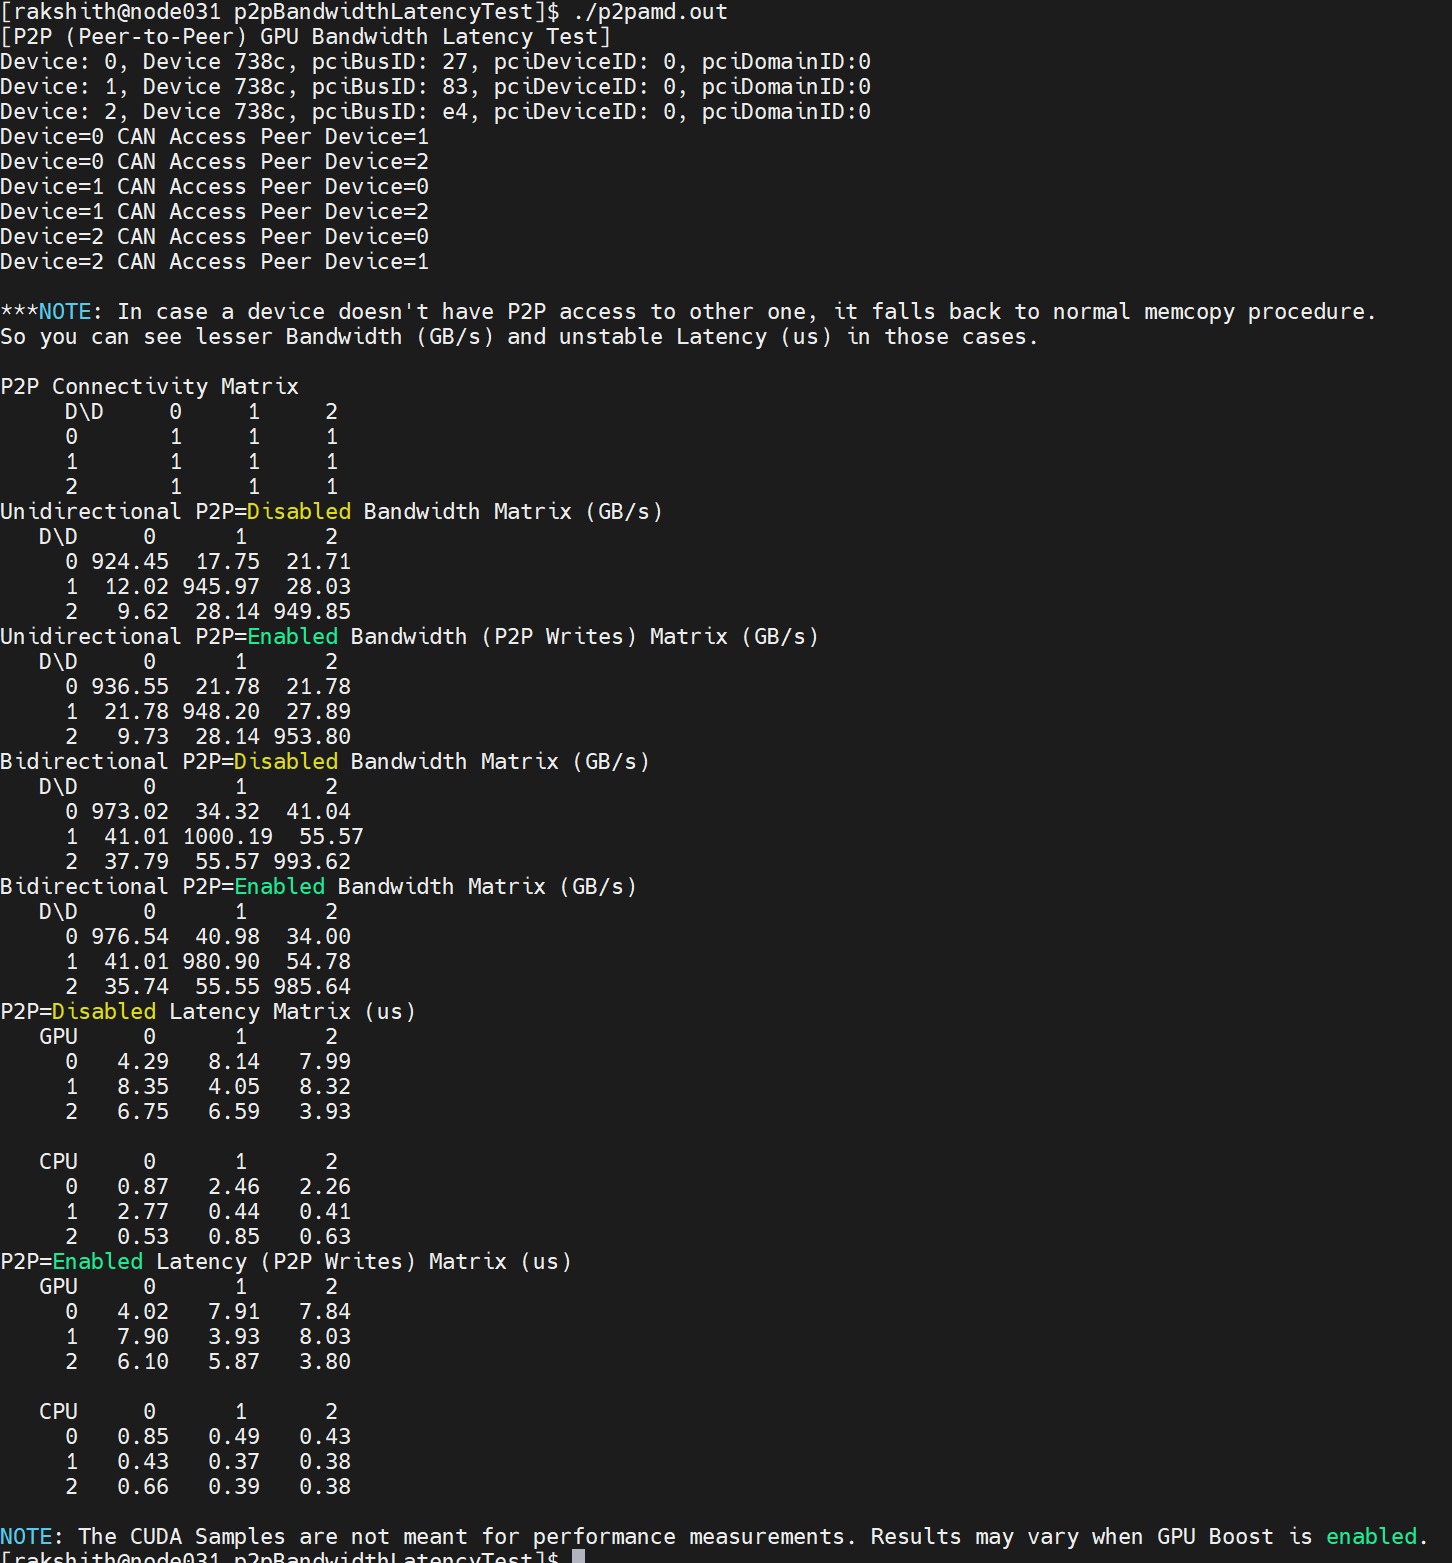
Figure 3: Output of the CUDAP2PBandWidthLatency test run on AMD GPUs
The output must include all the GPUs. In this use case, there are three GPUs: 0, 1, 2. - Use the rocminfo command to identify GPUs in the server and then you can use the rocm-smi command to identify the three GPUs in the server, as shown in the following figure:
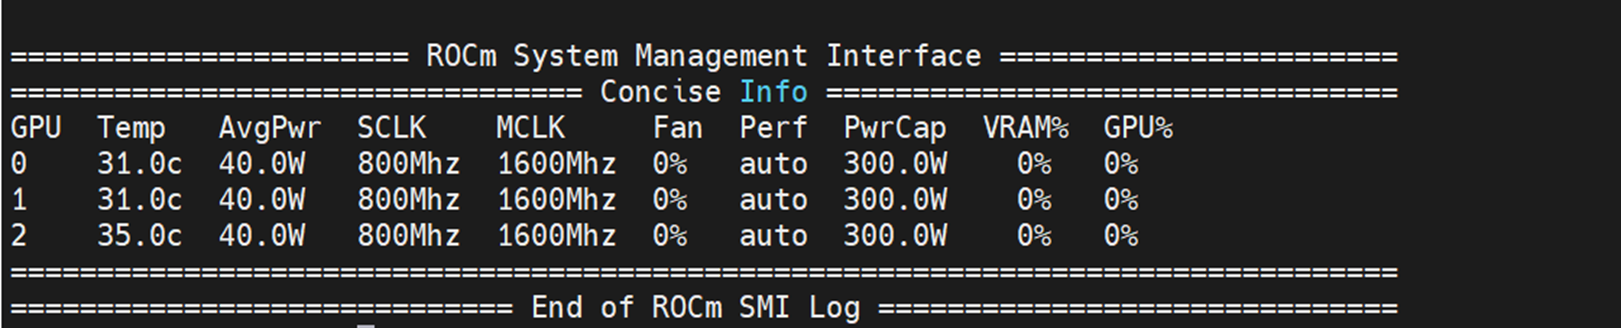
Figure 4: Output of the rocm-smi command showing all three GPUs in the server
Conclusion
HIPify is a time-saving tool for converting CUDA code to run on AMD Instinct accelerators. Because there are consistent improvements from the AMD software team, there are regular releases in the software stack . The HIPify path is an automated way to support conversion from CUDA to a generalized framework. After your code is ported to HIP, this conversion allows for running code on different accelerators from different vendors. This feature helps to enable further developments from a common platform.
This blog showed how to convert a sample use case from CUDA to HIP using the hipify-perl tool.
Run system information
Table 1: System details
Component | Description |
Operating system | CentOS Linux 8 (Core) |
ROCm version | 4.5 |
CUDA version | 11.1 |
Server | Dell PowerEdge R7525 |
CPU | 2 x AMD EPYC 7543 32-Core Processor |
Accelerator | AMD Instinct MI210 |
References
- https://github.com/ROCm-Developer-Tools
- https://github.com/ROCm-Developer-Tools/HIPIFY
- https://github.com/NVIDIA/cuda-samples
- https://github.com/ROCm-Developer-Tools/HIP/
- https://docs.amd.com/
- https://rocmdocs.amd.com/en/latest/Programming_Guides/HIP-porting-guide.html
- https://docs.amd.com/bundle/HIP_API_Guide/page/modules.html
- https://www.amd.com/en/graphics/servers-solutions-rocm
- https://www.amd.com/system/files/documents/the-amd-rocm-5-open-platform-for-hpc-and-ml-workloads.pdf