
Create virtual machines
Create virtual machines
-
To create virtual machines:
- In OVM, go to Compute -> Virtual Machines and click New to open the virtual machine wizard, as shown in Figure 96:
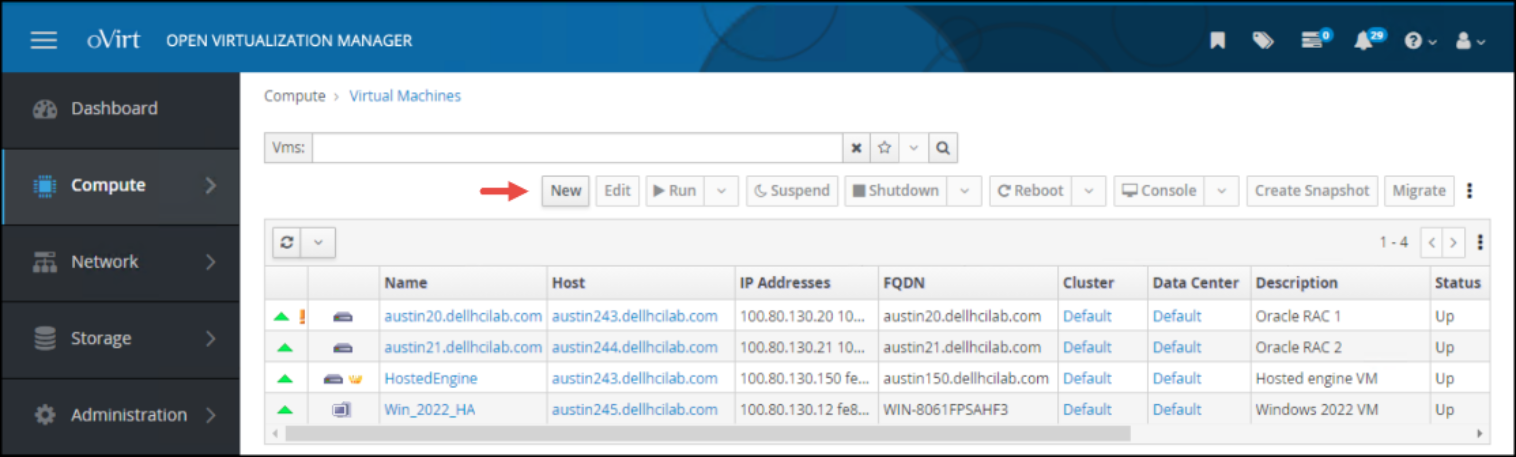
Figure 96. OVM VM creation – open wizard- In the General window, as shown in Figure 97, complete the following fields and then click Create:
- Operating System
- Name
- Description (optional)
- nic1
Note: A Microsoft Windows operating system requires additional steps because the VirtIO drivers are not present to discover the virtual disk for install. These drivers are available in any number of repositories online along with instructions about how to implement them.
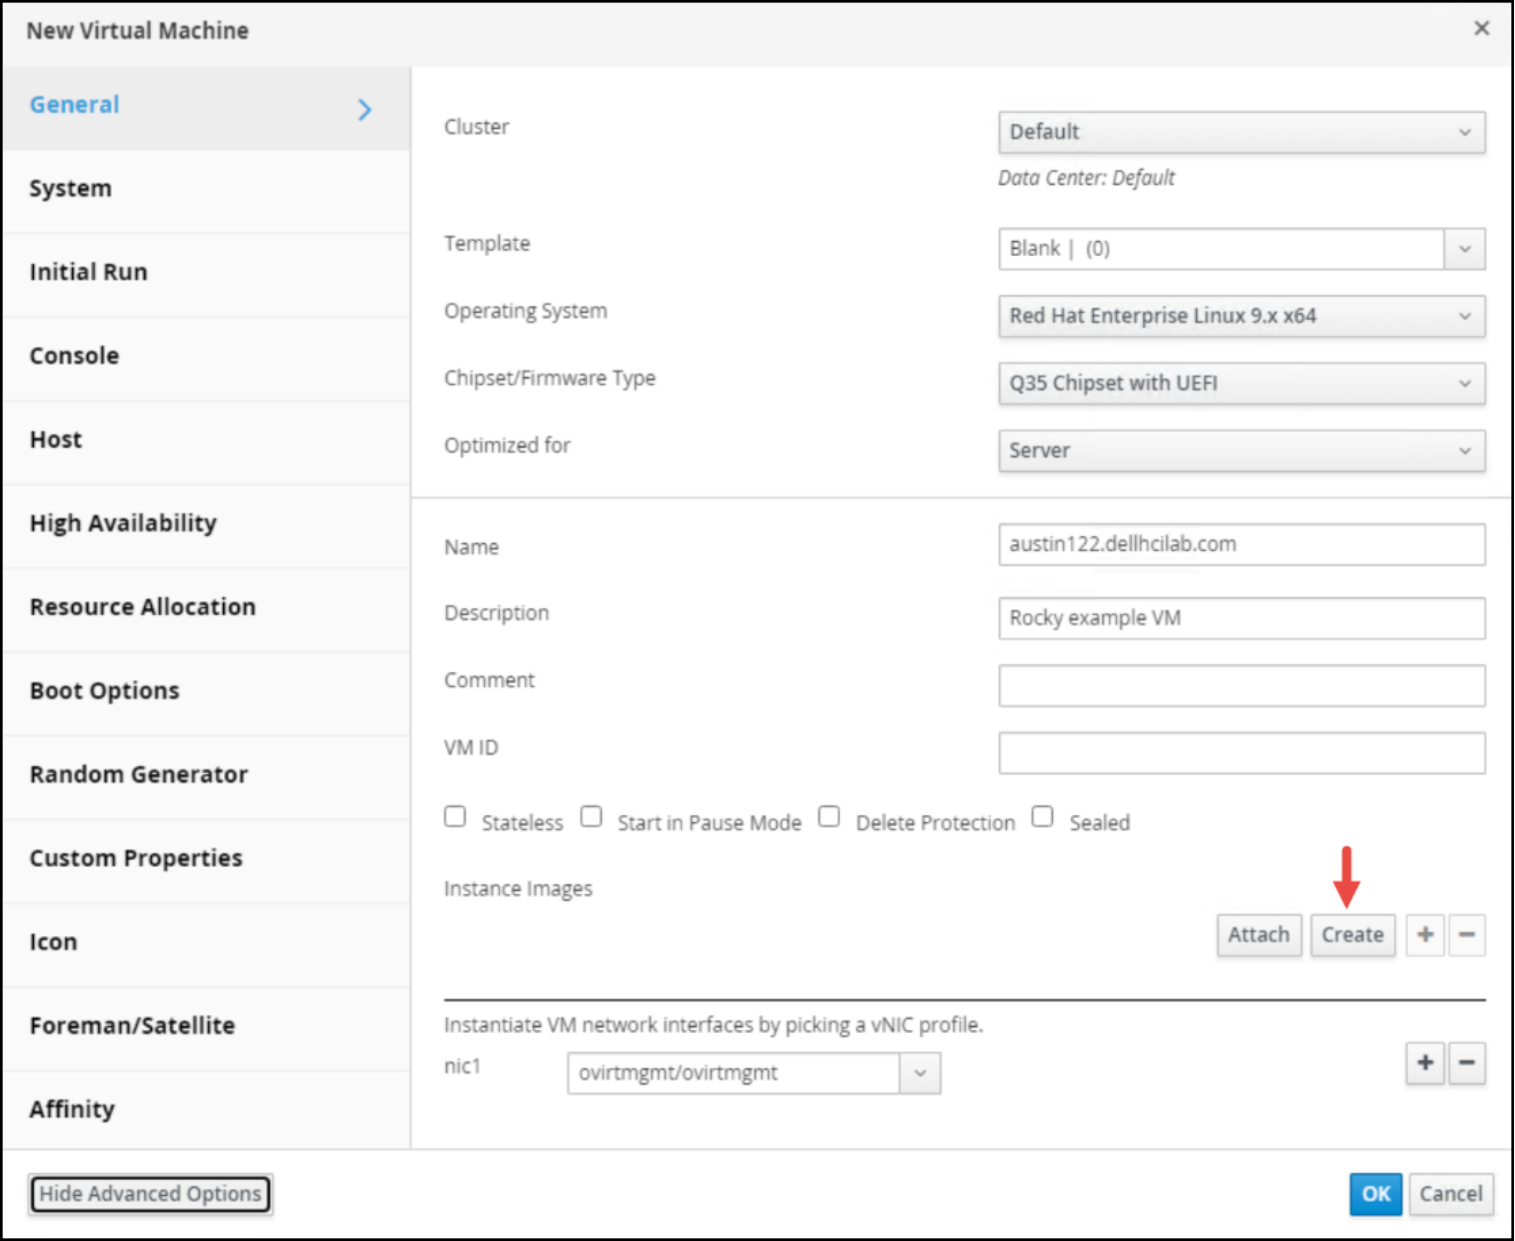
Figure 97. OVM VM creation – define virtual machine- In the New Virtual Disk dialog, complete the fields, as shown in Figure 98:
- Description (optional)
- Storage Domain
- Allocation Policy (defaults based on storage domain type)
Leave the checkboxes in their default state and click OK to return to the General dialog.
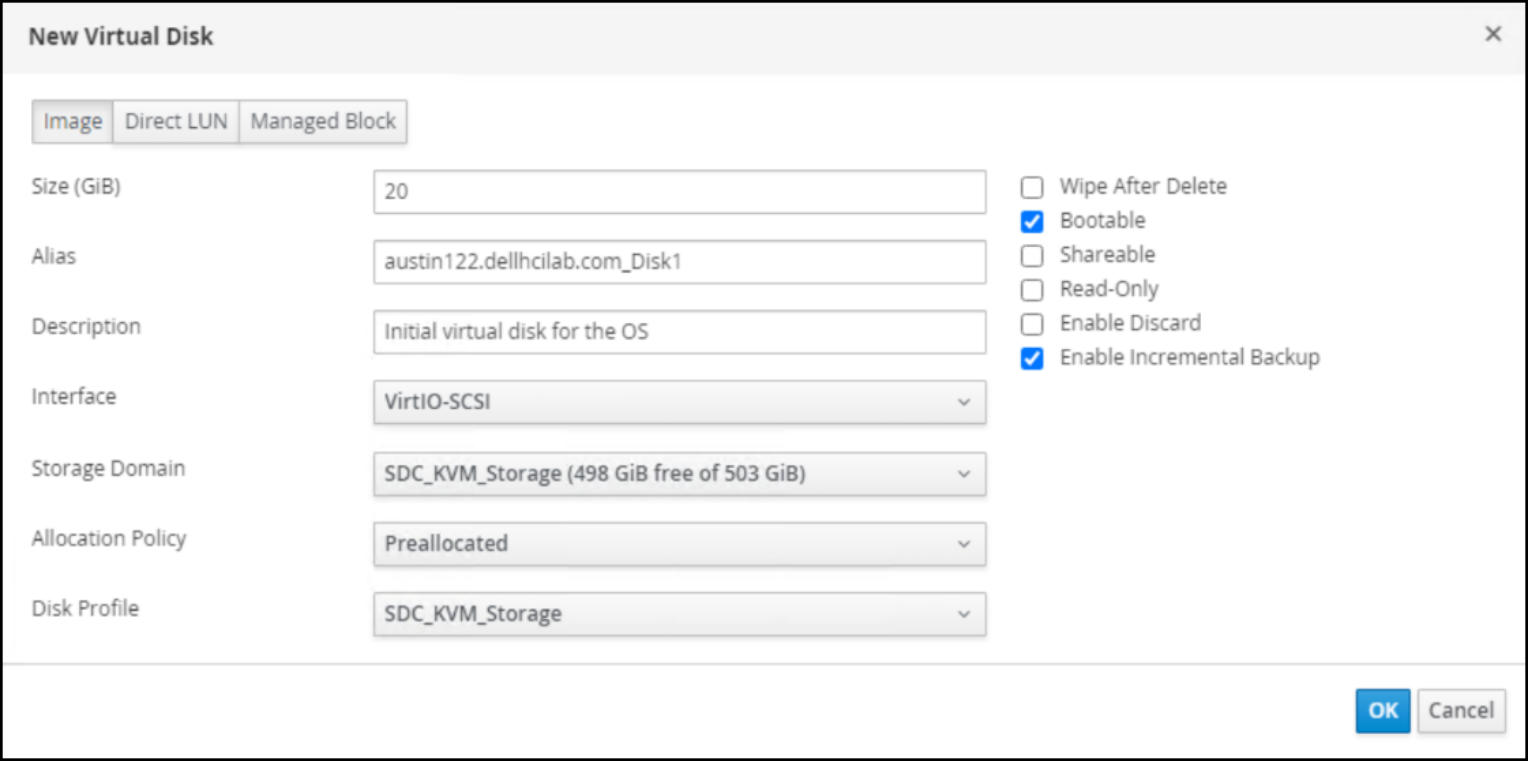
Figure 98. OVM VM creation – define new virtual disk- Note that the new Instance Images is displayed, as shown in Figure 99, and click OK to create the virtual machine.
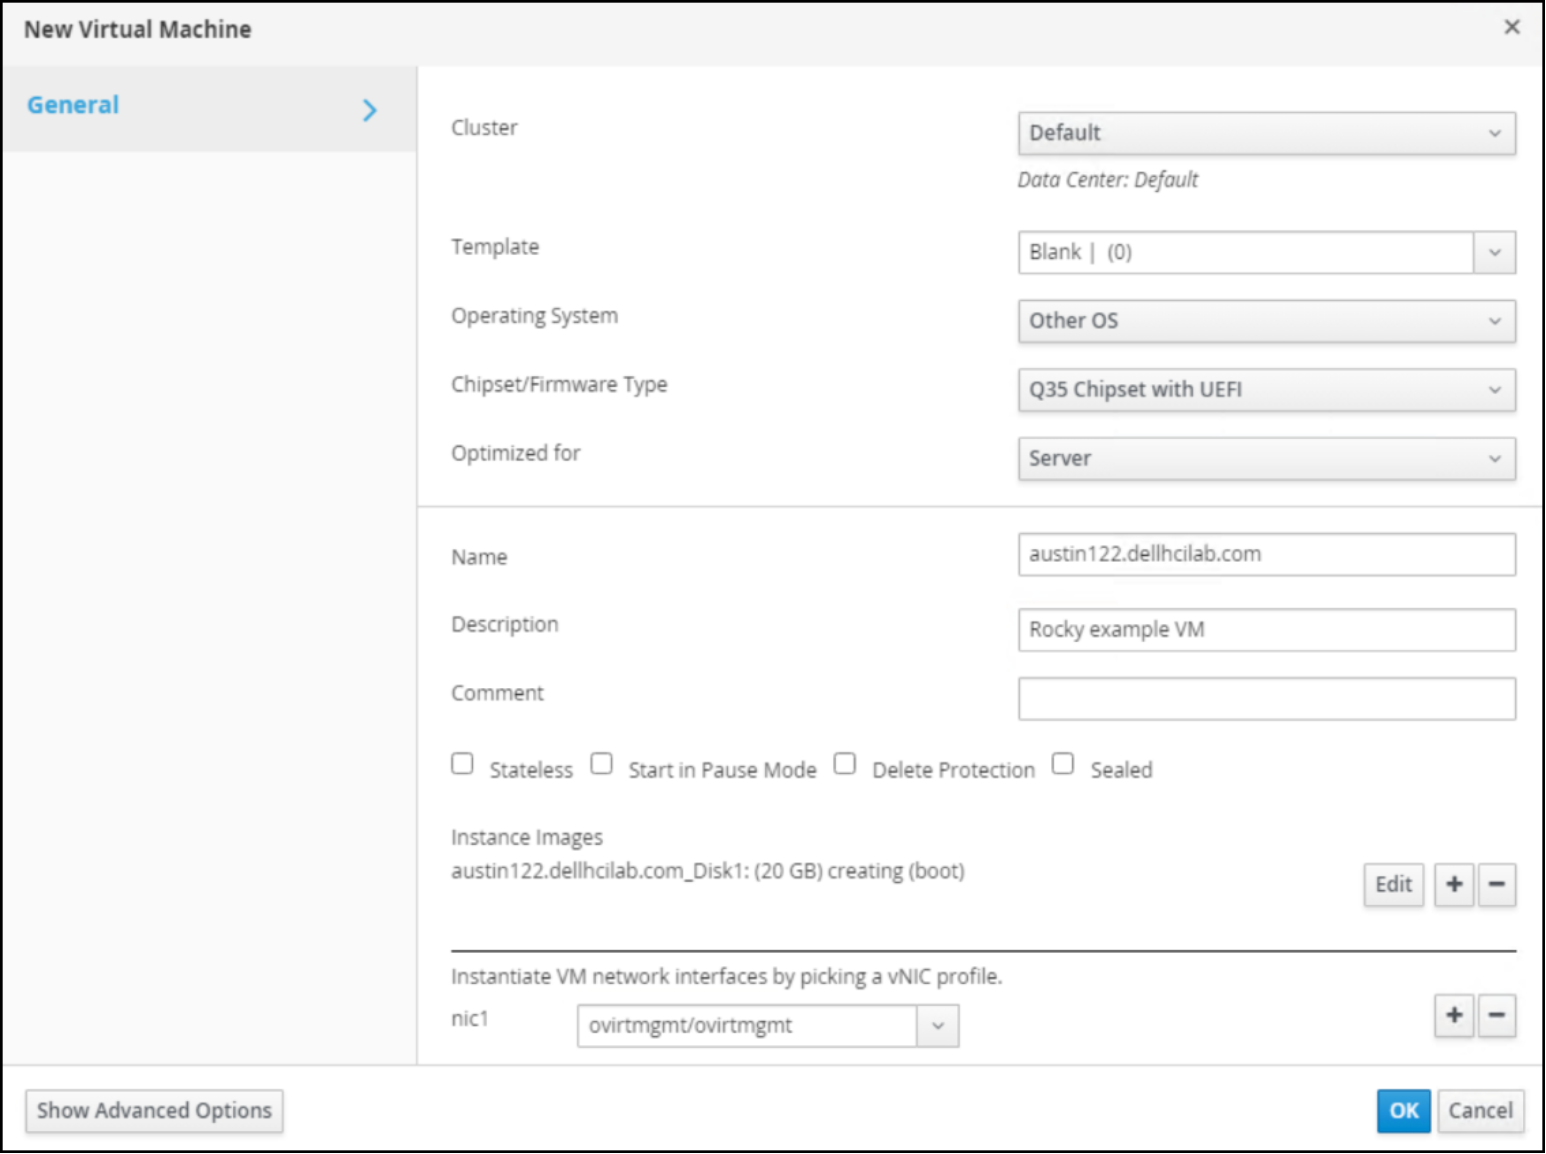
Figure 99. OVM VM creation – view instance imageThe user can add as many disks as wanted, though only one can be Bootable. The virtual machine defaults to one vCPU and 1 GB RAM.
The virtual machine creation time depends on the number of virtual disks that are created, their size, and whether they are preallocated.
- Attach the appropriate bootable ISO to the virtual machine:
Note: Although it can be assigned during the virtual machine creation, OVM offers the ability to attach the ISO so it is only used for the first power on.
- To enable this feature, highlight the newly created virtual machine.
- Find the Run button and use the drop-down list to select Run Once.
The following dialog is displayed, as shown in Figure 100:
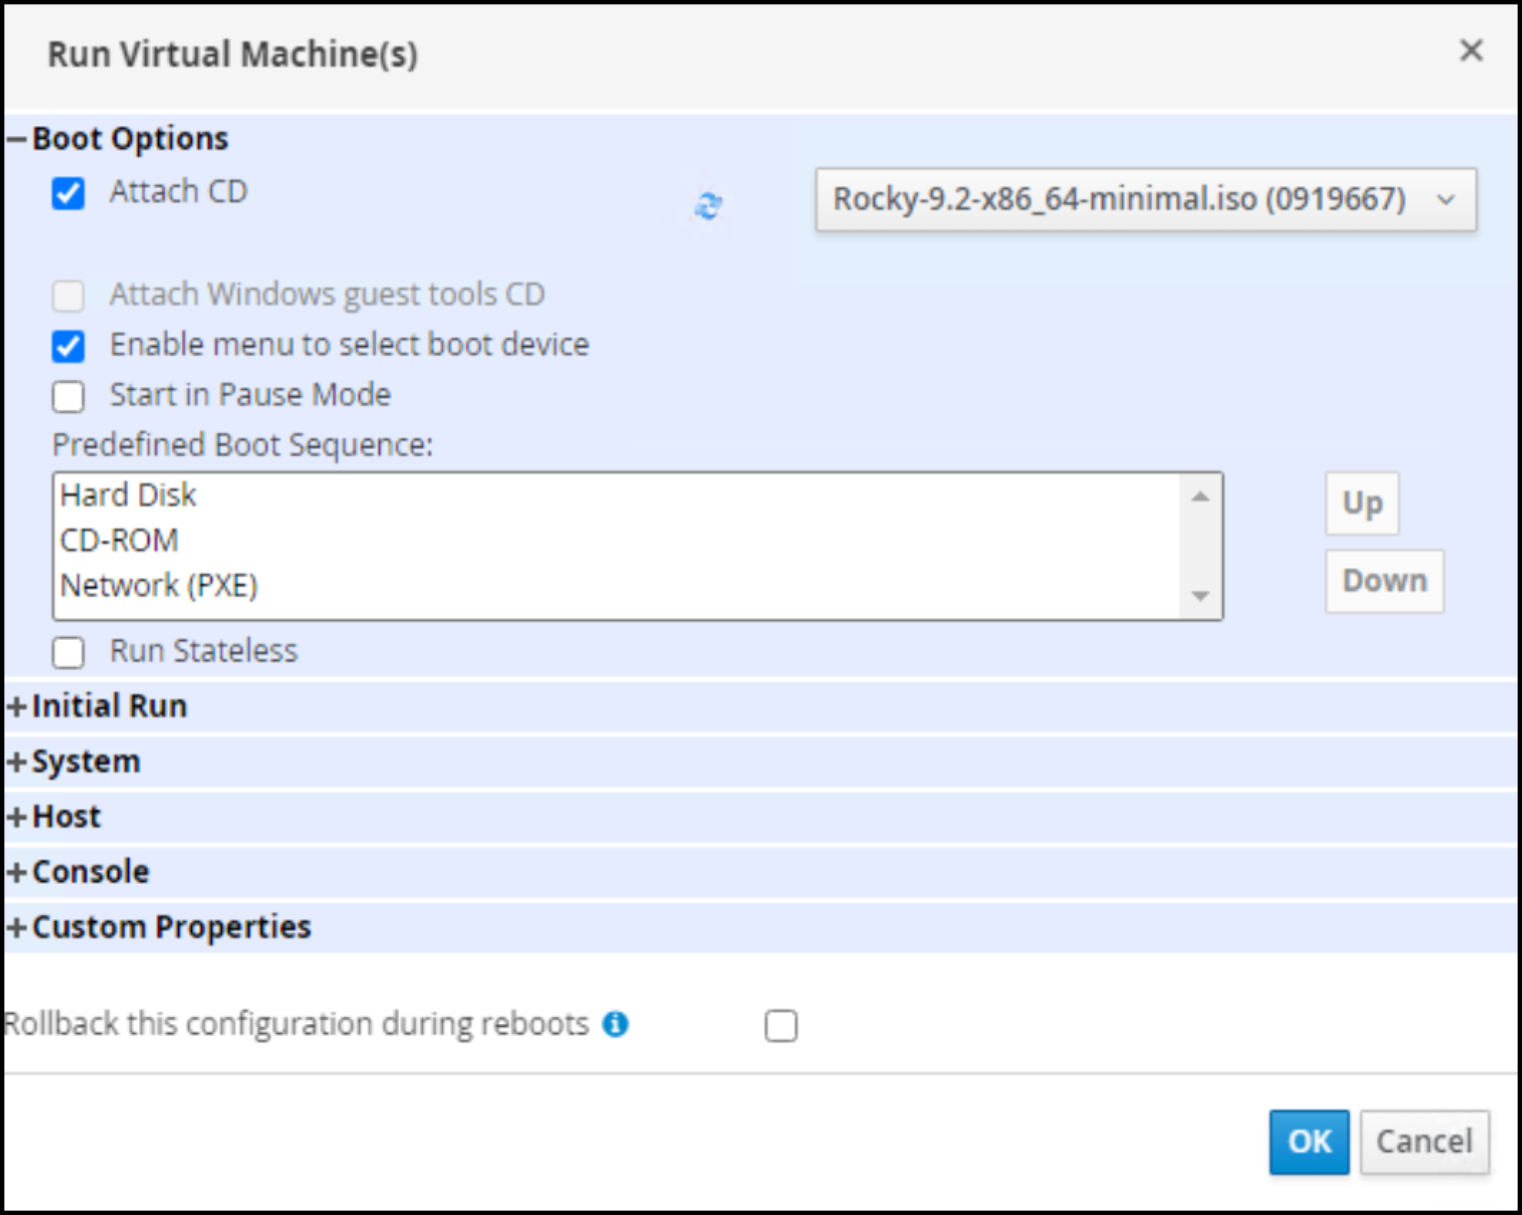
Figure 100. OVM VM creation – attach the bootable ISO- Expand the Boot Options section.
- Enable the Attach CD checkbox and use the drop-down list next to it to pick the correct ISO file.
- Click OK, which immediately powers on the virtual machine.
The virtual machine boots to the ISO.
- Highlight the virtual machine and note that it has been assigned a host, as shown in Figure 101:
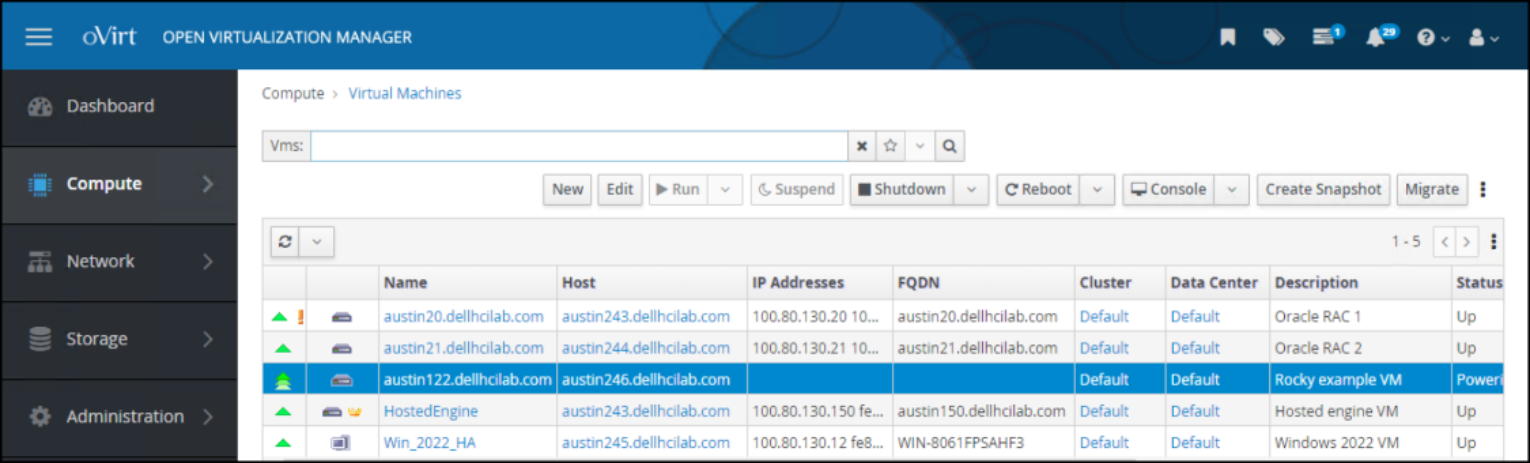
Figure 101. OVM VM creation – step 6- Click the Console to display the Virtual Machine Viewer as shown in Figure 102:
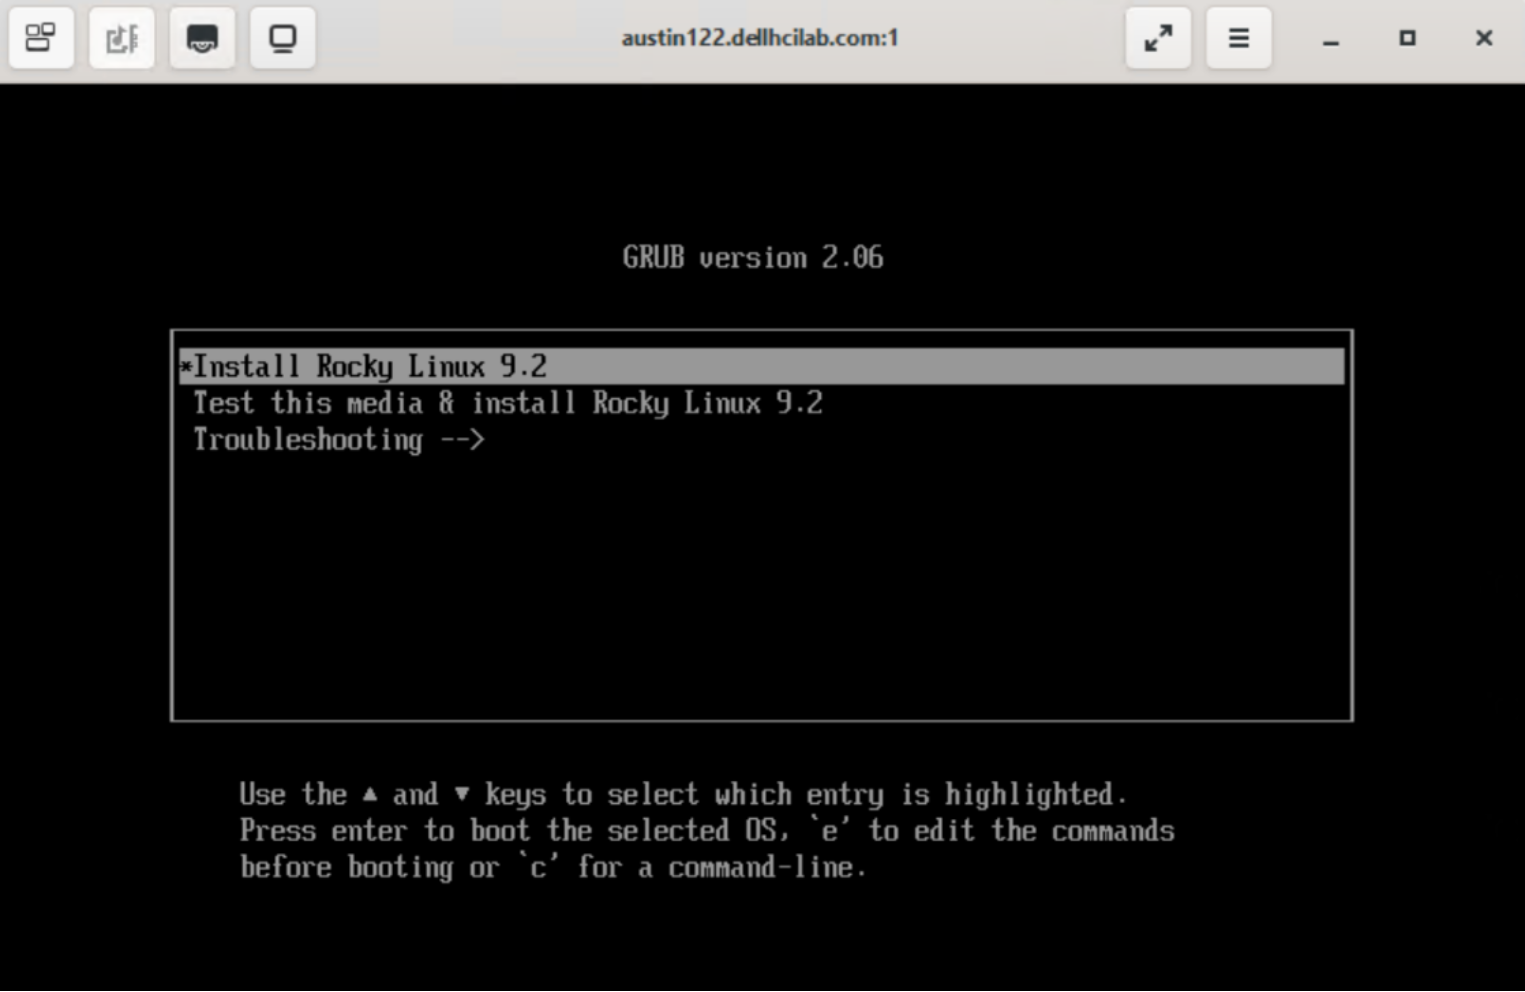
Figure 102. OVM VM creation - completeIf the Virtual Machine Viewer is not associated with the .vv extension, the browser prompts the user to save a file named console.vv. The user must then associate the file extension with the console viewer.
The user can now proceed with the operating system installation.
Guest agent
After the installation completes and the virtual machine reboots, OVM places an exclamation point next to the virtual machine indicating that the latest guest agent must be installed, as shown in Figure 103. The guest agent is required to enable functionality such as displaying the IP/FQDN, gracefully powering off the VM, and providing resource information.
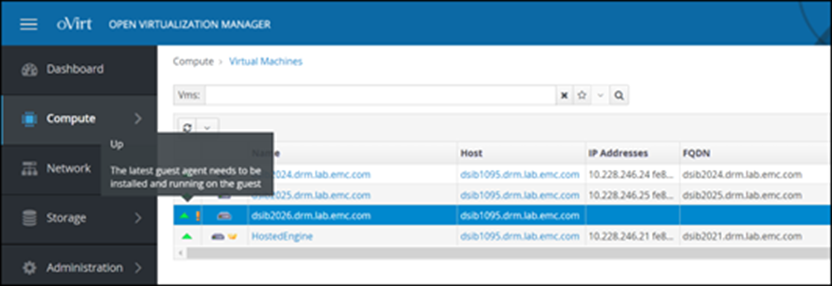
Figure 103. OVM VM creation - complete
The Virtual Machine Management Guide provides instructions for installing the agent depending on the operating system. For Enterprise Linux 8, like Rocky, run the following commands:
yum install qemu-guest-agent
systemctl start qemu-guest-agent
systemctl enable qemu-guest-agentVLAN tagging
oVirt supports adding multiple logical networks to physical NICs on the KVM node, including those networks with VLAN tagging. Because VLANs are used for file storage in this guide, the following steps show how to add a new logical network with VLAN tagging:
- In OVM, go to Network -> Networks and click New, as shown in Figure 104:
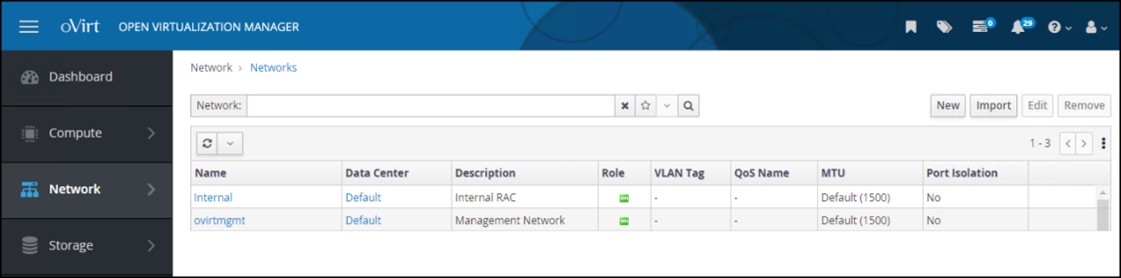
Figure 104. Logical networks - From the General option, enter the following information, as shown in Figure 105:
- Name
- Description
- Network label
- VLAN value after selecting the Enable VLAN tagging checkbox
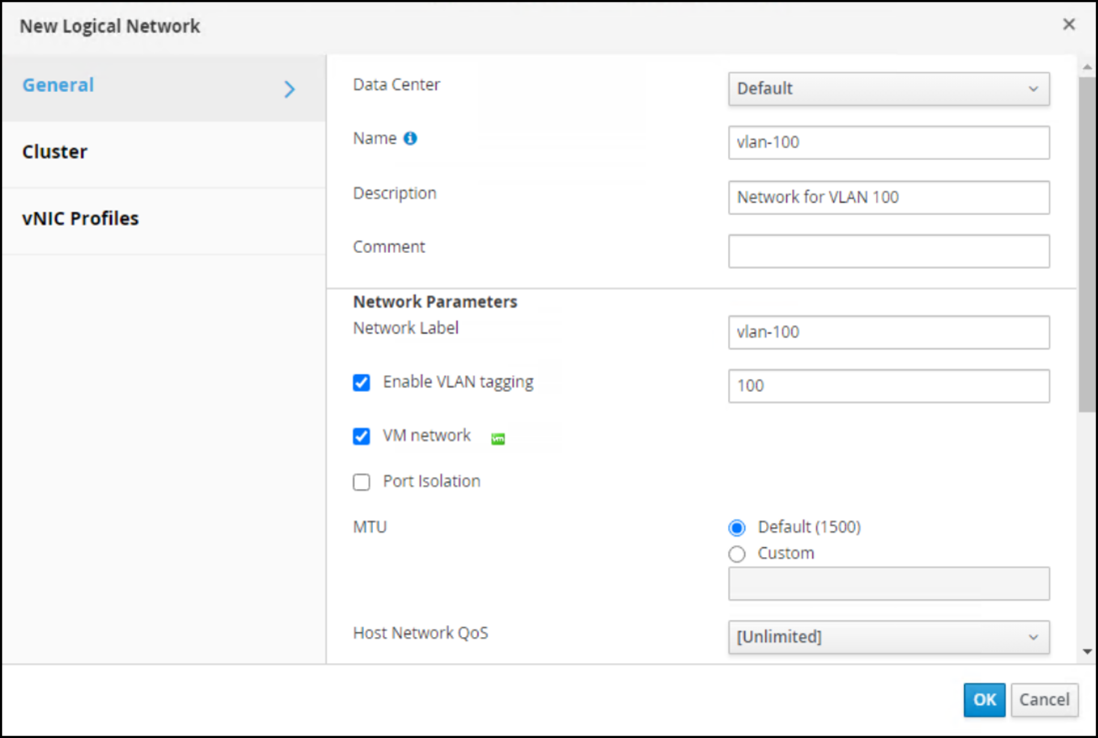 Figure 105. New logical network
 - Go to Network -> Networks and click the newly created hyperlink for the vlan-100 network, as shown in Figure 106:
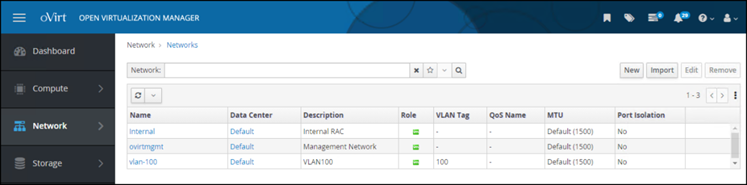 Figure 106. vlan-100 network
 - Click the Hosts tab, select an unattached host, and click Setup Host Networks, as shown in Figure 107:
 Figure 107. vlan-100 host assignment
 - In the Setup Host Networks dialog, click the new logical network on the right side and drag it to the appropriate physical NIC, as shown in Figure 108. More than one logical network can be assigned to an interface.
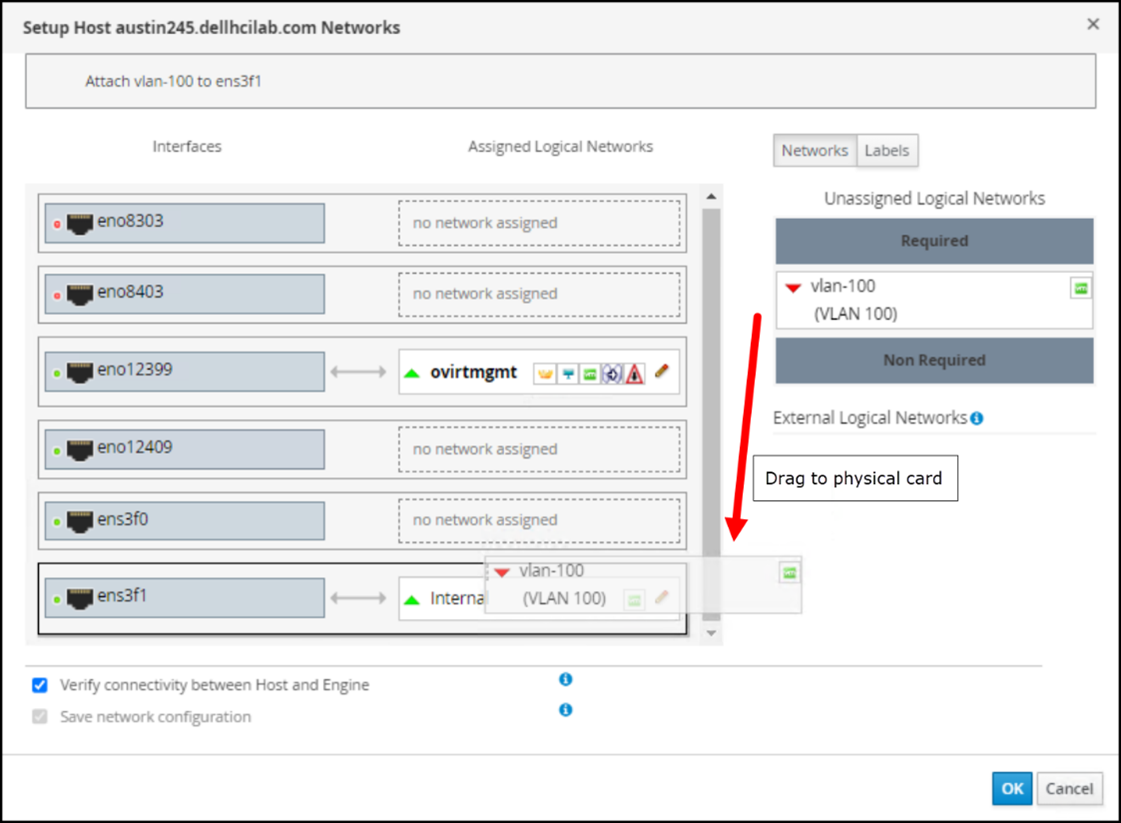 Figure 108. Assign a logical network to the interface
 - Optionally, click the pencil icon in the corner of the logical network to assign an IP address. Choose the appropriate Boot Protocol, add an IP address if required, and click OK, as shown in Figure 109:
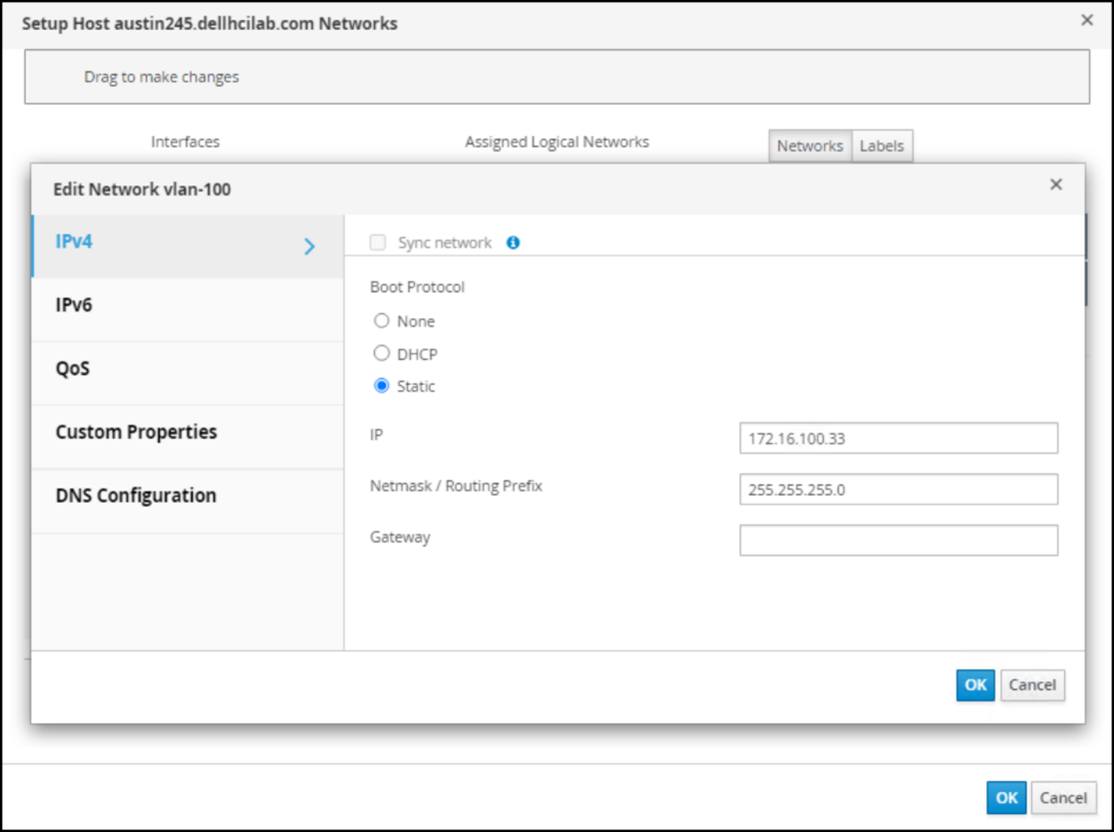 Figure 109. Assign boot protocol IP
oVirt then configures the network on the host.
The logical network is created and configured, as shown in Figure 110:

Figure 110 IP assigned - In OVM, go to Compute -> Virtual Machines and click New to open the virtual machine wizard, as shown in Figure 96: