
None
None
-
The OpenShift container platform can be deployed on the VMware vSphere environment or bare metal using the Assisted Installer. In the example shown in this document, it is configured with VMware.
Prerequisites
The following requirements must be met before deploying an OpenShift cluster:
- A management host that can access the OpenShift nodes/VMs.
- A DNS service is installed on the management host and configured with user-provisioned DNS records for Ingress/API, OpenShift control plane and compute nodes. For more information, see configuring DNS records.
- The Ingress/API IP address from DNS configurations. For more information, see Table 2.
- Create the OpenShift nodes as Virtual Machines from the vCenter. In this example, three control plane and three compute VMs are created in Power Off state.
- OpenShift cluster deployment in VMware first requires that all VMs are configured with disk UUIDs, so that the attached VMDKs present a consistent UUID to the VMs, allowing the disk to be mounted properly. The following steps document the process to enable UUID for VMs:
- Log in to the vCenter server
- Locate the OpenShift nodes that are created as VMs
- Right-click the VMs, and select Edit Settings
- Click the VM Options tab and select Advanced
- Click Edit Configuration in Configuration Parameters
- Click Add parameter
- In the Key column, type disk.EnableUUID
- In the Value column, type TRUE
- Click OK
- Add a network adapter to each of the control plane nodes/VMs as mentioned in Table 3. Capture the MAC address of each of the OpenShift control plane nodes using vSphere network information. The MAC address is requested by the Assisted Installer as a part of host discovery step.
- Add network adapters to each of the compute nodes/VMs as mentioned in Table 4. Capture the MAC address of each of the OpenShift compute nodes using vSphere network information. The MAC Address is requested by the Assisted Installer as a part of the host discovery step.
- Generate the SSH public key. This key must be generated on the management host that is used to authenticate SSH access to the OpenShift nodes/VMs. For example, to troubleshoot during deployment, or long-term maintenance post deployment. For more information, see Generating SSH public key.
Steps to deploy the OpenShift cluster
- Log in to the Red Hat Hybrid Cloud Console - https://console.redhat.com/openshift.
- Click Create Cluster and go to the Datacenter tab. Click Create cluster in the Assisted Installer section as shown in Figure 4.
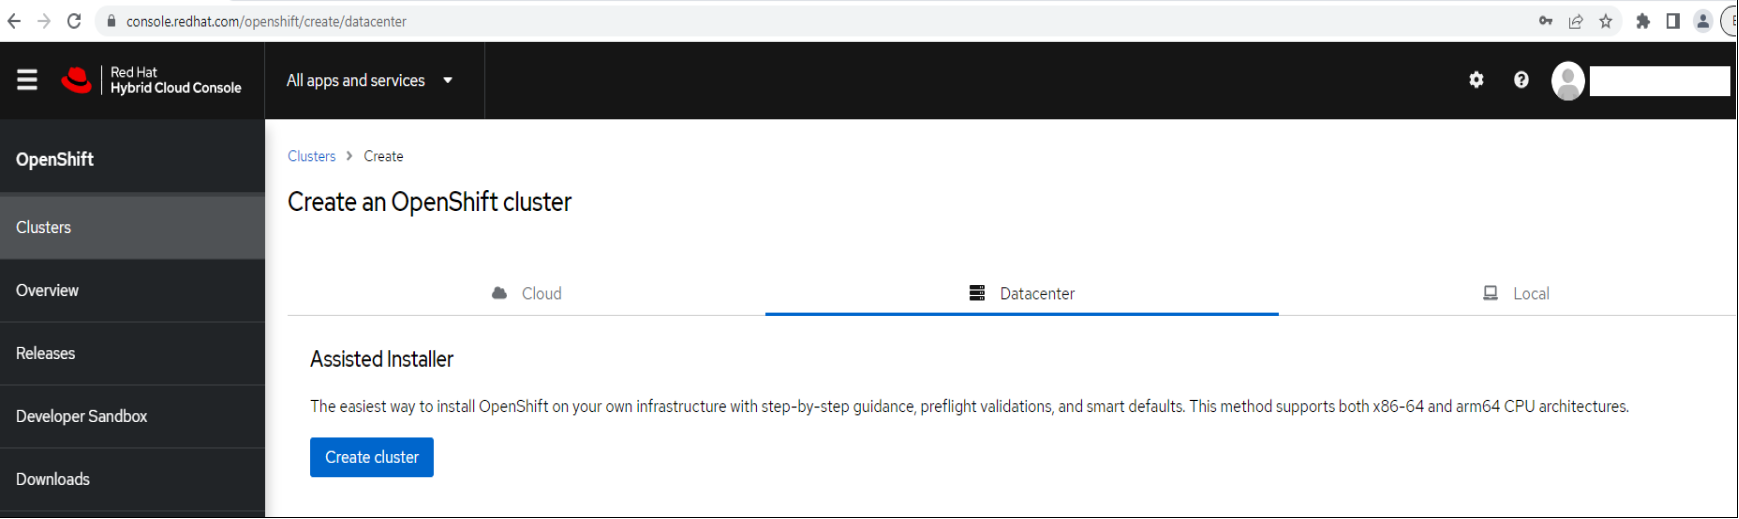
Figure 4. Creating an OpenShift cluster
- Enter the Cluster name and Base domain that represents the environmental specific DNS entries that have been preconfigured in prerequisites, and then select the OpenShift version. Select the Hosts’ network configuration as Static IP, bridges, and bonds to allow configuring LACP bonds and any required static network configuration beforehand. Click Next as shown in Figure 5.
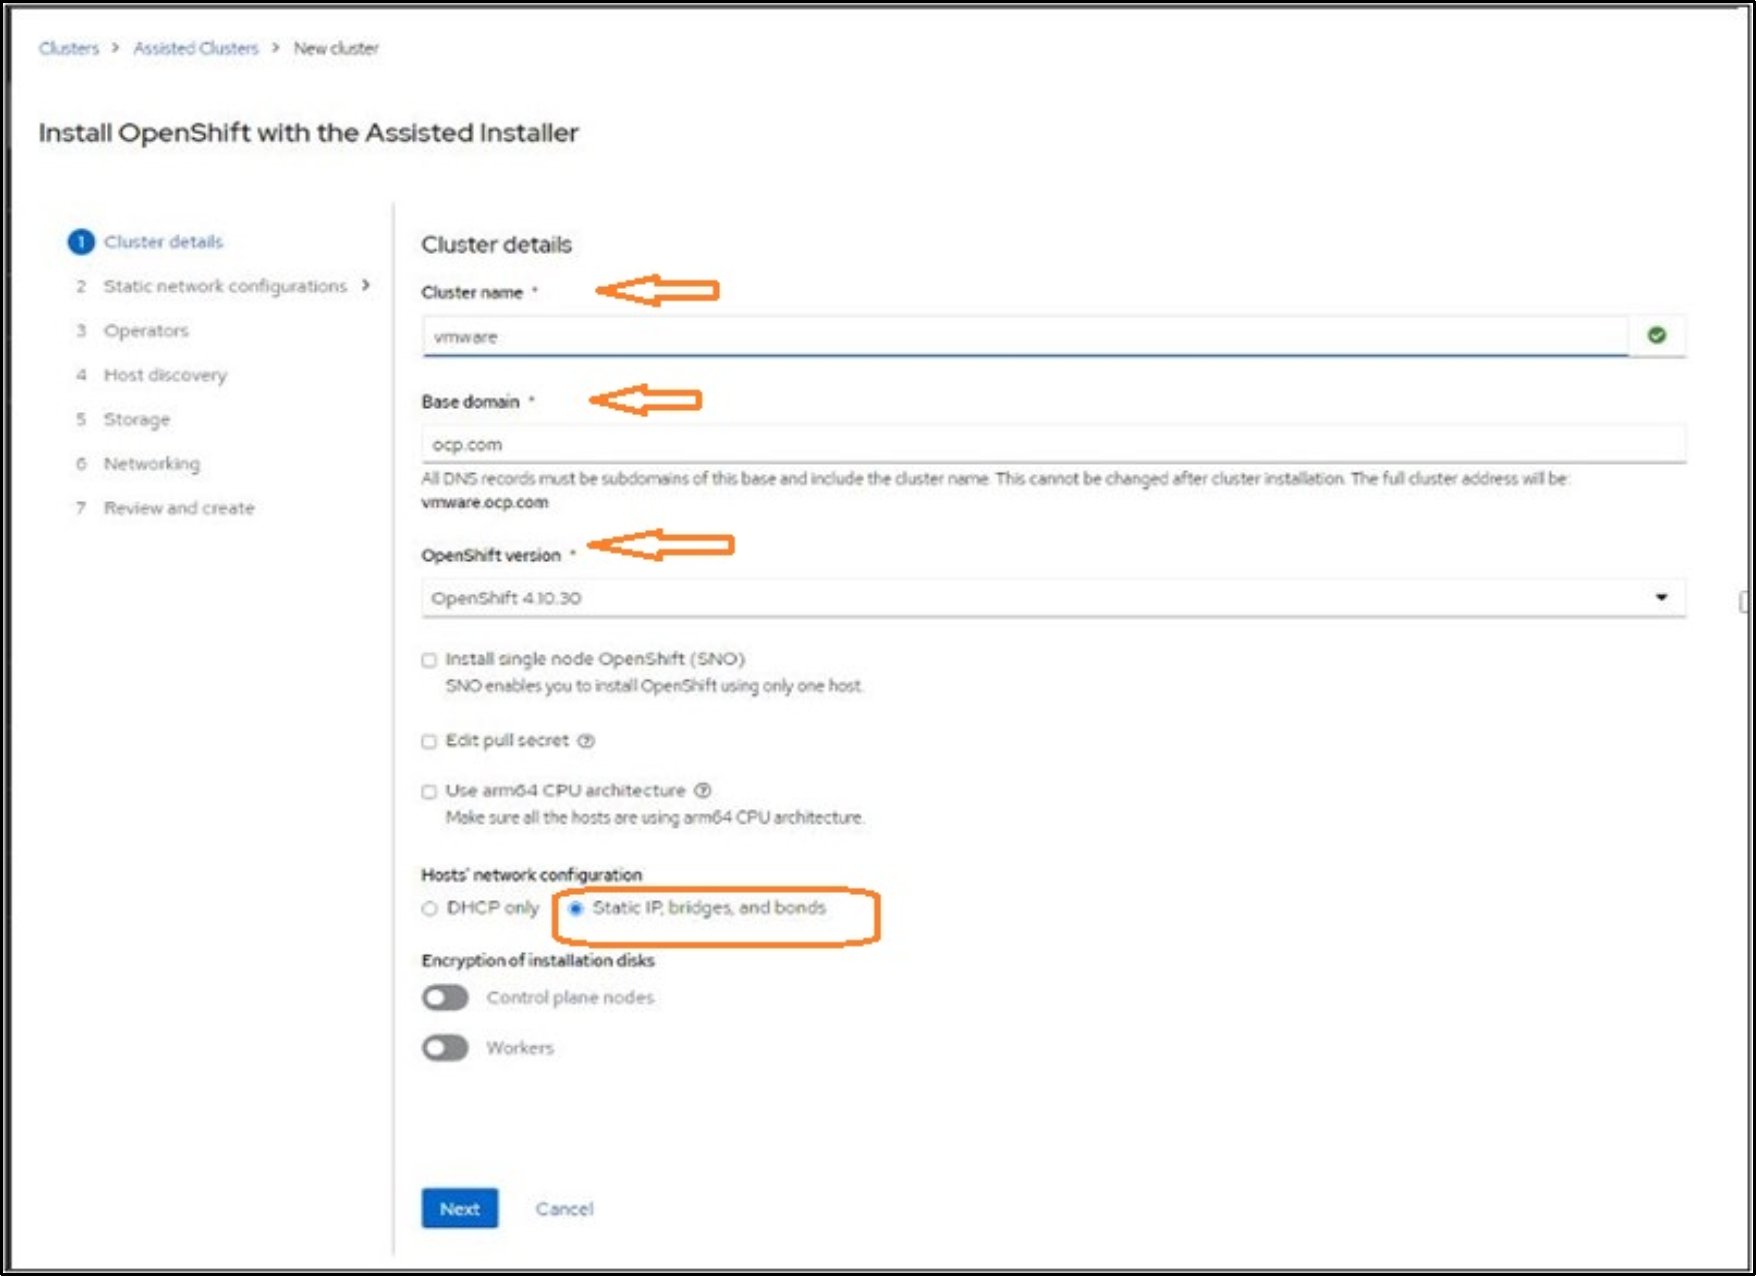
Figure 5. Installing OpenShift with Assisted Installer
- In the static network configurations, select the YAML view option and click Start from scratch inside the YAML editing box as shown in Figure 6.
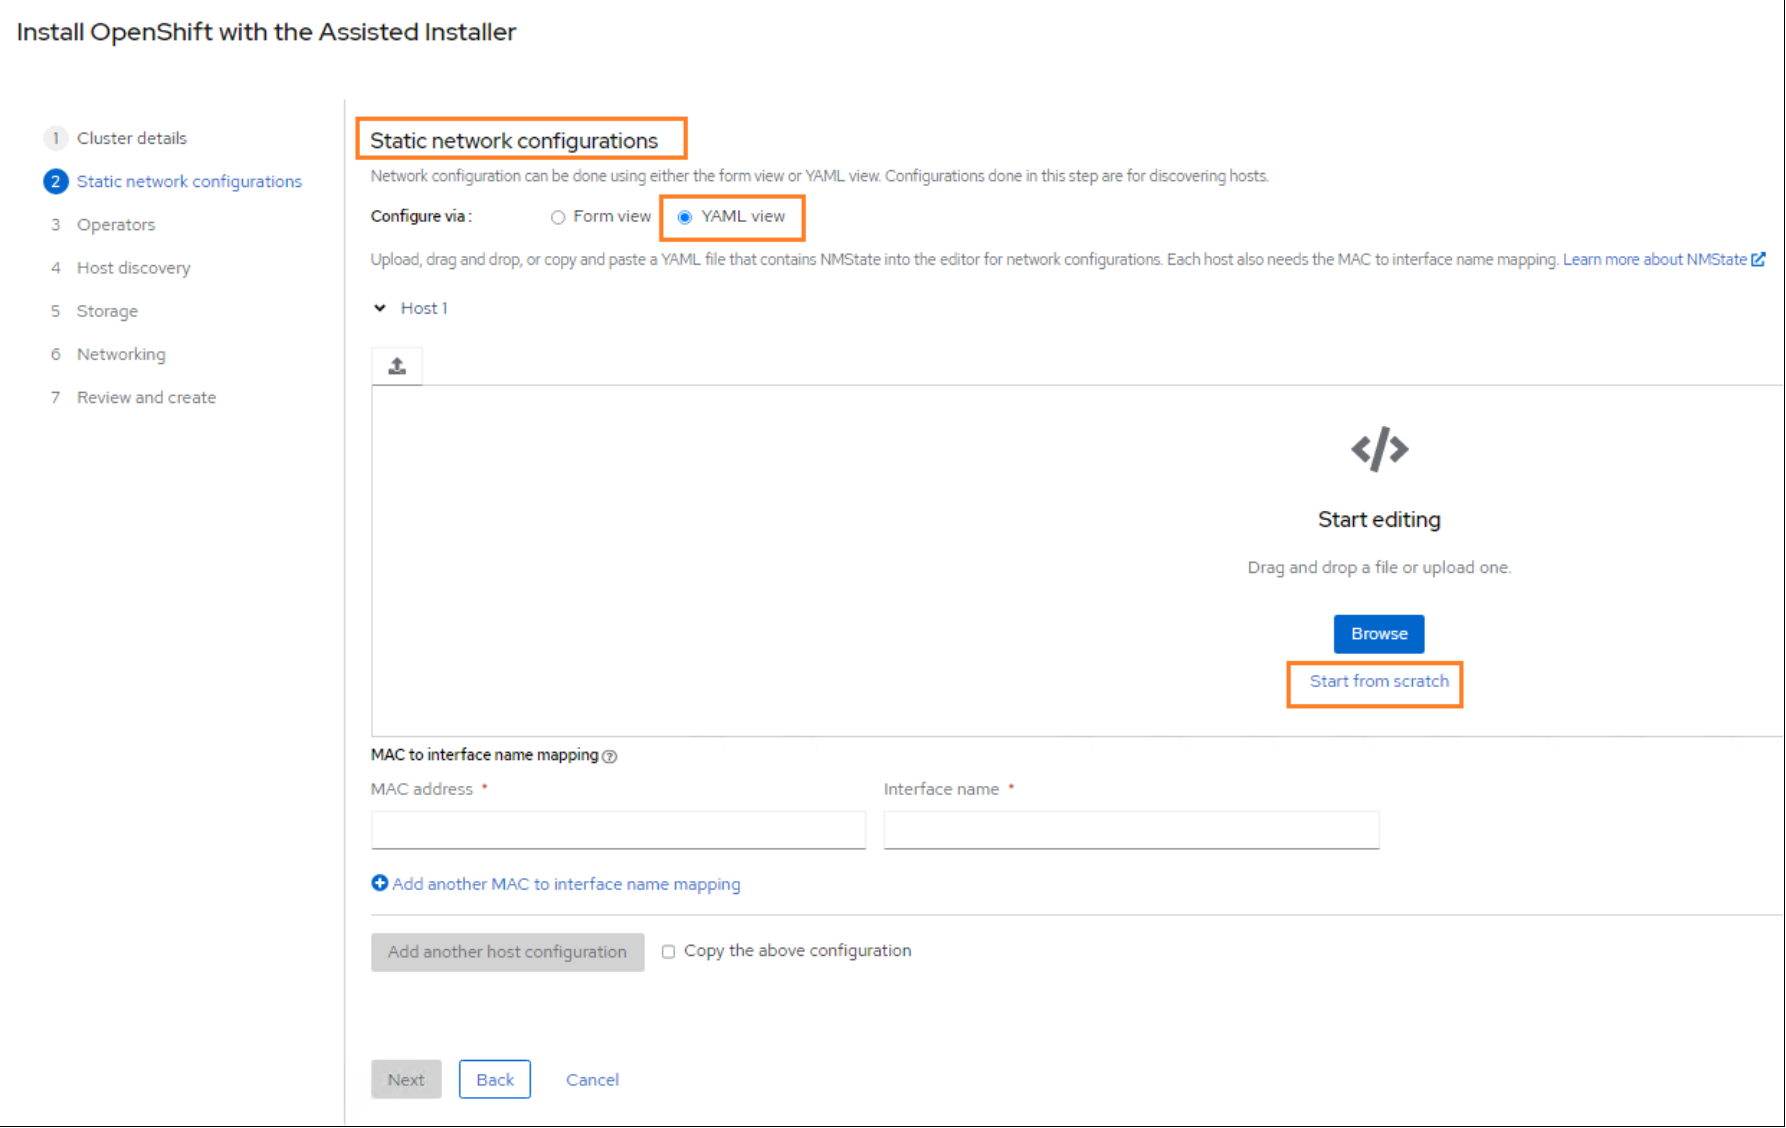
Figure 6. Static network configuration
- For each of the OpenShift control plane nodes/VMs, enter the correct MAC address captured in the Prerequisites and the Interface name for the Ingress/API network in the MAC to interface name section below the editing box. See the network configuration YAML file in Table 5 for the configuration of OpenShift control plane network. Copy and paste the following YAML file in the YAML editing box as shown in Figure 7.
Table 5. Network Configuration YAML file for OpenShift control planeinterfaces:
- name: ens192
type: ethernet
state: up
ipv4:
address:
- ip: 192.168.205.10
prefix-length: 24
enabled: true
mtu: 1500
routes:
config:
- destination: 0.0.0.0/0
next-hop-address: 192.168.205.90
next-hop-interface: ens192
dns-resolver:
config:
search:
- ocp.com
server:
- 192.168.205.90
- 10.118.225.100
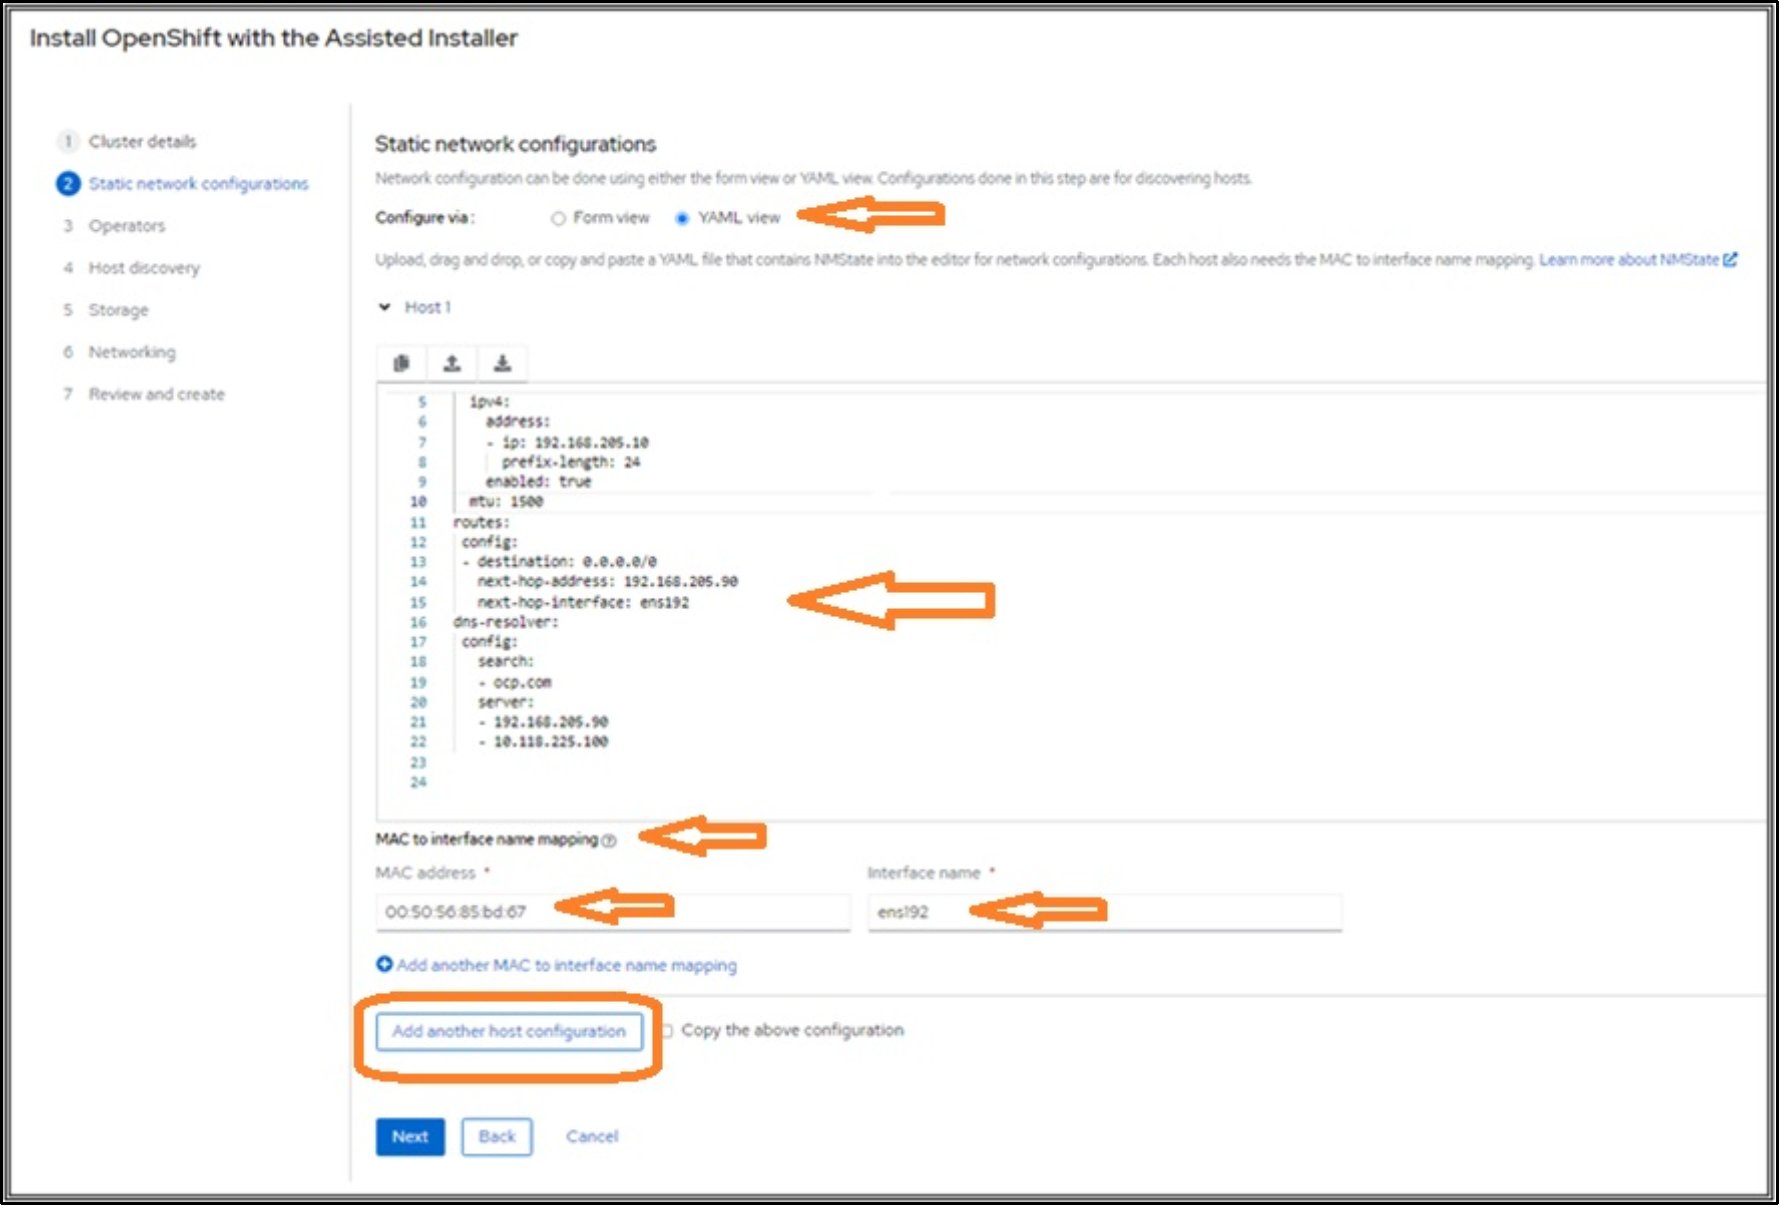
Figure 7. Network configuration for OpenShift control plane nodes/VMs
- Ensure that the YAML configuration and MAC to interface name mapping is added to the Host for each of the OpenShift control plane nodes/VMs.
- Click Add another host configuration button as shown in Figure 7 to add the OpenShift control plane nodes in the hosts.
- After the networks have been defined for all the OpenShift control plane nodes/VMs in the hosts, click the Add another host configuration button.
- Enter the details of each of the OpenShift compute nodes/VMs network configurations. Modify the IP address in the YAML configurations for Ingress/API, PowerFlex Data1 and PowerFlex Data2 networks. See the network configuration YAML file in Table 6 for the configuration of OpenShift compute node/VM networks. Copy and paste the following YAML file in the YAML editing box.
Table 6. Network configuration YAML file for OpenShift compute nodeInterfaces:
- name: ens192
type: ethernet
state: up
ipv4:
address:
- ip: 192.168.205.13
prefix-length: 24
enabled: true
mtu: 1500
- name: ens193
type: ethernet
state: up
ipv4:
address:
- ip: 192.168.151.13
prefix-length: 24
enabled: true
mtu: 900
- name: ens194
type: ethernet
state: up
ipv4:
address:
- ip: 192.168.152.13
prefix-length: 24
enabled: true
mtu: 9000routes:
config:
- destination: 0.0.0.0/0
next-hop-address: 192.168.205.90
next-hop-interface: ens192
dns-resolver:
config:
search:
- ocp.com
server:
- 192.168.205.90
- 10.118.225.100
- Enter the MAC address and Interface name in the MAC to interface name mapping boxes for Ingress/API, PowerFlex Data,1 and PowerFlex Data2 networks.
- Click Add another host configuration button for adding OpenShift compute nodes in hosts.
- After the networks have been defined for all the OpenShift compute nodes/VMs in hosts, click Next as shown in Figure 8.
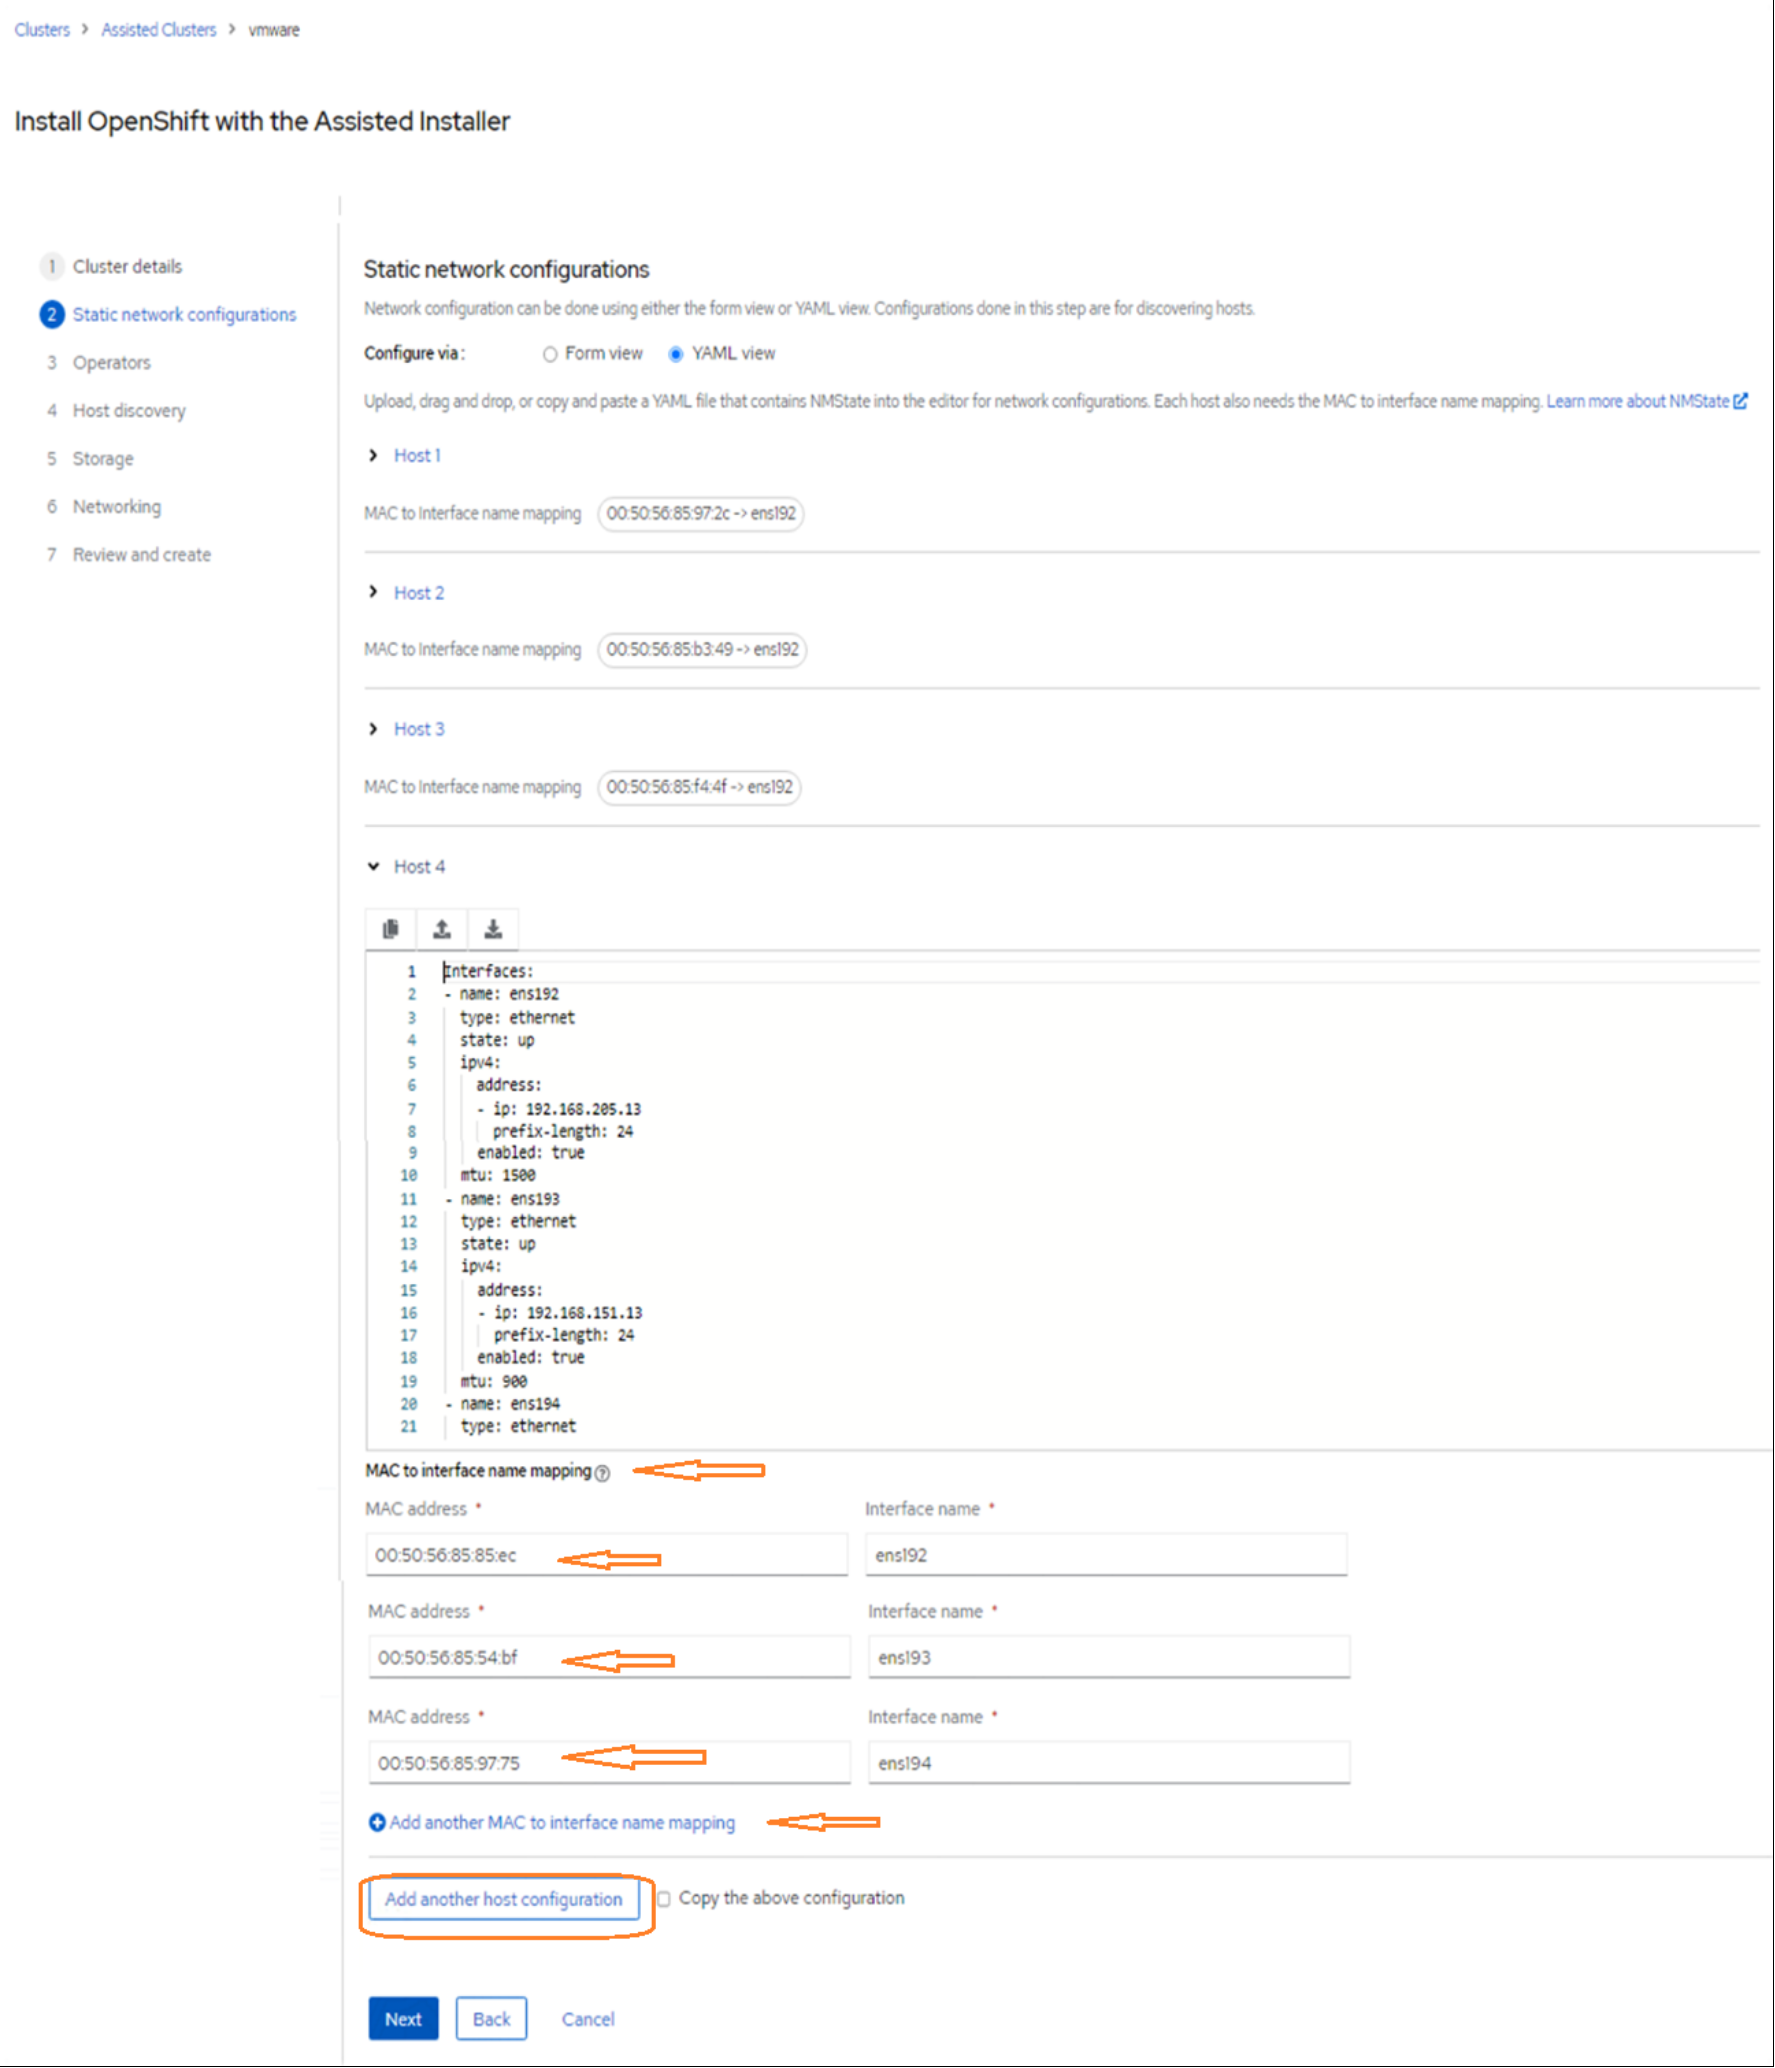
Figure 8. Static network configurations for OpenShift compute nodes/VMs
- In the Host Discovery section as shown in Figure 9, select Integrate with vSphere. Click Add hosts. Select Full image file and enter the SSH public key generated on the Management host as documented in the Prerequisites section to access the OpenShift nodes. Then, click Generate Discovery ISO as shown in Figure 10

Figure 9. Host discovery
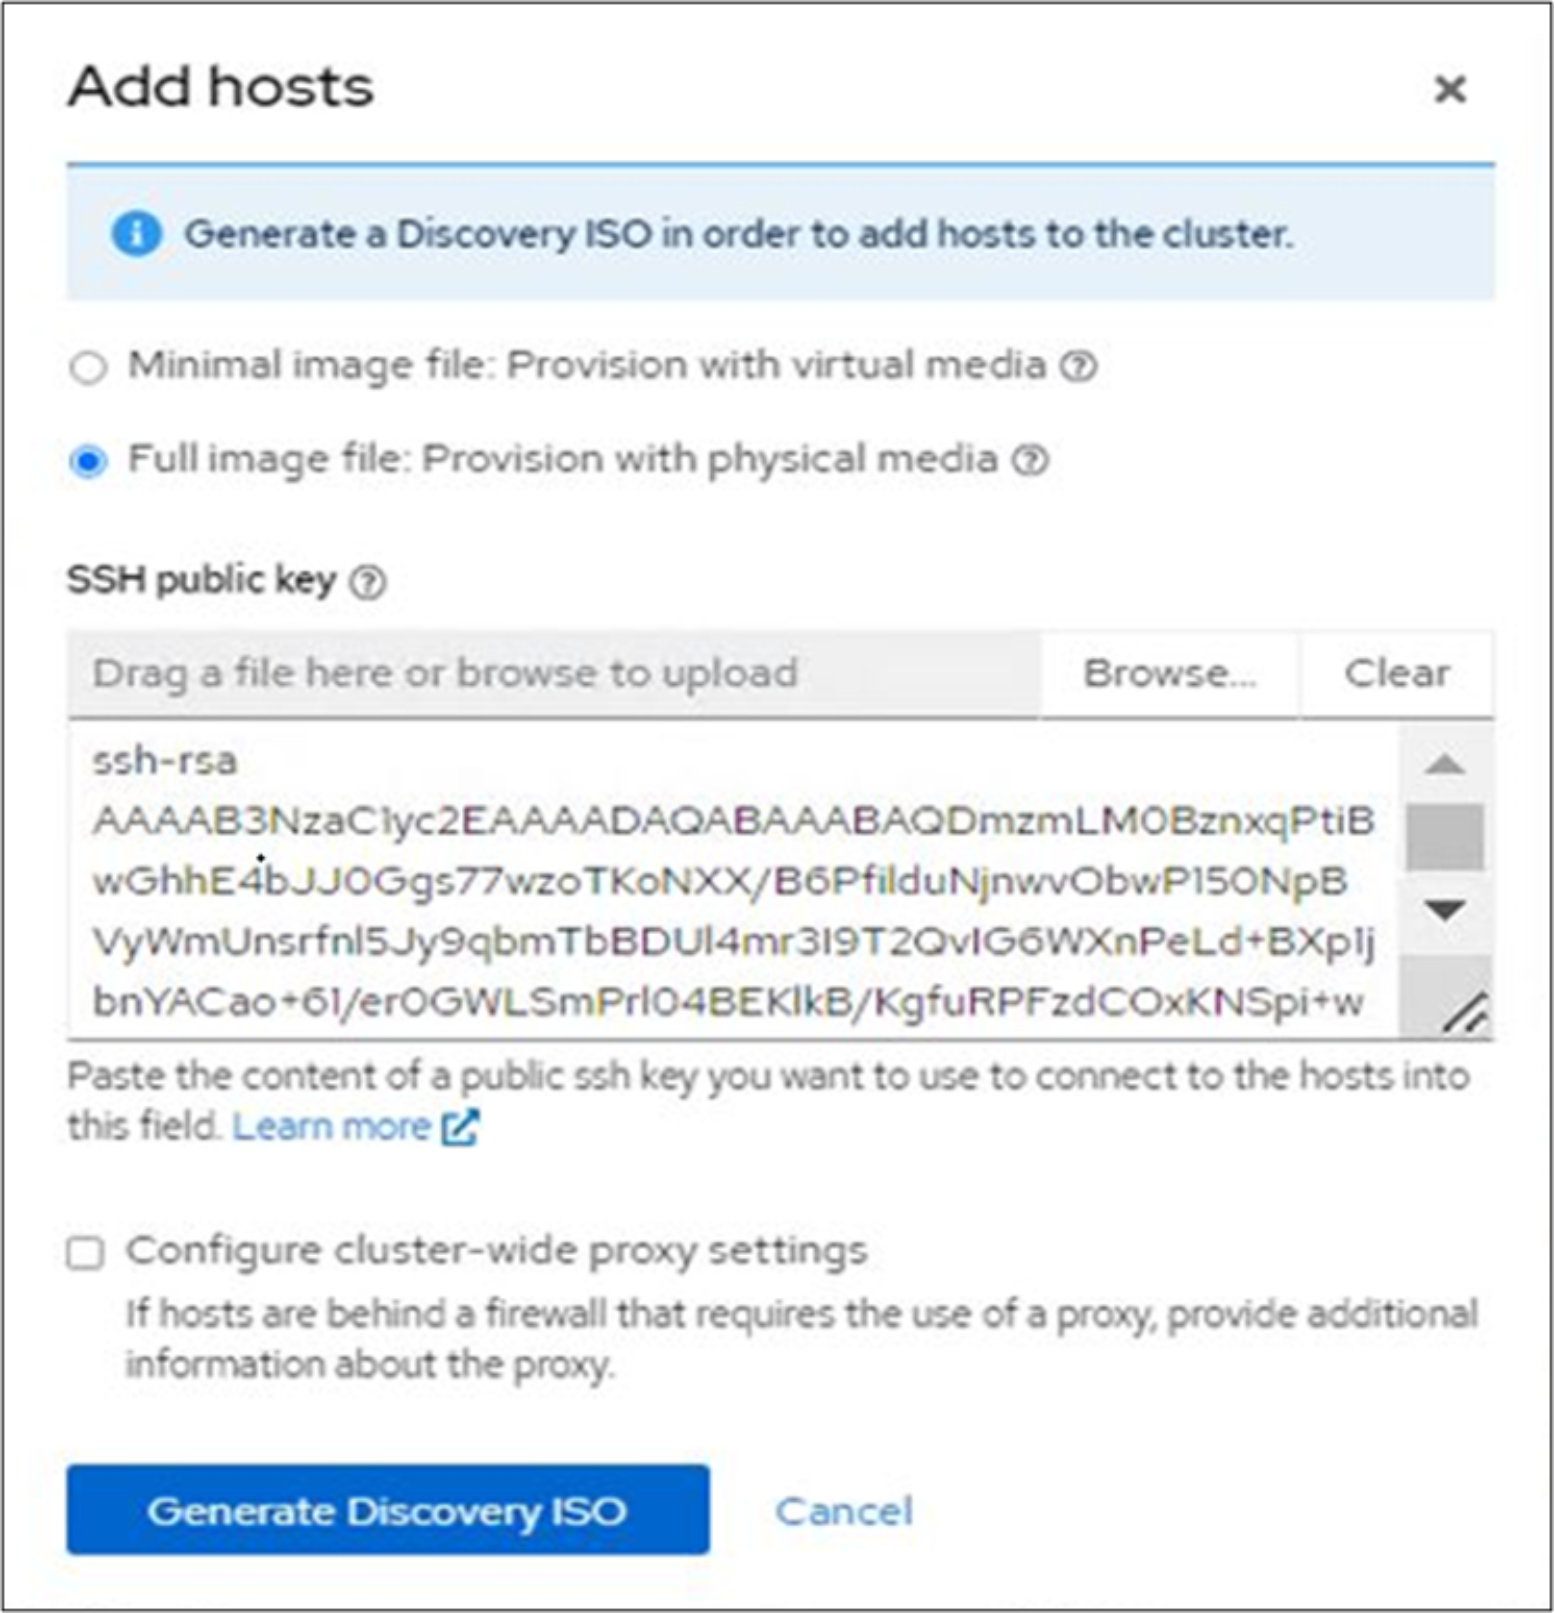
Figure 10. Generate Discovery ISO
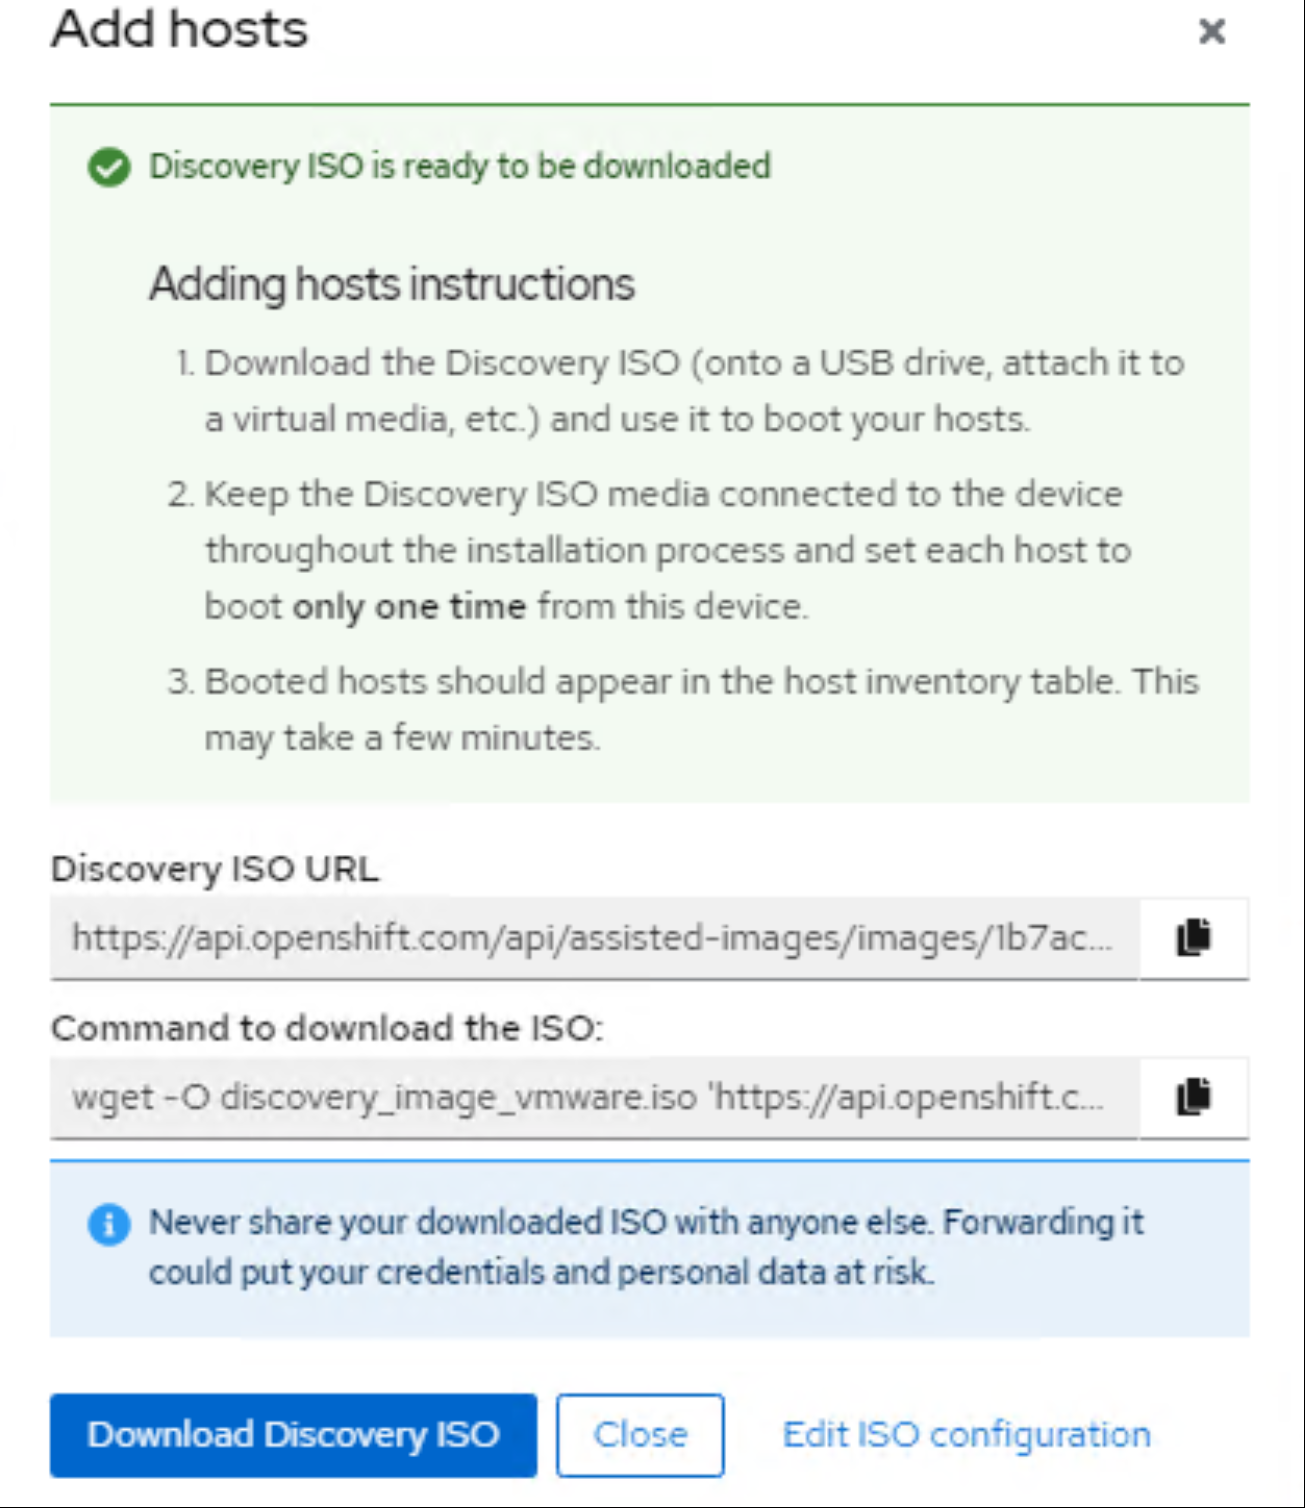
Figure 11. Download Discover ISO
- Click Download the discovery ISO to download the RHCOS discovery ISO file as shown in Figure 11.
- Mount the downloaded RHCOS discovery ISO to each of the OpenShift control plane and compute nodes that are created as VMs. Right click each VM and select Power On. For more information, see VMware documentation.
- The installation process starts automatically and all the OpenShift control plane and compute nodes are discovered as hosts in the Host Discovery section. When the Status of all the hosts changes to Ready, click Next as shown in Figure 9.
- In the Networking section, select Cluster-Managed Networking.
- Select the Ingress/API network as Machine network. Provide the API IP address and Ingress IP address. Click Next as shown in Figure 12. If an NTP error is displayed, expand each host to add NTP server details.

Figure 12. Network management
- Review the configuration and click Install cluster as shown in Figure 13. During the installation process, the OpenShift nodes/VMs reboot several times.
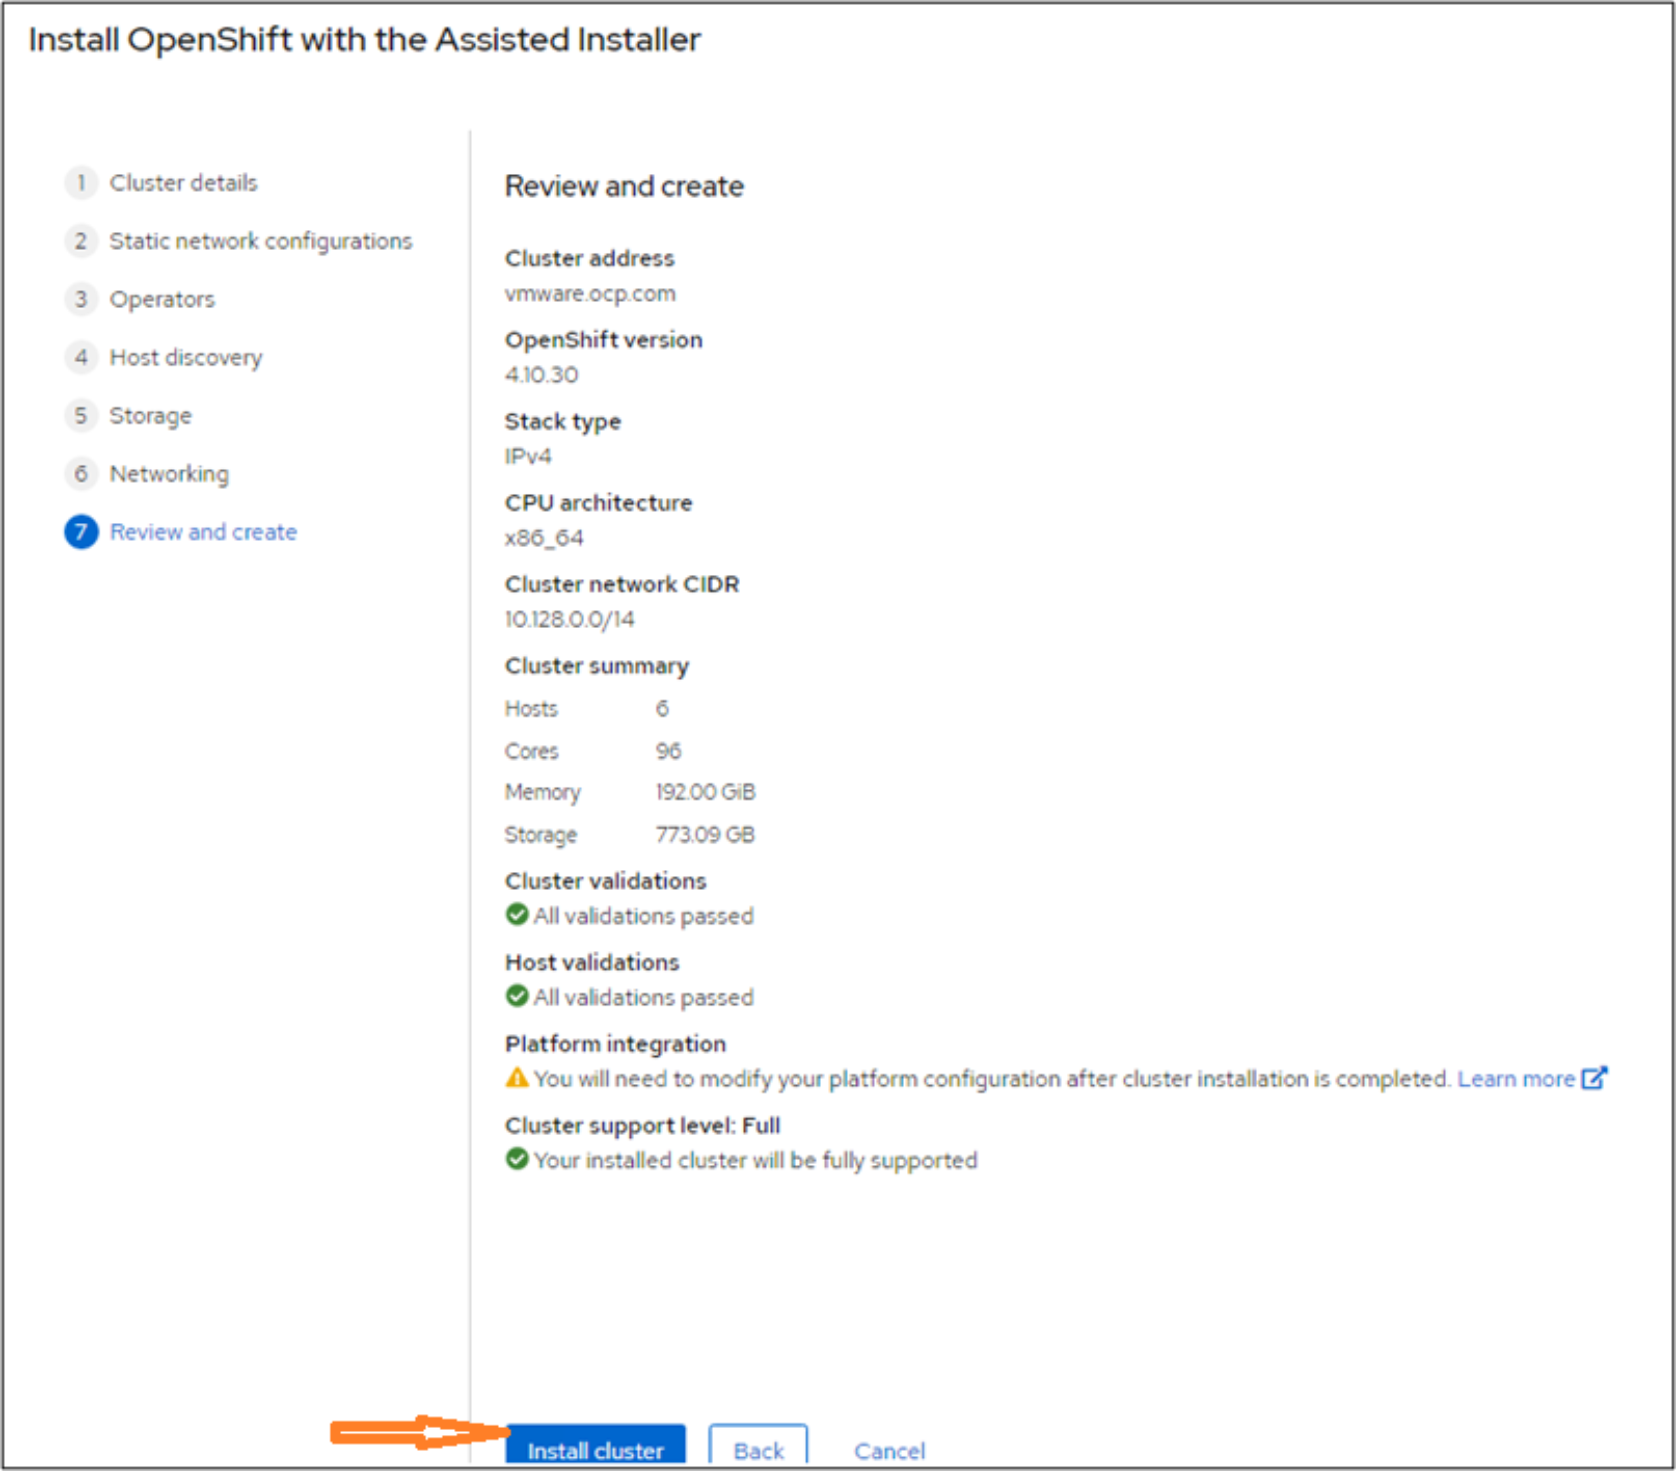
Figure 13. Review and create cluster
- Click View cluster events to view the installation logs.
- When the cluster deployment is complete, click Download kubeconfig to download the kubeconfig file and save the kubeadmin password. Use the Web Console URL to access the OpenShift Web Console as shown in Figure 14.
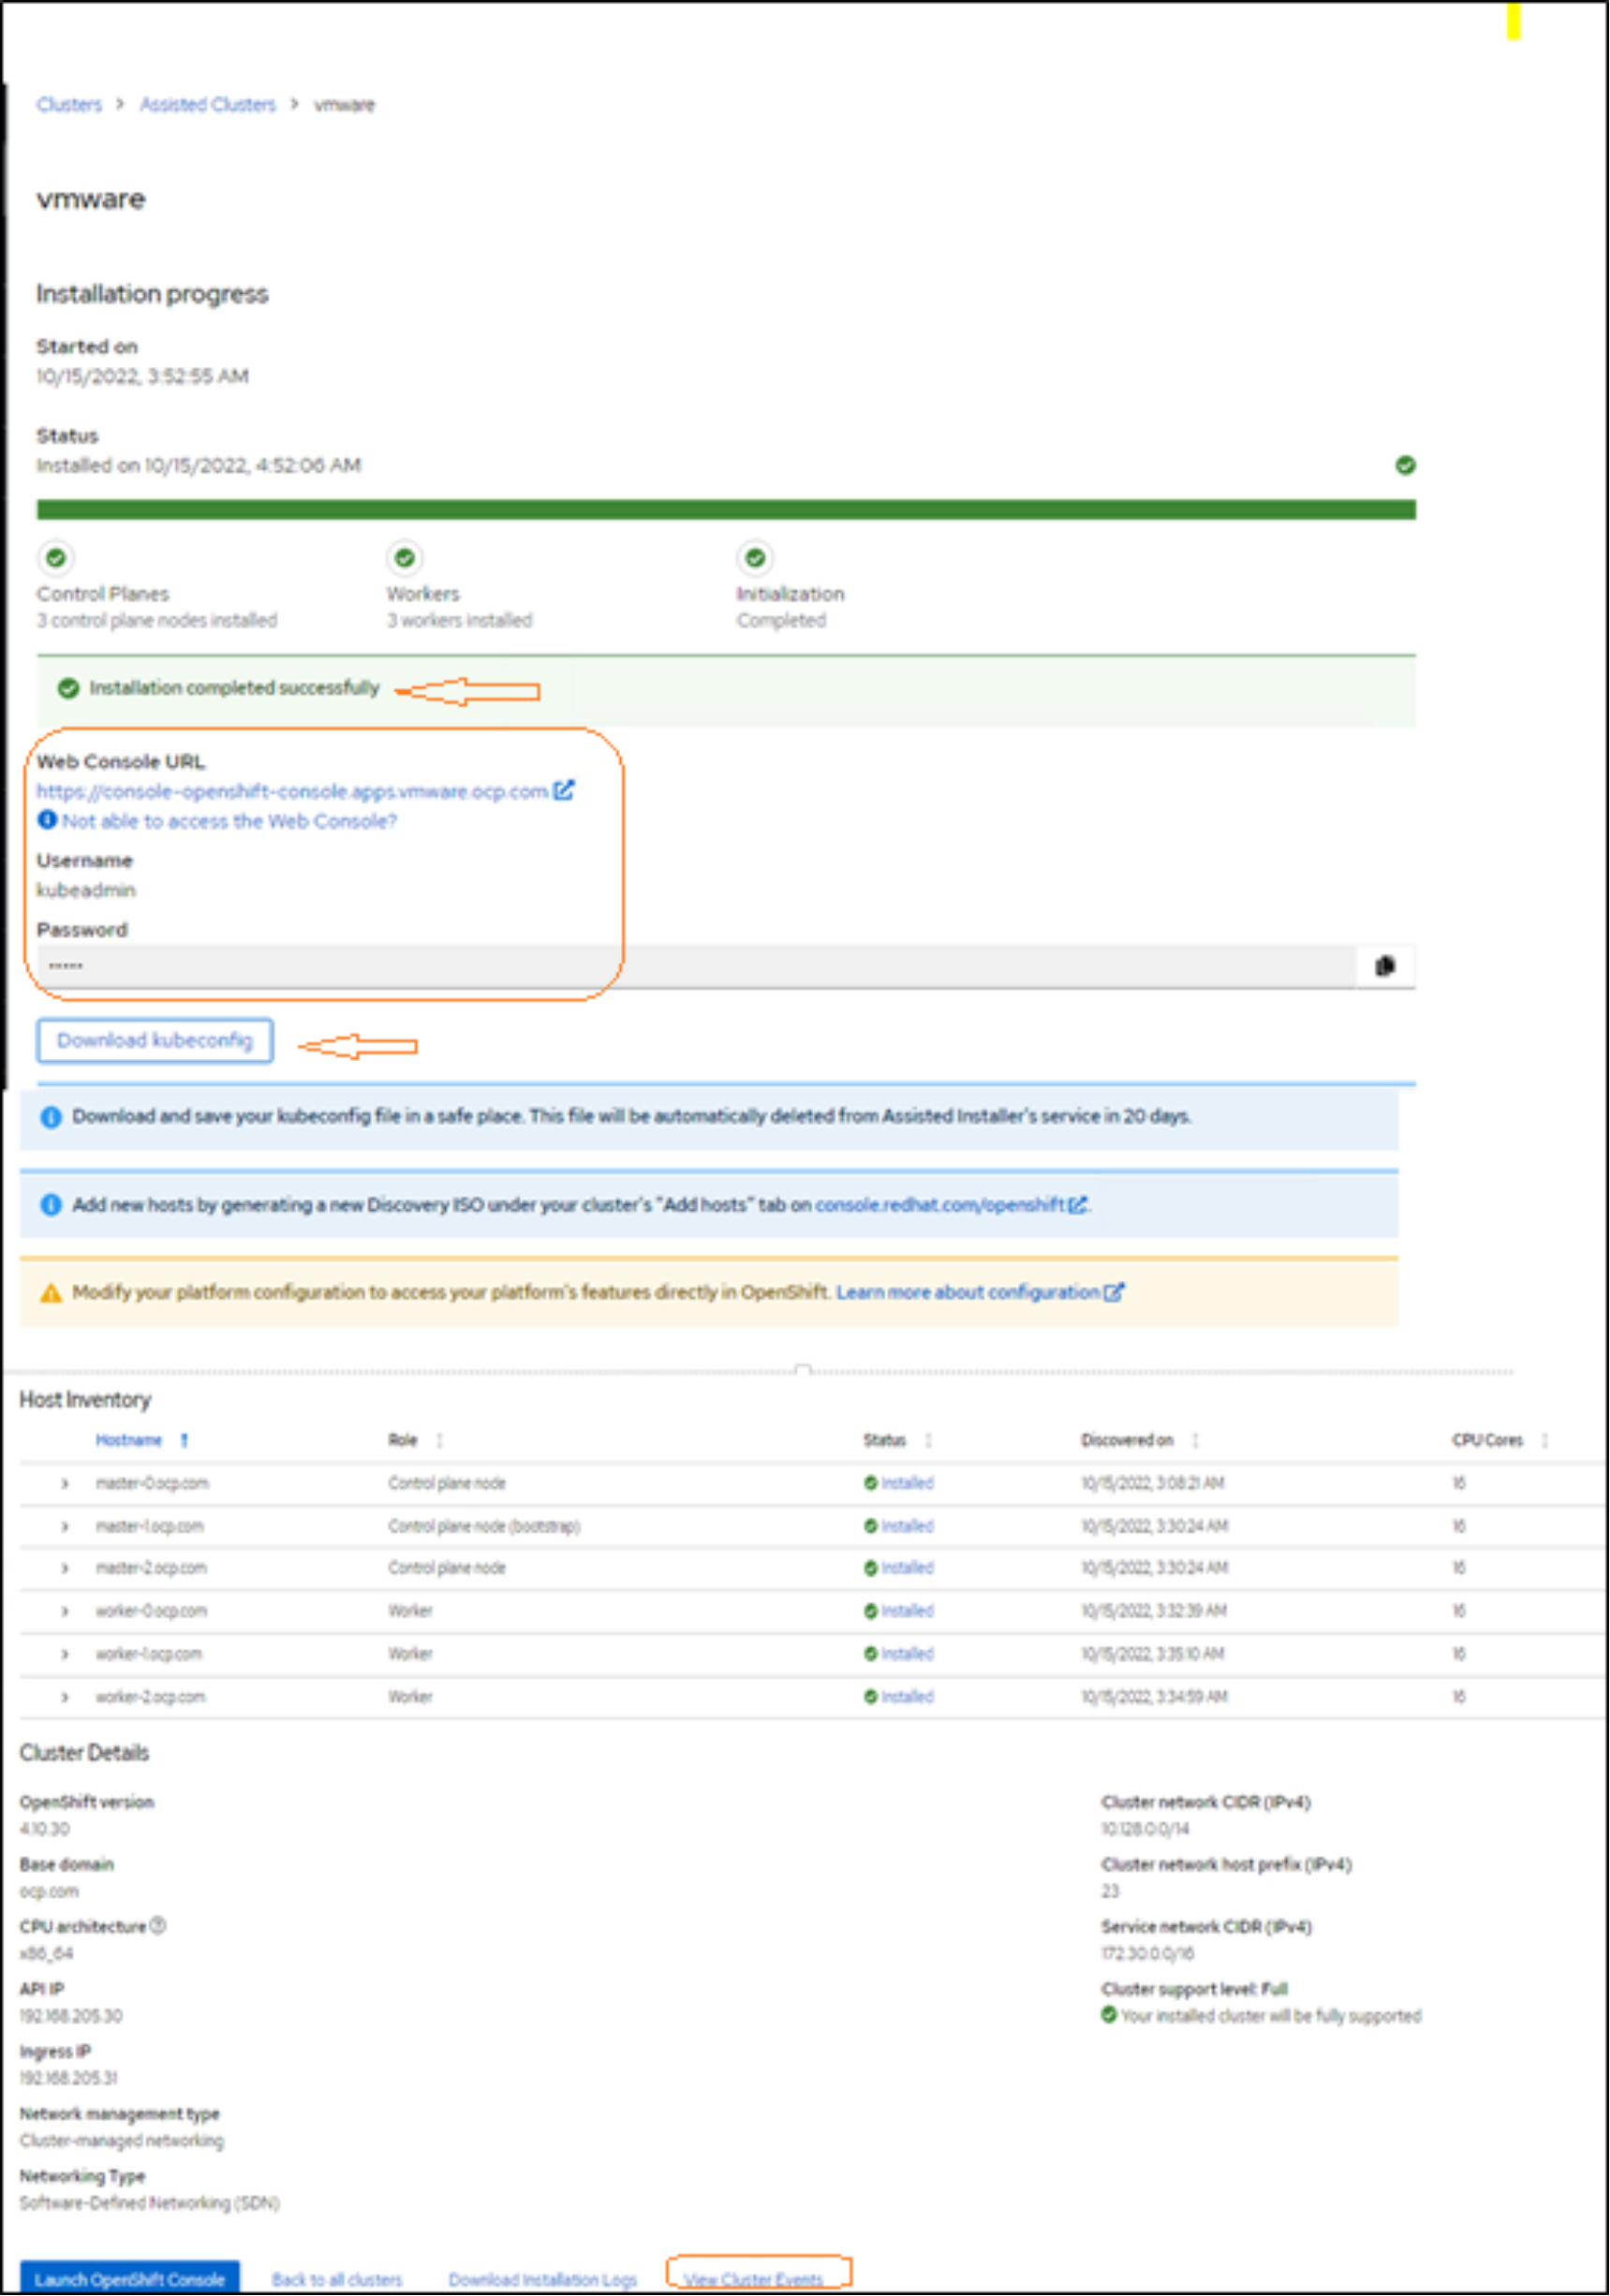
Figure 14. Installation complete