
None
None
-
Follow these instructions to deploy the OpenShift cluster:
1. Log in to Red Hat Hybrid Cloud Console - https://console.redhat.com/openshift.
2. Click Create Cluster and go to the Datacenter tab. Click Create cluster in the Assisted Installer section as shown in the following figure:
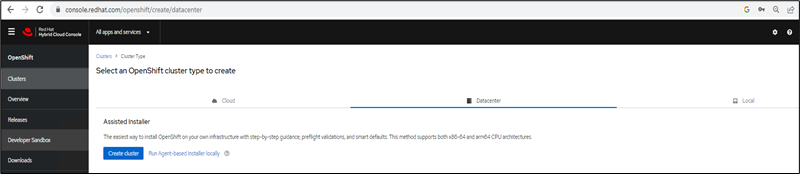 Figure 5. Creating an OpenShift cluster 3. Enter the Cluster name and Base Domain which will represent the environmental specific DNS entries that have been pre-configured, and then select the supported OpenShift version that is required. Select the Host network configuration as Static network configuration, which allows us to configure LACP bonds and any required static network configuration upfront and click Next as shown in the following figure:
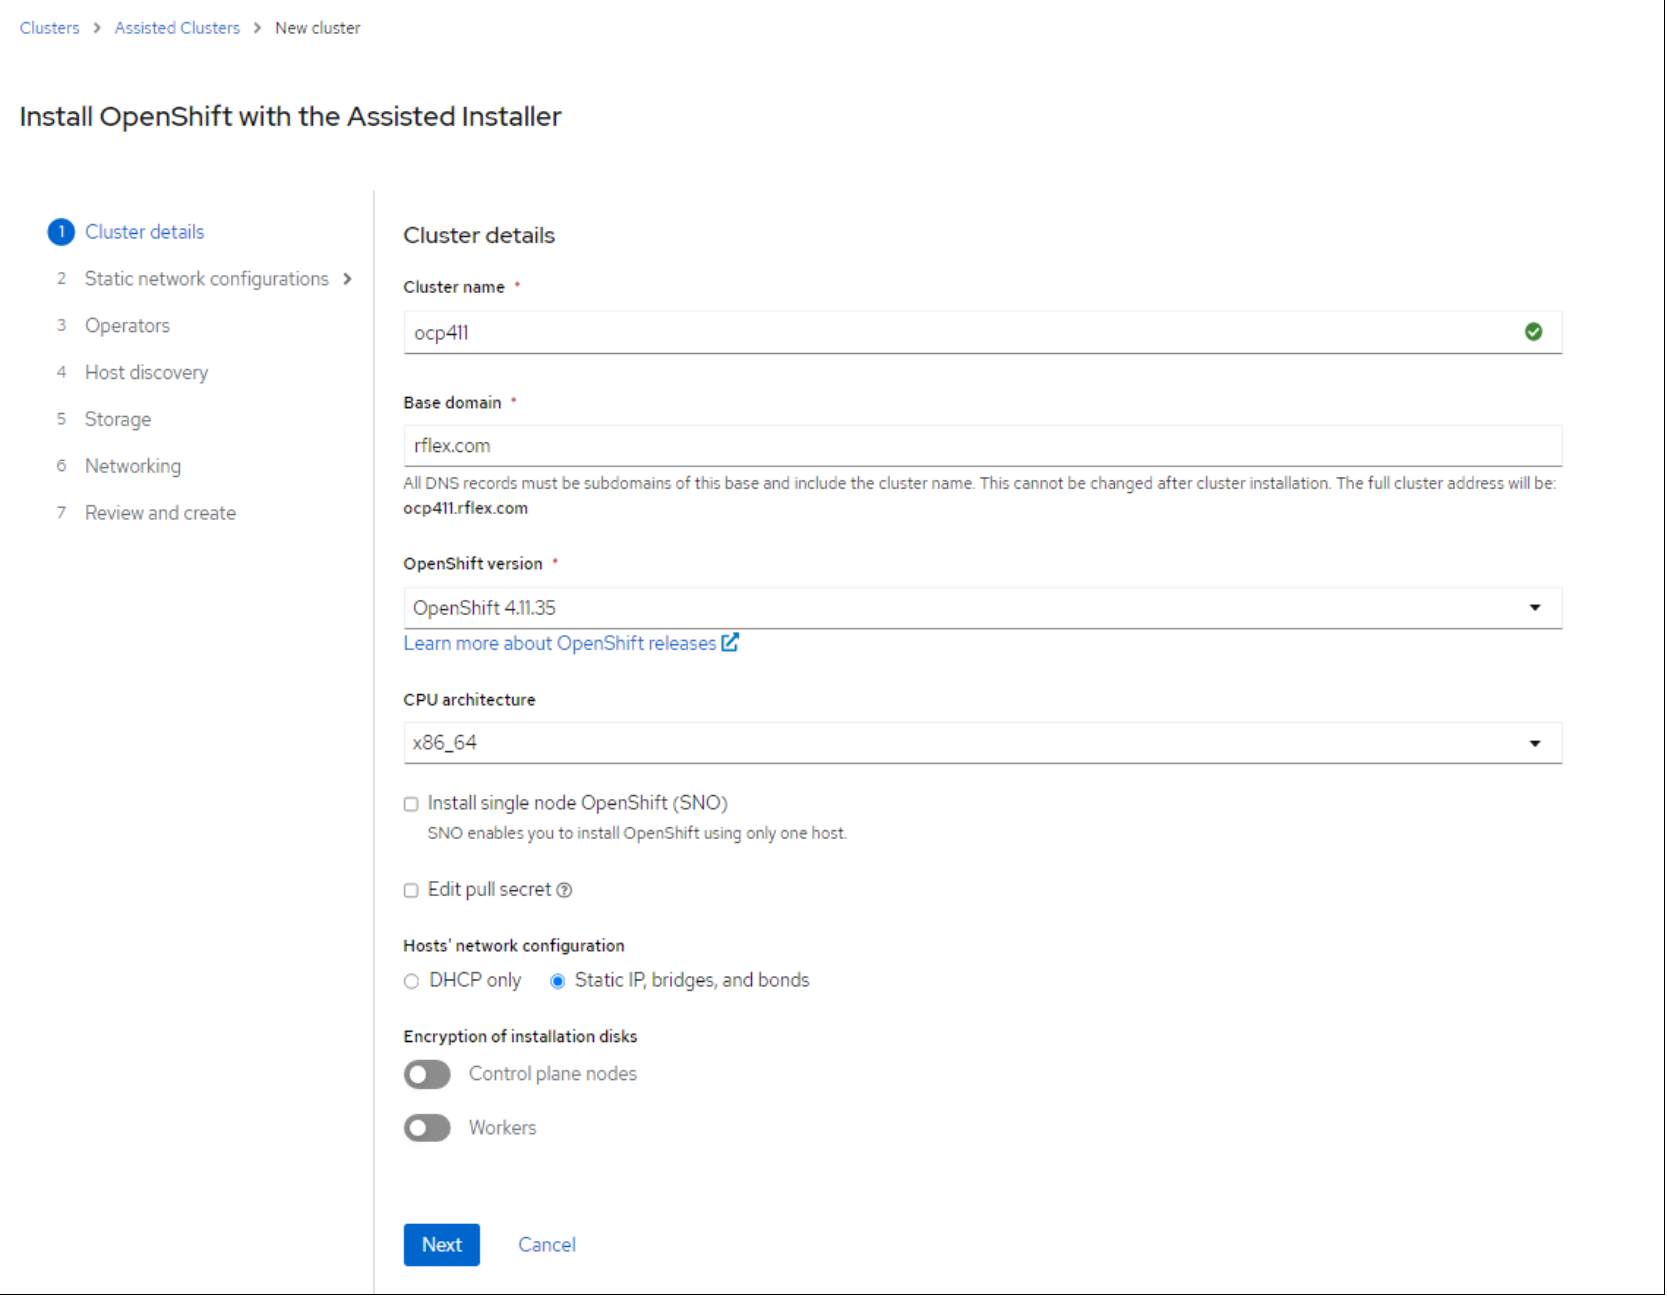 Figure 6. Installing OpenShift with Assisted Installer
4. Select the YAML view option and click Start from scratch inside the YAML editing box as shown in the following figure:
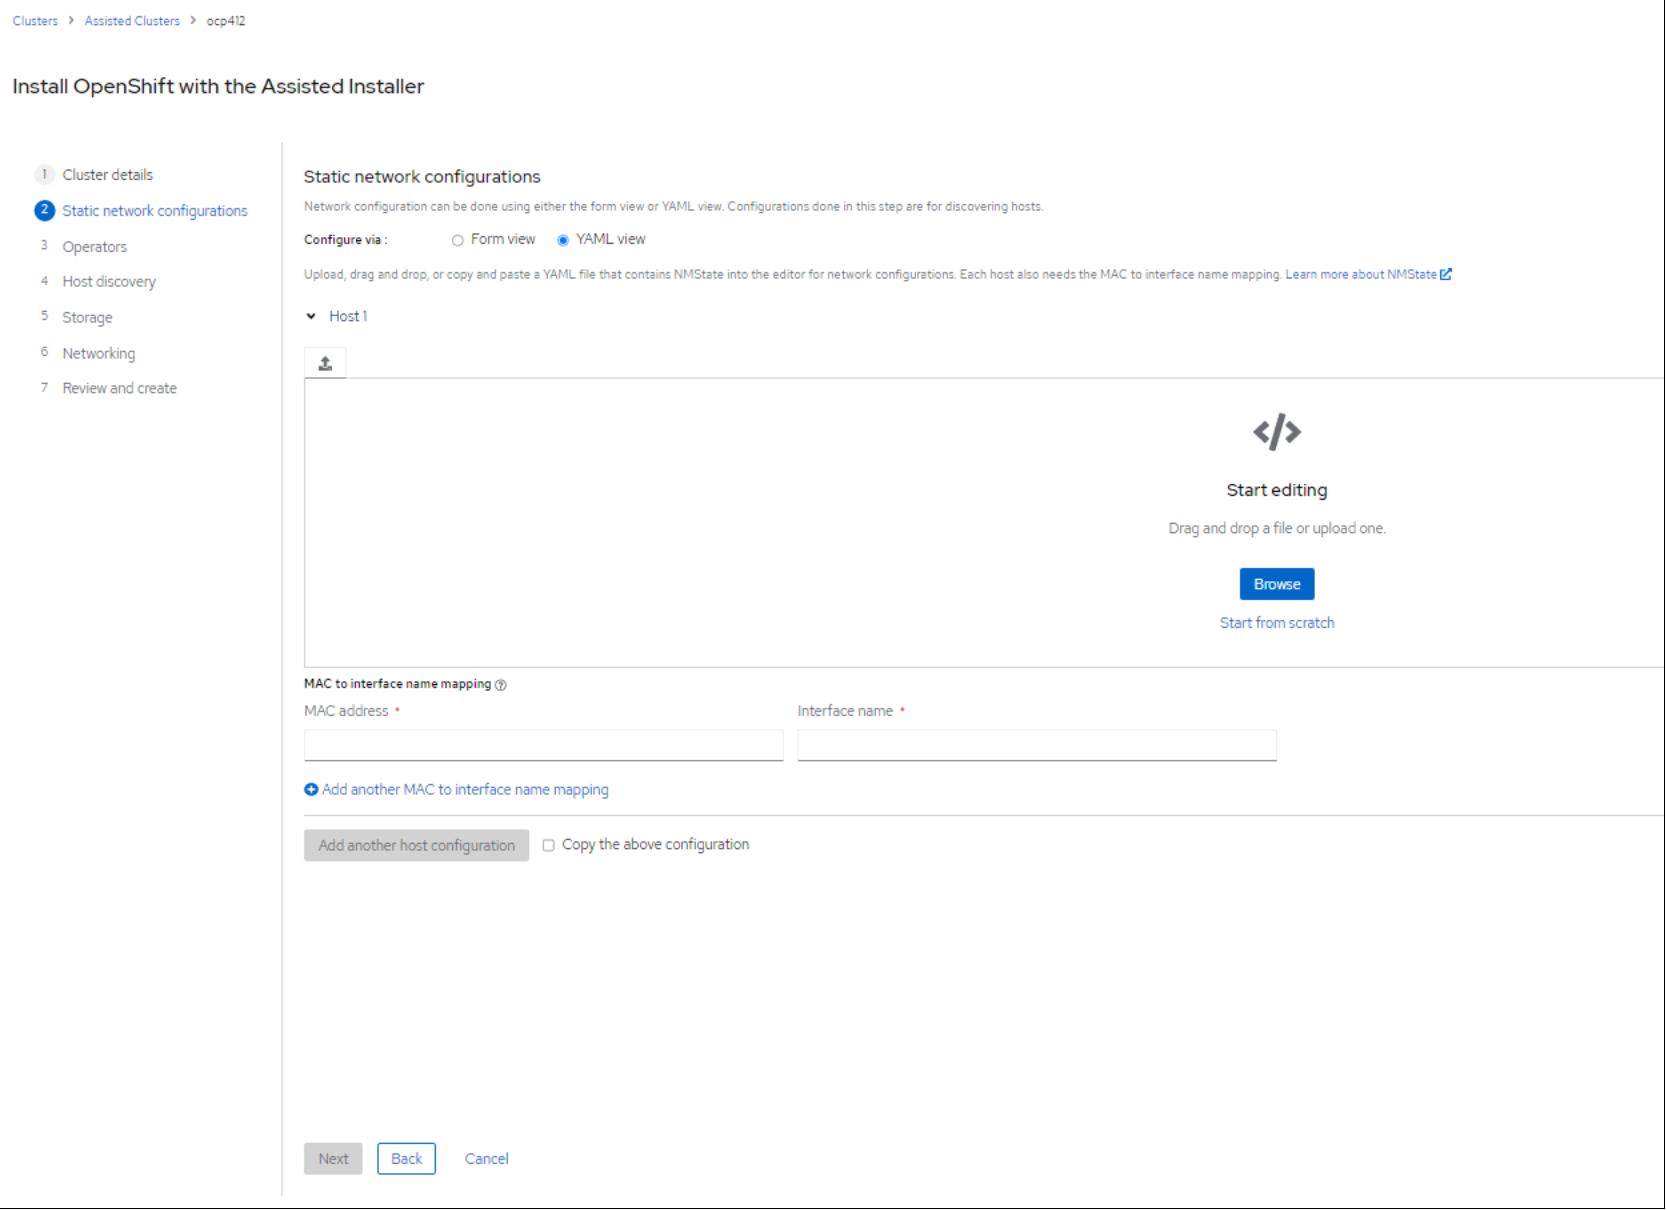 Figure 7. Static network configuration
5. Enter MAC address for the first interface and the Interface name in the Mac to interface name mapping section below the editing box. See the example network configuration YAML file for the configuration of OpenShift Ingress/API network. Copy and paste this YAML file in the YAML editing box as shown in the following figure:
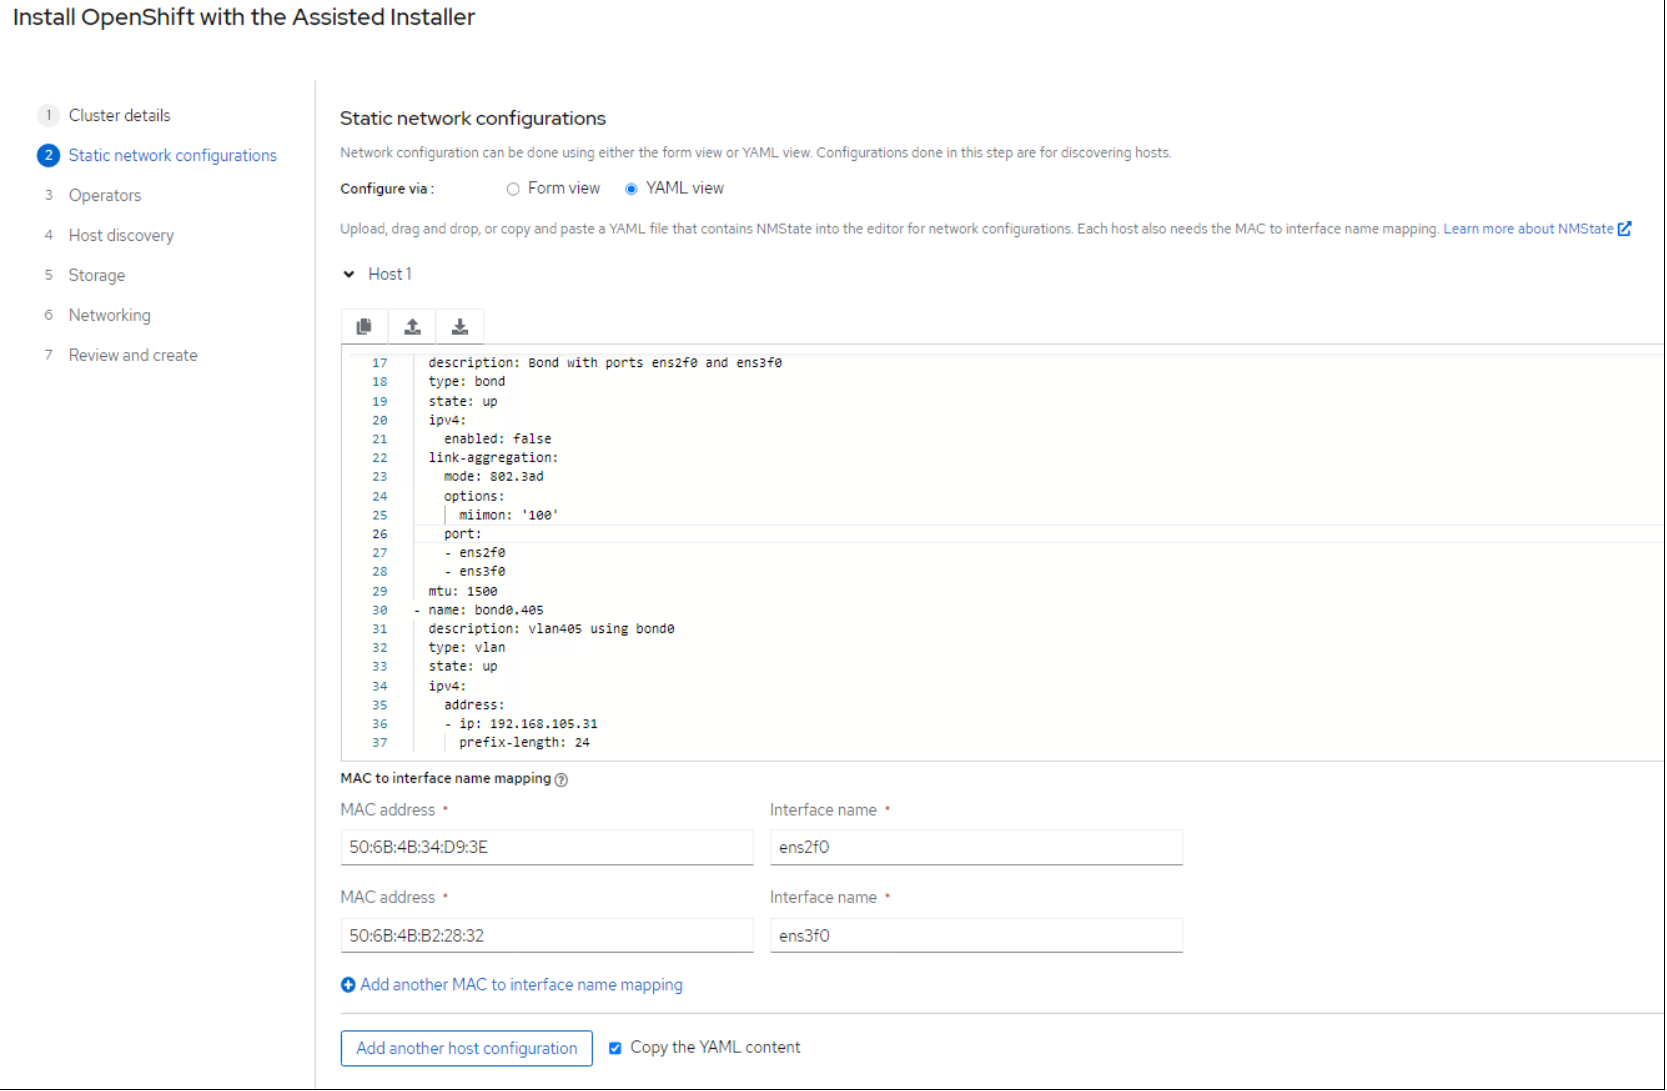 Figure 8. Network configuration
6. Ensure that the Copy the YAML content box is checked and click the Add another host configuration button to enter the details of additional hosts. Modify the IP address in the YAML and change the MAC address and Interface name in the boxes below. After the network has been added for all the hosts, click Next.
7. In the Operators section, for this solution ignore the Operators and click Next.
8. In the Host Discovery, click Add hosts. Select Full image file, enter an SSH public key for cluster nodes, and then click Generate Discovery ISO as shown in the following figure:
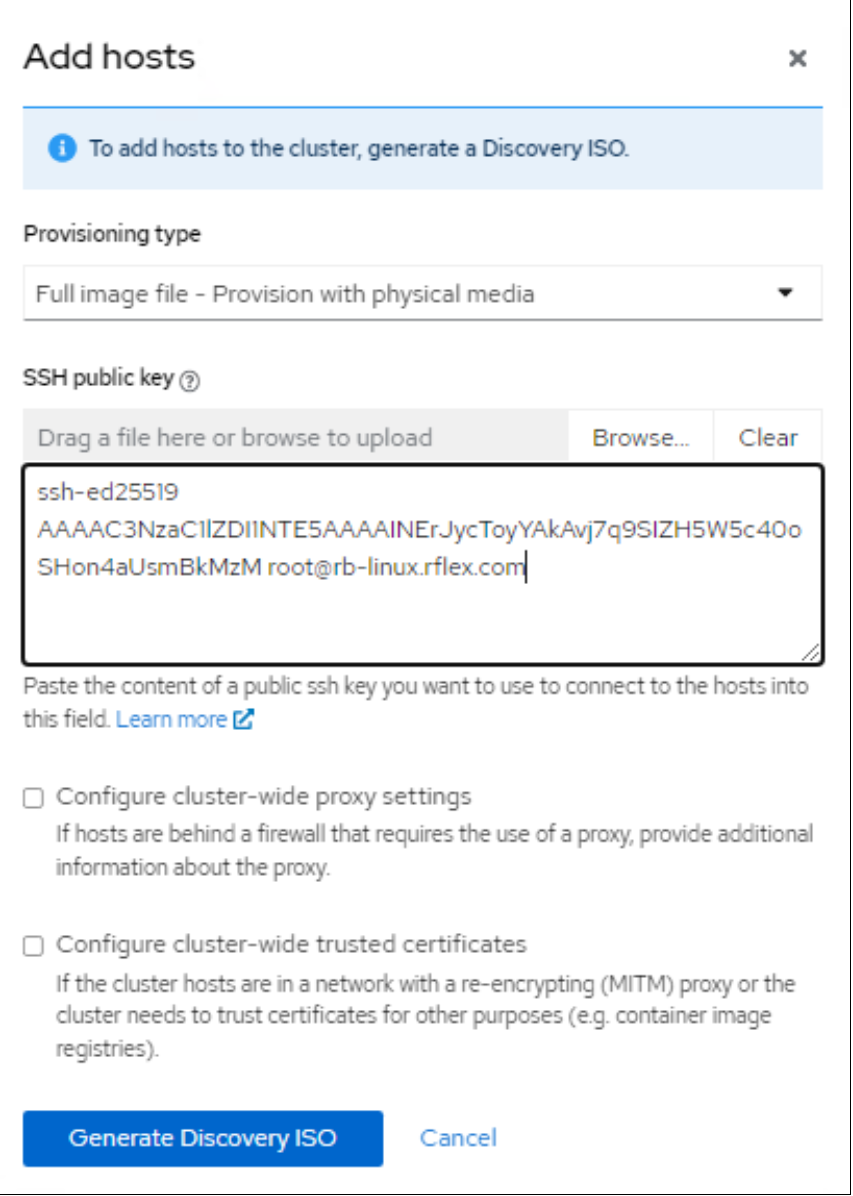 Figure 9. Adding hosts
9. Download the ISO and mount it to the iDRAC virtual media of the hosts. Boot the hosts from the virtual media.
10. The installation process starts automatically, and the hosts are discovered in the Red Hat Hybrid Cloud Console. When the Status of the node’s changes to Ready, assign roles (Control-plane or Worker) to each of the nodes and click Next as shown in the following figure:
 Figure 10. Discovered hosts
11.In the Storage section, ensure the correct bootable disks are chosen for formatting and click Next as shown in the following figure:
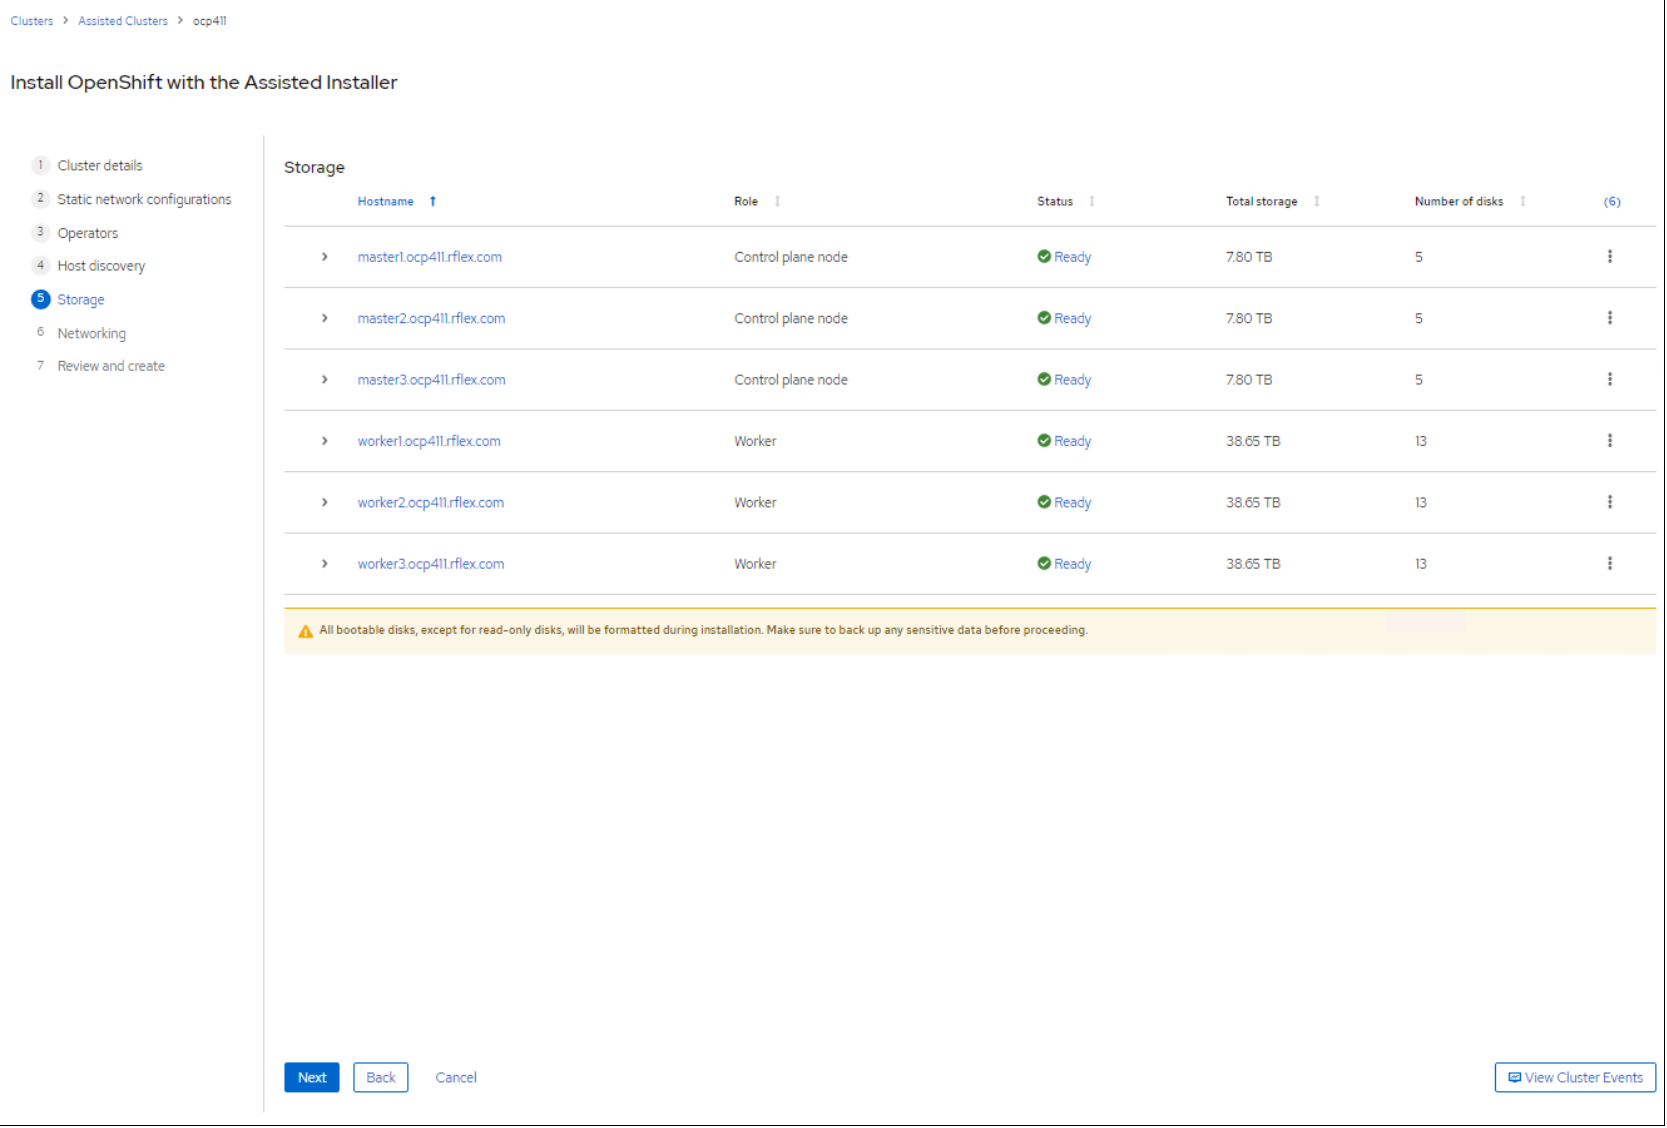 Figure 11. Storage management12. In the Networking section, select Cluster-Managed Networking. Enter the details of Available subnet, API IP address and Ingress IP address both the addresses should have been pre-identified, and mapped to specific DNS entries for API.<cluster-name>.<domain> and *.apps.<cluster-name>.<domain> respectively) and click Next as shown in the following figure. If an NTP error is displayed, expand each node to add NTP server details.
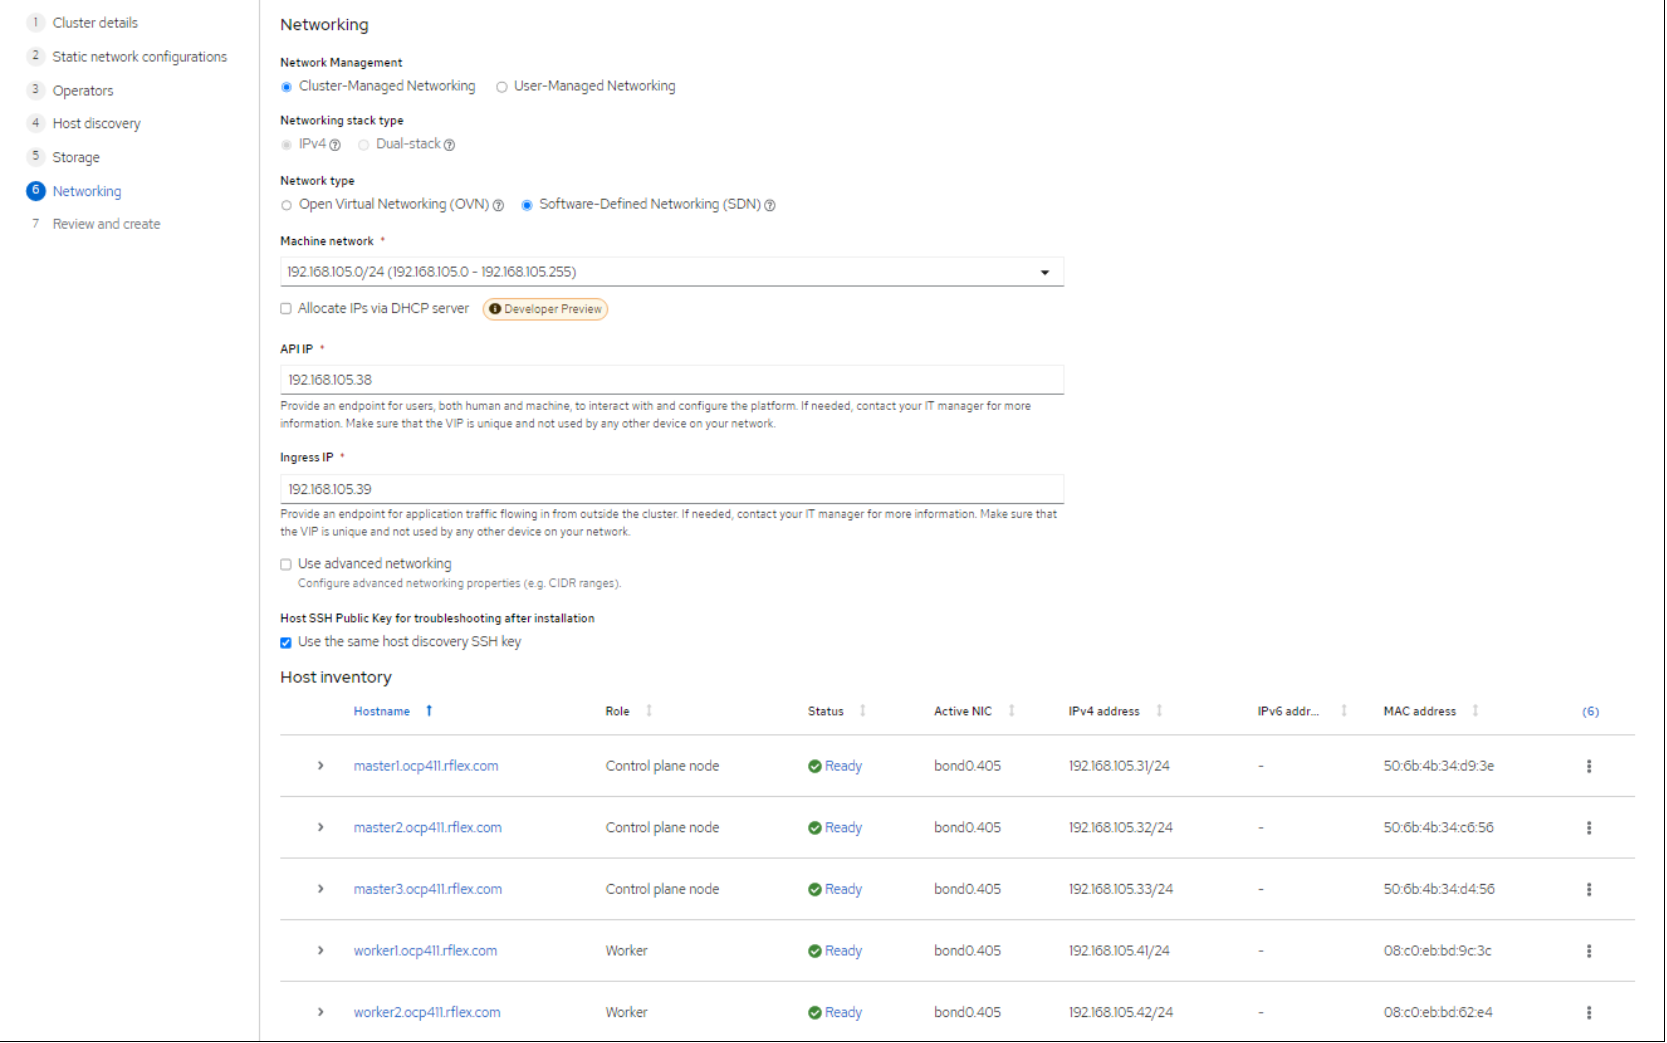 Figure 12. Network management
13. Review the configuration and click Install cluster as shown in the following figure. During the installation process, the nodes reboot several times.
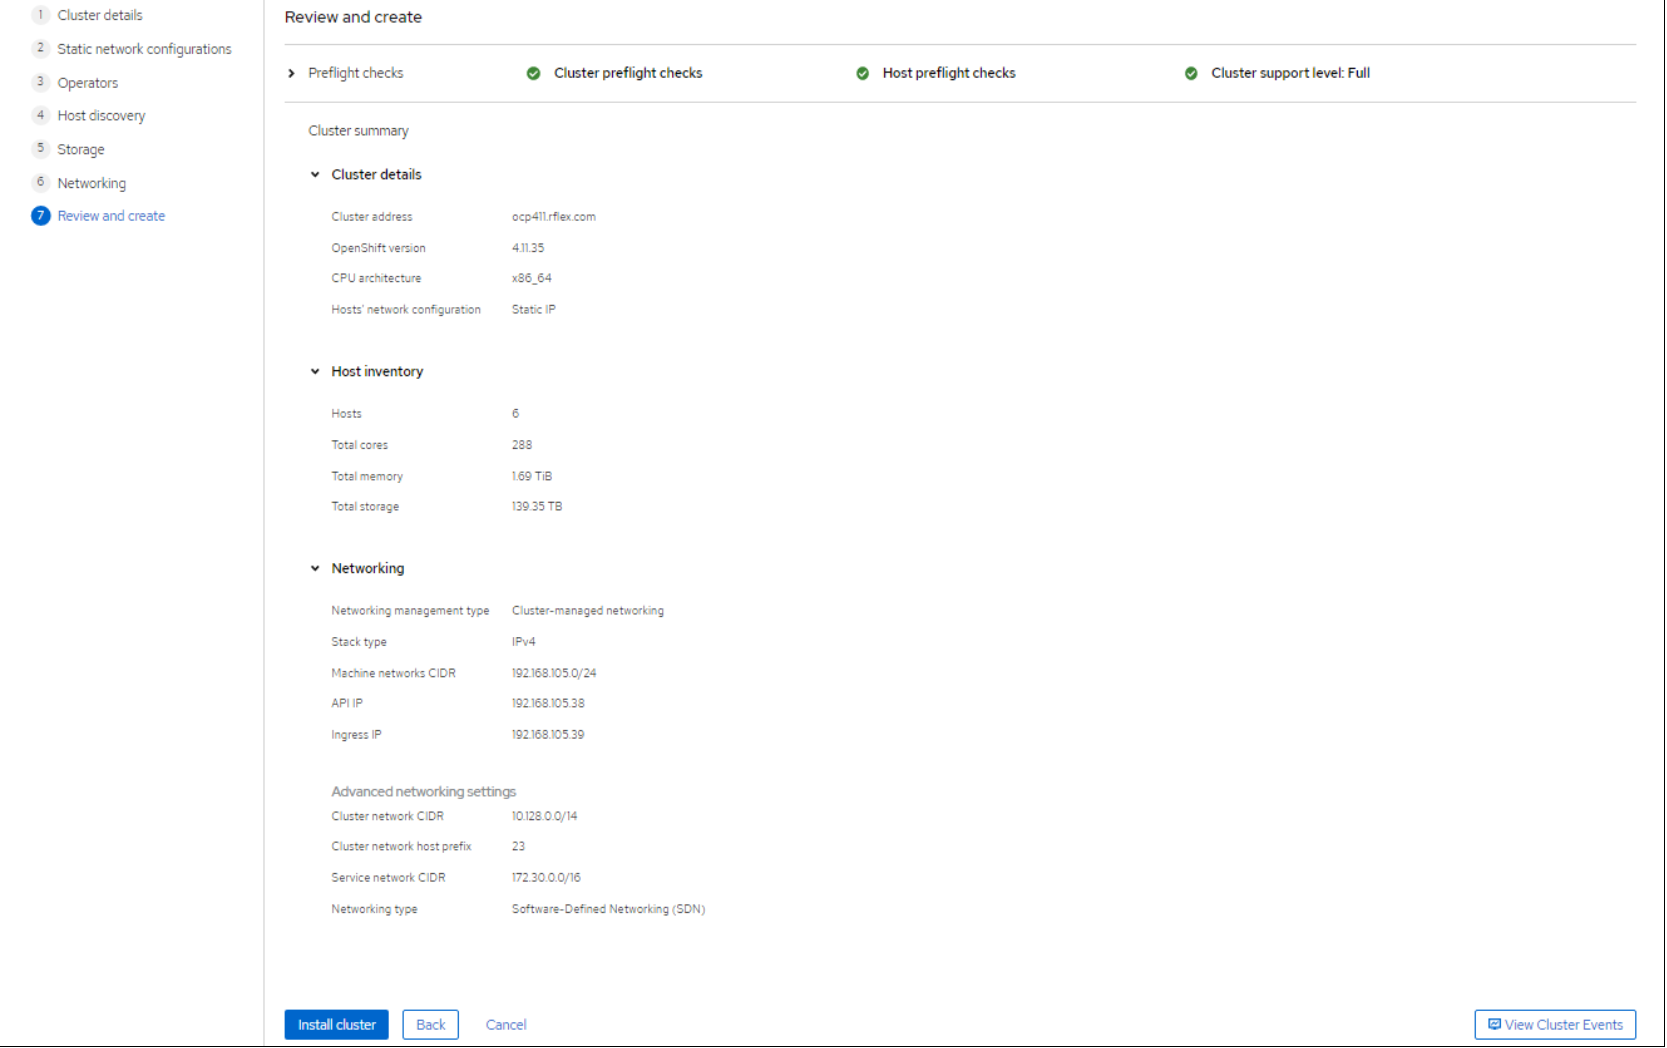 Figure 13. Review and create cluster
14. Click View cluster events to view the installation logs.
15. When the cluster deployment is complete, click Download kubeconfig to download the kubeconfig file and save the kubeadmin password. Use the Web Console URL to access the OpenShift Web Console as shown in the following figure:
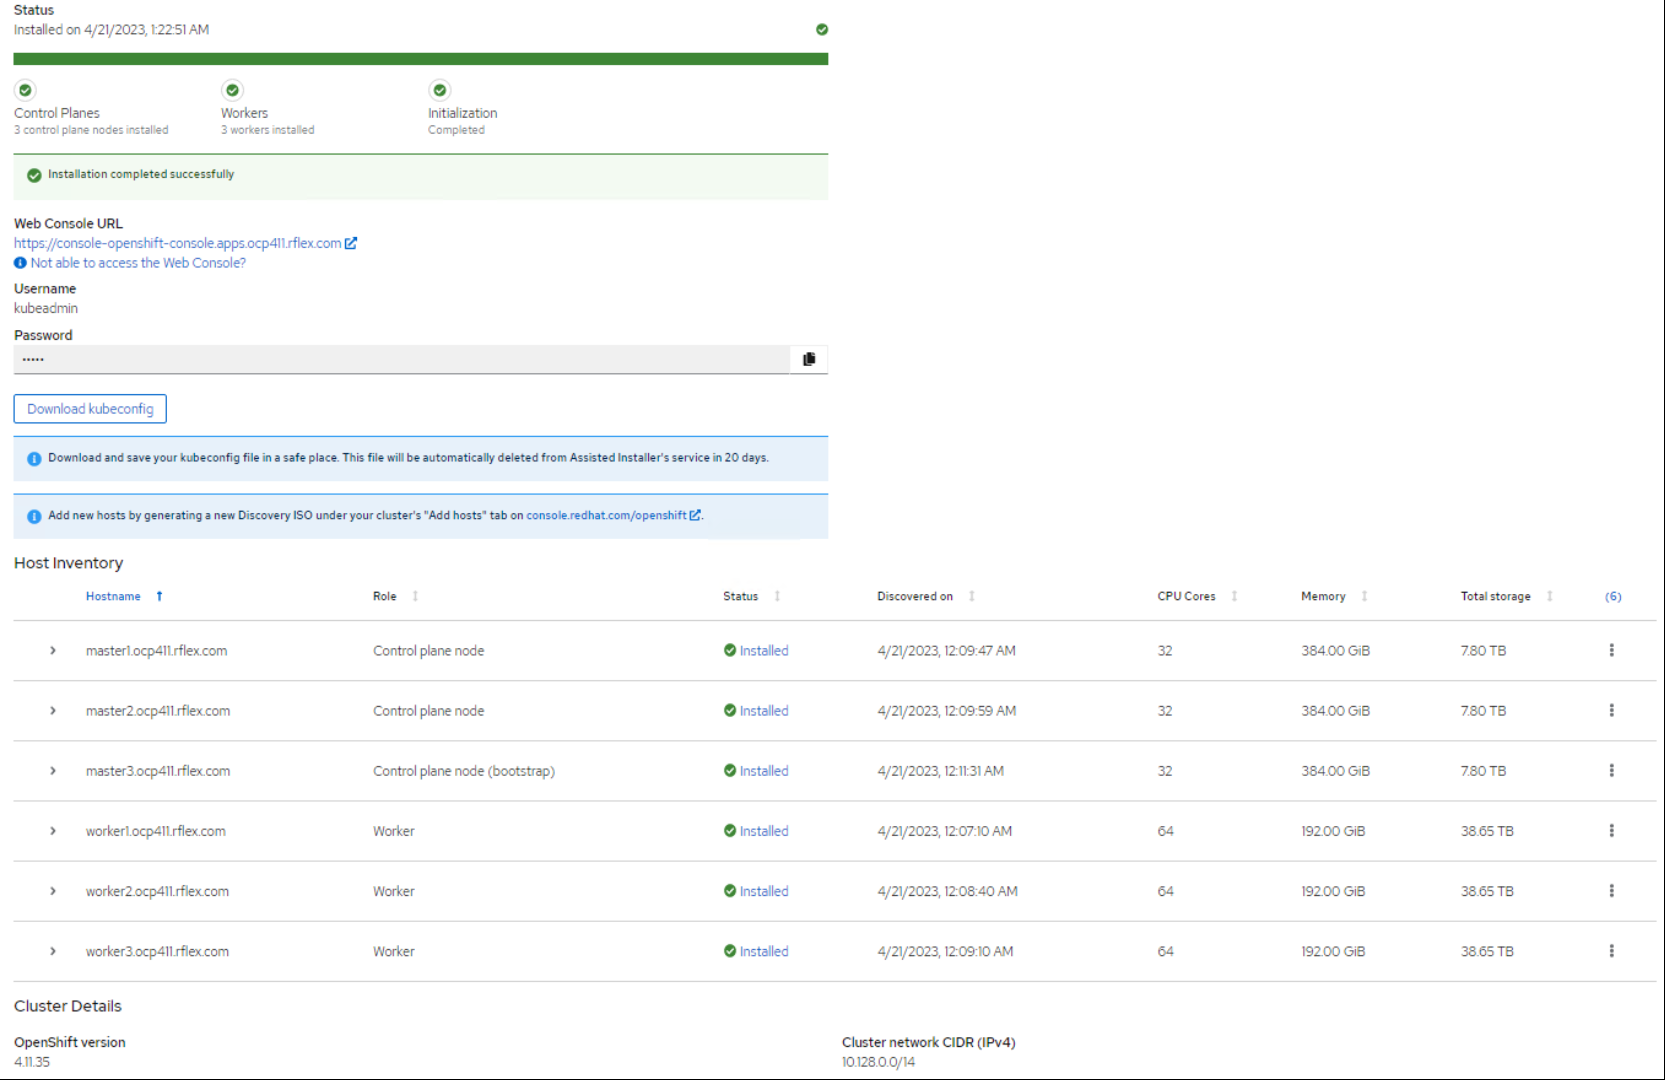 Figure 14. Installation complete
Note: Post-installation change to disconnected mode is not covered in this document. For more information, see Converting a connected cluster to a disconnected cluster.