
None
None
-
This section describes the steps how to create a Virtual Data Center on ECS.
- Log in to the ECS portal, go to Manage > Virtual Data Center, and click New Virtual Data Center as shown in the following figure.
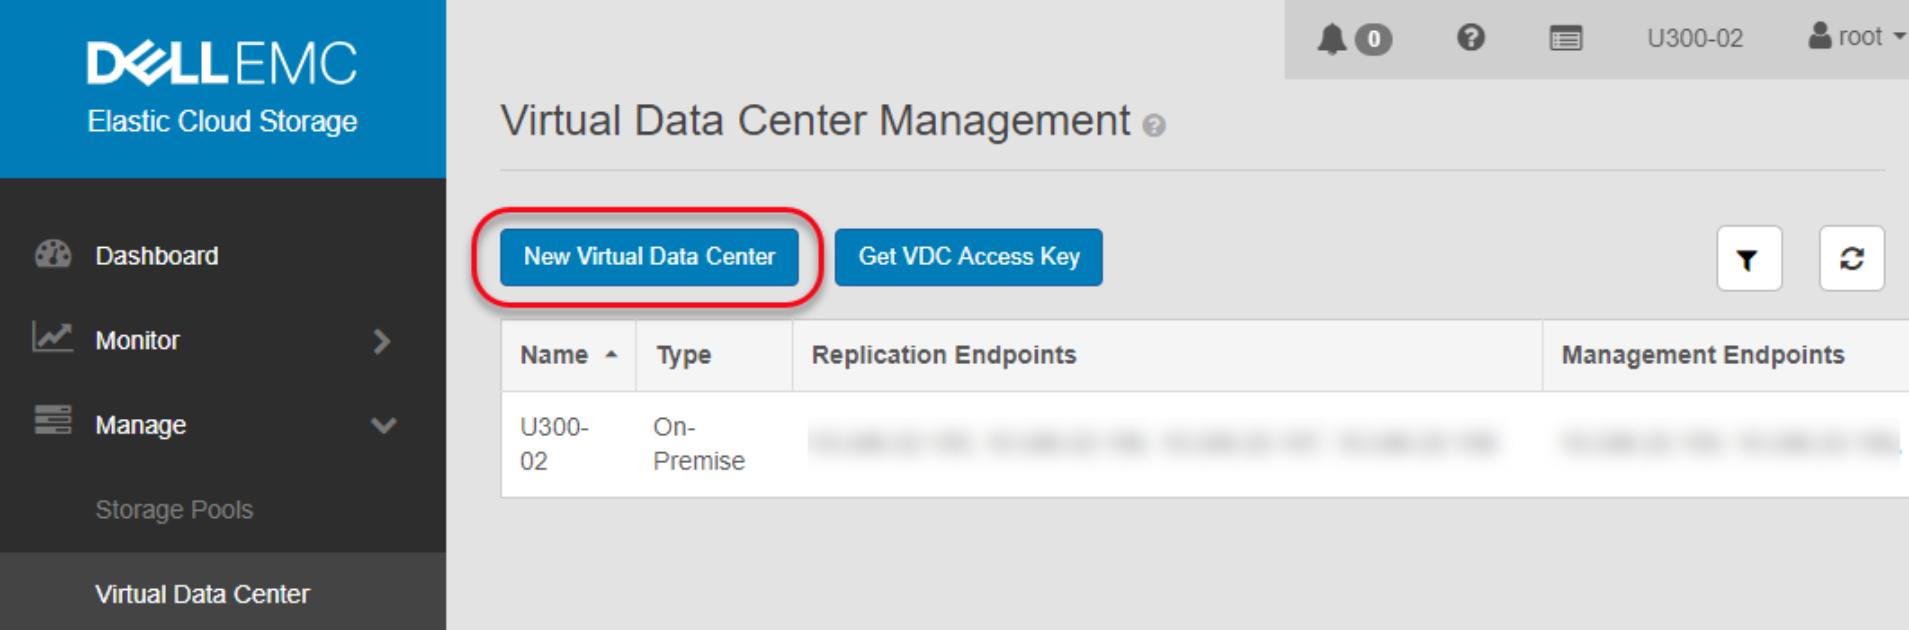
Figure 22. New Virtual Data Center
- From the New Virtual Data Center page as shown in Figure 23, the minimum information is as follows:
- Name: Type a name to identify the virtual data center.
- Key: Type a key or generate a new key.
- Replication and Management endpoints: The endpoints should contain a comma-separated listing of each node’s IP address. This option can either be the node’s public IP address or a separate replication or management network for each node. If network separation is not configured, both replication and management endpoints will be the same.
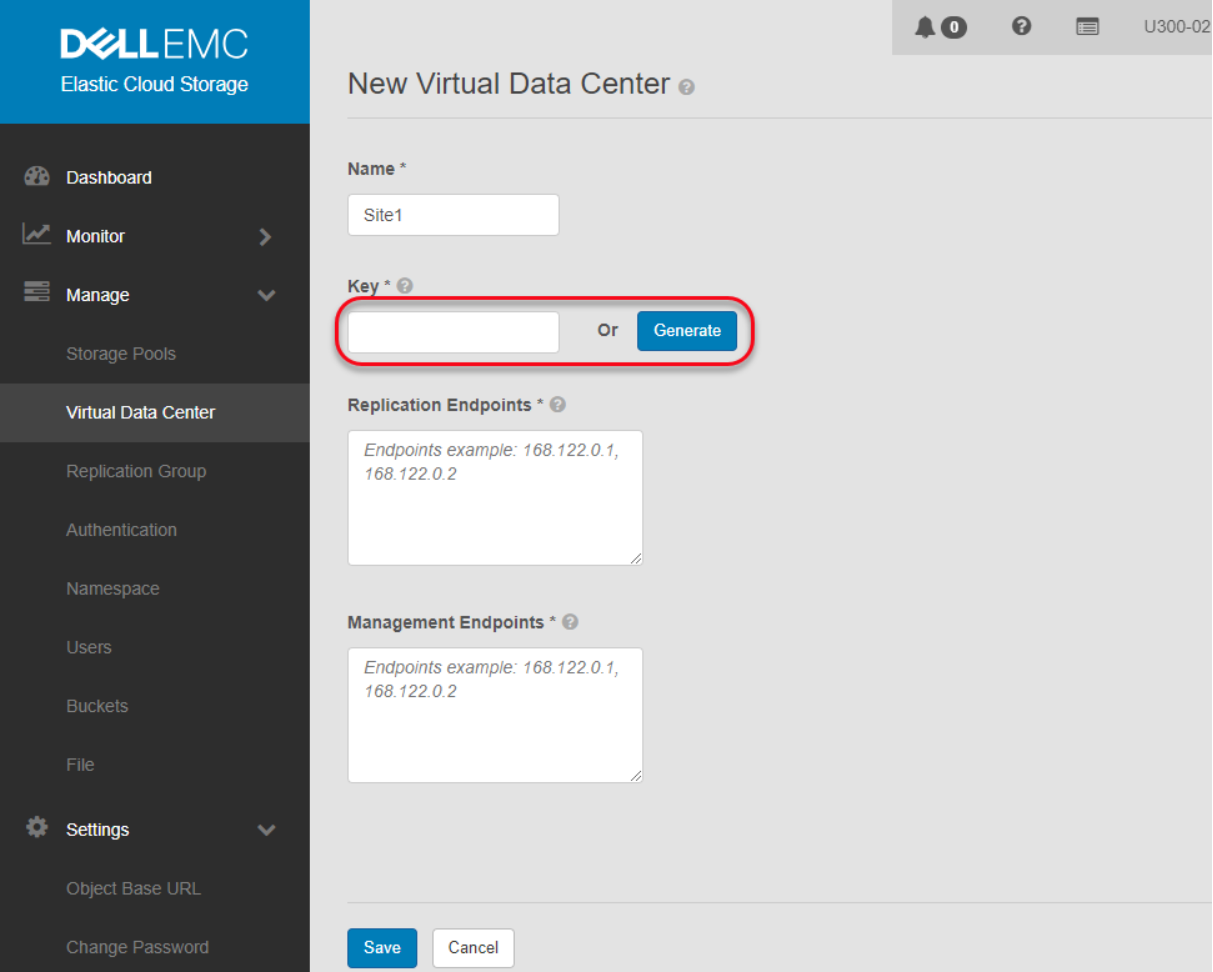
Figure 23. New Virtual Data Center page
- Click Save to create a new virtual data center.
If you want the cloud data to be replicated to a second site, you have to set up multiple virtual data centers (VDCs) that are federated together. The steps to create multiple VDCs are as follows:
- Log in to the second ECS portal and go to Manage > Virtual Data Center. Select Get VDC Access Key as shown in the following figure and copy the VDC Access Key. You will need it in the next step. Also make note of the second site’s replication and management IP addresses.
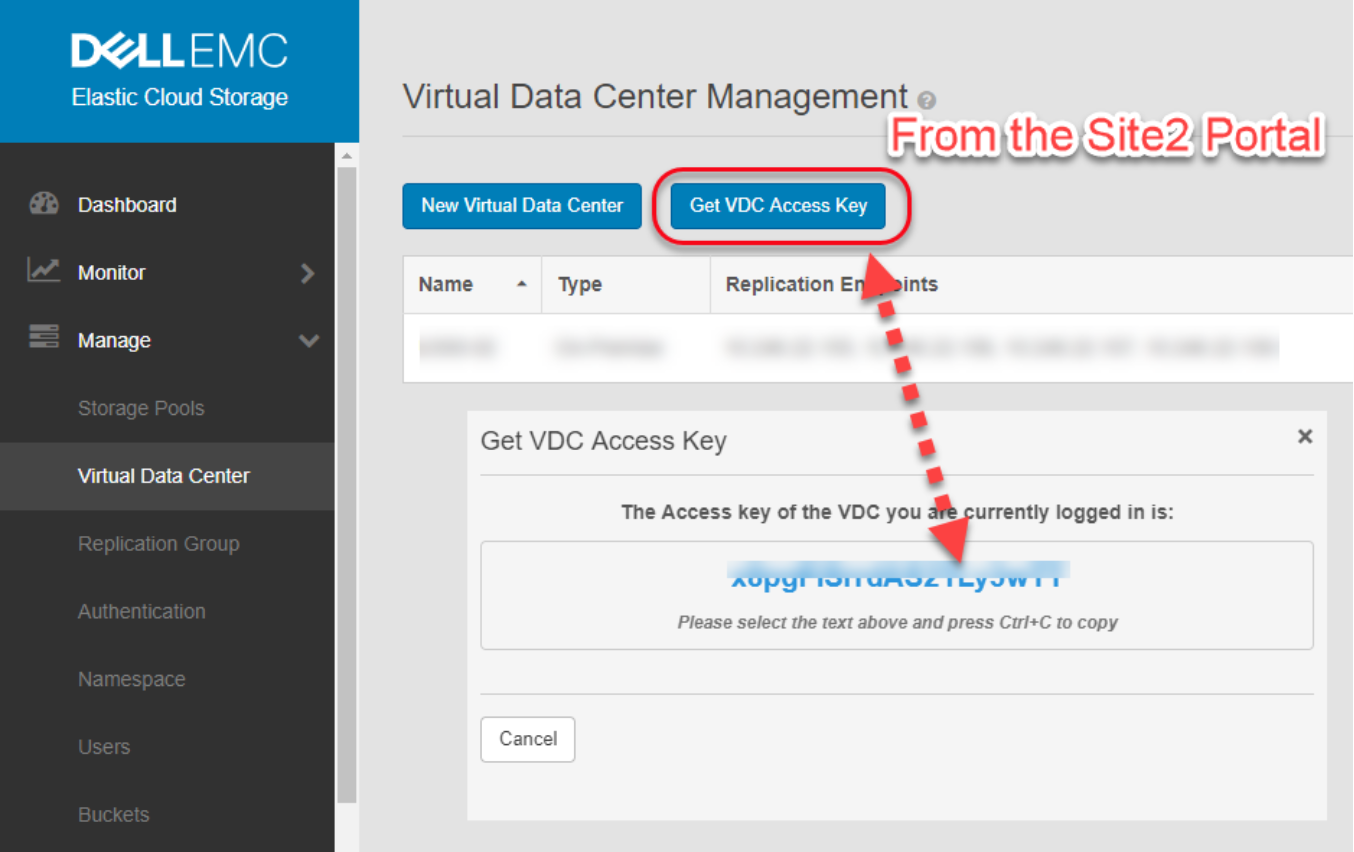
Figure 24. Get VDC Access Key from the Second ECS
- Log in to the primary ECS portal and go to Manage > Virtual Data Center. Select New Virtual Data Center as shown in Figure 25. The minimum information is as follows:
- Name: Type a name to identify the virtual data center.
- Key: Type the key copied from the second ECS portal in step 1.
- Replication and Management endpoints: The endpoints should contain a comma-separated listing of each node in the second site’s IP address. This option can either be the node’s public IP address or if a separate replication or management network for each node. If network separation is not configured, both replication and management endpoints will be the same.
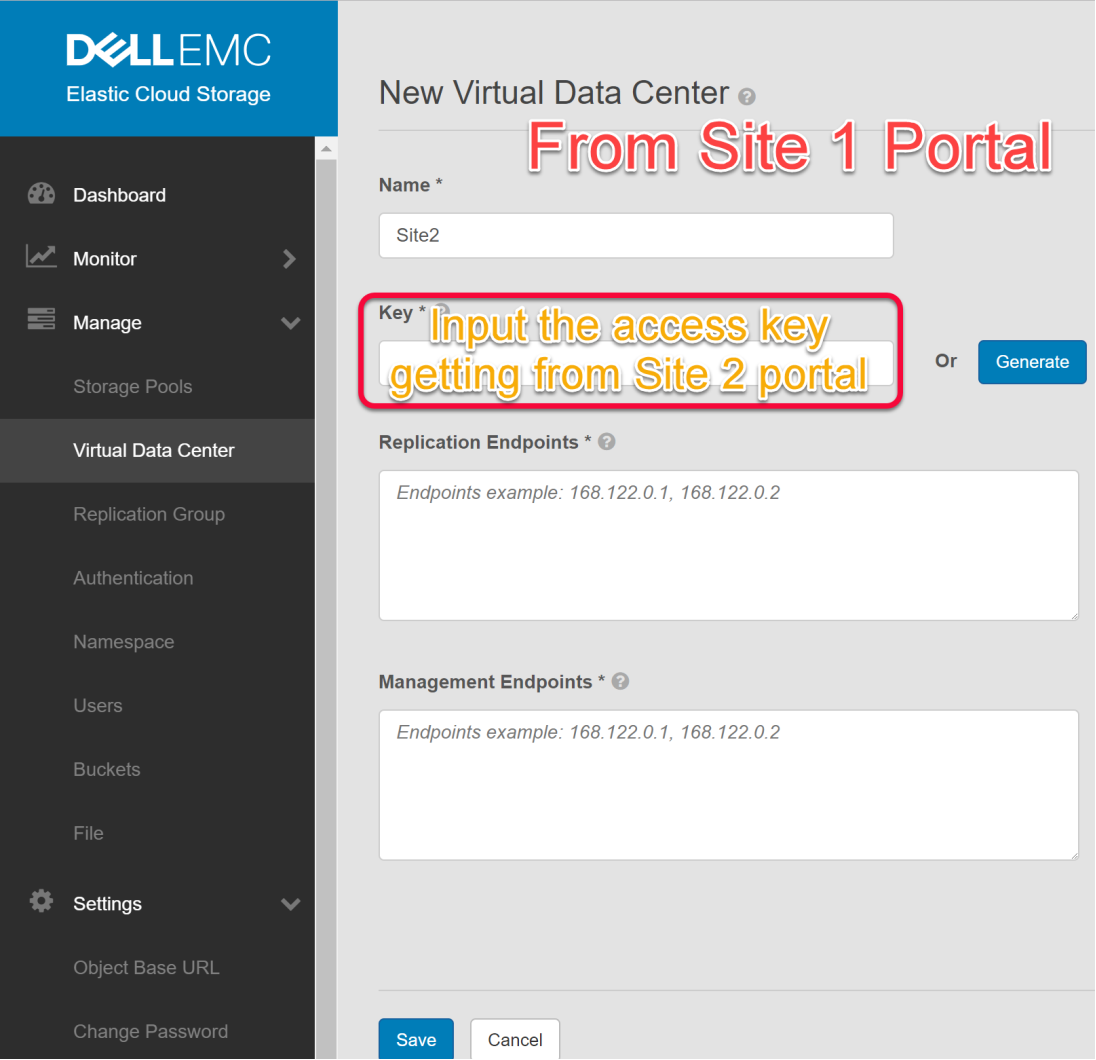
Figure 25. Create a VDC on primary ECS
- Click Save to create a new virtual data center.
Replication group
This section describes the steps how to create replication group on ECS.
- Log in to the ECS portal and go to Manage > Replication Group. Click the New Replication Group button as shown in the following figure.
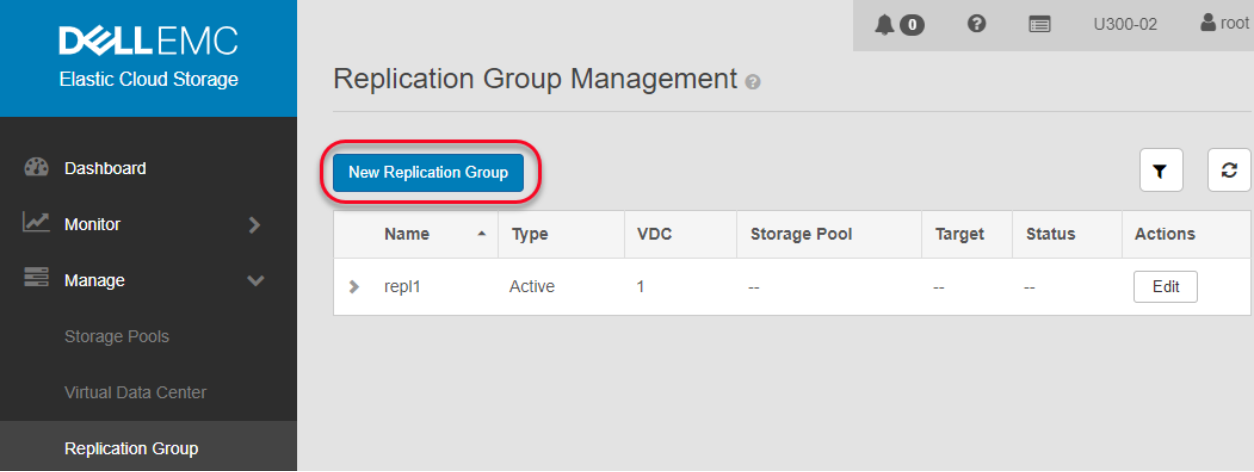
Figure 26. New Replication Group
- From the New Replication Group page as shown in Figure 27, the minimum information is as follows:
- Name: Type a name to identify the replication group.
- Replicate to All Site: Select the replication level preference by enabling or disabling “Replicate to All Sites”:
Enable: This option is used to replicate data to all sites or VDCs in the replication group. If your replication group has four sites that would mean four copies are stored, one at each site. This option offers the highest data durability but has the lowest space efficiency.
Disable: This option is used to maintain one additional copy of data at another site. Regardless of the number of sites you will always have two copies of the data. - Add VDC: The setting is ignored for single site replication groups. Add the appropriate virtual data centers and storage pools.
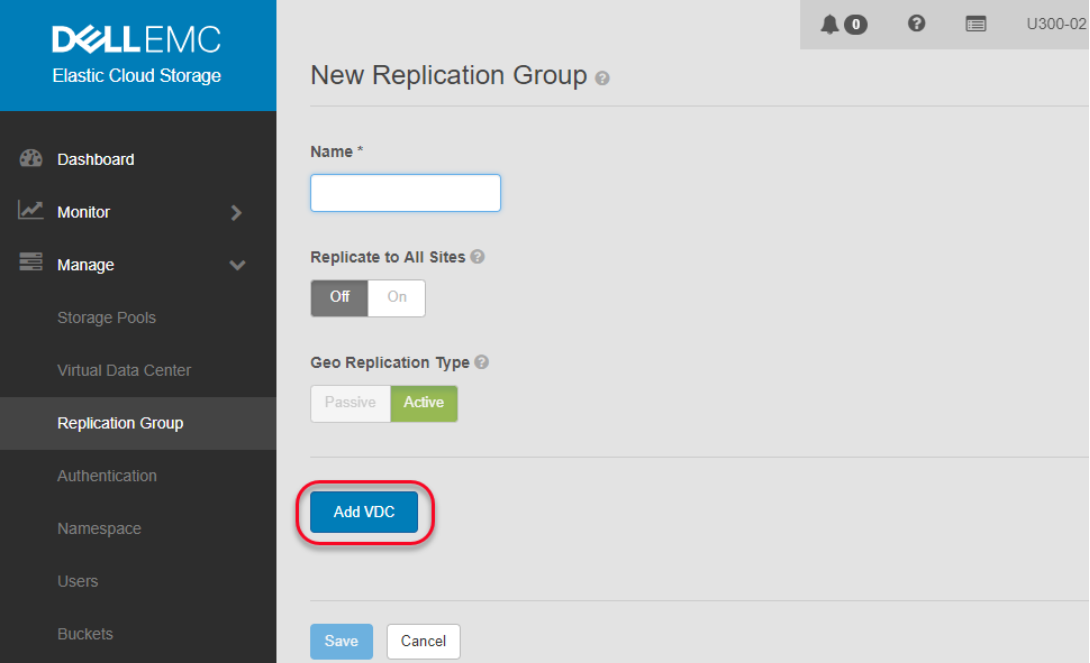
Figure 27. Configure New Replication Group
- Click Save to create a replication group.
Namespace
This section describes the steps how to create a namespace on ECS.
- Log in to the ECS portal, go to Manage > Namespace, and click New Namespace as shown in the following figure.
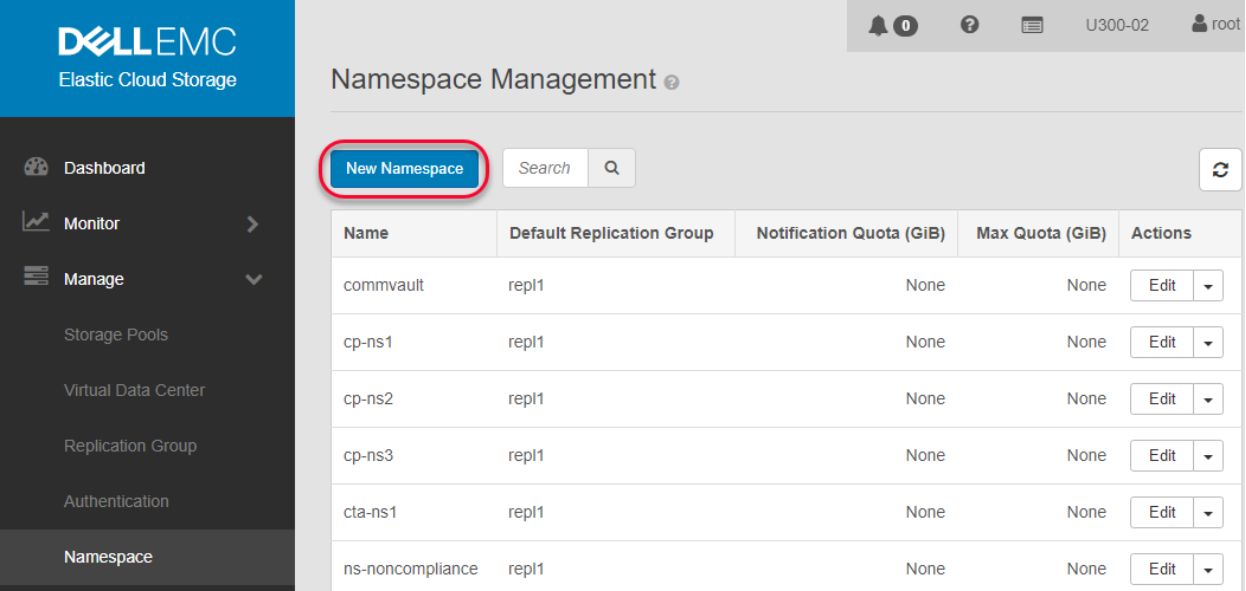
Figure 28. New Namespace
- From the New Namespace page as shown in Figure 29, the minimum information is as follows:
- Name: Type a name to identify the namespace.
- Replication group: The replication group will determine if the CloudPools data will be replicated to other ECS sites or not.
- Server-side Encryption: If you require the ECS cluster to perform server-side encryption, you must enable it. It cannot be changed after the namespace is created.
- Retention Policies: It is recommended not to enable file system, CAS, or Bucket Retention Periods for CloudPools buckets.
- Namespace Quota: It is recommended not to enable quota for CloudPools namespace.
- Default Bucket Quota: It is recommended not to enable quota for CloudPools bucket.
- Access During Outage: It is recommended to enable Access During Outage. See the ECS Administrator's Guide for more details on Access During Outage.

Figure 29. Configure New Namespace
- Click Save to create a namespace.
Object user
This section describes the steps how to create an object user on ECS.
- Log in to ECS portal, go to Manage > Users, and click New Object User as shown in the following figure.

Figure 30. New Object User
- From the New Object User page, as shown in Figure 31, the minimum information is as follows:
- Name: Type a name to identify the object user.
- Namespace: Select a namespace you want to use by the object user and click Next to Add Passwords.
- Generate & Add Secret Key: This option generates the password of the object user. You need this information to configure CloudPools on the PowerScale cluster.
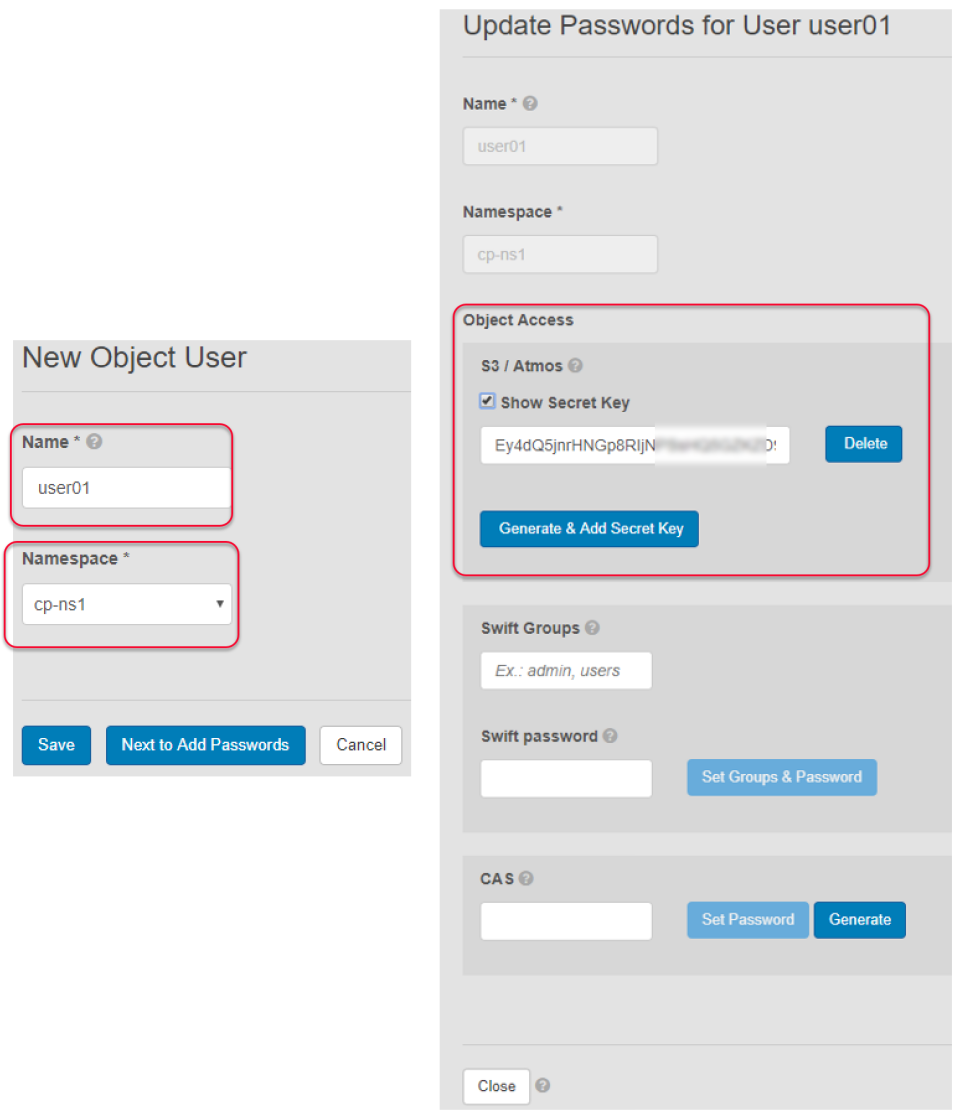
Figure 31. Configure New Object User
Base URL
This section describes the steps how to create a base URL on ECS.
- Log in to ECS portal, go to Settings > Object Base URL, and click New Base URL as shown in the following figure.
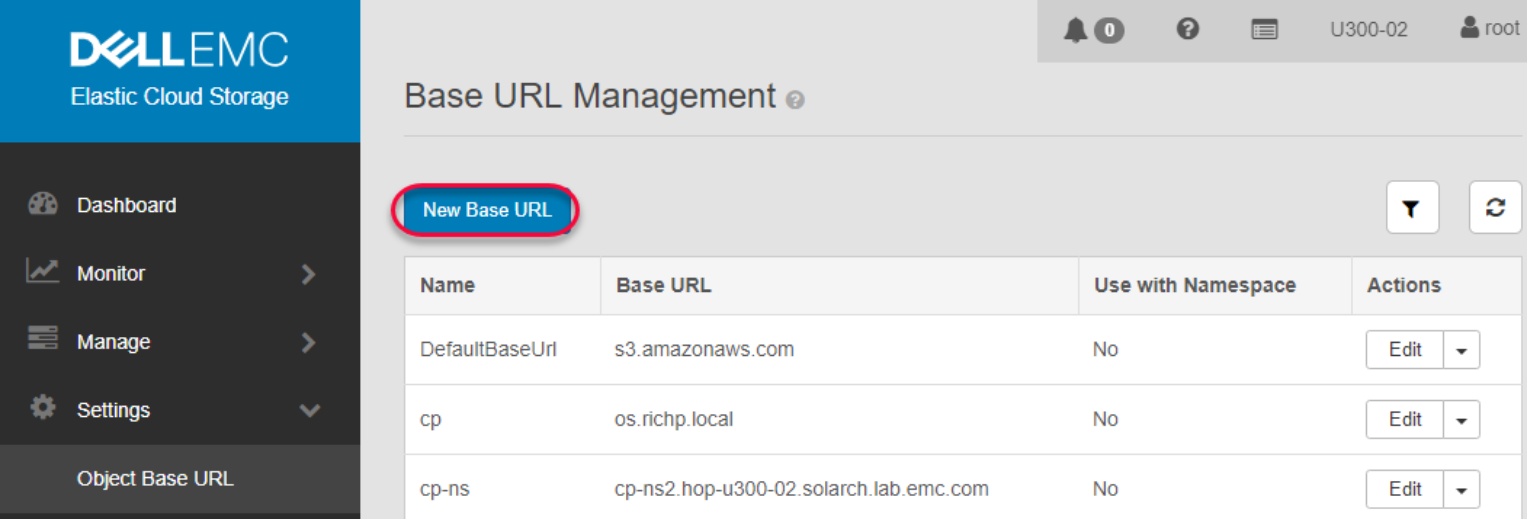
Figure 32. New Base URL
- From the New Base URL page as shown in Figure 33, the minimum information is as follows:
- Name: Type a name to identify the base URL.
- Base URL: This option is needed to configure the load balancer and DNS. See Base URL and Load balancer, which describe the URL when configuring the cloud storage account on the PowerScale cluster.
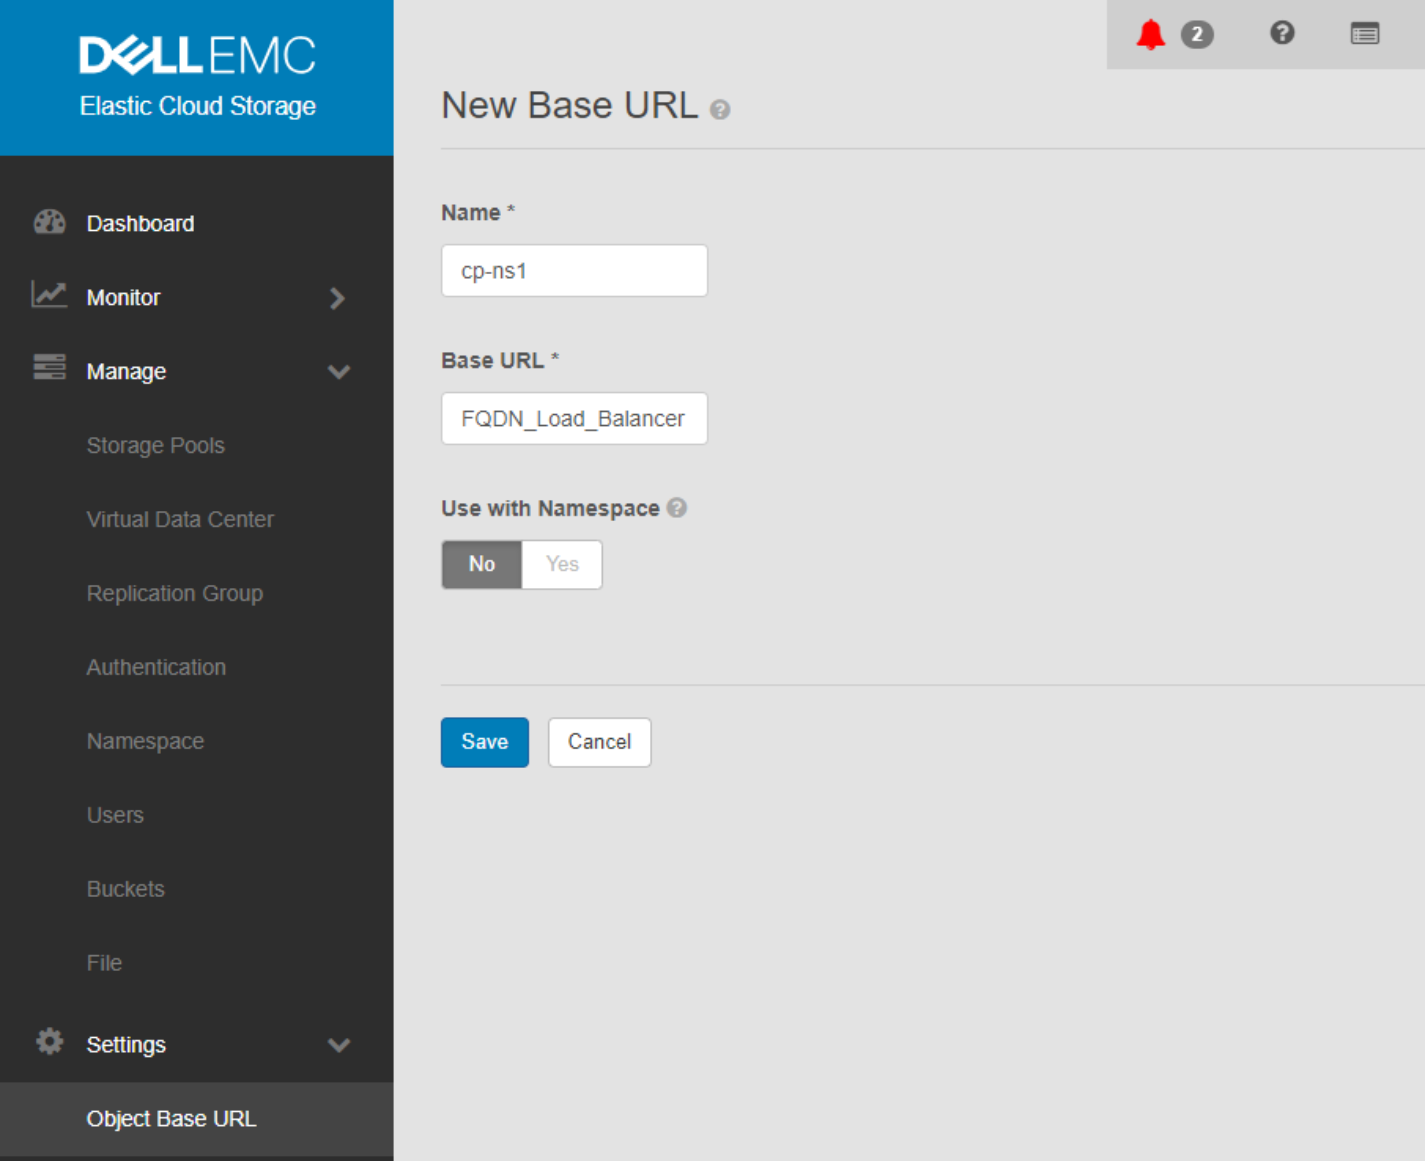
Figure 33. Base URL creation
- Click Save to create a base URL.
Load balancer
A load balancer balances traffic to the various ECS nodes from the PowerScale cluster. A load balancer can provide better performance and throughput for CloudPools. There are hardware and software load balancer options available. See the following deployment documents for the configuration of load balancer.
Note: A load balancer is required for CloudPools 2.0 and ECS.
- Log in to the ECS portal, go to Manage > Virtual Data Center, and click New Virtual Data Center as shown in the following figure.