
None
None
-
This section describes an example to protect SmartLink files and cloud data. Ensure that you have already configured ECS geo-replication and SyncIQ on the PowerScale clusters, which include:
- Fail over to the secondary PowerScale cluster
- Failback to the primary PowerScale cluster
- Fail over to the secondary ECS
- Failback to the primary ECS
Fail over to the secondary PowerScale cluster
This section describes the steps required to fail over to the secondary PowerScale cluster.
- Log in to the secondary OneFS WebUI and go to Data Protection > SyncIQ. Click Local Targets on the policy that you want to failover and select More > Allow Writes as shown in the following figure. This operation will grant read/write access to the data on the primary PowerScale cluster being replicated to the secondary PowerScale cluster.
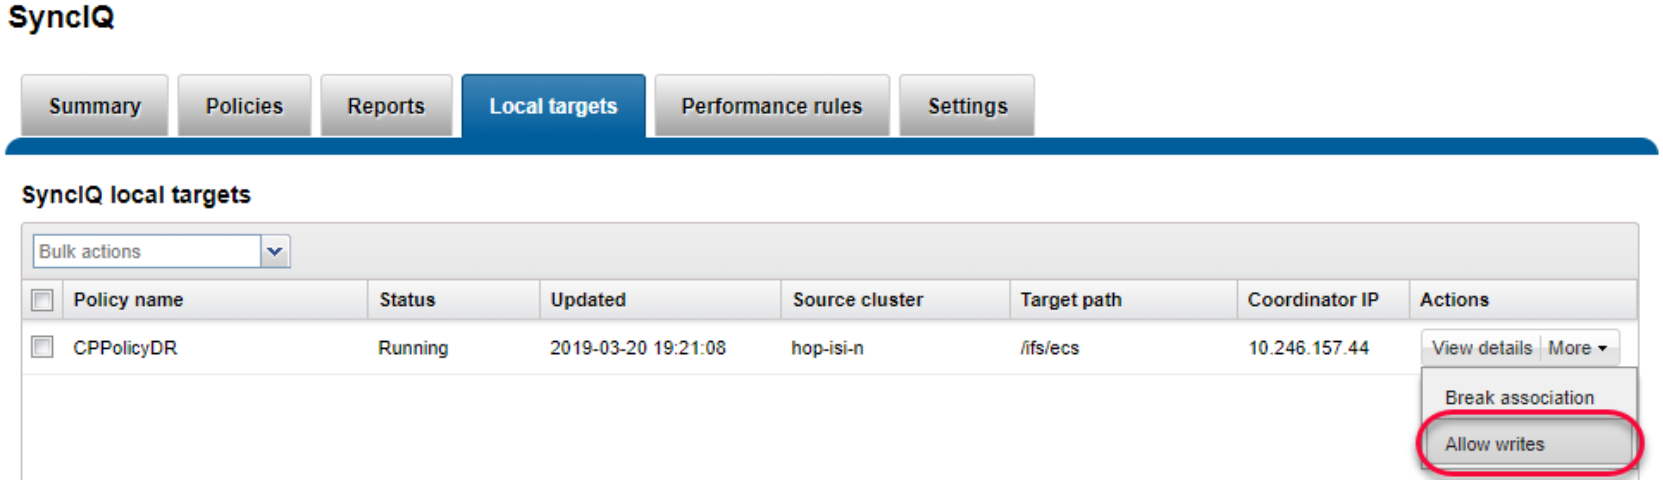
Figure 46. Allow writes on secondary cluster
Note: If the primary PowerScale cluster is still online, you need stop all writes to the replication policy’s directory.
- Check and change cloud access. Log in to the PowerScale clusters using SSH. To identify the CloudPools GUID, run the commands isi cloud access list and isi cloud access view <GUID>. The following figure shows the cloud access status on the secondary PowerScale cluster.
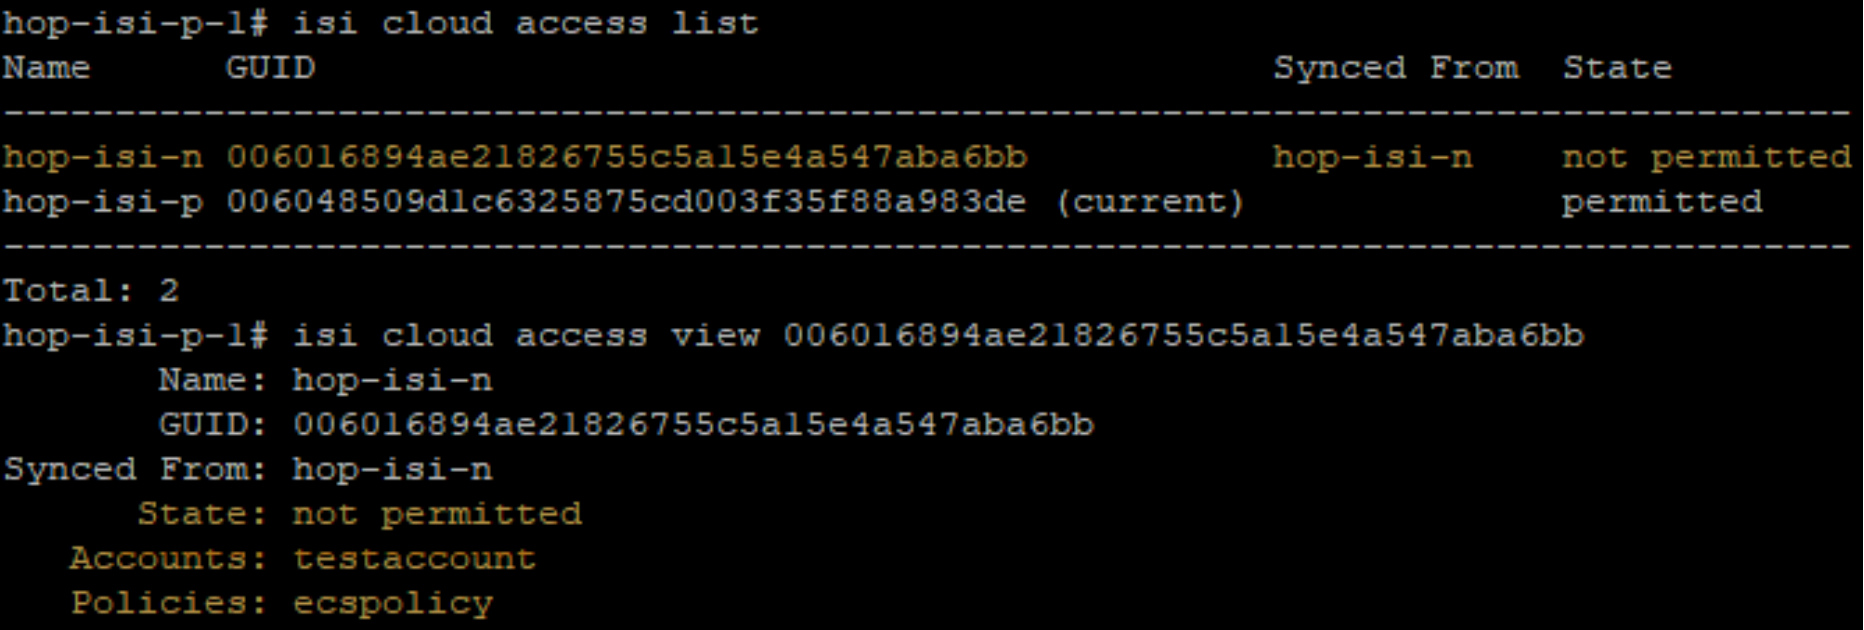
Figure 47. Identify CloudPools GUID to be transferred
- On the primary PowerScale cluster, remove the cloud write permission by running the command isi cloud access remove <GUID>, as shown in the following figure. This operation disables the file pool policy, CloudPool, and cloud storage account on the primary PowerScale cluster.

Figure 48. Remove Cloud write access on the primary PowerScale cluster
- On the secondary PowerScale cluster, add the cloud write permission by running the command isi cloud access add <GUID>, as shown in the following figure. This operation enables file pool policy, CloudPool, and cloud storage account on the secondary PowerScale cluster.
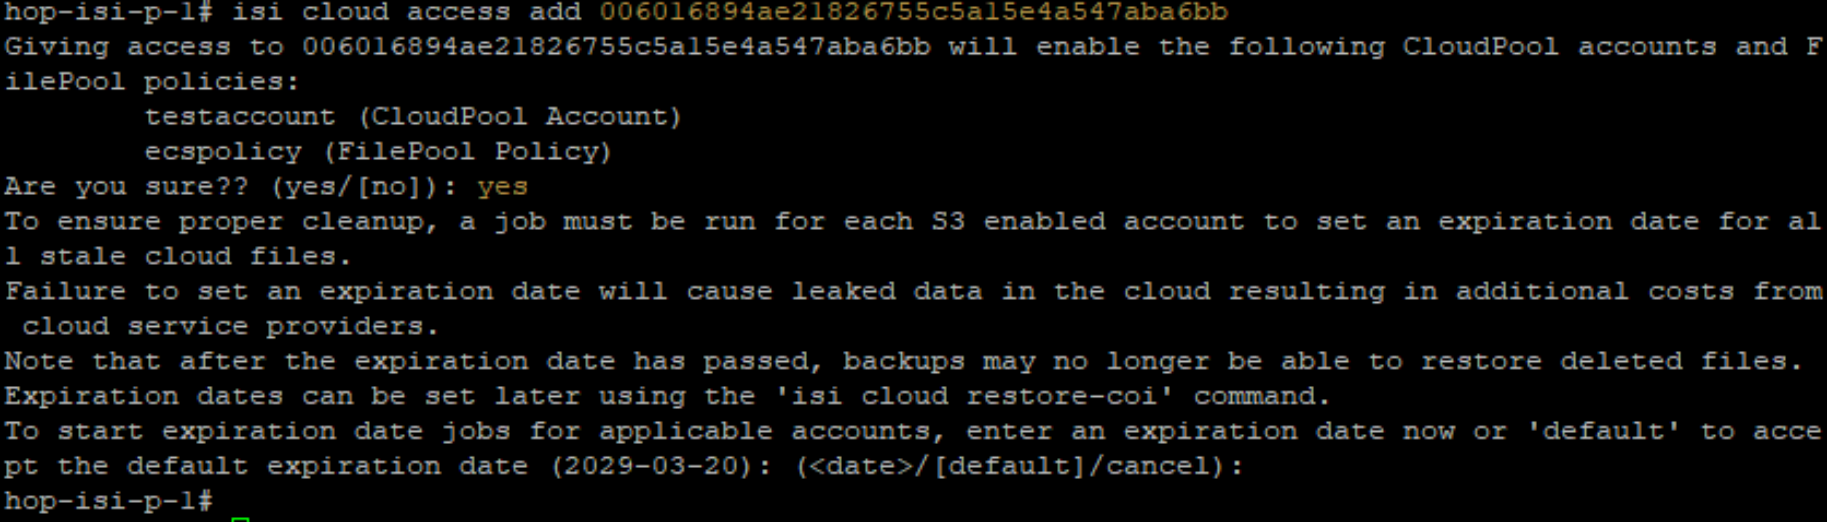
Figure 49. Add Cloud write access on the secondary PowerScale cluster
Note: Do not allow write access to the CloudPools from more than one PowerScale cluster.
The SyncIQ failover is complete.
Fail back to primary PowerScale cluster
This section describes the steps required to fail back to the primary PowerScale cluster.
- Log in to the primary OneFS WebUI and go to Data Protection > SyncIQ. Click Policies on the policy that you want to failback and select More > Resync-prep as shown in the following figure. This operation will create a SyncIQ replication mirror policy on the secondary PowerScale cluster.
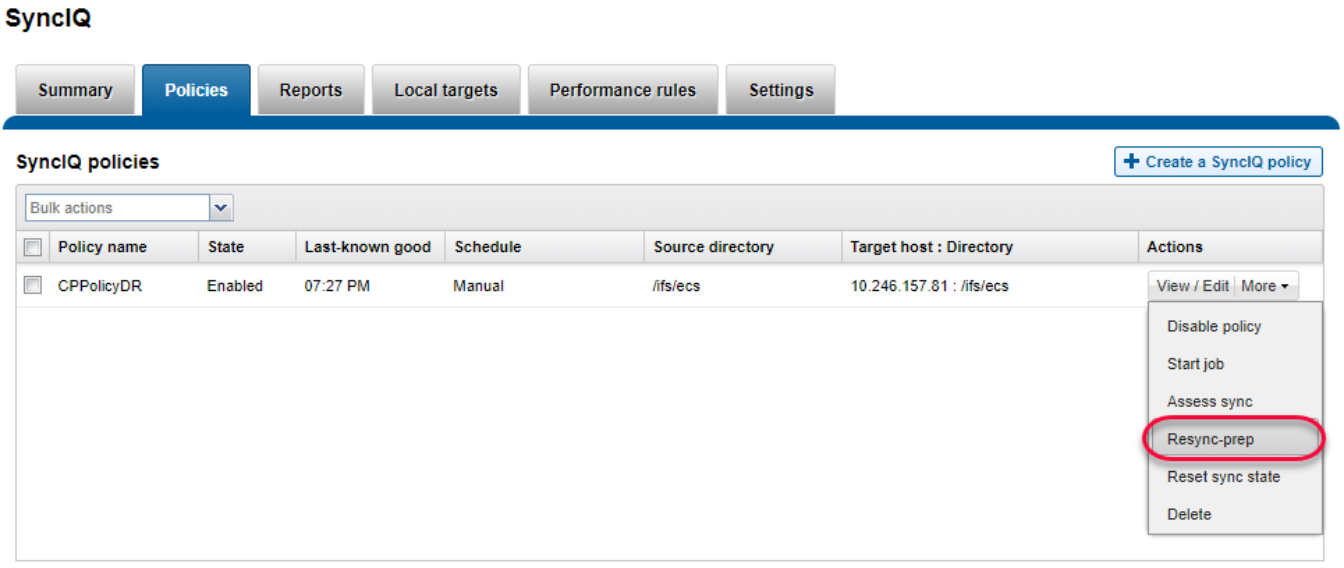
Figure 50. Resync prep SyncIQ policy on primary PowerScale cluster
- Log in to the secondary OneFS WebUI and go to Data Protection > SyncIQ > Policies. On the replication mirror policy that you want to failover and select More > Start Job as shown in the following figure. This operation will sync any changes that have been written to the secondary PowerScale cluster back to the primary PowerScale cluster.
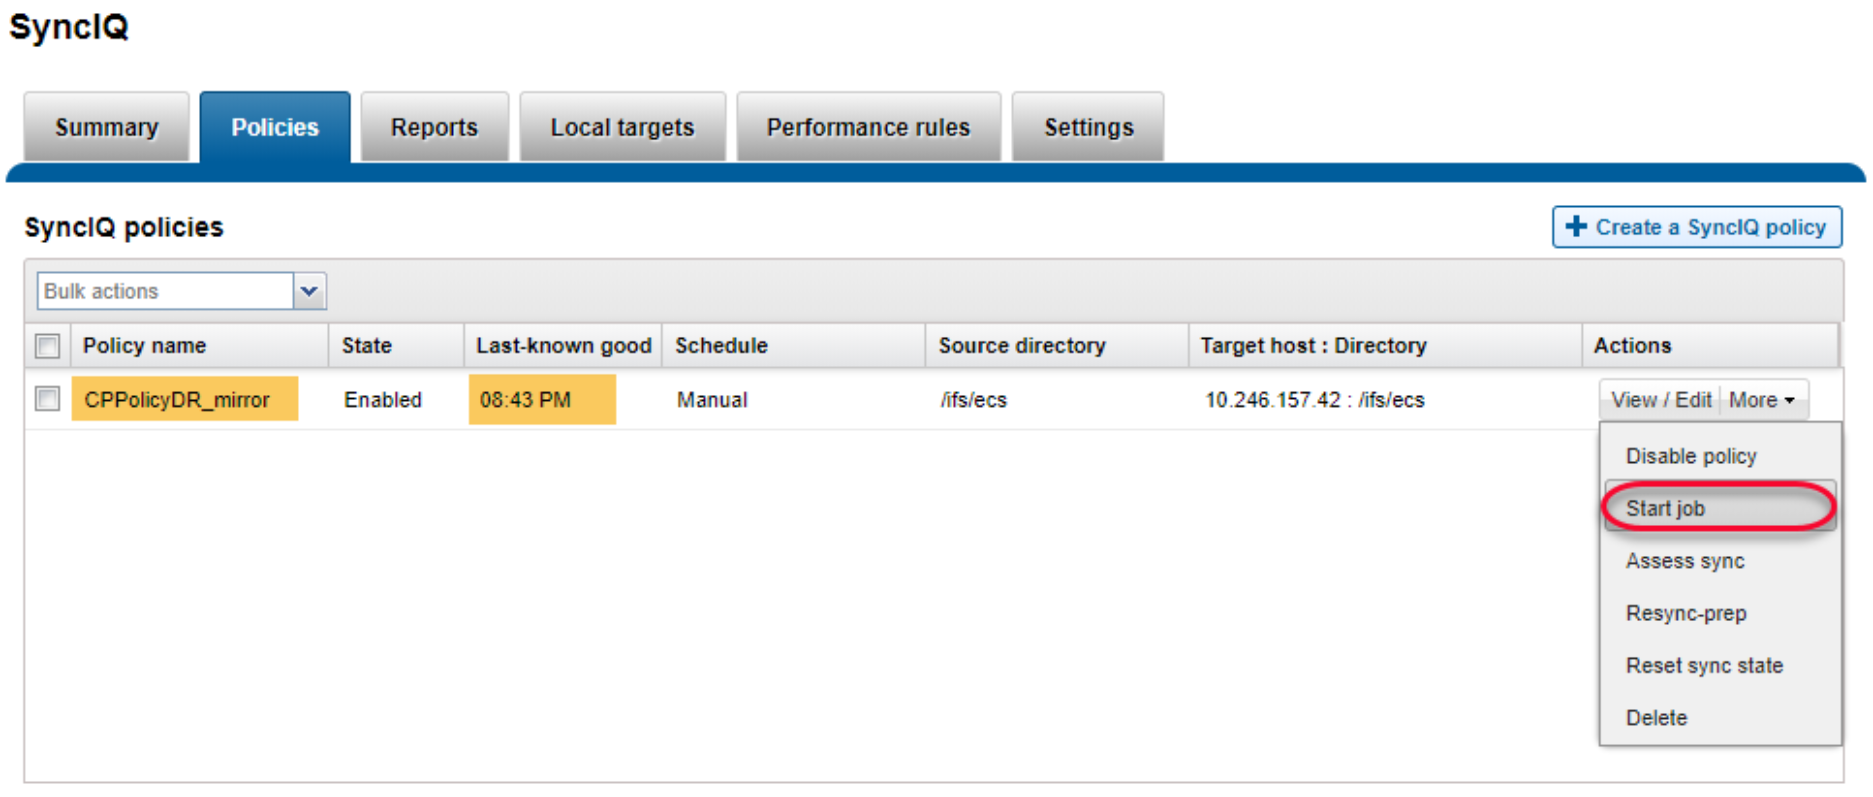
Figure 51. Sync data from secondary PowerScale cluster to primary PowerScale cluster
- Log in to the primary OneFS WebUI and go to Data Protection > SyncIQ. Click Local Targets on the policy that you want to failover and select More > Allow Writes as shown in the following figure. This operation will grant read/write access to the replication directory back to the primary PowerScale cluster and change the secondary PowerScale cluster’s access to this directory as read-only.
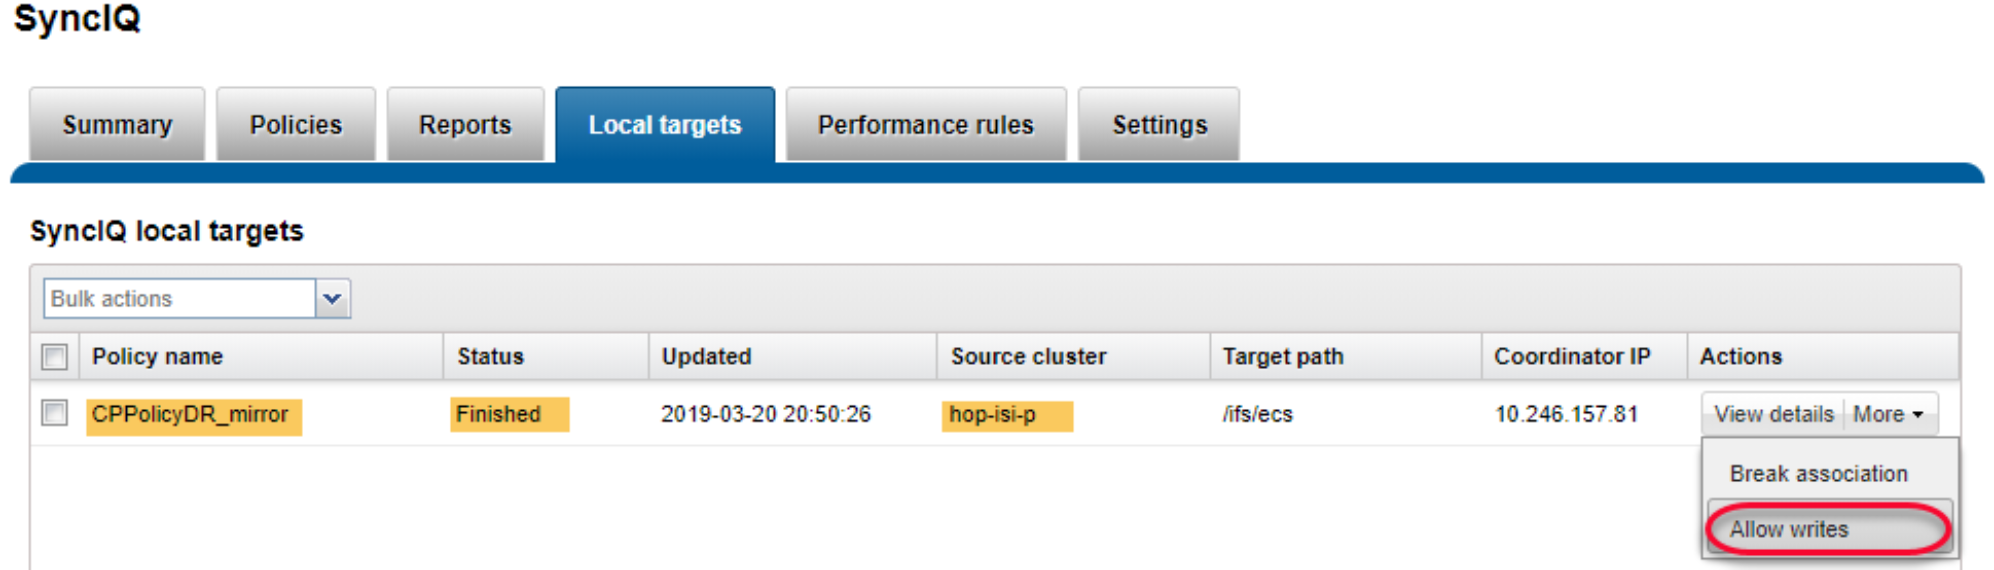
Figure 52. Allow writes on primary PowerScale cluster to SyncIQ replication directory
Note: If the secondary PowerScale cluster is still online, you need stop all writes to the replication policy’s directory. To perform a final replication from the secondary PowerScale cluster to the primary PowerScale cluster to ensure both sites are synchronized.
- Check and change cloud access. Log in to the PowerScale clusters using SSH. To identify the CloudPools GUID, run the commands isi cloud access list and isi cloud access view <GUID>. The following figure shows how to display the cloud access status on the secondary PowerScale cluster.
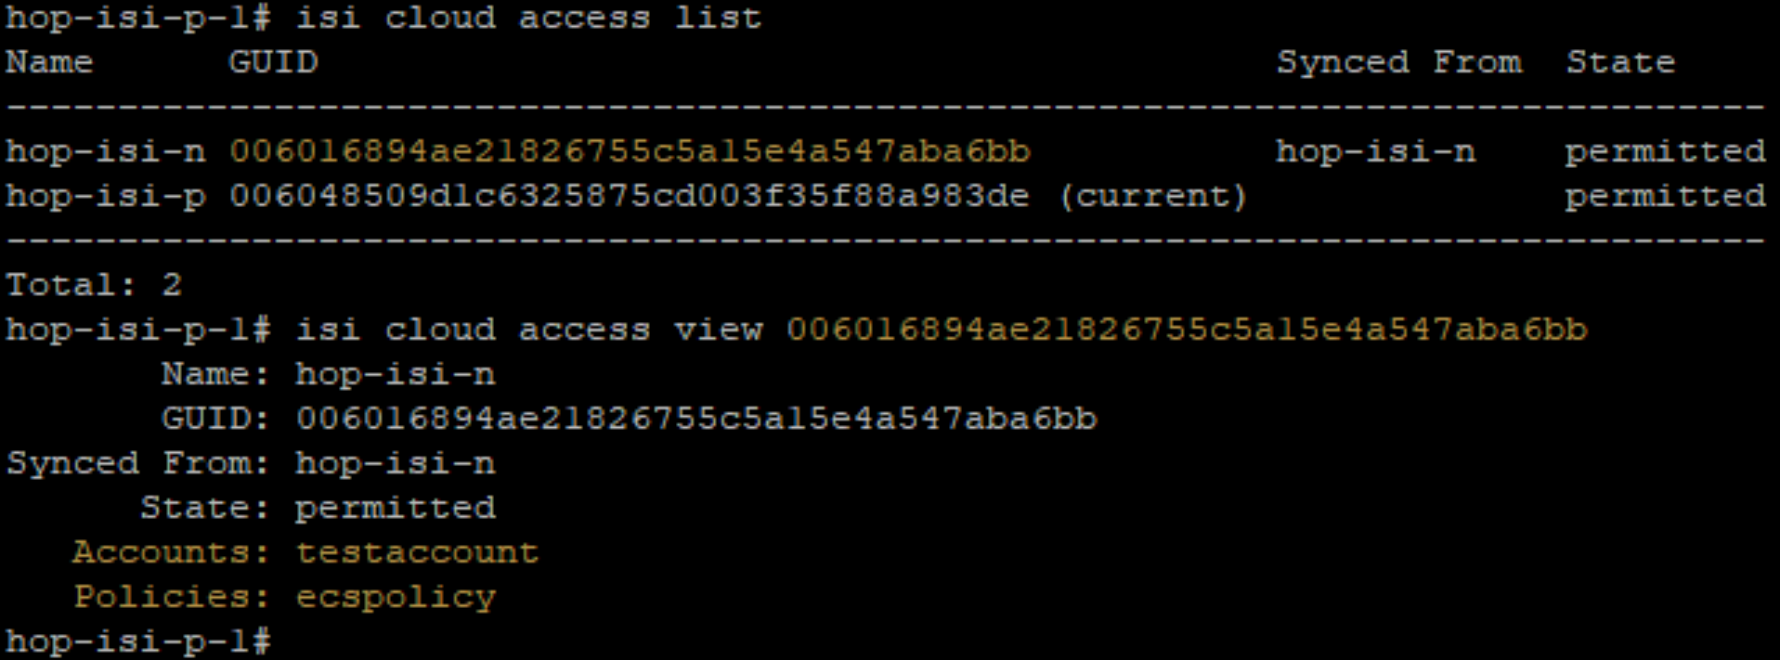
Figure 53. Identify GUID for CloudPools account and file pool policy
- On the secondary PowerScale cluster, remove the cloud write permission by running the command isi cloud access remove <GUID>, as shown in the following figure. This operation disables the file pool policy, CloudPool, and cloud storage account on the secondary PowerScale cluster.

Figure 54. Remove cloud write access on the secondary PowerScale cluster
- On the primary PowerScale cluster, you can add cloud write permission by running the command isi cloud access add <GUID>, as shown in the following figure. This operation enables file pool policy, CloudPool, and cloud storage account on the primary PowerScale cluster.
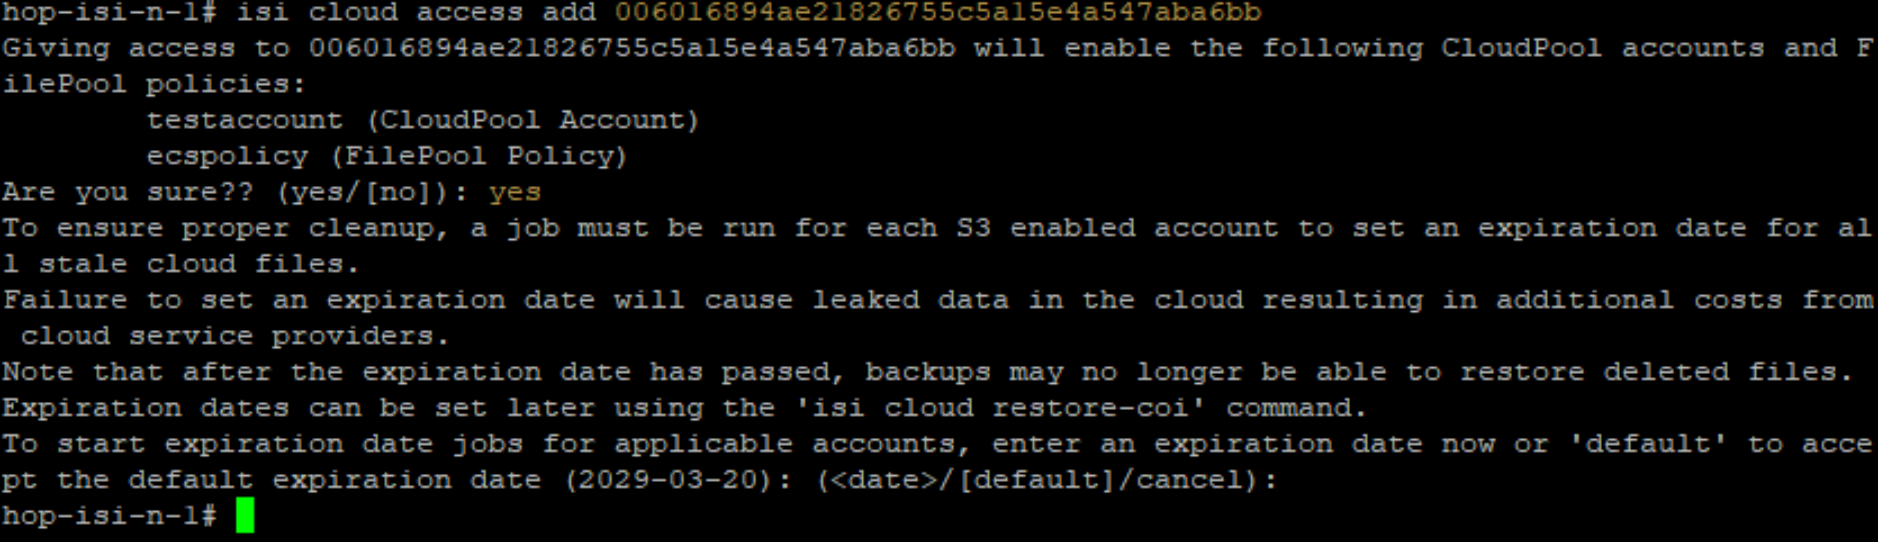
Figure 55. Give the primary PowerScale cluster cloud write access
Note: Do not allow write access to the CloudPools from more than one PowerScale clusters.
- Log in to the secondary OneFS WebUI and go to Data Protection > SyncIQ. Click Policies on the policy that you want to failback and select More > Resync-prep. This operation will disable the SyncIQ replication mirror policy on the secondary PowerScale cluster and place the secondary PowerScale cluster back into read-only mode. In addition, this operation will enable the SyncIQ replication policy on the primary PowerScale cluster.
The SyncIQ failback is complete.
Fail over to secondary ECS
By default, all ECS sites in a replication group have read/write access to the buckets. If the primary ECS site is unavailable, the cloud data is still available to the PowerScale cluster.
A load balancer needs to be configured for all ECS sites. It can recognize whether the primary ECS is unavailable or not. If so, the load balancer will automatically direct requests to the secondary ECS. It might take several minutes to connect to the secondary ECS.
HAProxy HTTP connections example:
option httpchk GET /?ping HTTP/1.1\nHost:\ haproxy\nX-Emc-Namespace:\ foo
option allbackups
server node1S1 <Node 1 IP address of primary ECS>:9020 check inter 10000 rise 2 fall 5
server node1S2 <Node 1 IP address of secondary ECS>:9020 check backup inter 10000 rise 2 fall 5
This server node1S1 line tells the load balancer to check if the S3 service is up and running on the primary ECS node. It performs a health check using the command stated in the option httpchk line. If the health check fails, the service is unavailable on the primary ECS. The allbackups option tells HAProxy to direct traffic to the secondary ECS nodes configured with the backup option, such as server node1S2.
Note: Cloud data might be lost if the updated cloud data is not completely replicated to the secondary ECS.
Fail back to primary ECS
If the primary ECS comes back online, the load balancer can recognize that the primary ECS is back online. It automatically directs requests to the primary ECS. It might take several minutes to connect the primary ECS.