
None
None
-
Perform a switchover
A switchover is the mandatory final synchronization step of every migration. The switchover involves downtime and reconfiguration of the users and applications accessing the storage system.
Manual switchover
To start a manual switchover, take the following steps.
1. Go to the Current event screen in the Switchover module and click the Start new event button as shown in the following figure:
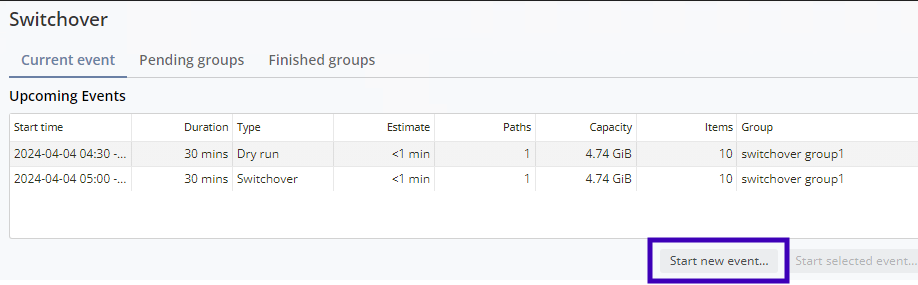
Figure 66. Start a new manual switchover event
2. Select Switchover from the Type dropdown list. Select a switchover group from the Group list, if available. If you need to define a switchover group, choose Other in the dropdown. Then click OK.
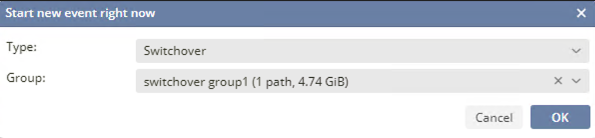
Figure 67. Select the event type
3. Enter a name and select the path(s). Click OK.
4. When you click OK, the following view appears:
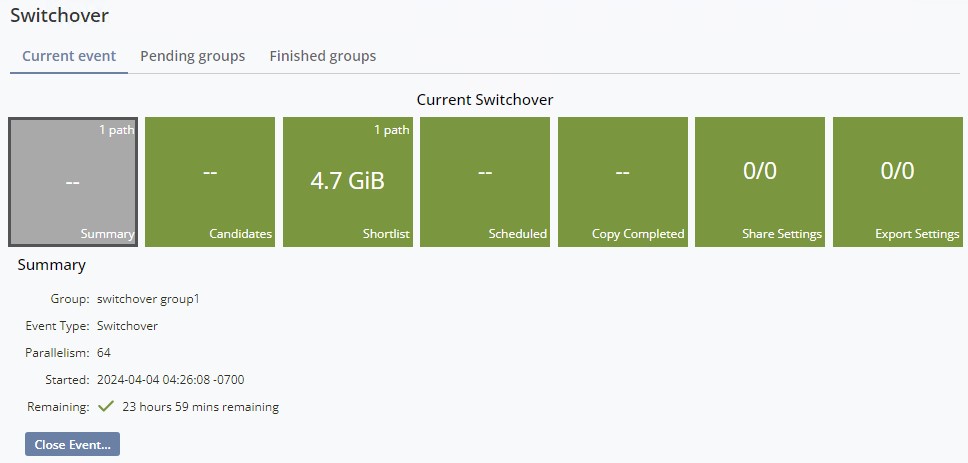
Figure 68. Current switchover path
5. Set the shares to read-only to prevent source data from being changed during the switchover. Select the Share Settings tile and select the shares for the switchover. Click Modify source access.

Figure 69. Modify source SMB shares access
6. Click OK in the Modify User… window. Click Close in the Results window.
7. A window appears with the option to set shares access to read-only. Click OK.
8. The following warning message is displayed:
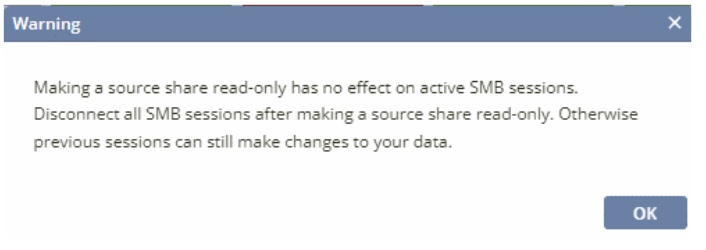
Figure 70. Read only access warning message
9. The active user sessions on the file server need to be disconnected. The disconnect can be managed externally, or within the UI using the connector icon for the related path.
10. Repeat the read-only steps in the Export Settings tile.
- Select the Export Settings tile.
- Select the exports for the switchover.
- Click the Modify source access button to move exports to read-only and close.
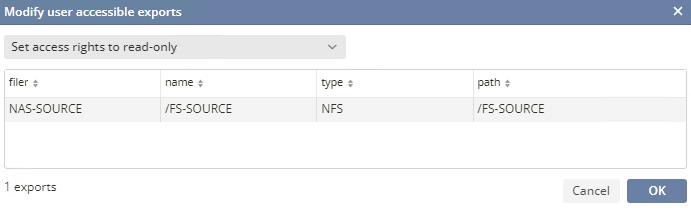
Figure 71. Modify source NFS exports access
11. Move the jobs from Shortlist to Scheduled tile.
- Select the Shortlist tile.
- Select the path for the switchover.
- Click the Schedule button.
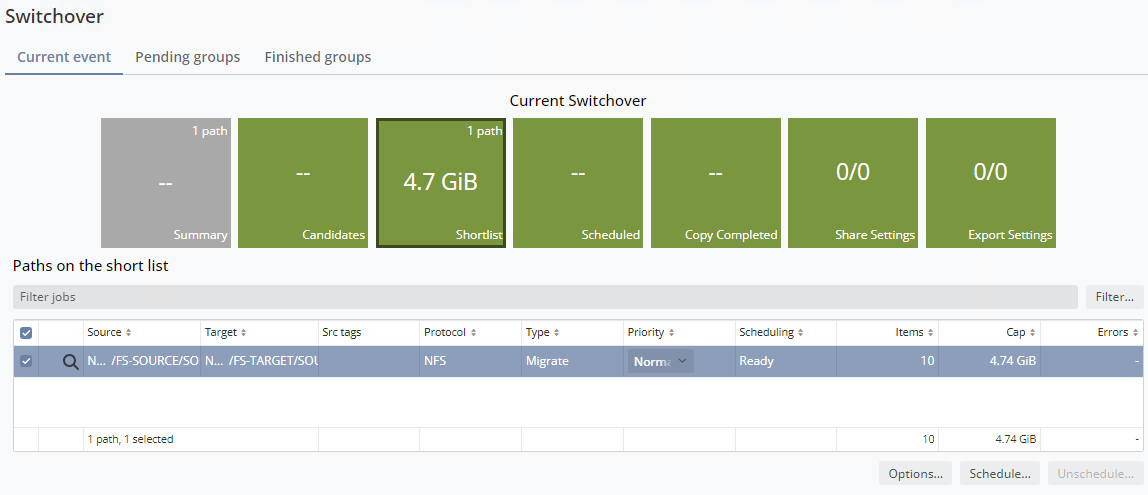
Figure 72. Moved to scheduled state
12. The following warning displays. Click Yes to continue.
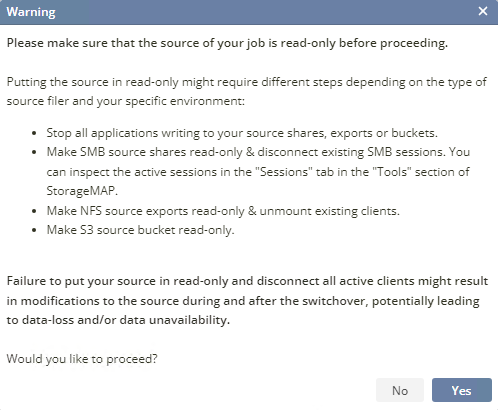
Figure 73. Read only access warning message
13. The paths are moved to the Scheduled tile where the final scan and copy is performed. This syncs the target with the source, and then moves the paths to the Copy Completed tile.
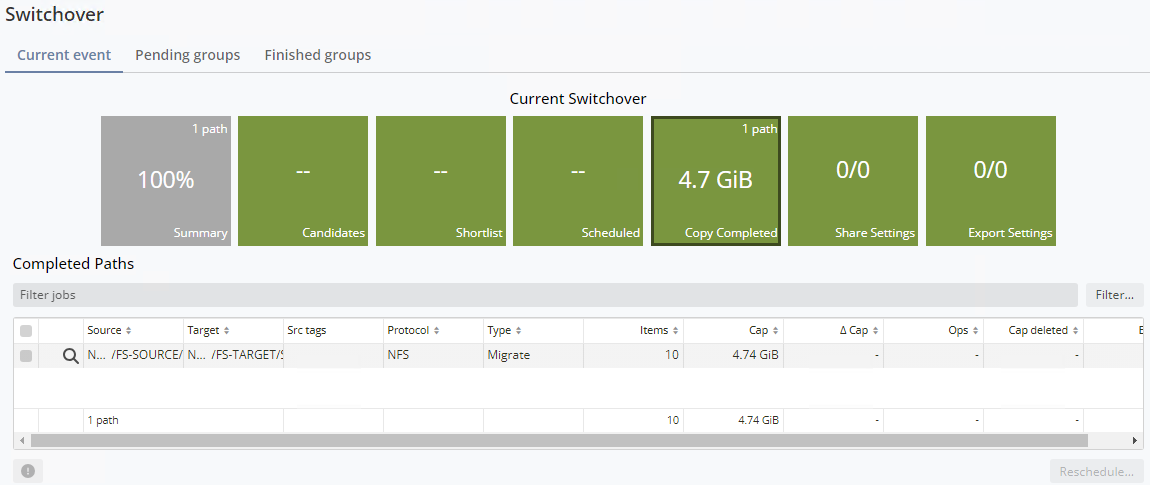
Figure 74. Copy completed state
14. Close the switchover event. Select the Summary tile and click the Close Event button.
15. Verify that the paths are in the Move to Finished status under the Decision column.
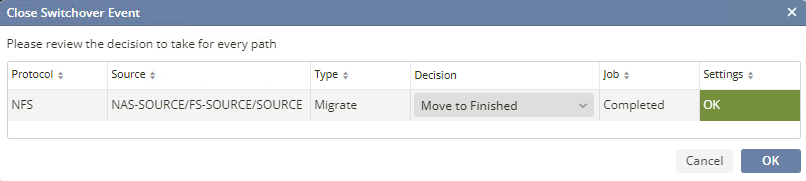
Figure 75. Move to finished state
16. Click OK to move the switched over migrations to the Finished tile on the Migrations dashboard.
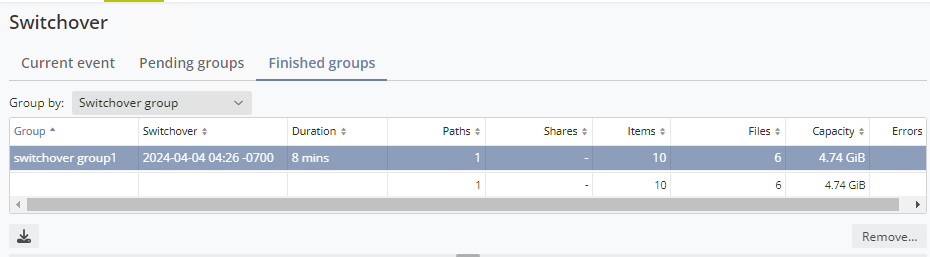
Figure 76. Finished groups
Cancel a switchover
A switchover can be cancelled after the last scan and copy have occurred but before the target shares and exports have been updated.
- From the Switchover > Current event window, click the Share Settings and Export Settings tiles to restore them to their original state.
- Click on the Restore Source access button, respectively. Click OK to complete.
- Move the migration paths to Steady State. Select the Summary tile and click the Close Event button.
- Change the Decision column values to Move Back to Steady State. Click OK.
- The system displays a dialog box asking if you want to add the migration paths to a new switchover group. You can click OK to do this or click Cancel to close and finish the switchover event.
- The Migrations dashboard now displays the paths are moved back to Steady State.